Love this? Save it for later!
Share the inspiration with your friends
This was supposed to be a batch of banana muffins. I had the bananas—overly ripe, practically crying out from the fruit bowl—and I had the ambition. But somewhere between measuring the flour and realizing I was out of milk, the plan went sideways. I grabbed a container of sour cream from the fridge thinking it was Greek yogurt. It wasn’t until I had already stirred a big dollop into the batter that I realized my mistake. My first instinct was panic. Muffins with sour cream? Would they be too dense? Would the tang ruin the sweetness? I almost tossed the whole bowl. But I was out of time and out of patience, so I poured the batter into a loaf pan instead, figuring I’d just see what happened. Let me tell you, what came out of that oven was nothing like the plan—and so much better.
The kitchen filled with this warm, comforting smell that was somehow familiar and new at the same time. The top was a deep, crackled gold, and the inside was so tender it practically fell apart when I sliced it. I stood there at the counter, eating a slice still warm from the pan, and honestly, I couldn’t believe it. That little swap—sour cream for milk—turned a simple banana bread into something else entirely. It was the moistest loaf I had ever made, with a soft, velvety crumb and a subtle richness that made each bite feel just a little bit special. Maybe you’ve been there, staring at a baking mishap and wondering if you should start over. I’m so glad I didn’t. This banana bread has become my go-to, the one I make when I want to guarantee smiles. It’s the recipe that taught me that sometimes the best things come from a happy accident.
Why You’ll Love This Recipe
This isn’t just another banana bread recipe. This is the one that will make you close your eyes after the first bite. I’ve tested this loaf more times than I can count, tweaking the ratios and the baking time until everything was just right. The result is a banana bread that’s consistently moist, deeply flavorful, and incredibly easy to make. Here’s why it stands out from the rest:
- Unbelievably Moist: The sour cream is the secret weapon here. It adds a gentle tang and a whole lot of moisture, creating a tender crumb that stays soft for days.
- Simple Ingredients: You probably have everything you need already. No fancy flours or hard-to-find extracts—just pantry staples that come together beautifully.
- Quick & Easy: The batter comes together in one bowl in about 15 minutes. It’s the perfect recipe for a lazy Sunday morning or a last-minute dessert.
- Perfect for Overripe Bananas: Finally, a way to use up those spotty bananas on the counter. This recipe turns them into something everyone will fight over.
- Crowd-Pleaser: I’ve brought this to brunches, potlucks, and family dinners. It always gets rave reviews, and people are shocked when I tell them how easy it was.
What makes this recipe different is the texture. The sour cream gives it a richness that milk or yogurt just can’t match. It’s not a gimmick—it’s a genuine upgrade that makes this loaf feel special without any extra work. This is comfort food reimagined: familiar, soul-soothing, and just a little bit better than you remember.
What Ingredients You Will Need
This recipe relies on simple, wholesome ingredients to deliver that big, satisfying flavor. Most of these are pantry staples, so you likely won’t need a special trip to the store. Here’s what you’ll need and why each one matters.
- Ripe Bananas (3 large, mashed): The star of the show. The riper the banana, the sweeter and more intense the flavor. I look for bananas that are heavily spotted with brown—almost black is even better. They mash easily and add natural sweetness.
- Unsalted Butter (½ cup, melted): Butter adds that irreplaceable rich flavor. I use unsalted so I can control the salt level. If you only have salted butter, just reduce the added salt by a quarter teaspoon.
- Granulated Sugar (1 cup): Provides sweetness and helps create a tender crumb. You can reduce this to ¾ cup if you prefer a less sweet loaf, but I find one cup is the sweet spot.
- Large Eggs (2, room temperature): Eggs bind the batter and add structure. Room temperature eggs mix in more evenly, which helps create a smoother batter. If you’re in a hurry, place them in a bowl of warm water for 5 minutes.
- Sour Cream (½ cup, full-fat): This is the magic ingredient. The sour cream adds moisture and a subtle tang that balances the sweetness of the bananas. I recommend using full-fat sour cream for the best texture—low-fat versions have more water and can make the bread denser.
- Vanilla Extract (1 teaspoon): Enhances the overall flavor and makes the banana taste even more “banana-y.” Use pure vanilla extract if you have it; the flavor is noticeably better.
- All-Purpose Flour (1 ½ cups): The structure of the bread. Spoon the flour into your measuring cup and level it off with a knife—don’t scoop directly from the bag, or you’ll pack in too much flour and end up with a dry loaf.
- Baking Soda (1 teaspoon): The leavening agent that helps the bread rise. Make sure your baking soda is fresh—if it doesn’t bubble when you mix it with a little vinegar, it’s time to buy a new box.
- Salt (½ teaspoon): Balances the sweetness and enhances all the other flavors. Don’t skip it, even if you’re using salted butter.
That’s it. No weird ingredients, no complicated steps. Just a handful of things that, when combined, create something truly special.
Equipment Needed
You don’t need a professional kitchen to make this banana bread. Here are the tools you’ll need, along with a few tips from my own experience.
- 9×5-inch Loaf Pan: This is the standard size for banana bread. If you use a smaller pan, the bread will take longer to bake and might not cook through in the center. A metal pan works best for even browning. Glass pans can cause the edges to over-brown before the middle is done.
- Large Mixing Bowl: For combining your wet and dry ingredients. A glass or stainless steel bowl is great because it doesn’t hold onto odors.
- Whisk and Wooden Spoon (or Spatula): You’ll use a whisk to mix the dry ingredients and a wooden spoon or silicone spatula to fold the batter together. A whisk incorporates air, while a spatula prevents over-mixing.
- Parchment Paper: This is my non-negotiable tip. Lining the loaf pan with parchment paper makes lifting the bread out so easy. No sticking, no breaking. Just cut a strip that hangs over the long sides of the pan.
- Cooling Rack: Essential for letting the bread cool evenly. If you leave it in the hot pan, the bottom can get soggy from the steam.
- Measuring Cups and Spoons: Accurate measurements matter in baking. Use dry measuring cups for flour and sugar, and a liquid measuring cup for the sour cream and melted butter.
If you don’t have a cooling rack, you can use the grates from your oven (just make sure they’re cool!). And if you’re out of parchment paper, you can grease the pan thoroughly with butter and dust it with a little flour.
Preparation Method
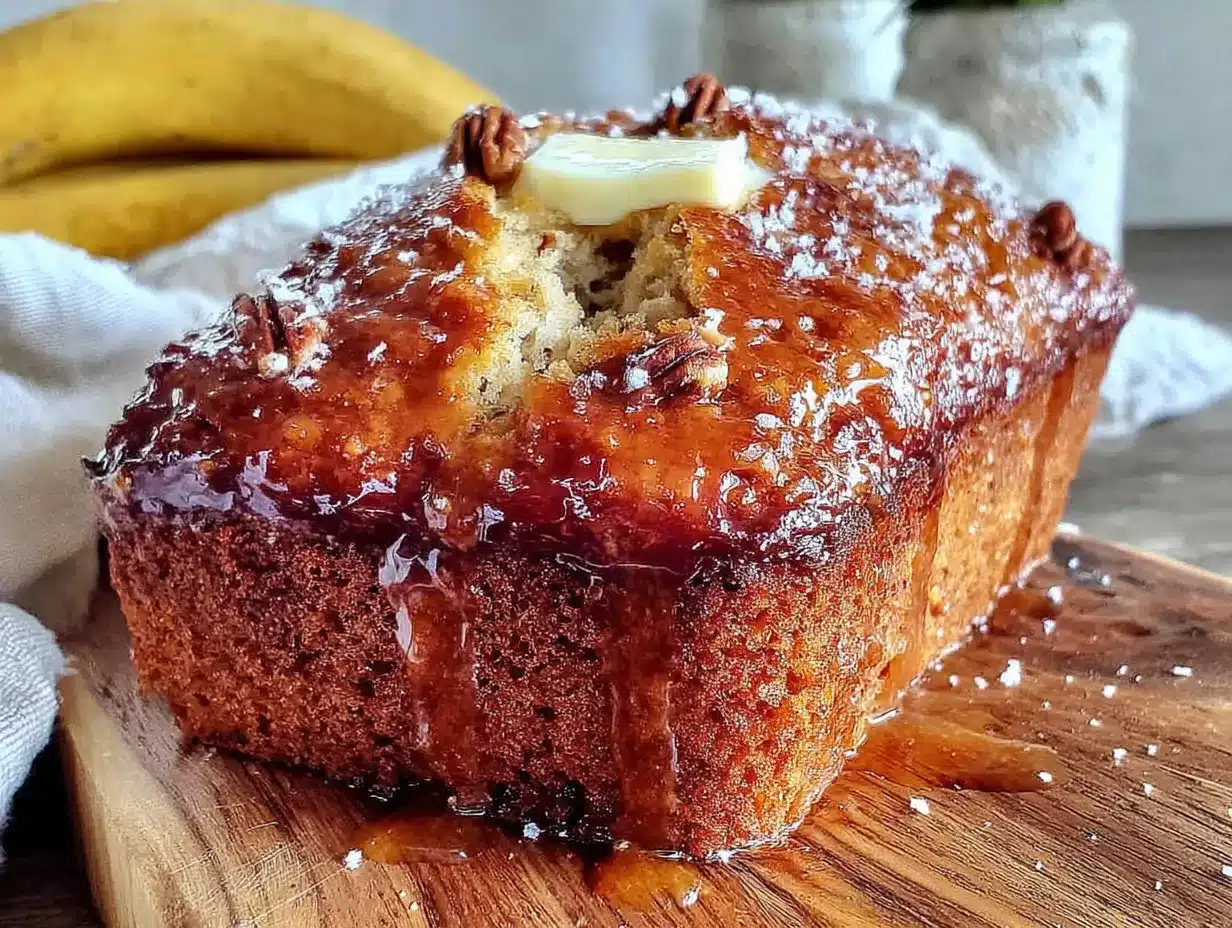
Let’s get baking. Follow these steps, and you’ll have a perfect loaf every time. I’ve added some sensory cues so you know exactly what to look for.
- Preheat and Prep (5 minutes): Preheat your oven to 350°F (175°C). Move the rack to the center position. Line your 9×5-inch loaf pan with parchment paper, leaving an overhang on the two long sides. This will be your “handle” to lift the bread out later.
- Mash the Bananas (3 minutes): In your large mixing bowl, mash the three ripe bananas with a fork. You want them mostly smooth with a few small lumps for texture. It should look like a chunky puree. Don’t over-mash into a liquid—you want some body left.
- Mix the Wet Ingredients (3 minutes): Add the melted butter, granulated sugar, eggs, sour cream, and vanilla extract to the mashed bananas. Whisk everything together until it’s smooth and well combined. The mixture will look a little thin and glossy—that’s perfect. The sour cream will make it look slightly curdled, but don’t worry, that’s normal.
- Combine the Dry Ingredients (2 minutes): In a separate small bowl, whisk together the all-purpose flour, baking soda, and salt. This step ensures the baking soda is evenly distributed so your bread rises evenly.
- Fold the Batter (2 minutes): Pour the dry ingredients into the wet ingredients. Use a wooden spoon or spatula to gently fold them together. Stir only until you no longer see streaks of flour. The batter will be thick and slightly lumpy. A few small streaks of flour are okay—over-mixing will make the bread tough.
- Bake (55-65 minutes): Pour the batter into your prepared loaf pan and spread it into an even layer. Bake for 55 to 65 minutes. Your bread is done when a toothpick inserted into the center comes out clean or with just a few moist crumbs. The top should be a deep golden brown and cracked in the center. If the top is browning too quickly after 40 minutes, tent the pan loosely with aluminum foil.
- Cool (1 hour): Let the bread cool in the pan on a wire rack for 10 minutes. Then, use the parchment paper to lift it out and transfer it to the rack to cool completely. Resist the urge to slice it while it’s warm—it needs time to set, or it will fall apart. Cooling completely takes about an hour.
Cooking Tips & Techniques
I’ve made this banana bread more times than I can count, and I’ve learned a few things along the way. Here are my best tips for getting it right every time.
Don’t Over-mix the Batter. This is the number one mistake I see. When you stir the flour into the wet ingredients, gluten develops. The more you stir, the more gluten forms, and the tougher your bread will be. Mix until it’s just combined—a few lumps are perfectly fine. I once got distracted and kept stirring, and the bread came out dense and chewy. Not the texture we’re going for.
Room Temperature Ingredients Matter. Cold eggs and cold sour cream won’t blend as smoothly into the batter. They can cause the melted butter to seize up, creating a lumpy texture. Take your eggs and sour cream out of the fridge 30 minutes before you start baking. If you forget, you can warm the eggs in a bowl of lukewarm water for 5 minutes.
Check Your Oven Temperature. Ovens can be liars. An oven that says 350°F might actually be running at 375°F or 325°F. I use an inexpensive oven thermometer to keep mine honest. If your bread is browning too fast on the outside but still raw in the middle, your oven is probably too hot.
Let It Cool Completely. I know it’s hard to wait, but this step is crucial. Slicing into warm banana bread is tempting, but the structure hasn’t fully set. The bread will be gummy and might fall apart. Give it at least an hour on the cooling rack. The flavor also deepens as it cools, so the wait is worth it.
Use the Toothpick Test Correctly. Insert the toothpick into the very center of the loaf, not the side. If it comes out with wet batter, it needs more time. If it comes out with a few moist crumbs, it’s done. If it comes out completely clean, it might be slightly over-baked, but it will still be delicious.
Variations & Adaptations
One of the best things about this banana bread is how easily it adapts. Here are a few ways I’ve changed it up over the years.
Chocolate Chip Banana Bread: This is my most-requested version. Fold in ¾ cup of semi-sweet chocolate chips along with the dry ingredients. The warm, melted chocolate pairs perfectly with the banana and sour cream. I’ve tried dark chocolate chips too, and they add a nice bitterness that balances the sweetness.
Nutty Banana Bread: Add ½ cup of chopped walnuts or pecans to the batter. Toast them first in a dry pan for 3-4 minutes to bring out their flavor. I love the crunch they add against the soft crumb of the bread. My neighbor swears by pecans, but I’m a walnut girl myself.
Gluten-Free Version: Substitute the all-purpose flour with a 1:1 gluten-free baking flour blend. I’ve used Bob’s Red Mill and King Arthur brands with great success. The texture is slightly more delicate, but the moisture from the sour cream helps keep it from being dry. Add an extra tablespoon of sour cream if the batter looks too thick.
Spiced Banana Bread: Add 1 teaspoon of cinnamon and ½ teaspoon of nutmeg to the dry ingredients. This gives the bread a warm, cozy flavor that’s perfect for fall. I sometimes add a pinch of ground ginger too for an extra kick.
Dairy-Free Adaptation: You can replace the butter with melted coconut oil and the sour cream with a dairy-free sour cream alternative or full-fat coconut cream. The coconut flavor is subtle and works well with the banana. I’ve made this for friends with dairy allergies, and it was a hit.
Serving & Storage Suggestions
This banana bread is wonderful on its own, but here are a few ways to make it even better.
Serving: Serve at room temperature for the best texture. I love a thick slice with a pat of salted butter on top—the salt really makes the sweetness pop. For a more decadent treat, toast a slice lightly and spread it with a little cream cheese or honey. It’s also fantastic with a cup of coffee or a glass of cold milk.
Storage: Keep the banana bread in an airtight container at room temperature for up to 4 days. To keep it extra moist, I place a piece of paper towel in the bottom of the container and another on top of the bread. The paper towel absorbs excess moisture without making the bread soggy.
Freezing: This bread freezes beautifully. Wrap the cooled loaf tightly in plastic wrap, then in a layer of aluminum foil. It will keep in the freezer for up to 3 months. When you’re ready to eat it, thaw it on the counter overnight. I often bake two loaves at once—one for now and one for later.
Reheating: For that just-baked taste, reheat individual slices in a toaster or toaster oven for 2-3 minutes. You can also warm the whole loaf in a 300°F oven for 10-15 minutes if you’re serving it to guests. The flavor actually develops and deepens after a day or two, so day-old banana bread is often even better.
Nutritional Information & Benefits
While this banana bread is a treat, it does have some redeeming qualities. Here’s a quick look at the nutritional profile per slice (based on 10 slices).
Estimated Nutrition per slice: Calories: 285, Fat: 12g, Carbohydrates: 41g, Fiber: 2g, Sugar: 22g, Protein: 4g.
Health Benefits: Bananas are a great source of potassium, which is important for heart health and muscle function. They also provide vitamin B6 and vitamin C. The eggs add a small amount of protein, and the sour cream contributes calcium. This isn’t a health food, but it’s a more balanced treat than a lot of store-bought desserts.
Dietary Considerations: This recipe contains gluten, dairy, and eggs. For a gluten-free option, see the variations section above. For a dairy-free option, use coconut oil and a dairy-free sour cream alternative. This recipe is naturally nut-free if you skip the optional nuts, making it safe for school lunches.
I believe in balance. I enjoy this banana bread as a special breakfast or an afternoon snack, and I don’t feel guilty about it. It’s made with real ingredients, and that counts for something.
Conclusion
This moist classic banana bread with sour cream is more than just a recipe—it’s a little piece of comfort that I’m so happy to share with you. It started as a mistake, but it quickly became a staple in my kitchen. The sour cream makes all the difference, giving the bread a tenderness and richness that you just can’t get any other way. It’s the kind of recipe that makes you look like a hero with very little effort.
I hope you give it a try, whether you’re using up those spotty bananas on your counter or just craving something warm and homemade. Feel free to make it your own—add chocolate chips, throw in some nuts, or keep it classic. That’s the beauty of a good recipe. It’s a starting point for your own kitchen adventures.
When you make it, I’d love to hear how it turns out. Did you add your own twist? Did it disappear as fast as mine always does? Leave a comment below and let me know. And if you loved it, please share this recipe with a friend who needs a little banana bread in their life. Happy baking, friend!
Frequently Asked Questions
Can I use frozen bananas for this recipe?
Absolutely! Frozen bananas work great. Thaw them completely at room temperature, then drain off any excess liquid before mashing. The thawed bananas will be very soft and almost liquid, which is perfect for this recipe.
Why is my banana bread dry?
Dry banana bread usually means it was over-baked or too much flour was used. Make sure you measure your flour correctly by spooning it into the measuring cup and leveling it off. Also, check your oven temperature with a thermometer to ensure it’s not running too hot.
Can I make this into muffins instead?
Yes! This batter makes about 12 standard muffins. Fill the muffin cups about ¾ full and bake at 350°F (175°C) for 18-22 minutes, or until a toothpick comes out clean. The baking time will be shorter than the loaf, so start checking at 18 minutes.
How do I know when the banana bread is fully baked?
The best test is the toothpick test. Insert a toothpick into the very center of the loaf. If it comes out clean or with just a few moist crumbs, it’s done. If it comes out with wet batter, it needs more time. The top should also be a deep golden brown and cracked.
Can I reduce the sugar in this recipe?
You can reduce the sugar to ¾ cup without significantly affecting the texture. If you reduce it further, the bread might be less tender and won’t brown as well. The bananas provide natural sweetness, so even with less sugar, it will still be delicious.
Pin This Recipe!
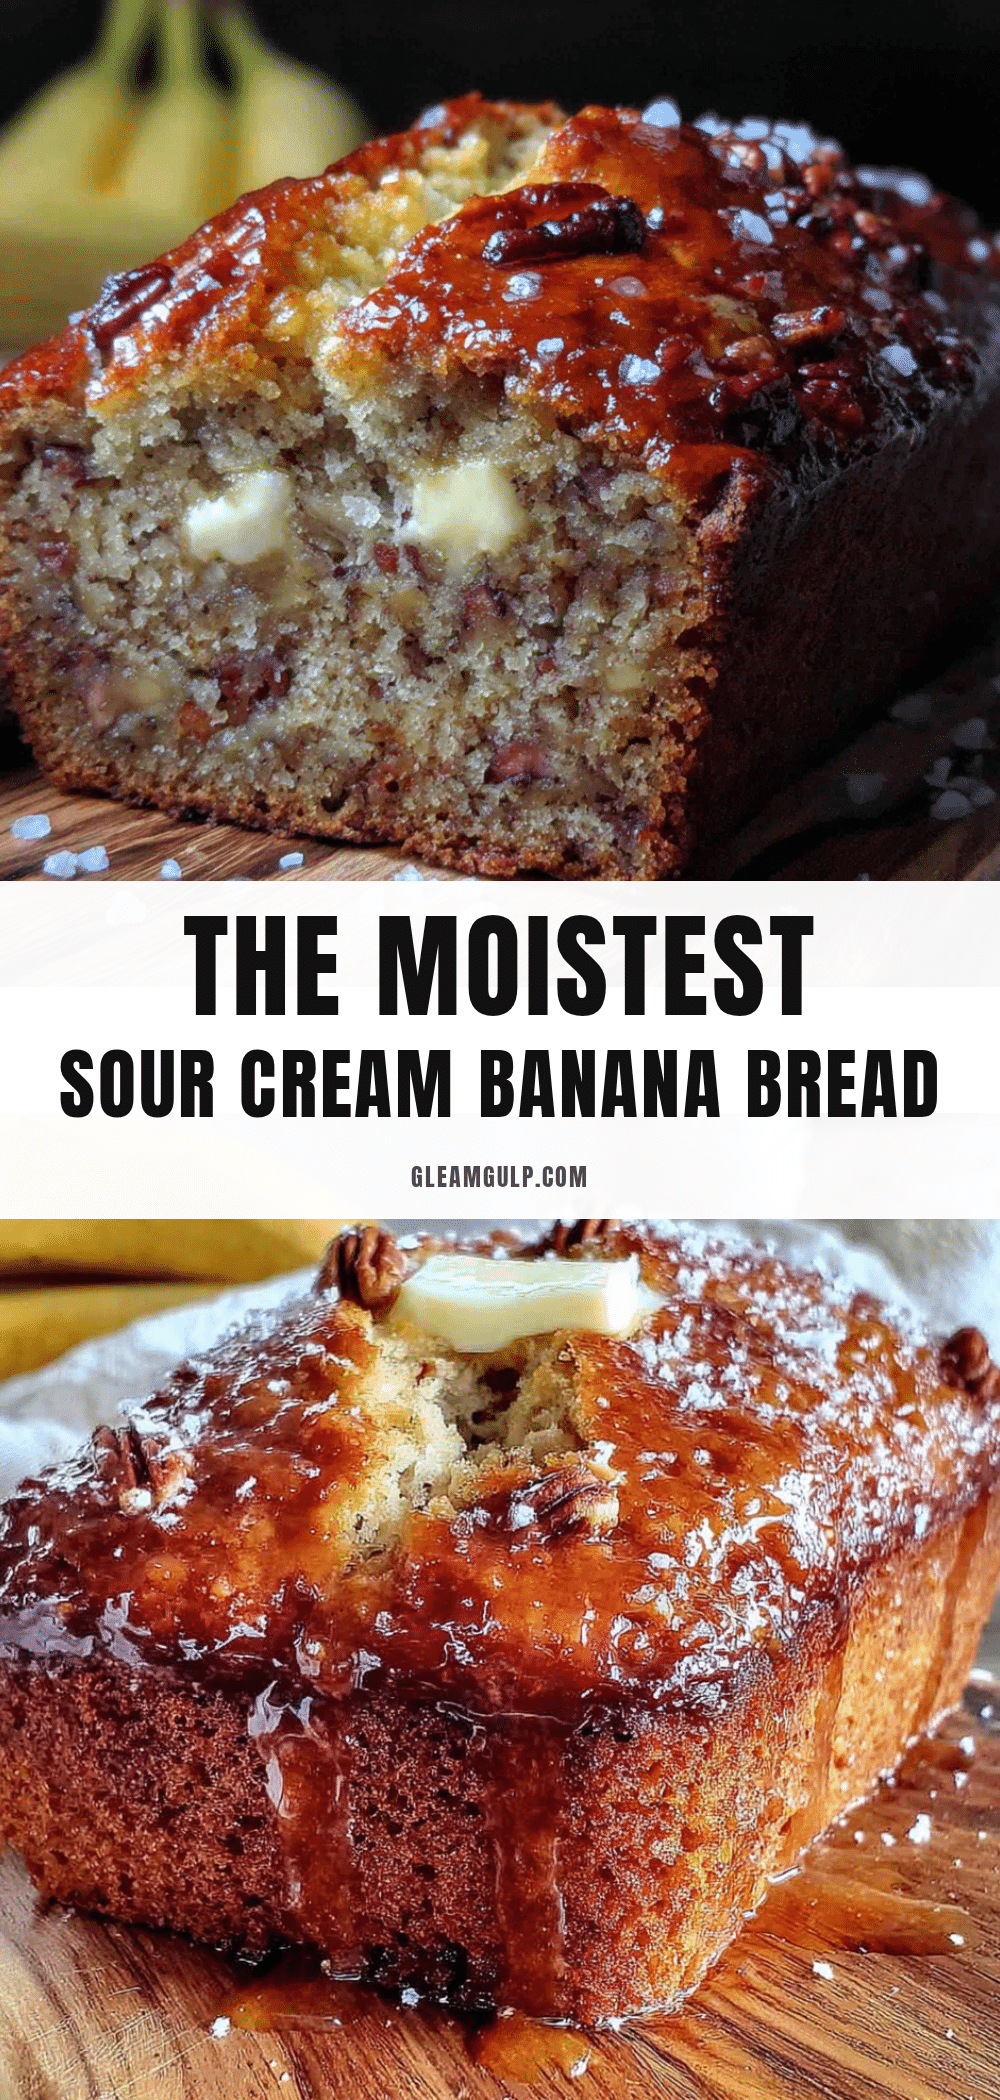
Best Moist Banana Bread with Sour Cream Recipe
This banana bread is incredibly moist and tender, thanks to a secret ingredient: sour cream. It’s a simple, one-bowl recipe that turns overripe bananas into a crowd-pleasing loaf with a rich, velvety crumb.
- Prep Time: 15 minutes
- Cook Time: 60 minutes
- Total Time: 1 hour 15 minutes
- Yield: 10 servings 1x
- Category: Dessert
- Cuisine: American
Ingredients
- 3 large ripe bananas, mashed
- ½ cup unsalted butter, melted
- 1 cup granulated sugar
- 2 large eggs, room temperature
- ½ cup full-fat sour cream
- 1 teaspoon vanilla extract
- 1 ½ cups all-purpose flour
- 1 teaspoon baking soda
- ½ teaspoon salt
Instructions
- Preheat oven to 350°F (175°C). Line a 9×5-inch loaf pan with parchment paper, leaving an overhang on the long sides.
- In a large mixing bowl, mash the bananas with a fork until mostly smooth with a few small lumps.
- Add melted butter, sugar, eggs, sour cream, and vanilla extract to the mashed bananas. Whisk until smooth and well combined.
- In a separate small bowl, whisk together flour, baking soda, and salt.
- Pour the dry ingredients into the wet ingredients. Fold gently with a wooden spoon or spatula until just combined (a few streaks of flour are okay). Do not over-mix.
- Pour the batter into the prepared loaf pan and spread evenly.
- Bake for 55-65 minutes, until a toothpick inserted into the center comes out clean or with a few moist crumbs. If the top browns too quickly, tent loosely with foil after 40 minutes.
- Cool in the pan on a wire rack for 10 minutes, then lift out using the parchment paper and cool completely on the rack (about 1 hour) before slicing.
Notes
For best results, use very ripe bananas (heavily spotted or black). Room temperature ingredients blend more smoothly. Do not over-mix the batter to avoid a tough loaf. Let the bread cool completely before slicing to prevent it from falling apart.
Nutrition
- Serving Size: 1 slice
- Calories: 285
- Sugar: 22
- Sodium: 280
- Fat: 12
- Saturated Fat: 7
- Carbohydrates: 41
- Fiber: 2
- Protein: 4
Keywords: banana bread, sour cream banana bread, moist banana bread, easy banana bread, banana bread recipe


