Love this? Save it for later!
Share the inspiration with your friends
This was supposed to be a gingerbread house. I had it all planned out—a cozy Sunday afternoon, my favorite holiday playlist, and a batch of dough destined to become a lopsided but charming little cottage with gumdrop shingles. I grabbed what I thought was a full stick of butter from the fridge, but it turned out to be about two tablespoons shy. The dough was too dry, crumbly, completely unworkable for walls and roofs. I was already running late for a cookie swap I was hosting that evening, and let me tell you, the panic was real. I stared at that sad, sandy mess on my counter, ready to scrap the whole idea and grab a box of store-bought cookies in defeat.
But then, out of sheer stubbornness, I decided to roll it into balls anyway. I figured they’d be dense little hockey pucks, but maybe, just maybe, they’d taste okay. I pressed a few cracked sugar crystals on top (because that’s all I had left after my “house construction” supplies were ruined) and popped them in the oven. Honestly, I didn’t even bother to chill the dough—what was the point? It was already a disaster. When the timer went off, the smell that filled my kitchen was so warm and spicy that my neighbor actually knocked on the door to ask what I was baking. I pulled the tray out, and they were perfect. Perfectly domed, cracked on top, impossibly soft. That happy accident turned into the only gingerbread cookie I’ve made since. Maybe you’ve been there—a recipe that goes sideways and ends up being the one you pass down.
Why You’ll Love This Recipe
These aren’t your average gingerbread cookies. They are the kind that make people close their eyes after the first bite, and they have saved me more times than I can count when I need a showstopper without the stress. I’ve tested this recipe at least a dozen times, tweaking the ratio of molasses to butter until the texture was just right, and I can tell you with confidence: this is it.
- No Chilling Required: Skip the fridge time. This dough goes straight from the bowl to the oven, making it perfect for last-minute baking sessions.
- Simple Pantry Ingredients: You likely have everything in your kitchen right now. No fancy extracts or hard-to-find spices needed.
- Perfect for Holiday Gatherings: Bring a plate of these to a cookie swap, a dinner party, or a festive get-together, and they will disappear before the savory dishes even hit the table.
- Crowd-Pleaser: Kids love the soft, cake-like texture, and adults appreciate the deep, spiced flavor. It’s a universal win.
- Unbelievably Soft: The secret is in the technique—using melted butter and a precise amount of molasses creates a cookie that stays tender for days.
What makes this version different from the rest? It is the texture. Most gingerbread cookies are either crisp or slightly hard. These are pillowy, almost like a soft-baked molasses muffin top, with a crackly sugar crust that gives way to a tender center. It’s comfort food reimagined—faster, easier, but with the same soul-soothing satisfaction. Perfect for impressing guests without stress, or turning a simple Tuesday into something memorable.
What Ingredients You Will Need
This recipe uses simple, wholesome ingredients to deliver bold flavor and satisfying texture without the fuss. Most of these are pantry staples, so you can whip up a batch anytime the craving strikes.
- Unsalted Butter (¾ cup, melted and slightly cooled): Using melted butter is the key to the “no chill” method. It creates a soft, tender crumb without needing to rest the dough. I prefer using a good quality European-style butter like Plugrà for extra richness, but any standard unsalted butter works perfectly.
- Dark Brown Sugar (1 cup, packed): This adds moisture and a deep, caramel-like sweetness that pairs beautifully with the molasses. Light brown sugar will work in a pinch, but dark brown gives a more robust flavor.
- Molasses (½ cup): Do not use blackstrap molasses here—it is too bitter. Look for “unsulphured” or “mild” molasses. Grandma’s Molasses is my go-to brand for this recipe. It provides the classic gingerbread flavor without overwhelming the other spices.
- Large Egg (1, room temperature): A room-temperature egg emulsifies better into the melted butter and sugar mixture, creating a smoother dough. If you forgot to take it out of the fridge, place it in a bowl of warm water for 5 minutes.
- All-Purpose Flour (2 ¼ cups, spooned and leveled): Spooning and leveling is crucial here. Scooping directly from the bag can pack the flour, leading to dry cookies. If you want a slightly chewier texture, you can substitute up to ½ cup of the flour with whole wheat pastry flour.
- Baking Soda (2 teaspoons): This gives the cookies their signature crackly tops and helps them spread just enough.
- Ground Ginger (2 teaspoons): Freshly opened ground ginger has a much more potent kick. If your jar has been sitting in the pantry for a while, consider replacing it for this recipe. The ginger is the star of the show.
- Ground Cinnamon (1 ½ teaspoons): Adds warmth and a familiar holiday aroma.
- Ground Cloves (½ teaspoon): A little goes a long way. It adds that classic “Christmas spice” depth that makes these cookies so memorable.
- Salt (½ teaspoon): Balances the sweetness and enhances all the spices.
- Granulated Sugar (for rolling, about ¼ cup): The cookies are rolled in sugar before baking to create that beautiful, crackly, sparkly exterior. Turbinado or demerara sugar adds an extra crunch if you have it on hand.
Equipment Needed
You don’t need a fancy bakery setup for these cookies. Just the basics will do, and I’ve made these in tiny apartment kitchens and big farmhouse kitchens with equal success.
- Large Mixing Bowl: Any large bowl will work. I prefer a glass or stainless steel bowl because they don’t hold onto odors from previous meals.
- Whisk and Wooden Spoon (or Electric Hand Mixer): A whisk is great for combining the wet ingredients, and a wooden spoon is perfect for folding in the dry ingredients. If you want to make it even easier, an electric hand mixer works well for the initial mixing, but avoid over-mixing the flour by hand at the end.
- Baking Sheets (2): Light-colored, aluminum baking sheets are best for even browning. Dark sheets can cause the bottoms to burn before the centers are set. If you only have one sheet, let it cool completely between batches.
- Parchment Paper or Silicone Baking Mats: This is non-negotiable for soft cookies. It prevents sticking and promotes even baking. Silicone mats are a great budget-friendly option that lasts for years.
- Cooling Rack: Essential for letting the cookies cool completely without getting soggy bottoms. If you don’t have one, carefully transfer the cookies to a clean dish towel on the counter.
- Cookie Scoop (about 1.5 tablespoons): A scoop ensures uniform size and even baking. It is also much faster than using two spoons. A #40 scoop is perfect for this recipe.
Preparation Method
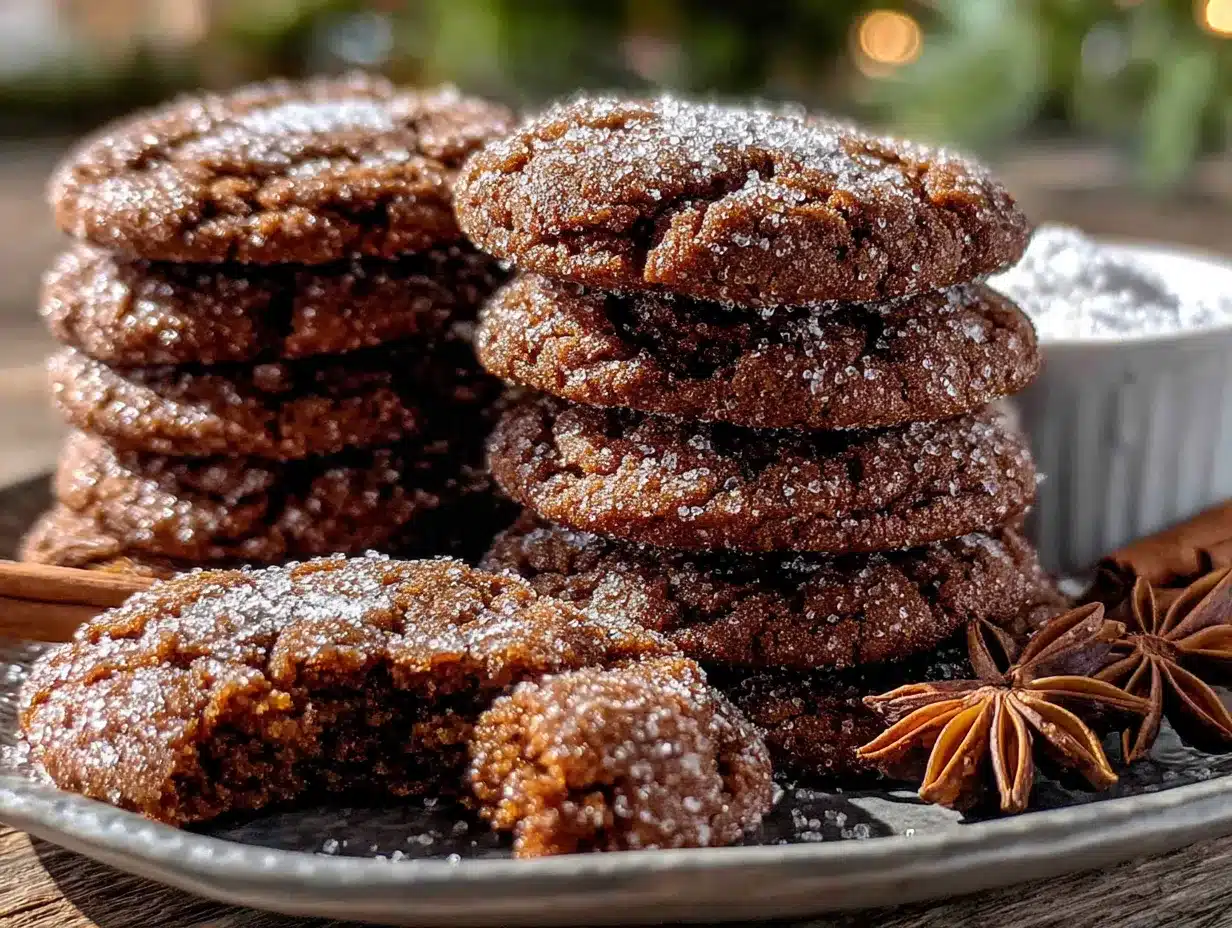
Follow these steps carefully, and you will have perfect cookies every single time. The process is straightforward, but a few small details make all the difference.
- Preheat and Prep (5 minutes): Preheat your oven to 350°F (175°C). Line two baking sheets with parchment paper or silicone mats. This step is important—do not skip the parchment.
- Combine Wet Ingredients (5 minutes): In a large mixing bowl, whisk together the ¾ cup melted butter and 1 cup packed dark brown sugar until smooth and combined. It should look like wet sand. Add the ½ cup molasses and 1 large egg, and whisk vigorously until the mixture is glossy and uniform. Take a moment to smell it—that deep, spicy aroma is the sign of good molasses.
- Mix Dry Ingredients (3 minutes): In a separate medium bowl, whisk together 2 ¼ cups all-purpose flour, 2 teaspoons baking soda, 2 teaspoons ground ginger, 1 ½ teaspoons cinnamon, ½ teaspoon cloves, and ½ teaspoon salt. Whisking ensures the baking soda and spices are evenly distributed, so you don’t get a pocket of baking soda in one cookie.
- Combine Wet and Dry (3 minutes): Gradually add the dry ingredients to the wet mixture. Stir with a wooden spoon or rubber spatula until just combined. Do not over-mix. A few streaks of flour are okay; they will disappear as you stir. The dough will be soft, slightly sticky, and very fragrant. If it seems too sticky to handle, let it sit for 2 minutes—the flour will absorb the moisture.
- Portion the Dough (5 minutes): Place about ¼ cup of granulated sugar in a small bowl. Using a cookie scoop or a tablespoon, scoop out rounded balls of dough (about 1.5 tablespoons each). Roll each ball between your palms to form a smooth sphere. Drop the ball into the sugar, roll it around to coat, and place it on the prepared baking sheet. Repeat, spacing the cookies about 2 inches apart. You should get about 24 cookies.
- Bake (10-12 minutes): Bake one sheet at a time on the center rack. Bake for 10-12 minutes. The cookies will look puffy and cracked on top, and the edges will be set but the centers will still look slightly soft and underdone. This is exactly what you want. Do not over-bake, or they will lose their soft texture.
- Cool (10 minutes): Let the cookies cool on the baking sheet for 5 minutes. They will be very fragile right out of the oven. After 5 minutes, carefully transfer them to a wire rack to cool completely. The centers will continue to set as they cool, resulting in that perfect, soft, chewy texture.
Cooking Tips & Techniques
I have made every mistake in the book with this recipe, so you don’t have to. The biggest lesson I learned? Patience at the cooling stage. I once tried to move a cookie too early, and it literally fell apart in my hands. Let them rest on the sheet for the full 5 minutes.
Another common mistake is using cold eggs. A cold egg can seize the melted butter, creating a lumpy dough. Your butter and egg should both be at room temperature for a smooth, emulsified batter. If you are in a rush, crack the egg into a small bowl and let it sit in a cup of warm water for a few minutes.
For the most consistent results, weigh your flour. A kitchen scale is a game-changer. If you don’t have one, use the spoon-and-level method: fluff the flour with a spoon, spoon it into your measuring cup, and level it off with a knife. Never scoop directly from the bag.
Multitasking tip: While one batch is baking, portion the next batch of dough balls and roll them in sugar. This keeps the assembly line moving efficiently. You can also prepare the dough a few hours ahead and keep it covered at room temperature—just don’t refrigerate it, or the butter will solidify and change the texture.
Variations & Adaptations
These cookies are incredibly forgiving and easy to customize. I have tried several variations over the years, and they all turned out delicious.
- Spiced-Up Version: Add ¼ teaspoon of black pepper and ½ teaspoon of cardamom to the dry ingredients. It gives the cookies a warm, complex kick that pairs wonderfully with a cup of chai tea.
- Gluten-Free Adaptation: Substitute the all-purpose flour with a 1:1 gluten-free baking flour blend (one that contains xanthan gum). I have used King Arthur Measure for Measure with great success. The texture will be slightly more cake-like, but still deliciously soft.
- Citrus Twist: Add the zest of one orange to the wet ingredients. The bright citrus notes cut through the heavy molasses and spices beautifully. It is a lovely variation for a springtime gathering.
- Chocolate Drizzle: Once the cookies are completely cool, drizzle them with melted dark chocolate or white chocolate. This turns them into an even more decadent dessert that feels special for a dinner party.
- Vegan Option: Replace the butter with vegan butter (I recommend Miyoko’s) and the egg with a flax egg (1 tablespoon ground flaxseed mixed with 3 tablespoons water, let sit for 5 minutes). The texture will be slightly less tender but still very good.
Serving & Storage Suggestions
These cookies are best served at room temperature, straight from the cooling rack. They are soft, tender, and practically melt in your mouth. For a dinner party, arrange them on a beautiful wooden board or a festive platter. They pair beautifully with a scoop of vanilla bean ice cream or a dollop of lightly sweetened whipped cream.
For a cozy holiday gathering, serve them alongside a warm mug of spiced apple cider, a creamy eggnog, or a strong cup of black coffee. The spices in the cookie complement the warmth of the drinks perfectly. I also love serving these after a heavy meal—the ginger helps with digestion, and the lightness of the cookie doesn’t weigh you down.
Storage: Store the cookies in an airtight container at room temperature for up to 5 days. Place a slice of bread in the container to keep them extra soft—the cookies will absorb the moisture from the bread. They actually taste even better on day two as the spices meld together.
Freezing: These cookies freeze beautifully. Place them in a single layer in a freezer-safe bag or container, separated by parchment paper. They will keep for up to 3 months. Thaw at room temperature for about 30 minutes before serving. You can also freeze the unbaked dough balls. Roll them in sugar, place them on a baking sheet, freeze until solid, then transfer to a freezer bag. Bake directly from frozen, adding 1-2 minutes to the baking time.
Nutritional Information & Benefits
While these are definitely a treat, there are a few nutritional bright spots worth noting. Molasses is a good source of iron, calcium, and magnesium, which is a nice bonus for a cookie. Ginger is well-known for its anti-inflammatory properties and can help with digestion—perfect after a big holiday meal.
Estimated Nutrition (per cookie, based on 24 cookies):
| Nutrient | Amount |
|---|---|
| Calories | 165 |
| Total Fat | 7g |
| Saturated Fat | 4g |
| Carbohydrates | 24g |
| Sugar | 15g |
| Protein | 2g |
| Iron | 4% DV |
| Calcium | 2% DV |
Dietary Considerations: This recipe contains gluten, dairy, and eggs. For a gluten-free version, see the variations above. For a dairy-free version, use vegan butter. For an egg-free version, use a flax egg. The cookies are naturally nut-free, making them a safe option for school events or gatherings where allergies are a concern.
Conclusion
These soft molasses gingerbread cookies are more than just a recipe—they are the kind of thing that makes people pause and ask for the recipe. They started as a mistake, a frustrated attempt to salvage a failed project, and they ended up being the most requested cookie in my kitchen. That is the magic of cooking, honestly. Sometimes the best things come from the moments when you are ready to give up.
I hope you give these a try, whether it is for a holiday cookie swap, a casual dinner party, or just a quiet afternoon when you need something warm and comforting. Customize them, make them your own, and please—share your results. Tag me in your photos, leave a comment below telling me how they turned out, or tell me about your own happy accident in the kitchen. I would love to hear your story.
Now go preheat that oven. Your new favorite cookie is waiting.
Frequently Asked Questions
Can I use blackstrap molasses in this recipe?
I do not recommend it. Blackstrap molasses is much more bitter and less sweet than regular unsulphured molasses. It will overpower the other spices and result in a cookie that tastes harsh and less balanced. Stick with mild or unsulphured molasses for the best flavor.
Why are my cookies flat and spread out?
Flat cookies usually mean the butter was too warm or the dough was over-mixed. Make sure your melted butter has cooled slightly before adding the other ingredients. Also, be gentle when mixing in the flour—over-mixing develops gluten, which can cause spreading. Finally, ensure your baking soda is fresh. Old baking soda loses its leavening power.
Can I make the dough ahead of time?
Yes, you can make the dough up to 24 hours in advance. However, do not refrigerate it. Keep it covered at room temperature. If you refrigerate it, the butter will solidify, and the cookies will not spread properly or achieve that soft, tender texture. If you must refrigerate, let the dough sit at room temperature for 30 minutes before scooping and baking.
How do I get the perfect crackly top?
The crackly top comes from rolling the dough balls in granulated sugar before baking. Make sure the balls are well-coated. Also, using the correct amount of baking soda is crucial—it creates the cracks as the cookies rise and set. Do not skip the rolling step, and do not press the cookies down before baking.
Can I double this recipe?
Absolutely. This recipe doubles beautifully for a crowd. Simply double all the ingredients. When mixing, add the dry ingredients in two batches to ensure even incorporation. You may need to bake in additional batches, but the baking time remains the same. This is my go-to recipe when I need to bring cookies to a large potluck or holiday party.
Pin This Recipe!
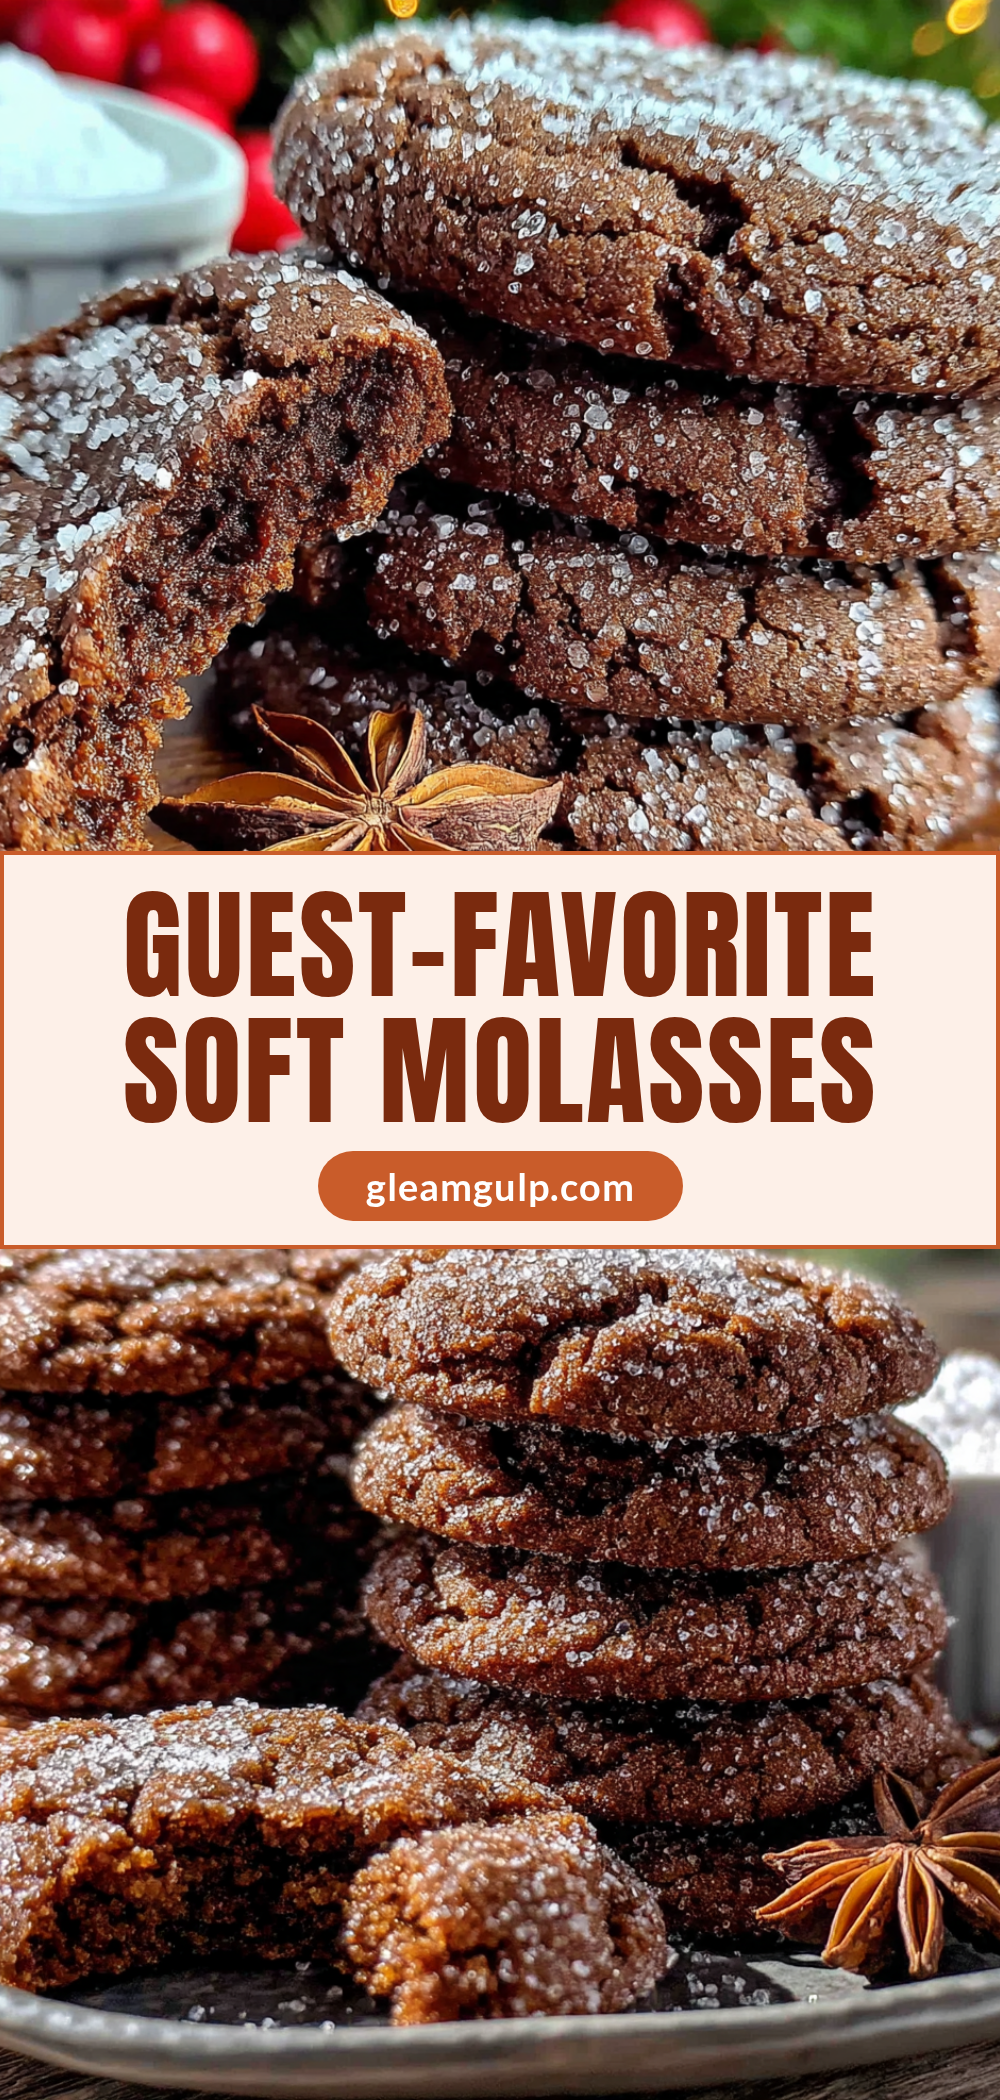
Best Soft Molasses Gingerbread Cookies Recipe (No Chill)
These soft molasses gingerbread cookies are pillowy, tender, and perfectly spiced. No chilling required, they come together quickly with simple pantry ingredients for a crowd-pleasing holiday treat.
- Prep Time: 15 minutes
- Cook Time: 12 minutes
- Total Time: 27 minutes
- Yield: 24 cookies 1x
- Category: Dessert
- Cuisine: American
Ingredients
- ¾ cup unsalted butter, melted and slightly cooled
- 1 cup dark brown sugar, packed
- ½ cup unsulphured or mild molasses
- 1 large egg, room temperature
- 2 ¼ cups all-purpose flour, spooned and leveled
- 2 teaspoons baking soda
- 2 teaspoons ground ginger
- 1 ½ teaspoons ground cinnamon
- ½ teaspoon ground cloves
- ½ teaspoon salt
- ¼ cup granulated sugar (for rolling)
Instructions
- Preheat oven to 350°F (175°C). Line two baking sheets with parchment paper or silicone mats.
- In a large mixing bowl, whisk together melted butter and dark brown sugar until smooth and combined.
- Add molasses and egg, whisk vigorously until glossy and uniform.
- In a separate medium bowl, whisk together flour, baking soda, ginger, cinnamon, cloves, and salt.
- Gradually add dry ingredients to wet mixture, stirring with a wooden spoon until just combined. Do not over-mix. Dough will be soft and slightly sticky.
- Place granulated sugar in a small bowl. Using a cookie scoop or tablespoon, scoop rounded balls of dough (about 1.5 tablespoons each). Roll each ball between palms to form a smooth sphere, then roll in sugar to coat.
- Place coated dough balls on prepared baking sheets, spacing about 2 inches apart.
- Bake one sheet at a time on center rack for 10-12 minutes. Cookies will look puffy and cracked on top, with edges set but centers still soft.
- Let cookies cool on baking sheet for 5 minutes, then transfer to a wire rack to cool completely.
Notes
Do not use blackstrap molasses—it is too bitter. Use unsulphured or mild molasses. For best results, spoon and level the flour. Let cookies cool on the baking sheet for a full 5 minutes before moving. Store in an airtight container at room temperature for up to 5 days; place a slice of bread in the container to keep them soft. Freeze baked cookies for up to 3 months.
Nutrition
- Serving Size: 1 cookie
- Calories: 165
- Sugar: 15
- Sodium: 160
- Fat: 7
- Saturated Fat: 4
- Carbohydrates: 24
- Protein: 2
Keywords: soft gingerbread cookies, molasses cookies, no chill cookies, holiday cookies, gingerbread recipe, soft baked cookies


