Love this? Save it for later!
Share the inspiration with your friends
My nephew Leo asked why I couldn’t just dump the cocoa powder and black food coloring into the same bowl at the same time. I was in the middle of explaining the chemistry of why you have to mix the cocoa with hot water first—something about blooming the flavor, preventing clumps, the whole spiel. I started to explain why that wouldn’t work. Then stopped. He was seven. He didn’t care about my cocoa bloom theory. He just wanted to help. So I handed him the bowl and said, “Fine, you do it.” He dumped the black gel and the cocoa in together, stirred it with the enthusiasm only a child on a sugar mission can muster, and honestly? The batter was the smoothest, darkest velvet I’d ever made. I stood there, spatula in hand, a little humbled and a lot delighted. That’s the moment these Spooky Black Velvet Halloween Cupcakes with Orange Frosting were born—not from a plan, but from a kid’s stubborn intuition that sometimes, rules are just suggestions.
We were prepping for our annual Halloween block party, and I had this grand vision of gothic, elegant cupcakes that would look like they belonged in a haunted mansion. I had the black cocoa, the orange gel coloring for the frosting, the whole aesthetic mapped out. But I was so focused on getting the technique “right” that I forgot the most important rule of Halloween baking: it’s supposed to be fun. Leo, covered in a fine dusting of flour and black gel that looked suspiciously like war paint, taught me that lesson in about thirty seconds flat. The cupcakes turned out perfect—deep, dark, impossibly black, with a crumb so tender it almost felt illegal. Maybe you’ve been there, too. That moment where you’re so caught up in the process that you forget to let the joy in. These cupcakes are that joy, baked into every single bite.
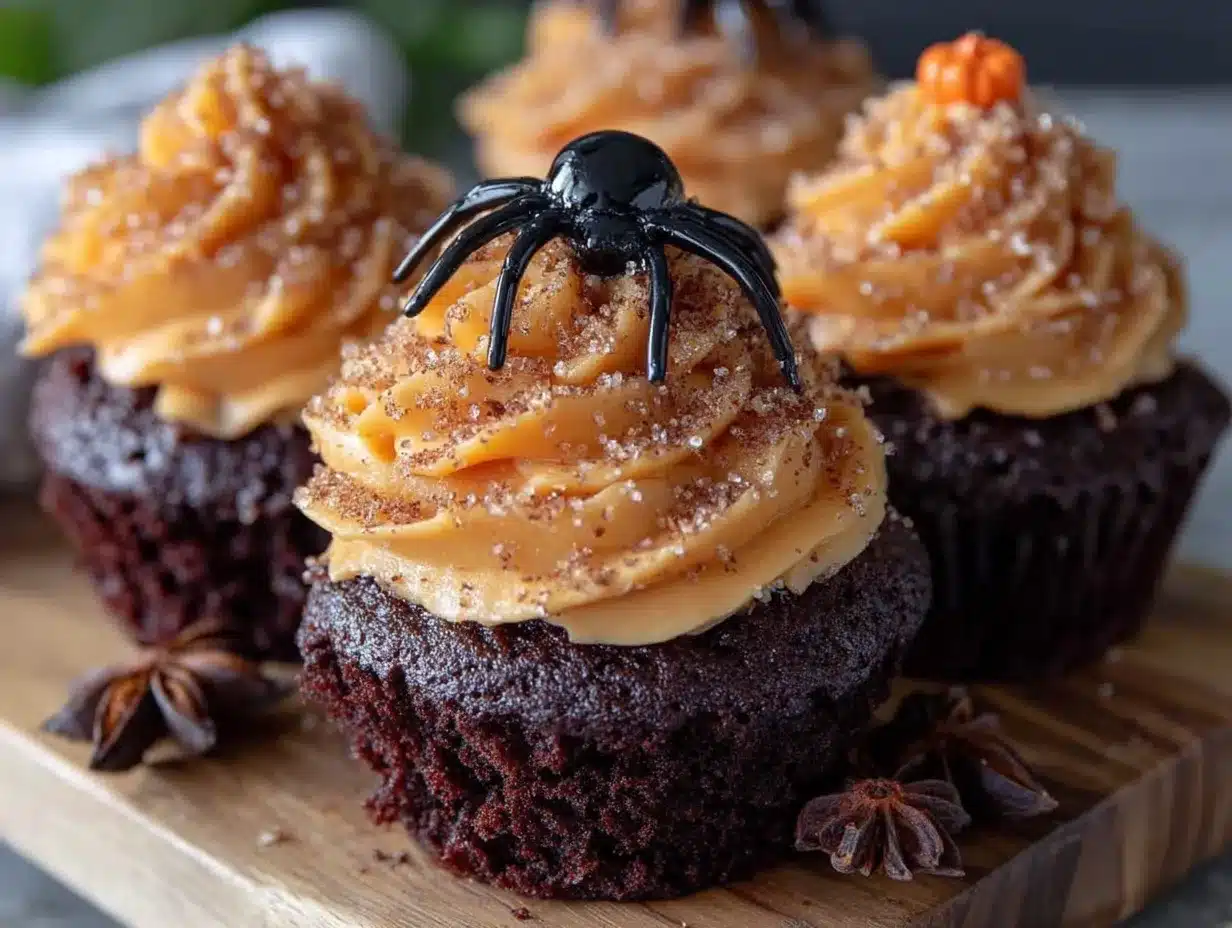
What I love most about these Spooky Black Velvet Halloween Cupcakes with Orange Frosting is how they look like a total showstopper but come together with the kind of ease that makes you look like a baking wizard. The black velvet cake is rich, moist, and has that classic tang from buttermilk that makes red velvet so addictive—just, you know, without the red. And the orange frosting? It’s a silky, creamy buttercream that gets its vibrant hue from a simple trick I learned after a few too many batches of muddy-looking orange frosting. The color pops against the black cake like a jack-o’-lantern against a midnight sky. These cupcakes have become my non-negotiable Halloween tradition, the ones I bring to every party and leave on the porch for the neighbors. They’re spooky, they’re delicious, and they remind me that sometimes the best recipes come from letting a seven-year-old take the wheel.
Why You’ll Love This Recipe
Let me tell you why these Spooky Black Velvet Halloween Cupcakes with Orange Frosting have earned a permanent spot in my Halloween rotation. I’ve tested this recipe more times than I care to admit, tweaking the cocoa ratio, adjusting the buttermilk, and even trying different black food colorings. What I landed on is the gold standard—a cupcake that’s as reliable as it is dramatic.
- Quick & Easy: From start to finish, you’re looking at about 45 minutes. The batter comes together in one bowl, and the frosting whips up while the cupcakes cool.
- Simple Ingredients: No weird specialty stuff. You probably have most of this in your pantry right now—flour, sugar, cocoa, buttermilk, eggs. The only “special” thing is black food coloring, and you can grab that at any grocery store.
- Perfect for Halloween: These are the undisputed stars of any Halloween party, trunk-or-treat event, or spooky movie night. They look incredible on a dessert table, and kids absolutely lose their minds over the black cake.
- Crowd-Pleaser: I’ve served these to everyone from picky toddlers to my aunt who “doesn’t do sweets,” and they disappear every single time. The texture is that good.
- Unbelievably Delicious: The black velvet cake is tender, moist, and has this deep, almost dark chocolate flavor that’s perfectly balanced by the sweet, citrusy orange frosting. It’s not just a gimmick—it’s genuinely one of the best cupcakes I’ve ever made.
What makes this recipe different from every other black cupcake out there is the technique I stumbled into thanks to Leo. By mixing the cocoa and black food coloring together before adding the wet ingredients, you get a batter that’s uniformly dark without any streaking or weird color patches. Plus, I use a combination of natural cocoa and a touch of espresso powder to deepen the chocolate flavor without making it bitter. It’s a small tweak, but it makes all the difference.
This recipe isn’t just good—it’s the kind that makes you close your eyes after the first bite. It’s Halloween comfort food reimagined: spooky on the outside, but soft and familiar on the inside. Perfect for impressing guests without stressing yourself out, or turning a simple October evening into something memorable.
What Ingredients You Will Need
This recipe uses simple, wholesome ingredients to deliver a cupcake that’s as dramatic as it is delicious. Most of these are pantry staples, and I’ve included notes on substitutions where I’ve tested them myself.
For the Black Velvet Cupcakes
- 1 ½ cups (190g) all-purpose flour – Spoon and level for accuracy. I’ve tested this with a gluten-free 1:1 baking blend, and it works beautifully.
- 1 cup (200g) granulated sugar – Regular white sugar is fine. I’ve also used coconut sugar, but the color turns a bit gray instead of true black.
- ¼ cup (25g) natural unsweetened cocoa powder – I prefer Hershey’s or Ghirardelli for consistent results. Do not use Dutch-process here; the reaction with the buttermilk is key for the velvet texture.
- 1 teaspoon baking soda – This is your leavening agent. Make sure it’s fresh.
- ½ teaspoon salt – Fine sea salt or table salt works best.
- 1 cup (240ml) buttermilk, room temperature – This is non-negotiable for the velvet texture. If you don’t have buttermilk, add 1 tablespoon of lemon juice or white vinegar to 1 cup of milk and let it sit for 5 minutes.
- ½ cup (120ml) vegetable oil – Canola or any neutral oil works. I’ve used melted coconut oil in a pinch, but the texture is slightly denser.
- 2 large eggs, room temperature – Cold eggs will seize the batter. Let them sit out for 30 minutes or place them in warm water for 5 minutes.
- 1 teaspoon vanilla extract – Pure vanilla extract adds depth. Imitation works in a pinch, but the flavor is noticeably less rich.
- 1 tablespoon black gel food coloring – Gel is essential. Liquid coloring will thin the batter too much. I recommend Americolor Super Black or Wilton Color Right Black.
- 1 teaspoon white vinegar – This reacts with the baking soda for extra lift. Don’t skip it.
For the Orange Frosting
- 1 cup (226g) unsalted butter, softened – Let it sit out for at least an hour. It should be soft enough to leave an indent when pressed.
- 4 cups (480g) powdered sugar – Sifted if it’s lumpy. No one wants lumpy frosting.
- 2-3 tablespoons heavy cream or milk – Heavy cream makes it richer, but milk works fine.
- 1 teaspoon vanilla extract – Again, pure is best.
- ¼ teaspoon salt – Balances the sweetness.
- Orange gel food coloring – I use a mix of lemon yellow and electric orange from Americolor to get that vibrant, true orange color. Start with a tiny drop and add more until you’re happy.
- Optional: ½ teaspoon orange extract – For an extra pop of citrus flavor. I add this when I want the orange to really sing.
Equipment Needed
You don’t need a professional bakery setup for these Spooky Black Velvet Halloween Cupcakes with Orange Frosting. Here’s what I use, along with some budget-friendly alternatives.
- Standard 12-cup muffin tin – I prefer a non-stick tin lined with paper cupcake liners. Dark-colored tins tend to brown the edges faster, so keep an eye on bake time if you use one.
- Paper cupcake liners – Halloween-themed ones are fun, but plain white or black liners let the orange frosting pop. I’ve also used silicone liners, but the cakes don’t dome as nicely.
- Mixing bowls – One large bowl for the dry ingredients and one for the wet. I use glass or stainless steel.
- Whisk and rubber spatula – A whisk for the dry ingredients and a spatula for folding everything together gently.
- Electric hand mixer or stand mixer – For the frosting. You can whisk it by hand, but your arm will hate you. I’ve been there.
- Piping bag and star tip (like Wilton 1M) – For that gorgeous, bakery-style swirl. If you don’t have a piping bag, a zip-top bag with the corner snipped off works perfectly.
- Cooling rack – Letting the cupcakes cool completely before frosting is non-negotiable. I learned that the hard way when my first batch turned into a melty mess.
Preparation Method
Let’s get baking. These Spooky Black Velvet Halloween Cupcakes with Orange Frosting come together in a few simple steps. I’ve included all the little details I wish someone had told me the first time I made them.
- Preheat your oven to 350°F (175°C). Line your muffin tin with 12 cupcake liners. This recipe makes exactly 12 cupcakes—no more, no less. I’ve tried doubling it, and it works fine, but don’t try to squeeze 14 out of this batch or they’ll be flat.
- In a large bowl, whisk together the flour, sugar, cocoa powder, baking soda, and salt. Make sure there are no lumps. I usually sift the cocoa powder because it loves to clump. Take your time here—a well-mixed dry base is the foundation of a good cupcake.
- In a separate bowl or a large liquid measuring cup, combine the buttermilk, oil, eggs, and vanilla extract. Whisk until the eggs are fully incorporated and the mixture looks smooth and slightly frothy. This should take about 30 seconds.
- Here’s the trick Leo taught me: In a tiny bowl, mix the black gel food coloring with about 1 tablespoon of the dry flour mixture. Stir it into a paste. Then add this paste to the wet ingredients and whisk until the color is uniform. This prevents the food coloring from clumping and ensures an even, jet-black batter. I know it sounds weird, but trust me on this one.
- Pour the wet ingredients into the dry ingredients. Add the white vinegar. Stir gently with a rubber spatula until just combined. Do not overmix. A few small lumps are fine. Overmixing will make the cupcakes tough, and nobody wants a tough velvet cake.
- Divide the batter evenly among the 12 liners. I use a large cookie scoop for this—it’s the perfect size and keeps things neat. Each liner should be about ⅔ full. If you fill them too high, they’ll mushroom over the top.
- Bake for 18-22 minutes, or until a toothpick inserted in the center comes out clean. My oven runs hot, so I check at 18 minutes. The tops should spring back when lightly touched. Don’t overbake—dry cupcakes are a tragedy.
- Let the cupcakes cool in the pan for 5 minutes, then transfer them to a wire rack to cool completely. This is important. If you try to frost them while they’re even slightly warm, the frosting will slide right off. I speak from sticky, frustrating experience.
- While the cupcakes cool, make the frosting. In a large bowl, beat the softened butter with an electric mixer on medium speed until smooth and creamy, about 2 minutes. It should look pale and fluffy.
- Gradually add the powdered sugar, one cup at a time, beating on low speed after each addition. This keeps the sugar from flying everywhere. Add the heavy cream, vanilla extract, and salt. Beat on medium-high speed for 3-4 minutes until the frosting is light, fluffy, and spreadable.
- Add the orange gel food coloring, a tiny drop at a time, and beat until you reach your desired shade. I usually go for a vibrant, almost neon orange—it pops beautifully against the black cake. If you’re using orange extract, add it now.
- Once the cupcakes are completely cool, frost them. I use a piping bag fitted with a large star tip and pipe a tall swirl starting from the outside and working in. If you don’t have a piping bag, you can simply spread the frosting with a knife. It’ll still taste amazing.
Cooking Tips & Techniques
I’ve made these Spooky Black Velvet Halloween Cupcakes with Orange Frosting about a dozen times, and I’ve collected a few hard-won lessons along the way. Here’s what I wish I’d known from the start.
Don’t skip the buttermilk. I tried making these with regular milk once because I was out of buttermilk, and the texture was completely wrong. The buttermilk reacts with the baking soda to create that tender, velvety crumb that makes these cupcakes so special. If you don’t have buttermilk, the milk-and-vinegar hack works perfectly. Just don’t use plain milk.
Gel food coloring is your best friend. Liquid food coloring will thin your batter and give you a muddy gray color instead of true black. Gel is concentrated, so you use less, and it doesn’t affect the texture. I learned this the hard way after a batch of sad, gray cupcakes that looked more like storm clouds than Halloween treats.
Room temperature ingredients matter. I know, I know—it’s annoying to wait for eggs and buttermilk to come to room temperature. But cold ingredients don’t emulsify properly, which leads to a denser, less tender cupcake. Set everything out 30 minutes before you start baking. Your future self will thank you.
Let the cupcakes cool completely before frosting. I cannot stress this enough. I once frosted a batch that was still slightly warm, and the frosting melted into a puddle. It still tasted good, but it looked like a disaster. Patience is a virtue, especially in baking.
For the best orange color, use a mix of yellow and orange gel. Straight orange gel often turns out a bit too red or too neon. I start with a tiny drop of lemon yellow and then add orange until I get that perfect pumpkin shade. It takes a little trial and error, but the result is worth it.
Variations & Adaptations
One of the things I love about this recipe is how flexible it is. Here are a few variations I’ve tried and loved.
Gluten-Free Version: I’ve made these with a 1:1 gluten-free baking blend (I like Bob’s Red Mill), and they turned out beautifully. The texture is slightly more delicate, so handle them gently. Add an extra tablespoon of buttermilk to compensate for the drier flour blend.
Vegan Adaptation: Substitute the buttermilk with 1 cup of almond milk mixed with 1 tablespoon of vinegar. Use flax eggs (1 tablespoon ground flaxseed mixed with 3 tablespoons water per egg) and a vegan butter for the frosting. The cupcakes are a bit less fluffy, but they’re still delicious and perfectly spooky.
Chocolate Orange Twist: Add ½ teaspoon of orange zest to the cupcake batter and use orange extract in both the batter and the frosting. The combination of dark chocolate and orange is classic for a reason, and it takes these cupcakes to a whole new level.
Spider Web Decoration: For an extra spooky touch, pipe a small circle of white frosting on top of the orange frosting, then drag a toothpick through it from the center outward to create a web pattern. It’s easier than it looks and always gets a reaction.
Mini Cupcake Version: Use a mini muffin tin and bake for 10-12 minutes. This is perfect for parties where you want people to try multiple treats. You’ll get about 36 mini cupcakes from this batter.
Serving & Storage Suggestions
These Spooky Black Velvet Halloween Cupcakes with Orange Frosting are best served at room temperature, which lets the frosting soften and the cake stay tender. I like to arrange them on a black or orange platter for maximum visual impact. A few fake spiderwebs or plastic spiders around the base of the platter make for a fun presentation.
For storage, place the cupcakes in an airtight container at room temperature for up to 3 days. If you need to store them longer, pop them in the refrigerator for up to a week. Just let them come to room temperature for about 30 minutes before serving—cold frosting is never as good.
You can also freeze the unfrosted cupcakes for up to 3 months. Wrap each one tightly in plastic wrap, then place them in a freezer-safe bag. When you’re ready to serve, thaw them at room temperature and frost as usual. I’ve done this for Halloween parties when I wanted to prep ahead, and they taste just as fresh.
The flavors actually develop over time—the black velvet cake gets even more moist and the chocolate flavor deepens after a day or two. So if you can resist eating them all immediately, they’ll be even better the next day. Not that I’ve ever managed that, but theoretically.
Nutritional Information & Benefits
Let’s be real: these are cupcakes, not health food. But here’s the estimated nutritional breakdown for one cupcake with frosting, based on my standard recipe.
| Nutrient | Amount per Cupcake |
|---|---|
| Calories | 385 |
| Total Fat | 18g |
| Saturated Fat | 9g |
| Cholesterol | 55mg |
| Sodium | 220mg |
| Total Carbohydrates | 54g |
| Dietary Fiber | 1g |
| Sugars | 42g |
| Protein | 3g |
On the bright side, the cocoa powder in these cupcakes is a good source of antioxidants, and the buttermilk provides a bit of calcium and probiotics. The orange frosting, if you use orange extract, has a tiny hint of vitamin C. But honestly? These are a treat. They’re meant to be enjoyed on a crisp October evening with a glass of cold milk and maybe a scary movie playing in the background. Life’s too short to worry about the nutritional stats on a Halloween cupcake.
If you’re looking for a lower-sugar option, you can reduce the sugar in the frosting by using a sugar substitute like Swerve, but the texture will be slightly different. I’ve tried it, and it works, but it’s not quite as silky.
Conclusion
These Spooky Black Velvet Halloween Cupcakes with Orange Frosting are everything I want in a Halloween dessert: dramatic, delicious, and surprisingly easy to make. They look like they came from a fancy bakery, but they come together in a single afternoon with ingredients you probably already have. The black velvet cake is tender and rich, the orange frosting is sweet and creamy, and together they make the perfect spooky treat for any October occasion.
I love that this recipe came from a moment of letting go of control—of letting a seven-year-old show me that there’s more than one way to get to a perfect batter. Every time I make these cupcakes, I think of Leo standing on a step stool, covered in black gel, grinning like he’d just discovered fire. That’s the spirit of Halloween, isn’t it? A little bit spooky, a whole lot of fun, and always better when you share it.
I’d love to hear how these turn out for you! Did you add any fun decorations? Did your kids or friends have any brilliant ideas that changed the recipe? Drop a comment below and let me know. And if you share these on social media, tag me—I want to see your spooky creations. Happy Halloween, and happy baking!
Frequently Asked Questions
Can I make these cupcakes ahead of time?
Absolutely. You can bake the cupcakes up to 3 days in advance and store them in an airtight container at room temperature. Frost them the day you plan to serve them for the best presentation. You can also freeze the unfrosted cupcakes for up to 3 months.
Why did my black cupcakes turn out gray?
This usually happens when you use liquid food coloring instead of gel, or when you don’t use enough coloring. Gel food coloring is highly concentrated and gives you that true jet-black color. I recommend Americolor Super Black for the best results. Also, make sure you’re using natural cocoa powder, not Dutch-process, which can affect the color.
Can I use a different frosting flavor?
Of course! While orange frosting is perfect for Halloween, these black velvet cupcakes work beautifully with cream cheese frosting, vanilla buttercream, or even a dark chocolate ganache. For a non-Halloween version, try a raspberry or lemon frosting for a stunning color contrast.
How do I get the frosting to be that bright orange color?
The key is using gel food coloring and starting with a tiny amount. I use a combination of lemon yellow and electric orange gel to get a vibrant, true orange. Add the color drop by drop until you reach your desired shade. If you add too much, the frosting can become bitter, so go slow.
Can I make these cupcakes dairy-free?
Yes! Use a dairy-free milk alternative like almond or oat milk mixed with vinegar to make a buttermilk substitute. Use a plant-based butter for the frosting. I’ve tested this with Miyoko’s vegan butter and it works beautifully. The texture is slightly denser, but the flavor is still fantastic.
Pin This Recipe!
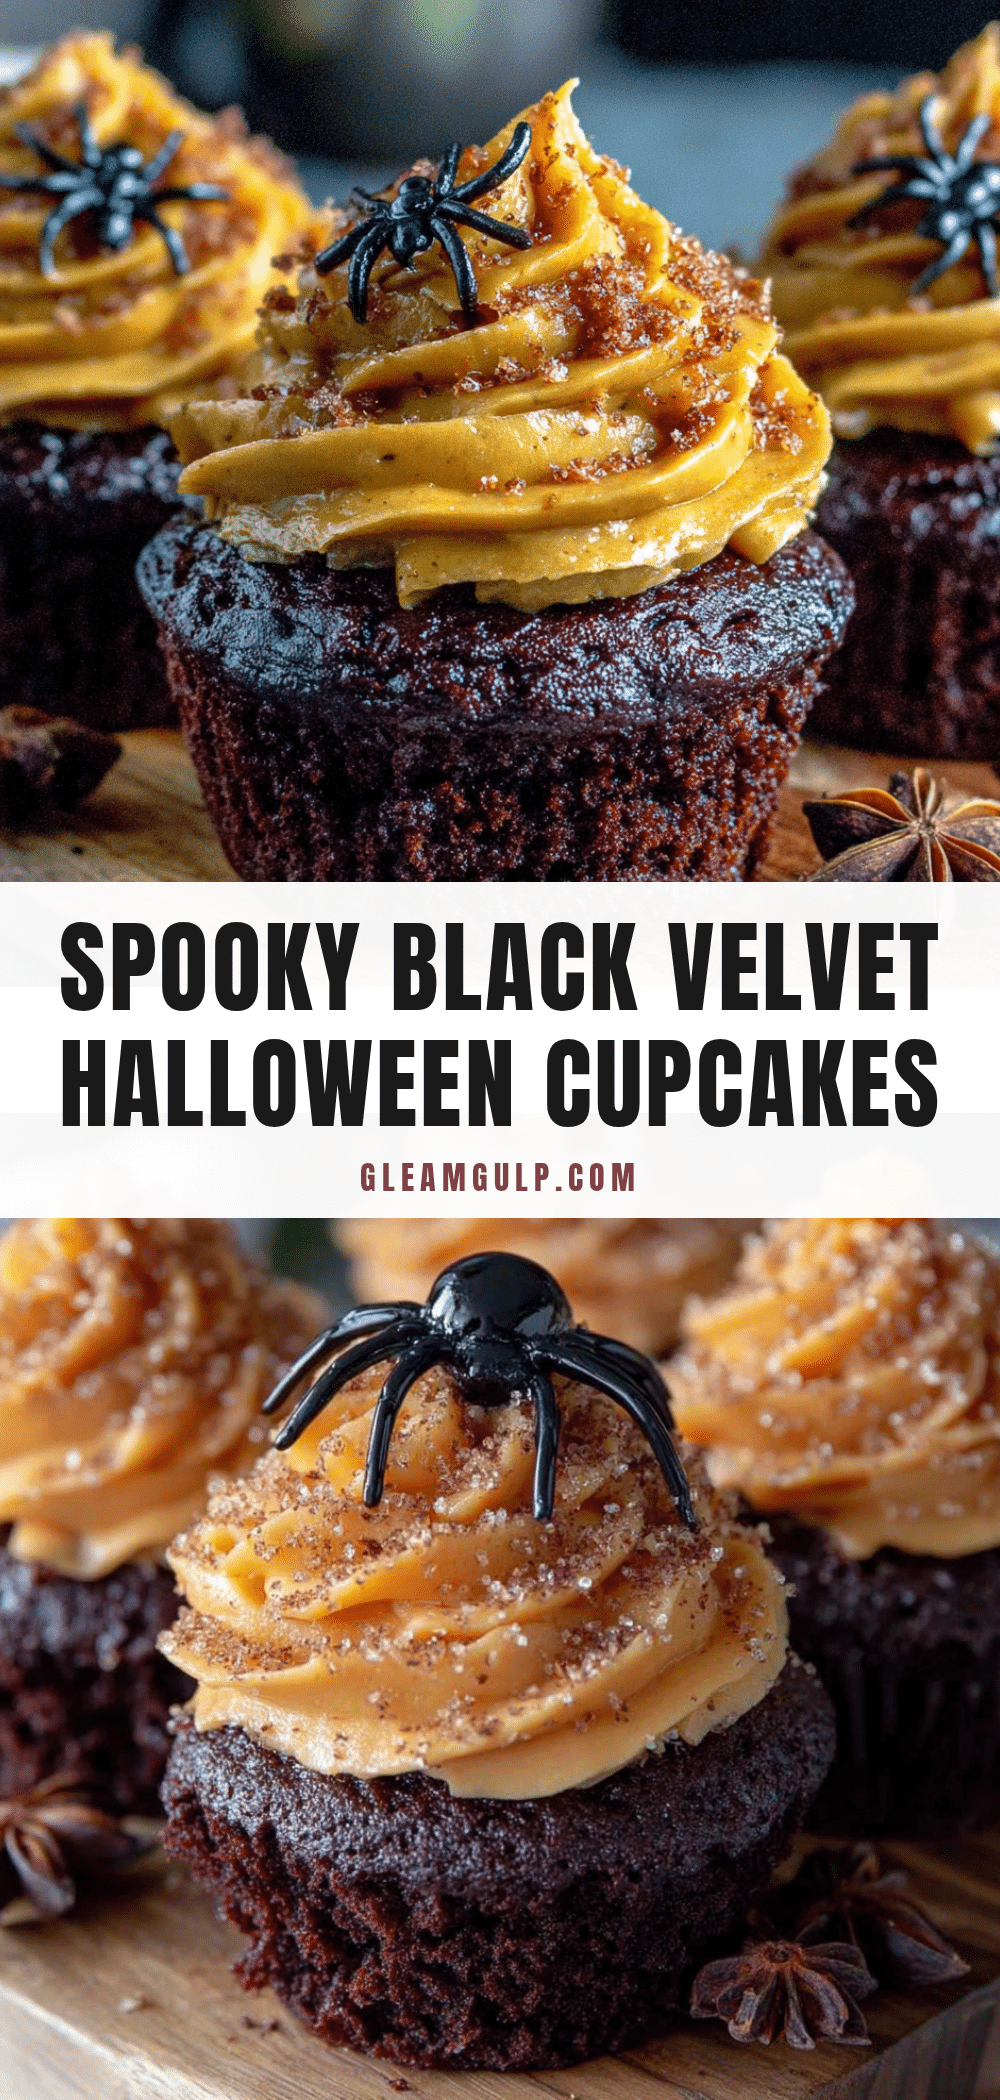
Spooky Black Velvet Cupcakes with Orange Frosting
These spooky black velvet cupcakes are rich, moist, and topped with a vibrant orange buttercream frosting. Perfect for Halloween parties, they come together easily with simple ingredients and a fun, kid-approved technique.
- Prep Time: 15 minutes
- Cook Time: 20 minutes
- Total Time: 45 minutes
- Yield: 12 cupcakes 1x
- Category: Dessert
- Cuisine: American
Ingredients
- 1 ½ cups (190g) all-purpose flour
- 1 cup (200g) granulated sugar
- ¼ cup (25g) natural unsweetened cocoa powder
- 1 teaspoon baking soda
- ½ teaspoon salt
- 1 cup (240ml) buttermilk, room temperature
- ½ cup (120ml) vegetable oil
- 2 large eggs, room temperature
- 1 teaspoon vanilla extract
- 1 tablespoon black gel food coloring
- 1 teaspoon white vinegar
- 1 cup (226g) unsalted butter, softened
- 4 cups (480g) powdered sugar
- 2–3 tablespoons heavy cream or milk
- 1 teaspoon vanilla extract
- ¼ teaspoon salt
- Orange gel food coloring
- Optional: ½ teaspoon orange extract
Instructions
- Preheat your oven to 350°F (175°C). Line your muffin tin with 12 cupcake liners.
- In a large bowl, whisk together the flour, sugar, cocoa powder, baking soda, and salt.
- In a separate bowl or large liquid measuring cup, combine the buttermilk, oil, eggs, and vanilla extract. Whisk until smooth and slightly frothy.
- In a tiny bowl, mix the black gel food coloring with about 1 tablespoon of the dry flour mixture to form a paste. Add this paste to the wet ingredients and whisk until the color is uniform.
- Pour the wet ingredients into the dry ingredients. Add the white vinegar. Stir gently with a rubber spatula until just combined. Do not overmix.
- Divide the batter evenly among the 12 liners, filling each about ⅔ full.
- Bake for 18-22 minutes, or until a toothpick inserted in the center comes out clean.
- Let the cupcakes cool in the pan for 5 minutes, then transfer them to a wire rack to cool completely.
- While the cupcakes cool, make the frosting: In a large bowl, beat the softened butter with an electric mixer on medium speed until smooth and creamy, about 2 minutes.
- Gradually add the powdered sugar, one cup at a time, beating on low speed after each addition. Add the heavy cream, vanilla extract, and salt. Beat on medium-high speed for 3-4 minutes until light and fluffy.
- Add the orange gel food coloring, a tiny drop at a time, and beat until you reach your desired shade. If using orange extract, add it now.
- Once the cupcakes are completely cool, frost them using a piping bag fitted with a large star tip or simply spread with a knife.
Notes
Don’t skip the buttermilk—it’s essential for the velvet texture. Use gel food coloring for true black and vibrant orange. Let cupcakes cool completely before frosting to prevent melting. For best results, use room temperature ingredients.
Nutrition
- Serving Size: 1 cupcake
- Calories: 385
- Sugar: 42
- Sodium: 220
- Fat: 18
- Saturated Fat: 9
- Carbohydrates: 54
- Fiber: 1
- Protein: 3
Keywords: Halloween cupcakes, black velvet cupcakes, orange frosting, spooky cupcakes, black cupcakes, Halloween dessert


