Love this? Save it for later!
Share the inspiration with your friends
I wasn’t expecting baking advice from a plumber, but there I was, standing in a hardware aisle holding a box of drain cleaner, listening to Gary explain exactly how to make spiderweb brownies. He was picking up a new toilet flapper, and I was just trying to escape the chaos of a Tuesday afternoon. “You just need a butter knife and some peanut butter,” he said, like he was telling me how to change a washer. Gary is not a baker. He fixes pipes. But apparently, his wife makes these for every Halloween party, and she’s been perfecting them for years. He even drew the web pattern on a receipt from his pocket. I stood there, clutching my plumbing supplies, genuinely surprised that this was the best recipe idea I’d heard all season.
Honestly, that moment stuck with me. I mean, here was a guy who spends his days under sinks, casually dropping the secret to a no-fuss Halloween dessert that actually looks impressive. I went home, grabbed a box of brownie mix, a jar of peanut butter, and gave it a shot. And you know what? It worked. Better than I expected. The peanut butter swirls into this gorgeous web pattern with almost zero effort, and the whole thing comes together faster than you can say “trick or treat.”
Maybe you’ve been there—scrolling through Pinterest at 10 PM, realizing you need something for the school bake sale tomorrow, and every recipe requires six steps you don’t have time for. That’s where these come in. They look like you spent hours, but really, you just need a box mix, a spoon, and about 20 minutes. I’ve made these for three Halloweens straight now, and every time, someone asks for the recipe. They’re always shocked when I tell them it came from a plumber in the hardware aisle. But honestly, that’s what makes them so good—they’re practical, no-nonsense, and they just work.
Why You’ll Love This Recipe
Let me tell you why these Quick Peanut Butter Spiderweb Brownies have become my go-to Halloween treat. I’ve tested this method at least a dozen times, tweaking the peanut butter ratio and the swirling technique until it was foolproof. Here’s what makes them stand out:
- Ready in 30 Minutes: From mixing to cooling, you can have these on the table in half an hour. Perfect for those last-minute Halloween party invites or when the kids suddenly need something for tomorrow’s classroom celebration.
- Simple Pantry Ingredients: You probably already have everything in your kitchen. A box of brownie mix, some peanut butter, and a few basic staples. No special trips to the store for fancy decorations or obscure ingredients.
- Perfect for Halloween Gatherings: Whether it’s a spooky movie night, a costume party, or just a fun treat for the family, these brownies fit the bill. They look festive without being over-the-top.
- Crowd-Pleaser Guaranteed: Kids love the peanut butter swirl, adults appreciate the not-too-sweet balance, and everyone is impressed by the spiderweb design. I’ve yet to meet someone who didn’t grab a second one.
- Unbelievably Delicious: The combination of fudgy chocolate and creamy peanut butter is a classic for a reason. The web pattern isn’t just for show—it bakes into these little pockets of peanut butter goodness throughout every bite.
What makes this recipe different from every other Halloween brownie out there? It’s the technique. Most spiderweb recipes have you pipe melted peanut butter or chocolate in concentric circles, which is messy and takes forever. My method uses softened peanut butter dropped in dollops, then swirled with a simple butter knife. It creates that iconic web pattern in about 30 seconds flat. No piping bags, no steady hands required.
This is comfort food for the busiest time of year. It’s the kind of treat that makes you feel like a Halloween hero without actually breaking a sweat. Perfect for when you want to impress but also want to be sitting on the couch watching a scary movie 20 minutes later.
What Ingredients You Will Need
This recipe uses simple, wholesome ingredients to deliver that irresistible chocolate-peanut butter combo without any fuss. Most of these are pantry staples, so you can whip these up on a whim.
- 1 box (15-18 oz) brownie mix (I prefer Duncan Hines Chewy Fudge or Ghirardelli for the richest flavor; any brand works, but avoid “low sugar” varieties as they can turn out dry)
- 1/2 cup vegetable oil (or melted coconut oil for a subtle flavor twist)
- 2 large eggs, room temperature (cold eggs can make the batter seize up slightly; let them sit out for 10 minutes)
- 1/4 cup water (or brewed coffee for a deeper chocolate flavor—trust me on this one)
- 1/2 cup creamy peanut butter, softened (do NOT use natural or oily peanut butter here; it won’t hold the swirl. Jif or Skippy works perfectly)
- 1/4 cup powdered sugar (optional, for dusting after baking—adds a snowy, spooky effect)
Ingredient Selection Tips: For the best texture, use a brownie mix that calls for oil and eggs, not one that just adds water. The oil gives you that fudgy, dense crumb that holds the peanut butter swirl beautifully. If you’re using a natural peanut butter that separates, stir it really well before measuring, but honestly, I’ve found the processed stuff works better here—it’s more stable and swirls without breaking.
Substitution Guidance: Need a dairy-free option? Most brownie mixes are dairy-free, but check the label. Use a dairy-free chocolate peanut butter if you can find it, or just stick with regular peanut butter (which is naturally dairy-free). For a gluten-free version, use a gluten-free brownie mix—Betty Crocker makes a good one. The peanut butter swirl works exactly the same way. If someone has a nut allergy, sunflower seed butter (like SunButter) works surprisingly well here, though the color will be slightly greener after baking (don’t panic—that’s normal).
Pro Tip from My Kitchen: I always buy an extra jar of peanut butter around Halloween because I inevitably end up making these three times in October. The first batch is for the party, the second is for “quality control,” and the third is because someone’s kid saw a picture and begged for them. Just warning you.
Equipment Needed
You don’t need any fancy tools for this recipe. Here’s what you’ll need:
- 8×8-inch baking pan (a 9×9 works too, but the brownies will be slightly thinner; adjust baking time by 2-3 minutes)
- Mixing bowl (medium-sized, any material works)
- Whisk or fork (for combining the brownie batter)
- Rubber spatula (for scraping every last bit of batter—waste not, want not)
- Butter knife or small offset spatula (for creating the spiderweb pattern)
- Parchment paper or non-stick spray (parchment paper makes cleanup infinitely easier; I line the pan with two overhanging strips so I can lift the whole block out)
- Cooling rack (optional but recommended for even cooling)
Budget-Friendly Options: Don’t have an 8×8 pan? Use a disposable aluminum one from the dollar store—they work fine. No offset spatula? A regular butter knife does the job perfectly. I’ve even used the back of a spoon in a pinch. The key is just having something flat to drag through the batter.
Personal Experience: I learned the hard way that glass pans can over-bake the edges while the center stays gooey. Metal pans (light-colored aluminum) give the most even results. Also, if you’re using a dark non-stick pan, reduce the oven temperature by 25°F to prevent over-browning. My first batch came out with crispy edges that were more “charred spiderweb” than “Halloween treat.” Lesson learned.
Preparation Method
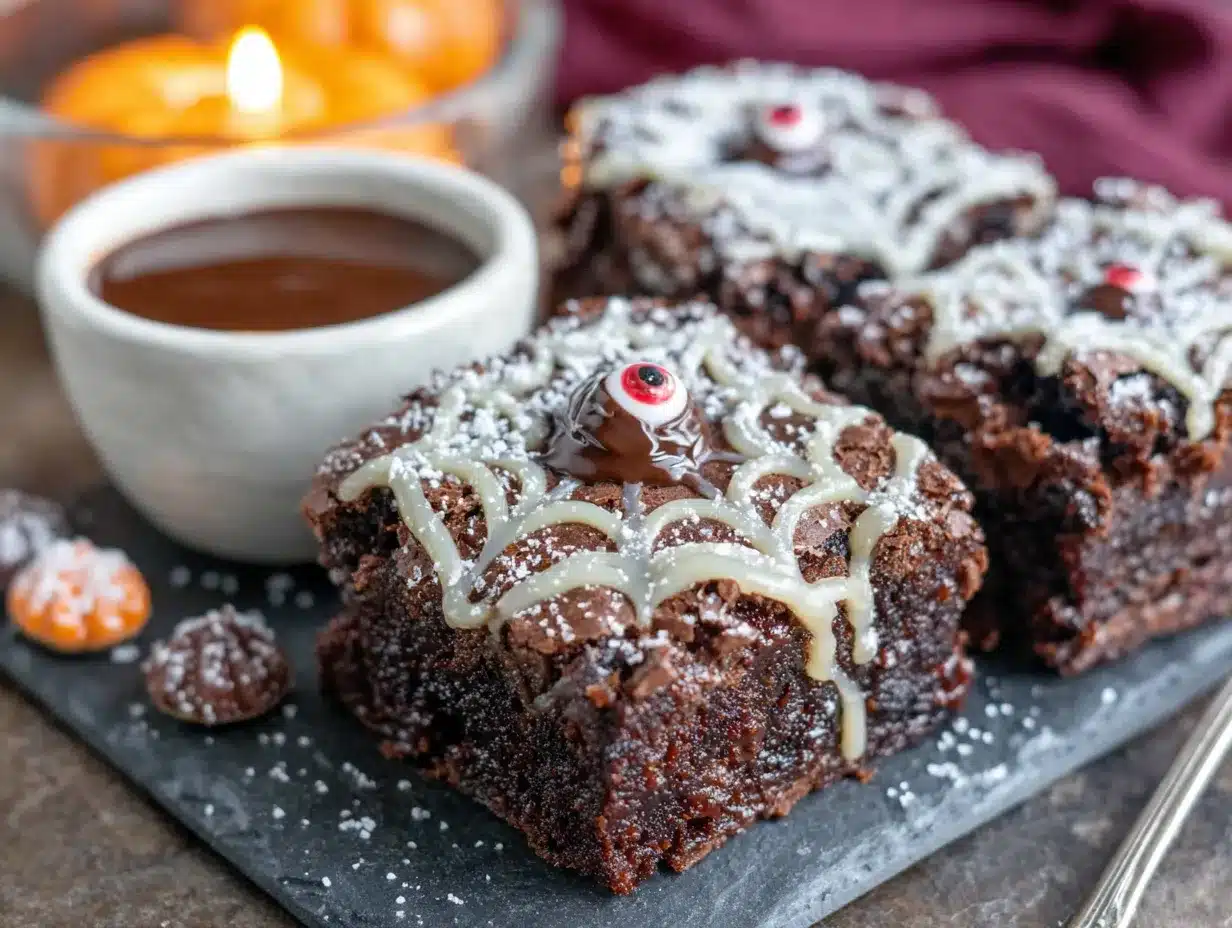
- Preheat your oven to 350°F (175°C). While it’s heating, line your 8×8 baking pan with parchment paper, leaving a 2-inch overhang on two opposite sides. This creates “handles” for lifting the brownies out later. If you’re using non-stick spray, go ahead and give it a good coating.
- Make the brownie batter. In your mixing bowl, combine the brownie mix, vegetable oil, eggs, and water. Stir with a whisk or fork until just combined—about 30 strokes. You want to see a smooth, glossy batter with no dry streaks. Don’t overmix! Overmixing develops gluten and gives you cakey brownies instead of fudgy ones. I speak from experience—my first batch was more “brownie muffin” than “fudgy treat.”
- Pour the batter into the prepared pan. Use your rubber spatula to scrape every bit out. Spread it into an even layer, making sure it reaches all four corners. The batter should be about 1/2 inch thick. Give the pan a gentle tap on the counter to release any air bubbles.
- Soften the peanut butter. Place your 1/2 cup of peanut butter in a small microwave-safe bowl. Microwave for 15-20 seconds until it’s soft and spoonable but not hot. You want it to be the consistency of thick frosting—easy to dollop but not runny. If it’s too stiff, it won’t swirl; if it’s too runny, it’ll sink into the batter.
- Create the spiderweb pattern. Drop small spoonfuls of the softened peanut butter evenly over the brownie batter. Aim for about 8-10 dollops, spaced about an inch apart. Don’t worry about being perfect—the imperfection is part of the charm.
- Swirl the web. Take your butter knife and insert it into the batter at a 45-degree angle. Drag it through the peanut butter dollops in a continuous, gentle motion. Start from one end and drag the knife in a spiral or zigzag pattern across the entire pan. You’re not stirring—you’re dragging. The goal is to create thin, wispy lines of peanut butter that resemble a web. Stop after 4-5 passes; over-swirling will muddy the pattern.
- Bake for 20-22 minutes. Place the pan on the middle rack. The brownies are done when the edges look set and a toothpick inserted into the center comes out with a few moist crumbs attached (not wet batter). If the toothpick is clean, you’ve overbaked them. Start checking at 18 minutes if your oven runs hot.
- Cool completely in the pan on a wire rack. This is crucial—warm brownies are too fragile to cut cleanly. Let them cool for at least 30 minutes. If you’re in a rush (and let’s face it, we usually are), pop the pan in the fridge for 15 minutes to speed things up.
- Lift and cut. Use the parchment paper handles to lift the entire block of brownies out of the pan. Place on a cutting board. Use a sharp knife to cut into squares—I do 16 small squares (4×4 grid) for parties or 9 larger ones for serious dessert cravings. Wipe the knife clean between cuts for the neatest edges.
- Optional: Dust with powdered sugar. Just before serving, sprinkle a light dusting of powdered sugar over the top. It adds a “spiderweb caught in moonlight” effect that looks magical. Use a fine-mesh strainer for even distribution.
Sensory Cue: When you drag the knife through the peanut butter, you should see distinct, feathery lines forming—like a web being spun. The batter will ripple slightly, and the peanut butter will streak through the chocolate in beautiful, irregular patterns. It’s oddly satisfying to watch.
Troubleshooting Tip: If your peanut butter sinks into the batter instead of sitting on top, it’s too warm. Chill it for 5 minutes before dolloping. If the web pattern disappears during baking, you probably over-swirled. Next time, do fewer passes with the knife.
Cooking Tips & Techniques
Let me share some hard-earned wisdom from my many batches of spiderweb brownies. I’ve made every mistake in the book so you don’t have to.
The Peanut Butter Temperature is Everything. This is the single most important factor. If your peanut butter is too cold, it won’t spread when you swirl—you’ll just get blobs. Too warm, and it sinks into the batter like a stone. Room temperature or slightly softened (microwaved for 10-15 seconds) is the sweet spot. I once used peanut butter straight from the fridge, and my “spiderwebs” looked more like sad little islands. Learn from my failure.
Don’t Overmix the Batter. I know it’s tempting to keep stirring until it’s perfectly smooth, but stop the moment the dry ingredients are incorporated. Overmixing activates the gluten in the flour, giving you tough, cakey brownies instead of the fudgy, dense texture we’re after. A few tiny lumps in the batter are totally fine—they’ll bake out.
The Butter Knife Swirl Technique. Use a gentle, confident hand. Insert the knife all the way to the bottom of the pan, then drag it in long, sweeping motions. Think of it like drawing a figure eight or a spiral. You want to see the peanut butter streak through the chocolate, not get fully incorporated. Less is more here—four or five passes across the pan is plenty.
Timing and Multitasking: While the brownies are baking, clean up your mixing bowl and utensils. The batter dries like cement if you wait too long. Also, set a timer for 18 minutes and start checking then—every oven is different, and the difference between perfect fudgy brownies and dry ones is about 90 seconds.
My Biggest Failure: Last Halloween, I tried to double the batch and bake it in a 9×13 pan. The spiderweb pattern was beautiful going in, but after 25 minutes, the edges were burnt and the center was raw. I learned that larger pans need lower temperatures and longer baking times. Stick with the 8×8 pan for the best results.
Variations & Adaptations
One of the best things about this recipe is how easily it adapts. Here are some variations I’ve tried and loved:
1. Dark Chocolate & Salted Peanut Butter: Use a dark chocolate brownie mix and add a sprinkle of flaky sea salt over the peanut butter swirl before baking. The salt enhances the chocolate and cuts through the richness. I tried this after a friend suggested it, and now I can’t go back. It’s like a gourmet salted caramel brownie, but with peanut butter.
2. White Chocolate Spiderwebs: Swap the peanut butter for melted white chocolate or white chocolate chips mixed with a tablespoon of coconut oil. The white chocolate creates a ghostly, pale web against the dark brownie—perfect for a more “spooky” aesthetic. Just be careful not to overheat the white chocolate; it seizes easily.
3. Nutella Swirl: For a hazelnut twist, use Nutella instead of peanut butter. It swirls beautifully and adds a different flavor profile. This is a huge hit with kids who aren’t peanut butter fans. Pro tip: warm the Nutella for 10 seconds in the microwave before dolloping.
4. Gluten-Free Version: Use a gluten-free brownie mix (King Arthur Flour makes an excellent one). The technique is exactly the same, and no one will notice the difference. I’ve served these to gluten-free friends who couldn’t believe they weren’t “regular” brownies.
5. Spooky Add-Ins: Fold in 1/4 cup of mini chocolate chips or candy eyes into the batter before pouring it into the pan. The candy eyes peek through the surface and look delightfully creepy. Just don’t add them on top of the peanut butter swirl, or they’ll get lost in the pattern.
Personal Variation: My favorite twist is adding a teaspoon of cinnamon to the brownie batter. It gives a subtle warmth that pairs beautifully with the chocolate and peanut butter. I discovered this by accident when I grabbed the wrong spice jar, and honestly, it was a happy mistake.
Serving & Storage Suggestions
Serving Temperature: These brownies are best at room temperature or slightly warm. If you’ve refrigerated them, let them sit out for 15 minutes before serving. The peanut butter swirl firms up when cold, and the texture is less fudgy straight from the fridge.
Presentation Ideas: Arrange the brownies on a black or orange platter for maximum Halloween effect. Add a few fake spider rings or plastic spiders around the edges for a fun touch. If you’re bringing them to a party, stack them in a clear jar with a ribbon—it looks adorable and keeps them from getting squished.
Complementary Dishes: Serve these with a scoop of vanilla ice cream for an indulgent dessert. A glass of cold milk is the classic pairing, but they’re also fantastic with a hot cup of coffee or a pumpkin spice latte. For a Halloween party, set them out alongside caramel apples and popcorn balls for a full spread.
Storage Instructions: Store leftover brownies in an airtight container at room temperature for up to 3 days. If your kitchen is warm, refrigerate them to keep the peanut butter from getting too soft. They actually taste better on day two—the flavors meld together beautifully.
Freezing Instructions: These freeze like a dream. Wrap individual brownie squares in plastic wrap, then place them in a freezer-safe bag. They’ll keep for up to 3 months. To thaw, just leave them on the counter for 30 minutes. I always stash a few in the freezer for unexpected Halloween cravings in November.
Reheating Method: For that just-baked texture, microwave a single brownie for 10-15 seconds. It softens the chocolate and warms the peanut butter swirl to that perfect gooey consistency. Just don’t overdo it, or you’ll end up with a puddle.
Flavor Development: Honestly, these brownies get better after a day. The peanut butter flavor infuses into the chocolate, and the texture becomes even more fudgy. If you can resist eating them all on day one, you’re in for a treat on day two.
Nutritional Information & Benefits
Here’s the estimated nutritional breakdown for one brownie (based on 16 servings):
| Nutrient | Amount per Serving |
|---|---|
| Calories | 210 |
| Total Fat | 11g |
| Saturated Fat | 3g |
| Cholesterol | 25mg |
| Sodium | 180mg |
| Total Carbohydrates | 27g |
| Dietary Fiber | 1g |
| Sugars | 18g |
| Protein | 4g |
Health Benefits of Key Ingredients: Peanut butter adds a good dose of protein and healthy fats, which helps balance out the sugar rush from the brownies. It also provides vitamin E, magnesium, and potassium. The dark chocolate in the brownie mix contains antioxidants (flavonoids) that are good for heart health—though let’s be honest, we’re eating these for the taste, not the health benefits.
Dietary Considerations: This recipe can be made gluten-free by using a GF brownie mix. It’s naturally dairy-free (check your brownie mix label to confirm). For a lower-sugar option, use a sugar-free brownie mix, but note that the texture may be slightly different. The peanut butter swirl adds protein, making these a bit more filling than regular brownies.
Potential Allergens: Contains peanuts, eggs, and wheat (if using standard brownie mix). If you’re serving these at a party, be sure to label them clearly for anyone with allergies. The sunflower seed butter substitution works well for nut-free environments.
My Personal Perspective: Look, I’m not going to pretend these are health food. They’re a treat, plain and simple. But I appreciate that the peanut butter adds a little protein and staying power, so one brownie actually satisfies that sweet craving instead of sending me on a sugar-fueled hunt for more. Everything in moderation, right?
Frequently Asked Questions
Can I make these spiderweb brownies ahead of time?
Absolutely! These are actually better when made a day ahead. Bake them, cool completely, and store in an airtight container at room temperature. The flavors meld overnight, and the texture becomes even more fudgy. Just add the powdered sugar dusting right before serving so it doesn’t dissolve into the brownies.
Why did my peanut butter sink into the batter?
This usually happens when the peanut butter is too warm or too runny. Make sure you’re using creamy, processed peanut butter (not natural) and only soften it for 10-15 seconds in the microwave. If it’s still sinking, try chilling the dolloped batter in the fridge for 10 minutes before swirling and baking. Also, make sure your brownie batter isn’t too thin—if it’s runny, the peanut butter has nothing to sit on.
Can I use homemade brownie batter instead of a box mix?
Yes, you can use your favorite homemade brownie recipe. Just make sure it’s a fudgy recipe (not cakey) so the peanut butter swirl holds its shape. A standard recipe using melted chocolate and butter works best. Avoid recipes that call for extra leavening (baking powder/soda), as they’ll rise too much and distort the web pattern.
How do I get clean cuts without the brownies crumbling?
Patience is key. Let the brownies cool completely—at least 30 minutes at room temperature or 15 minutes in the fridge. Use a sharp chef’s knife and wipe it clean with a damp paper towel between each cut. For the neatest edges, chill the brownies for an hour before cutting. If you’re in a rush, run the knife under hot water and dry it before slicing; the heat helps glide through the fudgy texture.
Can I double this recipe for a larger crowd?
You can, but you’ll need to adjust the pan size and baking time. For a 9×13 pan, double all ingredients. Bake at 325°F (163°C) for 28-32 minutes, checking for doneness at the 25-minute mark. The lower temperature prevents the edges from burning before the center sets. The spiderweb pattern works the same way—just use more peanut butter dollops spaced evenly across the larger surface.
Conclusion
These Quick Peanut Butter Spiderweb Brownies are proof that you don’t need hours in the kitchen or a pastry degree to create something genuinely impressive for Halloween. They come together in about 30 minutes, use ingredients you probably already have, and deliver that “wow” factor that makes everyone think you went all out. The best part? You can be sitting on the couch, watching a scary movie, while your friends are still marveling at the spiderweb pattern.
I love this recipe because it’s the perfect blend of practicality and creativity. It’s not fussy, it’s not complicated, and it doesn’t require a trip to the craft store for edible eyeballs or specialty sprinkles. It’s just a good, solid brownie with a clever twist that looks way harder than it is. And honestly, isn’t that the best kind of recipe to have in your back pocket?
So go ahead—grab that box of brownie mix, dig out the peanut butter, and give these a try. Customize them with your favorite add-ins, experiment with different swirl flavors, and make them your own. I’d love to hear how they turn out! Drop a comment below with your spiderweb creations, tag me in your photos, or share your own Halloween baking wins. Happy Halloween, and happy baking!
Pin This Recipe!
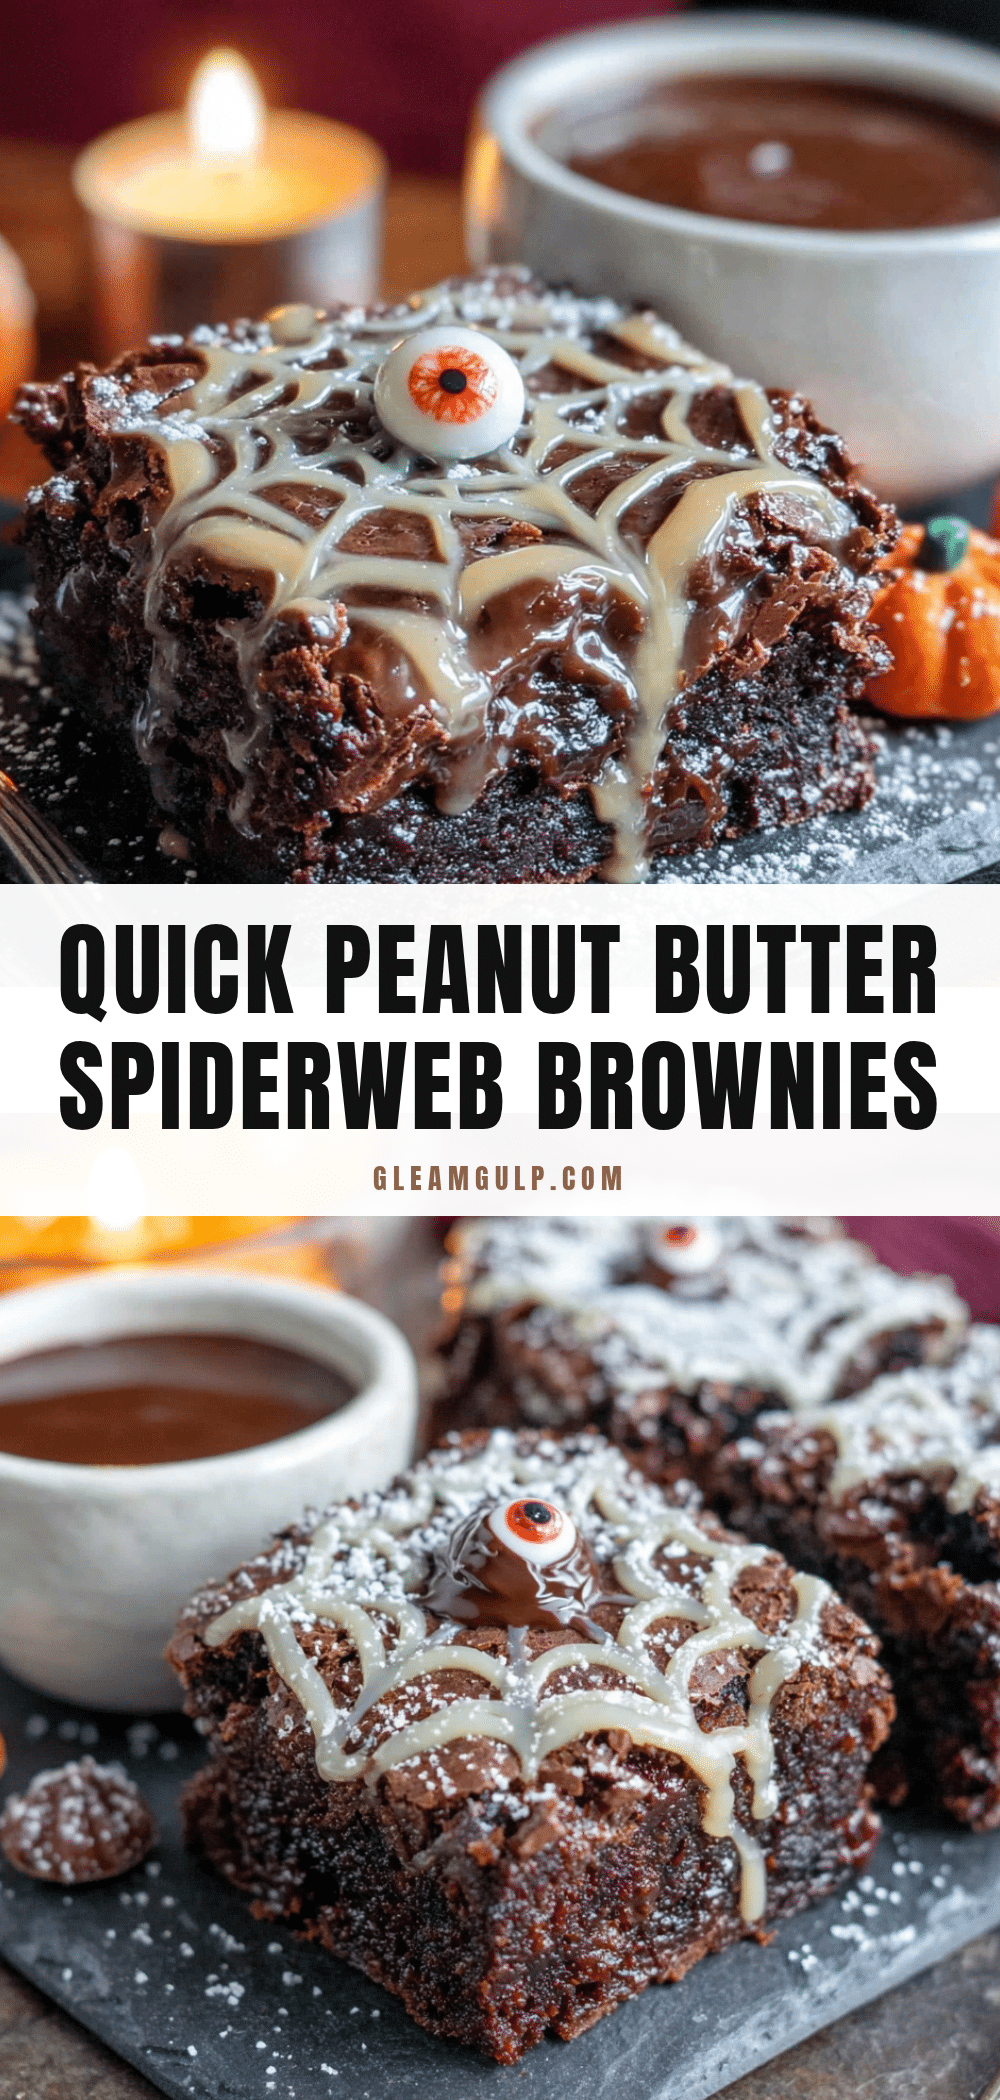
Quick Peanut Butter Spiderweb Brownies: Best Easy Halloween Treat
These Quick Peanut Butter Spiderweb Brownies are a no-fuss Halloween dessert that looks impressive. With a fudgy brownie base and a creamy peanut butter swirl, they come together in about 30 minutes using simple pantry ingredients.
- Prep Time: 10 minutes
- Cook Time: 20 minutes
- Total Time: 30 minutes
- Yield: 16 servings 1x
- Category: Dessert
- Cuisine: American
Ingredients
- 1 box (15-18 oz) brownie mix (preferably Duncan Hines Chewy Fudge or Ghirardelli)
- 1/2 cup vegetable oil (or melted coconut oil)
- 2 large eggs, room temperature
- 1/4 cup water (or brewed coffee for deeper flavor)
- 1/2 cup creamy peanut butter, softened (not natural or oily; Jif or Skippy recommended)
- 1/4 cup powdered sugar (optional, for dusting)
Instructions
- Preheat oven to 350°F (175°C). Line an 8×8-inch baking pan with parchment paper, leaving a 2-inch overhang on two opposite sides. Alternatively, grease the pan with non-stick spray.
- In a mixing bowl, combine brownie mix, vegetable oil, eggs, and water. Stir with a whisk or fork until just combined (about 30 strokes). Do not overmix.
- Pour the batter into the prepared pan and spread evenly. Tap the pan gently on the counter to release air bubbles.
- Place the peanut butter in a small microwave-safe bowl and microwave for 15-20 seconds until soft and spoonable (not hot).
- Drop small spoonfuls (about 8-10 dollops) of the softened peanut butter evenly over the brownie batter, spacing them about an inch apart.
- Using a butter knife, insert it into the batter at a 45-degree angle and drag it through the peanut butter dollops in a continuous, gentle motion (spiral or zigzag pattern). Make 4-5 passes across the pan to create a web pattern. Do not over-swirl.
- Bake on the middle rack for 20-22 minutes, or until the edges are set and a toothpick inserted into the center comes out with a few moist crumbs (not wet batter). Start checking at 18 minutes.
- Cool completely in the pan on a wire rack for at least 30 minutes (or 15 minutes in the fridge).
- Use the parchment paper handles to lift the brownies out of the pan. Place on a cutting board and cut into 16 squares (4×4 grid) or 9 larger squares. Wipe the knife clean between cuts.
- Optional: Dust with powdered sugar just before serving using a fine-mesh strainer.
Notes
For best results, use creamy processed peanut butter (not natural) and soften it just enough to be spoonable. Do not overmix the batter or over-swirl the peanut butter. If the peanut butter sinks, it may be too warm; chill it slightly before dolloping. For a gluten-free version, use a gluten-free brownie mix. For a dairy-free version, check that the brownie mix is dairy-free.
Nutrition
- Serving Size: 1 brownie
- Calories: 210
- Sugar: 18
- Sodium: 180
- Fat: 11
- Saturated Fat: 3
- Carbohydrates: 27
- Fiber: 1
- Protein: 4
Keywords: Halloween brownies, spiderweb brownies, peanut butter brownies, easy Halloween treat, quick dessert


