Love this? Save it for later!
Share the inspiration with your friends
I wasn’t expecting cooking advice from my accountant, but there I was, sitting in his cluttered office during tax season, watching him pull a crumpled piece of parchment paper from his desk drawer. “You like bread, right?” he asked, sliding it across the stack of receipts. I blinked at him. This was the same man who’d spent the last hour explaining depreciation schedules. But the paper had a recipe handwritten in faded blue ink—his grandmother’s focaccia, he said, from a tiny bakery in Bari that no longer existed. And honestly? I almost didn’t take it seriously. I mean, my accountant? But something about the way his voice softened when he talked about the olive oil soaking into the dough made me tuck it into my bag anyway.
That night, I tried it. The kitchen smelled like rosemary and garlic and something deeply comforting—the kind of smell that makes neighbors suddenly remember they need to borrow sugar. The dough came together with that satisfying, slightly sticky feel under my palms, and when I pulled it from the oven, golden and crackling, I knew I’d stumbled onto something special. It was the perfect balance of chewy and crisp, with those little dimples catching pools of herb-infused oil. I may have burned my tongue on the first piece. Worth it.
This Perfect Rosemary Garlic Sourdough Focaccia for a Crowd has become my go-to for every gathering since. It’s the bread that makes people stop mid-conversation and ask for the recipe. And honestly, it’s not complicated—just a little patience and a lot of love. Whether you’re hosting a dinner party or a casual potluck, this focaccia steals the show every single time. Let me tell you, there’s nothing quite like watching someone take that first bite and close their eyes.
Why You’ll Love This Recipe
I’ve tested this recipe more times than I can count—through humid summers and dry winters, with different brands of flour, and even after forgetting it on the counter overnight (don’t ask). It’s survived my worst baking mistakes and still turned out incredible. Here’s why it’s earned a permanent spot in my hosting rotation:
- Perfect for a Crowd: This recipe scales beautifully. One batch fills a half-sheet pan, easily serving 12-16 people as an appetizer or side. Your guests will fight over the corner pieces.
- Simple Ingredients: You likely have everything already—flour, water, salt, olive oil, garlic, rosemary. No fancy grocery store runs required.
- Make-Ahead Friendly: The dough can ferment in the fridge for up to 3 days, so you can prep before guests arrive and bake fresh right before serving. Stress-free hosting at its finest.
- Always Impresses: There’s something about homemade bread that feels like a flex. When you pull this golden, aromatic focaccia from the oven, people genuinely think you’re a professional baker.
- Unbelievably Versatile: Serve it as a side with soups and salads, slice it for sandwiches, or tear it apart as an appetizer with dips. It disappears fast.
What makes this version different from every other focaccia recipe out there? It’s the sourdough starter. That tangy, complex flavor you can’t get from commercial yeast alone. It adds depth and character that makes people ask, “What’s your secret?” Plus, the long, cold fermentation develops a texture that’s impossibly airy on the inside and shatteringly crisp on the outside. This isn’t just another focaccia—it’s the one your friends will text you about the next morning.
What Ingredients You Will Need
This recipe uses simple, honest ingredients to create something truly special. Most are pantry staples, and the sourdough starter adds that signature tang without any fuss. Here’s what you’ll need:
For the Dough
- 500g bread flour (I prefer King Arthur for consistent protein content; all-purpose works too, but the crumb will be slightly less chewy)
- 350g lukewarm water (about 80°F—think bathwater temperature)
- 100g active sourdough starter (fed and bubbly, ideally at its peak 4-6 hours after feeding)
- 10g fine sea salt (don’t skip this—it controls fermentation and adds flavor)
- 30g extra-virgin olive oil (plus more for the pan and topping—use a good quality one, it matters here)
For the Topping
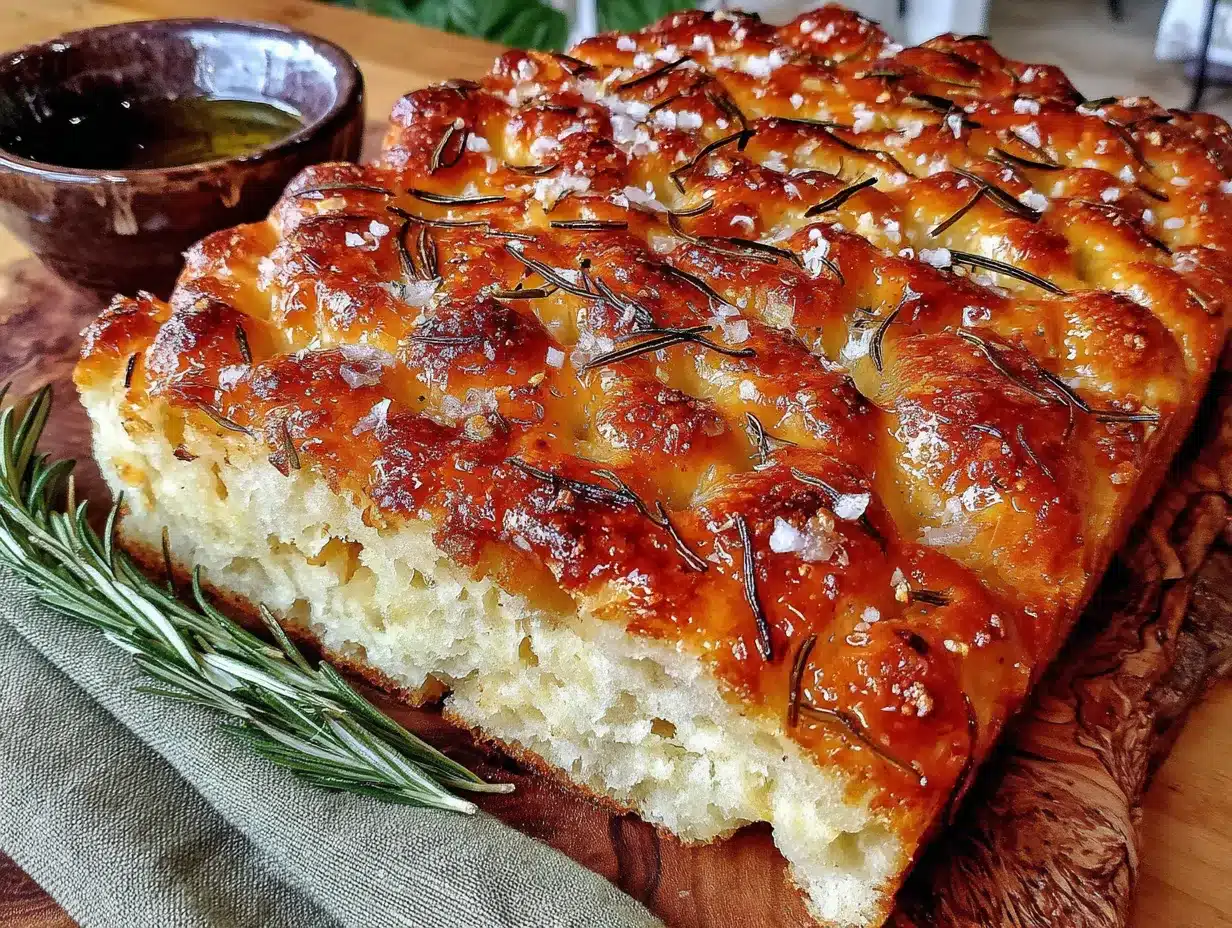
- 4-5 cloves garlic, thinly sliced (not minced—slices stay visible and don’t burn as easily)
- 3-4 sprigs fresh rosemary, leaves stripped and roughly chopped (dried works in a pinch, but fresh is non-negotiable for that aromatic punch)
- Flaky sea salt, like Maldon (regular salt works, but the flaky kind gives those perfect little bursts of saltiness)
- Extra-virgin olive oil, for drizzling (be generous—focaccia should be luxurious)
A few notes from my trials: Use bread flour if you can—it has higher protein content, which means more gluten development and that signature chewy texture. I’ve tested this with all-purpose flour and it works, but the crumb is noticeably softer and less structured. If you’re using a young or less active starter, you might need to extend the bulk fermentation time by an hour or two. Watch the dough, not the clock.
For the garlic, I’ve learned the hard way that thin slices are essential. Minced garlic tends to burn in the hot oven, turning bitter. Slices soften and caramelize beautifully, adding sweet, mellow flavor without any acrid notes. And please, please use fresh rosemary. The dried stuff just doesn’t deliver that piney, aromatic quality that makes this focaccia unforgettable.
Equipment Needed
You don’t need a professional bakery setup for this. Here’s what I use every time:
- Large mixing bowl (glass or ceramic works best—metal can sometimes react with the dough over long ferments)
- Half-sheet pan (18×13 inches—this is the standard size for feeding a crowd; a 9×13 pan works for a smaller batch)
- Digital kitchen scale (honestly, this is non-negotiable for consistent results. Measuring flour by volume is too unreliable)
- Bench scraper (makes handling sticky dough so much easier)
- Plastic wrap or a reusable bowl cover
- Pastry brush (for spreading oil in the pan)
- Cooling rack
If you don’t have a half-sheet pan, you can use two 9×13 pans or even a cast-iron skillet for a round focaccia. The baking time will vary slightly, so keep an eye on it. I’ve also used a pizza stone placed under the pan for extra-crispy bottoms—worth trying if you have one.
Preparation Method
This recipe takes about 24-48 hours from start to finish, but most of that is hands-off fermentation. Here’s how it breaks down:
Day 1: Make the Dough (20 minutes active time)
- Mix the dough: In your largest bowl, combine 350g lukewarm water and 100g active sourdough starter. Stir until the starter dissolves into the water—it should look cloudy and slightly bubbly.
- Add the flour: Pour in 500g bread flour and mix with your hands or a dough whisk until no dry bits remain. The dough will be shaggy and rough. Cover with plastic wrap and let it rest for 30 minutes. This is called autolyse—it lets the flour absorb the water and starts gluten development naturally.
- Add salt and oil: Sprinkle 10g salt over the dough and drizzle 30g olive oil on top. Pinch and fold the dough over itself until the salt and oil are incorporated. It’ll feel messy at first, but keep going—it comes together.
- Bulk fermentation begins: Cover the bowl and let it rest at room temperature (70-75°F) for 30 minutes.
- Stretch and folds: Every 30 minutes for the next 2 hours, perform a set of stretch and folds. Wet your hands slightly, grab one side of the dough, stretch it up and fold it over the center. Rotate the bowl and repeat on all four sides. You’ll do 4 sets total. The dough will become smoother and more elastic with each fold.
- Overnight cold ferment: After the last fold, cover the bowl tightly and place it in the refrigerator for 12-48 hours. The longer it sits, the more complex the flavor becomes. I usually aim for 24 hours.
Day 2: Shape and Bake (30 minutes active time)
- Prepare the pan: About 3 hours before you want to bake, generously coat your half-sheet pan with olive oil. Don’t be shy—this creates that crispy, golden bottom.
- Turn out the dough: Remove the cold dough from the fridge. It should be bubbly and slightly jiggly. Gently coax it onto the oiled pan using a bench scraper. Try not to deflate it too much.
- Stretch and relax: Let the dough rest for 20 minutes. Then, using oiled fingertips, gently stretch it toward the edges of the pan. It will resist and pull back—that’s normal. Let it rest another 20 minutes and stretch again. Repeat until the dough fills the pan evenly. This takes patience, but rushing it will deflate the air bubbles.
- Final proof: Cover the pan with plastic wrap and let the dough rise at room temperature for 2-3 hours, or until it’s puffy and nearly doubled. The surface should look bubbly and alive.
- Preheat the oven: About 30 minutes before baking, place a rack in the middle of the oven and preheat to 450°F (230°C). If you have a pizza stone, put it on the rack below the pan.
- Dimple and top: Just before baking, drizzle another 2-3 tablespoons of olive oil over the dough. Using oiled fingers, press deep dimples all over the surface—go all the way to the bottom of the pan. This is what creates those iconic focaccia pockets. Sprinkle the sliced garlic, chopped rosemary, and flaky sea salt evenly over the top.
- Bake: Place the pan in the oven and bake for 25-30 minutes, rotating halfway through. The focaccia is done when it’s deep golden brown on top and sounds hollow when tapped on the bottom. If the top is browning too fast, tent loosely with foil.
- Cool: Let the focaccia cool in the pan for 10 minutes, then transfer to a wire rack. Brush with more olive oil while it’s still warm—this adds shine and flavor. Let it cool at least 20 minutes before slicing. I know it’s hard to wait, but the texture sets during this time.
Cooking Tips & Techniques
After making this focaccia dozens of times, I’ve collected a few hard-won lessons. Let me save you some trouble:
Don’t rush the fermentation. The first time I made this, I was impatient and baked after only 6 hours at room temperature. The result? A dense, flat focaccia with barely any sourdough tang. The cold ferment is where the magic happens—it develops flavor and creates that open, airy crumb. Trust the process.
Watch your water temperature. If your kitchen is cold (below 70°F), use slightly warmer water—around 85°F. If it’s hot and humid, use cooler water, around 75°F. The dough should feel alive and active, not sluggish. I once used cold tap water in winter and my starter barely moved. Lesson learned.
Be generous with oil. Focaccia is meant to be indulgent. Skimping on olive oil leads to a dry, sad bread. The oil in the pan creates that crispy bottom, and the oil drizzled on top helps the toppings adhere and prevents burning. Use a good extra-virgin olive oil—it’s the star of the show.
Dimple with confidence. Don’t be gentle here. Press your fingers all the way down to the pan. Those deep dimples catch the oil and create pools of flavor. If you’re nervous, wet your fingers with oil first—it prevents sticking and adds more oil where it counts.
Multitask like a pro. While the dough is doing its final proof, prep your toppings and get your serving dishes ready. This focaccia is best served warm, so time it to come out of the oven right as guests arrive. The smell alone will set the mood for the whole evening.
Variations & Adaptations
This recipe is incredibly forgiving and adaptable. Here are some variations I’ve tried and loved:
Herb and Cheese Focaccia: After dimpling, scatter 1 cup of shredded Parmesan or crumbled feta over the top before baking. The cheese gets crispy and golden in the oven—absolutely irresistible. I’ve also used grated pecorino for a sharper flavor.
Caramelized Onion and Thyme: While the dough does its final proof, slowly caramelize 2 large sliced onions in butter and olive oil until deeply golden. Spread them over the dimpled dough along with fresh thyme leaves. This version is sweeter and more savory—perfect for fall gatherings.
Gluten-Free Adaptation: I’ve tested this with a good gluten-free bread flour blend (I recommend Cup4Cup). The texture is denser and less airy, but the flavor is still fantastic. Add an extra 50g of water to the dough, as gluten-free flours absorb more liquid. The fermentation time may also be shorter—watch for puffiness, not doubling.
Olive and Sun-Dried Tomato: Press halved Kalamata olives and chopped sun-dried tomatoes into the dimpled dough before baking. The briny, tangy pops of flavor pair beautifully with the rosemary and garlic. This is my go-to for Mediterranean-themed dinners.
Everything Bagel Focaccia: Skip the rosemary and garlic, and instead sprinkle everything bagel seasoning (sesame seeds, poppy seeds, dried garlic, dried onion, salt) over the dimpled dough. It’s a crowd-pleaser that disappears in minutes.
Serving & Storage Suggestions
This focaccia is best served warm, straight from the oven, when the crust is still crackling and the interior is pillowy soft. Here’s how to make it shine at your gathering:
Serving Ideas: Tear it into rustic pieces and serve in a bread basket lined with a cloth napkin. Pair it with a bowl of good olive oil and balsamic vinegar for dipping. It’s also fantastic alongside hearty soups, stews, or salads. For a dinner party, I love serving it as an appetizer with a selection of cured meats, cheeses, and marinated olives.
What to Serve Alongside: This focaccia is the perfect companion to a big Italian salad, a bowl of minestrone, or roasted vegetables. It also makes incredible sandwiches—split it horizontally and fill with roasted turkey, pesto, and provolone. Your guests will be talking about it for days.
Storage: Store leftover focaccia in an airtight container at room temperature for up to 2 days. Do not refrigerate—it will dry out and become stale. To reheat, place pieces on a baking sheet in a 350°F oven for 5-7 minutes. The crust will crisp back up, and the interior will soften.
Freezing: This focaccia freezes beautifully. Wrap the fully cooled loaf tightly in plastic wrap, then foil, and freeze for up to 3 months. To serve, thaw at room temperature, then reheat in a 350°F oven for 10 minutes. I often bake two loaves and freeze one for emergencies.
Flavor Development: Honestly, the focaccia is even better the next day. The flavors meld and deepen overnight. If you can resist eating it all fresh, save some for breakfast—toasted with butter and a drizzle of honey is a revelation.
Nutritional Information & Benefits
While this focaccia is an indulgence, it does offer some nutritional benefits worth noting:
| Nutritional Value | Per Serving (1/16 of recipe) |
|---|---|
| Calories | 180-200 |
| Total Fat | 8-10g |
| Saturated Fat | 1-2g |
| Carbohydrates | 22-25g |
| Protein | 4-5g |
| Fiber | 1-2g |
| Sodium | 250-300mg |
Health Highlights: Sourdough fermentation breaks down phytic acid in the flour, making minerals like magnesium and zinc more bioavailable. The long fermentation also creates beneficial bacteria that support gut health. Olive oil provides heart-healthy monounsaturated fats and antioxidants. Rosemary contains anti-inflammatory compounds. Of course, this is still bread—enjoy it as part of a balanced diet, not as a health food.
Dietary Considerations: This recipe contains gluten and is not suitable for those with celiac disease (unless using a certified gluten-free flour blend). It is vegan and dairy-free as written. For a lower-sodium version, reduce the salt in the dough to 8g and use less flaky salt on top.
Conclusion
This Perfect Rosemary Garlic Sourdough Focaccia for a Crowd has become my signature dish for a reason. It’s the bread that turns a simple gathering into a memorable occasion, the one that makes people lean in and ask, “Did you really make this?” It’s forgiving enough for beginners yet impressive enough for seasoned bakers. And honestly, there’s something deeply satisfying about pulling a golden, fragrant loaf from the oven and watching faces light up.
I hope you give this recipe a try—and more importantly, I hope you make it your own. Play with the toppings, adjust the fermentation time, experiment with different flours. The best recipes are the ones that evolve with you. And when you pull that first piece apart and see the steam rising, I think you’ll understand why my accountant’s grandmother’s recipe has become so special to me.
Have you made this focaccia? I’d love to hear how it turned out! Drop a comment below with your favorite topping combinations or any questions you have. And if you loved it, share this recipe with a friend who needs a showstopper for their next gathering. Happy baking, friends!
Frequently Asked Questions
Can I use active dry yeast instead of sourdough starter?
Yes, you can substitute 1 teaspoon of active dry yeast for the sourdough starter. Dissolve it in the lukewarm water with a pinch of sugar and let it sit for 5 minutes until foamy. The flavor will be milder, and the texture slightly less complex, but it will still be delicious. You can also skip the cold ferment and bake the same day if you’re short on time.
Why is my focaccia dense and not airy?
Dense focaccia usually means the dough wasn’t fermented long enough, or it was over-handled during shaping. Make sure your starter is active and bubbly before using it. During the stretch and folds, be gentle—you want to strengthen the gluten without deflating the gas bubbles. Also, let the dough fully double during the final proof before baking. Patience is key here.
Can I make this recipe in a 9×13 pan?
Absolutely. A 9×13 pan will give you a thicker, taller focaccia. The baking time will increase by about 5-10 minutes, so keep an eye on it. You’ll also want to reduce the recipe slightly—use 350g flour, 245g water, 70g starter, 7g salt, and 20g oil for the dough. The topping amounts can stay the same.
How do I know when my sourdough starter is ready to use?
Your starter is ready when it has doubled in size, is full of bubbles, and has a pleasant tangy smell. It should pass the “float test”—drop a small spoonful into a glass of water; if it floats, it’s ready. I usually feed my starter the night before I plan to make the dough, and it’s perfect by morning.
Can I freeze the unbaked dough?
Yes! After the cold ferment, you can shape the dough in the oiled pan, cover tightly, and freeze for up to 1 month. When ready to bake, thaw it in the refrigerator overnight, then let it come to room temperature and finish the final proof before baking. This is a great make-ahead option for busy hosts.
Pin This Recipe!
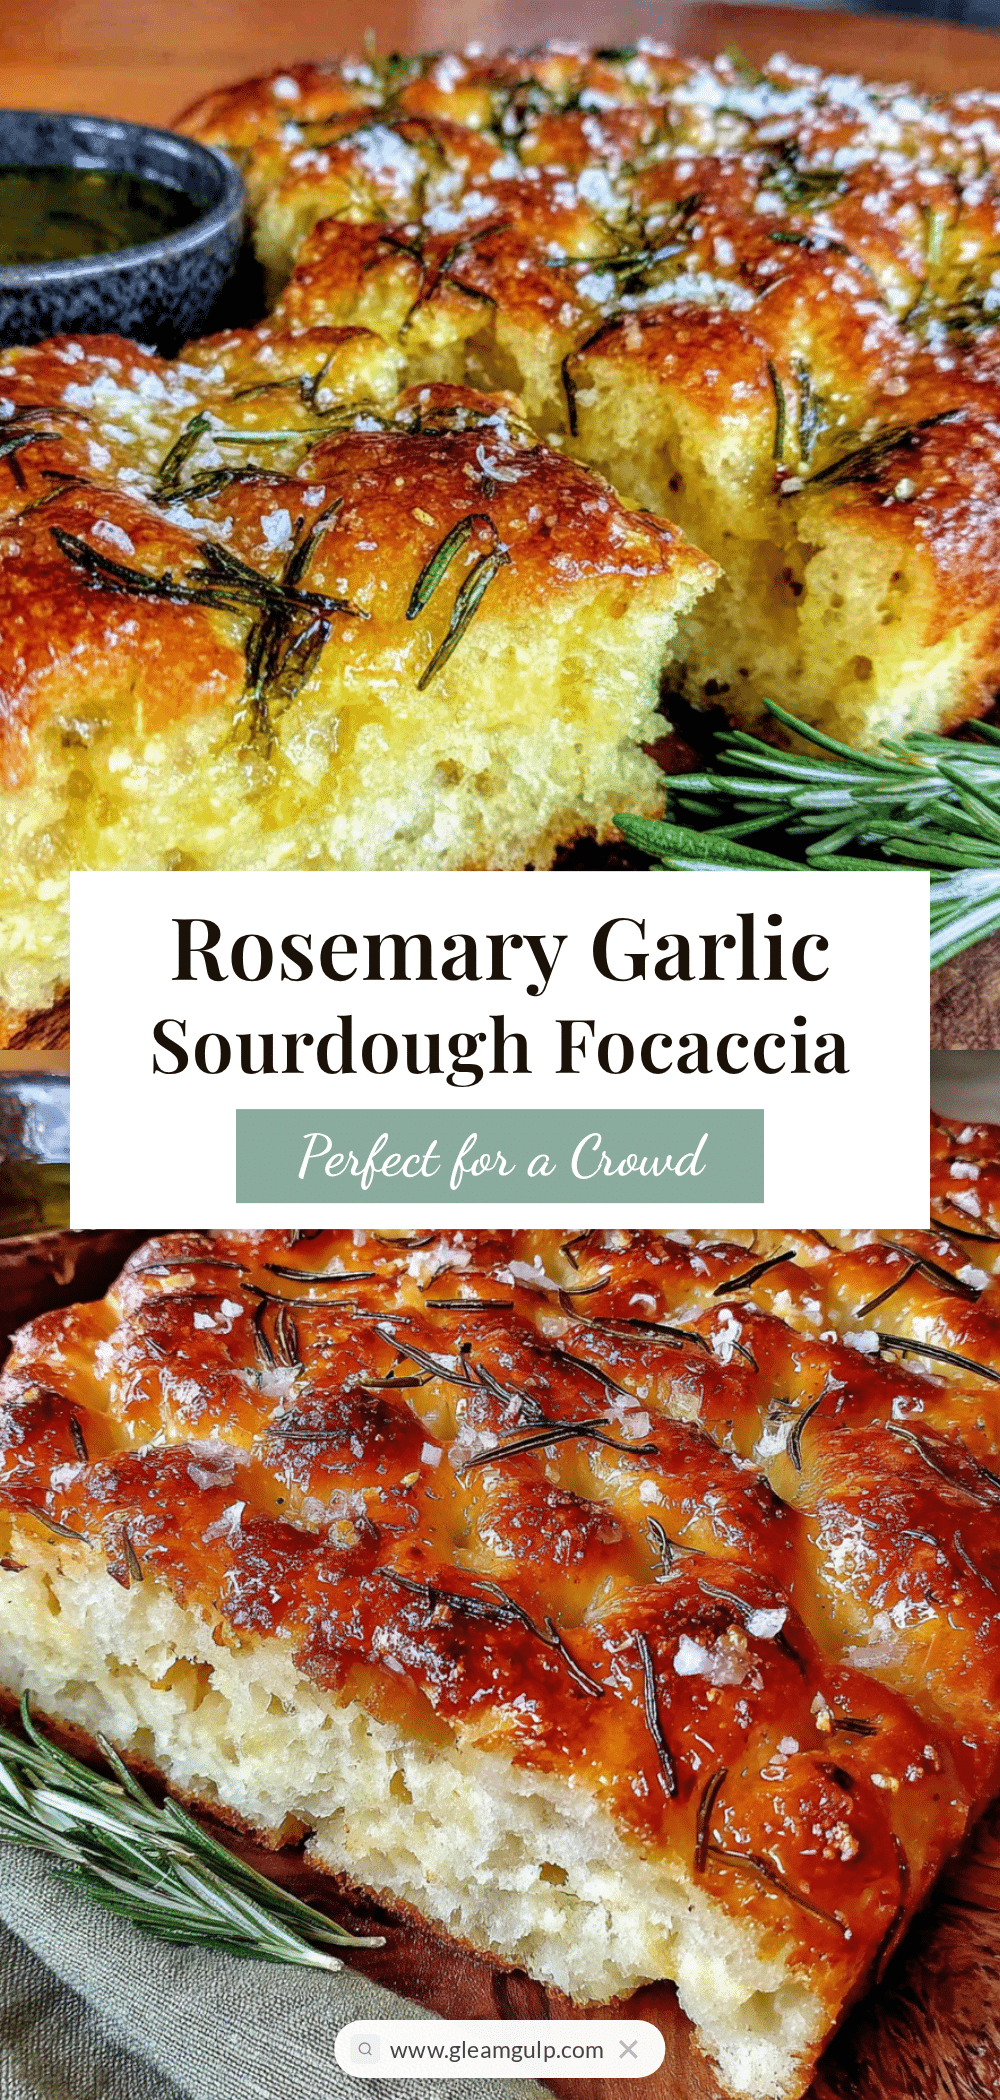
Perfect Rosemary Garlic Sourdough Focaccia for a Crowd
This tangy, airy sourdough focaccia with rosemary and garlic is perfect for gatherings. It’s forgiving for beginners yet impressive enough for seasoned bakers, with a shatteringly crisp crust and pillowy interior.
- Prep Time: 20 minutes (active)
- Cook Time: 25-30 minutes
- Total Time: 24-48 hours (mostly hands-off)
- Yield: 12-16 servings 1x
- Category: Bread
- Cuisine: Italian
Ingredients
- 500g bread flour (about 4 cups)
- 350g lukewarm water (about 1.5 cups, 80°F)
- 100g active sourdough starter (about 1/2 cup)
- 10g fine sea salt (about 1.5 teaspoons)
- 30g extra-virgin olive oil (about 2 tablespoons), plus more for pan and topping
- 4–5 cloves garlic, thinly sliced
- 3–4 sprigs fresh rosemary, leaves stripped and roughly chopped
- Flaky sea salt (like Maldon), for sprinkling
- Extra-virgin olive oil, for drizzling (about 2-3 tablespoons)
Instructions
- Mix the dough: In a large bowl, combine 350g lukewarm water and 100g active sourdough starter. Stir until dissolved.
- Add 500g bread flour and mix until no dry bits remain. Cover and rest for 30 minutes (autolyse).
- Sprinkle 10g salt over dough and drizzle 30g olive oil. Fold until incorporated.
- Cover and let rest at room temperature (70-75°F) for 30 minutes.
- Perform 4 sets of stretch and folds every 30 minutes over 2 hours. Wet hands slightly, stretch one side of dough, fold over center, rotate bowl, repeat on all four sides.
- Cover tightly and refrigerate for 12-48 hours (cold ferment).
- About 3 hours before baking, generously coat a half-sheet pan (18×13 inches) with olive oil.
- Remove cold dough from fridge and gently coax onto oiled pan using a bench scraper.
- Let rest 20 minutes, then gently stretch dough toward edges of pan. Repeat stretching every 20 minutes until dough fills pan evenly.
- Cover pan with plastic wrap and let rise at room temperature for 2-3 hours until puffy and nearly doubled.
- Preheat oven to 450°F (230°C) with rack in middle. If using a pizza stone, place on rack below pan.
- Drizzle 2-3 tablespoons olive oil over dough. Using oiled fingers, press deep dimples all over surface to bottom of pan.
- Sprinkle sliced garlic, chopped rosemary, and flaky sea salt evenly over top.
- Bake for 25-30 minutes, rotating halfway, until deep golden brown and hollow when tapped on bottom. Tent with foil if browning too fast.
- Cool in pan 10 minutes, then transfer to wire rack. Brush with more olive oil while warm. Cool at least 20 minutes before slicing.
Notes
Use bread flour for best texture. Cold ferment develops flavor and airy crumb. Be generous with olive oil. Dimple with confidence. Best served warm. Store at room temperature up to 2 days; freeze for up to 3 months.
Nutrition
- Serving Size: 1/16 of recipe
- Calories: 180200
- Sodium: 250300
- Fat: 810
- Saturated Fat: 12
- Carbohydrates: 2225
- Fiber: 12
- Protein: 45
Keywords: sourdough focaccia, rosemary garlic focaccia, crowd-pleasing bread, homemade focaccia, sourdough bread, Italian bread, party appetizer


