Love this? Save it for later!
Share the inspiration with your friends
I was halfway through bagging a random assortment of heirloom apples at the farmer’s market last October when the woman running the stall—a tiny, no-nonsense woman named Edna who I’d only ever exchanged money and pleasantries with—casually mentioned she’d just pulled a batch of black velvet cupcakes out of the oven. Not chocolate. Black velvet. I stopped mid-reach for a Honeycrisp and just stared at her. She shrugged, wiped her hands on her apron, and said, “It’s the only thing I bake that my husband actually asks for by name.” She scribbled the recipe on the back of a paper bag, the ink smudging a little from the apple moisture. I shoved it into my pocket and honestly forgot about it for a week. When I finally found it crumpled in the laundry, I figured it was probably a disaster waiting to happen—too much food coloring, a gimmick, something that looked better than it tasted. But I was wrong. Dead wrong. That first bite had this unexpected depth, a rich, almost smoky cocoa flavor that the black color somehow makes feel even more dramatic. The cake was impossibly tender, and the tangy cream cheese frosting cut through the sweetness perfectly. You know that feeling when you take a bite of something and immediately start planning when you can make it again? That was this. Edna’s secret, it turns out, wasn’t just the color—it was the way the ingredients worked together to create something that tasted as bold as it looked. I’ve tweaked her original method over the years, but the soul of it is still that crumpled paper bag recipe. These Perfect Black Velvet Cupcakes with Cream Cheese Web Frosting have become my go-to for Halloween parties, gothic-themed birthdays, or just a Tuesday that needs a little drama. They’re not just a pretty face.
Why You’ll Love This Recipe
Let’s be honest—black velvet cupcakes can easily turn into a dry, flavorless science experiment if you’re not careful. Too much dye, too much flour, and you’re left with a crumb that tastes like cardboard. This recipe is different. I’ve tested it more times than I care to admit, tweaking the liquid ratio, the cocoa type, and the mixing method until it was absolutely foolproof. Here’s why it works:
- Rich, Not Gimmicky: The black color comes from a combination of dark cocoa powder and black food coloring, but the flavor is all deep, complex chocolate. No bitter aftertaste.
- Tender, Moist Crumb: Buttermilk and a touch of oil keep these cupcakes soft for days. They don’t dry out by the next morning.
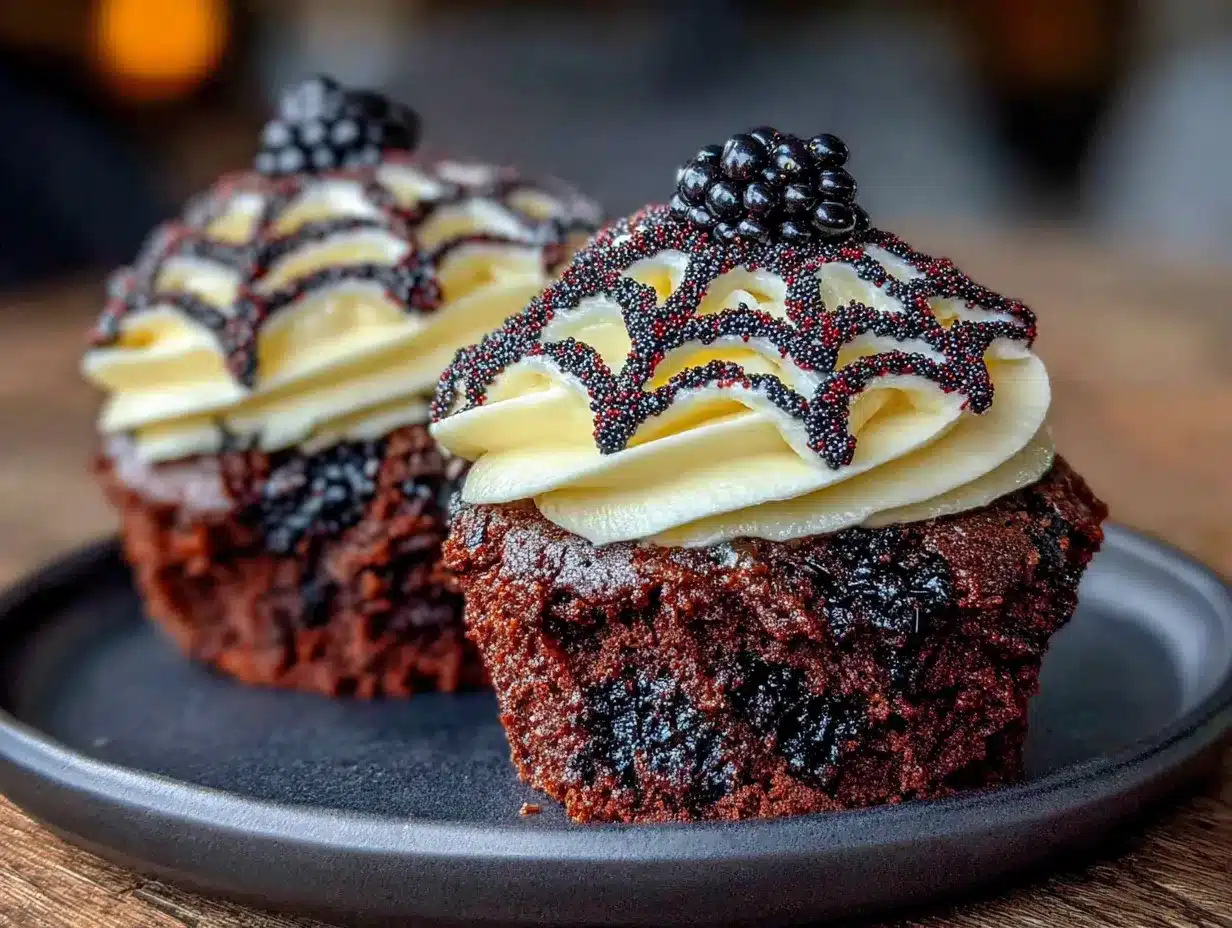
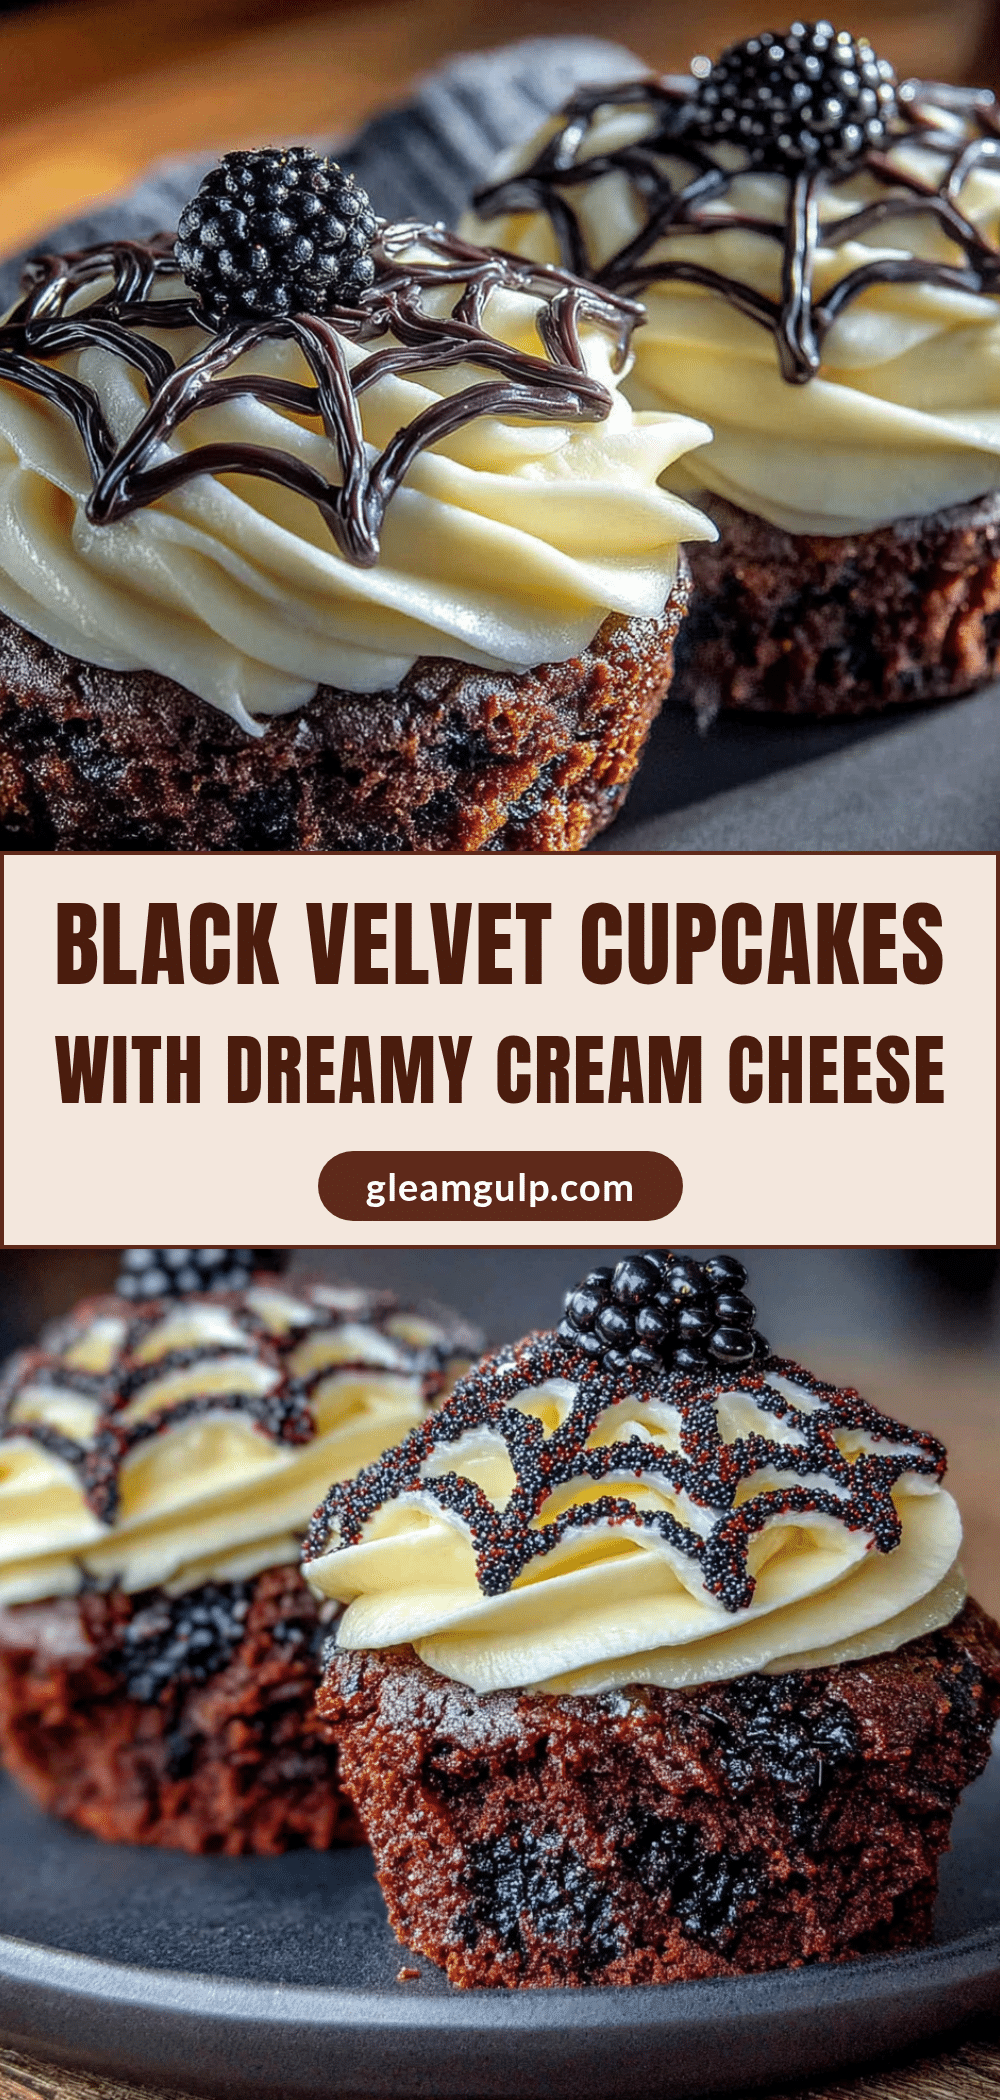
- Perfectly Balanced Frosting: The cream cheese frosting is tangy enough to cut through the sweetness, and the spider web design is surprisingly easy to pull off.
- Showstopper Presentation: These look like they came from a fancy bakery, but they’re totally doable in a home kitchen with basic tools.
- Crowd-Pleaser: I’ve brought these to potlucks, office parties, and Halloween gatherings. People freak out over the color, then go quiet when they taste them. That’s the best kind of compliment.
This recipe is the one that makes you close your eyes after the first bite. It’s comfort food with a dark, dramatic twist—faster than you’d think, but with the same soul-soothing satisfaction as a classic chocolate cupcake.
What Ingredients You Will Need
This recipe uses simple, everyday ingredients to build something that feels special. Most of these are pantry staples, but a few key players make all the difference. Let’s break it down.
For the Cupcakes
- All-purpose flour – 1 ½ cups (190g). Spoon and level it—don’t scoop straight from the bag or you’ll end up with dense cakes.
- Granulated sugar – 1 cup (200g). Adds sweetness and helps with structure.
- Unsweetened cocoa powder – ½ cup (50g). I prefer a dark cocoa powder like Hershey’s Special Dark or Droste for a richer flavor. Regular cocoa works too, but the color won’t be as deep.
- Baking soda – 1 teaspoon. Helps the cupcakes rise and keeps them tender.
- Salt – ½ teaspoon. Balances the sweetness and enhances the chocolate flavor.
- Buttermilk – ¾ cup (180ml), room temperature. Adds tanginess and activates the baking soda for a soft crumb. No buttermilk? Add 1 tablespoon of lemon juice or white vinegar to ¾ cup of milk and let it sit for 5 minutes.
- Vegetable oil – ½ cup (120ml). Keeps the cupcakes moist longer than butter alone would.
- Large eggs – 2, room temperature. They incorporate better when they’re not cold.
- Vanilla extract – 2 teaspoons. Pure, not imitation, if you can swing it.
- Black gel food coloring – 2 to 3 teaspoons. I use Americolor Super Black. Liquid coloring won’t give you the same deep shade without throwing off the liquid balance.
- Hot water – ½ cup (120ml). This helps bloom the cocoa and creates a thinner, more pourable batter.
For the Cream Cheese Frosting
- Cream cheese – 8 ounces (226g), softened. Full-fat is best for stability. Low-fat makes the frosting too soft.
- Unsalted butter – ½ cup (113g), softened. Adds richness and helps the frosting hold its shape.
- Powdered sugar – 3 to 4 cups (360g to 480g), sifted. Start with 3 cups and add more if you need a stiffer consistency for piping.
- Vanilla extract – 1 teaspoon.
- Pinch of salt – Just a tiny one, to cut the sweetness.
- Heavy cream or milk – 1 to 2 tablespoons, only if needed to loosen the frosting.
For the Spider Web Decoration
- White candy melts or white chocolate – ¼ cup (about 45g). Melted and drizzled over the frosting.
- Black sanding sugar or sprinkles – Optional, for a little sparkle.
Equipment Needed
- Muffin tin – Standard 12-cup. Grease it well or use paper liners.
- Paper liners – Black or white ones work best visually. I’ve used both; black liners make the cupcakes look extra moody.
- Mixing bowls – At least two medium bowls and one large one.
- Whisk and electric mixer – A hand mixer or stand mixer with the paddle attachment works great for the frosting.
- Rubber spatula – For scraping down the bowl and folding ingredients.
- Piping bag and tip – A large round tip (like Ateco 808 or Wilton 1A) for the frosting, or you can use a zip-top bag with the corner snipped off.
- Small piping bag or squeeze bottle – For the melted white chocolate web design.
- Cooling rack – Essential for even cooling.
Preparation Method
- Preheat and prep. Preheat your oven to 350°F (175°C). Line your muffin tin with paper liners. This recipe makes exactly 12 standard cupcakes, so don’t try to squeeze out 14—they’ll be too full.
- Mix the dry ingredients. In a medium bowl, whisk together the flour, sugar, cocoa powder, baking soda, and salt. Make sure there are no lumps. The cocoa tends to clump, so be thorough.
- Combine the wet ingredients. In a large bowl or the bowl of your stand mixer, whisk together the buttermilk, oil, eggs, and vanilla extract until smooth. It should look pale and slightly thickened.
- Add the food coloring. Stir in the black gel food coloring. Start with 2 teaspoons. The batter will look dark gray at this point—don’t panic. It will deepen as you add the hot water and during baking.
- Combine wet and dry. Add the dry ingredients to the wet mixture in two batches, mixing on low speed until just combined. Scrape down the sides of the bowl with a rubber spatula. Do not overmix—a few small lumps are okay.
- Add the hot water. With the mixer running on low, slowly pour in the hot water. The batter will become very thin and silky—this is exactly what you want. It should look like a thick milkshake. If it’s still too thick, add an extra tablespoon of hot water.
- Fill the liners. Use a cookie scoop or a measuring cup to divide the batter evenly among the 12 liners. Fill each one about ⅔ full. This batter is thin, so it will level itself out in the oven.
- Bake. Bake for 18 to 22 minutes, rotating the pan halfway through. A toothpick inserted into the center of a cupcake should come out with a few moist crumbs, not wet batter. The tops should spring back when lightly touched.
- Cool completely. Let the cupcakes cool in the pan for 5 minutes, then transfer them to a wire rack to cool completely. Do not frost them while they’re warm—the cream cheese frosting will slide right off.
- Make the frosting. While the cupcakes cool, beat the softened cream cheese and butter together in a large bowl with an electric mixer until smooth and fluffy—about 2 minutes. Scrape down the bowl. Add the vanilla and salt, then gradually add the powdered sugar, 1 cup at a time, beating on low speed until incorporated. Once all the sugar is in, beat on medium-high for 1 to 2 minutes until light and fluffy. If the frosting is too soft to pipe, refrigerate it for 15 minutes.
- Frost the cupcakes. Fit your piping bag with a large round tip and fill it with the frosting. Pipe a generous swirl on each cooled cupcake. You can also use an offset spatula to spread it, but the piped swirl looks more professional.
- Create the spider web. Melt the white candy melts or white chocolate in a small microwave-safe bowl in 20-second bursts, stirring between each, until smooth. Transfer to a small piping bag or a squeeze bottle. Pipe a spiral on top of each frosted cupcake, starting from the center and working outward. Then, use a toothpick or a skewer to drag lines from the center to the edges, creating the web effect. Work quickly—the melted chocolate sets fast.
- Finish and chill. Sprinkle with black sanding sugar if you’re using it. Refrigerate the cupcakes for at least 30 minutes to set the frosting and the web design. This also makes them easier to transport.
Cooking Tips & Techniques
Let me save you from some of the mistakes I made along the way. First, don’t skip the hot water. I know it feels wrong to add liquid to an already thin batter, but that hot water is what blooms the cocoa and creates that ultra-moist, tender crumb. Without it, the cupcakes turn out dense and dry. I learned that the hard way when I was rushing through a batch for a party and thought I could skip the step. They were edible, but they weren’t memorable.
Second, invest in good gel food coloring. Liquid food coloring is fine for pastel shades, but for black velvet, you need a concentrated gel. Americolor Super Black or Wilton’s black gel are both reliable. I’ve also used Chefmaster’s Black Velvet—aptly named—and it works beautifully. Start with 2 teaspoons and add more if you want a deeper, more dramatic black. Just remember that the color deepens as the cupcakes cool and sit overnight.
Third, let your cream cheese and butter come to room temperature naturally. Don’t microwave them to soften them quickly—you’ll end up with melted butter and lumpy cream cheese, and your frosting will be a grainy mess. Take them out of the fridge an hour before you start baking. If you forget, cut them into small cubes and let them sit on the counter for 20 minutes. It’s not ideal, but it works in a pinch.
Finally, don’t overmix the batter once you add the dry ingredients. Overmixing develops gluten, which makes the cupcakes tough. Mix until you can’t see any more flour streaks, then stop. A few small lumps are totally fine—they’ll bake out in the oven.
Variations & Adaptations
This recipe is surprisingly flexible. Here are a few ways I’ve adapted it over the years:
- Gluten-Free Version: Substitute the all-purpose flour with a 1-to-1 gluten-free baking flour blend that contains xanthan gum. I’ve used Bob’s Red Mill with great results. The texture is slightly denser, but the flavor is still spot-on.
- Vegan Adaptation: Replace the eggs with flax eggs (2 tablespoons ground flaxseed mixed with 6 tablespoons water, let sit for 5 minutes). Use a plant-based buttermilk (almond milk + lemon juice) and a vegan cream cheese for the frosting. The cupcakes won’t rise quite as high, but they’re still delicious.
- Peppermint Black Velvet: Add ½ teaspoon of peppermint extract to the batter along with the vanilla. Top with crushed candy canes instead of the white chocolate web for a wintery twist.
- Spicy Chocolate Version: Add ½ teaspoon of cayenne pepper and ½ teaspoon of cinnamon to the dry ingredients. The heat sneaks up on you and pairs beautifully with the dark cocoa.
- Mini Cupcakes: Use a mini muffin tin and bake for 10 to 12 minutes. You’ll get about 36 mini cupcakes. They’re perfect for parties or lunchbox surprises.
Serving & Storage Suggestions
These cupcakes are best served at room temperature. The cream cheese frosting softens slightly, and the cake feels incredibly tender. If you’ve refrigerated them, let them sit on the counter for 20 to 30 minutes before serving.
For storage, place the cupcakes in an airtight container in the refrigerator for up to 4 days. The cream cheese frosting needs to stay chilled if you’re not eating them within a few hours. I’ve found that the flavor actually improves after a day—the black velvet color deepens, and the cocoa flavor becomes more pronounced.
You can also freeze the unfrosted cupcakes for up to 3 months. Wrap each one individually in plastic wrap, then place them in a freezer-safe bag. Thaw at room temperature before frosting. I’ve done this for holiday baking marathons, and nobody can tell the difference.
For reheating, pop a single cupcake in the microwave for 10 to 15 seconds. It brings back that just-baked warmth without melting the frosting.
Nutritional Information & Benefits
Let’s be real—these are cupcakes, not health food. But they’re made with real ingredients, and that counts for something. Here’s the approximate breakdown per cupcake (with frosting):
- Calories: 380
- Fat: 18g
- Carbohydrates: 52g
- Protein: 5g
- Sugar: 38g
The dark cocoa powder is rich in antioxidants and flavonoids, which are known to support heart health. The cream cheese adds a small amount of calcium and protein. And honestly, sometimes the biggest benefit is the joy of eating something that looks and tastes incredible. These cupcakes are a celebration—a little dramatic, a little indulgent, and totally worth every bite.
Conclusion
These Perfect Black Velvet Cupcakes with Cream Cheese Web Frosting are the kind of recipe that makes you look like a baking genius with minimal effort. They’re dramatic enough for Halloween, elegant enough for a birthday party, and delicious enough to become a regular request in your kitchen. The black color is striking, but it’s the tender crumb and tangy frosting that will keep people coming back for seconds. I’ve made these for everything from spooky movie nights to baby showers (yes, really), and they always steal the show.
I’d love to hear how yours turn out. Did you add a twist? Did the spider web design come out perfect on the first try? Drop a comment below and let me know—I read every single one. And if you’re looking for another showstopper, you might want to try my classic red velvet cupcakes for a colorful counterpart, or these chocolate espresso cupcakes for a more grown-up flavor. Happy baking, and don’t forget to save this recipe for your next spooky celebration!
Frequently Asked Questions
Can I use regular cocoa powder instead of dark cocoa?
Yes, you can. The cupcakes will still taste good, but the color won’t be as deep, and the chocolate flavor will be milder. If you’re using regular cocoa, you might need an extra teaspoon of black food coloring to get that dramatic black shade.
Why did my cream cheese frosting turn out runny?
This usually happens when the cream cheese is too soft or when you’ve added too much liquid. Make sure your cream cheese and butter are softened but not melted. If your frosting is runny, refrigerate it for 15 to 20 minutes before piping. You can also beat in a little more powdered sugar to stiffen it up.
Can I make these cupcakes ahead of time?
Absolutely. You can bake the cupcakes a day ahead and store them in an airtight container at room temperature. Frost them the day you plan to serve them for the freshest look. The unfrosted cupcakes also freeze beautifully for up to 3 months.
How do I get the spider web design to look perfect?
Pipe a continuous spiral of melted white chocolate on top of the frosting, starting from the center and working outward. Then, use a toothpick to drag lines from the center to the edges, like spokes on a wheel. Work quickly—the chocolate sets fast. If it thickens, pop the bowl back in the microwave for 10 seconds.
Can I make these without a piping bag?
Yes. For the frosting, use a zip-top bag with the corner snipped off, or simply spread the frosting with an offset spatula. For the spider web, use a small squeeze bottle or even a spoon to drizzle the melted chocolate in a spiral pattern. It won’t be as precise, but it will still look great.
Pin This Recipe!
Perfect Black Velvet Cupcakes with Cream Cheese Frosting
These dramatic black velvet cupcakes are incredibly tender and moist, with a rich, deep cocoa flavor. Topped with a tangy cream cheese frosting and a stunning spider web design, they’re a showstopper for Halloween, gothic-themed parties, or any day that needs a little drama.
- Prep Time: 20 minutes
- Cook Time: 20 minutes
- Total Time: 40 minutes
- Yield: 12 cupcakes 1x
- Category: Dessert
- Cuisine: American
Ingredients
- 1 ½ cups (190g) all-purpose flour
- 1 cup (200g) granulated sugar
- ½ cup (50g) unsweetened dark cocoa powder (e.g., Hershey’s Special Dark or Droste)
- 1 teaspoon baking soda
- ½ teaspoon salt
- ¾ cup (180ml) buttermilk, room temperature
- ½ cup (120ml) vegetable oil
- 2 large eggs, room temperature
- 2 teaspoons vanilla extract
- 2 to 3 teaspoons black gel food coloring (e.g., Americolor Super Black)
- ½ cup (120ml) hot water
- 8 ounces (226g) cream cheese, softened
- ½ cup (113g) unsalted butter, softened
- 3 to 4 cups (360g to 480g) powdered sugar, sifted
- 1 teaspoon vanilla extract
- Pinch of salt
- 1 to 2 tablespoons heavy cream or milk (optional, to loosen frosting)
- ¼ cup (about 45g) white candy melts or white chocolate
- Black sanding sugar or sprinkles (optional)
Instructions
- Preheat oven to 350°F (175°C). Line a 12-cup muffin tin with paper liners.
- In a medium bowl, whisk together flour, sugar, cocoa powder, baking soda, and salt until no lumps remain.
- In a large bowl, whisk together buttermilk, oil, eggs, and vanilla extract until smooth and slightly thickened.
- Stir in black gel food coloring (start with 2 teaspoons). The batter will look dark gray.
- Add dry ingredients to wet mixture in two batches, mixing on low speed until just combined. Do not overmix.
- With mixer running on low, slowly pour in hot water. Batter will become thin and silky, like a thick milkshake.
- Divide batter evenly among the 12 liners, filling each about ⅔ full.
- Bake for 18 to 22 minutes, rotating pan halfway through. A toothpick inserted in center should come out with a few moist crumbs.
- Cool in pan for 5 minutes, then transfer to a wire rack to cool completely.
- For frosting: Beat softened cream cheese and butter together until smooth and fluffy (about 2 minutes). Add vanilla and salt, then gradually beat in powdered sugar, 1 cup at a time, until light and fluffy. If too soft, refrigerate 15 minutes.
- Fit a piping bag with a large round tip and fill with frosting. Pipe a generous swirl on each cooled cupcake.
- Melt white candy melts or white chocolate in 20-second bursts in the microwave. Transfer to a small piping bag or squeeze bottle.
- Pipe a spiral of melted white chocolate on each frosted cupcake, then drag a toothpick from center to edges to create a web effect. Work quickly.
- Sprinkle with black sanding sugar if desired. Refrigerate at least 30 minutes to set.
Notes
Don’t skip the hot water—it blooms the cocoa and creates a moist crumb. Use gel food coloring, not liquid, for the deepest black color. Let cream cheese and butter come to room temperature naturally for best frosting texture. Do not overmix the batter once dry ingredients are added. Cupcakes can be stored in an airtight container in the refrigerator for up to 4 days, or unfrosted cupcakes can be frozen for up to 3 months.
Nutrition
- Serving Size: 1 cupcake
- Calories: 380
- Sugar: 38
- Sodium: 280
- Fat: 18
- Saturated Fat: 8
- Carbohydrates: 52
- Fiber: 2
- Protein: 5
Keywords: black velvet cupcakes, cream cheese frosting, spider web cupcakes, Halloween cupcakes, chocolate cupcakes, gothic cupcakes


