Love this? Save it for later!
Share the inspiration with your friends
This was supposed to be a batch of plain sugar cookies. I had the butter softening, the flour measured, and a very specific vision of neat little rounds with sprinkles on top. But then my neighbor knocked on the door holding a black cat who had wandered into her garage, and I spent the next twenty minutes making phone calls to see if anyone was missing a very friendly, slightly dusty tuxedo cat. By the time I got back to the kitchen, the butter was too soft, I grabbed the cocoa powder instead of the extra flour, and I was already running late for the Halloween party I was supposed to bring treats to. What came out of the oven was nothing like the plan—and better.
Honestly, I almost threw the dough away. It looked wrong, a deep, dark gray instead of the pale beige I was expecting. But I was out of time and out of patience, so I rolled it out anyway. I cut the shapes, baked them off, and when I pulled the tray out, I just stared. They were black. Perfectly, beautifully, Halloween-black. I decorated them with orange icing eyes and little whiskers, and let me tell you, they were the first thing to disappear at the party. Someone actually asked if I had ordered them from a bakery. I just smiled and said it was a happy little accident.
That cat found his home, by the way. He belonged to a family three houses down, and he now has a very fancy collar with a bell. And these cookies? They became my go-to for every Halloween gathering. They look impressive, they taste like a classic sugar cookie with a hint of rich cocoa, and they come together with ingredients you probably already have. Maybe you’ve been there—standing in a messy kitchen, convinced you’ve ruined something, only to realize you’ve accidentally created something even better. That’s this recipe. It’s the mistake that worked out, and I think you’re going to love it.
Why You’ll Love This Recipe
Let’s be real for a second. Halloween treats can be a lot of work. Between carving pumpkins, decorating the house, and figuring out costumes, the last thing you need is a complicated cookie recipe that takes three days and a pastry degree. These black cat sugar cookies are the opposite of that. They are straightforward, forgiving, and they deliver a visual punch that makes people think you spent hours on them.
Here is why this recipe stands out from the crowd:
- Quick & Easy: From start to finish, you are looking at about 45 minutes of active time. The dough comes together in one bowl, and there is no chilling required if you are in a rush (though chilling does help with cleaner edges).
- Simple Ingredients: You probably have everything in your pantry right now. Butter, sugar, flour, cocoa powder, an egg, vanilla, and baking powder. No weird food coloring, no specialty extracts, no trips to three different stores.
- Perfect for Halloween Parties: These cookies are made for a crowd. They stack beautifully on a platter, they travel well, and kids and adults both reach for them. Plus, they are a conversation starter—everyone wants to know how you got that color.
- Crowd-Pleaser: I have brought these to potlucks, classroom parties, and neighborhood gatherings. They disappear every single time. The cocoa flavor is subtle enough that even picky eaters enjoy them, but rich enough that chocolate lovers feel satisfied.
- Unbelievably Delicious: The texture is where these really shine. They are crisp on the edges, soft in the center, and they hold their shape perfectly. No spreading, no puffing up into blobs. Just clean, sharp cookie shapes every time.
What makes this recipe different from the other black cookie recipes out there? It is the balance of cocoa to flour. Too much cocoa, and the cookies turn bitter and dry. Too little, and they come out a sad, dusty gray. I have tested this ratio more times than I care to admit, and this is the sweet spot. The cookies are black, tender, and taste like a classic sugar cookie with a hint of chocolate. It is not just another version—it is the best version.
This recipe is the kind that makes you close your eyes after the first bite. It is comfort food reimagined for a spooky season—faster than you expect, but with the same soul-soothing satisfaction. Perfect for impressing guests without stress, or turning a simple Halloween gathering into something memorable.
What Ingredients You Will Need
This recipe uses simple, wholesome ingredients to deliver bold flavor and a striking appearance without any fuss. Most of these are pantry staples, so you can probably get started right now without a grocery run.
For the Cookies:
- 1 cup (226g) unsalted butter, softened – Make sure it is truly softened, not melted. You want it to be at room temperature so it creams properly with the sugar. I prefer using a good quality butter like Kerrygold for the flavor, but any brand works.
- 1 cup (200g) granulated sugar – Regular white sugar gives these cookies their classic sweetness and helps them spread just the right amount. You can use organic cane sugar if you prefer.
- 1 large egg, room temperature – A room temperature egg emulsifies into the butter mixture much better than a cold one. If you forgot to take it out of the fridge, place it in a bowl of warm water for 5 minutes.
- 1 teaspoon vanilla extract – Pure vanilla extract makes a difference here. Imitation vanilla will work, but the flavor will be noticeably less rich. I am partial to Nielsen-Massey, but use what you have.
- 2 cups (250g) all-purpose flour – Spoon and level your flour. Scooping directly from the bag can pack in too much flour and make the cookies dry. I cannot stress this enough—it is the most common mistake I see.
- 1/2 cup (50g) unsweetened cocoa powder, preferably Dutch-process – This is the secret to the black color. Dutch-process cocoa is darker and less acidic than natural cocoa powder. If you only have natural cocoa, the cookies will be a dark brown rather than black, and they will taste slightly more bitter. I recommend using Droste or Valrhona for the best results.
- 1 teaspoon baking powder – This gives the cookies a little lift without making them puff up and lose their shape. Make sure your baking powder is fresh—test it by dropping a pinch into hot water; it should bubble immediately.
- 1/4 teaspoon salt – Salt balances the sweetness and enhances the chocolate flavor. I use fine sea salt, but table salt works too.
For the Royal Icing (optional but recommended):
- 2 cups (240g) powdered sugar – Sift it first to avoid lumps. Trust me on this.
- 2 tablespoons meringue powder – This gives the icing structure so it dries hard and shiny. You can find it in the baking aisle or online. If you cannot find it, you can use 2 tablespoons of pasteurized egg whites instead.
- 3-4 tablespoons water – Add slowly. You want the icing to be thick enough to hold its shape but thin enough to pipe easily.
- Orange gel food coloring – For the eyes and whiskers. I use gel colors because they do not thin out the icing like liquid ones do. Americolor and Wilton both make great options.
- Black gel food coloring – Only if you want to outline the cookies. Honestly, I skip this step most of the time because the cookies are already black.
Substitution Guidance: If you need a dairy-free option, you can use a high-quality vegan butter stick like Country Crock Plant Butter. The texture will be slightly different—a little less crisp—but the flavor will still be excellent. For a gluten-free version, swap the all-purpose flour with a 1:1 gluten-free baking flour blend that contains xanthan gum. I have tested this with King Arthur Measure for Measure and it works beautifully.
Equipment Needed
You do not need a lot of fancy equipment for these cookies, which is part of the reason I make them so often. Here is what you will need:
- Mixing bowls – One large bowl for the dough, and one medium bowl for the icing. I use glass or stainless steel, but any material works.
- Electric hand mixer or stand mixer – A hand mixer is perfectly fine for this recipe. If you are using a stand mixer, use the paddle attachment. You can technically do this by hand with a wooden spoon, but your arm will get a workout.
- Rolling pin – I prefer a French rolling pin (the one without handles) because it gives me more control. A regular rolling pin works just as well. If you do not have one, a wine bottle works in a pinch—I have done it.
- Cat-shaped cookie cutters – You want a cutter that is about 3 to 4 inches in size. I have a set from Wilton that includes a sitting cat and a stretching cat. Look for cutters with clean edges for the sharpest shapes.
- Baking sheets – Two or three rimmed baking sheets. I recommend light-colored aluminum sheets for even baking. Dark sheets can cause the bottoms to brown too quickly.
- Parchment paper or silicone baking mats – Parchment paper is my go-to. It prevents sticking and makes cleanup a breeze. Silicone mats work too, but the cookies might spread slightly more.
- Wire cooling rack – Essential for letting the cookies cool completely before decorating. If you ice them while they are warm, the icing will melt into a puddle.
- Piping bags or zip-top bags – For the royal icing. I use disposable piping bags with a small round tip (size 2 or 3). If you do not have piping bags, snip a tiny corner off a zip-top bag. It works surprisingly well.
- Small offset spatula – Not strictly necessary, but helpful if you want to flood the cookies with icing. A butter knife works too.
A quick tip on maintenance: wash your cookie cutters by hand. I ruined a perfectly good bat-shaped cutter by putting it in the dishwasher. The heat warped the metal, and now it cuts lopsided bats. Learn from my mistake.
Preparation Method
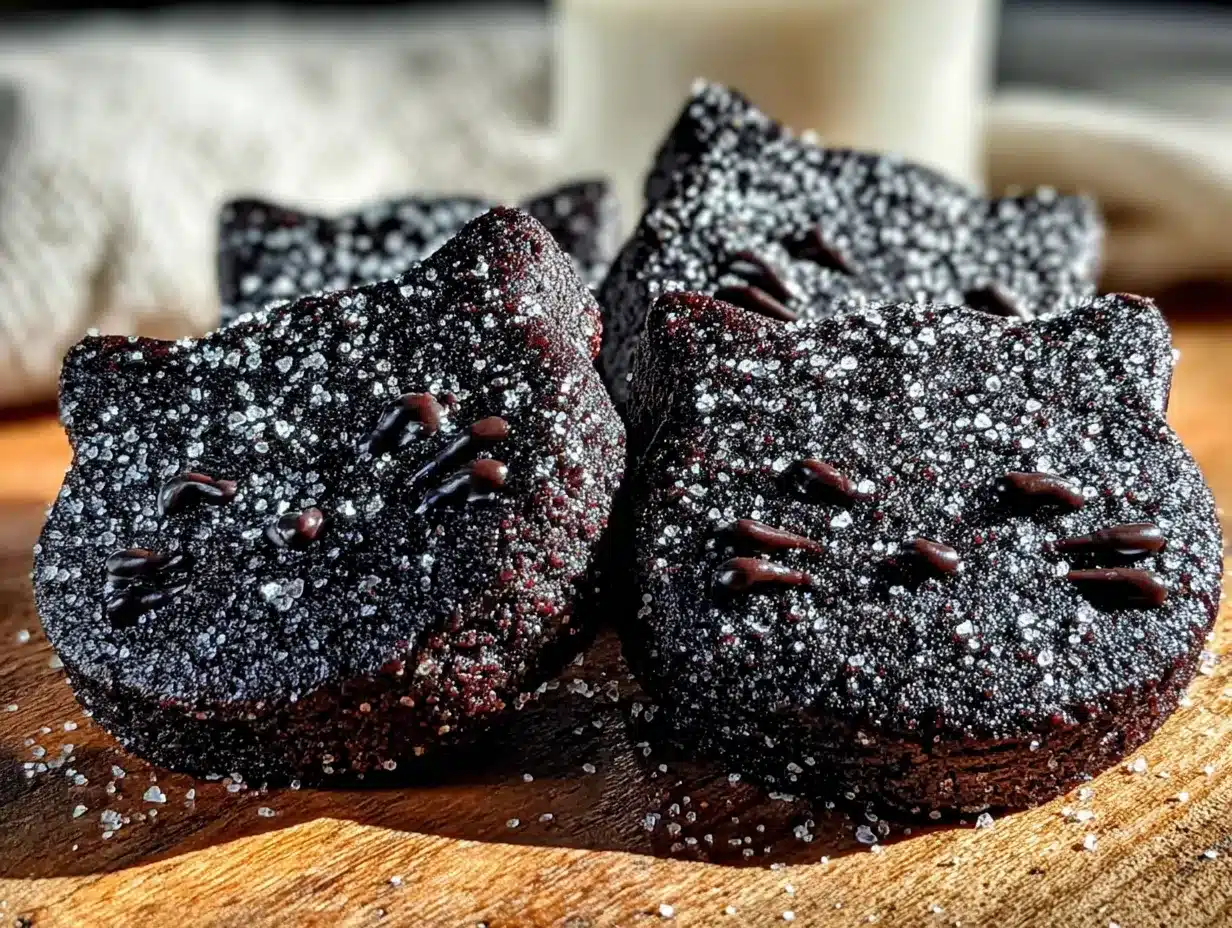
Alright, let us get to the fun part. Follow these steps carefully, and you will have a batch of perfect black cat cookies that will be the star of any Halloween party.
Step 1: Cream the Butter and Sugar
In a large mixing bowl, beat the softened butter and granulated sugar together on medium speed until light and fluffy. This takes about 2 to 3 minutes with a hand mixer, or 1 to 2 minutes in a stand mixer. You want the mixture to look pale and airy. Scrape down the sides of the bowl with a rubber spatula at least once to make sure everything is incorporated.
Step 2: Add the Egg and Vanilla
Add the room temperature egg and the vanilla extract. Beat on medium speed until fully combined, about 30 seconds. The mixture might look a little curdled at this point—do not panic. That is normal, especially if your egg was slightly cooler than the butter. It will come back together once you add the dry ingredients.
Step 3: Combine the Dry Ingredients
In a separate medium bowl, whisk together the all-purpose flour, Dutch-process cocoa powder, baking powder, and salt. Whisking ensures the baking powder and salt are evenly distributed throughout the flour. If you skip this step, you might end up with a cookie that has a bitter pocket of baking powder in one bite and a salty spot in the next. I have made that mistake. It is not pleasant.
Step 4: Mix the Dough
Gradually add the dry ingredients to the wet ingredients, mixing on low speed. Add about a third of the flour mixture at a time, mixing just until it disappears before adding the next batch. The dough will look crumbly at first, then it will come together into a stiff, dark dough. Stop mixing as soon as there are no more streaks of flour. Overmixing develops gluten, which makes the cookies tough.
Step 5: Shape and Chill the Dough
Turn the dough out onto a lightly floured surface. Divide it in half and shape each half into a flat disc about 1 inch thick. Wrap each disc in plastic wrap and refrigerate for at least 30 minutes. This step is optional if you are in a hurry, but I strongly recommend it. Chilling the dough firms up the butter, which means the cookies will hold their shape better when baked. If you skip this step, the cookies will spread more and you might lose the detail in the cat shapes.
Step 6: Preheat and Prepare
While the dough chills, preheat your oven to 350°F (175°C). Line two baking sheets with parchment paper or silicone baking mats. If you only have one baking sheet, that is fine—just let it cool completely between batches. A hot baking sheet will cause the dough to start melting before it even goes in the oven.
Step 7: Roll and Cut
Lightly flour your work surface and rolling pin. Roll one disc of dough to about 1/4-inch thickness. Try to roll as evenly as possible. If the edges are thinner than the center, those edges will burn while the center is still underbaked. Dip your cat-shaped cookie cutter in flour before each cut to prevent sticking. Press straight down and lift straight up—do not twist the cutter. Twisting seals the edges and prevents the cookies from rising evenly.
Step 8: Bake
Place the cut cookies on the prepared baking sheets, spacing them about 2 inches apart. They do not spread much, but they need a little breathing room. Bake for 8 to 10 minutes. The cookies are done when the edges look set and the centers look slightly dry. They will not brown much because of the cocoa, so do not wait for golden edges. If you press gently on the center, it should spring back slightly. Let the cookies cool on the baking sheet for 5 minutes, then transfer them to a wire cooling rack to cool completely.
Step 9: Make the Royal Icing
In a medium bowl, whisk together the powdered sugar and meringue powder. Add 3 tablespoons of water and stir until smooth. The icing should be thick but flowy—think the consistency of honey. If it is too thick, add more water a teaspoon at a time. If it is too thin, add more powdered sugar. Divide the icing into two bowls. Leave one bowl white, and tint the other bowl with orange gel food coloring. Transfer each color to a piping bag or zip-top bag.
Step 10: Decorate
Once the cookies are completely cool, pipe two small orange circles for the eyes. Use the white icing to pipe tiny dots in the center of the eyes for a highlight. Pipe whiskers with the orange icing—three on each side of the face. You can also pipe a little pink nose if you are feeling fancy. Let the icing set for at least 2 hours before stacking or serving. The icing needs time to dry hard, or it will smudge.
Cooking Tips & Techniques
I have made these cookies more times than I can count, and I have learned a few things the hard way. Here are my best tips to make sure your batch turns out perfectly.
Measure Your Flour Correctly
This is the number one mistake I see. Scooping your measuring cup directly into the flour bag packs in way too much flour. The result is a dry, crumbly dough that cracks when you try to roll it out. Instead, spoon the flour into the measuring cup and level it off with the back of a knife. This simple change will transform your baking.
Do Not Overwork the Dough
When you are rolling out the scraps and re-rolling them, the dough can get tough. I try to limit re-rolls to once or twice. After that, the cookies from the scraps will be noticeably denser. I usually bake those off as “test cookies” for quality control purposes. You know, for science.
Use Parchment Paper for Easy Transfer
Instead of trying to lift fragile cut-out cookies onto a baking sheet with a spatula, roll the dough out directly on a sheet of parchment paper. Then you can slide the parchment onto the baking sheet, cut out the shapes, and remove the scraps. It is a game-changer for delicate shapes.
Watch the Baking Time Closely
Because these cookies are black, it is almost impossible to tell when they are done by looking at the color. I rely on the timer and the touch test. At the 8-minute mark, check them. If the edges look set and the center feels slightly firm to the touch, they are done. Every oven runs a little differently, so start checking early.
Let Them Cool Completely
I know it is tempting to start decorating right away, but warm cookies will turn your royal icing into a sloppy mess. I have ruined an entire batch this way. Let the cookies cool on the baking sheet for 5 minutes, then transfer them to a wire rack and walk away for at least 30 minutes. Go put on a Halloween movie or something.
Make-Ahead Strategy
This dough freezes beautifully. Wrap the discs tightly in plastic wrap, then place them in a freezer bag. They will keep for up to 3 months. When you are ready to bake, thaw the dough in the refrigerator overnight, then roll and cut as usual. This is my secret for stress-free party prep.
Variations & Adaptations
One of the things I love about this recipe is how adaptable it is. Here are a few ways to switch things up depending on your mood or dietary needs.
Gluten-Free Version
I have tested this with a 1:1 gluten-free flour blend, and it works beautifully. The dough will be slightly more delicate, so handle it gently. Chill the dough for a full hour before rolling to make it more manageable. The texture is a little more tender than the original, but the flavor is spot on.
Vegan Option
To make these vegan, substitute the butter with a high-quality vegan butter stick. Use a flax egg instead of a regular egg: mix 1 tablespoon of ground flaxseed with 3 tablespoons of water and let it sit for 5 minutes until it becomes gel-like. For the royal icing, use aquafaba (the liquid from a can of chickpeas) instead of the meringue powder. Whisk it until it is frothy before adding the powdered sugar.
Spiced Halloween Cookies
Add 1 teaspoon of pumpkin pie spice to the dry ingredients for a fall twist. The warmth of the cinnamon, nutmeg, and ginger pairs beautifully with the dark cocoa. I made a batch of these for a Thanksgiving Friendsgiving and they were a huge hit.
Different Shapes
While black cats are the star of this recipe, this dough works with any Halloween cookie cutter. Ghosts, pumpkins, bats, and skulls all come out beautifully. If you are making pumpkins, you can skip the orange icing and just use a little green for the stem. For ghosts, use white royal icing with black eyes.
Gluten-Free Royal Icing
If you are making the gluten-free version, you do not need to change the royal icing. Powdered sugar is naturally gluten-free, and meringue powder is typically made from dried egg whites. Just double-check the labels to be sure.
Serving & Storage Suggestions
These cookies are designed to be the star of your Halloween dessert table, and they deliver on that promise. Here is how to serve and store them for the best results.
Serving Temperature and Presentation
Serve these cookies at room temperature. They are best within 24 hours of decorating, when the icing is fully set and the cookies are still crisp. Arrange them on a black or orange platter for maximum visual impact. I like to group them in clusters of three or four, with the cats facing different directions. It makes the platter look playful and intentional.
Complementary Dishes and Beverages
These cookies pair wonderfully with a warm mug of apple cider or a pumpkin spice latte. If you are serving them at a party, set them out alongside other Halloween treats like caramel apples, popcorn balls, or pumpkin dip with ginger snaps. For a more grown-up gathering, they go beautifully with a glass of cold milk or a dark stout beer. The bitterness of the stout complements the cocoa in the cookies perfectly.
Storage Instructions
Store undecorated cookies in an airtight container at room temperature for up to 1 week. If you have decorated them with royal icing, let the icing dry completely (at least 2 hours) before stacking them. Place a sheet of parchment paper between each layer to prevent the icing from sticking. Do not store them in the refrigerator—the moisture will make the cookies soft and the icing tacky.
Freezer Instructions
You can freeze the baked, undecorated cookies for up to 3 months. Place them in a single layer on a baking sheet and freeze until solid, then transfer them to a freezer-safe container or bag. When you are ready to serve, thaw them at room temperature and decorate as usual. I do this all the time for holiday parties. It is such a time-saver.
How Flavors Develop Over Time
Honestly, these cookies taste even better the day after they are baked. The cocoa flavor deepens and the texture evens out. If you can resist eating them all on day one, you will be rewarded on day two. I have never managed to test day three, because they are always gone by then.
Nutritional Information & Benefits
Let us be honest—these are cookies, not health food. But that does not mean they cannot fit into a balanced lifestyle. Here is a rough breakdown of what you are looking at per cookie (based on a 3-inch cat shape, without icing).
- Calories: Approximately 120-140 calories per cookie
- Fat: 7g (mostly from butter)
- Carbohydrates: 16g
- Sugar: 9g
- Protein: 2g
- Fiber: 1g (thanks to the cocoa powder)
Health Benefits of Key Ingredients
Cocoa powder is actually a surprising source of antioxidants. It contains flavonoids that can help reduce inflammation and support heart health. Of course, the sugar and butter offset some of that benefit, but it is nice to know there is a tiny bit of goodness in every bite. The butter provides vitamin A and healthy fats, while the egg adds a small amount of protein.
Dietary Considerations
These cookies are naturally nut-free, which makes them a safe option for school parties and gatherings where allergies are a concern. They can easily be made gluten-free or vegan with the substitutions listed above. They are not low-carb or keto-friendly due to the sugar and flour content, but there are plenty of other recipes out there for that. This one is about indulgence, and that is okay.
My Personal Wellness Perspective
I believe in balance. I eat salads most days, but I also believe that holidays deserve real treats. These cookies are made with real ingredients, no artificial colors or preservatives, and they bring genuine joy to the people who eat them. That has its own kind of nutritional value. So go ahead, have two. You earned it.
Frequently Asked Questions
Why are my black cat sugar cookies not black?
The most common reason is using natural cocoa powder instead of Dutch-process cocoa. Natural cocoa is lighter in color and more acidic. Dutch-process cocoa has been treated with an alkali to neutralize the acid, which darkens the color significantly. If you only have natural cocoa, your cookies will be a dark brown rather than black. They will still taste good, but they will not have that dramatic black appearance.
Can I make the dough ahead of time?
Absolutely. The dough can be refrigerated for up to 3 days or frozen for up to 3 months. Just wrap it tightly in plastic wrap to prevent it from drying out. When you are ready to bake, let it sit at room temperature for about 10 minutes to soften slightly before rolling. If it is too cold, it will crack when you try to roll it out.
My cookies spread too much. What did I do wrong?
This usually happens for one of three reasons: the butter was too soft, the dough was not chilled long enough, or the baking sheet was too hot. Make sure your butter is softened but not melted. Chill the dough for at least 30 minutes before rolling. And always let your baking sheets cool completely between batches. A hot baking sheet will cause the butter in the dough to melt before the cookies even hit the oven.
Can I use a different type of icing?
Of course. Royal icing gives the cleanest, most professional look, but you can absolutely use a simple powdered sugar glaze or even store-bought frosting in a tube. If you use a buttercream, keep in mind that it will not dry hard, so the cookies will be more delicate to stack and transport. For a quick option, melt some white chocolate chips and tint them orange with gel food coloring. It sets up beautifully.
How do I get clean edges on my cookie shapes?
Dip your cookie cutter in flour before each cut. Press straight down without twisting. Twisting the cutter seals the edges of the dough, which prevents the cookies from rising evenly and can cause the edges to look ragged. Also, make sure your dough is evenly rolled to 1/4-inch thickness. Uneven dough leads to uneven baking and messy shapes.
Conclusion
These black cat sugar cookies are proof that sometimes the best recipes come from the most unexpected places. What started as a distracted, slightly chaotic afternoon in my kitchen turned into a Halloween tradition that I genuinely look forward to every year. They are simple enough for a beginner baker to tackle, but impressive enough to make you look like a pro. The deep black color, the tender crumb, and the playful decorations come together to create a cookie that is as fun to make as it is to eat.
I hope you give these a try for your next Halloween party. Customize them however you like—add sprinkles, change up the icing colors, or use different cookie cutters. That is the beauty of a good sugar cookie base. It is a blank canvas for your creativity. And if you accidentally mess something up along the way? Do not stress. Some of the best recipes are born from happy accidents. Just ask that black cat who wandered into my garage.
I would love to hear how yours turn out. Drop a comment below and let me know if you tried any fun variations, or tag me in your photos on social media. Seeing your creations honestly makes my day. Happy Halloween, and happy baking!
Pin This Recipe!
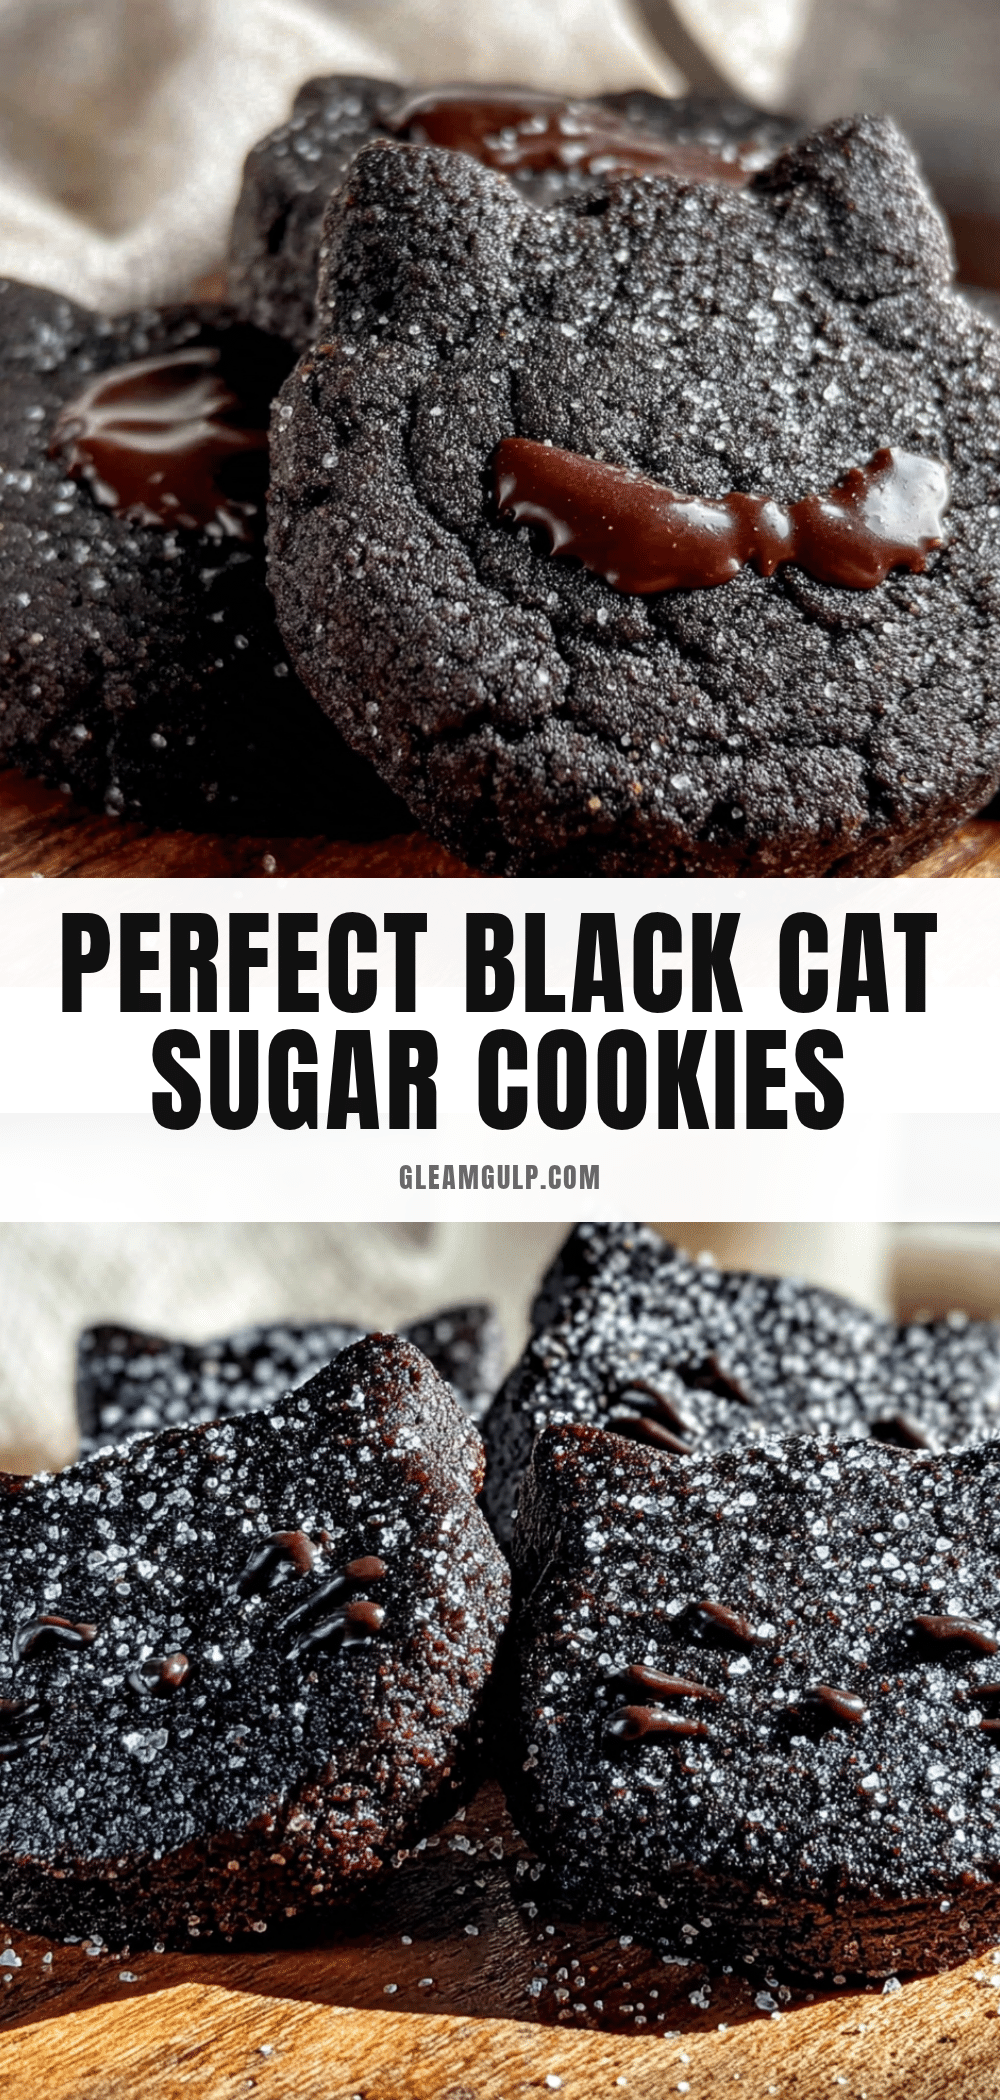
Perfect Black Cat Sugar Cookies: Easy Halloween Party Treat
These black cat sugar cookies are a happy accident turned Halloween tradition. They are easy to make, use simple ingredients, and deliver a striking black color with a tender, delicious crumb that tastes like a classic sugar cookie with a hint of rich cocoa.
- Prep Time: 45 minutes
- Cook Time: 10 minutes
- Total Time: 55 minutes
- Yield: 24 servings 1x
- Category: Dessert
- Cuisine: American
Ingredients
- 1 cup (226g) unsalted butter, softened
- 1 cup (200g) granulated sugar
- 1 large egg, room temperature
- 1 teaspoon vanilla extract
- 2 cups (250g) all-purpose flour
- 1/2 cup (50g) unsweetened Dutch-process cocoa powder
- 1 teaspoon baking powder
- 1/4 teaspoon salt
- 2 cups (240g) powdered sugar
- 2 tablespoons meringue powder
- 3–4 tablespoons water
- Orange gel food coloring
- Black gel food coloring (optional)
Instructions
- Cream the butter and sugar: In a large mixing bowl, beat the softened butter and granulated sugar together on medium speed until light and fluffy, about 2 to 3 minutes with a hand mixer or 1 to 2 minutes in a stand mixer. Scrape down the sides of the bowl at least once.
- Add the egg and vanilla: Add the room temperature egg and vanilla extract. Beat on medium speed until fully combined, about 30 seconds. The mixture may look slightly curdled; this is normal.
- Combine the dry ingredients: In a separate medium bowl, whisk together the all-purpose flour, Dutch-process cocoa powder, baking powder, and salt.
- Mix the dough: Gradually add the dry ingredients to the wet ingredients, mixing on low speed. Add about a third of the flour mixture at a time, mixing just until it disappears before adding the next batch. Stop mixing as soon as there are no more streaks of flour.
- Shape and chill the dough: Turn the dough out onto a lightly floured surface. Divide it in half and shape each half into a flat disc about 1 inch thick. Wrap each disc in plastic wrap and refrigerate for at least 30 minutes.
- Preheat and prepare: Preheat your oven to 350°F (175°C). Line two baking sheets with parchment paper or silicone baking mats.
- Roll and cut: Lightly flour your work surface and rolling pin. Roll one disc of dough to about 1/4-inch thickness. Dip your cat-shaped cookie cutter in flour before each cut. Press straight down and lift straight up—do not twist the cutter.
- Bake: Place the cut cookies on the prepared baking sheets, spacing them about 2 inches apart. Bake for 8 to 10 minutes. The cookies are done when the edges look set and the centers look slightly dry. Let the cookies cool on the baking sheet for 5 minutes, then transfer them to a wire cooling rack to cool completely.
- Make the royal icing: In a medium bowl, whisk together the powdered sugar and meringue powder. Add 3 tablespoons of water and stir until smooth. The icing should be thick but flowy—think the consistency of honey. Divide the icing into two bowls. Leave one bowl white, and tint the other bowl with orange gel food coloring. Transfer each color to a piping bag or zip-top bag.
- Decorate: Once the cookies are completely cool, pipe two small orange circles for the eyes. Use the white icing to pipe tiny dots in the center of the eyes for a highlight. Pipe whiskers with the orange icing—three on each side of the face. Let the icing set for at least 2 hours before stacking or serving.
Notes
For the blackest cookies, use Dutch-process cocoa powder. If you only have natural cocoa, the cookies will be dark brown. Chilling the dough is recommended for cleaner edges. The dough can be refrigerated for up to 3 days or frozen for up to 3 months. Let cookies cool completely before decorating to prevent icing from melting.
Nutrition
- Serving Size: 1 cookie (3-inch cat
- Calories: 130
- Sugar: 9
- Sodium: 75
- Fat: 7
- Saturated Fat: 4
- Carbohydrates: 16
- Fiber: 1
- Protein: 2
Keywords: black cat sugar cookies, Halloween cookies, sugar cookies, easy Halloween treats, black cookies, cocoa cookies, royal icing cookies


