Love this? Save it for later!
Share the inspiration with your friends
This was supposed to be a full-blown apple pie. I had the crust chilling, the apples sliced, and my neighbor Maria was coming over to help me test a “lighter” version of my grandmother’s recipe for our annual Friendsgiving potluck. I was already running late—the butter for the crust was still too cold, my phone kept buzzing with texts about who was bringing what, and honestly, I was starting to panic. I grabbed what I thought was a bag of whole wheat pastry flour, dumped it into the food processor with the butter, and pulsed. It wasn’t until I saw the texture—more like coarse cornmeal than flaky dough—that I realized I’d grabbed the oat flour instead. My heart sank. The crust was doomed.
I stood there for a solid minute, staring at this crumbly, oat-y mess. Maria was due in twenty minutes, and I had nothing to show but a bowl of what looked like sad, sandy breakfast cereal. In a moment of pure desperation—and maybe a little stubbornness—I dumped the whole thing into a baking dish, pressed it down with my fingers, and decided to just layer the apples on top. No crust to speak of. Just apples and this oat crumble situation. I tossed a bit more oat flour and some butter on top for good measure, slid it into the oven, and braced for failure.
When the timer went off, the smell that hit me was not failure. It was warm, spiced, and buttery—like a hug from a kitchen that forgives mistakes. The top was golden and craggy, the apples bubbling up at the edges. Maria took one bite and said, “Okay, you have to bring these instead of the pie.” And that’s how these Lighter Friendsgiving Apple Pie Bars with Oat Crumble were born—out of a wrong ingredient, a frantic afternoon, and a complete lack of plan. Honestly, I’ve never looked back. The original pie? It’s gathering dust in my recipe box. These bars? They’re the thing people ask for by name. Maybe you’ve been there—a kitchen mishap that turned into something you couldn’t have planned if you tried. That’s this recipe.
Why You’ll Love This Recipe
These apple pie bars are the kind of dessert that makes you feel good about eating dessert. They’re lighter than traditional apple pie—less butter, less sugar, and a whole lot of whole-grain oat goodness—but they don’t taste like a compromise. I’ve tested this recipe about seven times (the first few were a little dry, let me tell you), and I’ve landed on a version that’s perfectly balanced: tender, spiced apples with a crunchy, buttery oat topping that’s just sweet enough.
- Quick & Easy: Comes together in under an hour, with no rolling pins or finicky pie crusts. Perfect for when you want a showstopper without the stress.
- Simple Ingredients: You probably already have oat flour, butter, and apples in your kitchen. No weird specialty items.
- Perfect for Friendsgiving: These bars are made for sharing—easy to cut, transport, and serve. They’re the dish everyone reaches for.
- Crowd-Pleaser: I’ve brought these to potlucks, brunches, and holiday dinners. Kids love them, adults go back for seconds, and nobody believes they’re “lighter.”
- Unbelievably Delicious: The oat crumble gets this incredible crunchy-chewy texture, and the apples stay soft but not mushy. It’s comfort food that feels wholesome.
What makes these different from other apple bars? It’s the oat flour crust—it’s not really a crust at all. It’s more of a pressed crumble that bakes into a sturdy, slightly sweet base that holds everything together without being heavy. I’ve tried versions with all-purpose flour, whole wheat, and even almond flour, and nothing beats the nutty, toasty flavor of oats. Plus, by cutting back on the sugar and butter, you can actually taste the apples. It’s a dessert that lets the fruit shine, and that’s something I can get behind.
What Ingredients You Will Need
This recipe uses simple, wholesome ingredients to deliver bold apple flavor and a satisfying crumble without the fuss. Most of these are pantry staples, which makes it easy to whip up on a whim.
For the Oat Crumble Base & Topping
- Oat flour, 2 cups (240g) – I use Bob’s Red Mill oat flour, or you can make your own by blending rolled oats in a food processor until fine. It gives the bars a tender, slightly nutty flavor.
- Rolled oats, 1 cup (90g) – Not quick oats! Rolled oats add texture and that classic crumble chewiness.
- Light brown sugar, ½ cup (100g), packed – Adds a gentle molasses sweetness. You can swap coconut sugar for a less processed option.
- Ground cinnamon, 1 teaspoon – Warming and essential for apple desserts.
- Ground nutmeg, ¼ teaspoon – Just a pinch to round out the spice.
- Salt, ¼ teaspoon – Balances the sweetness.
- Unsalted butter, ½ cup (113g), cold and cut into small cubes – Cold butter is key for a crumbly texture. Use dairy-free butter if needed.
For the Apple Filling
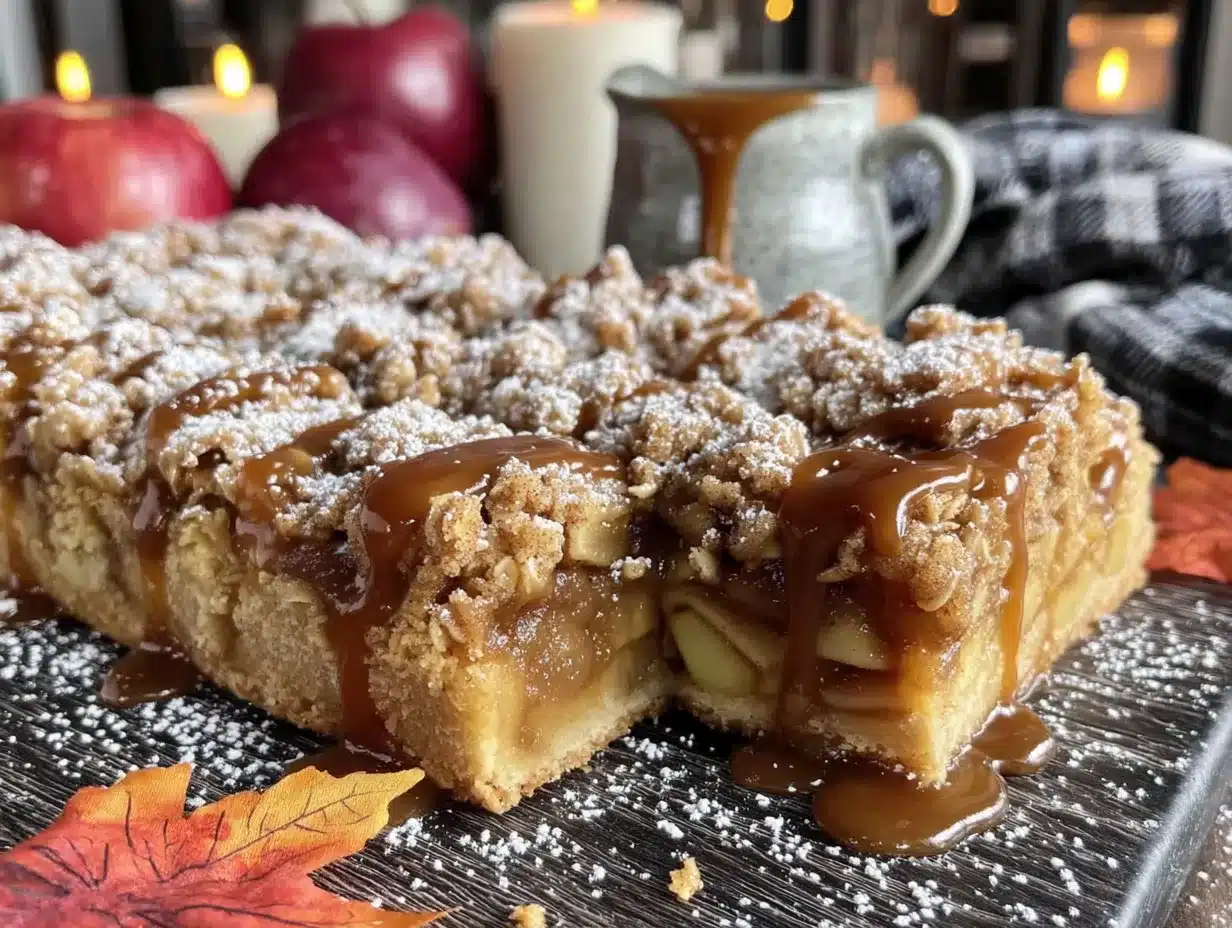
- Apples, 4 medium (about 600g) – I prefer Honeycrisp or Granny Smith. Honeycrisp adds natural sweetness, while Granny Smith gives a nice tangy contrast. Peel and slice them into ¼-inch thick pieces.
- Granulated sugar, 3 tablespoons (36g) – Less than traditional recipes, but the apples’ natural sweetness does the heavy lifting.
- Lemon juice, 1 tablespoon (15ml) – Keeps the apples from browning and brightens the flavor.
- Cornstarch, 1 tablespoon (8g) – Helps thicken the apple juices so the bars aren’t soggy.
- Ground cinnamon, ½ teaspoon – For the filling, because you can never have too much.
Equipment Needed
- 8×8-inch baking dish – A metal or glass dish works. I prefer glass so I can see when the bottom is golden.
- Mixing bowls – One large, one medium.
- Pastry cutter or two forks – For cutting butter into the oat mixture. Your hands work too, but work quickly so the butter stays cold.
- Sharp knife and cutting board – For slicing apples evenly.
- Measuring cups and spoons – Accuracy matters here, especially for the cornstarch.
- Parchment paper – Lining the dish makes lifting the bars out so much easier. Don’t skip this.
- Cooling rack – Helps the bars set properly before slicing.
Preparation Method
- Preheat your oven to 375°F (190°C). Line an 8×8-inch baking dish with parchment paper, leaving a little overhang on two sides. This will be your best friend when it’s time to lift the bars out.
- Make the oat crumble mixture. In a large bowl, whisk together the oat flour, rolled oats, brown sugar, cinnamon, nutmeg, and salt. Add the cold butter cubes. Using a pastry cutter or your fingertips, work the butter into the dry ingredients until the mixture looks like coarse sand with some pea-sized butter lumps. Don’t overwork it—those little butter pockets create flaky texture. Set aside 1 cup of this mixture for the topping.
- Press the base. Transfer the remaining oat mixture into your prepared baking dish. Press it down firmly and evenly with your fingers or the bottom of a measuring cup. Make sure it’s compact—this is what holds the bars together. Bake for 12 minutes, until lightly golden and fragrant. Let it cool slightly while you prepare the apples.
- Prepare the apple filling. In a medium bowl, toss the sliced apples with granulated sugar, lemon juice, cornstarch, and cinnamon. Make sure every slice is coated. The cornstarch might look a little dusty at first, but it will dissolve as the apples release their juices during baking.
- Layer the apples. Arrange the apple slices evenly over the pre-baked crust. Don’t pile them too high—they’ll shrink as they bake. I like to overlap them slightly in neat rows, but a rustic tumble works just fine.
- Add the topping. Sprinkle the reserved oat crumble mixture evenly over the apples. Use your fingers to create some larger clumps—those will bake into extra-crunchy bits.
- Bake. Place the dish on the middle rack and bake for 30-35 minutes, until the topping is deep golden brown and the apple juices are bubbling at the edges. If the topping is browning too quickly, tent loosely with foil for the last 10 minutes.
- Cool completely. This is the hardest part. Let the bars cool in the dish on a wire rack for at least 30 minutes. Then refrigerate for another 20 minutes to firm up. This helps the bars hold their shape when you slice them. Use the parchment overhang to lift the whole block out onto a cutting board. Slice into 9 or 16 squares, depending on how generous you’re feeling.
Cooking Tips & Techniques
I’ve made a lot of mistakes with these bars, and I’m happy to share them so you don’t have to. First, don’t skip chilling the butter. I once used room-temperature butter because I was in a hurry, and the crumble turned into a dense, greasy mess. Cold butter is non-negotiable for that light, sandy texture.
Second, slice your apples evenly. I know it’s tedious, but uneven slices mean some pieces will be mushy while others are still firm. Aim for ¼-inch thick—thin enough to soften, thick enough to hold their shape. If you’re using a mix of apple varieties, that’s totally fine. Just keep the slices uniform.
Third, let the bars cool completely. I know you want to dig in while they’re warm, and you can—just know they’ll be a little loose. For clean, bakery-style slices, patience pays off. I usually make these a day ahead and refrigerate overnight. The flavors meld together, and the texture firms up beautifully.
One more thing: if your apples are particularly juicy, you might see some liquid pooling around the edges after baking. Don’t panic—just let the bars cool, and the cornstarch will thicken it into a lovely glaze. If it’s still too runny, you can add an extra teaspoon of cornstarch next time.
Variations & Adaptations
- Gluten-Free: Use certified gluten-free oat flour and rolled oats. This recipe is naturally gluten-free as long as your oats are labeled gluten-free.
- Dairy-Free: Swap the butter for a high-quality vegan butter stick (I like Miyoko’s). Keep it cold and cut it in the same way.
- Lower Sugar: Reduce the brown sugar to ⅓ cup and the granulated sugar to 2 tablespoons. The apples will still provide plenty of sweetness, especially if you use Honeycrisp or Fuji.
- Add-Ins: Toss ½ cup of chopped walnuts or pecans into the topping for extra crunch. Or add ½ cup of dried cranberries to the apple filling for a festive twist.
- Spice It Up: Add a pinch of cardamom or ginger to the apple filling for a more complex flavor profile. I tried it with cardamom once, and it was incredible—like a chai-spiced apple bar.
- Make It a Crisp: Skip the pressed base and just layer the apples in the dish, then top with all the crumble. Bake for 25-30 minutes for a more traditional apple crisp.
Serving & Storage Suggestions
These bars are best served at room temperature or slightly warm. If you’re reheating, pop a slice in the microwave for 10-15 seconds, or in a 300°F oven for 5 minutes. The topping gets crunchy again, and the apples soften perfectly.
For a Friendsgiving spread, I love serving these with a dollop of Greek yogurt or a scoop of vanilla ice cream. A drizzle of warm caramel sauce is never a bad idea either. They pair beautifully with a cup of hot cider or a spiced chai latte.
To store, keep the bars in an airtight container in the refrigerator for up to 5 days. They actually get better after a day or two as the flavors meld. You can also freeze them for up to 3 months—wrap individual slices in plastic wrap and then foil. Thaw in the fridge overnight, then reheat as needed.
Nutritional Information & Benefits
Per serving (based on 9 servings): Approximately 280 calories, 12g fat, 42g carbohydrates, 4g fiber, 5g protein. These numbers are estimates and will vary based on your specific ingredients.
The oat flour provides a good dose of soluble fiber, which is great for heart health and keeping you full. Apples are rich in antioxidants and vitamin C, and using less sugar than a traditional pie means you’re getting more fruit and less refined sweetness. I love that these bars feel indulgent but are actually a smarter choice for a holiday dessert. They’re not “healthy” in the diet sense, but they’re a lighter, more wholesome version of a classic—and that’s exactly what I want on my Friendsgiving table.
Conclusion
These Lighter Friendsgiving Apple Pie Bars with Oat Crumble are proof that sometimes the best recipes come from happy accidents. They’re simpler than pie, more portable, and honestly, more delicious in my humble opinion. The oat crumble gives them a rustic, homey feel that’s perfect for sharing with the people you love.
I hope you make these for your next gathering—or just for a quiet Tuesday night with a cup of tea. Don’t be afraid to play with the spices or swap in different apples. That’s the beauty of a recipe like this: it’s built to adapt. And if you end up with a kitchen mishap of your own, lean into it. You never know what you might discover.
If you try these bars, I’d love to hear about it! Drop a comment below or tag me in your photos. Happy baking, and happy Friendsgiving!
Frequently Asked Questions
Can I use quick oats instead of rolled oats?
I wouldn’t recommend it. Quick oats are more finely chopped and will absorb too much moisture, making the crumble mushy rather than crunchy. Rolled oats hold their shape and give that classic texture.
Can I make these bars vegan?
Yes! Use a good vegan butter stick (not spreadable tub butter) and make sure your sugar is vegan-friendly. The rest of the recipe is naturally plant-based.
Why did my bars turn out soggy?
This usually happens if the apples are too watery or if they weren’t baked long enough. Make sure to use firm apples like Granny Smith, and don’t skip the cornstarch. Also, let the bars cool completely before slicing—they set as they cool.
Can I double this recipe?
Absolutely. Use a 9×13-inch baking dish and double all the ingredients. You may need to bake for an extra 5-10 minutes. Keep an eye on the topping and tent with foil if it browns too quickly.
How do I make my own oat flour?
Just blitz rolled oats in a food processor or blender until they form a fine powder. One cup of rolled oats yields about one cup of oat flour. Sift it if you want a super fine texture, but I usually don’t bother.
Pin This Recipe!
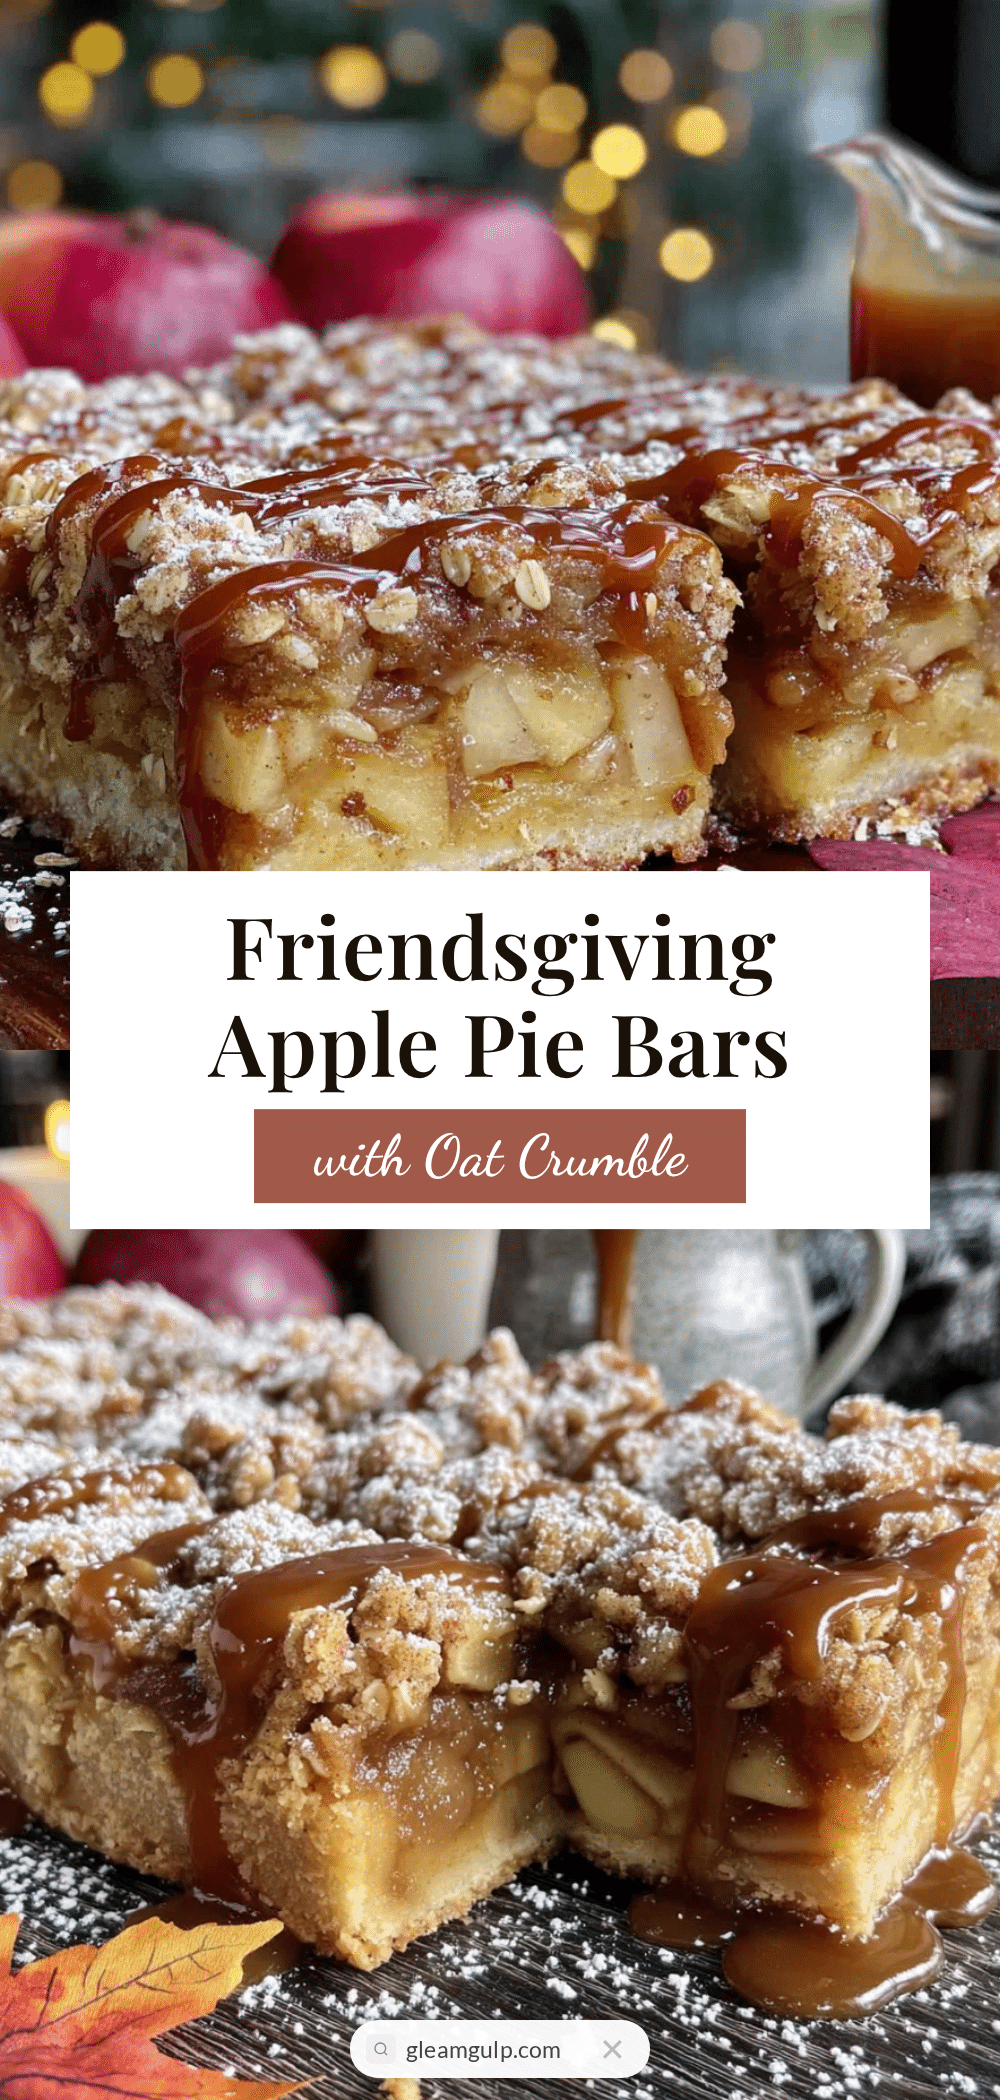
Lighter Friendsgiving Apple Pie Bars with Oat Crumble
These apple pie bars are a lighter, simpler take on traditional apple pie, featuring a tender oat crumble base and topping with spiced apple filling. Perfect for sharing at Friendsgiving or any gathering, they come together in under an hour with no rolling pins required.
- Prep Time: 15 minutes
- Cook Time: 42-47 minutes
- Total Time: 1 hour 2 minutes to 1 hour 7 minutes
- Yield: 9 servings 1x
- Category: Dessert
- Cuisine: American
Ingredients
- 2 cups (240g) oat flour
- 1 cup (90g) rolled oats
- ½ cup (100g) packed light brown sugar
- 1 teaspoon ground cinnamon
- ¼ teaspoon ground nutmeg
- ¼ teaspoon salt
- ½ cup (113g) cold unsalted butter, cut into small cubes
- 4 medium apples (about 600g), peeled and sliced ¼-inch thick (Honeycrisp or Granny Smith recommended)
- 3 tablespoons (36g) granulated sugar
- 1 tablespoon (15ml) lemon juice
- 1 tablespoon (8g) cornstarch
- ½ teaspoon ground cinnamon
Instructions
- Preheat your oven to 375°F (190°C). Line an 8×8-inch baking dish with parchment paper, leaving overhang on two sides.
- Make the oat crumble mixture: In a large bowl, whisk together oat flour, rolled oats, brown sugar, cinnamon, nutmeg, and salt. Add cold butter cubes. Using a pastry cutter or fingertips, work the butter into the dry ingredients until the mixture resembles coarse sand with some pea-sized butter lumps. Set aside 1 cup for the topping.
- Press the base: Transfer the remaining oat mixture into the prepared dish. Press down firmly and evenly. Bake for 12 minutes, until lightly golden and fragrant. Let cool slightly.
- Prepare the apple filling: In a medium bowl, toss sliced apples with granulated sugar, lemon juice, cornstarch, and cinnamon until evenly coated.
- Layer the apples: Arrange apple slices evenly over the pre-baked crust.
- Add the topping: Sprinkle the reserved oat crumble mixture evenly over the apples, creating some larger clumps with your fingers.
- Bake: Place dish on the middle rack and bake for 30-35 minutes, until topping is deep golden brown and apple juices are bubbling at the edges. If topping browns too quickly, tent loosely with foil for the last 10 minutes.
- Cool completely: Let bars cool in the dish on a wire rack for at least 30 minutes, then refrigerate for 20 minutes to firm up. Use parchment overhang to lift the block out onto a cutting board. Slice into 9 or 16 squares.
Notes
Don’t skip chilling the butter—cold butter is key for a crumbly texture. Slice apples evenly (¼-inch thick) for uniform cooking. Let bars cool completely before slicing for clean, bakery-style pieces. If apples are very juicy, let bars cool fully; cornstarch will thicken the juices into a glaze. For best results, make a day ahead and refrigerate overnight.
Nutrition
- Serving Size: 1 bar (based on 9 se
- Calories: 280
- Sugar: 24
- Sodium: 95
- Fat: 12
- Saturated Fat: 7
- Carbohydrates: 42
- Fiber: 4
- Protein: 5
Keywords: apple pie bars, oat crumble, Friendsgiving, lighter dessert, apple bars, oat flour, fall dessert


