Love this? Save it for later!
Share the inspiration with your friends
My sister claimed she hated meringue for twenty-seven years. The texture, she said. Too airy, too fragile, too much like eating sweetened nothing. Every time I brought up making them, she’d make a face like I’d suggested boiled liver for dessert. I let it go. Some battles aren’t worth fighting, you know?
Last Tuesday, I had three egg whites sitting in my fridge from a carbonara experiment gone sideways. I couldn’t stand to waste them, so I whipped up a batch of these light & ghostly 3-ingredient meringue cookies out of pure practicality. I mean, honestly, it was just the most logical thing to do. I wasn’t trying to prove a point. I wasn’t trying to convert anyone. I just let them cool on the counter and went about my afternoon.
That’s when I caught her. Hand hovering over the cookie jar, trying to be sneaky about it. She thought I was in the other room. She grabbed one, took a bite, and her eyebrows went up. Then she grabbed three more and walked away without saying a word. I didn’t say anything either. Some victories are best enjoyed quietly.
Maybe you’ve been there—staring at leftover egg whites, wondering what to do with them that isn’t a fussy French dessert. These cookies are the answer. They’re crisp, they’re sweet, they practically dissolve on your tongue. And they only need three things you probably already have in your kitchen. Let me tell you, once you make them, you’ll understand why I keep coming back to this recipe. It’s not about the simplicity—it’s about how something so minimal can feel so satisfying.
Why You’ll Love This Recipe
These light & ghostly 3-ingredient meringue cookies are honestly magic in cookie form. I’ve tested this recipe a dozen times, adjusting temperatures and mixing times until the texture was absolutely perfect. Here’s why you’re going to want these in your regular rotation:
- Quick & Easy: Comes together in about 10 minutes of active prep. The oven does most of the work while you do literally anything else.
- Simple Ingredients: Egg whites, sugar, and vanilla. That’s it. No grocery run required.
- Perfect for Clean-Out-The-Fridge Days: Have leftover egg whites from another recipe? This is the best way to use them up without any waste.
- Crowd-Pleaser: Everyone loves these—even people who claim they don’t like meringue. Trust me on this one.
- Unbelievably Delicious: The texture is what gets you. That initial crisp shell that gives way to a melt-in-your-mouth center. It’s next-level comfort in a tiny package.
What makes this version different from every other meringue recipe out there? It’s the technique. I whip the egg whites to stiff peaks with a pinch of salt first, then add the sugar gradually. This creates a more stable structure that holds up better during baking. The result is a cookie that’s crisp all the way through, not chewy or sticky in the middle.
This recipe isn’t just good—it’s the kind that makes you close your eyes after the first bite. It’s a simple pleasure reimagined. Healthier than most cookies (no butter, no oil), faster than you’d expect, but with the same soul-soothing satisfaction. Perfect for when you want something sweet without feeling weighed down.
What Ingredients You Will Need
This recipe uses just three simple ingredients to deliver that signature light, airy texture and sweet vanilla flavor. These are pantry staples you likely already have on hand.
- 3 large egg whites, at room temperature (room temperature whites whip up higher and more stable; cold egg whites take forever to foam properly)
- ¾ cup (150g) granulated white sugar (I prefer Domino or C&H for consistent results; superfine sugar dissolves even faster if you have it)
- 1 teaspoon vanilla extract (pure vanilla extract gives the best flavor, but imitation vanilla works fine too; I use Nielsen-Massey when I’m feeling fancy)
- Pinch of salt (optional but recommended—it balances the sweetness and helps stabilize the egg whites)
A few notes on ingredient selection. For the egg whites, fresh is best. Avoid using carton egg whites for this recipe—they often contain stabilizers that prevent proper whipping. If you have leftover yolks, save them for custard, lemon curd, or carbonara.
The sugar here isn’t just for sweetness. It actually helps create that crisp structure. Don’t be tempted to reduce it significantly, or your cookies won’t hold their shape. If you want to experiment, you can substitute up to half the sugar with powdered erythritol for a lower-sugar version, but the texture will be slightly different.
For the vanilla, you can swap in other extracts. Almond extract is lovely, or peppermint for holiday cookies. Just keep the total extract amount the same. You can also scrape half a vanilla bean into the whites for a more intense vanilla flavor with those beautiful little specks.
Equipment Needed
You don’t need much for these light & ghostly 3-ingredient meringue cookies. Here’s what you’ll want to have ready:
- Electric mixer (stand mixer or hand mixer both work; I’ve made these with both and honestly prefer my hand mixer for small batches—easier to scrape down the bowl)
- Large mixing bowl (glass or metal is best; plastic bowls can retain grease that prevents egg whites from whipping properly)
- Baking sheet (rimmed or unrimmed, either works)
- Parchment paper (absolutely essential—meringue sticks to everything else)
- Piping bag with star tip (optional but gives that classic meringue cookie look; you can also use a zip-top bag with the corner snipped off, or just drop spoonfuls)
- Cooling rack (for letting cookies cool completely)
If you don’t have a piping bag, don’t stress. I’ve made these plenty of times using just two spoons to drop dollops onto the baking sheet. They look a little more rustic, but they taste exactly the same. The parchment paper, though—don’t skip that. I learned that lesson the hard way when I had to soak a baking sheet for an hour to get the meringue off.
Make sure your bowl and beaters are completely clean and dry. Any trace of grease or yolk will prevent your whites from whipping. I wipe mine down with a little lemon juice or vinegar on a paper towel before starting, just to be safe.
Preparation Method
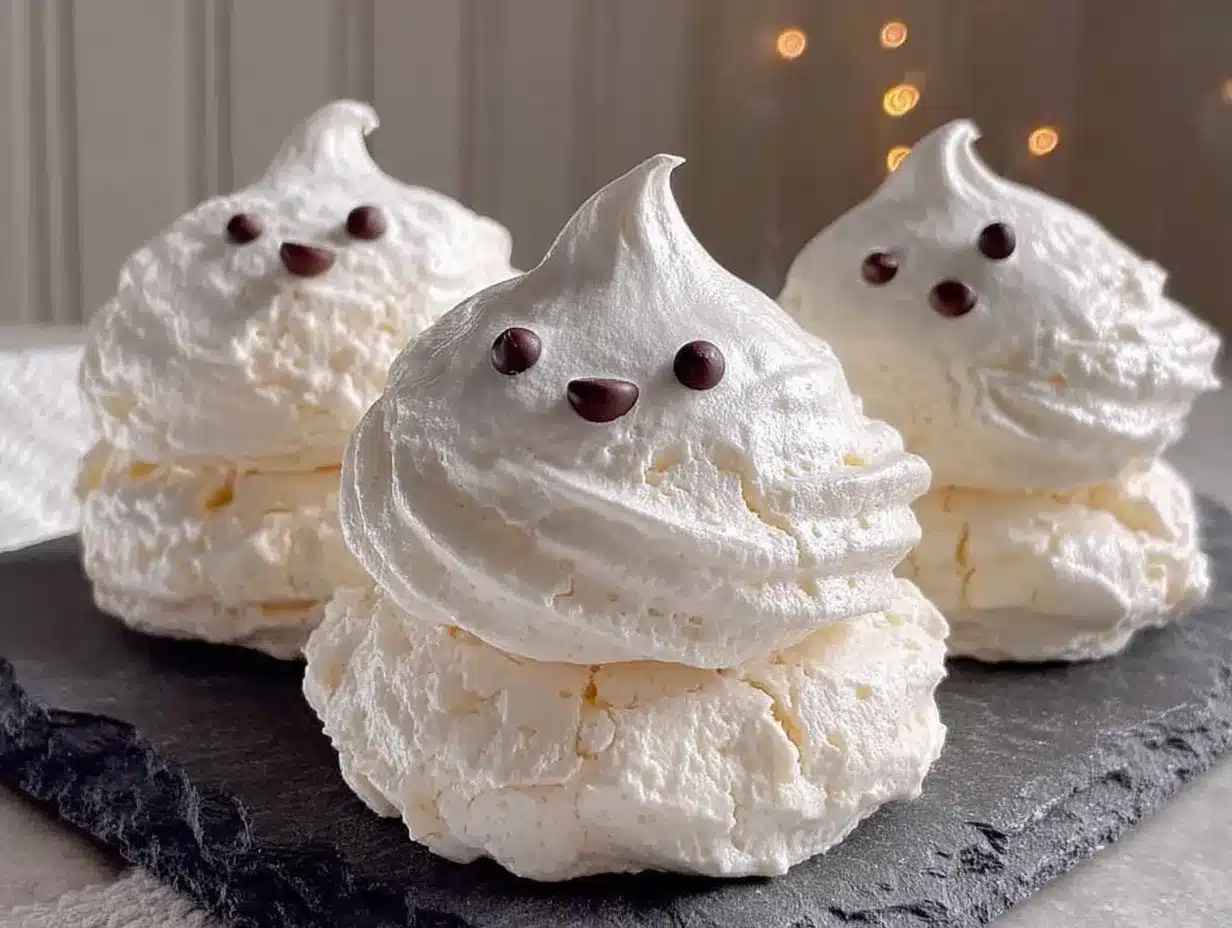
Making these light & ghostly 3-ingredient meringue cookies is straightforward, but there are a few key moments where attention to detail makes all the difference. Follow these steps, and you’ll get perfect cookies every time.
- Preheat your oven to 200°F (93°C). Yes, this is a low temperature. We’re drying the meringue, not baking it. Place a rack in the center of the oven. Line a baking sheet with parchment paper and set aside.
- Separate your eggs while cold, then let the whites come to room temperature. Cold eggs separate more cleanly because the yolks are firmer. Crack each egg carefully—any yolk in the whites will ruin your meringue. I separate each egg over a small bowl first, then transfer the white to my mixing bowl. That way, if I break a yolk, I only lose one egg instead of contaminating the whole batch. Let the whites sit on the counter for about 20 minutes. Room temperature whites whip up to triple their volume.
- Start whipping the egg whites on medium speed. After about 30 seconds, they’ll become foamy with large bubbles. Add the pinch of salt at this point. Continue whipping until soft peaks form—when you lift the beater, the peaks should droop over slightly. This usually takes 2-3 minutes.
- Begin adding the sugar, one tablespoon at a time. This is the most important step. If you dump all the sugar in at once, your meringue will deflate. Add it slowly, letting each spoonful incorporate before adding the next. With the mixer running on medium-high, sprinkle in the sugar gradually. The whole process should take about 3-4 minutes.
- Add the vanilla extract. Pour it in and continue whipping on high speed for another 2-3 minutes. You’re looking for stiff, glossy peaks. The meringue should be thick and marshmallowy. Here’s how to test: lift the beater straight up. The peak should stand straight without drooping. Rub a little meringue between your fingers—if it feels smooth and not grainy, the sugar has dissolved completely. If it feels gritty, keep whipping for another minute.
- Transfer the meringue to a piping bag. Fit your piping bag with a large star tip (I use a Wilton 1M). Fold the top of the bag over your hand to create a cuff, then fill it with the meringue. Twist the top to seal. If you’re using a zip-top bag, snip about ½ inch off one corner.
- Pipe small cookies onto the prepared baking sheet. Hold the bag straight up and down, about ½ inch above the parchment. Apply steady pressure to create a small mound, then pull straight up. You can also pipe little kisses or stars—whatever shape you like. Leave about 1 inch between cookies; they don’t spread much. If you’re doing drop cookies, use two spoons to scoop and shape the meringue.
- Bake for 60-75 minutes. The exact time depends on your oven and the size of your cookies. Small cookies (about 1 inch wide) take closer to 60 minutes. Larger ones may need 75. The cookies are done when they’re dry to the touch and easily lift off the parchment. They should be pale ivory in color, not brown at all.
- Turn off the oven and let the cookies cool inside. Leave the oven door slightly ajar (I wedge a wooden spoon in it). Let them cool completely for at least 1 hour. This helps them dry out fully and develop that perfect crisp texture.
- Remove from the oven and enjoy! The cookies should be light as air and crisp all the way through. If they’re chewy or sticky, they need more drying time. You can pop them back in a 200°F oven for another 15 minutes if needed.
Cooking Tips & Techniques
After making these light & ghostly 3-ingredient meringue cookies more times than I can count, I’ve picked up a few things worth sharing.
Humidity is your enemy. Meringue absorbs moisture from the air, which makes it sticky and prevents proper drying. If it’s a rainy or humid day, your cookies might take longer to bake and may never get perfectly crisp. I learned this the hard way during a summer thunderstorm—my cookies came out chewy and sad. Try making these on a dry day for best results.
Don’t rush the sugar addition. I know it’s tempting to just dump it all in. I’ve done it. Twice. Both times I ended up with flat, weepy meringue that never firmed up properly. Adding sugar slowly gives it time to dissolve into the egg white structure. If your meringue feels gritty after whipping, keep going—it means the sugar hasn’t fully dissolved yet.
Check your oven temperature. Ovens run hot or cold, and meringue is sensitive. I use an oven thermometer to make sure mine stays at 200°F. If your oven runs hot, the cookies will brown and get weepy. If it runs cold, they’ll take forever to dry. Worth the $8 investment.
Let them cool completely. I know you’ll want to try one immediately. Resist the urge. They continue drying as they cool, and pulling them out too early can cause them to collapse. Trust the process. They’ll be waiting for you when they’re ready.
Storage matters. Meringue cookies stay crisp in an airtight container at room temperature for up to two weeks. Don’t refrigerate them—the moisture will ruin them. If they do get soft, you can re-crisp them in a 200°F oven for 10 minutes.
Variations & Adaptations
These light & ghostly 3-ingredient meringue cookies are endlessly adaptable. Here are some of my favorite variations:
Chocolate Meringue Cookies: Sift 2 tablespoons of cocoa powder with the sugar before adding to the egg whites. The cookies will be a pale chocolate color with a rich, subtle cocoa flavor. I made these for a friend who claimed she didn’t like meringue, and she ate six in one sitting.
Peppermint Meringue Cookies: Swap the vanilla extract for ½ teaspoon peppermint extract. Add a drop of red food coloring before piping to create pink swirls. These are perfect for holiday cookie plates. Crush up a candy cane and sprinkle it on top before baking for extra crunch.
Lemon Meringue Cookies: Replace the vanilla with 1 teaspoon lemon extract and add 1 teaspoon of lemon zest. The citrus cuts through the sweetness beautifully. These taste like summer in cookie form.
Coffee Meringue Cookies: Dissolve 1 teaspoon of instant espresso powder in the vanilla extract before adding. The coffee flavor deepens the sweetness without making them taste like coffee. Great for afternoon snacking.
Vegan Meringue Cookies: Substitute the egg whites with aquafaba (the liquid from a can of chickpeas). Use 3 tablespoons of aquafaba per egg white. The texture is slightly different—a little less crisp—but surprisingly close. Whip it the same way you would egg whites. It works, I promise.
For a lower-sugar version, replace up to half the sugar with powdered erythritol or allulose. The cookies won’t be quite as crisp, but they’ll still be delicious. I’ve tested this with Swerve and was pleasantly surprised by the results.
Serving & Storage Suggestions
These light & ghostly 3-ingredient meringue cookies are best served at room temperature. They’re perfect on their own, but here are a few ways to dress them up:
Serve them alongside fresh berries and a dollop of whipped cream for an elegant dessert. The sweetness of the cookies balances the tartness of the fruit beautifully. Or crumble them over ice cream for a crunchy topping. I’ve also dipped them in melted dark chocolate and let it set—dangerously good.
For storage, keep them in an airtight container at room temperature. I use a glass jar with a tight-fitting lid. They’ll stay crisp for up to two weeks. Don’t stack them too high, or the ones on the bottom might break. If you’re giving them as gifts, pack them in a single layer with parchment paper between layers.
Do not refrigerate meringue cookies. The moisture in the fridge will make them sticky and soft. If you live in a humid climate, add a silica gel packet (the kind that comes in shoe boxes) to the container to absorb excess moisture. Yes, I’m serious. It works.
If your cookies lose their crispness over time, spread them on a baking sheet and pop them in a 200°F oven for 10 minutes. Let them cool completely before returning to the container. Good as new.
These cookies also freeze beautifully. Place them in a freezer-safe container with parchment between layers. They’ll keep for up to three months. Thaw at room temperature for about 30 minutes before serving. The texture stays surprisingly crisp.
Nutritional Information & Benefits
Per cookie (based on 36 cookies per batch): approximately 20 calories, 0g fat, 5g carbohydrates, 0g fiber, 5g sugar, 0.5g protein. These numbers are estimates and will vary based on exact ingredient brands and cookie size.
These light & ghostly 3-ingredient meringue cookies are naturally fat-free and have no cholesterol (since we only use the whites). They’re also gluten-free, dairy-free, and nut-free, making them a safe option for many dietary restrictions.
The main ingredient here is sugar, so they’re not exactly health food. But compared to traditional cookies that use butter, oil, and flour, these are significantly lighter in calories and fat. They’re a great option when you want something sweet without the heaviness of a typical dessert.
Egg whites are a good source of protein and contain no fat. They’re also rich in selenium, riboflavin, and potassium. If you use pure vanilla extract, you get trace amounts of antioxidants from the vanilla bean.
For those watching their sugar intake, consider the lower-sugar variation I mentioned earlier. You can also make these smaller—mini meringues that are just one or two bites—to help with portion control. Sometimes it’s about the experience of having something sweet, not the quantity.
Conclusion
These light & ghostly 3-ingredient meringue cookies are proof that you don’t need a complicated recipe to create something truly special. Three ingredients. Ten minutes of prep. An hour of hands-off baking. And you end up with cookies that are crisp, sweet, and utterly delightful.
I love how forgiving this recipe is once you know the basic technique. You can flavor them however you like, shape them however you want, and they always come out beautiful. They’re the kind of cookies that make you look like you spent hours in the kitchen when really, you were just using up leftover egg whites.
Try them plain first. Then experiment with the variations. Add chocolate, peppermint, or lemon. Make them for holiday parties or just because it’s Tuesday. They’re always worth it.
I’d love to hear how yours turn out. Did you try a variation? Did you manage to keep someone from eating them all before they cooled? Drop a comment below and let me know. And if you have a favorite flavor combination I haven’t tried, share that too. I’m always looking for new ideas.
Happy baking, friend. You’ve got this.
Frequently Asked Questions
Can I use carton egg whites for meringue cookies?
I don’t recommend it. Carton egg whites often contain stabilizers that prevent them from whipping to stiff peaks. Fresh egg whites from whole eggs give you the best volume and texture. If you must use carton, look for one without added stabilizers and let it come to room temperature first.
Why are my meringue cookies chewy instead of crisp?
They likely haven’t dried out enough. Either your oven temperature was too high (which causes the inside to stay moist) or you didn’t bake them long enough. Try baking at a slightly lower temperature for longer. You can also leave them in the turned-off oven with the door open to continue drying.
Can I make these without a piping bag?
Absolutely. Use two spoons to drop dollops of meringue onto the parchment paper. They’ll look more rustic, but they taste exactly the same. You can also use a zip-top bag with a corner snipped off. No special equipment required.
How do I know when the egg whites are whipped enough?
Lift the beater straight up. The meringue should form a stiff peak that stands straight without drooping. The mixture should look glossy and smooth, not grainy. Rub a little between your fingers—if it feels smooth, you’re good. If it’s gritty, keep whipping until the sugar dissolves.
Can I double this recipe?
Yes, but you’ll need to whip the egg whites longer to incorporate all the sugar. Use a stand mixer if doubling, as hand mixers can struggle with larger volumes. Make sure your bowl is big enough—meringue expands significantly. You may also need to bake in batches or use two baking sheets.
Pin This Recipe!
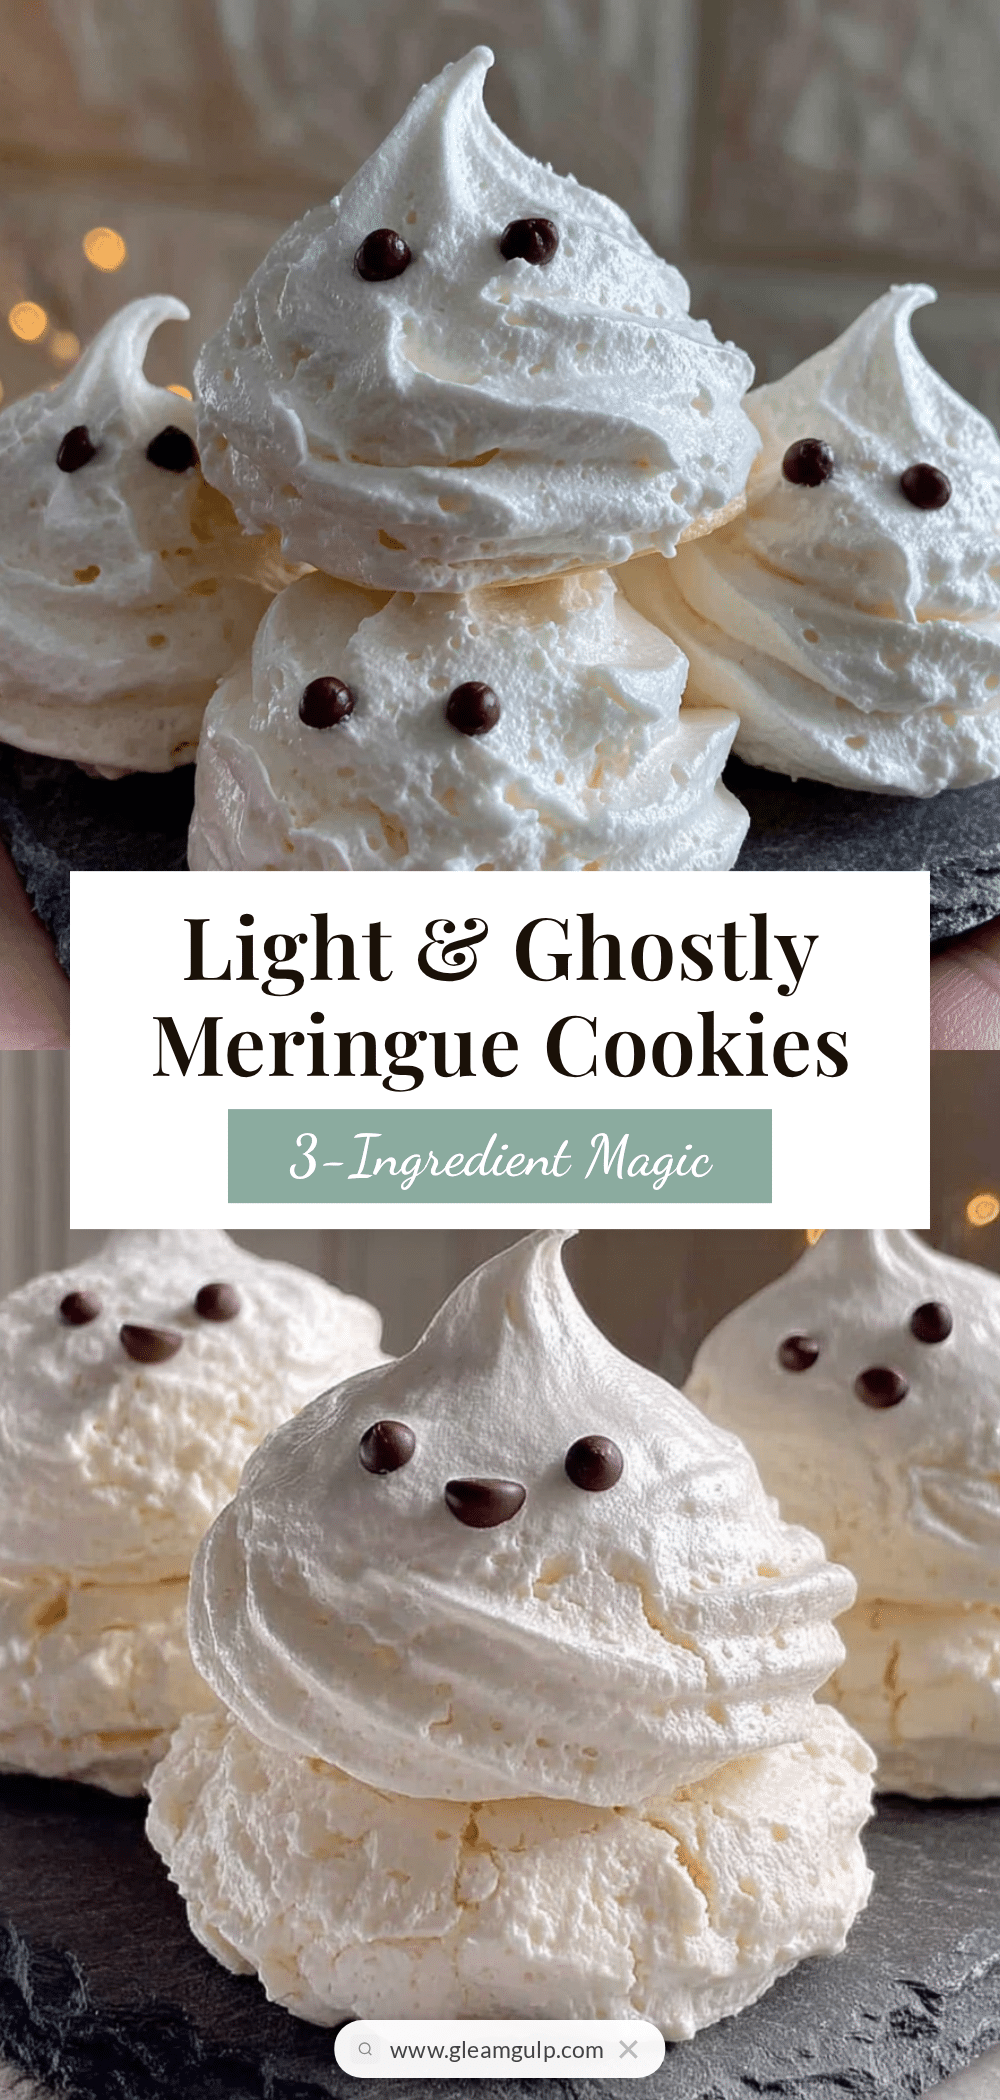
Light & Ghostly 3-Ingredient Meringue Cookies
Crisp, sweet, and melt-in-your-mouth meringue cookies made with just egg whites, sugar, and vanilla. An easy, foolproof recipe that turns leftover egg whites into a delightful treat.
- Prep Time: 10 minutes
- Cook Time: 60-75 minutes
- Total Time: 1 hour 10 minutes to 1 hour 25 minutes
- Yield: 36 cookies 1x
- Category: Dessert
- Cuisine: American
Ingredients
- 3 large egg whites, at room temperature
- ¾ cup (150g) granulated white sugar
- 1 teaspoon vanilla extract
- Pinch of salt (optional)
Instructions
- Preheat your oven to 200°F (93°C). Place a rack in the center of the oven. Line a baking sheet with parchment paper and set aside.
- Separate your eggs while cold, then let the whites come to room temperature (about 20 minutes).
- Start whipping the egg whites on medium speed. After about 30 seconds, they’ll become foamy. Add the pinch of salt. Continue whipping until soft peaks form (2-3 minutes).
- Begin adding the sugar, one tablespoon at a time, with the mixer running on medium-high. Sprinkle in the sugar gradually over 3-4 minutes.
- Add the vanilla extract and continue whipping on high speed for another 2-3 minutes until stiff, glossy peaks form. The meringue should be thick and marshmallowy.
- Transfer the meringue to a piping bag fitted with a large star tip (or use a zip-top bag with a corner snipped off).
- Pipe small cookies onto the prepared baking sheet, leaving about 1 inch between them.
- Bake for 60-75 minutes, until the cookies are dry to the touch and easily lift off the parchment.
- Turn off the oven and let the cookies cool inside with the door slightly ajar for at least 1 hour.
- Remove from the oven and enjoy! If chewy or sticky, return to a 200°F oven for another 15 minutes.
Notes
Humidity is your enemy; make on a dry day for best results. Don’t rush the sugar addition. Check oven temperature with an oven thermometer. Let cookies cool completely before removing from oven. Store in an airtight container at room temperature for up to two weeks. Do not refrigerate. If cookies lose crispness, re-crisp in a 200°F oven for 10 minutes.
Nutrition
- Serving Size: 1 cookie
- Calories: 20
- Sugar: 5
- Sodium: 5
- Carbohydrates: 5
- Protein: 0.5
Keywords: meringue cookies, 3-ingredient cookies, egg white cookies, light cookies, ghostly cookies, easy meringue, vanilla meringue


