Love this? Save it for later!
Share the inspiration with your friends
My neighbor, Mrs. Gable, wasn’t trying to impress anyone. I’d stopped by to borrow a lug wrench—my car had made a terrible noise on the way home from the grocery store—and the smell hit me before I even got to her screen door. It was deep, warm, and slightly sharp, like a kitchen had decided to hug itself. She was standing at the stove, stirring a pot that looked like it had been through a few decades of service, and she barely looked up. “Sit down,” she said, pointing her wooden spoon at a kitchen chair. “You look tired.”
I sat. She kept stirring. The steam curled up and filled the whole room with this rich, almost wine-like scent, and I could see dark purple bubbles breaking the surface. She didn’t explain what she was making until she’d poured it through a strainer into a mason jar. “Elderberries,” she said, like it was nothing. “With cloves. Keeps the grandkids out of the doctor’s office.” She handed me a warm mug of the syrup mixed with water, and honestly, I wasn’t expecting much. But that first sip was something else—sweet, but not cloying, with a little bite from the cloves that lingered on my tongue. I watched her label the jar with a piece of masking tape and a ballpoint pen, and I knew right then I’d be making this myself.
Maybe you’ve been there—standing in someone’s kitchen, watching them do something that seems so simple, yet you know there’s years of knowing behind it. That’s how this homemade elderberry immune syrup felt. It wasn’t fancy. It wasn’t complicated. It was just good sense in a jar, and I’ve been making it ever since. Every time I stir the pot, I think of Mrs. Gable’s cracked linoleum floor and the way she shrugged when I asked for the recipe. “It’s just berries and patience,” she said. She was right.
Why You’ll Love This Recipe
Let me tell you—this homemade elderberry immune syrup with cloves has become a staple in my kitchen, and I think it’ll become one in yours too. I’ve tested this recipe more times than I can count, tweaking the clove ratio and the simmering time until it felt just right. It’s the kind of thing you make once and then realize you can’t imagine cold season without it.
- Quick & Easy: This syrup comes together in about 45 minutes, most of which is hands-off simmering. Perfect for a Sunday afternoon when you want to feel productive without actually working hard.
- Simple Ingredients: You need dried elderberries, whole cloves, ginger, cinnamon, raw honey, and water. That’s it. No weird extracts or trips to a specialty store.
- Perfect for Cold Season: Whether you’re trying to stay healthy or you’re already feeling rough, this syrup is a gentle, natural way to support your immune system.
- Family-Approved: My kids actually ask for this. The cloves give it a warm, almost chai-like flavor that makes it feel like a treat, not a medicine.
- Unbelievably Delicious: I know immune syrups can taste terrible. This one doesn’t. The honey balances the tart elderberries, and the cloves add this cozy depth that makes you want to take it by the spoonful.
What makes this recipe different? It’s the cloves. Most elderberry syrups rely on cinnamon and ginger alone, but adding whole cloves brings a subtle warmth and a natural antimicrobial boost that takes this syrup to another level. It’s not just another version—it’s my best version, tested and tweaked until the flavors sang together. Trust me, once you taste it, you’ll understand why I keep a jar in my fridge year-round.
What Ingredients You Will Need
This recipe uses simple, wholesome ingredients that work together to create a syrup that’s both delicious and supportive for your immune system. Most of these are pantry staples or easy to find at any grocery store.
- Dried elderberries: 1 cup (about 140g). Look for deep purple-black berries with a tart, earthy smell. I recommend Mountain Rose Herbs or Starwest Botanicals for consistent quality. Fresh or frozen elderberries can be used, but they require different water ratios and longer simmering.
- Whole cloves: 1 tablespoon (about 6g). Don’t use ground cloves—they’ll make the syrup gritty and overpowering. Whole cloves infuse gently and are easy to strain out.
- Fresh ginger: 2 inches, sliced into thin coins (about 20g). No need to peel it—just wash it well. The ginger adds warmth and helps with digestion.
- Cinnamon sticks: 2 sticks (about 8g total). Cassia cinnamon has a stronger flavor, but Ceylon works beautifully too.
- Raw honey: 1 cup (340g). Use local raw honey if you can—it adds its own immune benefits and a floral sweetness that processed honey just can’t match. For a vegan option, substitute with maple syrup or agave.
- Filtered water: 4 cups (960ml). Tap water with chlorine can affect the taste, so filtered or spring water is best.
- Optional: 1 teaspoon orange zest (adds brightness and vitamin C) or 1 star anise pod (for a licorice note that pairs beautifully with cloves).
When choosing elderberries, look for berries that are mostly whole, not crushed into powder. Whole berries release their goodness slowly and strain cleanly. If you find your syrup is too thin after the first batch, don’t worry—you can simmer it a little longer next time to reduce it more. Every batch is a learning experience, and honestly, that’s part of the fun.
Equipment Needed
You don’t need fancy equipment for this recipe, which is one of the reasons I love it. Here’s what you’ll need:
- Medium saucepan: A 3-quart pot works perfectly. Stainless steel or enameled is ideal—avoid aluminum, which can react with the berries.
- Fine-mesh strainer: A standard mesh strainer works, but a nut milk bag or cheesecloth gives you a clearer syrup. I’ve used both, and honestly, the strainer is easier to clean.
- Glass jars: Two 8-ounce mason jars work well. Make sure they’re sterilized—run them through the dishwasher or boil them for 10 minutes.
- Wooden spoon: For stirring. Metal can scratch your pot, and plastic might melt if it touches the side.
- Measuring cups and spoons: A liquid measuring cup for the water and dry measuring cups for the berries.
- Funnel: Optional, but it makes pouring into jars much less messy. I learned this the hard way after cleaning elderberry stains off my counter for the third time.
If you don’t have a fine-mesh strainer, you can use a colander lined with a clean kitchen towel or paper towels. It works, though it’s a little slower. And if you’re making this regularly, invest in a good strainer—it’s worth every penny.
Preparation Method
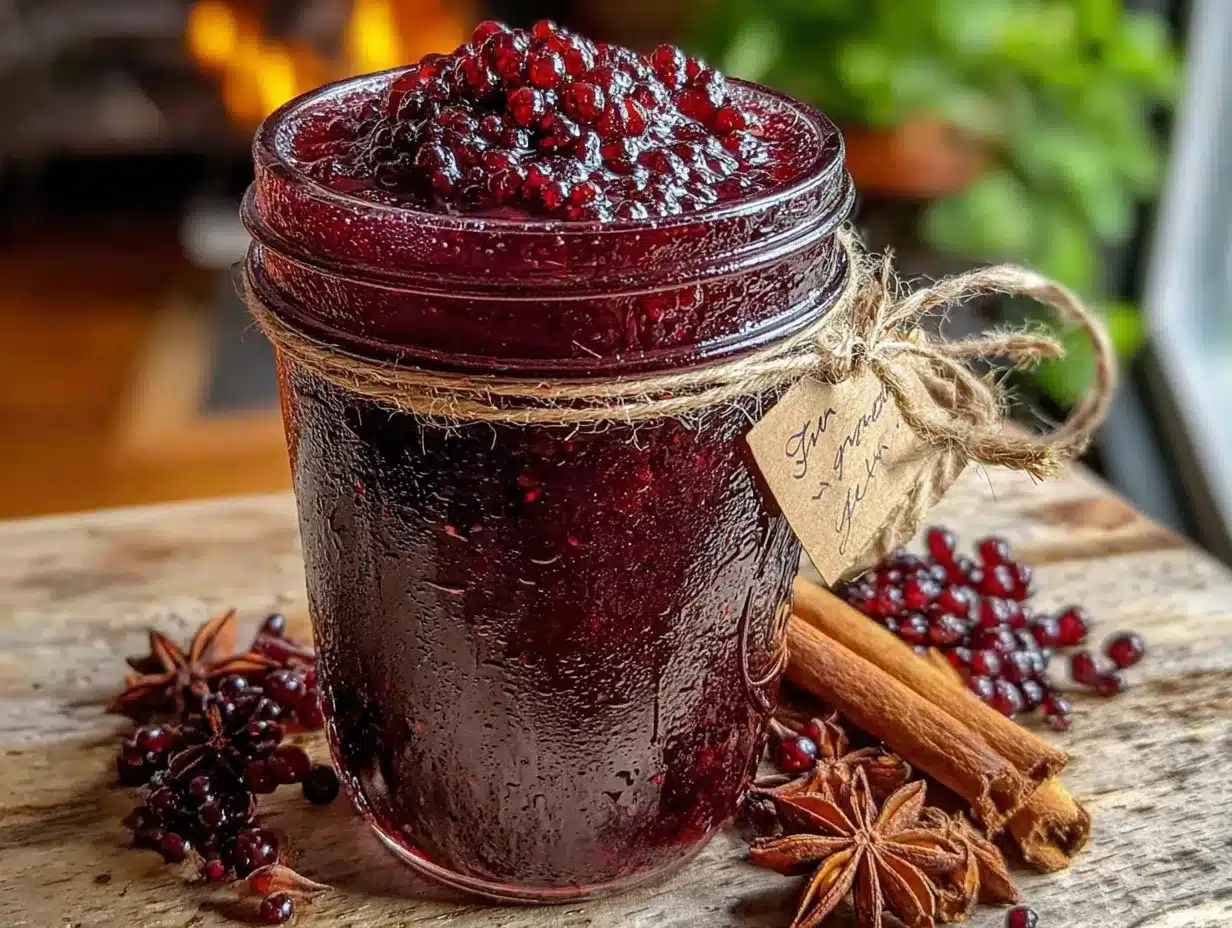
- Combine the ingredients: In your medium saucepan, add the dried elderberries, whole cloves, sliced ginger, cinnamon sticks, and filtered water. Give it a quick stir with your wooden spoon. The water will look dark and inky almost immediately—that’s normal.
- Bring to a boil: Set the pot over medium-high heat and bring the mixture to a gentle boil. You’ll see small bubbles breaking the surface, and the smell will start to fill your kitchen. This takes about 8-10 minutes. Don’t walk away—watch for it to boil so you can reduce the heat right away.
- Simmer gently: Once it’s boiling, reduce the heat to low and let it simmer, uncovered, for 30-35 minutes. The liquid should be barely bubbling, like a quiet conversation. Stir occasionally and press the berries against the side of the pot with your spoon to release their goodness. You’ll notice the liquid getting thicker and darker as it reduces.
- Check the consistency: After 30 minutes, the liquid should have reduced by about half. It should look like a dark, rich tea and taste slightly tart and spicy. If it’s still very thin, let it simmer another 5-10 minutes. I usually aim for a consistency that coats the back of a spoon lightly.
- Strain the mixture: Place your fine-mesh strainer over a large bowl or a heatproof measuring cup. Carefully pour the hot mixture through the strainer. Use the back of a spoon to press the berries and ginger gently to extract every last drop of liquid. Don’t rush this step—you want all that goodness.
- Let it cool slightly: Let the strained liquid cool for about 15-20 minutes. It should be warm but not hot—around 110°F (43°C). This is important because raw honey loses its beneficial enzymes if you add it to liquid that’s too hot. I’ve made this mistake before, and it still tasted good, but I felt like I’d wasted the honey’s benefits.
- Add the honey: Once the liquid has cooled, stir in the raw honey until it’s fully dissolved. The mixture will become glossy and slightly thicker. Taste it here and adjust if needed—if you want it sweeter, add a little more honey. If you want more spice, you can steep a few extra cloves in the warm syrup for 10 minutes and strain again.
- Bottle and store: Using your funnel, pour the syrup into the sterilized glass jars. Leave about 1/2 inch of headspace at the top. Seal tightly and let the jars cool to room temperature before refrigerating. The syrup will thicken slightly as it cools.
Sensory cues to watch for: At the simmering stage, the liquid should smell deeply fruity with a clear spicy note from the cloves. When you press the berries, they should feel soft and almost mushy. The finished syrup should have the consistency of warm maple syrup—not watery, but not thick like honey either.
Cooking Tips & Techniques
I’ve made this homemade elderberry immune syrup with cloves more times than I can count, and I’ve learned a few things the hard way. Here’s what I wish someone had told me the first time.
Don’t boil the berries too hard. I made this mistake on my second batch—I got distracted and let it boil vigorously for too long. The syrup turned out bitter and slightly astringent. Gentle simmering is key. The berries release their flavor slowly, and high heat can break down the compounds that make them so beneficial.
Temperature check for honey. This is the most common mistake I see. If you add raw honey to liquid that’s above 120°F (49°C), you destroy the beneficial enzymes and probiotics that make raw honey special. I use a kitchen thermometer now, but you can also just dip your finger in—it should feel warm, not hot. If it’s too hot for your finger, it’s too hot for the honey.
Press, don’t squeeze. When straining, use the back of a spoon to press the berries gently. Don’t squeeze them hard through cheesecloth—this can push bitter compounds into the syrup. I learned this after a batch that tasted like I’d added aspirin. Gentle pressure gives you all the good stuff without the bitterness.
Timing strategy: I like to start my syrup right after breakfast on a weekend morning. It simmers while I clean up the kitchen, and by the time I’ve had my second cup of coffee, it’s ready to strain. The whole process takes about 45 minutes, but only 10 minutes of that is active work.
Consistency tip: If your syrup turns out too thin, don’t panic. You can pour it back into the pot, add a little more water, and simmer it again with a few extra berries. If it’s too thick, add a tablespoon of warm water at a time until it reaches the consistency you like. Every batch is a little different, and that’s okay.
Variations & Adaptations
One of the things I love about this homemade elderberry immune syrup with cloves is how flexible it is. Here are some variations I’ve tried and loved.
Spiced Chai Version: Add 2 star anise pods and 4 cardamom pods (lightly crushed) along with the other spices. The result is a syrup that tastes like chai tea and is absolutely delicious stirred into warm oat milk. I made this version during the holidays and it was gone in a week.
Citrus Boost: Add the zest of one orange and one lemon during the last 10 minutes of simmering. The citrus brightens the flavor and adds extra vitamin C. I do this when I feel like I’m coming down with something. Just remember to strain the zest out well—it can be bitter if you leave it in too long.
Low-Sugar Option: If you’re watching your sugar intake, you can reduce the honey to 1/2 cup and add a few drops of stevia or monk fruit sweetener to taste. The syrup won’t be as thick, but it will still have all the immune benefits. I’ve made this for a friend with diabetes, and she loved it.
Dried Fruit Addition: Add 1/4 cup dried rose hips or hibiscus flowers along with the elderberries. Rose hips add more vitamin C, and hibiscus gives a beautiful tartness and a deep red color. This version feels almost like a fancy herbal tea in syrup form.
Alcohol-Based Tincture: If you want a shelf-stable version, you can skip the honey and replace the water with vodka or brandy. Combine the berries and spices with the alcohol in a jar, let it steep for 4-6 weeks, then strain. This is a completely different product—more medicinal, less sweet—but it lasts for years.
Serving & Storage Suggestions
This syrup is incredibly versatile. Here’s how I use it and store it.
Daily maintenance: Take 1 tablespoon daily during cold season, either straight or stirred into a cup of warm water or tea. I take mine in the morning with breakfast, and it feels like a little ritual that sets me up for the day.
At the first sign of illness: Increase to 1 tablespoon every 3-4 hours. I mix it with hot water, a squeeze of lemon, and an extra pinch of cinnamon. It’s soothing for sore throats and feels like a warm hug from the inside.
In beverages: Stir it into sparkling water for a homemade elderberry soda, or add it to smoothies for an immune boost. My kids love it drizzled over vanilla ice cream—honestly, it’s delicious that way.
Storage: Keep the syrup in a sealed glass jar in the refrigerator. It will last for 2-3 months. If you see any mold or off smells, discard it immediately. I’ve never had this happen, but it’s always good to be careful with homemade preserves.
Freezing: You can freeze the syrup in ice cube trays for individual portions. Once frozen, pop the cubes into a freezer bag. They’ll keep for up to 6 months. Just thaw a cube in the fridge overnight or drop it into hot water for an instant immune drink.
Flavor development: The flavors actually deepen and meld after a few days in the fridge. The cloves become less sharp, and the honey and berries settle into a harmonious sweetness. I always think the syrup tastes better on day three than it does on day one.
Nutritional Information & Benefits
This homemade elderberry immune syrup with cloves isn’t just delicious—it’s packed with goodness that supports your body naturally.
Estimated nutritional values per tablespoon (15ml):
- Calories: 35-40
- Carbohydrates: 10g (mostly from honey)
- Sugar: 9g (natural sugars from honey and berries)
- Vitamin C: 2-3mg (from elderberries and optional citrus zest)
- Antioxidants: High (elderberries are among the most antioxidant-rich berries)
Health benefits: Elderberries are rich in flavonoids, particularly anthocyanins, which support immune function and help reduce inflammation. Cloves contain eugenol, a compound with antimicrobial properties that can help fight off infections. Ginger supports digestion and has its own anti-inflammatory effects. Raw honey provides enzymes, probiotics, and soothing properties for sore throats.
Dietary considerations: This recipe is naturally gluten-free, dairy-free, and nut-free. For a vegan version, substitute the honey with maple syrup or agave nectar. If you’re diabetic or watching your sugar intake, use the low-sugar variation mentioned above.
Potential allergens: Some people with pollen allergies may react to raw honey or elderberries. If you have known allergies, introduce this syrup in small amounts first. As always, consult with your healthcare provider before using any herbal remedy, especially if you’re pregnant, nursing, or on medication.
Conclusion
This homemade elderberry immune syrup with cloves has become one of those recipes I just can’t imagine my kitchen without. Every time I make it, I’m reminded of Mrs. Gable’s nonchalant confidence and the way she stirred that pot like she was making something completely ordinary—when really, she was making something extraordinary.
I hope you give this recipe a try and make it your own. Maybe you’ll add extra ginger, or skip the cloves entirely, or stir it into your morning tea instead of taking it by the spoonful. That’s the beauty of a simple recipe—it leaves room for you to find what works. And honestly, that’s what cooking should be about: finding what works for you and the people you love.
I’d love to hear how your syrup turns out. Did you try any variations? Did your kids actually ask for more? Drop a comment below and let me know—I read every single one, and your stories are what keep me stirring the pot. Until next time, stay warm, stay healthy, and keep a jar of this syrup in your fridge. You never know when you’ll need it.
Frequently Asked Questions
Can I use fresh elderberries instead of dried?
Yes, you can use fresh elderberries, but you’ll need to adjust the water ratio. Use 2 cups of fresh berries for every 1 cup of dried, and reduce the water to 3 cups since fresh berries contain more moisture. Simmer for an additional 10-15 minutes to account for the extra liquid. Just make sure you never eat raw elderberries—they must be cooked to be safe.
How long does this syrup last in the fridge?
Properly stored in a sealed glass jar in the refrigerator, this syrup will last for 2-3 months. The honey acts as a natural preservative. If you see any mold, cloudiness, or off smells, discard it immediately. I always label my jars with the date I made them so I can keep track.
Can I give this syrup to children?
Yes, but in smaller doses. For children over 1 year old, give 1/2 to 1 teaspoon daily for maintenance, and up to 1 teaspoon every 3-4 hours if they’re feeling under the weather. Do not give raw honey to children under 1 year old due to the risk of botulism. For infants, substitute with maple syrup or simply omit the sweetener.
Can I make this syrup without honey?
Absolutely. You can omit the honey entirely and use the elderberry decoction as a tea base or a concentrate to add to other drinks. It will be tart and spicy, but still delicious. Alternatively, you can use maple syrup, agave nectar, or coconut sugar as a sweetener. Just add the sweetener after the liquid has cooled slightly, just like with honey.
Why did my syrup turn out bitter?
Bitterness usually comes from one of two things: boiling the berries too vigorously or pressing them too hard when straining. Next time, keep the heat low and gentle during simmering, and press the berries lightly with the back of a spoon instead of squeezing them through cheesecloth. If your syrup is already bitter, you can try adding a little extra honey to balance the flavor.
Pin This Recipe!
Homemade Elderberry Immune Syrup: Easy Clove Recipe
This homemade elderberry immune syrup with cloves is a quick and easy recipe that combines dried elderberries, whole cloves, ginger, cinnamon, and raw honey to create a delicious, immune-supporting syrup perfect for cold season.
- Prep Time: 10 minutes
- Cook Time: 35 minutes
- Total Time: 45 minutes
- Yield: 2 cups (16 servings of 1 tablespoon each) 1x
- Category: Condiment
- Cuisine: American
Ingredients
- 1 cup (about 140g) dried elderberries
- 1 tablespoon (about 6g) whole cloves
- 2 inches fresh ginger, sliced into thin coins (about 20g)
- 2 cinnamon sticks (about 8g total)
- 1 cup (340g) raw honey
- 4 cups (960ml) filtered water
- 1 teaspoon orange zest (optional)
- 1 star anise pod (optional)
Instructions
- Combine the ingredients: In a medium saucepan, add the dried elderberries, whole cloves, sliced ginger, cinnamon sticks, and filtered water. Stir with a wooden spoon.
- Bring to a boil: Set the pot over medium-high heat and bring the mixture to a gentle boil, about 8-10 minutes.
- Simmer gently: Reduce heat to low and let it simmer, uncovered, for 30-35 minutes, stirring occasionally and pressing berries against the side of the pot.
- Check the consistency: After 30 minutes, the liquid should have reduced by about half and coat the back of a spoon lightly. If too thin, simmer another 5-10 minutes.
- Strain the mixture: Place a fine-mesh strainer over a large bowl or heatproof measuring cup. Pour the hot mixture through the strainer, pressing berries gently with the back of a spoon.
- Let it cool slightly: Let the strained liquid cool for 15-20 minutes until warm but not hot (around 110°F or 43°C).
- Add the honey: Stir in the raw honey until fully dissolved. Taste and adjust sweetness if needed.
- Bottle and store: Pour the syrup into sterilized glass jars using a funnel, leaving 1/2 inch headspace. Seal tightly and let cool to room temperature before refrigerating.
Notes
Don’t boil the berries too hard to avoid bitterness. Add honey only when liquid is below 120°F to preserve enzymes. Press berries gently when straining to avoid bitter compounds. The syrup thickens slightly as it cools. Flavors deepen after a few days in the fridge.
Nutrition
- Serving Size: 1 tablespoon (15ml)
- Calories: 3540
- Sugar: 9
- Carbohydrates: 10
Keywords: elderberry syrup, immune syrup, homemade syrup, elderberry recipe, clove recipe, cold season remedy, natural immune support


