Love this? Save it for later!
Share the inspiration with your friends
“You ever notice how some grilled food just hits that perfect spot, while other times it’s a bit off?” That’s exactly what happened one Saturday at my friend Jamie’s backyard BBQ. I was chatting with him while flipping burgers, and he casually mentioned how he swears by switching between direct and indirect heat grilling, depending on what he’s cooking. Honestly, I’d heard these terms before but never really paid much attention—just tossed everything over the flames and hoped for the best.
That day, Jamie pulled out a whole chicken and set it on the cooler side of the grill, explaining it was indirect heat. I watched as he managed the fire, adjusting coals and vents like a pro. The result? Juicy, perfectly cooked chicken with crispy skin that tasted like a smoky dream. Meanwhile, the burgers were sizzling right over the flames with that classic charred crust. It was like watching a grilling maestro at work, and I couldn’t help but be intrigued.
Maybe you’ve been there too, standing in front of the grill wondering why your steaks or ribs don’t turn out quite right. Well, this Essential Direct vs Indirect Heat Grilling Guide for Perfect BBQ is exactly what you need. I mean, understanding when to sear your meat and when to let it cook slowly off the heat can change your backyard game forever. I’ll walk you through everything you need to know—trust me, once you get this down, you’ll wonder how you ever grilled without it.
Why You’ll Love This Recipe
After countless weekends of trial and error, I can confidently say mastering direct and indirect heat grilling has been a game changer for my BBQ skills. Here’s why this guide will become your grilling bible:
- Quick & Easy: Learn the basics quickly so you can get grilling without fussing over complicated techniques.
- Simple Ingredients: No need for exotic tools or ingredients—just your trusty grill and some charcoal or gas.
- Perfect for Any Occasion: Whether it’s a casual weeknight dinner or a big summer cookout, this guide fits all scenarios.
- Crowd-Pleaser: Impress friends and family with perfectly cooked meats and veggies every time.
- Unbelievably Delicious: Achieve that mouthwatering crust and tender inside without guesswork.
What sets this guide apart is the clear explanation of when and why to use each heat method. For example, Jamie’s trick of using indirect heat for thicker cuts means you avoid the dreaded burnt outside and raw inside scenario. Plus, you’ll get insider tips that I picked up from grilling pros and backyard enthusiasts alike. Honestly, once you start applying these techniques, your BBQ sessions will feel more like a relaxed ritual than a stressful chore. And if you’re looking to pair your perfectly grilled dishes, I recommend trying my smoky mac and cheese—it’s a match made in backyard heaven!
What Ingredients You Will Need
This guide focuses on the essential ingredients you’ll grill using direct and indirect heat methods. The key here is choosing quality proteins and veggies that respond well to these heat styles. Most of these ingredients are pantry staples or easy to find at your local market.
- For Direct Heat Grilling:
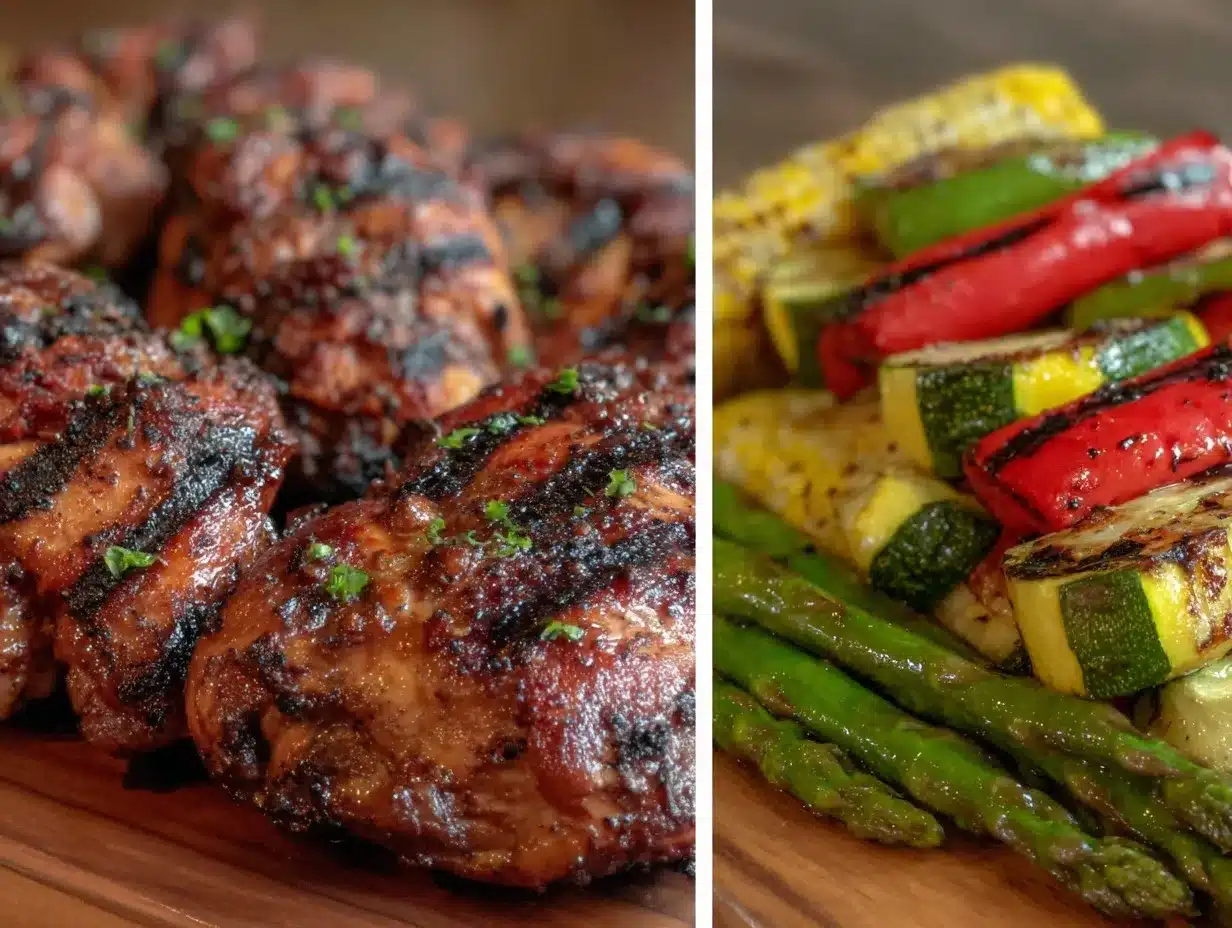
- Steak cuts like ribeye or sirloin (1 to 1.5 inches thick)
- Boneless chicken breasts or thighs (trimmed of excess fat)
- Vegetables like bell peppers, zucchini, mushrooms (sliced or whole small pieces)
- Shrimp or scallops (skewered for easy flipping)
- For Indirect Heat Grilling:
- Whole chicken or spatchcocked chicken
- Pork ribs or larger bone-in cuts (e.g., pork shoulder)
- Larger vegetables like whole potatoes or corn on the cob (wrapped in foil)
- Thicker fish fillets like salmon or swordfish steaks
- Additional Essentials:
- Charcoal briquettes or lump charcoal (I prefer lump charcoal for a cleaner burn)
- Wood chips for smoking (optional, hickory or applewood are great choices)
- High smoke point oil (like avocado or grapeseed oil) for brushing
- Dry rub spices or marinades depending on your flavor preference
When selecting your proteins, look for well-marbled meats for direct grilling so they stay juicy. For indirect heat, tougher cuts are ideal as the slower cooking breaks down connective tissue beautifully. If you’re feeling adventurous, try swapping pork ribs with beef ribs for a different twist. And if you need a vegetarian option, grilling portobello mushrooms using indirect heat works wonders for a smoky, meaty texture. For inspiration on grilling veggies, my grilled garlic asparagus recipe pairs perfectly with these techniques.
Equipment Needed
Getting the right tools makes a huge difference in mastering direct vs indirect heat grilling. Here’s what you’ll want handy:
- Grill: A charcoal or gas grill with adjustable vents or burners. Charcoal grills offer more control over direct and indirect zones, but gas grills can work well with a two-zone setup.
- Charcoal Chimney Starter: If you’re using charcoal, this is a lifesaver for lighting coals evenly without lighter fluid.
- Grill Tongs and Spatula: Long-handled tools to keep your hands safe and make flipping easier.
- Meat Thermometer: A must-have for monitoring internal temps, especially during indirect grilling.
- Grill Brush: For cleaning grates before and after cooking—trust me, nothing ruins flavor like leftover char.
- Aluminum Foil: Useful for wrapping veggies or creating drip pans during indirect grilling.
- Heat-Resistant Gloves: Optional, but great for handling hot grill parts safely.
If you don’t have a meat thermometer, you can eyeball doneness by touch, but it’s less reliable. My first few BBQ attempts suffered because I didn’t trust a thermometer, and I ended up with undercooked ribs—lesson learned! For budget-friendly grills, even a simple charcoal kettle grill can do the job once you master airflow control. And for the charcoal chimney, I recommend the classic Weber model—it lasts forever and makes lighting easy.
Preparation Method
- Set Up Your Grill Zones: For charcoal grills, pile coals on one side for direct heat and leave the other side empty for indirect heat. For gas grills, turn on burners on one side only, leaving the other side off.
- Preheat the Grill: Close the lid and let the grill heat up for about 10-15 minutes. Aim for 450°F to 550°F (230°C to 290°C) on the direct side for searing.
- Prepare Your Food: Pat meats dry and apply oil and seasoning or marinade. For vegetables, tossing them in oil and salt helps prevent sticking.
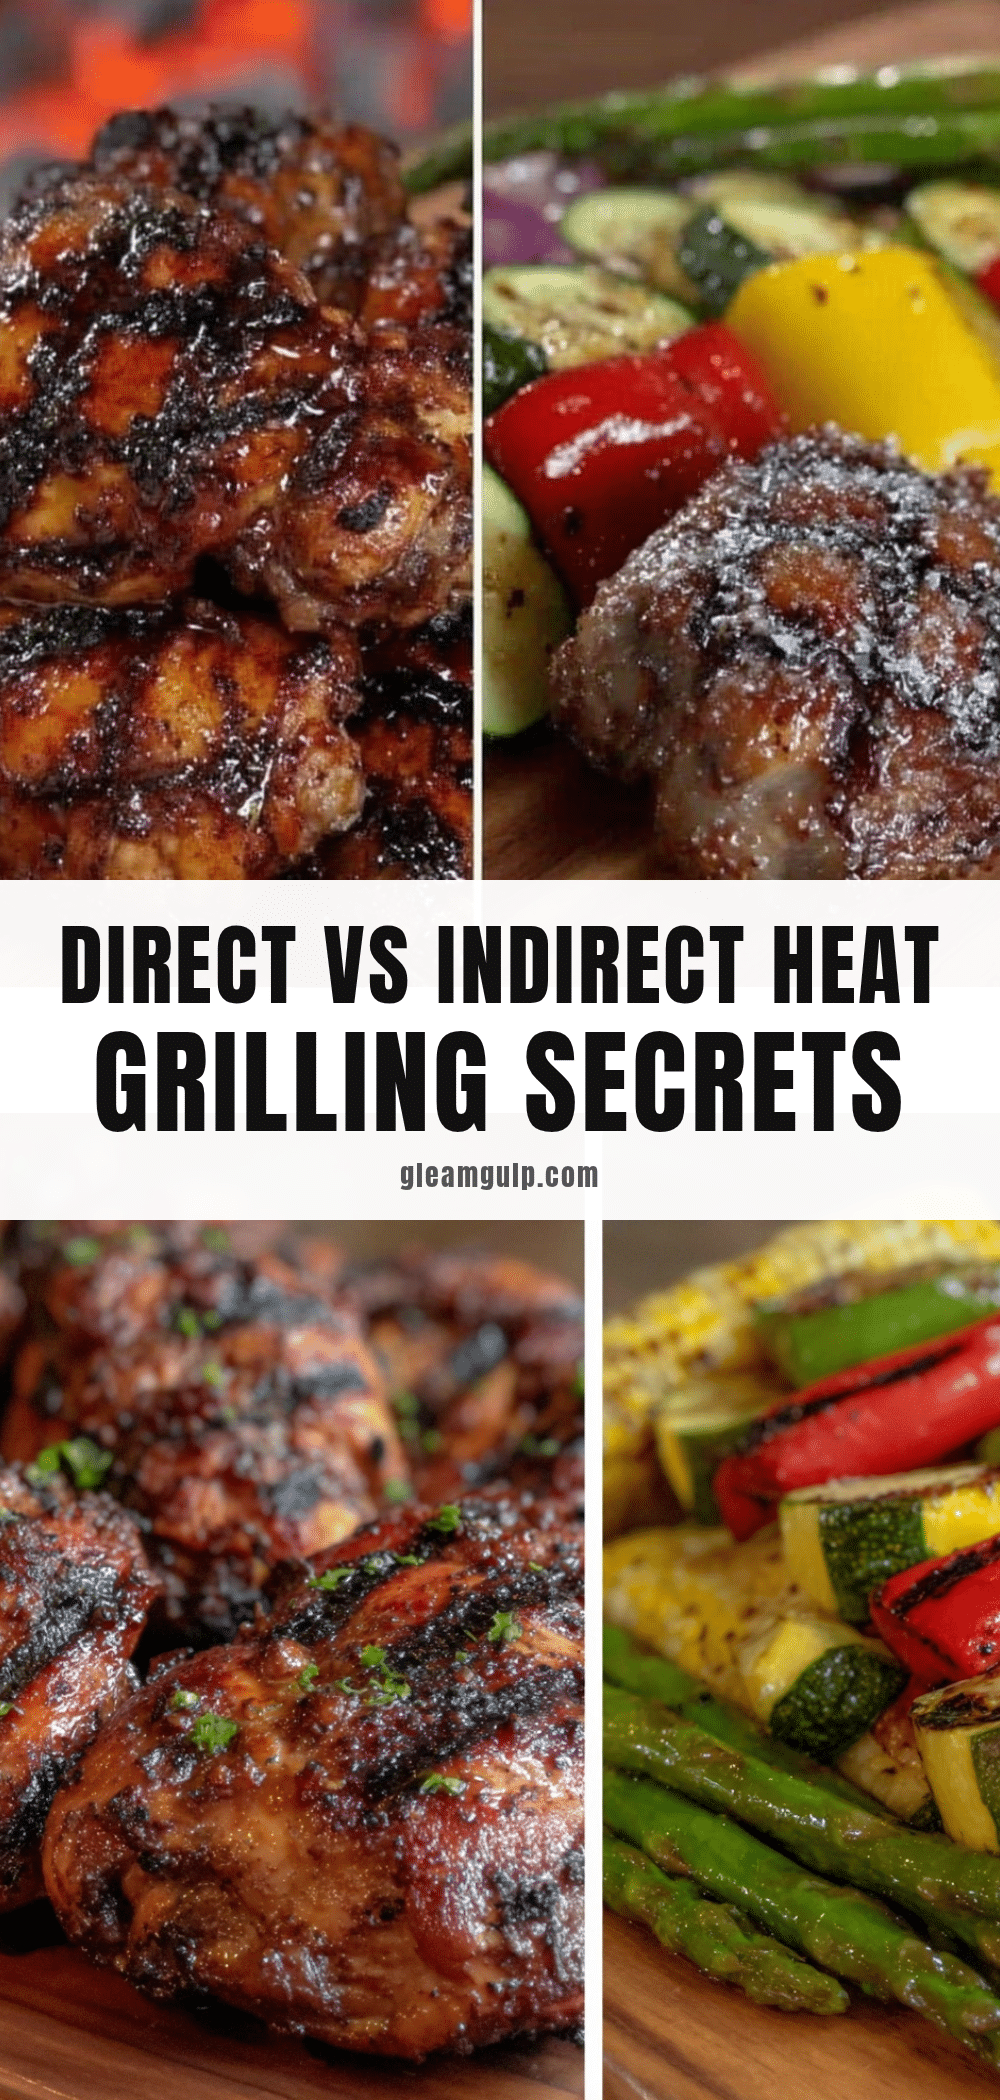
- Cooking with Direct Heat: Place thinner cuts like steaks or chicken breasts directly over the hot coals or burners. Sear for 2-4 minutes per side, watching for grill marks and crust formation.
- Switch to Indirect Heat: Move thicker cuts or whole chickens to the cooler side of the grill. Close the lid to trap heat and cook slowly. Use a drip pan underneath if needed to catch fat and prevent flare-ups.
- Monitor Internal Temperature: Use your meat thermometer to check doneness. For example, chicken should reach 165°F (74°C), ribs about 190°F (88°C) for tender pull-apart texture.
- Managing Flare-Ups: If flames flare up from dripping fat, quickly move the food to indirect heat and close the lid briefly to tame the fire.
- Rest the Meat: Once done, remove from grill and let rest for 5-10 minutes. This helps juices redistribute for a juicy bite.
One time, I forgot to set up the indirect zone and tried cooking ribs right over the flames. Let’s just say it was a smoky, crunchy disaster! Now I always take the time to arrange my coals or burners properly—it really pays off. Also, closing the lid is a game-changer for indirect grilling; it’s like turning your grill into a mini oven, which locks in heat and smoke flavors.
Cooking Tips & Techniques
Grilling is an art, but a few tried-and-true tips can help you level up fast:
- Know Your Heat Zones: Direct heat is your friend for quick searing and caramelization. Indirect heat is best for slow cooking larger cuts to avoid burning.
- Don’t Overcrowd: Give your food space on the grill for even cooking and airflow. Crowding causes steaming instead of grilling.
- Use a Thermometer: Guessing internal temps can lead to undercooked or dried-out meat. Digital thermometers give you confidence every time.
- Let It Rest: Resting meat after grilling is crucial. It keeps juices locked in and makes slicing easier.
- Manage Flare-Ups: Fat dripping onto flames causes flare-ups. Move food away quickly, or use a spray bottle of water to control flames.
- Preheat the Grill: Hot grates prevent sticking and help create those gorgeous grill marks.
I once rushed a steak by flipping it too often—rookie mistake! Now I let it sit undisturbed on direct heat, flipping just once or twice. The crust and flavor difference is huge. Also, I learned that adding soaked wood chips on the coals during indirect grilling imparts subtle smoky notes that taste incredible. If you want to expand your grilling repertoire, my grilled stuffed peppers recipe uses both heat methods for amazing results.
Variations & Adaptations
This grilling guide is flexible enough to suit different preferences and dietary needs. Here are some variations to consider:
- Vegetarian/Vegan: Use firm tofu or tempeh for direct heat grilling. For indirect heat, try grilling whole eggplants or stuffed portobello mushrooms.
- Low-Carb/Keto: Focus on fatty cuts like ribeye or pork belly cooked with indirect heat for tenderness and flavor.
- Different Cooking Methods: You can adapt indirect heat techniques for smokers or pellet grills for deeper smoke flavor.
- Flavor Twists: Experiment with marinades like citrus-herb for chicken or spicy dry rubs for ribs to customize your BBQ.
- Allergen-Friendly: Swap soy-based marinades for olive oil and herbs if avoiding soy allergens.
Personally, I once tried grilling a spatchcocked turkey using indirect heat for a family Thanksgiving, and it came out juicy and golden without the oven drama. Plus, I managed to free up kitchen space to make sides! Also, if you love smoky flavors but want a quick meal, try grilling shrimp over direct heat with a garlic butter baste—it’s a crowd favorite and cooks in minutes.
Serving & Storage Suggestions
Serving your grilled masterpieces at the right temperature makes all the difference. Serve meats hot off the grill, rested, for the best texture and juiciness. Grilled vegetables taste great warm or at room temperature, perfect for picnics or potlucks.
Pair your BBQ with sides like grilled corn, fresh salads, or classic coleslaw to balance smoky richness. For drinks, a crisp cold beer or a zesty lemonade complements grilled flavors beautifully.
To store leftovers, wrap tightly in foil or airtight containers and refrigerate within two hours of cooking. Most grilled meats stay good for 3-4 days refrigerated. Reheat gently in a low oven or on indirect heat to avoid drying out.
Flavors often deepen after a day or two, especially with ribs or pulled pork cooked indirectly. I love making extra portions to enjoy next-day BBQ sandwiches—just add pickles and a slaw!
Nutritional Information & Benefits
Grilling using direct and indirect heat can be a healthy cooking method since it requires little added fat. Lean proteins like chicken and fish grilled indirectly retain moisture without excess oil. Vegetables grilled over direct heat keep their vitamins and get a tasty char.
Typical nutritional content per serving varies depending on meat choice, but you can expect:
- High protein content supporting muscle health
- Low carbohydrate levels, especially when avoiding sugary sauces
- Good sources of vitamins A and C from grilled veggies
- Potential reduced fat if trimming excess before grilling
If you’re mindful of allergens, note that marinades or rubs may contain gluten or soy, so always check labels or make your own mixes. From a wellness perspective, grilling is a wonderful way to enjoy natural flavors without heavy processing or frying—plus, the smoky aroma always makes me feel like I’m truly outdoors, soaking up summer vibes.
Conclusion
Understanding the essential difference between direct and indirect heat grilling is the key to making your BBQ truly shine. This guide isn’t just theory—it’s everything I’ve learned through burnt edges, undercooked centers, and those magical moments when it all just clicks. I love this approach because it takes the guesswork out of grilling and lets you focus on enjoying good food with great company.
Feel free to tweak the methods and ingredients to suit your taste and style. Whether you’re grilling for a crowd or a quiet dinner, mastering these techniques will have you feeling confident at the grill all year round. If you try this guide, let me know how it goes—I’m always excited to hear your BBQ stories and any unique twists you add!
Now get out there and fire up that grill—you’ve got this!
Frequently Asked Questions
What’s the main difference between direct and indirect heat grilling?
Direct heat grilling cooks food directly over the heat source, ideal for quick searing. Indirect heat involves cooking food next to, but not directly over, the heat source for slower, even cooking.
Can I use indirect heat on a gas grill?
Yes! Simply turn on burners on one side and leave the other side off to create a cooler zone for indirect cooking.
How do I know when my meat is cooked using these methods?
The best way is to use a meat thermometer to check internal temperature based on the type of meat you’re grilling.
Is indirect heat grilling only for large cuts of meat?
Mostly, yes. Thicker or tougher cuts benefit from indirect heat, but you can also use it for delicate items like fish that might burn over direct flames.
Can I add wood chips for smoke flavor with both heat methods?
Absolutely! Wood chips can be added to coals or smoker boxes to infuse smoky flavors during both direct and indirect grilling.
Pin This Recipe!
Essential Direct vs Indirect Heat Grilling Guide for Perfect BBQ Results
Master the art of grilling by understanding when to use direct and indirect heat methods for perfectly cooked meats and vegetables every time. This guide offers essential tips, ingredient suggestions, and equipment recommendations to elevate your BBQ skills.
- Prep Time: 10 minutes
- Cook Time: Varies depending on cut and method (typically 15-90 minutes)
- Total Time: 25 minutes to 1.5 hours
- Yield: 4 servings
- Category: Main Course
- Cuisine: American
Ingredients
- Steak cuts like ribeye or sirloin (1 to 1.5 inches thick)
- Boneless chicken breasts or thighs (trimmed of excess fat)
- Vegetables like bell peppers, zucchini, mushrooms (sliced or whole small pieces)
- Shrimp or scallops (skewered for easy flipping)
- Whole chicken or spatchcocked chicken
- Pork ribs or larger bone-in cuts (e.g., pork shoulder)
- Larger vegetables like whole potatoes or corn on the cob (wrapped in foil)
- Thicker fish fillets like salmon or swordfish steaks
- Charcoal briquettes or lump charcoal
- Wood chips for smoking (optional, hickory or applewood)
- High smoke point oil (like avocado or grapeseed oil) for brushing
- Dry rub spices or marinades depending on flavor preference
Instructions
- Set up your grill zones: For charcoal grills, pile coals on one side for direct heat and leave the other side empty for indirect heat. For gas grills, turn on burners on one side only, leaving the other side off.
- Preheat the grill: Close the lid and let the grill heat up for about 10-15 minutes. Aim for 450°F to 550°F on the direct side for searing.
- Prepare your food: Pat meats dry and apply oil and seasoning or marinade. For vegetables, toss them in oil and salt to prevent sticking.
- Cooking with direct heat: Place thinner cuts like steaks or chicken breasts directly over the hot coals or burners. Sear for 2-4 minutes per side, watching for grill marks and crust formation.
- Switch to indirect heat: Move thicker cuts or whole chickens to the cooler side of the grill. Close the lid to trap heat and cook slowly. Use a drip pan underneath if needed to catch fat and prevent flare-ups.
- Monitor internal temperature: Use a meat thermometer to check doneness. Chicken should reach 165°F, ribs about 190°F for tender pull-apart texture.
- Manage flare-ups: If flames flare up from dripping fat, quickly move the food to indirect heat and close the lid briefly to tame the fire.
- Rest the meat: Once done, remove from grill and let rest for 5-10 minutes to allow juices to redistribute.
Notes
Use a meat thermometer for best results to avoid undercooking. Manage flare-ups by moving food to indirect heat and closing the lid. Rest meat after grilling to keep it juicy. Adding soaked wood chips during indirect grilling adds smoky flavor. Avoid overcrowding the grill for even cooking.
Nutrition
- Serving Size: One serving is appro
- Calories: 30050
- Sugar: 25
- Fat: 1530
- Saturated Fat: 410
- Carbohydrates: 515
- Fiber: 25
- Protein: 2540
Keywords: grilling, BBQ, direct heat grilling, indirect heat grilling, backyard BBQ, grilling tips, meat grilling, vegetable grilling, charcoal grilling, gas grilling


