Love this? Save it for later!
Share the inspiration with your friends
I was standing in the produce aisle last October, staring at a carton of eggs like it held the secrets to the universe, when this weird, quiet feeling washed over me. It was the cool air from the open refrigerator case, maybe, mixed with the faint smell of damp cardboard — and suddenly I was seven years old, sitting cross-legged on my Aunt Rita’s linoleum kitchen floor. She was at the counter, her back to me, humming something off-key while she peeled a mountain of hard-boiled eggs. The kitchen smelled like vinegar and paprika and her specific, powdery perfume. I remember the way the afternoon light slanted through her yellow curtains, turning everything a little bit golden. She was making deviled eggs for a Halloween party, and I was there to “help,” which mostly meant I got to eat the broken ones. I can still see her turning one of those pale yellow ovals into a spider with a single black olive, and the way my cousins all squealed when she brought the platter out. She passed away a few years back, and I haven’t thought about those eggs in forever. But standing there in the grocery store, I knew I had to try and make them myself. Honestly, I almost teared up right over the bagged spinach. You know that feeling when a memory just ambushes you? This is my attempt to hold onto that moment, one creepy-crawly egg at a time.
Why You’ll Love This Recipe
Let me tell you, as a mom who has been burned by more than a few “fun” Halloween recipes that ended up in the trash, this one is a total winner. I’ve tested this recipe about four times now, tweaking the olive placement and the yolk-to-mayo ratio, and I can finally say it’s foolproof. This isn’t just another pretty snack — it’s the one that actually works for real families.
- Kid-Friendly Fun: This is the kind of recipe your kids can actually help with. My seven-year-old placed all the olive legs last weekend, and he was so proud he practically floated off the couch.
- Budget-Friendly Ingredients: You probably already have most of this stuff in your fridge. Eggs, mayo, mustard, olives — no fancy grocery trips required. It’s perfect for feeding a family on a sensible budget.
- Quick & Easy: Once your eggs are boiled and cooled, the whole thing comes together in about 20 minutes. Seriously, you can make these while your kid is finishing their homework.
- Picky Eater Approved: I’ve got one kid who won’t touch anything green and another who lives on carbs, and they both devour these. There’s something about the “spider” shape that makes them irresistible.
- Make-Ahead Magic: You can prep the filling and the olive spiders a day in advance. That means less stress on the big day, which honestly is the real win here.
What makes this recipe different from every other spider deviled egg out there? It’s the texture. I’ve learned that the secret to a silky, non-grainy filling is to press the yolks through a fine-mesh sieve instead of just mashing them with a fork. It takes an extra two minutes, I know, but the difference is night and day. No one wants a lumpy spider, right?
This is the kind of recipe that makes you close your eyes after the first bite. It’s comfort food reimagined — creepy, cute, and totally soul-soothing. Perfect for impressing the other parents at the Halloween party without any stress.
What Ingredients You Will Need
This recipe uses simple, everyday ingredients to deliver bold flavor and that classic deviled egg satisfaction. You likely have most of these in your kitchen right now, which is exactly how I like it.
- For the Eggs:
- 12 large eggs (look for eggs that are a week or two old — they peel much easier after boiling)
- 1 tablespoon white vinegar (added to the boiling water — this helps prevent the whites from leaking if an egg cracks)
- 1 teaspoon salt (also added to the water, helps with peeling)
- For the Filling:
- 1/3 cup mayonnaise (I prefer Hellmann’s or Duke’s for the creamiest texture, but any full-fat mayo works)
- 1 teaspoon yellow mustard (adds that tangy kick — you can use Dijon for a more sophisticated flavor)
- 1/2 teaspoon paprika (smoked paprika is incredible here, but sweet works too)
- 1/4 teaspoon garlic powder (trust me on this — it makes the filling more savory and adult-friendly)
- Salt and black pepper to taste (go easy on the salt since the olives add saltiness later)
- 1 teaspoon pickle juice (optional, but it’s my secret ingredient for brightness — my Aunt Rita swore by it)
- For the Spider Decoration:
- 24 pitted black olives (you need large ones for the bodies and smaller ones for the legs — I use Lindsay brand)
- 1 tablespoon cream cheese (this is my trick for making the olive bodies stick to the egg white — a tiny dab goes a long way)
Ingredient Selection Tips: For the best texture, use eggs that aren’t super fresh. I know that sounds weird, but farm-fresh eggs are actually harder to peel after boiling. If you only have fresh eggs, try steaming them instead — it makes a huge difference. As for the olives, look for large, plump black olives for the spider bodies. The smaller, sliced olives work better for the legs because they’re easier to cut into thin strips.
Substitution Guidance: Need a dairy-free option? Skip the cream cheese and just use a tiny smear of mayo to stick the olives. For a lighter filling, you can swap half the mayo with plain Greek yogurt — it adds a nice tang. And if you’re watching your sodium, rinse the olives under cold water before using them.
Equipment Needed
You don’t need any fancy gadgets for this recipe, which is part of the beauty of it. Here’s what you’ll need:
- Large Pot: For boiling the eggs. I use my old stainless steel stockpot, but any pot that fits the eggs in a single layer works.
- Bowl of Ice Water: For shocking the eggs after boiling. This stops the cooking process and makes peeling easier.
- Fine-Mesh Sieve: This is my non-negotiable tool for silky filling. A potato ricer also works if you have one.
- Mixing Bowl: For combining the filling ingredients.
- Piping Bag or Zip-Top Bag: For filling the egg whites neatly. A zip-top bag with the corner snipped off works perfectly and costs nothing.
- Sharp Paring Knife: For cutting the olives into legs. A dull knife will just squish them.
- Cutting Board: Any board will do, but a smaller one is easier to manage for olive work.
Budget-Friendly Tip: If you don’t have a piping bag, don’t buy one. Just use a sturdy zip-top bag — I’ve been doing it for years and it works like a charm. And if you don’t have a fine-mesh sieve, you can press the yolks through a potato masher or just mash them really well with a fork. The texture won’t be quite as silky, but it’ll still taste great.
Preparation Method
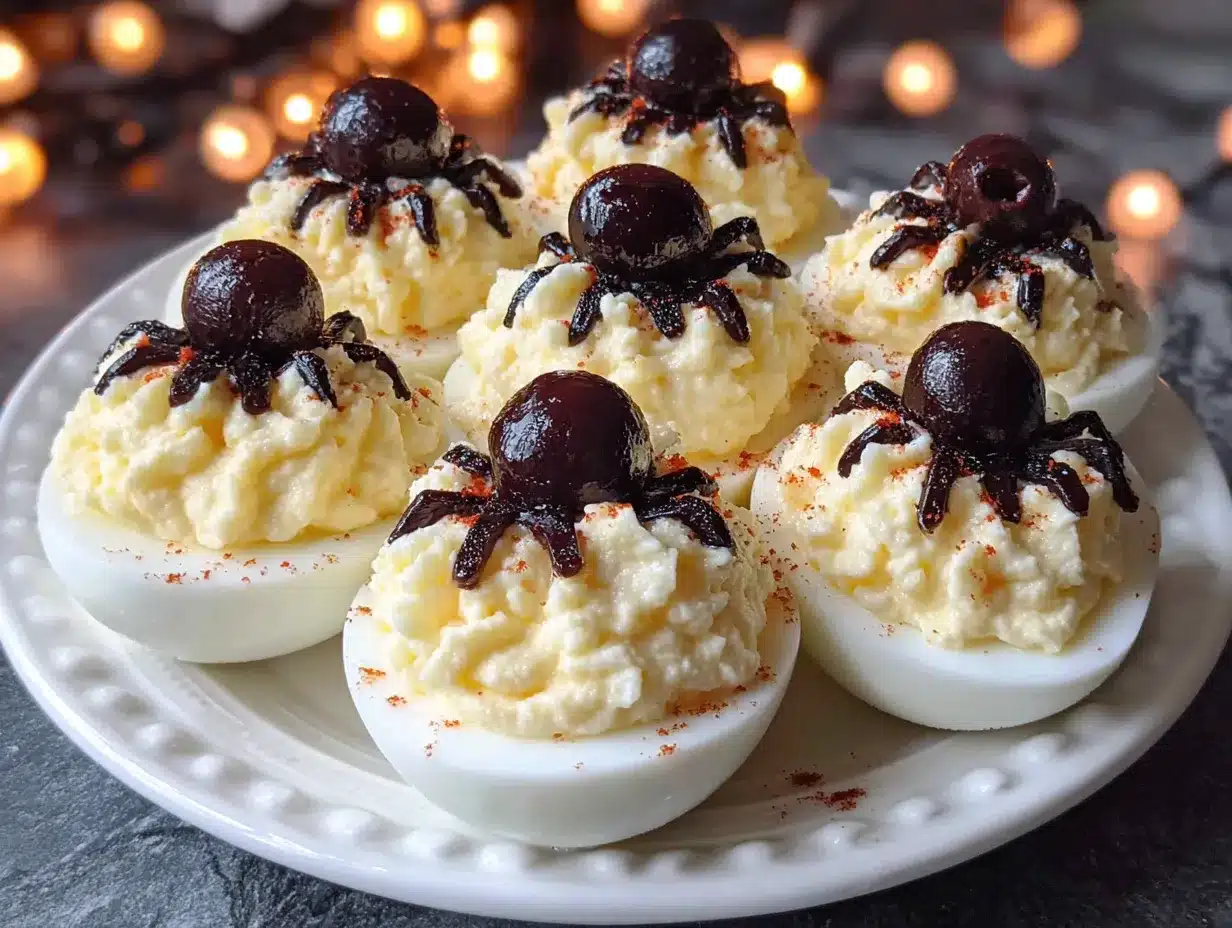
Alright, let’s get into the nitty-gritty. I’ve broken this down into clear steps so you don’t miss a thing. Take your time with the eggs — they’re the foundation of the whole recipe.
- Boil the Eggs: Place your 12 eggs in a single layer in a large pot. Cover them with cold water by about an inch. Add the tablespoon of white vinegar and the teaspoon of salt. Bring the water to a rolling boil over high heat — this usually takes about 8-10 minutes. Once it’s boiling, cover the pot, turn off the heat, and let the eggs sit in the hot water for exactly 12 minutes. Set a timer, seriously. I once forgot and ended up with gray yolks that tasted like rubber.
- Ice Bath: While the eggs are sitting, fill a large bowl with ice and cold water. When the timer goes off, use a slotted spoon to transfer the eggs to the ice bath. Let them chill for at least 10 minutes. This stops the cooking process and makes peeling so much easier. I’ve learned this the hard way — skipping this step means torn egg whites and frustration.
- Peel the Eggs: Gently tap each egg on the counter to crack the shell all over, then roll it between your palms to loosen the shell. Start peeling from the wider end where the air pocket is — this is the easiest spot to get under the membrane. Rinse the peeled eggs under cold water to remove any tiny shell fragments. Pat them dry with a paper towel.
- Slice and Scoop: Using a sharp knife, slice each egg in half lengthwise. Gently pop out the yolks into a small bowl. Arrange the egg white halves on a serving platter, cut-side up. Try not to tear the whites — if you do, just hide that one at the back of the platter. We’ve all been there.
- Make the Filling: Press the yolks through your fine-mesh sieve into a mixing bowl. This is the step that makes all the difference. Add the mayonnaise, yellow mustard, paprika, garlic powder, salt, pepper, and pickle juice if you’re using it. Mix everything together with a fork until it’s completely smooth and creamy. Taste it and adjust the seasoning — you want it to be flavorful but not overpowering.
- Fill the Egg Whites: Spoon the filling into your piping bag or zip-top bag. Snip off the corner (about 1/4 inch wide). Pipe the filling into each egg white half, mounding it slightly. You want it to look generous and inviting, not skimpy. If you don’t have a bag, you can use two spoons — one to scoop and one to push the filling off. It’s messier but it works.
- Make the Spider Legs: This is the fun part. Take your large black olives and slice each one in half lengthwise. These will be the spider bodies. For the legs, take the smaller olives and slice them into thin strips lengthwise — you want about 8 strips per spider. I find it easiest to cut them one at a time with a sharp knife. You’ll need 2 strips for each side of the spider, so 4 strips per spider body half.
- Assemble the Spiders: Dab a tiny bit of cream cheese on the flat side of each large olive half. This is your glue. Place one olive half on each filled egg white, pressing gently so it sticks. Then, arrange 4 olive leg strips on each side of the spider body, pushing them gently into the filling so they stay in place. Bend the legs slightly so they look like a spider crawling. It’s okay if they’re not perfect — my first batch looked more like octopuses and the kids still loved them.
- Chill and Serve: Refrigerate the deviled eggs for at least 30 minutes before serving. This helps the filling firm up and the flavors meld together. When you’re ready to serve, sprinkle a little extra paprika on top for color.
Cooking Tips & Techniques
Let me share some things I’ve learned the hard way so you don’t have to. First off, the biggest mistake people make with deviled eggs is overcooking the yolks. If you see a greenish-gray ring around the yolk, you’ve cooked them too long. That 12-minute rest after boiling is the sweet spot — trust the process.
Another thing I’ve learned is that cold eggs are easier to peel than warm ones. After that ice bath, let them sit in the fridge for an hour if you have time. The cold firms up the whites and makes the membrane release more easily. I once tried to peel eggs while they were still warm because I was in a hurry, and I ended up with a bowl of egg confetti. It was not my finest moment.
For the smoothest filling, make sure your mayonnaise is at room temperature. Cold mayo doesn’t blend as well with the yolks and can leave lumps. Just take it out of the fridge when you start boiling the eggs, and it’ll be ready by the time you need it.
Timing is everything with Halloween parties. I like to boil and peel the eggs the night before, then make the filling and assemble the spiders the next day. This way, the eggs are perfectly chilled and the filling is fresh. You can also make the olive legs in advance and store them in a covered container in the fridge — just make sure they don’t dry out.
One more tip: if you’re transporting these to a party, put a damp paper towel under the platter to keep the eggs from sliding around. I learned this after showing up to a potluck with a platter of scrambled deviled eggs. Not cute.
Variations & Adaptations
This recipe is super flexible, so feel free to make it your own. Here are some variations I’ve tried and loved:
- Spicy Spider Eggs: Add a dash of hot sauce or a pinch of cayenne pepper to the filling. The kids might not go for this one, but the adults at the party will love it. I made these for a Halloween game night and they disappeared in minutes.
- Avocado Deviled Spiders: Replace half the mayonnaise with mashed ripe avocado. This makes the filling greener and creamier, and it’s a great way to sneak in some healthy fats. Just be aware that the filling will brown faster, so make these closer to serving time.
- Bacon-Topped Spiders: Crumble some crispy bacon on top of the filling before you add the olive body. The salty, smoky flavor pairs perfectly with the creamy filling. My husband calls these “the good ones” and hides them from the kids.
- Gluten-Free Option: This recipe is naturally gluten-free, so you don’t need to change a thing. Just make sure your mustard and mayonnaise are certified gluten-free if you’re serving someone with celiac disease.
- Vegan Adaptation: You can make a vegan version using silken tofu or mashed chickpeas for the filling, and vegan mayo. The texture won’t be exactly the same, but it’s still delicious. I tried this for a friend and was surprised at how good it turned out.
Serving & Storage Suggestions
These spider deviled eggs are best served chilled, right out of the fridge. Arrange them on a large platter or a black serving tray for a spooky Halloween vibe. I like to add some fake spider webs or plastic spiders around the platter for extra effect — the kids go crazy for it.
For a Halloween party, I pair these with other finger foods like mini hot dogs wrapped in crescent rolls (they look like mummies!), pumpkin-shaped cheese slices, and a bowl of “witches’ brew” punch. The contrast of the creamy eggs with salty snacks is always a hit.
Storage Instructions: Store any leftover deviled eggs in an airtight container in the refrigerator for up to 2 days. I don’t recommend freezing them — the texture of the filling gets watery and weird when thawed. Trust me, I tried it once and it was a disaster.
Reheating: Don’t. These are meant to be served cold. If you’ve stored them, just take them out of the fridge about 15 minutes before serving to take the chill off. The flavors actually get better after a day in the fridge — the paprika and garlic meld together beautifully.
One thing I’ve noticed is that the olive legs can soften a bit after a few hours in the fridge. If you’re making these way ahead, I’d recommend adding the legs just before serving. The bodies can go on earlier, but the legs stay crunchier if they’re fresh.
Nutritional Information & Benefits
Here’s the rough nutritional breakdown per spider deviled egg (one half):
- Calories: 85
- Protein: 6g
- Fat: 6g
- Carbohydrates: 1g
- Sodium: 180mg
Eggs are a fantastic source of high-quality protein and contain important nutrients like choline, which is great for brain health — especially for growing kids. The olives add healthy monounsaturated fats and a dose of vitamin E. This recipe is naturally low-carb and gluten-free, making it suitable for a variety of dietary needs.
If you’re watching your cholesterol, you can make a lighter version using egg whites only for the filling (though the texture won’t be as rich). Or you can use a combination of whole eggs and egg whites to cut down on fat while keeping the protein.
From a wellness perspective, I love that this recipe uses real, whole ingredients. There’s nothing processed or artificial here — just good food that happens to look like spiders. It’s a win for both your body and your Halloween spirit.
Conclusion
Look, I know deviled eggs might seem like a simple thing, but these spider deviled eggs are honestly something special. They’re the kind of recipe that brings people together — kids laughing as they arrange the olive legs, adults sneaking extras when they think no one’s watching, and everyone feeling that little thrill when they see the creepy-crawly platter on the table.
I make these every Halloween now, and every time I do, I think of Aunt Rita’s yellow kitchen and the way she made everything feel like magic. This recipe is my way of keeping that feeling alive, and I hope it becomes a tradition in your home too.
Don’t be afraid to tweak the filling to your taste — add more mustard, less mayo, a pinch of cayenne, whatever makes you happy. That’s the beauty of cooking, right? Making something your own.
So go ahead, boil those eggs, and get creative with your spiders. And when you do, come back and tell me about it in the comments. I’d love to hear how your kids reacted, or if you came up with a fun variation I haven’t tried. Happy Halloween, friends — now go make some spiders!
Frequently Asked Questions
Can I make these spider deviled eggs a day ahead?
Absolutely! I actually recommend making the filling and assembling the spiders up to 24 hours in advance. Just wait to add the olive legs until right before serving to keep them crunchy. Store them covered in the fridge.
How do I get my eggs to peel perfectly every time?
The key is using older eggs (a week or two old) and shocking them in an ice bath immediately after boiling. Also, adding vinegar and salt to the water helps loosen the shells. Start peeling from the wider end where the air pocket is.
Can I use a different type of olive for the spiders?
You can, but black olives give the most spider-like appearance. Green olives work in a pinch, but they’re a bit too bright and might look more like alien spiders. Kalamata olives are too soft and will fall apart when you try to cut them into legs.
How long will these keep at a Halloween party?
Deviled eggs should not sit out at room temperature for more than 2 hours. If you’re serving them at a party, keep the platter on ice or in the fridge until right before serving. After 2 hours, any leftovers should be discarded.
My kids are picky eaters — will they actually eat these?
I get it, I really do. But in my experience, the “spider” factor makes these way more appealing to kids than regular deviled eggs. My own picky eaters gobble them up because they’re fun. If your child is really hesitant, let them help make the spiders — kids are more likely to eat food they helped create.
Pin This Recipe!
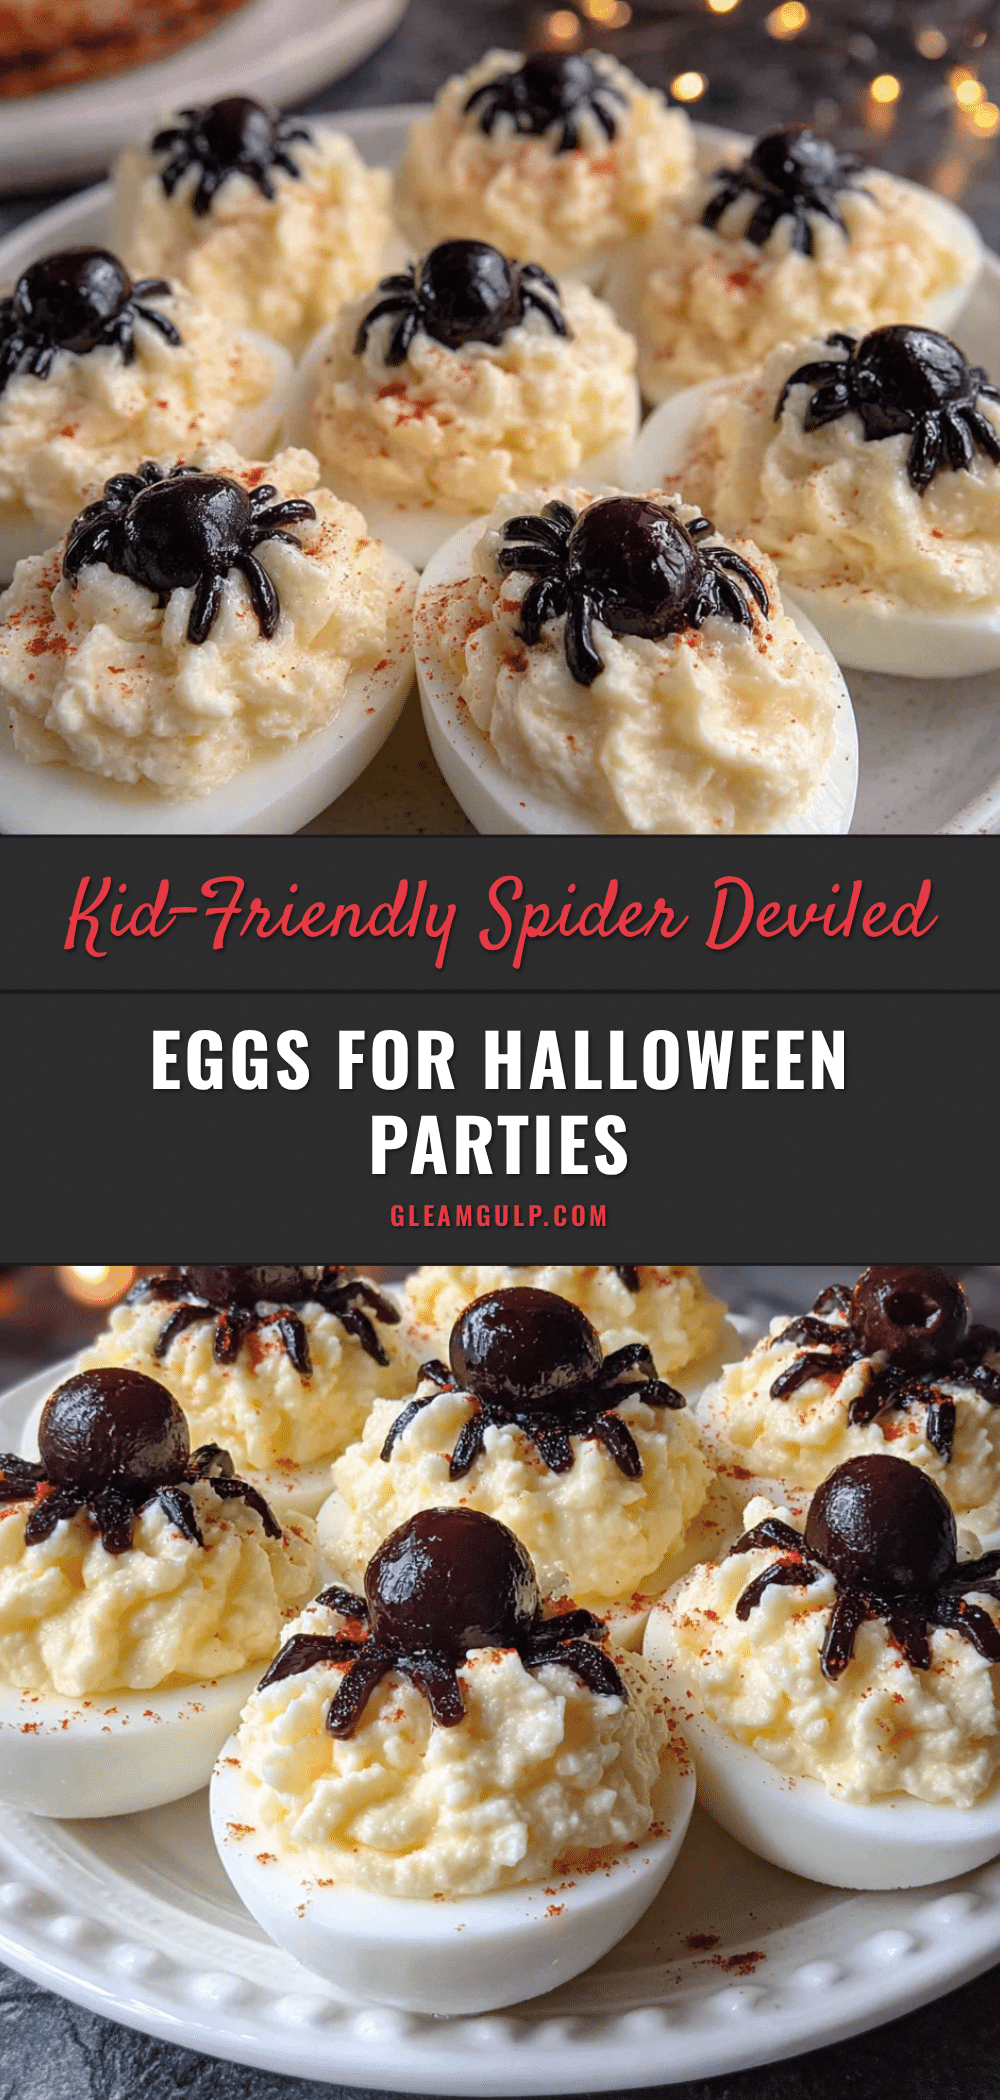
Easy Spider Deviled Eggs for Halloween Fun
These creepy-crawly spider deviled eggs are a fun and festive Halloween treat that kids and adults will love. Made with simple ingredients, they’re quick to prepare and perfect for parties.
- Prep Time: 20 minutes
- Cook Time: 12 minutes
- Total Time: 32 minutes (plus chilling time)
- Yield: 24 servings (1 spider deviled egg half per serving) 1x
- Category: Appetizer
- Cuisine: American
Ingredients
- 12 large eggs (a week or two old for easier peeling)
- 1 tablespoon white vinegar
- 1 teaspoon salt
- 1/3 cup mayonnaise (Hellmann’s or Duke’s recommended)
- 1 teaspoon yellow mustard (or Dijon for a more sophisticated flavor)
- 1/2 teaspoon paprika (smoked or sweet)
- 1/4 teaspoon garlic powder
- Salt and black pepper to taste
- 1 teaspoon pickle juice (optional, secret ingredient for brightness)
- 24 pitted black olives (large for bodies, smaller for legs)
- 1 tablespoon cream cheese (for sticking olive bodies)
Instructions
- Boil the Eggs: Place 12 eggs in a single layer in a large pot. Cover with cold water by about an inch. Add 1 tablespoon white vinegar and 1 teaspoon salt. Bring to a rolling boil over high heat (8-10 minutes). Once boiling, cover the pot, turn off the heat, and let sit for exactly 12 minutes.
- Ice Bath: While eggs sit, fill a large bowl with ice and cold water. Transfer eggs to the ice bath using a slotted spoon. Let chill for at least 10 minutes to stop cooking and make peeling easier.
- Peel the Eggs: Gently tap each egg on the counter to crack the shell all over, then roll between palms to loosen. Start peeling from the wider end (air pocket). Rinse under cold water to remove shell fragments. Pat dry.
- Slice and Scoop: Slice each egg in half lengthwise. Gently pop out yolks into a small bowl. Arrange egg white halves on a serving platter, cut-side up.
- Make the Filling: Press yolks through a fine-mesh sieve into a mixing bowl. Add mayonnaise, yellow mustard, paprika, garlic powder, salt, pepper, and pickle juice (if using). Mix until completely smooth and creamy. Taste and adjust seasoning.
- Fill the Egg Whites: Spoon filling into a piping bag or zip-top bag. Snip off a 1/4-inch corner. Pipe filling into each egg white half, mounding slightly. Alternatively, use two spoons.
- Make the Spider Legs: Slice large black olives in half lengthwise for spider bodies. Slice smaller olives into thin strips lengthwise (about 8 strips per spider). You’ll need 4 strips per spider body half.
- Assemble the Spiders: Dab a tiny bit of cream cheese on the flat side of each large olive half. Place one olive half on each filled egg white, pressing gently. Arrange 4 olive leg strips on each side of the spider body, pushing into the filling. Bend legs slightly for a crawling look.
- Chill and Serve: Refrigerate deviled eggs for at least 30 minutes before serving. Sprinkle extra paprika on top for color.
Notes
For silky filling, press yolks through a fine-mesh sieve. Use older eggs for easier peeling. Olive legs can soften if made ahead; add just before serving for crunch. Store leftovers in an airtight container in the fridge for up to 2 days. Do not freeze.
Nutrition
- Serving Size: 1 spider deviled egg
- Calories: 85
- Sodium: 180
- Fat: 6
- Saturated Fat: 1.5
- Carbohydrates: 1
- Protein: 6
Keywords: Halloween deviled eggs, spider deviled eggs, easy Halloween appetizer, kid-friendly Halloween recipe, deviled eggs with olives


