Love this? Save it for later!
Share the inspiration with your friends
Introduction
The other day, I was rearranging my spice rack when a sharp, familiar aroma of garlic and dill suddenly punched through the air — and just like that, I was eight years old again, sitting on the creaky wooden porch steps of Mrs. Langston’s house on a humid July afternoon. She was the neighbor who always seemed to have jars of homemade pickles lined up on her windowsill, their glass catching the sunlight like little green jewels. I remember how she’d wink and hand me a spicy, tangy pickle slice from one of those jars, telling me it was her secret recipe that didn’t need any fussing with hot water baths or big kettles. Honestly, I forgot half the ingredients that day because I was too busy marveling at the crunch and the zing, but that fleeting taste stuck with me for years.
Fast forward to now, and I still chase that exact bite — the one where garlic hits first, then that whisper of dill, followed by a fiery kick that wakes up your taste buds. Making these Easy Spicy Garlic Dill Refrigerator Pickles is my way of holding onto that summer afternoon spirit. No canning, no sweating over boiling jars — just simple, fresh ingredients that you mix, chill, and enjoy. Maybe you’ve been there too, craving that perfect pickle that tastes homemade but doesn’t require a whole day in the kitchen. Well, this recipe is the answer.
I’ll admit, the first time I tried making them, I forgot to add the chili flakes — a rookie mistake that left the pickles a little too mellow for my liking. But once I got that right, it became a staple snack, a side dish, and a little moment of joy in my fridge. Let me tell you, these pickles have a way of turning any sandwich or salad into something special, and they’re just waiting for you to discover them.
Why You’ll Love This Recipe
After testing countless pickle recipes in my kitchen — and trusting a few tips from some local pickle pros — I can say these Easy Spicy Garlic Dill Refrigerator Pickles are a game-changer. Here’s why:
- Quick & Easy: Ready in just under 24 hours, with most of the time spent doing nothing but chilling. Perfect for busy weeknights or last-minute cravings.
- Simple Ingredients: No exotic spices or hard-to-find items here. Your pantry probably has everything you need, and the cucumbers are the star.
- Perfect for Snacking & Entertaining: Great for picnics, burgers, sandwiches, or just munching straight from the jar.
- Crowd-Pleaser: The balance of spicy garlic and fresh dill hits all the right notes — kids and adults love them alike.
- Unbelievably Delicious: The texture stays crisp, and the flavor is bold without overpowering, thanks to a perfectly balanced brine.
This isn’t just a pickle recipe; it’s the kind that makes you pause mid-bite and savor the crunch and heat. The magic lies in the no-canning method — no jars boiling on the stove, no waiting weeks for flavor. Just mix, chill, and you’re good to go. Honestly, it changed how I think about pickling, and I suspect it will for you too.
What Ingredients You Will Need
This recipe uses straightforward, fresh ingredients that work together to deliver that classic spicy garlic dill flavor. Most are pantry staples, and you can easily swap or adjust based on what you have on hand.
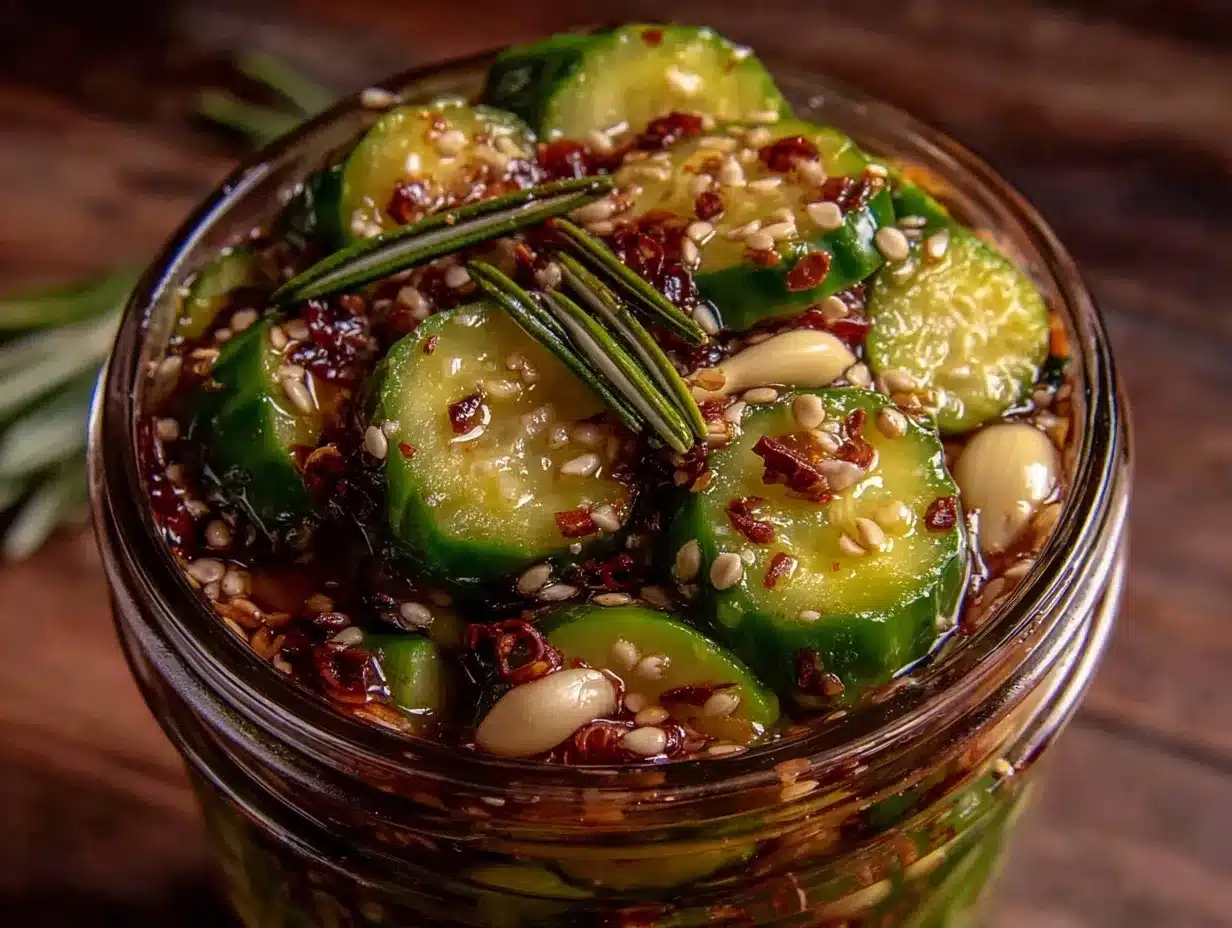
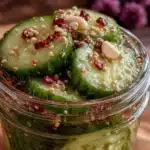
- Cucumbers (about 2 pounds / 900 grams) — I recommend Kirby or Persian cucumbers for their crisp texture. If you like, slice them into spears or rounds.
- Garlic cloves (4-5 large, peeled and smashed) — the star of the show for that punchy flavor.
- Fresh dill (a few sprigs) — if you can get your hands on fresh dill, it really makes a difference. Dried dill can substitute in a pinch.
- Red pepper flakes (1 to 2 teaspoons) — adjust to your heat preference. These add the spicy kick that sets these pickles apart.
- White vinegar (1 cup / 240 ml) — I use distilled white vinegar for a clean, sharp tang.
- Water (1 cup / 240 ml) — to balance the acidity and keep the pickles crisp.
- Granulated sugar (1 tablespoon) — just a touch to round out the flavors.
- Kosher salt (1 tablespoon) — pickling or kosher salt works best; avoid iodized salt to keep the brine clear.
You can find most of these ingredients at your local grocery store like Trader Joe’s or Whole Foods. For the red pepper flakes, I trust McCormick for consistent heat.
Substitution tips: Use apple cider vinegar if you prefer a fruitier tang, or swap out the fresh dill for dill seeds if fresh isn’t available. For a milder version, cut back on the red pepper flakes or omit them.
Equipment Needed
Making these pickles is as simple as your equipment. Here’s what I use:
- Large glass jar or airtight container (at least 1 quart / 1 liter) — I prefer mason jars because they seal well and keep the pickles fresh longer. If you don’t have jars, any BPA-free plastic container with a lid works.
- Measuring cups and spoons — for precise brine measurements.
- Sharp knife and cutting board — to slice cucumbers evenly for consistent pickling.
- Mixing bowl — for combining the brine ingredients before pouring.
For budget-friendly options, reuse clean jars from store-bought pickles. Just make sure to wash them thoroughly. I’ve tried plastic containers before and noticed the cucumbers don’t stay quite as crisp — so glass is my recommendation if you want the best texture.
Preparation Method
- Prepare the cucumbers: Wash about 2 pounds (900 grams) of cucumbers thoroughly. Slice them into spears about 3 to 4 inches long or into ¼-inch thick rounds, depending on your preference. This takes about 10 minutes.
- Make the brine: In a mixing bowl, combine 1 cup (240 ml) white vinegar, 1 cup (240 ml) water, 1 tablespoon kosher salt, and 1 tablespoon granulated sugar. Stir until the salt and sugar dissolve completely — this usually takes 2 to 3 minutes. If you want a clearer brine, warm the mixture slightly, then cool before using.
- Pack the jar: Into your clean, large glass jar (1 quart / 1 liter), place 4 to 5 smashed garlic cloves, a few sprigs of fresh dill, and 1 to 2 teaspoons red pepper flakes. Then, tightly pack the sliced cucumbers on top. The tighter the pack, the better the flavor absorption.
- Pour the brine: Pour the brine over the cucumbers, garlic, and dill, making sure everything is submerged. You can press down lightly with a spoon or clean weight if needed to keep cucumbers under the liquid.
- Seal and refrigerate: Screw on the lid tightly and place the jar in the refrigerator. Let the pickles chill for at least 24 hours before tasting, but honestly, they get better after 2 to 3 days as the flavors meld.
- Check and enjoy: After chilling, open the jar and enjoy a spicy, garlicky crunch. Keep the pickles refrigerated and consume within 2 to 3 weeks for best taste and texture.
Tip: If your cucumbers start to soften too much after a week, try swapping plain water for part of the brine in your next batch to keep them extra crisp. Also, I learned the hard way that not smashing the garlic enough makes the flavor too subtle — so don’t be shy with that step!
Cooking Tips & Techniques
To get these pickles just right, here are a few tricks from my kitchen:
- Use fresh, firm cucumbers: The crunch is everything here. Avoid cucumbers with soft spots or wrinkles.
- Smash the garlic cloves: This releases more flavor than just slicing, giving you that bold garlicky punch.
- Keep cucumbers fully submerged: Exposure to air can cause them to spoil faster or get mushy. Use a clean weight or a small ziplock bag filled with water as a press if your jar isn’t packed tight.
- Don’t rush the pickling: While you can taste after 24 hours, letting them rest longer (up to 3 days) develops deeper flavor and better spice infusion.
- Watch your salt and sugar: Too much salt can make pickles too salty; too little and they won’t preserve well. I stick to the measured amounts for a balanced brine.
- Chilling temperature matters: Your refrigerator should be around 38°F (3°C). Too warm, and your pickles won’t keep as long.
I once tried to speed things up by adding hot vinegar directly to the cucumbers and skipped chilling overnight. The pickles were sour but lacked the crunch and spice balance. Trust me, patience pays off.
Variations & Adaptations
These pickles are easy to tweak depending on your mood or dietary needs:
- Mild version: Omit the red pepper flakes or reduce to ¼ teaspoon for a gentle heat that kids can enjoy.
- Extra spicy: Add sliced fresh jalapeños or a dash of cayenne powder for a fiery punch.
- Herb twist: Swap dill for fresh tarragon or basil for a different herbaceous note.
- Low-sodium: Reduce salt by half and increase chilling time to 48 hours to compensate.
- Vegan & allergy-friendly: This recipe is naturally vegan and gluten-free, but if you need to avoid garlic, try using garlic-infused oil to mimic flavor without the actual cloves.
Once, I added thinly sliced carrots along with the cucumbers for a colorful, slightly sweet crunch that my family loved. It’s a fun way to get more veggies into your snack game.
Serving & Storage Suggestions
Serve these pickles chilled straight from the fridge for that crisp, refreshing bite. They’re fantastic on sandwiches, burgers, or as a zesty side to grilled meats and salads.
For storage, keep the pickles in their sealed jar in the refrigerator. They’ll stay fresh and crunchy for up to 3 weeks, though I doubt they’ll last that long around here! If you want to prep in advance, these pickles actually deepen in flavor after a few days, so making them a couple of days ahead of a party is a great move.
To reheat (if you prefer warm pickles for some reason), gently warm in a small pot on low heat, but honestly, I recommend eating them cold to preserve that snap.
Nutritional Information & Benefits
These pickles are a low-calorie, flavorful snack with a few great perks:
- Low in calories (about 10-15 calories per pickle spear).
- Contains antioxidants from garlic and dill that support immune health.
- Provides a small dose of probiotics when naturally fermented (though this recipe is quick pickled, not fermented).
- Gluten-free, vegan, and suitable for most diets.
- Helps curb cravings for salty snacks without added preservatives or artificial flavors.
From a personal wellness perspective, I like having these pickles on hand as a guilt-free snack that brightens meals without extra carbs or sugar.
Conclusion
If you’re looking for a no-fuss, no-canning way to enjoy spicy, garlicky dill pickles, this recipe is a keeper. It’s simple, quick, and packs the kind of flavor that makes you want to keep a jar in the fridge at all times. I love how easily you can customize it for heat, herbs, and even dipping veggies.
Give it a try, and feel free to make it your own — after all, the best recipes are the ones you tweak until they feel just right for you. Let me know how your pickles turn out or if you have any fun variations you’ve discovered. Sharing those moments is what keeps cooking fun and alive!
Happy pickling!
FAQs
How long do these refrigerator pickles last?
They stay fresh and crunchy in the fridge for up to 3 weeks when stored properly in an airtight jar.
Can I use other types of cucumbers?
Yes! Kirby or Persian cucumbers are best for crunch, but regular slicing cucumbers work too. Just avoid ones that are soft or seedy.
Do I have to use fresh dill?
Fresh dill provides the best flavor, but dried dill can be substituted if needed. Use about 1 tablespoon of dried dill instead of fresh sprigs.
Can I make these pickles without garlic?
Yes, but garlic is key to the flavor profile. A garlic-infused oil can be a gentle alternative for those with allergies.
Is canning necessary for these pickles?
No! This recipe is designed for quick refrigerator pickling, so no boiling water baths or canning equipment are required.
Pin This Recipe!
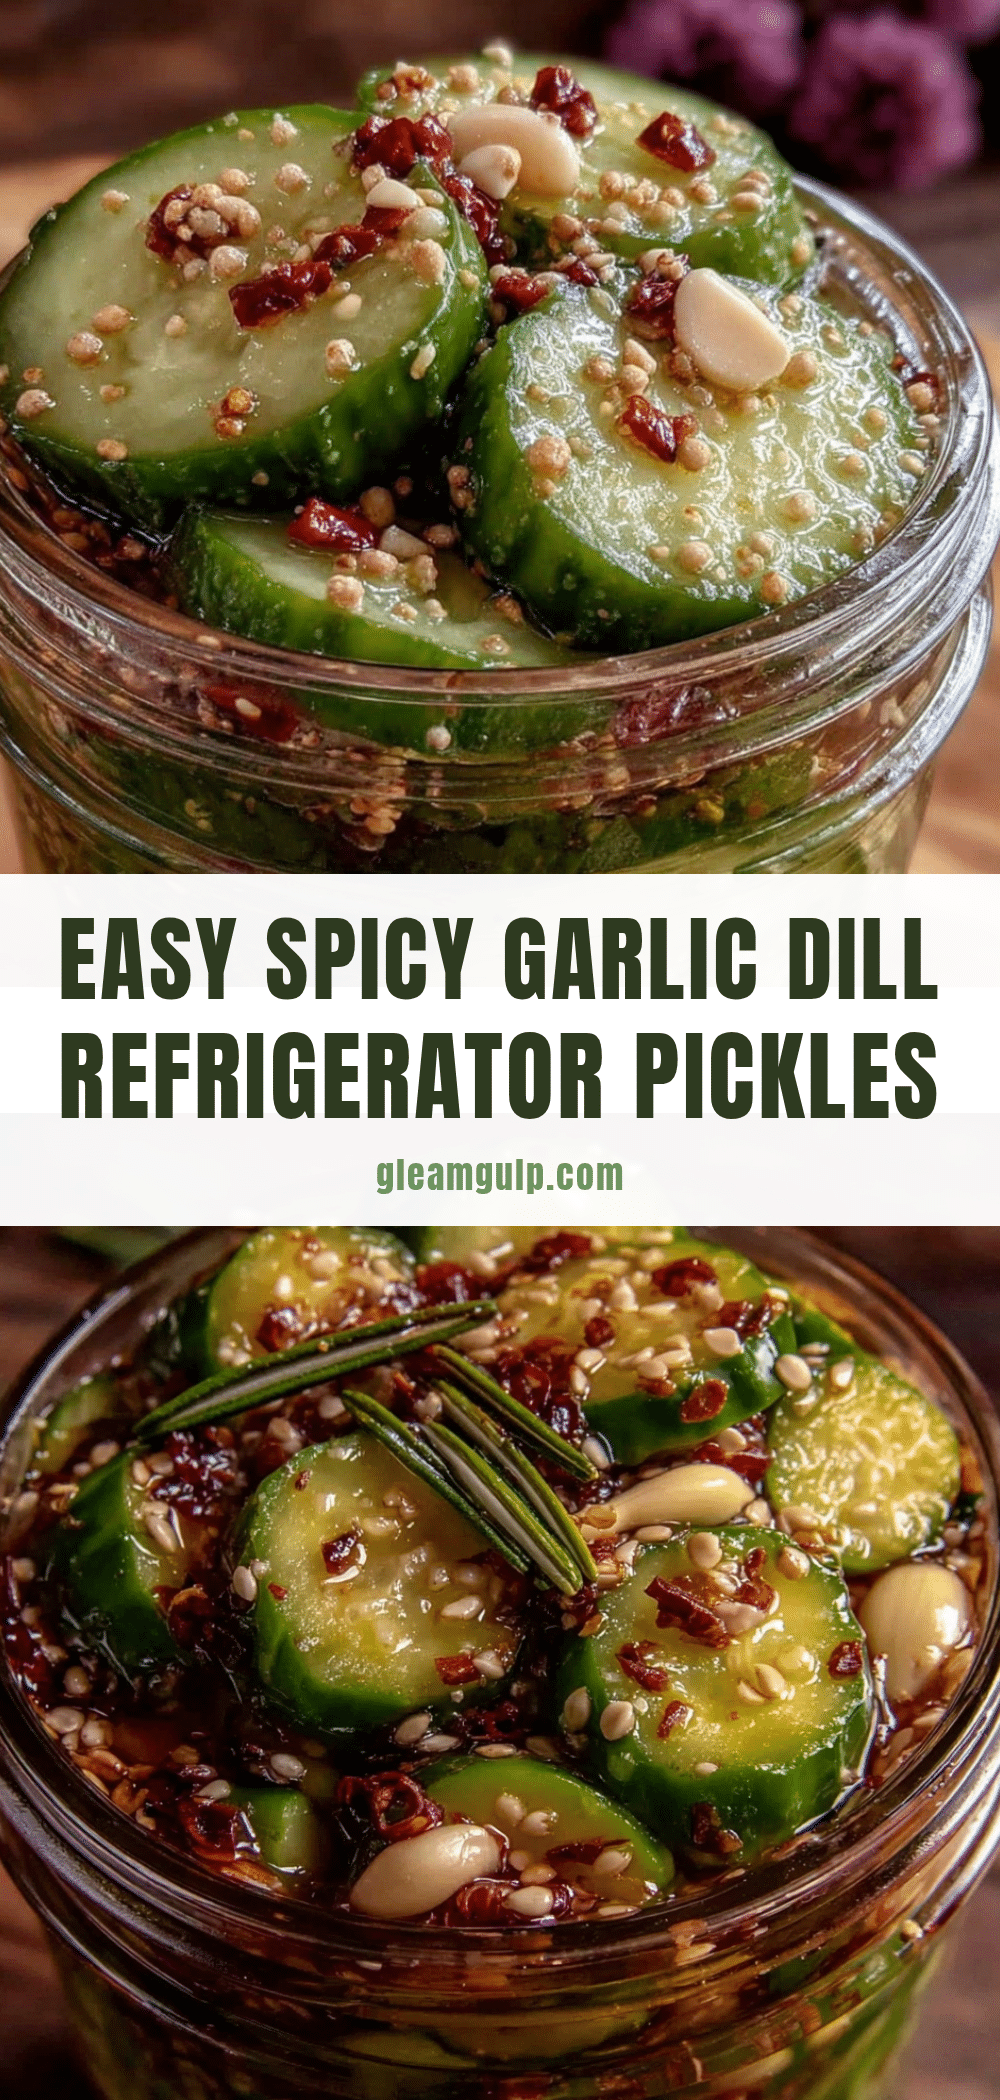
Easy Spicy Garlic Dill Refrigerator Pickles Recipe No Canning Needed
A quick and easy refrigerator pickle recipe featuring spicy garlic and fresh dill, requiring no canning and ready in under 24 hours. Perfect for snacking or adding a zesty crunch to sandwiches and salads.
- Prep Time: 15 minutes
- Cook Time: 0 minutes
- Total Time: 24 hours
- Yield: About 1 quart / 4 servings 1x
- Category: Side Dish
- Cuisine: American
Ingredients
- 2 pounds (900 grams) cucumbers (Kirby or Persian recommended), sliced into spears or rounds
- 4–5 large garlic cloves, peeled and smashed
- A few sprigs fresh dill (or 1 tablespoon dried dill as substitute)
- 1 to 2 teaspoons red pepper flakes
- 1 cup (240 ml) white vinegar (distilled recommended)
- 1 cup (240 ml) water
- 1 tablespoon granulated sugar
- 1 tablespoon kosher salt (pickling or kosher salt preferred)
Instructions
- Wash about 2 pounds (900 grams) of cucumbers thoroughly. Slice into spears about 3 to 4 inches long or into ¼-inch thick rounds.
- In a mixing bowl, combine 1 cup (240 ml) white vinegar, 1 cup (240 ml) water, 1 tablespoon kosher salt, and 1 tablespoon granulated sugar. Stir until salt and sugar dissolve completely (2 to 3 minutes). Optionally warm and cool the brine for clarity.
- In a clean large glass jar (1 quart / 1 liter), place 4 to 5 smashed garlic cloves, a few sprigs of fresh dill, and 1 to 2 teaspoons red pepper flakes.
- Tightly pack the sliced cucumbers on top of the garlic, dill, and red pepper flakes.
- Pour the brine over the cucumbers, ensuring everything is submerged. Press down lightly if needed to keep cucumbers under the liquid.
- Seal the jar tightly and refrigerate for at least 24 hours before tasting. For best flavor, chill 2 to 3 days.
- After chilling, open and enjoy the pickles. Keep refrigerated and consume within 2 to 3 weeks.
Notes
Use fresh, firm cucumbers for best crunch. Smash garlic cloves to release more flavor. Keep cucumbers fully submerged in brine to prevent spoilage. Let pickles chill for 2-3 days for deeper flavor. Avoid iodized salt to keep brine clear. Refrigerate at about 38°F (3°C).
Nutrition
- Serving Size: Approximately 1/4 cu
- Calories: 1015
- Sugar: 1
- Sodium: 400
- Carbohydrates: 2
- Fiber: 0.5
- Protein: 0.3
Keywords: refrigerator pickles, spicy pickles, garlic dill pickles, no canning pickles, quick pickles, easy pickles, homemade pickles


