Love this? Save it for later!
Share the inspiration with your friends
My neighbor, Maria, watched me trying to wrangle a screaming toddler and a bag of groceries at my front door and didn’t say anything at first. Then she just appeared, took the grocery bag from my arm, and said, “You look like you need a dinner that cooks itself.” She was right. I was exhausted, the kid was hangry, and I had absolutely no plan for dinner. She walked me through her lemon garlic chicken and rice—the one her mother used to make back in Portugal—right there on my messy front step. It wasn’t a formal cooking lesson. It was just a conversation between two moms trying to get through a Tuesday.
The recipe itself is deceptively simple. You toss chicken thighs into one pan, throw in some rice, garlic, and lemon, and let the oven do all the heavy lifting. Honestly, I was skeptical. I mean, how good could something that easy actually be? But the first time I made it, the smell drifting through my kitchen was unbelievable. The chicken came out tender, the rice was fluffy and soaked up all that lemony goodness, and my toddler actually asked for seconds. Let me tell you, that never happens.
What I love most about this easy one-pan lemon garlic chicken and rice is that it feels like a real meal—the kind you’d be proud to serve guests—but it comes together with almost no effort. Maria didn’t give me a fancy recipe card. She just told me what to do, and I scribbled it on the back of an envelope. Maybe you’ve been there, standing in your kitchen with no clue what to make, wishing someone would just hand you a solution. This is that solution. It’s the recipe I keep coming back to, week after week, because it works every single time.
Why You’ll Love This Recipe
This isn’t just another chicken and rice dish. After testing this recipe at least a dozen times—adjusting the liquid ratio, playing with cooking times, and swapping in different cuts of chicken—I can confidently say this version is the one. It’s the one that delivers consistent results without any fuss. Here’s why it works so well for busy families:
- One Pan, No Mess: Everything cooks in a single skillet or baking dish. That means fewer dishes to wash and less time cleaning up after dinner. For a busy parent, that’s a game-changer.
- Budget-Friendly Ingredients: Chicken thighs, rice, lemons, and garlic are all affordable staples. You don’t need any fancy ingredients or specialty items from a gourmet store. This easy one-pan lemon garlic chicken and rice is designed to work with what you already have in your pantry.
- Picky Eater Approved: The flavors are simple and familiar—garlic, lemon, a little butter—nothing too adventurous. My own kids, who usually turn their noses up at anything green, gobble this up without complaint. The rice is soft, the chicken is juicy, and the lemon adds just enough brightness without being sour.
- Leftovers That Actually Taste Good: This is one of those rare dishes that reheats beautifully. The rice stays moist, and the chicken doesn’t dry out. I often make a double batch on Sunday so we have lunch ready for Monday and Tuesday.
- No Special Skills Required: If you can chop garlic and measure rice, you can make this recipe. There’s no searing, no deglazing, no complicated techniques. Just mix, bake, and eat.
What makes this recipe different from all the other lemon chicken recipes out there is the ratio of liquid to rice. I’ve found that using chicken broth instead of water adds a depth of flavor that plain water just can’t match. And the trick of adding the lemon slices on top of the chicken before baking? That’s pure magic. The lemon infuses the meat while it roasts, making every bite bright and savory. This is comfort food that doesn’t weigh you down—it’s satisfying, simple, and soul-warming in the best possible way.
What Ingredients You Will Need
This recipe uses simple, wholesome ingredients that come together to create a meal that tastes far more complex than it actually is. Most of these are pantry staples or easy to find at any grocery store. Let me walk you through what you’ll need and why each ingredient matters.
- Chicken Thighs (bone-in, skin-on, about 6-8 pieces): I prefer thighs over breasts for this recipe because they stay juicy and flavorful during the longer baking time. The skin gets crispy and golden, which adds a lovely texture to the dish. If you’re watching your fat intake, you can use boneless, skinless thighs, but reduce the cooking time by about 10 minutes. (I’ve tested both, and bone-in really does give the best results.)
- Long-Grain White Rice (1 ½ cups): Basmati or jasmine rice works beautifully here. Avoid short-grain rice, which can turn gummy. I’ve also tried this with brown rice, and while it works, you’ll need to increase the liquid by ½ cup and bake for an additional 20 minutes. For a quick weeknight meal, stick with white rice.
- Chicken Broth (2 ½ cups): Use low-sodium broth so you can control the salt level. The broth is what gives the rice its savory flavor—water alone won’t cut it. If you have homemade broth in the freezer, even better. I like using Swanson or Kitchen Basics for consistent results.
- Lemons (2 large): You’ll need the juice of one lemon and the slices from the other. Fresh lemons are non-negotiable here. Bottled lemon juice has a flat, acidic taste that just doesn’t compare. Look for lemons that feel heavy for their size—they’ll be juicier.
- Garlic (6-8 cloves, minced): Fresh garlic is key. Don’t use the pre-minced stuff from a jar—it lacks the pungent, aromatic quality that makes this dish shine. I usually add a little extra because, honestly, you can never have too much garlic.
- Butter (3 tablespoons, unsalted): Butter adds richness and helps the rice stay creamy. You can substitute olive oil if you prefer, but butter really does give a better flavor. I’ve tried both, and butter wins every time.
- Dried Oregano (1 teaspoon): This herb pairs beautifully with lemon and garlic. If you have fresh oregano, use about 1 tablespoon, chopped. (Fresh is lovely, but dried works perfectly fine and is more budget-friendly.)
- Dried Thyme (½ teaspoon): Thyme adds a subtle earthiness that balances the brightness of the lemon. You can also use fresh thyme sprigs—just lay them on top of the chicken before baking and remove them before serving.
- Salt and Black Pepper (to taste): Don’t be shy with the salt—rice needs a fair amount of seasoning. I use about 1 ½ teaspoons of salt and ½ teaspoon of pepper for the whole dish.
- Fresh Parsley (for garnish, optional): A sprinkle of chopped parsley adds a pop of color and a fresh finish. It’s not essential, but it makes the dish look restaurant-worthy.
- Optional: Red Pepper Flakes (¼ teaspoon): If you like a little heat, add a pinch of red pepper flakes along with the herbs. It doesn’t make the dish spicy—just gives it a subtle warmth.
Substitution Guidance: For a dairy-free version, use olive oil instead of butter. For a gluten-free option, this recipe is naturally gluten-free as long as your chicken broth is certified gluten-free. If you want to add vegetables, throw in a cup of frozen peas or chopped carrots during the last 15 minutes of baking—they’ll steam right in the pan.
Equipment Needed
You don’t need a fully stocked kitchen to make this easy one-pan lemon garlic chicken and rice. Here’s what you’ll need:
- Large Oven-Safe Skillet or Baking Dish: A 12-inch cast-iron skillet is my go-to for this recipe. It heats evenly and goes from stovetop to oven without any fuss. If you don’t have cast iron, any oven-safe skillet or a 9×13-inch baking dish will work. (I’ve even used a ceramic baking dish, and it turned out great.)
- Cutting Board and Sharp Knife: For mincing garlic and slicing lemons. A good chef’s knife makes the prep work quick and easy.
- Measuring Cups and Spoons: Accurate measurements matter, especially for the rice-to-liquid ratio. Use dry measuring cups for the rice and liquid measuring cups for the broth.
- Aluminum Foil: You’ll need this to cover the pan during the first part of baking. It traps the steam and ensures the rice cooks evenly. Parchment paper won’t work the same way—foil is best.
- Tongs: For arranging the chicken thighs in the pan. Tongs give you better control than a fork, and they won’t tear the skin.
- Meat Thermometer (optional but helpful): Chicken is safe to eat at 165°F, but I find thighs are best at 175-180°F—the higher temperature breaks down the connective tissue and makes the meat extra tender.
If you don’t have a cast-iron skillet, don’t worry. A stainless steel skillet or even a disposable aluminum roasting pan will work in a pinch. The key is using a pan that’s large enough to hold the chicken in a single layer without crowding.
Preparation Method
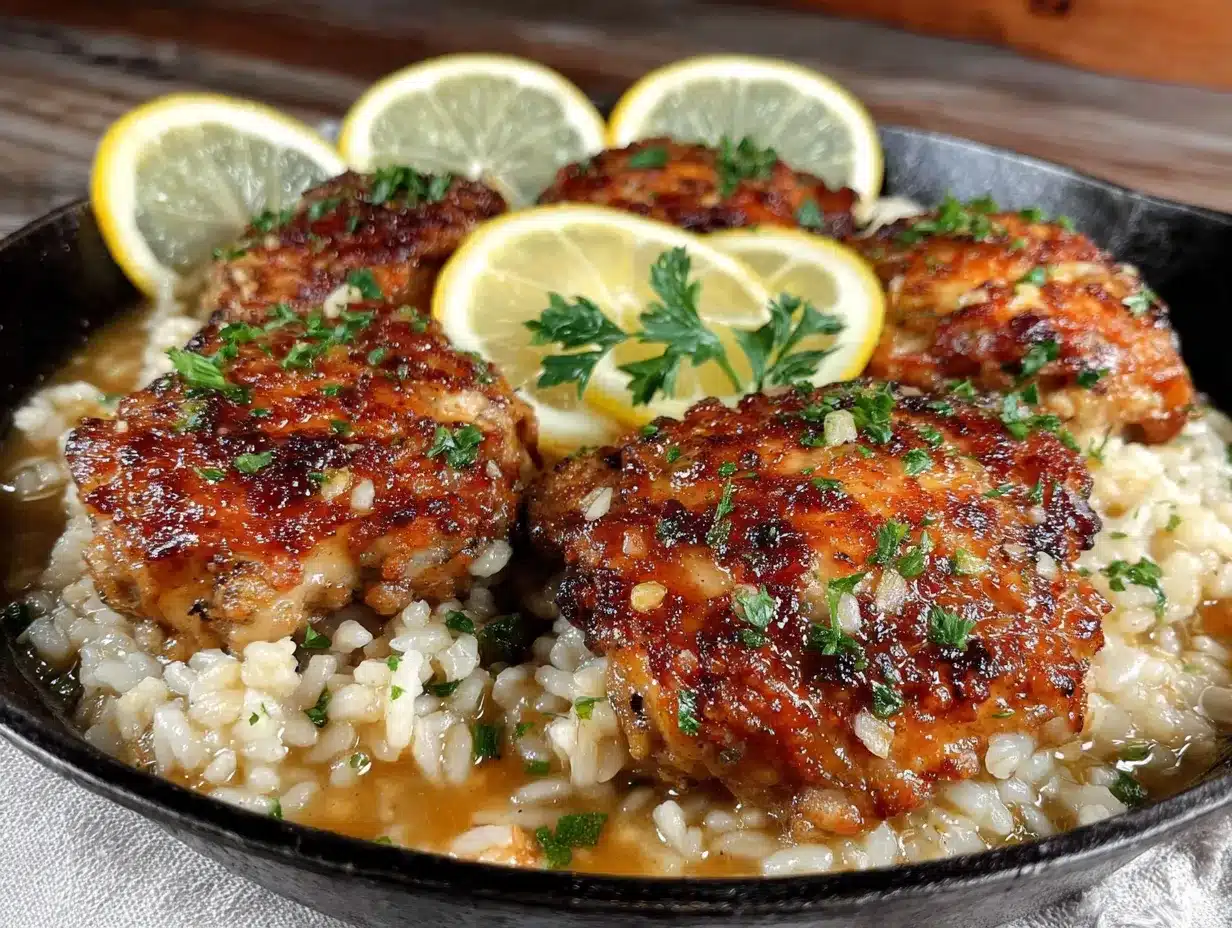
This recipe comes together in about 10 minutes of active prep time, then the oven does the rest. Follow these steps, and you’ll have a perfect dinner every time.
- Preheat your oven to 375°F (190°C). While the oven is heating, take your chicken thighs out of the refrigerator and let them sit at room temperature for about 10 minutes. This helps them cook more evenly.
- Prepare the rice mixture. In your oven-safe skillet or baking dish, combine the 1 ½ cups of long-grain white rice, 2 ½ cups of low-sodium chicken broth, the juice of one lemon, 3 tablespoons of melted butter, the minced garlic, 1 teaspoon of dried oregano, ½ teaspoon of dried thyme, 1 ½ teaspoons of salt, and ½ teaspoon of black pepper. Stir everything together until well combined. The broth should look slightly cloudy from the butter and lemon—that’s a good sign.
- Season the chicken. Pat the chicken thighs dry with paper towels. (This step is crucial for crispy skin.) Season both sides generously with salt and pepper. Don’t skip this—the chicken is a major source of flavor for the rice.
- Arrange the chicken. Nestle the chicken thighs into the rice mixture, skin-side up. Make sure they’re sitting on top of the rice, not buried in it. The rice needs to be exposed to the steam to cook properly. Arrange the slices from the second lemon around and on top of the chicken pieces.
- Cover and bake. Cover the skillet tightly with aluminum foil. Bake for 30 minutes. The foil traps the steam, which cooks the rice and keeps the chicken moist.
- Uncover and finish baking. After 30 minutes, carefully remove the foil. The rice should be mostly cooked and the chicken should be starting to brown. Increase the oven temperature to 400°F (200°C) and bake uncovered for another 15-20 minutes, until the chicken skin is golden and crispy and the rice is tender. If the rice still looks a little wet, give it an extra 5 minutes.
- Rest before serving. Remove the skillet from the oven and let it rest for 5 minutes. This allows the rice to absorb any remaining liquid and makes it easier to serve. Sprinkle with fresh parsley and a pinch of red pepper flakes if desired.
Troubleshooting Tip: If your rice is still crunchy after the full baking time, don’t panic. Add ¼ cup of hot broth or water, re-cover with foil, and bake for another 10 minutes. This usually fixes the problem. Also, keep in mind that different ovens run at different temperatures—if yours runs hot, check the dish 5 minutes early.
Sensory Cues: When you uncover the pan after 30 minutes, you should see steam rising and the rice should look plump and hydrated. The chicken should be firm to the touch and starting to pull away from the bone. When it’s fully done, the skin should be crackling-crisp and deep golden brown, and the rice should be fluffy, not mushy.
Cooking Tips & Techniques
Over the dozens of times I’ve made this easy one-pan lemon garlic chicken and rice, I’ve learned a few tricks that make a real difference. Here are my best tips for getting it right every time.
- Don’t skip the pat-dry step: I know it seems fussy, but drying the chicken skin thoroughly is the secret to getting that crispy, golden crust. If the skin is wet, it will steam instead of crisp. I learned this the hard way after making a batch with sad, rubbery skin.
- Use a meat thermometer for confidence: Chicken thighs are forgiving, but if you’re nervous about undercooking, use a thermometer. Insert it into the thickest part of the thigh, avoiding the bone. 175°F is the sweet spot for tender, juicy meat.
- Let the rice rest: I know it’s tempting to dig in right away, but letting the dish rest for 5 minutes makes a huge difference. The rice continues to absorb liquid and sets up properly. Serve it too soon, and you’ll have soupy rice.
- Toast the rice for extra flavor (optional): If you have an extra 5 minutes, try toasting the rice in the butter before adding the broth. Just melt the butter in the skillet, add the dry rice, and stir for 2-3 minutes until it smells nutty. Then add the broth and continue with the recipe. It adds a subtle depth that’s really lovely.
- Watch your salt: Different brands of chicken broth have varying sodium levels. If you’re using regular (not low-sodium) broth, reduce the added salt to 1 teaspoon. You can always add more at the table.
- Don’t overcrowd the pan: The chicken thighs need to be in a single layer with a little space between them. If they’re crammed together, they’ll steam instead of roast. Use a larger pan if needed, or cook in two batches.
One mistake I made early on was lifting the foil to “check on things” during the first 30 minutes. Don’t do this! Every time you lift the foil, you release steam, and that steam is what cooks the rice. Trust the process and keep it covered.
Variations & Adaptations
This recipe is incredibly versatile. Here are some ways to change it up based on what you have on hand or what your family prefers.
- Vegetable-Packed Version: Add 1 cup of frozen peas, chopped carrots, or green beans during the last 15 minutes of baking. They’ll steam in the pan and add color and nutrition. My kids actually love the peas—they soak up the lemon flavor.
- Creamy Lemon Chicken and Rice: For a richer version, stir in ½ cup of heavy cream or full-fat coconut milk after the rice is cooked. Return the pan to the oven for 5 minutes to heat through. It turns the dish into a creamy, indulgent comfort meal.
- Spicy Kick: Add ½ teaspoon of smoked paprika and ¼ teaspoon of cayenne pepper to the rice mixture. The smokiness pairs beautifully with the lemon. I made this version for a potluck, and it was gone in 20 minutes.
- Herb Garden Twist: Swap the dried oregano and thyme for 2 tablespoons of fresh chopped rosemary and 1 tablespoon of fresh dill. The rosemary adds a piney aroma that’s amazing with chicken. Just sprinkle the fresh herbs over the top before baking.
- One-Pan Lemon Garlic Chicken and Rice with Sausage: Replace half the chicken thighs with smoked sausage or kielbasa, sliced into rounds. The sausage adds a smoky, savory flavor that my husband absolutely loves. Just nestle the sausage pieces into the rice alongside the chicken.
- Dairy-Free Adaptation: Substitute the butter with olive oil or avocado oil. The flavor will be slightly different, but it still works beautifully. I’ve made it this way for friends with dairy allergies, and no one complained.
If you’re feeding a crowd, this recipe doubles easily. Just use a larger pan (like a 10×15-inch baking dish) and increase the baking time by about 10 minutes. Check the rice for doneness before serving.
Serving & Storage Suggestions
This easy one-pan lemon garlic chicken and rice is a complete meal on its own, but it pairs beautifully with a few simple sides.
Serving Suggestions: Serve the chicken and rice hot, straight from the pan. A side of steamed green beans or a simple arugula salad with lemon vinaigrette complements the flavors perfectly. For a heartier meal, add some crusty bread to soak up the lemony juices. I also love serving this with a dollop of Greek yogurt or tzatziki on the side—the coolness balances the bright lemon.
Storage Instructions: Store leftovers in an airtight container in the refrigerator for up to 4 days. The flavors actually deepen overnight, so this is one of those dishes that tastes even better the next day. To reheat, place individual portions in the microwave for 1-2 minutes, or reheat in a covered skillet over medium-low heat with a splash of broth to keep the rice moist.
Freezer Instructions: This recipe freezes surprisingly well. Let the dish cool completely, then transfer it to a freezer-safe container. It will keep for up to 3 months. To thaw, place it in the refrigerator overnight. Reheat in a 350°F oven, covered, for about 20 minutes, or until warmed through. The rice may be slightly softer after freezing, but the flavor is still fantastic.
Meal Prep Tip: I often make this on Sunday and portion it into lunch containers for the week. It’s a lifesaver on busy days when I don’t have time to cook. Just add a handful of fresh spinach or a squeeze of lemon before serving to brighten it up.
Nutritional Information & Benefits
This easy one-pan lemon garlic chicken and rice is a balanced meal that provides protein, carbohydrates, and healthy fats. Here’s an approximate nutritional breakdown per serving (based on 6 servings, using bone-in, skin-on chicken thighs):
- Calories: 485
- Protein: 28g
- Carbohydrates: 42g
- Fat: 22g
- Saturated Fat: 8g
- Fiber: 1g
- Sodium: 720mg
Health Benefits: Chicken thighs are a great source of protein, iron, and B vitamins, which support energy metabolism. Garlic is known for its immune-boosting properties, and lemons provide a good dose of vitamin C. Using chicken broth instead of water adds minerals like calcium and magnesium. If you’re watching your sodium, use low-sodium broth and reduce the added salt.
Dietary Considerations: This recipe is naturally gluten-free and nut-free. For a lower-carb option, reduce the rice to 1 cup and add extra vegetables like cauliflower florets or zucchini. For a lower-fat version, use boneless, skinless chicken thighs and reduce the butter to 1 tablespoon.
Personal Note: I love that this dish feels indulgent but is actually quite balanced. It’s the kind of meal that leaves you feeling satisfied without being weighed down. And knowing that my family is getting a good mix of nutrients makes it even better.
Conclusion
This easy one-pan lemon garlic chicken and rice has become a staple in my kitchen for good reason. It’s simple enough for a harried Tuesday night but impressive enough for company. The combination of tender, juicy chicken, fluffy rice, and bright lemon flavors is just unbeatable. And the fact that it all comes together in one pan? That’s the kind of convenience every home cook deserves.
I hope you give this recipe a try and make it your own. Maybe you’ll add extra garlic, throw in some vegetables your kids love, or serve it with a side of roasted broccoli. However you make it, I promise it will become a regular in your dinner rotation. There’s something so comforting about a meal that works every single time, no matter how chaotic your day has been.
If you make this recipe, I’d love to hear how it turned out! Leave a comment below and let me know your favorite variation. Did your family love it? Did you add a secret ingredient? Share your stories—I read every single one. And if you’re looking for more easy weeknight dinners, be sure to check out my crispy garlic chicken or this one-pot creamy tomato pasta for another family favorite. Happy cooking, friends!
Frequently Asked Questions
Can I use chicken breasts instead of thighs?
Yes, you can, but be aware that chicken breasts cook faster and can dry out more easily. If using boneless, skinless breasts, reduce the uncovered baking time to 10-12 minutes and check the internal temperature. For bone-in breasts, follow the recipe as written but start checking for doneness 5 minutes early.
Why is my rice still crunchy after baking?
Crunchy rice usually means there wasn’t enough liquid or the oven temperature was too low. Add ¼ cup of hot broth, re-cover with foil, and bake for an additional 10 minutes. Make sure your broth measurement is accurate next time—using a liquid measuring cup is key.
Can I make this recipe in a slow cooker or Instant Pot?
I haven’t tested this exact recipe in a slow cooker, but you can adapt it. For a slow cooker, reduce the broth to 2 cups and cook on low for 4-5 hours. For an Instant Pot, use the sauté function to brown the chicken first, then add the rice and broth and pressure cook on high for 5 minutes with a natural release. The texture will be different, but the flavor will still be great.
How do I prevent the rice from becoming mushy?
Mushy rice is usually a sign of too much liquid or overcooking. Stick to the 1:1.5 ratio of rice to broth (1 ½ cups rice to 2 ¼ cups broth, plus the lemon juice). Also, don’t stir the rice once it’s in the oven—stirring releases starch and can make it gummy.
Can I add vegetables to this dish?
Absolutely! Frozen peas, chopped carrots, green beans, or even diced zucchini work well. Add them during the last 15 minutes of baking so they don’t overcook. If you’re using fresh vegetables, cut them into small, even pieces so they cook through in time.
Pin This Recipe!
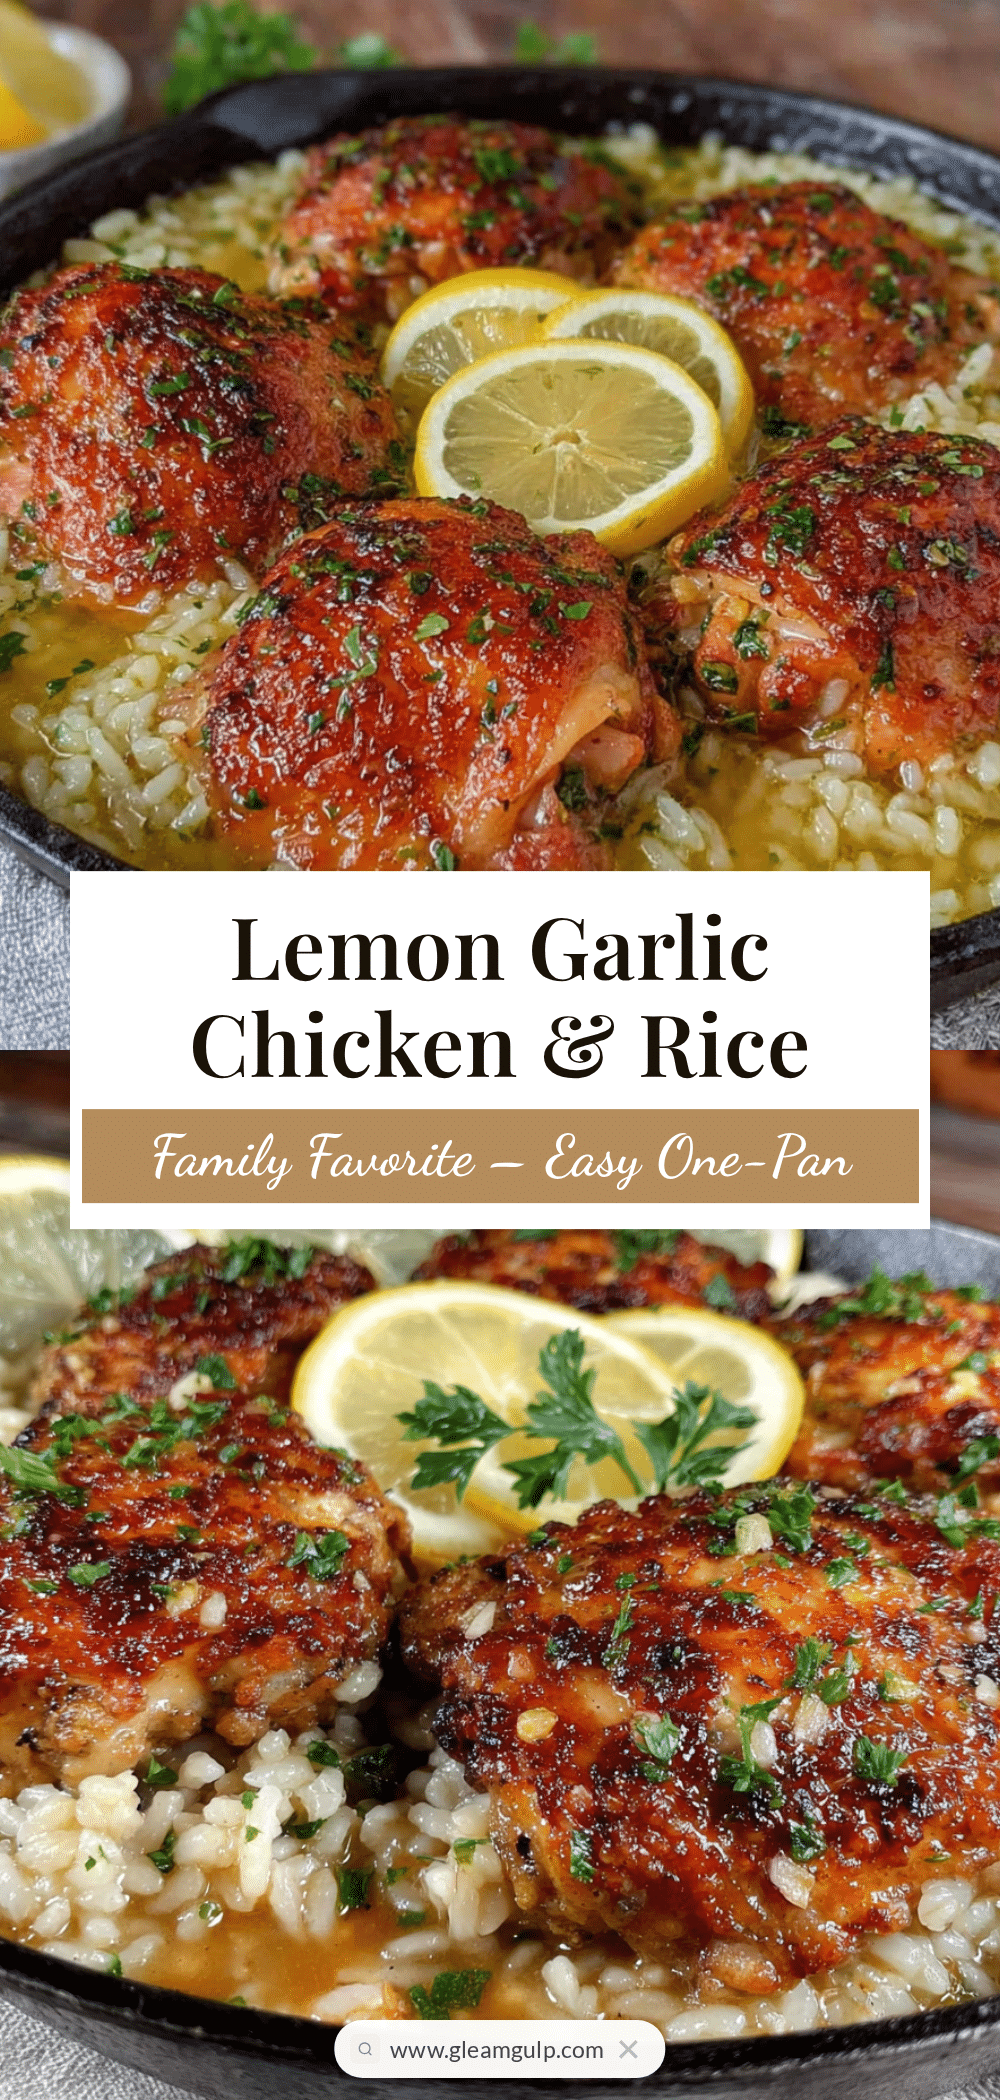
Easy One-Pan Lemon Garlic Chicken and Rice

A simple, one-pan meal featuring tender chicken thighs and fluffy rice infused with lemon and garlic. Perfect for busy weeknights, this budget-friendly recipe requires minimal prep and delivers maximum flavor.
- Prep Time: 10 minutes
- Cook Time: 45 minutes
- Total Time: 55 minutes
- Yield: 6 servings 1x
- Category: Main Course
- Cuisine: Portuguese-inspired
Ingredients
- 6–8 bone-in, skin-on chicken thighs
- 1 ½ cups long-grain white rice (basmati or jasmine)
- 2 ½ cups low-sodium chicken broth
- 2 large lemons (juice of one, slices of the other)
- 6–8 cloves garlic, minced
- 3 tablespoons unsalted butter, melted
- 1 teaspoon dried oregano
- ½ teaspoon dried thyme
- 1 ½ teaspoons salt
- ½ teaspoon black pepper
- Fresh parsley for garnish (optional)
- ¼ teaspoon red pepper flakes (optional)
Instructions
- Preheat oven to 375°F (190°C). Let chicken thighs sit at room temperature for 10 minutes.
- In an oven-safe skillet or baking dish, combine rice, chicken broth, lemon juice, melted butter, minced garlic, oregano, thyme, salt, and pepper. Stir well.
- Pat chicken thighs dry with paper towels. Season both sides generously with salt and pepper.
- Nestle chicken thighs into the rice mixture, skin-side up. Arrange lemon slices around and on top of the chicken.
- Cover tightly with aluminum foil and bake for 30 minutes.
- Remove foil, increase oven temperature to 400°F (200°C), and bake uncovered for 15-20 minutes until chicken skin is golden and crispy and rice is tender.
- Let rest for 5 minutes. Garnish with fresh parsley and red pepper flakes if desired.
Notes
For crispy skin, pat chicken dry thoroughly. Do not lift foil during the first 30 minutes of baking. If rice is still crunchy after baking, add ¼ cup hot broth, re-cover, and bake 10 more minutes. For dairy-free, substitute butter with olive oil.
Nutrition
- Serving Size: 1 serving (1 chicken
- Calories: 485
- Sugar: 2
- Sodium: 720
- Fat: 22
- Saturated Fat: 8
- Carbohydrates: 42
- Fiber: 1
- Protein: 28
Keywords: one-pan chicken and rice, lemon garlic chicken, easy weeknight dinner, one skillet meal, chicken thigh recipe


