Love this? Save it for later!
Share the inspiration with your friends
I was hunched over my steering wheel, trying to parallel park on a ridiculously narrow street in Portland, when a woman in a bright yellow raincoat tapped on my window. I rolled it down, expecting directions or maybe a complaint about my parking job. Instead, she said, “You look like you need a good recipe for pumpkin scones.” And honestly? She wasn’t wrong. I had been chasing a decent pumpkin scone recipe for months, and every single one turned out like a dense, sad hockey puck. This was my accountant, Mrs. Gable, from three blocks over—the same woman who once told me the secret to her marriage was never discussing finances after 6 PM. I wasn’t expecting baking advice from my accountant, but there I was, half-parked, listening to her describe exactly how to make these perfect, kid-approved pumpkin scones with maple glaze.
She scribbled the recipe on the back of a grocery receipt she fished out of her pocket. The paper was crumpled and had a coffee stain in one corner. I remember thinking, “This is either going to be a disaster or the best thing I’ve ever baked.” I mean, the woman balanced my checkbook, so how bad could her scones be? I thanked her, finished my parking job (barely), and drove home with that crinkled receipt sitting on my passenger seat like a golden ticket.
The first batch I made, I forgot to chill the butter. The scones spread out into flat, greasy blobs. But the flavor? Even then, it was there—warm, spiced, and just sweet enough. The second time, I followed her instructions to the letter, and let me tell you, the kitchen smelled like a cozy fall festival. My kids, who usually turn their noses up at anything with “pumpkin” in the name, devoured three each before I could even get the maple glaze drizzled on. That’s when I knew this recipe was a keeper. Maybe you’ve been there, too—trying to find a baked good that pleases everyone without costing a small fortune or requiring a culinary degree. This is that recipe.
Why You’ll Love This Recipe
These aren’t just any pumpkin scones. They are the kind that makes you feel like you’ve won the breakfast lottery. I’ve tested this recipe at least a dozen times (my family is very patient), and it checks every single box for a busy home cook. Here’s why you’ll be making these on repeat:
- Kid-Approved and Picky-Eater Tested: My own kids are my toughest critics. They’ll eat a plain buttered noodle over anything with a hint of “healthy.” But these scones? They ask for them by name. The maple glaze is the secret weapon—it’s sweet enough to win them over, but the pumpkin and spices keep it from being just another sugar bomb.
- Budget-Friendly Pantry Ingredients: You probably have most of these items in your kitchen right now. No need to hunt down fancy flours or expensive extracts. Canned pumpkin is cheap, and a little goes a long way. This is smart cooking for a happy table without breaking the bank.
- Comes Together in Under 30 Minutes: From mixing bowl to oven, you’re looking at about 10 minutes of active prep. The scones bake in 12 to 15 minutes. That’s faster than a trip to the coffee shop, and you get a whole batch instead of just one.
- Perfect for Weekday Mornings or Weekend Treats: They’re sturdy enough to pack in lunchboxes (yes, my kids have taken them to school), but fancy enough to serve when you have company. I’ve even brought them to a potluck, and they disappeared before the main course.
- Leftovers Reheat Like a Dream: Pop one in the microwave for 15 seconds, and it tastes almost fresh from the oven. The glaze gets a little melty, which is honestly even better. No sad, dry scones here.
What makes these different from every other pumpkin scone recipe out there? It’s the texture. Most scones are either too dry or too cakey. These strike that perfect balance—flaky on the outside, soft and tender on the inside. The trick is using cold butter and not overmixing the dough. I learned that the hard way after my first few flops. This version also uses a touch of maple syrup in the dough itself, not just the glaze, which adds a subtle warmth that cinnamon alone can’t give you.
What Ingredients You Will Need
This recipe uses simple, wholesome ingredients to deliver big flavor without the fuss. Most of these are pantry staples, and the ones that aren’t are easy to find and won’t break the bank. Let’s break down what you need and why each ingredient matters.
- 2 cups all-purpose flour (spooned and leveled): This is the base of your scones. I prefer King Arthur Flour for consistent results, but any brand works. If you want a slightly nuttier flavor, you can swap half a cup with whole wheat pastry flour.
- 1/3 cup granulated sugar: Just enough sweetness to balance the pumpkin. Don’t be tempted to cut it down—the sugar also helps with browning and texture.
- 1 tablespoon baking powder: This is your leavening agent. Make sure it’s fresh! Expired baking powder is the number one reason scones turn out flat.
- 1/2 teaspoon baking soda: Works with the buttermilk to give the scones a little extra lift. If you don’t have buttermilk, you can use regular milk with a teaspoon of vinegar or lemon juice.
- 1 teaspoon ground cinnamon: The star spice. I use Saigon cinnamon when I can find it—it’s stronger and more aromatic.
- 1/2 teaspoon ground ginger: Adds a gentle warmth. Freshly ground is nice, but the jarred stuff works perfectly.
- 1/4 teaspoon ground nutmeg: Freshly grated is amazing, but pre-ground is fine. A little goes a long way.
- 1/4 teaspoon ground cloves: Just a pinch. It rounds out the spice blend and makes the kitchen smell incredible.
- 1/2 teaspoon salt: Don’t skip it! Salt enhances all the other flavors and keeps the scones from tasting flat.
- 6 tablespoons cold unsalted butter, cut into small cubes: This is crucial. The butter needs to be cold so it creates little pockets of steam in the oven, giving you those flaky layers. I pop my butter in the freezer for 10 minutes before cutting it.
- 1/2 cup canned pumpkin puree: Not pumpkin pie filling! Make sure you get 100% pure pumpkin. Libby’s is my go-to brand. If you have leftover pumpkin, you can freeze it in ice cube trays for later use.
- 1/4 cup buttermilk, cold: The acidity in buttermilk tenderizes the gluten, making the scones soft. If you don’t have buttermilk, stir 1 teaspoon of white vinegar into 1/4 cup of regular milk and let it sit for 5 minutes.
- 1/4 cup pure maple syrup: This adds sweetness and moisture to the dough. Use the real stuff, not pancake syrup. The flavor is noticeably better.
- 1 large egg: Binds everything together and adds richness. Take it out of the fridge 15 minutes before you start so it’s at room temperature.
- 1 teaspoon vanilla extract: Pure vanilla extract is worth the splurge here. It enhances the warm spices beautifully.
For the Maple Glaze:
- 1 cup powdered sugar, sifted: Sifting prevents lumps. I know it’s an extra step, but it makes a difference in the smoothness of the glaze.
- 2 tablespoons pure maple syrup: The star of the glaze. Use the same syrup you used in the dough.
- 1 to 2 tablespoons milk (or cream): This thins the glaze to the perfect drizzling consistency. Start with 1 tablespoon and add more as needed.
- Pinch of salt: Balances the sweetness. A tiny pinch is all you need.
Equipment Needed
You don’t need a fancy bakery setup to make these scones. Here’s what you’ll need, along with a few tips I’ve picked up along the way.
- Large mixing bowl: Any bowl will do, but a wide one makes it easier to mix the butter into the flour without making a mess.
- Pastry cutter or two forks: A pastry cutter is ideal for cutting cold butter into flour. If you don’t have one, two forks or even your fingertips work in a pinch. Just work quickly so the butter stays cold.
- Whisk: For mixing the dry ingredients and the wet ingredients separately.
- Baking sheet: A light-colored baking sheet is best—dark ones can cause the bottoms to brown too quickly. Line it with parchment paper for easy cleanup.
- Bench scraper or sharp knife: For cutting the scone dough into wedges. A bench scraper is my favorite because it cuts cleanly without smashing the dough.
- Cooling rack: Essential for letting the scones cool evenly. If you leave them on the hot baking sheet, they’ll continue to cook and can dry out.
- Small bowl and whisk: For making the glaze. A fork works in a pinch, but a small whisk gives you a smoother result.
If you don’t have a pastry cutter, don’t worry. I’ve used a food processor before, pulsing the butter into the flour in short bursts. Just be careful not to overprocess—you want pea-sized butter pieces, not a fine meal. Also, a pizza cutter works surprisingly well for cutting the dough triangles!
Preparation Method
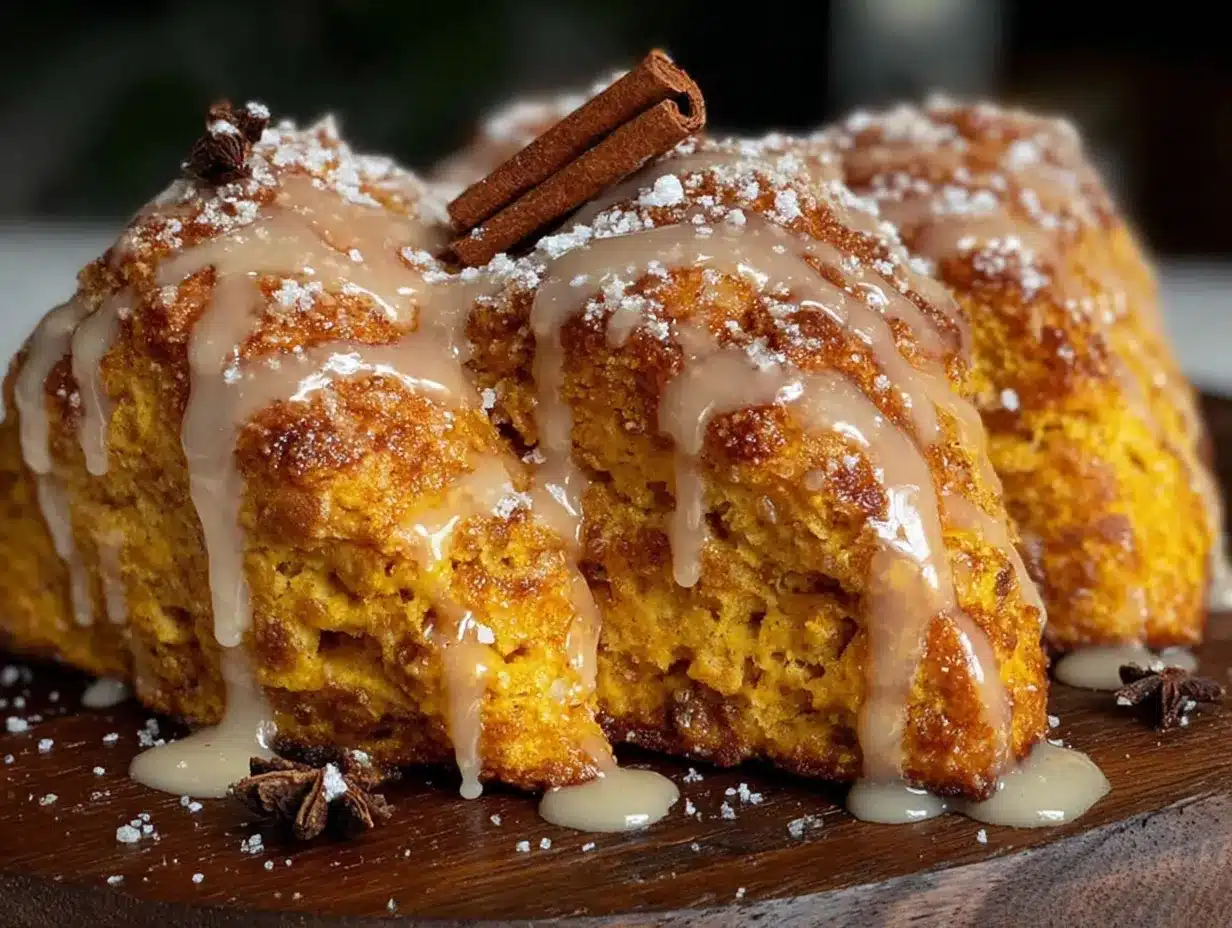
Let’s get baking! Follow these steps carefully, and you’ll have a tray of golden, flaky scones in no time. I’ve included my best tips and tricks to help you avoid the mistakes I made early on.
- Preheat your oven to 400°F (200°C). Line a baking sheet with parchment paper. This is non-negotiable—parchment paper prevents sticking and makes cleanup a breeze. If you don’t have parchment, a silicone baking mat works too.
- In a large bowl, whisk together the dry ingredients: 2 cups all-purpose flour, 1/3 cup granulated sugar, 1 tablespoon baking powder, 1/2 teaspoon baking soda, 1 teaspoon cinnamon, 1/2 teaspoon ginger, 1/4 teaspoon nutmeg, 1/4 teaspoon cloves, and 1/2 teaspoon salt. Make sure there are no lumps, especially in the baking powder.
- Cut in the cold butter: Add the 6 tablespoons of cold, cubed butter to the flour mixture. Use a pastry cutter or two forks to cut the butter into the flour until the mixture looks like coarse crumbs with pea-sized butter pieces. Don’t overdo it—those little butter chunks are what create flaky layers. If the butter starts to soften, pop the bowl in the fridge for 5 minutes.
- In a separate bowl, whisk together the wet ingredients: 1/2 cup pumpkin puree, 1/4 cup buttermilk, 1/4 cup maple syrup, 1 large egg, and 1 teaspoon vanilla extract. Whisk until smooth and fully combined. The mixture will be a bit thick, and that’s okay.
- Combine wet and dry ingredients: Pour the wet mixture into the flour-butter mixture. Stir with a spatula or wooden spoon until just combined. The dough will look shaggy and a little dry—that’s what you want. Do not overmix, or the scones will be tough. If there are a few streaks of flour left, that’s fine.
- Turn the dough out onto a lightly floured surface: Use your hands to gently bring the dough together into a ball. It will be crumbly at first, but the warmth of your hands will help it come together. If it’s too dry to hold together, add a teaspoon of buttermilk at a time until it does.
- Shape the dough into a 3/4-inch thick circle: Pat it out gently—don’t use a rolling pin, as that can overwork the dough. The circle should be about 8 to 9 inches in diameter. Use a bench scraper to help shape it if needed.
- Cut the dough into 8 wedges: Use a sharp knife or bench scraper to cut the circle into 8 equal triangles. Cut cleanly straight down—don’t saw back and forth, which can seal the edges and prevent rising. Place the wedges on the prepared baking sheet, spacing them about 2 inches apart.
- Bake for 12 to 15 minutes: The scones are done when they are lightly golden on the bottom and the edges are just starting to brown. The tops should look set and feel firm to the touch. A toothpick inserted into the center should come out clean or with a few moist crumbs.
- Cool on the baking sheet for 5 minutes: This allows them to set up a bit. Then transfer them to a cooling rack to cool completely before glazing. If you glaze them while they’re still warm, the glaze will melt and soak in, which isn’t a disaster, but you’ll lose that pretty drizzle.
- Make the glaze: In a small bowl, whisk together 1 cup sifted powdered sugar, 2 tablespoons maple syrup, 1 to 2 tablespoons milk, and a pinch of salt. Whisk until smooth. The glaze should be thick but pourable. If it’s too thick, add a few drops of milk. If it’s too thin, add a little more powdered sugar.
- Drizzle the glaze over the cooled scones: Use a spoon to drizzle the glaze back and forth over the scones. You can also dip the tops of the scones into the glaze for a thicker coating. Let the glaze set for about 10 minutes before serving.
Cooking Tips & Techniques
I’ve made my share of scone mistakes, so you don’t have to. Here are the most important things I’ve learned, along with a few pro tips to help you nail these every single time.
Keep everything cold. This is the golden rule of scone-making. Cold butter creates steam pockets as it melts in the oven, which gives you those flaky layers. If your kitchen is warm, chill your flour and bowl too. I’ve even frozen my butter and grated it into the flour on hot summer days. Works like a charm.
Don’t overmix the dough. I cannot stress this enough. Overmixing develops gluten, which makes scones tough and chewy. You want to stir just until the flour is moistened. A few dry spots are totally fine. When you pat the dough into a circle, handle it as little as possible. My first few batches were bricks because I couldn’t stop fussing with the dough.
Use a light touch when shaping. Instead of pressing the dough down, try patting it gently with your fingertips. If the dough sticks to your hands, dust them lightly with flour. I used to use a rolling pin, but it always compressed the dough too much. Now I just use my hands, and the scones come out much lighter.
Chill the shaped scones before baking. This is an optional step, but it makes a difference. After cutting the scones, pop the baking sheet in the fridge for 15 to 20 minutes. This firms up the butter again, which means the scones will rise higher and spread less. If you’re short on time, you can skip it, but your scones will be a bit flatter.
Bake on the middle rack. The middle rack provides the most even heat. If your scones are browning too quickly on the bottom, slide another baking sheet underneath to insulate them. I learned this trick after burning the bottoms of three batches in a row.
Let them cool completely before glazing. I know it’s tempting to drizzle that glaze on while they’re still warm, but patience pays off. A warm scone will absorb the glaze, leaving you with a sticky mess instead of a beautiful drizzle. If you’re in a hurry, you can spread the glaze on with a brush, but the texture won’t be quite the same.
Variations & Adaptations
One of the best things about this recipe is how flexible it is. Here are some of my favorite ways to switch it up, depending on what I have on hand or who I’m feeding.
Gluten-Free Version: Swap the all-purpose flour with a 1:1 gluten-free baking flour blend. I’ve had good luck with Bob’s Red Mill 1-to-1 Baking Flour. Add an extra tablespoon of buttermilk, as gluten-free flours tend to absorb more liquid. The texture will be slightly more crumbly, but the flavor is still spot-on.
Dairy-Free Adaptation: Use cold coconut oil or vegan butter in place of the regular butter. For the buttermilk, stir 1 tablespoon of lemon juice into 1/4 cup of unsweetened almond or oat milk and let it sit for 5 minutes. The scones will be a little less flaky, but they’ll still be delicious. My dairy-free neighbor loves these with a coconut milk-based glaze.
Add-In Extras: Fold in 1/2 cup of mini chocolate chips, dried cranberries, or chopped pecans after you combine the wet and dry ingredients. Chocolate chips are my kids’ favorite addition—they claim it makes the scones taste like dessert. White chocolate chips would also be amazing with the pumpkin and maple flavors.
Spice It Up: If you love a stronger spice flavor, add 1/4 teaspoon of cardamom or allspice to the flour mixture. I once made a batch with a pinch of cayenne pepper, and it was surprisingly good—a little warmth that cuts through the sweetness. Just don’t tell the kids unless they like a kick.
Pumpkin-Free Option: Believe it or not, you can use 1/2 cup of mashed sweet potato or butternut squash puree instead of pumpkin. The flavor will be a bit different, but the texture works the same way. I’ve done this when I ran out of canned pumpkin and had leftover roasted sweet potatoes in the fridge.
Serving & Storage Suggestions
These scones are wonderful fresh, but they also hold up well for a few days. Here’s how to serve and store them for the best experience.
Serving Temperature: Scones are best served at room temperature or slightly warm. If you’re reheating, pop them in a 300°F (150°C) oven for 5 minutes, or microwave them for 10 to 15 seconds. The microwave will soften them, while the oven will crisp up the edges again.
Presentation Ideas: Arrange the glazed scones on a pretty plate or a wooden board. Dust them with a little extra cinnamon or a sprinkle of flaky sea salt for a fancy touch. I like to serve them with a side of warm apple cider or a hot cup of coffee for a cozy fall treat.
Complementary Dishes: These scones pair beautifully with a bowl of hearty soup or chili for a savory-sweet combo. For breakfast, serve them alongside scrambled eggs and fresh fruit. They’re also fantastic with a dollop of whipped cream or a scoop of vanilla ice cream for dessert.
Storage Instructions: Store unglazed scones in an airtight container at room temperature for up to 3 days. Glazed scones should be stored in a single layer in an airtight container, with parchment paper between layers to prevent sticking. They’ll keep for 2 days at room temperature.
Freezer Tips: You can freeze the unbaked scone wedges on a baking sheet until solid, then transfer them to a freezer bag. Bake from frozen, adding 2 to 3 minutes to the baking time. Baked and cooled scones (unglazed) can also be frozen for up to 3 months. Thaw at room temperature and reheat before glazing.
Flavor Development: Honestly, these scones are even better the next day. The spices have time to meld, and the texture softens slightly. If you can resist eating them all on day one, you’re in for a treat on day two.
Nutritional Information & Benefits
While scones are definitely a treat, this version has a few redeeming qualities that make me feel a little better about serving them for breakfast. Here’s a rough nutritional breakdown per scone (based on 8 servings, with glaze).
| Nutrient | Amount per Scone |
|---|---|
| Calories | ~320 |
| Total Fat | ~12g |
| Saturated Fat | ~7g |
| Carbohydrates | ~50g |
| Sugar | ~28g |
| Protein | ~5g |
| Fiber | ~2g |
| Vitamin A | ~60% DV |
Health Benefits: Pumpkin is packed with Vitamin A, which is great for eye health and immune function. It also adds moisture without a ton of fat, which is why these scones stay tender. The maple syrup provides a touch of antioxidants, though let’s be honest—we’re eating these for the taste, not the health benefits. Still, it’s nice to know there’s a vegetable hiding in there.
Dietary Considerations: This recipe is vegetarian. For a vegan version, use a flax egg (1 tablespoon ground flaxseed mixed with 3 tablespoons water) and the dairy-free substitutions mentioned above. It is not low-carb or keto-friendly due to the flour and sugar. If you have a nut allergy, this recipe is naturally nut-free as written.
Conclusion
So there you have it—a recipe that came to me on a crumpled receipt from my accountant, of all people, and has since become a staple in my kitchen. These kid-approved pumpkin scones with maple glaze are everything I want in a fall baked good: easy to make, full of warm spices, and sweet enough to make everyone happy. They don’t require a trip to a specialty bakery or a long list of expensive ingredients. They’re just good, honest food that brings people together.
I love that I can make these on a Sunday afternoon and have happy kids (and a happy husband) all week long. The maple glaze is the finishing touch that makes them feel special, but honestly, they’re pretty amazing even without it. If you try them, I hope you’ll make them your own. Add some chocolate chips, swap the spices, or double the glaze—there’s no wrong way to enjoy a good scone.
I’d love to hear how these turn out for you! Drop a comment below and let me know if your kids gave them the thumbs up, or if you came up with a fun variation I haven’t tried yet. Don’t forget to share this recipe with a friend who needs a little pumpkin in their life. Happy baking, friends!
Frequently Asked Questions
Can I use fresh pumpkin instead of canned?
Yes, you can! Just make sure you roast or steam the pumpkin and then puree it until smooth. You’ll need to drain off any excess liquid, as fresh pumpkin can be more watery than canned. Pat it with a paper towel if it seems too wet.
Why did my scones turn out dry?
Dry scones usually happen for one of two reasons: too much flour or overbaking. Make sure you spoon and level your flour instead of scooping it directly from the bag. Also, check your oven temperature—an oven that runs hot can dry out scones quickly. Bake them just until the edges are lightly golden.
Can I make the dough ahead of time?
Absolutely! You can prepare the dough, shape it into wedges, and refrigerate them on a baking sheet for up to 24 hours. Cover them tightly with plastic wrap. When you’re ready to bake, you can pop them straight into the oven, adding a minute or two to the baking time.
How do I get a thicker glaze?
For a thicker, more opaque glaze, use less milk. Start with just 1 tablespoon of milk and add a few drops at a time until you reach your desired consistency. You can also let the glaze sit for a few minutes—it will thicken as it sits. If it gets too thick, just stir in a tiny splash more milk.
Can I freeze the glazed scones?
I don’t recommend freezing glazed scones, as the glaze can become sticky and messy when thawed. It’s best to freeze the scones without the glaze, then thaw and glaze them fresh. If you have glazed leftovers, store them at room temperature and eat them within 2 days.
Pin This Recipe!

Easy Kid-Approved Pumpkin Scones with Maple Glaze
These pumpkin scones are flaky on the outside, soft and tender on the inside, and topped with a sweet maple glaze. They come together in under 30 minutes and are perfect for weekday mornings or weekend treats.
- Prep Time: 10 minutes
- Cook Time: 15 minutes
- Total Time: 25 minutes
- Yield: 8 scones 1x
- Category: Breakfast
- Cuisine: American
Ingredients
- 2 cups all-purpose flour (spooned and leveled)
- 1/3 cup granulated sugar
- 1 tablespoon baking powder
- 1/2 teaspoon baking soda
- 1 teaspoon ground cinnamon
- 1/2 teaspoon ground ginger
- 1/4 teaspoon ground nutmeg
- 1/4 teaspoon ground cloves
- 1/2 teaspoon salt
- 6 tablespoons cold unsalted butter, cut into small cubes
- 1/2 cup canned pumpkin puree
- 1/4 cup buttermilk, cold
- 1/4 cup pure maple syrup
- 1 large egg
- 1 teaspoon vanilla extract
- 1 cup powdered sugar, sifted
- 2 tablespoons pure maple syrup
- 1 to 2 tablespoons milk (or cream)
- Pinch of salt
Instructions
- Preheat your oven to 400°F (200°C). Line a baking sheet with parchment paper.
- In a large bowl, whisk together the dry ingredients: 2 cups all-purpose flour, 1/3 cup granulated sugar, 1 tablespoon baking powder, 1/2 teaspoon baking soda, 1 teaspoon cinnamon, 1/2 teaspoon ginger, 1/4 teaspoon nutmeg, 1/4 teaspoon cloves, and 1/2 teaspoon salt.
- Cut in the cold butter: Add the 6 tablespoons of cold, cubed butter to the flour mixture. Use a pastry cutter or two forks to cut the butter into the flour until the mixture looks like coarse crumbs with pea-sized butter pieces.
- In a separate bowl, whisk together the wet ingredients: 1/2 cup pumpkin puree, 1/4 cup buttermilk, 1/4 cup maple syrup, 1 large egg, and 1 teaspoon vanilla extract. Whisk until smooth and fully combined.
- Combine wet and dry ingredients: Pour the wet mixture into the flour-butter mixture. Stir with a spatula or wooden spoon until just combined. The dough will look shaggy and a little dry.
- Turn the dough out onto a lightly floured surface. Use your hands to gently bring the dough together into a ball.
- Shape the dough into a 3/4-inch thick circle, about 8 to 9 inches in diameter.
- Cut the dough into 8 wedges using a sharp knife or bench scraper. Place the wedges on the prepared baking sheet, spacing them about 2 inches apart.
- Bake for 12 to 15 minutes, until lightly golden on the bottom and the edges are just starting to brown.
- Cool on the baking sheet for 5 minutes, then transfer to a cooling rack to cool completely before glazing.
- Make the glaze: In a small bowl, whisk together 1 cup sifted powdered sugar, 2 tablespoons maple syrup, 1 to 2 tablespoons milk, and a pinch of salt. Whisk until smooth.
- Drizzle the glaze over the cooled scones. Let the glaze set for about 10 minutes before serving.
Notes
Keep all ingredients cold for flaky scones. Do not overmix the dough. For best results, chill the shaped scones for 15-20 minutes before baking. Let scones cool completely before glazing.
Nutrition
- Serving Size: 1 scone
- Calories: 320
- Sugar: 28
- Sodium: 350
- Fat: 12
- Saturated Fat: 7
- Carbohydrates: 50
- Fiber: 2
- Protein: 5
Keywords: pumpkin scones, maple glaze, kid-approved, easy, fall recipe


