Love this? Save it for later!
Share the inspiration with your friends
My neighbor, a retired kindergarten teacher named Mrs. Gable, watched me fumbling with a piping bag one October afternoon. I was trying—and failing—to make fancy ghost-shaped meringues for a Halloween party. She didn’t laugh, not really. She just shook her head, walked into her kitchen, and came back with a bag of Oreos, a box of instant pudding, and a handful of gummy worms. “Forget the fancy stuff,” she said, setting them on my counter. “Kids want dirt. They want worms. They want something they can help make without a meltdown.” That was seven years ago, and I haven’t made a single complicated Halloween dessert since. Honestly, she was right. These spooky Halloween dirt cups aren’t just easy—they’re the kind of recipe that turns a chaotic afternoon into a memory. The kids get to crush cookies (which, let’s face it, is deeply satisfying), and you get to look like a hero without breaking a sweat. Maybe you’ve been there, staring at a Pinterest board of impossibly decorated treats, feeling that familiar knot of “I don’t have time for this.” I get it. But this recipe? It’s the antidote. It’s the dessert that says, “Hey, Halloween is supposed to be fun, not stressful.” And honestly, that’s why it’s stayed in my rotation all these years.
Why You’ll Love This Recipe
Let me tell you why these dirt cups have become my go-to for every Halloween gathering, school party, and spooky movie night. They’re not just cute—they’re practically foolproof.
- Quick & Easy: From start to finish, you’re looking at about 15 minutes of active prep time. The hardest part is waiting for the pudding to set, and even that’s only about an hour.
- Simple Ingredients: You probably have most of these in your pantry right now. Pudding mix, milk, Oreos, cream cheese, and gummy worms. No specialty store runs required.
- Perfect for Halloween: Whether it’s a classroom party, a trunk-or-treat event, or just a cozy night watching Hocus Pocus, these cups fit right in. They’re portable, individual-serving, and mess-free.
- Crowd-Pleaser: I’ve served these to kids, adults, and even picky relatives who “don’t do dessert.” Every single time, the cups come back empty. There’s something about eating “dirt” that makes everyone feel like a kid again.
- Unbelievably Delicious: The combination of creamy pudding, tangy cream cheese, and crunchy Oreo crumbs is honestly addictive. It’s like a no-bake cheesecake crossed with a cookies-and-cream dream.
What makes this recipe different from all the other dirt cup recipes out there? It’s the cream cheese. Most versions just use pudding and crushed cookies, which can taste a bit flat. By folding in softened cream cheese, you get a richer, tangier filling that actually tastes like something special. I tested this with my neighbor’s original recipe and tweaked it until the texture was silky and the flavor had that little extra something. It’s comfort food reimagined—faster, simpler, but with the same soul-soothing satisfaction. Perfect for impressing guests without stress, or turning a simple October evening into something memorable.
What Ingredients You Will Need
This recipe uses simple, wholesome ingredients to deliver that rich, creamy, cookies-and-cream flavor without any fuss. Most of these are pantry staples, especially if you’ve got a sweet tooth like me.
- 1 (3.9-ounce) package instant chocolate pudding mix – I prefer Jell-O brand for consistent texture, but any instant mix works. Don’t use cook-and-serve; it won’t set properly in the fridge.
- 2 cups cold whole milk – Whole milk gives the richest, creamiest pudding. You can use 2% or even oat milk, but the texture will be slightly less luxurious. (Adds richness)
- 8 ounces cream cheese, softened – This is my secret weapon. Make sure it’s at room temperature so it blends smoothly. Full-fat is best, but neufchâtel works in a pinch. (Adds tangy creaminess)
- 1/2 cup powdered sugar – This sweetens the cream cheese without making it grainy. Regular granulated sugar won’t dissolve as well, so stick with powdered.
- 1 teaspoon vanilla extract – Pure vanilla extract adds warmth and depth. Imitation vanilla works, but the flavor won’t be as rich.
- 1 (14.3-ounce) package Oreo cookies – You’ll use the whole package, including the filling. Regular Oreos work best, but Double Stuf is fine too—just expect slightly sweeter crumbs. (Use dairy-free Oreos if needed)
- 1 cup gummy worms – Go for the classic sour or regular variety. I like the bright green and orange ones for maximum Halloween vibes. (Use vegan gummy worms for a plant-based option)
- Optional: 1/2 cup Cool Whip or whipped cream – Fold this in for an even lighter, fluffier texture. I often skip it, but it’s nice if you want a mousse-like consistency.
- Optional: Green food coloring – A drop or two in the pudding gives it a swampy, eerie green tint. Totally optional, but kids love it.
Ingredient Selection Tips: For the best texture, look for firm, small-curd cream cheese—the block kind, not the whipped tub. And when it comes to Oreos, don’t bother with the generic brands; the real thing has that perfect crunch-to-cream ratio. If you’re making these for a classroom, check for nut-free labels on all packaged ingredients. Most Oreos are nut-free, but always double-check.
Equipment Needed
You don’t need any fancy gadgets for this recipe, which is part of its charm. Here’s what you’ll need:
- Electric hand mixer or stand mixer – For beating the cream cheese until smooth. A whisk and some elbow grease work too, but your arm will thank you for the mixer.
- Large mixing bowl – For the pudding and cream cheese mixture. A glass or stainless steel bowl is ideal.
- Medium mixing bowl – For crushing the Oreos. I use a separate bowl to keep the crumbs contained.
- Ziploc bag or rolling pin – For crushing the Oreos without making a mess. Put the cookies in a bag, seal it, and go to town with a rolling pin. It’s oddly therapeutic.
- 6 to 8 small cups or glasses – Clear plastic cups (like the 9-ounce Solo cups) show off the layers beautifully. Small mason jars or even juice glasses work too. I’ve used everything from fancy stemware to paper cups.
- Spatula – For folding and scraping every last bit of that creamy goodness. A rubber spatula is your best friend here.
- Measuring cups and spoons – Basic but essential. I use a liquid measuring cup for the milk and dry ones for the sugar.
Budget-Friendly Tip: Don’t run out and buy special cups. Reuse yogurt containers, small jam jars, or even disposable shot glasses for mini versions. I once made these in cleaned-out applesauce cups for a toddler party, and they were a hit. Also, if you don’t have a mixer, a sturdy whisk and a bit of patience will get the job done—just make sure the cream cheese is really soft.
Preparation Method
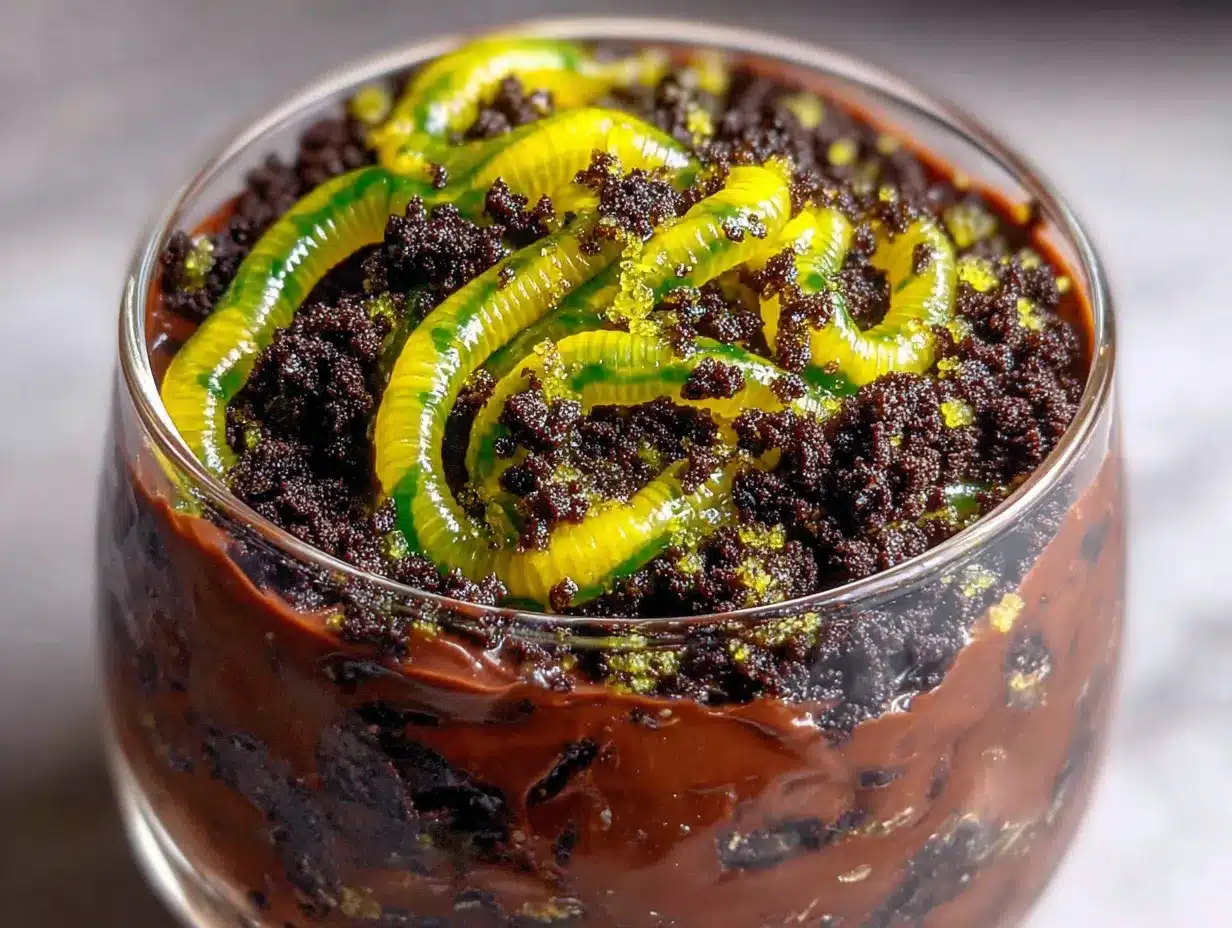
Follow these steps, and you’ll have spooky Halloween dirt cups ready to haunt your table in no time. I’ve included sensory cues so you know exactly what to look for at each stage.
- Make the pudding base: In a large mixing bowl, combine the instant chocolate pudding mix with 2 cups of cold whole milk. Whisk vigorously for about 2 minutes, until the mixture thickens and becomes glossy. You’ll feel it get heavier as it sets. Let it sit for 5 minutes to fully thicken. (If you’re using the green food coloring, stir it in now until you reach your desired swampy hue.)
- Beat the cream cheese: In a separate bowl, beat the softened cream cheese with an electric mixer on medium speed until it’s smooth and fluffy—about 2 minutes. Scrape down the sides of the bowl with a spatula. Add the powdered sugar and vanilla extract, then beat for another minute until combined. The mixture should be light and airy, with no lumps. (If you find any lumps, your cream cheese wasn’t soft enough; let it sit for 10 more minutes and try again.)
- Fold it all together: Gently fold the cream cheese mixture into the thickened pudding using a spatula. Stir until just combined—don’t overmix, or you’ll lose that silky texture. If you’re using Cool Whip, fold it in now. The final mixture should be thick, creamy, and a little bit dreamy. Taste it. Seriously, taste it. That tangy-sweet balance is exactly what you’re after.
- Crush the Oreos: Place the entire package of Oreos (cream filling and all) into a large Ziploc bag. Seal it, then use a rolling pin to crush them into fine crumbs. You want a mix of fine dust and slightly chunkier pieces—it looks more like real soil that way. If you’re feeling extra, leave a few larger chunks for texture. (Pro tip: Let the kids do this step. It’s messy, loud, and they love it.)
- Layer the cups: Spoon about 2 tablespoons of the Oreo crumbs into the bottom of each cup. This is your “soil” base. Next, spoon or pipe the pudding mixture on top, filling each cup about three-quarters full. Use the back of a spoon to smooth the surface. Finally, top with another generous layer of Oreo crumbs, covering the pudding completely. The top should look like a little pot of dirt.
- Add the worms: Gently poke 2 or 3 gummy worms into the “dirt” so they look like they’re crawling out. Some can be half-buried, some fully visible. Get creative—make one look like it’s escaping over the rim. (I always save a few worms for snacking. No judgment.)
- Chill and set: Place the cups in the refrigerator for at least 1 hour, or up to overnight. The chilling time allows the pudding to fully set and the flavors to meld. The longer they sit, the better they taste. (If you’re in a rush, 30 minutes in the freezer works, but don’t forget them—they’ll turn into ice blocks.)
Cooking Tips & Techniques
Over the years, I’ve made these dirt cups more times than I can count, and I’ve learned a few things the hard way. Here’s what I wish someone had told me from the start.
Don’t skip softening the cream cheese. I know, you’re in a hurry. But cold cream cheese will leave you with lumpy pudding, and nobody wants lumpy dirt. Leave it on the counter for 30 minutes, or if you’re desperate, microwave it in 10-second bursts until it’s soft to the touch. (I once forgot and tried to beat cold cream cheese—my mixer almost walked off the counter.)
Crush the Oreos just before assembling. If you crush them too early, they’ll absorb moisture from the air and lose that crunchy texture. Freshly crushed Oreos give you that satisfying “digging into dirt” experience. Also, don’t pulverize them into dust—you want some texture. Think garden soil, not beach sand.
Use a piping bag for the pudding layer. If you want clean, Instagram-worthy layers, spoon the pudding into a piping bag or a Ziploc bag with the corner snipped off. This lets you pipe the filling neatly without smearing it on the sides of the cup. (I learned this after my first batch looked like a mudslide.)
Let them chill overnight for best flavor. The pudding softens the Oreo crumbs slightly, creating a cake-like texture that’s absolutely divine. Plus, the flavors meld together beautifully. Make them the night before your Halloween party, and you’ll thank yourself later.
Common mistake: overfilling the cups. Leave about half an inch of space at the top for the Oreo crumb layer. If you fill the cup too full, the dirt will spill over when you add the worms, and you’ll have a sticky mess. Trust me on this one.
Variations & Adaptations
One of the best things about this recipe is how flexible it is. Here are some ways to make it your own.
Gluten-Free Version: Swap the Oreos for gluten-free chocolate sandwich cookies. There are several brands available now that taste just like the real thing. The rest of the ingredients are naturally gluten-free, but double-check your pudding mix label.
Dairy-Free Version: Use dairy-free cream cheese (like Kite Hill or Tofutti), coconut milk or oat milk for the pudding, and dairy-free chocolate sandwich cookies. The texture will be slightly different, but still delicious. I’ve made this for a dairy-free friend, and she said it was the best dessert she’d had in months.
Vegan Gummy Worms: Look for vegan gummy worms made without gelatin. Brands like Surf Sweets or YumEarth make excellent options that are free from animal products. They’re also free from artificial dyes, which is a bonus for sensitive kids.
Pumpkin Spice Dirt Cups: For a fall twist, use vanilla pudding instead of chocolate, and add 1 teaspoon of pumpkin pie spice to the cream cheese mixture. Top with crushed graham crackers instead of Oreos, and use candy corn instead of worms. It’s like a pumpkin pie in a cup.
Peanut Butter Dirt Cups: Fold 1/4 cup of creamy peanut butter into the cream cheese mixture before combining with the pudding. The chocolate-peanut butter combo is irresistible. (Obviously, skip this for nut-free events.)
My Personal Favorite Variation: I once made these with crushed chocolate graham crackers instead of Oreos and added a layer of homemade chocolate mousse instead of pudding. It was a little extra work, but the result was dangerously good. My husband called them “adult dirt cups.”
Serving & Storage Suggestions
These dirt cups are best served cold, straight from the fridge. The contrast between the creamy filling and the crunchy Oreo topping is at its peak when they’re thoroughly chilled.
Serving Temperature: Pull them out of the fridge about 5 minutes before serving—just enough to take the chill off without losing the texture. If they sit out too long, the Oreo crumbs will get soggy.
Presentation Ideas: For a Halloween party, arrange the cups on a tray lined with fake spiderwebs or autumn leaves. Add a few plastic spiders on top for extra spookiness. You can also label each cup with a spooky name like “Worm Graveyard” or “Monster Mud.” Kids get a kick out of that.
Complementary Dishes: Serve these alongside other Halloween treats like spiderweb dip with pretzels, or a batch of mummy hot dogs for a savory-sweet balance. A warm mug of apple cider or hot chocolate pairs beautifully with the chocolatey richness.
Storage Instructions: Cover each cup with plastic wrap or a lid and store in the refrigerator for up to 3 days. The Oreo crumbs will soften over time, but some people actually prefer that cake-like texture. (My kids fight over the day-old ones.)
Freezing: You can freeze these for up to 1 month, but the texture will change. The pudding becomes icy, and the Oreos get very soft. If you do freeze them, let them thaw in the fridge overnight before serving. I don’t recommend freezing if you’re serving them to guests, but for a quick treat on a busy night, it works.
Reheating: These are meant to be served cold, so no reheating needed. If you’ve frozen them, just thaw and enjoy.
Flavor Development: Honestly, these taste even better the next day. The flavors meld together, and the Oreo crumbs absorb just enough moisture to create a fudgy, almost brownie-like layer. Make them a day ahead if you can.
Nutritional Information & Benefits
Let’s be real—these are a treat, not a health food. But knowing what’s in them can help you make informed choices, especially if you’re serving them to kids with dietary needs.
Estimated Nutritional Values (per serving, based on 8 servings):
- Calories: 380
- Total Fat: 18g
- Saturated Fat: 9g
- Cholesterol: 35mg
- Sodium: 420mg
- Total Carbohydrates: 52g
- Dietary Fiber: 2g
- Sugars: 36g
- Protein: 6g
Health Benefits of Key Ingredients: Cream cheese provides a small amount of calcium and protein. Oreos, while not exactly a superfood, contain a bit of iron from the enriched flour. Gummy worms are mostly sugar, but they do make people smile—and that’s a health benefit in my book.
Dietary Considerations: This recipe can be adapted for gluten-free, dairy-free, and vegan diets (see variations above). It contains dairy, gluten, and soy (from the Oreos). If you’re serving a crowd with allergies, always check labels and offer a safe alternative.
Personal Wellness Perspective: I believe in balance. These dirt cups are a once-in-a-while treat, perfect for celebrations. They’re not everyday food, and that’s okay. The joy they bring—especially when kids see those gummy worms poking out—is worth every calorie. Moderation, not deprivation, is my motto.
Conclusion
These spooky Halloween dirt cups are everything a Halloween dessert should be: fun, easy, and absolutely delicious. They’re the kind of recipe that brings people together, whether you’re making them with your kids for a rainy afternoon or serving them at a party full of adults who secretly want to feel like kids again. I love that they’re no-bake, require minimal cleanup, and can be customized in a hundred different ways. Honestly, they’ve become a non-negotiable part of my Halloween tradition. I hope they become part of yours too.
So grab some Oreos, a pack of gummy worms, and a few little cups. Get messy. Laugh a little. And when someone takes that first bite and their eyes light up, remember—that’s what this is all about. I’d love to hear how yours turn out! Drop a comment below with your favorite variation, tag me in your photos, or share your own spooky twist. Happy Halloween, friends—now go make some dirt!
Frequently Asked Questions
Can I make these dirt cups ahead of time?
Absolutely! In fact, they taste better the next day. Assemble them up to 24 hours in advance, cover with plastic wrap, and store in the refrigerator. Just add the gummy worms right before serving so they stay firm and chewy.
Can I use sugar-free pudding mix?
Yes, you can. Sugar-free instant pudding works perfectly fine. Just note that the texture might be slightly less creamy, and the sweetness level will be lower. You may want to add an extra tablespoon of powdered sugar to the cream cheese mixture to balance it out.
How do I keep the gummy worms from getting soggy?
Add the gummy worms just before serving, not during the chilling time. If you bury them in the pudding and let them sit overnight, they’ll absorb moisture and become soft and sticky. For the best texture, poke them in right before you put the cups on the table.
Can I use a different type of cookie?
Of course! Chocolate graham crackers, vanilla wafers, or even crushed pretzels work well. Each gives a slightly different flavor and texture. If you use a lighter cookie, the “dirt” effect won’t be as convincing, but it’ll still taste great. Golden Oreos are a fun twist for a “sand” version.
How many servings does this recipe make?
This recipe makes 6 to 8 servings, depending on the size of your cups. If you’re using standard 9-ounce cups, you’ll get about 6 generous portions. For smaller cups (like 5-ounce juice glasses), you can stretch it to 8 or even 10 servings. Perfect for parties or portion control!
Pin This Recipe!
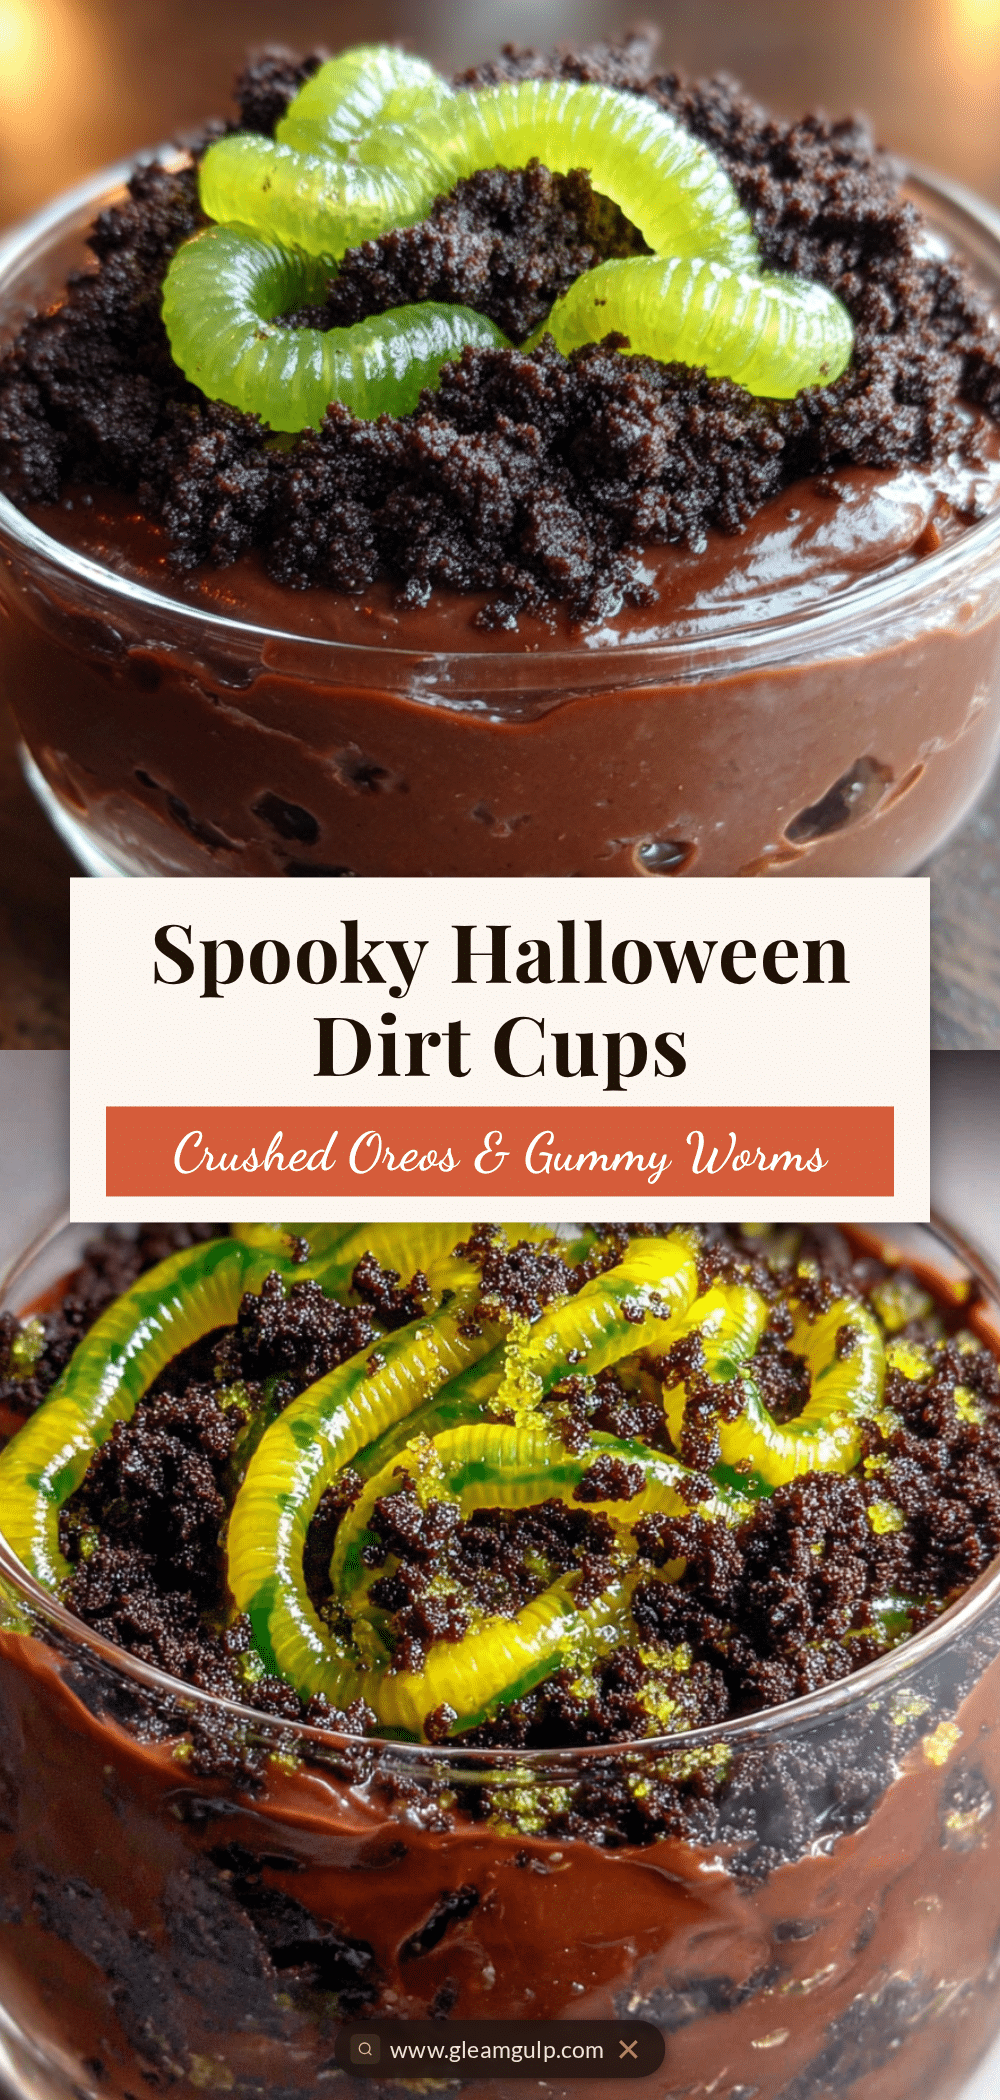
Easy Halloween Dirt Cups with Oreos & Gummy Worms
These spooky Halloween dirt cups are a no-bake, kid-friendly dessert featuring layers of creamy chocolate pudding, tangy cream cheese, and crushed Oreo cookies, topped with gummy worms. Perfect for parties and quick to assemble.
- Prep Time: 15 minutes
- Cook Time: 0 minutes
- Total Time: 1 hour 15 minutes
- Yield: 6 to 8 servings 1x
- Category: Dessert
- Cuisine: American
Ingredients
- 1 (3.9-ounce) package instant chocolate pudding mix
- 2 cups cold whole milk
- 8 ounces cream cheese, softened
- 1/2 cup powdered sugar
- 1 teaspoon vanilla extract
- 1 (14.3-ounce) package Oreo cookies
- 1 cup gummy worms
- Optional: 1/2 cup Cool Whip or whipped cream
- Optional: Green food coloring
Instructions
- In a large mixing bowl, combine the instant chocolate pudding mix with 2 cups of cold whole milk. Whisk vigorously for about 2 minutes, until the mixture thickens and becomes glossy. Let it sit for 5 minutes to fully thicken. (If using green food coloring, stir it in now.)
- In a separate bowl, beat the softened cream cheese with an electric mixer on medium speed until smooth and fluffy—about 2 minutes. Scrape down the sides. Add the powdered sugar and vanilla extract, then beat for another minute until combined.
- Gently fold the cream cheese mixture into the thickened pudding using a spatula until just combined. If using Cool Whip, fold it in now.
- Place the entire package of Oreos into a large Ziploc bag. Seal it, then use a rolling pin to crush them into fine crumbs with some chunkier pieces.
- Spoon about 2 tablespoons of the Oreo crumbs into the bottom of each cup. Spoon or pipe the pudding mixture on top, filling each cup about three-quarters full. Smooth the surface. Top with another generous layer of Oreo crumbs.
- Gently poke 2 or 3 gummy worms into the ‘dirt’ so they look like they’re crawling out.
- Place the cups in the refrigerator for at least 1 hour, or up to overnight, to set.
Notes
For best results, soften cream cheese to room temperature. Crush Oreos just before assembling for maximum crunch. Add gummy worms just before serving to prevent sogginess. These taste even better the next day.
Nutrition
- Serving Size: 1 cup
- Calories: 380
- Sugar: 36
- Sodium: 420
- Fat: 18
- Saturated Fat: 9
- Carbohydrates: 52
- Fiber: 2
- Protein: 6
Keywords: Halloween dirt cups, Oreo dirt cups, gummy worms, no-bake dessert, Halloween dessert, easy dessert, kid-friendly


