Love this? Save it for later!
Share the inspiration with your friends
My neighbor, a retired baker named Sal, watched me scrape a jar of sourdough discard into the trash one Tuesday morning. He didn’t say anything at first. He just stood there on his side of the fence, holding a mug of coffee, shaking his head with this look of genuine disappointment. “You know,” he finally said, “you’re throwing away liquid gold.” I laughed it off, but the next week he showed up at my door with a small, round focaccia that had the most incredible crispy bottom I’d ever seen. The top was scattered with fresh rosemary and big, flaky salt crystals that caught the morning light. Honestly, I felt a little embarrassed. I mean, I’d been baking sourdough for months, treating the discard like waste, when all along it was the secret to something this beautiful.
That first bite changed everything. The crust shattered when I bit into it, and the inside was so light and airy it practically dissolved on my tongue. There was this subtle tang from the discard that played perfectly against the savory olive oil and the piney rosemary. I asked Sal for the recipe, and he shrugged and said, “It’s just bread, kid. Feed your starter, not your trash can.” I’ve made it every week since then, tweaking it here and there until it felt like my own. Maybe you’ve been there, staring at a jar of discard, wondering what to do with it. Let me tell you, this is the answer. This isn’t just a way to use up leftovers — it’s the reason you should keep feeding that starter in the first place.
Why You’ll Love This Recipe
This crispy sourdough discard focaccia is the kind of recipe that makes you feel like a professional baker without any of the stress. I’ve tested it at least a dozen times, tweaking hydration levels and fermentation times, and what I’m sharing with you today is the version that works every single time. No complicated folds, no fancy equipment, just a simple, forgiving dough that delivers restaurant-quality results.
- No Waste, All Taste: That jar of discard sitting in your fridge finally has a purpose. Instead of feeding the trash, you’re feeding your family something genuinely delicious.
- Incredibly Crispy Crust: The secret is a generous pool of olive oil in the pan. It fries the bottom of the dough as it bakes, creating a crust so crispy it shatters.
- Simple Ingredients: You probably have everything you need right now. Flour, water, olive oil, salt, and your discard. That’s it.
- Perfect for Beginners: There’s no kneading, no shaping, no scoring. You literally dump the dough into a pan and let it do its thing.
- Incredibly Versatile: Serve it alongside soup, use it for sandwiches, or just eat it straight out of the pan with a glass of wine. I won’t judge.
What makes this recipe different from all the other focaccia recipes out there? It’s the discard. The fermented flour adds a depth of flavor that you just can’t get from commercial yeast alone. It’s subtle, but it’s there — a gentle tang that makes you take another bite just to figure out what that taste is. And the texture? The discard helps create a more open, airy crumb while the long cold fermentation builds even more flavor. This isn’t just another bread recipe. It’s your new favorite way to bake.
What Ingredients You Will Need
This recipe uses simple, wholesome ingredients to deliver that signature crispy crust and airy interior. Most of these are pantry staples, and the star of the show is that neglected jar of sourdough discard sitting in your fridge.
For the Dough
- 1 cup (240g) sourdough discard — straight from the fridge is fine. Unfed, active, or even a few days old. It all works. I’ve used discard that was a week old with great results.
- 2 cups (250g) bread flour — I prefer King Arthur for its higher protein content, which gives the focaccia a better structure. All-purpose flour works too, but the crust won’t be quite as crispy.
- 1/2 cup (120ml) warm water — about 90°F to 100°F. Too hot and you’ll kill the natural yeast in the discard. Too cold and fermentation will take forever.
- 2 tablespoons (30ml) extra virgin olive oil — plus more for the pan. Use a good quality oil here, it really matters. The oil is what gives the focaccia that golden, crispy bottom.
- 1 teaspoon (5g) sea salt — fine sea salt for the dough. Save the flaky stuff for the topping.
- 1 teaspoon (4g) instant yeast — optional, but it guarantees a good rise. If your discard is very active and bubbly, you can skip it. I usually add it because I like the insurance.
- 1 teaspoon (4g) honey or sugar — just a tiny bit to feed the yeast and encourage browning. You won’t taste it in the final bread.
For the Topping

- 3 tablespoons (45ml) extra virgin olive oil — be generous. This is what creates the crispy, almost fried bottom crust.
- 2 tablespoons fresh rosemary — chopped finely. I grow my own, but store-bought is fine. Dried rosemary works in a pinch, but use half the amount.
- 1 to 2 teaspoons flaky sea salt — Maldon is my go-to. The big crystals add little bursts of saltiness that make every bite exciting.
- Optional: fresh cracked black pepper or red pepper flakes — for a little heat.
I recommend using a good quality bread flour for the best texture. If you only have all-purpose, your focaccia will still be delicious, just a little less chewy. And please, don’t skimp on the olive oil. This is not the time for the cheap stuff. The oil is doing double duty here — it’s flavoring the bread and creating that incredible crispy crust.
Equipment Needed
You don’t need much to make this focaccia, which is part of its charm. Here’s what I use every time:
- A 9×13 inch metal baking pan — metal conducts heat better than glass or ceramic, giving you a crispier bottom. I’ve used my grandmother’s old aluminum pan for years and it works perfectly.
- A kitchen scale — honestly, this is the best investment you can make for baking. Measuring by weight is so much more accurate than cups. If you don’t have one, fluff your flour and spoon it into the measuring cup.
- A large mixing bowl — any bowl will do. I use a ceramic one because it retains heat well during proofing.
- A wooden spoon or dough whisk — for mixing the dough. It’s too sticky to use your hands at first.
- Plastic wrap or a damp kitchen towel — to cover the dough while it proofs. A shower cap actually works great in a pinch.
- Optional: A stand mixer with a dough hook — if you want to save your arm some work. I usually mix by hand because I find it meditative, but the mixer does a great job too.
If you don’t have a metal pan, a cast iron skillet works beautifully. Just make sure it’s at least 10 inches wide. The key is to use something that heats up evenly and retains heat well. Glass pans will work, but your bottom crust won’t be quite as crispy.
Preparation Method
Let me walk you through this step by step. I’ve made this recipe so many times that I could do it in my sleep, but I still remember how nervous I was the first time. Trust the process. It’s easier than it looks.
- Mix the dough (10 minutes): In a large mixing bowl, combine the sourdough discard, warm water, and honey. Stir until the discard breaks up and everything looks homogenous. Add the bread flour, salt, and instant yeast. Mix with a wooden spoon until a shaggy, sticky dough forms. It will look rough and lumpy — that’s exactly what you want. Cover the bowl with plastic wrap and let it rest for 30 minutes. This autolyse step lets the flour absorb the water and makes the dough easier to work with.
- First rise (2 to 3 hours): After the rest, perform a series of stretch and folds. Wet your hands so the dough doesn’t stick, grab one side of the dough, stretch it up, and fold it over the top. Rotate the bowl 90 degrees and repeat. Do this four times total, covering the bowl between each set. Let the dough rise at room temperature until it’s doubled in size and looks bubbly and alive. If your kitchen is cold, this might take closer to 4 hours. Be patient.
- Cold fermentation (overnight, 8 to 12 hours): This is the secret to the best flavor. Cover the bowl tightly and pop it in the fridge overnight. The cold slows down fermentation, allowing the flavors to develop and deepen. The dough will be easier to handle in the morning too. I’ve let it go as long as 24 hours and it only gets better.
- Prepare the pan (5 minutes): The next day, pour 3 tablespoons of olive oil into your 9×13 metal pan. Use your fingers to spread it all over the bottom and up the sides. The oil should pool slightly on the bottom — this is what creates that legendary crispy crust. Don’t be shy with it.
- Transfer and stretch (10 minutes): Gently scrape the cold dough into the oiled pan. It will be sticky and reluctant to cooperate. That’s okay. Let it rest for 20 minutes to warm up slightly, then use your fingertips to gently stretch it toward the edges of the pan. If it springs back, let it rest another 10 minutes and try again. Don’t force it — you’ll deflate all those beautiful bubbles.
- Second rise (1.5 to 2 hours): Cover the pan with plastic wrap and let the dough rise at room temperature until it’s puffy and has nearly doubled in thickness. It should look pillowy and full of air. When you poke it gently, the indentation should slowly spring back. If it doesn’t spring back at all, it’s over-proofed. If it springs back immediately, give it more time.
- Dimple and top (5 minutes): Here’s the fun part. Oil your fingers generously, then press them straight down into the dough, creating deep dimples all the way to the bottom of the pan. Don’t be gentle about it — you want those pockets to hold the oil and toppings. Sprinkle the chopped rosemary evenly over the top, followed by the flaky sea salt. If you’re adding black pepper or red pepper flakes, now’s the time.
- Bake (25 to 30 minutes): Preheat your oven to 425°F (220°C) with a rack in the middle. Bake the focaccia for 25 to 30 minutes, rotating the pan halfway through. The top should be deep golden brown and the bottom should be crispy and dark. If you lift it with a spatula, you should hear a satisfying crackle. Let it cool in the pan for 5 minutes, then transfer to a wire rack. I know it’s tempting, but let it cool for at least 15 minutes before cutting. The steam needs to escape or the inside will be gummy.
Cooking Tips & Techniques
I’ve made every mistake in the book with this recipe, so you don’t have to. Here’s what I’ve learned the hard way:
Don’t skip the cold fermentation. The first time I made this, I was impatient and skipped the overnight rest. The focaccia was fine, but it lacked that complex, tangy flavor that makes this recipe special. The cold fermentation is where the magic happens. The discard gets a chance to really work its magic, breaking down the flour and developing those deep, sour notes.
Use enough oil. I cannot stress this enough. The oil in the pan is not just for flavor — it’s what creates that crispy, almost fried bottom crust. If you skimp on the oil, you’ll end up with a pale, soft bottom that’s more like bread than focaccia. Be generous. The dough will absorb what it needs, and the rest will pool around the edges, creating those irresistible crispy bits.
Wet your fingers for dimpling. The dough will be sticky, and dry fingers will just pull at it. Dip your fingers in a bowl of water or oil before pressing into the dough. This creates cleaner dimples and prevents the dough from tearing. And don’t be shy — press all the way down to the bottom of the pan. Those deep pockets are what hold the olive oil and create those golden, crispy spots.
Watch the temperature. Every oven is different. I’ve baked this in three different ovens and the timing varies by up to 5 minutes. Start checking at 25 minutes. The top should be a deep golden brown, and the bottom should sound hollow when you tap it. If the top is browning too quickly, tent it loosely with foil for the last 5 minutes.
Let it cool properly. I know, I know. The smell is intoxicating and you want to tear into it immediately. But cutting into hot focaccia will compress the crumb and make it gummy. Give it at least 15 minutes on a wire rack. The steam needs to escape so the interior can set properly.
Variations & Adaptations
This recipe is incredibly forgiving and adaptable. Here are some of my favorite variations:
Herb and Garlic Focaccia: Swap the rosemary for a mix of fresh thyme, oregano, and sliced garlic. Add the garlic along with the herbs before baking. The garlic roasts and sweetens in the oven, becoming soft and spreadable. I make this version when I’m serving it alongside pasta.
Everything Bagel Focaccia: After dimpling, sprinkle the dough with everything bagel seasoning instead of rosemary and salt. The sesame seeds, poppy seeds, garlic, and onion create an incredible crust. This version is amazing for breakfast sandwiches.
Cheese and Jalapeño Focaccia: Press small cubes of pepper jack or cheddar cheese into the dimples before baking, then add sliced pickled jalapeños. The cheese melts into the pockets and creates these amazing cheesy, spicy bites. It’s my go-to for game day.
Gluten-Free Adaptation: Substitute the bread flour with a good quality gluten-free all-purpose blend that contains xanthan gum. The texture will be slightly different — more cakey and less chewy — but it’s still delicious. Add an extra tablespoon of olive oil to help with moisture.
Whole Wheat Version: Replace half the bread flour with whole wheat flour. The focaccia will be denser and nuttier, but it’s still fantastic. You might need to add an extra tablespoon of water since whole wheat flour absorbs more liquid.
Serving & Storage Suggestions
This focaccia is best served warm, straight from the oven, when the crust is at its crispiest and the interior is still pillowy soft. I love serving it as an appetizer with a bowl of good olive oil and balsamic vinegar for dipping. It’s also incredible alongside a bowl of hearty vegetable minestrone soup or a simple green salad with a lemony vinaigrette.
For sandwiches, slice the focaccia horizontally and fill it with roasted vegetables, fresh mozzarella, and pesto. The sturdy, oily crumb holds up beautifully to hearty fillings without getting soggy. I’ve also used it as the base for an incredible panini — the crispy crust gets even better when pressed and grilled.
Storage: Store leftover focaccia in an airtight container at room temperature for up to 2 days. Do not refrigerate it — the cold will dry it out and make it stale. To reheat, pop it in a 350°F oven for 5 to 7 minutes. The crust will crisp right back up. You can also reheat slices in a skillet with a little olive oil for an extra crispy finish.
Freezing: This focaccia freezes beautifully. Wrap it tightly in plastic wrap, then foil, and freeze for up to 3 months. Thaw at room temperature, then reheat in the oven. I often make a double batch and freeze one for later. It’s a lifesaver on busy weeknights.
The flavors actually develop and deepen over time. Day-old focaccia is still delicious, especially when toasted. The tang from the discard becomes more pronounced, and the rosemary infuses the bread even more.
Nutritional Information & Benefits
While focaccia is definitely an indulgence, it does offer some nutritional benefits, especially when made with sourdough discard. The fermentation process breaks down phytic acid, making the minerals in the flour more bioavailable. This means your body can actually absorb more of the nutrients from the bread.
Here are the approximate nutritional values per serving (1/8 of the recipe):
- Calories: 220
- Fat: 10g
- Carbohydrates: 28g
- Fiber: 1g
- Protein: 5g
- Sodium: 380mg
The olive oil provides heart-healthy monounsaturated fats and antioxidants. Rosemary is rich in antioxidants and anti-inflammatory compounds. And the sourdough fermentation process creates beneficial bacteria that can support gut health. It’s not health food, but it’s certainly better for you than most store-bought bread.
This recipe is vegetarian and can be made vegan by using maple syrup instead of honey. It contains gluten and is not suitable for celiacs unless you use the gluten-free adaptation mentioned above.
Conclusion
This crispy sourdough discard focaccia has become a weekly staple in my kitchen, and I have a feeling it will become one in yours too. It’s the perfect solution for using up that jar of discard that’s been taking up space in your fridge, and the results are genuinely restaurant-quality. The crispy, almost fried bottom crust, the airy, tangy interior, and the fragrant rosemary and salt topping — it’s a combination that never gets old.
What I love most about this recipe is how forgiving it is. You don’t need to be an experienced baker to make it. You don’t need special equipment or hard-to-find ingredients. You just need a little patience and a willingness to get your hands dirty. And the payoff? A loaf of bread that will make you feel like you’ve accomplished something truly special.
I’d love to hear how your focaccia turns out. Did you try a different topping combination? Did you serve it with something amazing? Drop a comment below and let me know. And if you’re looking for more ways to use up your sourdough discard, check out my recipe for sourdough discard cinnamon rolls — they’re just as forgiving and even more indulgent. Happy baking, friends!
Frequently Asked Questions
Can I use active sourdough starter instead of discard?
Absolutely. If your starter is active and bubbly, you can use it in place of discard. Just keep in mind that the fermentation will happen faster, so keep an eye on your rise times. The flavor might be slightly less tangy since active starter has less acetic acid.
Why is my focaccia dense and not airy?
This usually happens for one of three reasons: your dough didn’t ferment long enough, you deflated it too much when transferring to the pan, or your discard was too old and weak. Make sure your discard is at least somewhat bubbly when you use it, and be gentle when handling the dough.
Can I make this recipe without instant yeast?
Yes, but you’ll need to extend the fermentation time. Without commercial yeast, the natural yeast in your discard will need more time to do the work. Plan on a first rise of 4 to 6 hours instead of 2 to 3. The flavor will be even more complex and sour.
How do I get a crispier bottom crust?
Use more olive oil in the pan and make sure you’re using a metal pan. Glass and ceramic don’t conduct heat as well, so the bottom won’t crisp up as nicely. Also, make sure your oven is fully preheated before you put the focaccia in.
Can I add other toppings besides rosemary and salt?
Absolutely! This focaccia is a blank canvas. Try caramelized onions, sliced olives, cherry tomatoes, or even a sprinkle of Parmesan cheese. Just add them after dimpling and before baking. Get creative and make it your own.
Pin This Recipe!
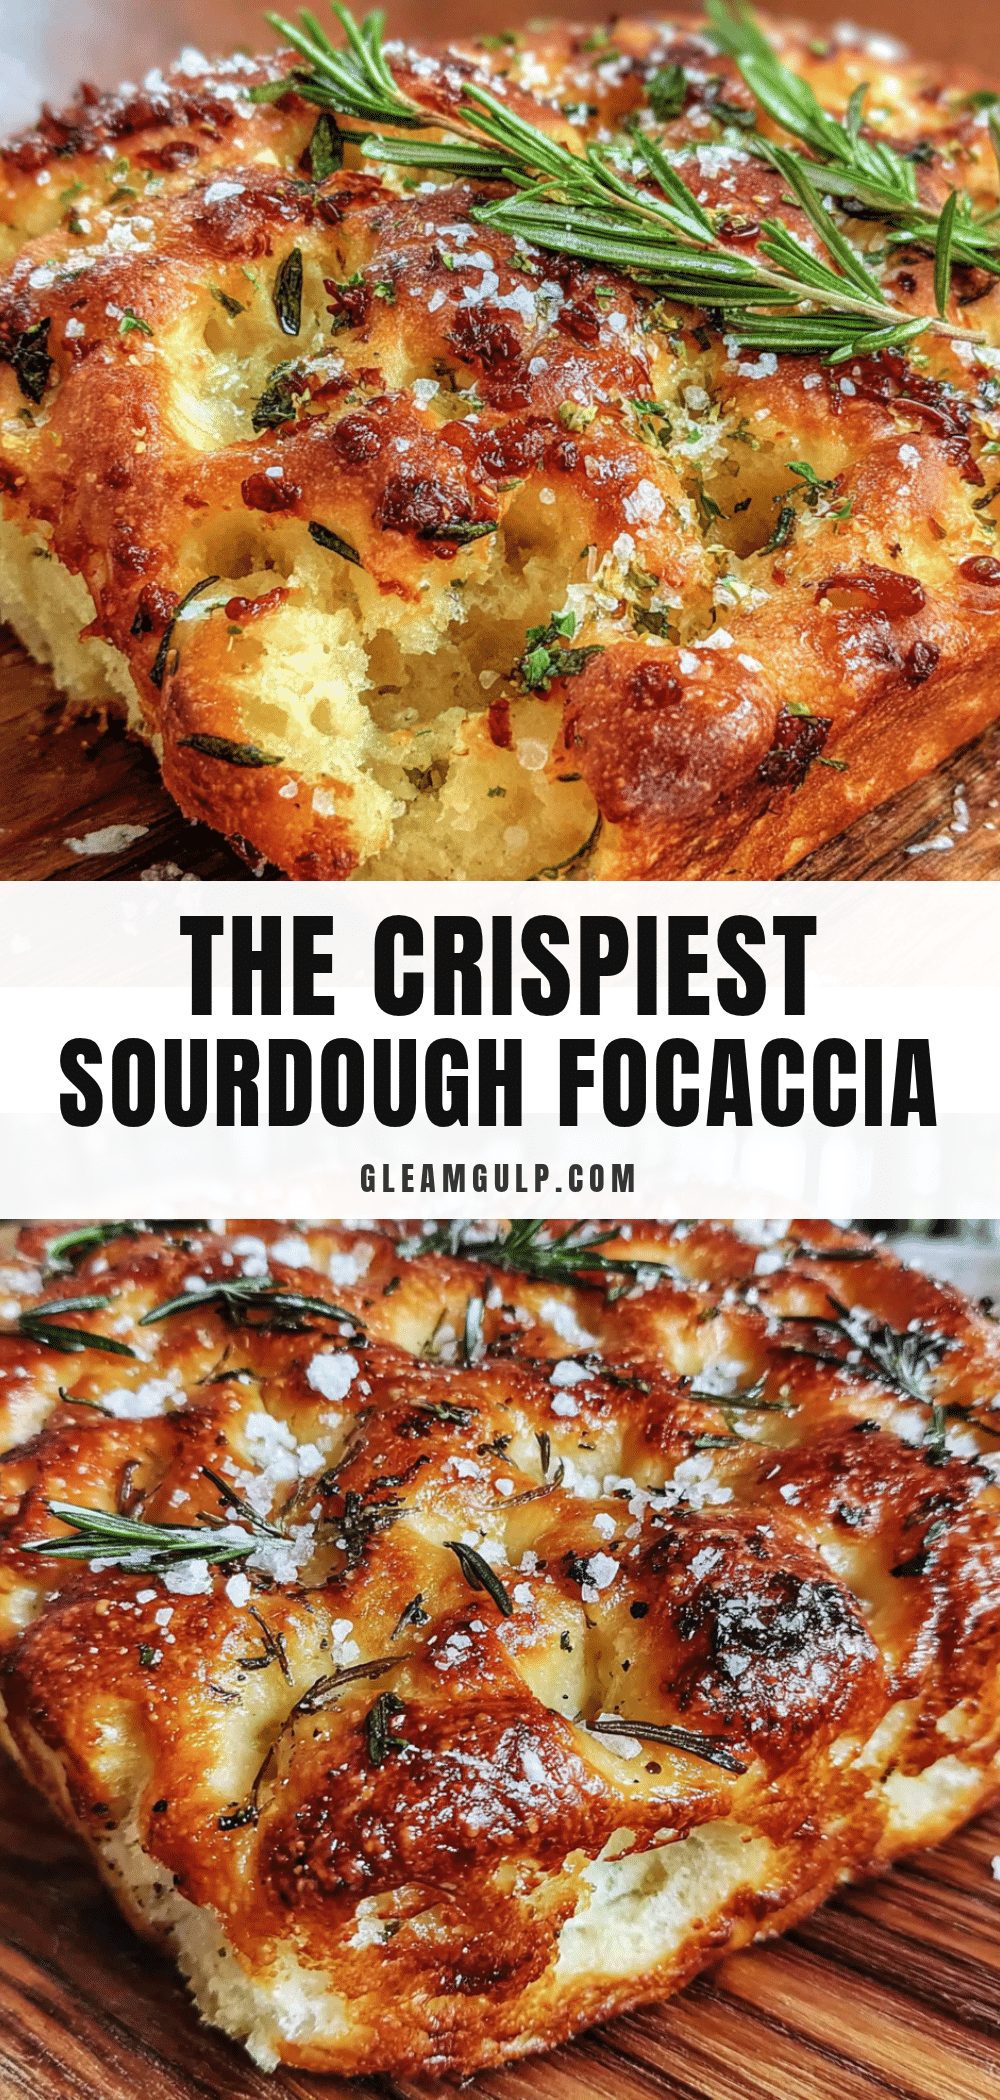
Crispy Sourdough Discard Focaccia with Rosemary & Salt
This crispy sourdough discard focaccia is the perfect solution for using up that jar of discard sitting in your fridge. With a shatteringly crispy crust, airy interior, and fragrant rosemary and salt topping, it delivers restaurant-quality results with simple ingredients and no complicated techniques.
- Prep Time: 20 minutes
- Cook Time: 25-30 minutes
- Total Time: 12-14 hours (includes overnight fermentation)
- Yield: 8 servings 1x
- Category: Bread
- Cuisine: Italian
Ingredients
- 1 cup (240g) sourdough discard
- 2 cups (250g) bread flour
- 1/2 cup (120ml) warm water (90°F to 100°F)
- 2 tablespoons (30ml) extra virgin olive oil, plus more for the pan
- 1 teaspoon (5g) sea salt
- 1 teaspoon (4g) instant yeast (optional)
- 1 teaspoon (4g) honey or sugar
- 3 tablespoons (45ml) extra virgin olive oil (for the pan)
- 2 tablespoons fresh rosemary, chopped finely
- 1 to 2 teaspoons flaky sea salt (e.g., Maldon)
- Optional: fresh cracked black pepper or red pepper flakes
Instructions
- Mix the dough: In a large mixing bowl, combine the sourdough discard, warm water, and honey. Stir until the discard breaks up and everything looks homogenous. Add the bread flour, salt, and instant yeast. Mix with a wooden spoon until a shaggy, sticky dough forms. Cover the bowl with plastic wrap and let it rest for 30 minutes.
- First rise: After the rest, perform a series of stretch and folds. Wet your hands, grab one side of the dough, stretch it up, and fold it over the top. Rotate the bowl 90 degrees and repeat. Do this four times total, covering the bowl between each set. Let the dough rise at room temperature until doubled in size and bubbly (2 to 3 hours, or up to 4 hours in a cold kitchen).
- Cold fermentation: Cover the bowl tightly and refrigerate overnight (8 to 12 hours) for best flavor. Can go up to 24 hours.
- Prepare the pan: The next day, pour 3 tablespoons of olive oil into a 9×13 inch metal baking pan. Use your fingers to spread it all over the bottom and up the sides.
- Transfer and stretch: Gently scrape the cold dough into the oiled pan. Let it rest for 20 minutes to warm up slightly, then use your fingertips to gently stretch it toward the edges of the pan. If it springs back, let it rest another 10 minutes and try again.
- Second rise: Cover the pan with plastic wrap and let the dough rise at room temperature until puffy and nearly doubled in thickness (1.5 to 2 hours).
- Dimple and top: Oil your fingers generously, then press them straight down into the dough, creating deep dimples all the way to the bottom of the pan. Sprinkle the chopped rosemary evenly over the top, followed by the flaky sea salt. Add optional black pepper or red pepper flakes if desired.
- Bake: Preheat oven to 425°F (220°C) with a rack in the middle. Bake for 25 to 30 minutes, rotating the pan halfway through, until the top is deep golden brown and the bottom is crispy and dark. Let cool in the pan for 5 minutes, then transfer to a wire rack. Let cool for at least 15 minutes before cutting.
Notes
Don’t skip the cold fermentation for best flavor. Use enough olive oil in the pan for a crispy bottom crust. Wet your fingers for dimpling to prevent sticking. Let the focaccia cool properly before cutting to avoid a gummy interior. Store leftovers in an airtight container at room temperature for up to 2 days; reheat in a 350°F oven for 5-7 minutes. Freezes well for up to 3 months.
Nutrition
- Serving Size: 1/8 of recipe
- Calories: 220
- Sugar: 1
- Sodium: 380
- Fat: 10
- Saturated Fat: 1.5
- Carbohydrates: 28
- Fiber: 1
- Protein: 5
Keywords: sourdough discard, focaccia, crispy focaccia, rosemary focaccia, sourdough bread, easy bread recipe, no-knead bread


