Love this? Save it for later!
Share the inspiration with your friends
There used to be a tiny bakery tucked behind a vintage bookstore in Portland’s Hawthorne district that made the most incredible pear and ginger crisp. When they closed their doors three years ago—the owner retired to the Oregon coast, I heard—I honestly felt a little panicked. That crisp was my go-to comfort dessert after long days, and I’d never found anything that came close. After twelve tries—twelve, let me tell you, including one disaster where I forgot the sugar entirely—I finally cracked the code. This cozy spiced pear and ginger crisp is the exact thing I’ve been chasing.
The secret, I learned the hard way, isn’t just in the fruit or the topping. It’s in how the ginger hits your nose before you even take a bite, and how the pears soften into this almost jammy sweetness that pairs with the crunchy oat topping. I mean, I spent a whole weekend testing different ginger ratios—fresh versus ground, more versus less—and my kitchen smelled like a holiday market by Sunday night. My neighbor actually knocked on the door asking what I was baking. That’s when I knew I had something worth sharing.
Maybe you’ve been there—that feeling when a favorite spot disappears and takes a beloved recipe with it? This post is for you. This cozy spiced pear and ginger crisp brings back that warmth, that golden-brown topping, that little kick of ginger that makes you close your eyes after the first spoonful. And honestly? It might be even better than the original.
Why You’ll Love This Recipe
This isn’t just another fruit crisp recipe. After all those test batches, I can tell you exactly why this one stands out from the crowd. It’s the kind of dessert that feels fancy enough for company but simple enough for a random Tuesday night.
- Quick & Easy: Comes together in under an hour, with just 15 minutes of active prep time. Perfect for those evenings when you’re craving something warm but don’t want a complicated project.
- Simple Ingredients: No fancy grocery trips needed here. You likely already have most of the topping ingredients in your pantry right now.
- Perfect for Fall Gatherings: Great for Thanksgiving, Friendsgiving, or cozy dinner parties where you want to impress without stress.
- Crowd-Pleaser: Gets rave reviews from both kids and adults. The ginger adds a little warmth without being too spicy for little ones.
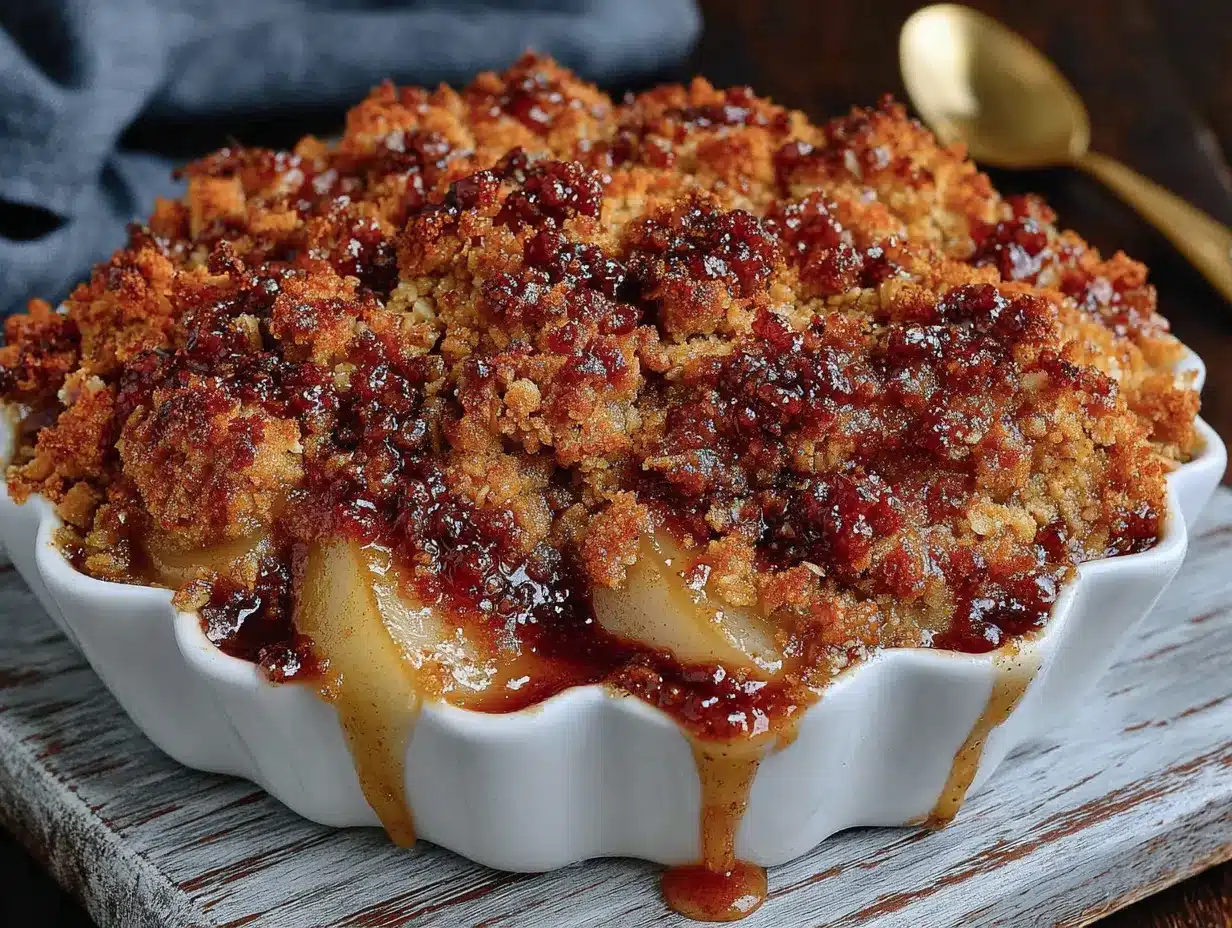
- Unbelievably Delicious: The contrast between the soft, spiced pears and the crunchy, buttery oat topping is pure comfort food magic.
What makes this recipe different from the rest? It’s the double-ginger approach. I use both fresh grated ginger and ground ginger, which gives you that bright, zesty kick alongside the deeper, warmer notes. Plus, I add a pinch of black pepper to the filling—trust me on this one. It doesn’t make the dessert spicy; it just makes the ginger and cinnamon sing louder.
This cozy spiced pear and ginger crisp is the kind of dessert that makes you slow down. It’s comfort food reimagined—familiar but with a little unexpected warmth. Perfect for impressing guests without breaking a sweat, or turning a simple weeknight into something memorable.
What Ingredients You Will Need
This recipe uses simple, wholesome ingredients that come together to create something truly special. The pears do the heavy lifting, while the ginger and spices add that cozy fall warmth we’re all craving.
For the Pear Filling
- 6 medium ripe but firm pears (Bosc or Anjou work best—they hold their shape during baking)
- 1/4 cup granulated sugar (adds sweetness and helps create that syrupy texture)
- 2 tablespoons brown sugar (packed, for deeper flavor)
- 1 tablespoon fresh ginger (peeled and grated finely—this is non-negotiable for that bright kick)
- 1 teaspoon ground ginger (adds warmth without the sharpness of fresh)
- 1 teaspoon ground cinnamon
- 1/4 teaspoon ground nutmeg (freshly grated if you have it)
- 1/8 teaspoon black pepper (trust me, this is the secret ingredient)
- 2 tablespoons cornstarch (helps thicken the juices)
- 2 tablespoons fresh lemon juice (balances sweetness and prevents browning)
- 1 teaspoon vanilla extract
- Pinch of salt
For the Crisp Topping
- 1 cup old-fashioned rolled oats (not quick oats—they get mushy)
- 3/4 cup all-purpose flour (I prefer King Arthur for consistent results)
- 1/2 cup brown sugar (packed)
- 1/4 cup granulated sugar
- 1 teaspoon ground ginger
- 1/2 teaspoon ground cinnamon
- 1/4 teaspoon salt
- 1/2 cup cold unsalted butter (cut into small cubes—I use Kerrygold for its richness)
- 1/2 cup chopped pecans or walnuts (optional but highly recommended for crunch)
Ingredient Tips: For the pears, look for ones that yield slightly to pressure at the stem but aren’t mushy. Bosc pears have that lovely warm honey flavor that pairs beautifully with ginger. If you can only find Bartlett pears, that’s fine—just reduce the sugar by a tablespoon since they’re sweeter. For a gluten-free version, swap the all-purpose flour with a 1:1 gluten-free baking blend. I’ve tested this with Bob’s Red Mill and it works great.
Equipment Needed
Nothing too fancy here—this cozy spiced pear and ginger crisp is designed for real home kitchens. Here’s what you’ll need:
- 9×13-inch baking dish (or a 10-inch cast iron skillet for extra rustic vibes)
- Large mixing bowl (for the pear filling)
- Medium mixing bowl (for the topping)
- Sharp knife and cutting board
- Microplane or fine grater (for the fresh ginger—a regular grater works too, just peel the ginger first)
- Measuring cups and spoons
- Pastry cutter or two forks (for cutting butter into the topping)
- Rubber spatula
- Aluminum foil (for tenting if the topping browns too quickly)
I’ve made this in everything from a ceramic baking dish to a disposable foil pan when I brought it to a potluck. The cast iron skillet gives you the best golden-brown edges, but honestly, any oven-safe dish works. If you don’t have a pastry cutter, just use your fingertips—the warmth of your hands actually helps the butter incorporate nicely. Just work quickly so the butter stays cold.
Preparation Method
Let’s walk through this together. I’ve made this cozy spiced pear and ginger crisp so many times I could do it in my sleep, but I’ll share every little detail so yours turns out perfect on the first try.
- Preheat your oven to 375°F (190°C). Position the rack in the center of the oven. While it’s heating, lightly grease your baking dish with butter or cooking spray.
- Prepare the pears. Peel the pears, then cut them in half lengthwise. Use a melon baller or small spoon to scoop out the cores. Slice each half into 1/4-inch thick wedges—not too thin, or they’ll turn to mush. You want them to hold some shape. I usually get about 6 cups of sliced pears from 6 medium pears.
- Make the filling. In your large mixing bowl, combine the sliced pears with both sugars, fresh grated ginger, ground ginger, cinnamon, nutmeg, black pepper, cornstarch, lemon juice, vanilla extract, and a pinch of salt. Toss everything gently with a rubber spatula until the pears are evenly coated. Let this sit for 5 minutes while you make the topping—this gives the pears time to release some juice, which will create that lovely syrupy sauce.
- Make the crisp topping. In your medium bowl, whisk together the oats, flour, both sugars, ground ginger, cinnamon, and salt. Add the cold butter cubes. Using a pastry cutter or your fingertips, work the butter into the dry ingredients until the mixture resembles coarse meal with some pea-sized butter pieces remaining. If you’re using nuts, stir them in now. The key here is to not overwork the butter—those little chunks will melt in the oven and create those crispy, craggy bits we all love.
- Assemble the crisp. Pour the pear mixture into your prepared baking dish and spread it into an even layer. Sprinkle the topping evenly over the pears, covering them completely. Don’t press the topping down—you want it light and airy so it gets crispy.
- Bake for 35-40 minutes. Place the dish on a baking sheet to catch any bubbly overflow (learned this one the hard way). Bake until the filling is bubbly and the topping is golden brown. About halfway through, if the topping is browning too quickly, tent loosely with foil. Your kitchen is going to smell absolutely incredible at this point.
- Cool slightly before serving. Let the crisp rest on a wire rack for at least 15 minutes. This allows the filling to set up a bit—if you serve it immediately, it’ll be too runny. The waiting is the hardest part, I know.
Sensory Cues: When it’s done, you’ll see the filling bubbling up around the edges of the topping. The pears should be tender when pierced with a fork but not falling apart. The topping should be deep golden brown and feel crisp to the touch. And the smell? Warm ginger, caramelized pears, and toasted oats—pure fall in a dish.
Cooking Tips & Techniques
After twelve test batches, I’ve collected some hard-won wisdom. Let me save you from my mistakes.
Don’t skip the cornstarch. I tried making this without it once, thinking the pears would thicken naturally. They didn’t. I ended up with pear soup. The cornstarch helps create that luscious, syrupy texture that clings to each spoonful.
Keep your butter cold. This is the number one rule for a crispy topping. If the butter softens before it goes in the oven, you’ll get a dense, greasy mess instead of those beautiful crunchy clusters. If your kitchen is warm, pop the topping in the fridge for 10 minutes before baking.
Grate your ginger on a microplane. A coarse grater leaves stringy bits of ginger that are unpleasant to bite into. A microplane gives you a fine paste that disperses evenly throughout the filling. I learned this after my third batch had those annoying ginger fibers.
Let the pears macerate. That 5-minute rest after tossing the filling isn’t just for show. It draws out the natural juices, which mix with the sugar and cornstarch to create that gorgeous syrup. If you skip this step, the filling will be drier and less flavorful.
Use a baking sheet underneath. I cannot stress this enough. Fruit crisps bubble over. It’s what they do. Save yourself the scrubbing and place your dish on a lined baking sheet before it goes in the oven.
Variations & Adaptations
One of the things I love about this cozy spiced pear and ginger crisp is how flexible it is. Here are some ways to make it your own:
Apple-Pear Combo: Swap half the pears for apples—Granny Smith or Honeycrisp work beautifully. The apples add a little tartness and hold their shape even better than pears. This is actually my favorite variation for Thanksgiving.
Vegan Version: Use coconut oil or a plant-based butter stick in place of regular butter. I’ve tested this with Miyoko’s European Style Cultured Vegan Butter and it works perfectly. The topping might be slightly less crispy, but the flavor is still amazing.
Gluten-Free Adaptation: Replace the all-purpose flour with a 1:1 gluten-free baking blend that contains xanthan gum. Bob’s Red Mill and King Arthur both make excellent options. The oats should be certified gluten-free if that’s a concern.
Extra Ginger Kick: If you’re a ginger lover like me, add 2 tablespoons of crystallized ginger, finely chopped, to the filling. It adds little bursts of intense ginger flavor that are absolutely delightful.
Individual Servings: Divide the filling and topping among 6 ramekins or small baking dishes. Reduce the baking time to 20-25 minutes. Perfect for dinner parties where everyone wants their own little crisp.
Serving & Storage Suggestions
This cozy spiced pear and ginger crisp is at its best warm, about 15-20 minutes after it comes out of the oven. The filling is still soft and saucy, but it’s had time to set up enough that it won’t run all over your plate.
What to serve with it: A scoop of vanilla bean ice cream is the classic choice, and for good reason—the cold creaminess contrasts perfectly with the warm spiced fruit. If you’re feeling fancy, try a drizzle of heavy cream, a dollop of whipped cream, or even a spoonful of Greek yogurt for a slightly tangier option. For a dairy-free version, coconut whipped cream or oat milk ice cream work beautifully.
Storage: Cover the cooled crisp tightly with foil or plastic wrap and store it in the refrigerator for up to 4 days. The topping will lose some of its crunch over time, but the flavors actually deepen and get even better.
Reheating: The best way to bring this crisp back to life is in the oven. Pop it in a 350°F oven for 10-15 minutes, until the filling is bubbly and the topping crisps up again. The microwave works in a pinch, but the topping will be soft rather than crunchy. If you’re reheating individual portions, an air fryer at 350°F for 5 minutes works wonders.
Freezing: You can freeze the unbaked crisp for up to 3 months. Assemble it in a freezer-safe dish, wrap tightly in plastic wrap and foil, and freeze. Bake from frozen, adding 15-20 minutes to the baking time. Baked crisp also freezes well—just thaw overnight in the refrigerator and reheat in the oven.
Nutritional Information & Benefits
Here’s the estimated nutritional breakdown for one serving (about 1/6 of the recipe):
- Calories: 385
- Total Fat: 16g
- Saturated Fat: 8g
- Carbohydrates: 58g
- Fiber: 6g
- Sugar: 36g
- Protein: 4g
Health Highlights: Pears are an excellent source of dietary fiber, which supports digestive health and helps keep you feeling full. They also contain vitamin C and copper. Ginger is well-known for its anti-inflammatory properties and can help soothe digestion. The oats in the topping provide soluble fiber, which is great for heart health. While this is definitely a treat, it’s made with whole food ingredients that offer real nutritional value.
Dietary Considerations: This recipe can be made gluten-free and vegan with the substitutions mentioned above. It contains dairy (butter) and nuts (optional), so adjust accordingly for allergies. The sugar content can be reduced by cutting back on the granulated sugar in the filling—the pears are naturally sweet, especially if they’re perfectly ripe.
Conclusion
This cozy spiced pear and ginger crisp is more than just a dessert—it’s a little piece of comfort that brings warmth to any fall evening. After all those test batches, I can honestly say this version is the one I keep coming back to. The ginger is bright without being overwhelming, the pears are tender and sweet, and that crunchy oat topping is everything you want a crisp topping to be.
I’d love to hear how yours turns out. Did you add the black pepper? Try it with apples? Serve it with something unexpected? Drop a comment below and let me know—I read every single one, and your variations might just inspire my next test batch. And if you loved this recipe, please share it with a friend who needs a little cozy comfort in their life. Happy baking, friends!
Frequently Asked Questions
Can I use canned pears instead of fresh?
You can, but I don’t recommend it for this recipe. Canned pears are much softer and will break down during baking, leaving you with a mushy texture. Fresh pears hold their shape better and have a more complex flavor. If you’re in a pinch, drain canned pears well, reduce the sugar by half, and skip the cornstarch since the canned pears won’t release as much juice.
How do I know when the pears are ripe enough?
Ripe pears should yield gently to pressure near the stem, similar to a ripe peach. They should smell sweet and floral at the stem end. If they’re rock hard, let them sit on the counter for a few days. If they’re soft and bruised, they’re too far gone for this recipe. Bosc pears are more forgiving since they stay firmer even when ripe.
Can I make this ahead of time?
Absolutely! You can assemble the crisp completely (without baking) up to 24 hours in advance. Just cover it and store it in the refrigerator. When you’re ready to bake, add about 10 minutes to the baking time since you’re starting from cold. The topping might not get quite as crispy, but the flavor will be just as good.
Why did my topping turn out soggy?
Soggy topping usually happens for one of three reasons: the butter was too warm when you mixed it in, you pressed the topping down onto the fruit, or the crisp wasn’t baked long enough. Make sure your butter is cold, sprinkle the topping loosely, and bake until it’s deep golden brown. If your fruit is particularly juicy, you can also pre-bake the topping on a separate sheet pan for 10 minutes before adding it to the fruit.
Can I use ground ginger instead of fresh?
You can, but you’ll lose that bright, zesty kick that makes this recipe special. Fresh ginger has a peppery, almost citrusy quality that ground ginger just can’t replicate. If you absolutely must substitute, use 1 teaspoon of ground ginger in place of the fresh, but honestly, fresh ginger is worth the extra minute of grating. The flavor difference is night and day.
Pin This Recipe!
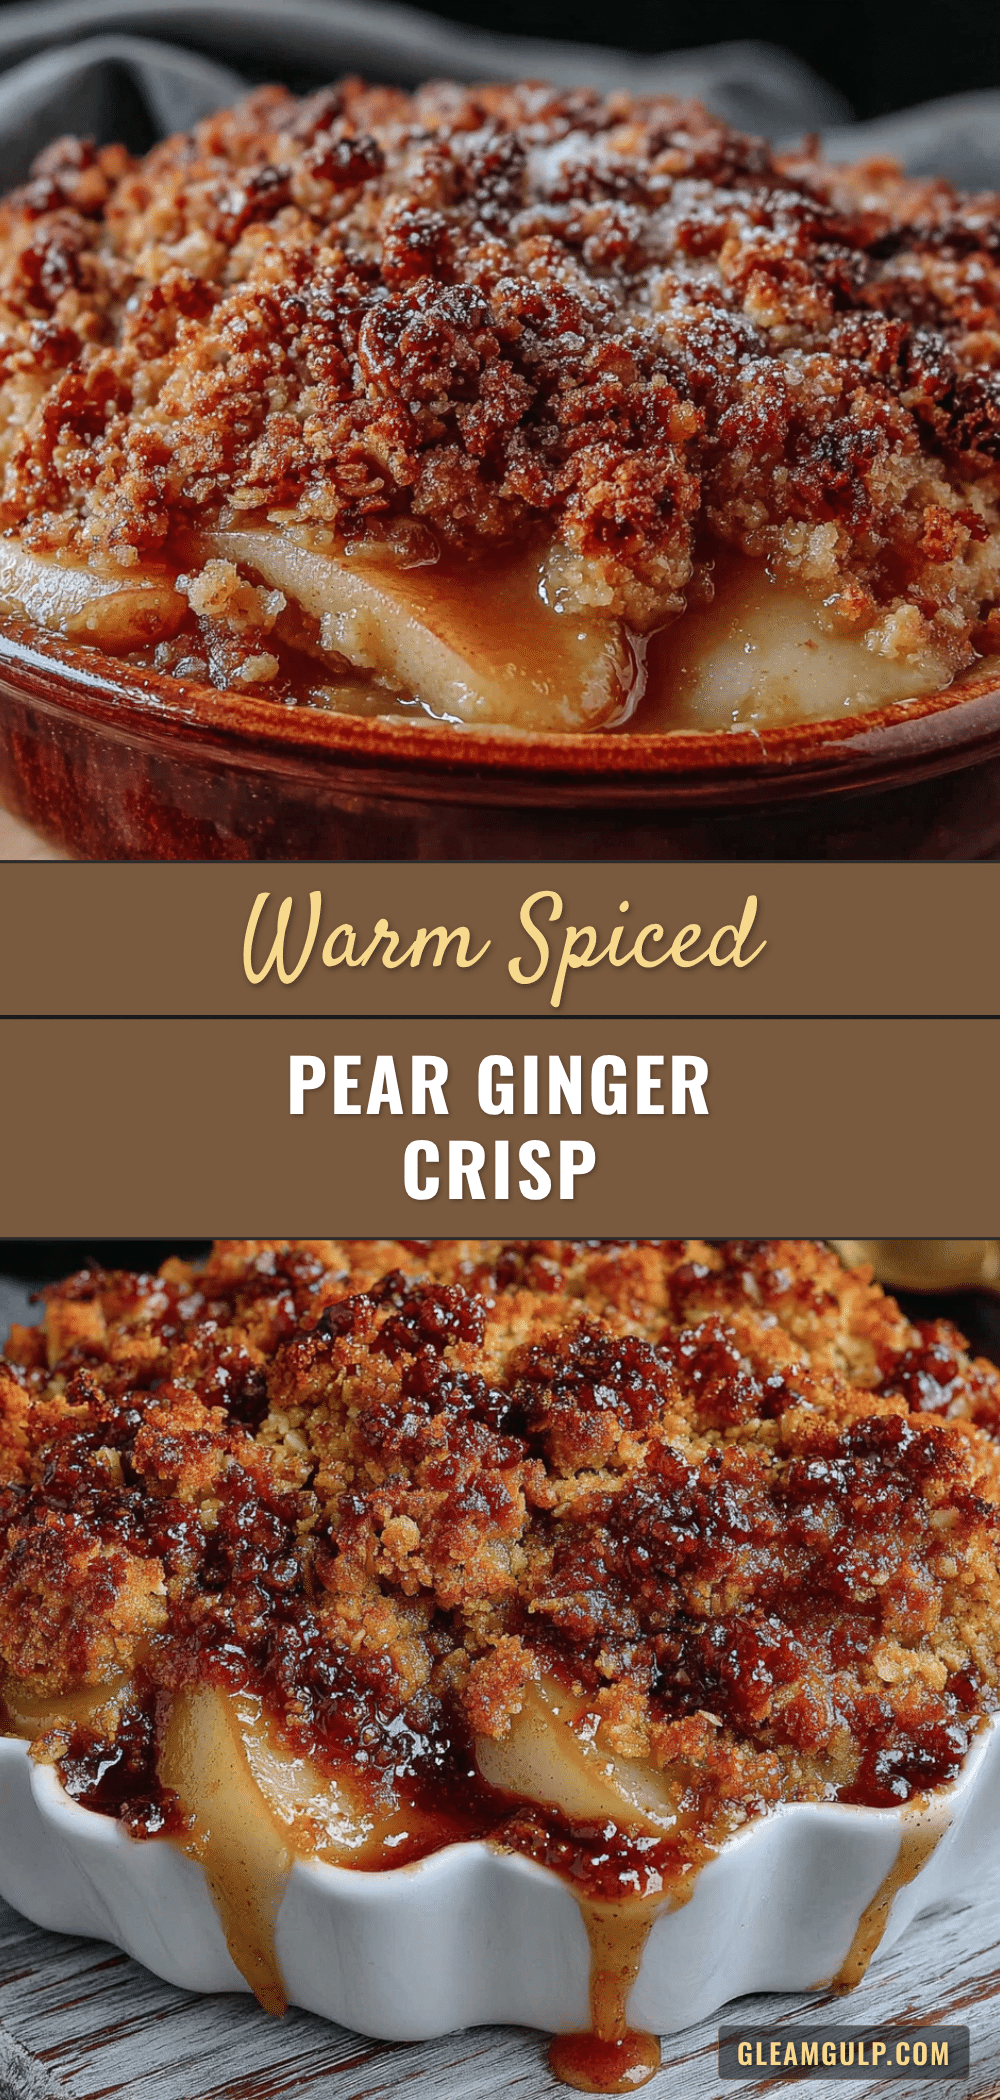
Cozy Spiced Pear and Ginger Crisp: Easy Fall Dessert

This cozy spiced pear and ginger crisp features tender pears with a double-ginger kick and a crunchy oat topping. It’s the perfect easy fall dessert that comes together in under an hour with simple ingredients.
- Prep Time: 15 minutes
- Cook Time: 35-40 minutes
- Total Time: 50-55 minutes
- Yield: 6 servings 1x
- Category: Dessert
- Cuisine: American
Ingredients
- 6 medium ripe but firm pears (Bosc or Anjou work best)
- 1/4 cup granulated sugar
- 2 tablespoons brown sugar, packed
- 1 tablespoon fresh ginger, peeled and grated finely
- 1 teaspoon ground ginger
- 1 teaspoon ground cinnamon
- 1/4 teaspoon ground nutmeg
- 1/8 teaspoon black pepper
- 2 tablespoons cornstarch
- 2 tablespoons fresh lemon juice
- 1 teaspoon vanilla extract
- Pinch of salt
- 1 cup old-fashioned rolled oats
- 3/4 cup all-purpose flour
- 1/2 cup brown sugar, packed
- 1/4 cup granulated sugar
- 1 teaspoon ground ginger
- 1/2 teaspoon ground cinnamon
- 1/4 teaspoon salt
- 1/2 cup cold unsalted butter, cut into small cubes
- 1/2 cup chopped pecans or walnuts (optional)
Instructions
- Preheat your oven to 375°F (190°C). Position the rack in the center of the oven. Lightly grease your baking dish with butter or cooking spray.
- Prepare the pears: Peel the pears, cut them in half lengthwise, and scoop out the cores. Slice each half into 1/4-inch thick wedges.
- Make the filling: In a large mixing bowl, combine the sliced pears with both sugars, fresh grated ginger, ground ginger, cinnamon, nutmeg, black pepper, cornstarch, lemon juice, vanilla extract, and a pinch of salt. Toss gently until the pears are evenly coated. Let sit for 5 minutes.
- Make the crisp topping: In a medium bowl, whisk together the oats, flour, both sugars, ground ginger, cinnamon, and salt. Add the cold butter cubes. Using a pastry cutter or your fingertips, work the butter into the dry ingredients until the mixture resembles coarse meal with some pea-sized butter pieces remaining. Stir in nuts if using.
- Assemble the crisp: Pour the pear mixture into the prepared baking dish and spread into an even layer. Sprinkle the topping evenly over the pears, covering them completely. Do not press the topping down.
- Bake for 35-40 minutes, placing the dish on a baking sheet to catch any overflow. If the topping browns too quickly, tent loosely with foil halfway through. Bake until the filling is bubbly and the topping is golden brown.
- Cool slightly before serving: Let the crisp rest on a wire rack for at least 15 minutes before serving.
Notes
For the pears, look for ones that yield slightly to pressure at the stem but aren’t mushy. Bosc pears have a lovely warm honey flavor that pairs beautifully with ginger. If using Bartlett pears, reduce the sugar by a tablespoon since they’re sweeter. For a gluten-free version, swap the all-purpose flour with a 1:1 gluten-free baking blend. Keep the butter cold for a crispy topping. Let the pears macerate for 5 minutes to draw out juices. Use a baking sheet underneath to catch any overflow. The crisp can be assembled up to 24 hours in advance and stored in the refrigerator; add about 10 minutes to the baking time if starting from cold.
Nutrition
- Serving Size: 1/6 of recipe
- Calories: 385
- Sugar: 36
- Fat: 16
- Saturated Fat: 8
- Carbohydrates: 58
- Fiber: 6
- Protein: 4
Keywords: pear crisp, ginger crisp, fall dessert, easy dessert, fruit crisp, pear dessert, ginger dessert, comfort food


