Love this? Save it for later!
Share the inspiration with your friends
I was supposed to be making a charcuterie board. A nice, normal, autumnal charcuterie board with fancy cheeses, some prosciutto, and maybe those little pumpkin-shaped crackers I’d spotted at the store. That was the plan. But somewhere between digging through my pantry and realizing I’d forgotten to pick up the fancy cheese, I found myself staring at a bag of baby carrots, a head of broccoli, and a bag of pretzel sticks. The power had flickered (it was a very windy Tuesday), and I was already running late for my own Halloween party. I grabbed the wrong dip, the cutting board was way too small, and honestly, I was this close to just ordering pizza.
Then I looked at the black olives. And the baby carrots. And something clicked. Not a genius idea, more like a desperate, last-ditch attempt to not show up empty-handed. I started arranging the carrots like ribs, the broccoli like a spooky spine. The pretzels became bones. By the time the power came back on, I had a skeleton made of vegetables staring back at me from the board. It wasn’t the charcuterie I planned, but it was way more fun. And you know that feeling when a complete accident turns out better than the original idea? That was this tray. It’s been a staple at every fall gathering since.
Why You’ll Love This Recipe
This isn’t just another veggie platter. This is a conversation starter, a healthy centerpiece, and a genuinely fun way to get everyone—even the picky eaters—to eat their vegetables. I’ve tested this layout about a dozen times to make sure it holds up, and I can tell you, it’s foolproof. It’s the kind of recipe that makes you look like a Halloween hero without breaking a sweat.
- Quick & Easy : You can assemble this entire skeleton in under 20 minutes. Seriously. It’s perfect for last-minute parties or a cozy night in when you want to do something a little special without a lot of fuss.
- Simple Ingredients : No fancy grocery trips needed. You likely already have most of these veggies in your fridge. It’s all about the arrangement, not the ingredients.
- Perfect for Halloween : Whether it’s a spooky movie night, a kid’s school party, or a grown-up gathering, this tray fits right in. It’s festive without being overly complicated.
- Crowd-Pleaser : I’ve watched kids who swear they hate broccoli grab a “bone” and munch away. The presentation does all the heavy lifting.
- Unbelievably Delicious : The best part? You can pair it with your favorite dips. The crunchy veggies and creamy dip combo is next-level comfort food—healthy comfort food, that is.
What makes this recipe different from every other veggie tray out there is the sheer joy of it. It’s not just a pile of carrots and celery. It’s a skeleton. It’s a little bit spooky, a little bit silly, and totally satisfying. It’s the kind of dish that makes you close your eyes after the first crunchy bite and think, “Yeah, this is exactly what I needed.” Perfect for impressing guests without any stress, or turning a simple snack into something memorable.
What Ingredients You Will Need
This recipe uses simple, wholesome ingredients to build a spooky, satisfying skeleton. The magic is in the shapes and colors, not expensive or hard-to-find items. Most of these are pantry staples or easy to find at any grocery store.
- For the Skeleton Body:
- Baby Carrots (1 large bag, about 20-25) – These form the ribs. Look for long, straight ones if you can, but any will work. (I find the organic ones at [Brand] are usually the straightest.)
- Broccoli Florets (2 cups) – These create the spine and the skull. Fresh broccoli is best for structure. (Frozen will be too mushy.)
- Pretzel Sticks (1 cup) – These are the long bones of the arms and legs. They add that perfect salty crunch. (Gluten-free pretzel sticks work great here.)
- Black Olives (1 can, pitted) – For the eyes, nose, and joints. They add a great salty, briny pop. (Look for large, firm olives for the best “eye” shape.)
- Red Bell Pepper (1 medium) – For the mouth and a few decorative accents. It adds a pop of color and sweetness.
- Cucumber (1 medium) – For the pelvis and hip bones. The round slices are perfect for this.
- Celery Sticks (2-3 stalks) – For the arms and legs. They add a nice crunch and structure.
- For the Dip & Decoration:
- Ranch Dip (1 cup) – The best dip for a veggie skeleton. You can use store-bought or make your own. (I prefer [Brand] for its creaminess.)
- Hummus (1/2 cup) – A great alternative for the dip bowl. (Roasted red pepper hummus adds a nice color.)
- Fresh Dill or Parsley (a few sprigs) – For garnish, to look like “grass” around the skeleton.
Ingredient Substitutions: If you’re not a fan of ranch, use a creamy Greek yogurt dip or a dairy-free option. For a gluten-free version, swap the pretzel sticks for carrot sticks or cucumber spears. You can also use cauliflower florets instead of broccoli for a paler, more “bone-like” look.
Equipment Needed
You don’t need any fancy gadgets for this one. Just a few basic kitchen tools that you probably already have.
- Large Serving Platter or Cutting Board – A rectangular one works best for the skeleton shape, but a large round one can also work. I use a wooden board from [Brand] that I’ve had for years.
- Sharp Knife – For cutting the bell pepper, cucumber, and celery. A good chef’s knife makes all the difference.
- Cutting Board – For prepping your veggies. (I learned the hard way that using a small board makes a huge mess.)
- Small Bowl – For the dip. A small, round bowl works perfectly as the “heart” or “stomach” of the skeleton.
- Toothpicks – Optional, for securing the olives to the pretzels or carrots if you’re transporting the tray.
Budget-Friendly Tip: If you don’t have a large platter, a clean baking sheet lined with parchment paper works like a charm. I’ve done it before in a pinch, and it looks just as good.
Preparation Method
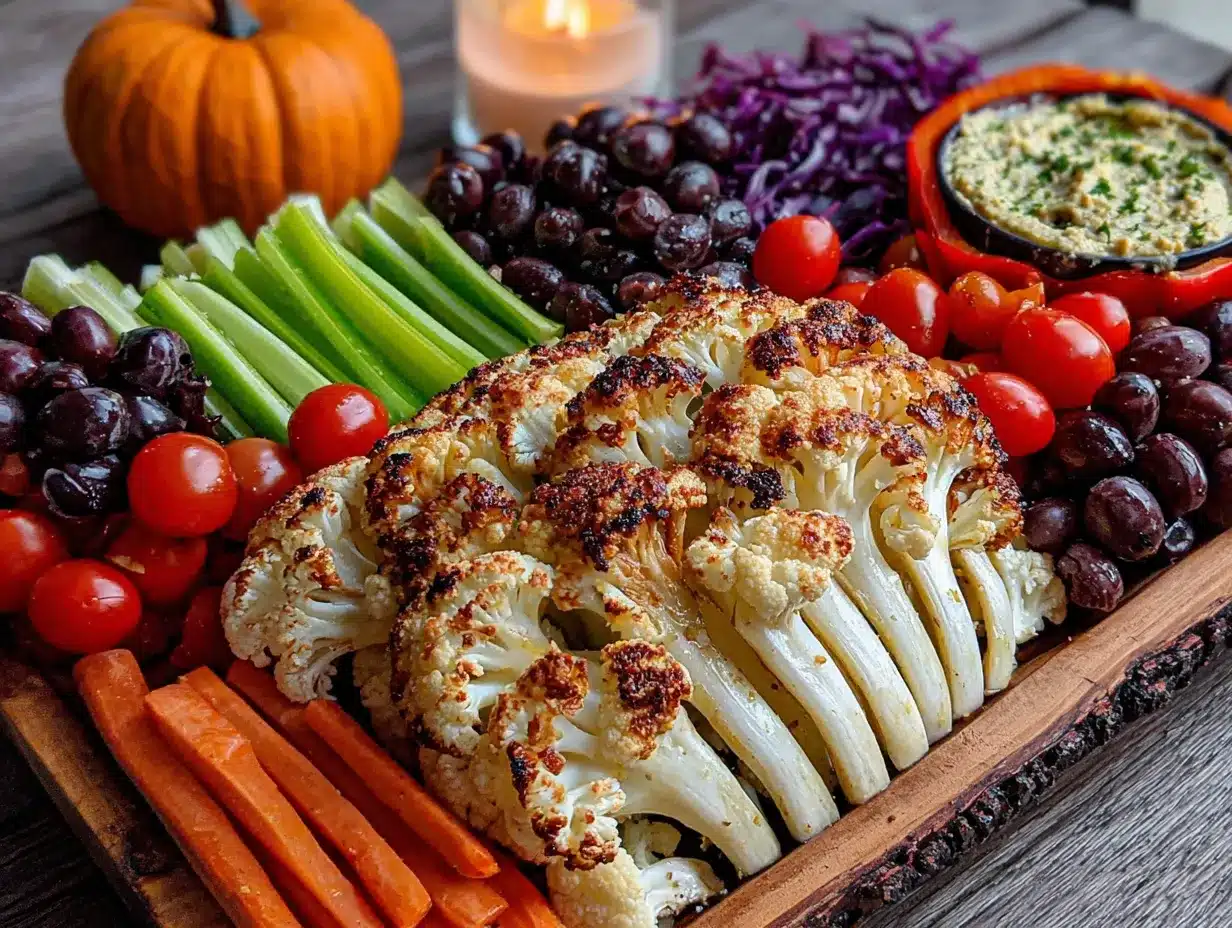
Here’s how to build your spooky skeleton, step by step. Take your time with the placement—it’s like a puzzle, and it’s oddly satisfying.
- Prep Your Veggies (5 minutes): Wash all your vegetables thoroughly. Cut the cucumber into thick rounds (about 1/2 inch thick). Slice the red bell pepper into a wide, curved strip for the mouth and a few small triangles for other details. Cut the celery stalks in half crosswise. Set everything aside.
- Create the Skull (3 minutes): Place a small cluster of broccoli florets at the top center of your platter. This will be the skull. Use two large black olives for the eyes, placing them on top of the broccoli. Use a small sliver of red bell pepper for the mouth, curving it into a spooky grin below the eyes.
- Build the Spine (4 minutes): Below the skull, start arranging a line of broccoli florets going straight down the center of the platter. This is the spine. Leave a small gap in the middle for the dip bowl. The spine should be about 8-10 inches long, depending on your platter size.
- Add the Ribs (5 minutes): On either side of the spine, start laying down the baby carrots. Angle them slightly outward and downward to look like ribs. You’ll want about 4-5 carrots on each side. They should fan out a bit, getting wider towards the bottom. (I always mess this up the first time—don’t worry, you can rearrange them easily!)
- Form the Pelvis (2 minutes): At the bottom of the spine, arrange 3-4 cucumber slices in a fan shape. This creates the pelvis or hip bones. It gives the skeleton a nice, grounded look.
- Construct the Arms & Legs (5 minutes): For the arms, place a celery stalk on each side of the ribs, angling them outward and slightly up. Use a pretzel stick for the upper arm and a piece of celery for the lower arm. For the legs, place two celery stalks going straight down from the pelvis. Use pretzel sticks for the upper legs and cucumber slices for the “knees” and “feet.”
- Add the Joints & Details (2 minutes): Use black olives to mark the “joints” of the skeleton—the shoulders, elbows, wrists, hips, knees, and ankles. This is what makes it look like a real skeleton! Add a few small red bell pepper triangles for fingernails or toenails if you’re feeling fancy.
- Place the Dip Bowl (1 minute): In the gap you left in the middle of the spine, place your small bowl filled with ranch dip or hummus. This acts as the skeleton’s “heart” or “stomach.” It’s a fun touch.
- Garnish & Serve (1 minute): Sprinkle a few sprigs of fresh dill or parsley around the base of the skeleton to look like spooky grass. Serve immediately or refrigerate until ready.
Sensory Cue: When you place the carrots, you should see them fanning out like actual ribs. If they look too clumped, just spread them out a bit. The final result should look like a clear, recognizable skeleton shape.
Cooking Tips & Techniques
I’ve made this tray about ten times now, and I’ve learned a few things the hard way. Here are my best tips to make your skeleton look its spookiest.
- Don’t Overthink the Skull: The first time I made this, I spent 15 minutes trying to carve a perfect skull out of a bell pepper. It looked terrible. Just use a cluster of broccoli and two olives. It’s simple, it’s recognizable, and it takes two seconds.
- Use Straight Veggies for Bones: When picking out your baby carrots and celery, try to find the straightest ones. They look much more like bones than curved ones. (Curved carrots can be used for the ribs, though—they look more natural that way.)
- Keep a Damp Paper Towel Handy: Veggies can be slippery. If your hands are getting wet, just dry them off with a paper towel. It makes placing the olives and pretzels much easier.
- Transport Tip: If you’re taking this to a party, assemble it on a baking sheet and cover it tightly with plastic wrap. The veggies will stay fresh, and the skeleton will hold its shape. I once tried to transport it on a flimsy platter, and the whole thing slid off in the car. Not fun.
- Multitasking Strategy: While you’re washing the veggies, you can also be cutting the bell pepper and cucumber. It saves time and keeps your workflow smooth.
Variations & Adaptations
This recipe is super flexible. Here are a few ways to make it your own.
- Spooky Skeleton Dip: Swap the ranch for a black bean dip or a spinach and artichoke dip for a darker, more “spooky” look. I once made a beet hummus that turned the dip bowl a deep, bloody red—it was a huge hit.
- Halloween Monster Mash: Instead of a skeleton, arrange the veggies to look like a Frankenstein monster. Use green bell pepper for the head, red pepper for the bolts, and cucumber for the body. It’s a fun twist if you’re tired of skeletons.
- Dietary Adaptations: For a keto-friendly version, skip the pretzel sticks and use more cucumber and celery. For a vegan option, make sure your dip is plant-based. (Most hummus is naturally vegan.)
- Seasonal Swaps: In the summer, use fresh cherry tomatoes for the eyes and joints instead of olives. In the fall, add some roasted pumpkin seeds around the base for extra crunch.
- Personal Variation: I once added a “heart” made from a sliced strawberry in the dip bowl. It looked like the skeleton had a little red heart, and it was adorable. My kids still ask for the “heart skeleton” every year.
Serving & Storage Suggestions
This tray is best served cold or at room temperature. The crunch of the fresh veggies is the star of the show.
- Serving Temperature: Serve the tray straight from the fridge. The veggies will be crisp and refreshing. If you’re serving it at a party, keep it on a bed of ice to stay cold.
- Presentation: Place the tray in the center of your snack table. It’s a showstopper, so give it room to shine. I like to put it on a dark tablecloth to make the colors pop.
- Complementary Dishes: This pairs perfectly with other Halloween snacks like spiderweb pizza dip or mummy pigs in a blanket. It also goes great with a warm bowl of creamy pumpkin soup for a cozy night in.
- Storage: If you have leftovers (unlikely, but possible!), store the veggies in an airtight container in the fridge. The dip should be stored separately. They’ll stay fresh for up to 2 days.
- Reheating: This is a cold dish, so no reheating is needed. If the veggies seem a little wilted after storage, just give them a quick rinse in cold water to crisp them back up.
- Flavor Development: The veggies are best eaten fresh, but the flavors of the dip will meld a bit if you let it sit for an hour. The ranch will soak into the broccoli a little, which some people love.
Nutritional Information & Benefits
This veggie tray is a nutritional powerhouse. It’s packed with vitamins, fiber, and antioxidants, making it a guilt-free Halloween treat.
- Estimated Nutritional Values (per serving, with 2 tbsp ranch):
- Calories: ~120
- Fat: 7g
- Carbohydrates: 12g
- Fiber: 4g
- Protein: 3g
- Health Benefits: Carrots are rich in beta-carotene, which is great for eye health. Broccoli is loaded with vitamin C and fiber. Olives provide healthy fats and antioxidants. It’s a snack that actually makes you feel good after eating it.
- Dietary Considerations: This recipe is naturally gluten-free (if you skip the pretzels or use gluten-free ones), vegetarian, and can easily be made vegan. It’s also low in sugar and high in fiber, making it a great option for anyone watching their blood sugar.
- Allergen Note: The ranch dip may contain dairy. If you have a dairy allergy, use a dairy-free ranch or hummus instead. The pretzel sticks may contain gluten.
- Personal Wellness Perspective: I love that this recipe makes healthy eating fun. It’s not about deprivation—it’s about creativity. You get to enjoy a Halloween treat that’s actually good for you, and that feels pretty great.
Conclusion
This Cozy Halloween Veggie Tray Skeleton is more than just a snack—it’s a little piece of Halloween magic. It started as a happy accident, but it’s become one of my favorite traditions. It’s proof that you don’t need fancy ingredients or hours in the kitchen to create something memorable. You just need a little imagination and a bag of carrots.
I honestly love this recipe because it brings people together. There’s something about a skeleton made of vegetables that makes everyone smile. It’s silly, it’s spooky, and it’s delicious. I hope you give it a try and make it your own. Maybe you’ll add a different dip, or use a different veggie for the bones. That’s the beauty of it—it’s yours to play with.
So go ahead, grab your veggies, and build a skeleton. I’d love to see how it turns out! Leave a comment below and tell me about your Halloween creations. Did you add a heart? Did you make a monster instead? Share your stories—I read every single one. Happy Halloween, and happy snacking!
Frequently Asked Questions
Can I make this veggie skeleton ahead of time?
Yes, you can! Assemble the skeleton on the platter, cover it tightly with plastic wrap, and store it in the fridge for up to 4 hours. Add the dip bowl just before serving to keep it from getting soggy.
What other dips can I use?
Anything creamy works great! Try a Greek yogurt dill dip, a roasted red pepper hummus, or even a warm cheese dip for a different vibe. Just make sure it’s thick enough to hold its shape in the bowl.
Can I use frozen vegetables?
I wouldn’t recommend it. Frozen veggies will release water as they thaw, making your skeleton soggy and sad. Stick with fresh, crisp vegetables for the best results.
How do I get the skeleton to stay in place?
The veggies should stay put on a flat platter. If you’re worried about them sliding, you can use a little bit of hummus or cream cheese as “glue” on the bottom of each piece. Toothpicks also work well for securing the olives.
Is this recipe kid-friendly?
Absolutely! Kids love helping to build the skeleton. It’s a great way to get them excited about eating vegetables. Just supervise the use of toothpicks if you use them.
Pin This Recipe!
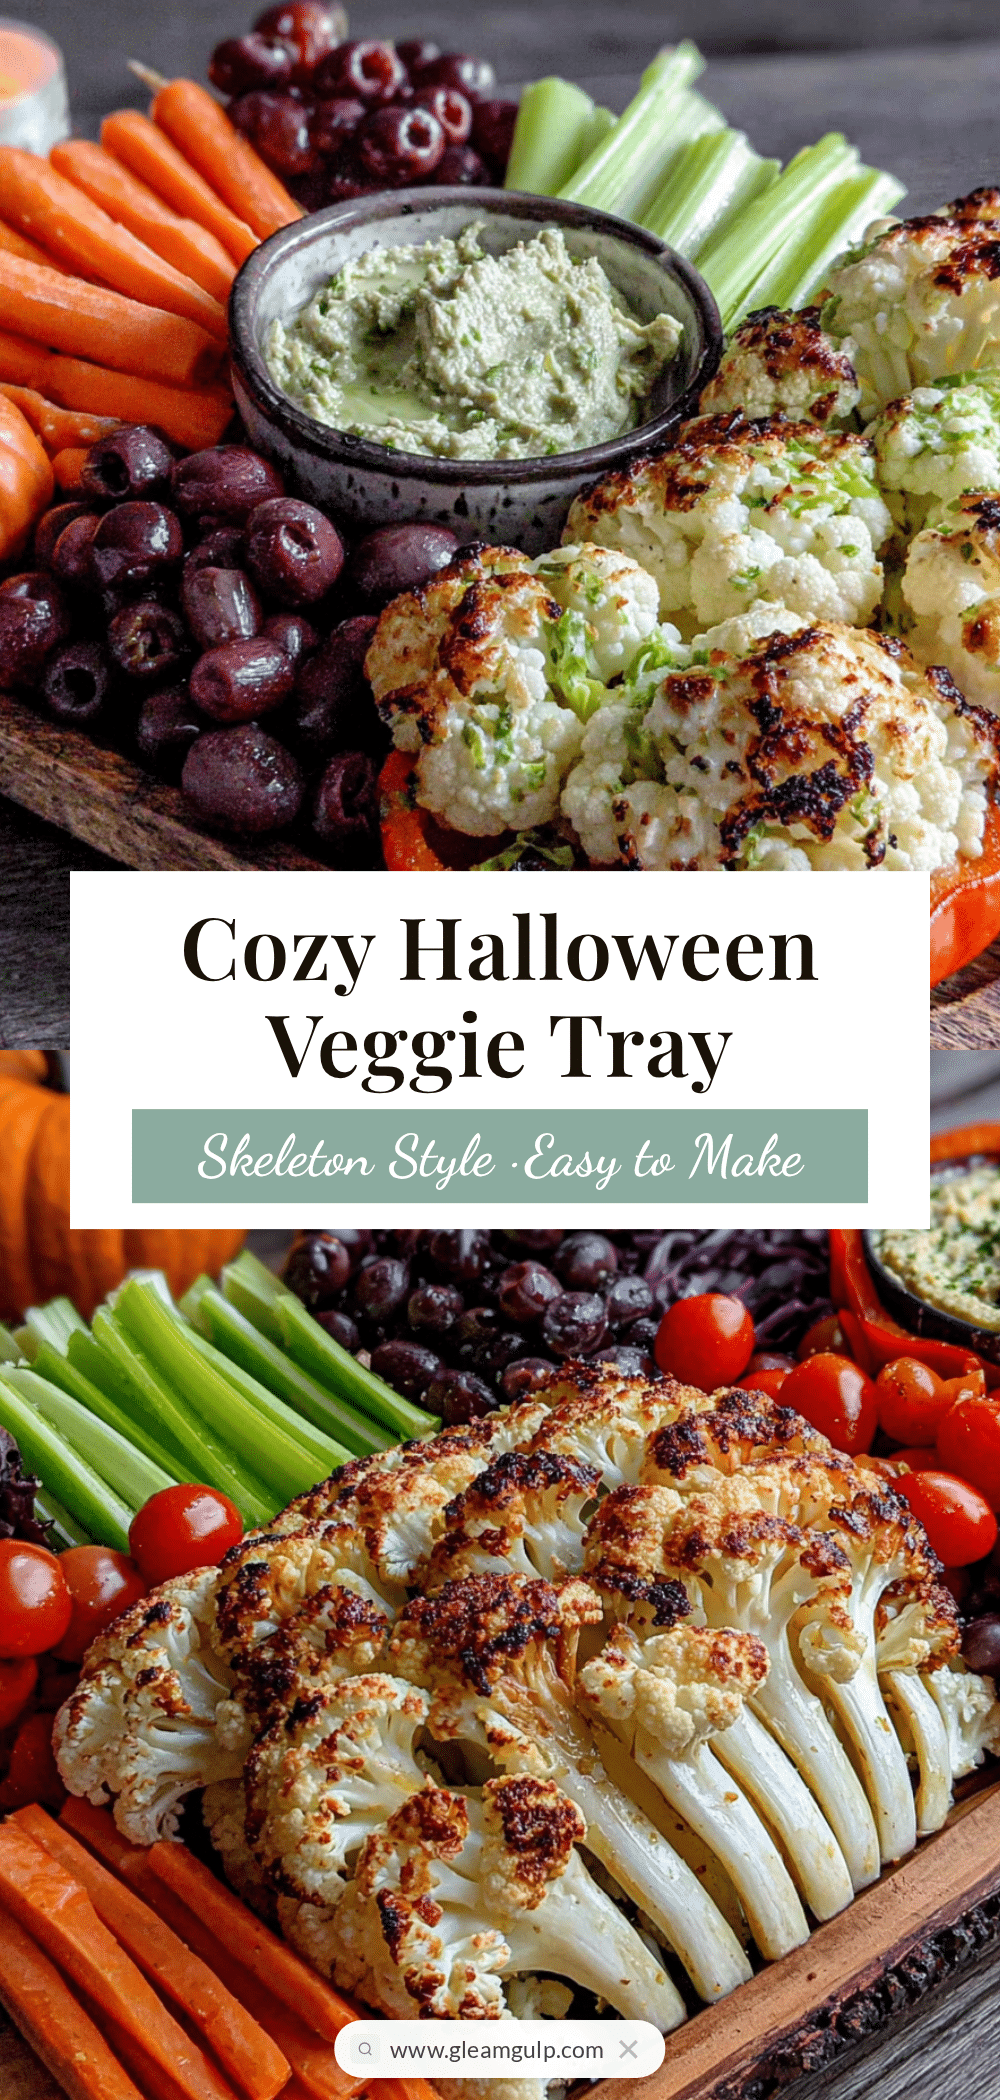
Cozy Halloween Veggie Tray Skeleton: Easy & Healthy
A fun and healthy Halloween veggie tray shaped like a skeleton, made with simple ingredients like baby carrots, broccoli, and pretzel sticks. Perfect for parties and a great way to get everyone to eat their vegetables.
- Prep Time: 20 minutes
- Cook Time: 0 minutes
- Total Time: 20 minutes
- Yield: 8 servings 1x
- Category: Appetizer
- Cuisine: American
Ingredients
- 1 large bag baby carrots (about 20-25)
- 2 cups broccoli florets
- 1 cup pretzel sticks
- 1 can black olives, pitted
- 1 medium red bell pepper
- 1 medium cucumber
- 2–3 celery stalks
- 1 cup ranch dip
- 1/2 cup hummus
- Fresh dill or parsley for garnish
Instructions
- Wash all vegetables thoroughly. Cut cucumber into thick rounds (about 1/2 inch thick). Slice red bell pepper into a wide, curved strip for the mouth and small triangles for details. Cut celery stalks in half crosswise.
- Place a small cluster of broccoli florets at the top center of the platter for the skull. Use two large black olives for eyes and a small sliver of red bell pepper for the mouth.
- Below the skull, arrange a line of broccoli florets down the center of the platter for the spine, leaving a gap in the middle for the dip bowl.
- On either side of the spine, lay down baby carrots angled slightly outward and downward to form ribs (4-5 per side).
- At the bottom of the spine, arrange 3-4 cucumber slices in a fan shape for the pelvis.
- For arms, place a celery stalk on each side of the ribs, angling outward and up. Use pretzel sticks for upper arms and celery for lower arms. For legs, place two celery stalks down from the pelvis, using pretzel sticks for upper legs and cucumber slices for knees and feet.
- Use black olives to mark joints (shoulders, elbows, wrists, hips, knees, ankles). Add small red bell pepper triangles for fingernails or toenails if desired.
- Place a small bowl of ranch dip or hummus in the gap in the spine.
- Garnish with fresh dill or parsley around the base. Serve immediately or refrigerate until ready.
Notes
For a gluten-free version, swap pretzel sticks for carrot sticks or cucumber spears. Use dairy-free ranch or hummus for a vegan option. The skeleton can be assembled up to 4 hours ahead; add dip just before serving.
Nutrition
- Serving Size: 1 serving (with 2 tb
- Calories: 120
- Sugar: 5
- Sodium: 350
- Fat: 7
- Saturated Fat: 1
- Carbohydrates: 12
- Fiber: 4
- Protein: 3
Keywords: Halloween, veggie tray, skeleton, healthy snack, party appetizer, vegetable platter


