Love this? Save it for later!
Share the inspiration with your friends
The neighborhood Halloween potluck was in six hours and I’d completely forgotten. Everyone else would be bringing elaborate, Pinterest-perfect creations—I’d seen the sign-up sheet last week. Witch-hat cupcakes with hand-piped frosting. A graveyard cake with hand-molded sugar tombstones. And me? I had a half-empty bag of Oreos, a box of instant pudding mix I’d bought on a whim, and a bag of gummy worms I’d grabbed for a movie night that never happened. Honestly, I almost just grabbed a bag of chips and called it a day.
But then I remembered these little cups of dirt from when I was a kid. I mean, they weren’t fancy. They were messy, a little ridiculous, and definitely not what anyone would call “elevated” cuisine. But you know that feeling when you’re desperate and a memory just clicks? That was me, standing in my kitchen at 2 PM on a Saturday, staring at chocolate pudding mix like it held the answers to the universe. Maybe you’ve been there—the panic sets in, and suddenly you’re willing to try anything.
I threw those cookies in a bag and crushed them with a rolling pin (my neighbor probably thought I was having a breakdown). I whisked the pudding, layered everything in some clear plastic cups I found in the back of a cabinet, and shoved a few gummy worms in sideways. It took me maybe fifteen minutes. I walked into that potluck feeling like a fraud, carrying a tray of what looked like a kindergarten art project.
And you know what happened? Those little dirt cups disappeared first. The elaborate cupcakes sat untouched for an hour. People kept coming back for “just one more.” A mom asked me for the recipe. A kid told me it was the best thing he’d ever eaten. I just stood there, sheepish and a little amused, holding an empty tray. That’s the thing about this recipe—it’s not trying to be impressive. It just is. And honestly, that’s why I keep making it. It’s the underdog that always wins.
Why You’ll Love This Recipe
Look, I’ve tested a lot of dessert recipes in my time. Some are complicated. Some require a trip to three different stores. These cozy Halloween dirt cups? They’re the opposite of all that. They’re the recipe you make when you want to show up with something that looks like you tried—without actually trying that hard. Here’s why they work.
- Quick & Easy: You can have these assembled in under 20 minutes. No baking, no fussing, no melting chocolate in a double boiler. Just mix, layer, and go.
- Simple Ingredients: You probably have most of this in your pantry right now. Oreos, instant pudding, milk, and gummy worms. That’s it. No fancy grocery store trips required.
- Perfect for Halloween: Whether it’s a classroom party, a work potluck, or a cozy night in with the kids, these dirt cups fit right in. They’re festive without being over-the-top.
- Crowd-Pleaser: I’ve brought these to parties with adults only and to gatherings full of kids. They disappear every single time. There’s something about digging into a cup of “dirt” that makes everyone feel like a kid again.
- Unbelievably Delicious: Let’s be real—chocolate pudding and crushed Oreos is a winning combination. Add in the silly fun of gummy worms, and you’ve got a dessert that tastes as good as it makes you smile.
What makes this recipe different from the dozens of other dirt cup recipes out there? It’s the texture. I use a specific ratio of pudding to cookie crumb that gives you that perfect spoonful—creamy, crunchy, and just the right amount of sweetness. Plus, I’ve figured out the trick to keeping the gummy worms from getting soggy (hint: it’s all about when you add them). This isn’t just another version. It’s the version I’ve made for three Halloweens straight because it always, always works.
This recipe is the kind that makes you close your eyes after the first bite. It’s comfort food in its purest form—nostalgic, silly, and deeply satisfying. Perfect for when you want to impress without the stress, or when you just need a little cozy sweetness in your life.
What Ingredients You Will Need
This recipe uses simple, everyday ingredients to create something that feels special. No exotic spices, no hard-to-find items—just the stuff that makes dessert feel like a hug. Let’s break it down.
For the Pudding Layer
- 1 (3.9 oz) box instant chocolate pudding mix – I prefer Jell-O brand for its consistent texture, but any brand works. Make sure it’s the instant kind, not cook-and-serve (that changes everything).
- 2 cups cold whole milk – Whole milk gives the creamiest result, but 2% works in a pinch. For a dairy-free version, use oat milk or full-fat coconut milk (just know the texture will be slightly looser).
For the “Dirt” Layer
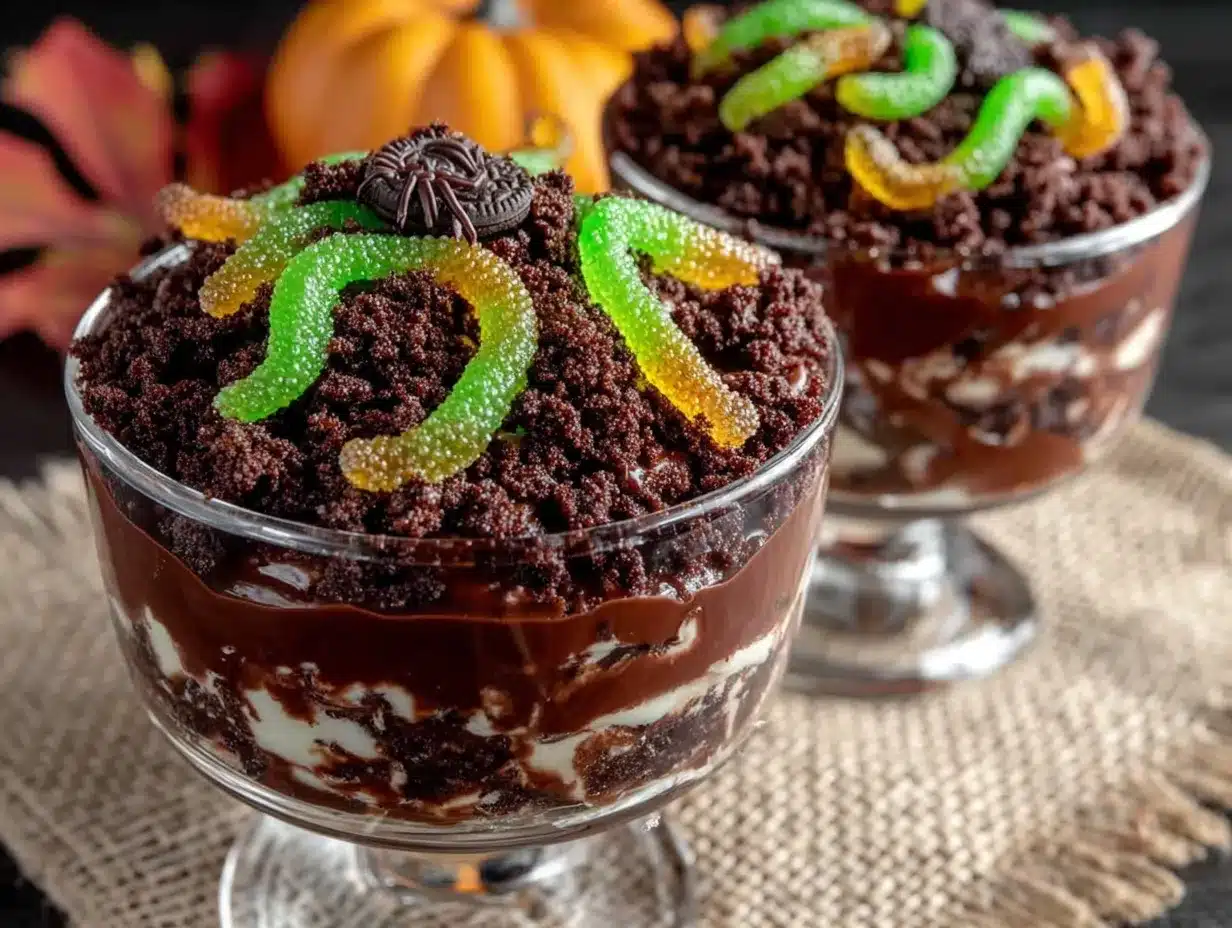
- 1 (14.3 oz) package Oreo cookies – Regular Oreos work best. Don’t use Double Stuf—the extra cream filling makes the crumbs clump instead of looking like dirt. You’ll need about 24 cookies. (Pro tip: grab an extra pack if you’re like me and “test” a few while crushing.)
For the Decoration
- 1 (4 oz) bag gummy worms – Any brand works, but I like the classic sour worms for that extra tangy kick against the sweet pudding. Avoid the giant ones—they’re hard to fit in the cups.
- Optional: 4-6 chocolate sandwich cookies, crushed finer – Save these for the very top layer to give a “freshly disturbed dirt” look.
For Serving
- 6 to 8 small clear plastic cups (about 5 oz each) – Clear cups are key here. The whole point is seeing those layers of dirt and worms. I use the ones from the party supply aisle.
One thing I’ve learned the hard way: don’t skip chilling the pudding. I know, I know—you’re in a hurry. But that 5-minute set time in the fridge makes a huge difference in how the layers hold up. Trust me on this one.
Equipment Needed
You don’t need a fancy kitchen for these dirt cups. Here’s what you’ll actually use:
- Mixing bowls: One medium bowl for the pudding, one small bowl for the cookie crumbs (or you can crush them right in the bag).
- Whisk: For the pudding. A fork works in a pinch, but you’ll have more lumps.
- Rolling pin or food processor: For crushing the Oreos. I’ve used both. The rolling pin is more therapeutic (and lets you take out your stress). The food processor is faster and gives a more even crumb. If you’re using a rolling pin, put the cookies in a zip-top bag first to contain the mess.
- Measuring cups and spoons: For the milk and pudding mix.
- Small clear cups: 5 to 7 ounces each. I’ve used everything from fancy glassware to solo cups. The clear ones really show off the layers.
- Spoon or small spatula: For layering.
- Refrigerator: For chilling the pudding and setting the final cups.
That’s it. No mixer required. No special pans. Just basic tools you probably already own.
Preparation Method
Alright, let’s get to the fun part. Here’s how to make these cozy Halloween dirt cups step by step.
- Crush the Oreos. Place the entire package of Oreos (cream filling and all) in a large zip-top bag. Seal it tight—trust me, you don’t want chocolate dust all over your counter. Use a rolling pin to crush them into fine crumbs. You want them to look like dirt, not gravel. Aim for a mix of fine powder and tiny pebbles. Set aside about 1/4 cup of the finest crumbs for the top garnish.
- Make the pudding. In a medium bowl, whisk together the instant chocolate pudding mix and 2 cups of cold milk. Whisk for about 2 minutes until it starts to thicken. It will be quite thin at first—don’t panic. That’s normal. Let it sit for 5 minutes to fully set. You’ll know it’s ready when you can drag a spoon through it and the line holds.
- Layer the cups. Grab your clear cups. Start with a layer of crushed Oreos at the bottom—about 2 tablespoons per cup. Press it down gently with the back of a spoon. This creates a stable base and keeps the pudding from seeping through.
- Add the pudding. Spoon or pour the chocolate pudding over the Oreo layer. Fill each cup about halfway. Tap the cup gently on the counter to settle the pudding and remove any air bubbles. You want a smooth, even layer.
- Add the worms. Here’s the trick: stick 2 or 3 gummy worms into the pudding layer, letting them poke out at odd angles. Don’t push them all the way in—you want them to look like they’re crawling out of the dirt. Place them now, before you add the top layer of crumbs. This keeps them from getting completely buried.
- Top with more “dirt.” Sprinkle another layer of crushed Oreos over the pudding, covering it completely. Use about 2 tablespoons per cup. This is where you use that reserved fine crumb if you saved it—it gives a nicer, more “soil-like” finish.
- Add the final worms. Poke 1 or 2 more gummy worms into the top layer of crumbs. Arrange them so they look like they’re emerging from the dirt. Some half-buried, some fully visible. Get creative with it.
- Chill. Place the cups in the refrigerator for at least 30 minutes before serving. This lets the pudding fully set and the flavors meld. The worms will stay chewy and the cookie crumbs will stay crunchy—that perfect contrast.
- Serve cold. These are best enjoyed straight from the fridge. The cold pudding, the crunchy dirt, the chewy worms—it’s a texture party in every bite.
A quick note: if you’re serving these at a party, you can assemble them a few hours ahead. Just wait to add the final worm garnish until right before serving to keep them looking fresh and lively.
Cooking Tips & Techniques
I’ve made these dirt cups more times than I care to count, and I’ve learned a few things along the way. Here’s what I wish someone had told me.
Don’t overmix the pudding. I know it’s tempting to keep whisking until it’s perfectly smooth, but overmixing can make the pudding thin and runny. Whisk just until the powder is incorporated, then let it sit. It will thicken on its own.
The chilling step is non-negotiable. I once skipped the chill time because I was in a rush. The result? A soupy mess that looked more like a mud puddle than a dirt cup. Give it those 30 minutes. Your future self will thank you.
Crush the Oreos in batches if needed. If you’re using a food processor, don’t overload it. Work in batches to get an even crumb. If you’re using a rolling pin, make sure the bag is sealed tight—I learned this one the hard way when chocolate dust exploded across my kitchen.
Use cold milk. Cold milk helps the instant pudding set up faster and more evenly. If your milk is room temperature, the pudding will take longer to thicken and might end up lumpy.
Layer strategically. The bottom layer of crumbs isn’t just for looks. It creates a barrier that keeps the pudding from making the bottom of the cup soggy. Press it down firmly, but don’t compact it into a brick—you still want some texture.
Don’t skimp on the worms. I know they’re the star of the show, but I’ve seen recipes that use just one or two per cup. That’s not enough. You want every bite to have a chance of getting a worm. I use 4 to 5 per cup, and it’s always the right amount.
One mistake I still make: I forget to save some fine crumbs for the top. Then I’m left with chunky crumbs that look more like gravel than dirt. Learn from my error. Set aside that 1/4 cup of fine crumb before you start layering.
Variations & Adaptations
The beauty of this recipe is how easy it is to tweak. Here are some ways I’ve made it my own over the years.
Dairy-Free Version: Use your favorite dairy-free milk (oat milk works beautifully) and a dairy-free instant pudding mix. Most major brands offer a chocolate option. The texture will be slightly less creamy, but still delicious.
Gluten-Free Option: Swap the Oreos for a gluten-free chocolate sandwich cookie. There are several good brands out there now. Everything else in the recipe is naturally gluten-free.
Peanut Butter Twist: Add a layer of peanut butter between the pudding and the top crumbs. Just warm a few tablespoons in the microwave for 10 seconds and drizzle it over the pudding. The salty-sweet combo is incredible.
Pumpkin Spice Version: For a fall twist, use vanilla pudding instead of chocolate and add 1 teaspoon of pumpkin pie spice to the pudding mix. Top with crushed graham crackers instead of Oreos. It’s like pumpkin pie in a cup.
Adult Version: Add a splash of Kahlua or Bailey’s to the pudding mix before chilling. About 1 tablespoon per cup. It adds a grown-up warmth that pairs beautifully with the chocolate.
Different Candies: Not a fan of gummy worms? Use gummy spiders, candy eyeballs, or even crushed candy corn for a different Halloween vibe. I once made these with little chocolate bats on top, and they were a hit.
Mini Version: Use shot glasses or small paper cups for a party appetizer version. Perfect for Halloween parties where guests want something bite-sized.
Serving & Storage Suggestions
These dirt cups are best served cold, straight from the fridge. The contrast between the chilled pudding and the crunchy cookie crumbs is what makes them so satisfying.
How to Serve: Place the cups on a tray and let guests grab their own. If you’re feeling fancy, add a small plastic spider or a little paper tombstone to each cup. Kids love this. Adults pretend they don’t, but they secretly love it too.
What to Serve With: These pair beautifully with a warm drink. Hot apple cider, a cozy cup of coffee, or even a mug of hot chocolate. The cold dessert against the warm drink is a match made in autumn heaven.
Storage: Keep the cups covered in the refrigerator for up to 3 days. The cookie crumbs will soften over time, but they’ll still be delicious. If you’re making them ahead, wait to add the final worm garnish until just before serving to keep them looking fresh.
Freezing: I don’t recommend freezing these. The pudding will become icy and the texture will be off. These are a refrigerator-only dessert.
Flavor Development: Honestly, these are best the day you make them. The crumbs are crunchiest, the pudding is creamiest. That said, they’re still pretty great on day two. The crumbs soften into something almost like a crust, which has its own charm.
Nutritional Information & Benefits
Let’s be real—these are a treat. But here’s the nutritional breakdown for one serving (based on 8 cups):
| Nutrient | Amount per Serving |
|---|---|
| Calories | 285 |
| Total Fat | 11g |
| Saturated Fat | 4g |
| Carbohydrates | 42g |
| Sugar | 30g |
| Protein | 5g |
| Calcium | 8% DV |
| Iron | 10% DV |
Are these a health food? No. But they’re made with real ingredients, and there’s something to be said for that. The milk provides calcium and protein. The cocoa in the Oreos and pudding contains antioxidants. And honestly? Sometimes the biggest health benefit is the joy of sharing something silly and delicious with people you love.
Dietary Considerations: This recipe contains dairy and gluten. For dairy-free and gluten-free options, see the variations section above.
Potential Allergens: Milk, wheat, soy (in the Oreos). Gummy worms may contain gelatin (not vegetarian) and artificial colors.
My personal take? I don’t make these every day. But for Halloween, for a party, for a night when you just need something fun? They’re perfect. And that’s a kind of wellness too.
Frequently Asked Questions
Can I make these ahead of time?
Yes! Assemble the cups up to 24 hours in advance. Just wait to add the final gummy worms until right before serving so they look fresh and lively.
Can I use homemade pudding instead of instant?
You can, but the texture will be different. Homemade pudding is thinner and won’t set as firmly. If you go that route, use less milk and chill the cups for at least 2 hours.
How do I keep the gummy worms from getting soggy?
The key is layering. Place the worms into the pudding layer, then cover them with the top layer of crumbs. The crumbs act as a barrier that keeps the worms from sitting directly in the moisture.
Can I use a different type of cookie?
Absolutely. Chocolate wafer cookies, gluten-free sandwich cookies, or even crushed brownies work well. Just avoid cookies with a lot of cream filling, as they won’t crush into a “dirt” texture.
My pudding turned out runny. What went wrong?
This usually happens for one of three reasons: you used warm milk, you overmixed the pudding, or you didn’t let it set long enough. Next time, use cold milk, whisk gently, and give it the full 5 minutes to set before layering.
Conclusion
Look, I know these cozy Halloween dirt cups aren’t going to win any awards for culinary sophistication. But that’s kind of the point. They’re fun. They’re easy. They’re the recipe you make when you want to show up with something that feels special without spending all day in the kitchen. And honestly? They taste amazing.
I’ve made these for classroom parties, office potlucks, and quiet nights at home with my family. Every single time, they disappear. Kids love the silly worms. Adults love the nostalgic comfort. And I love that I can throw them together in 20 minutes with ingredients I already have.
So go ahead—customize them however you like. Add extra worms. Swap the pudding flavor. Make them dairy-free. This recipe is forgiving and flexible, just like all the best comfort food should be.
If you make these, I’d love to hear about it. Drop a comment below and tell me how they turned out. Did you add a twist? Did the kids go crazy? Did you eat three in one sitting (no judgment here)? Share your dirt cup stories. And if you’re looking for more cozy Halloween treats, you might enjoy our spooky pumpkin bread or these candy corn popcorn balls.
Happy Halloween, friend. Go make some dirt.
Pin This Recipe!
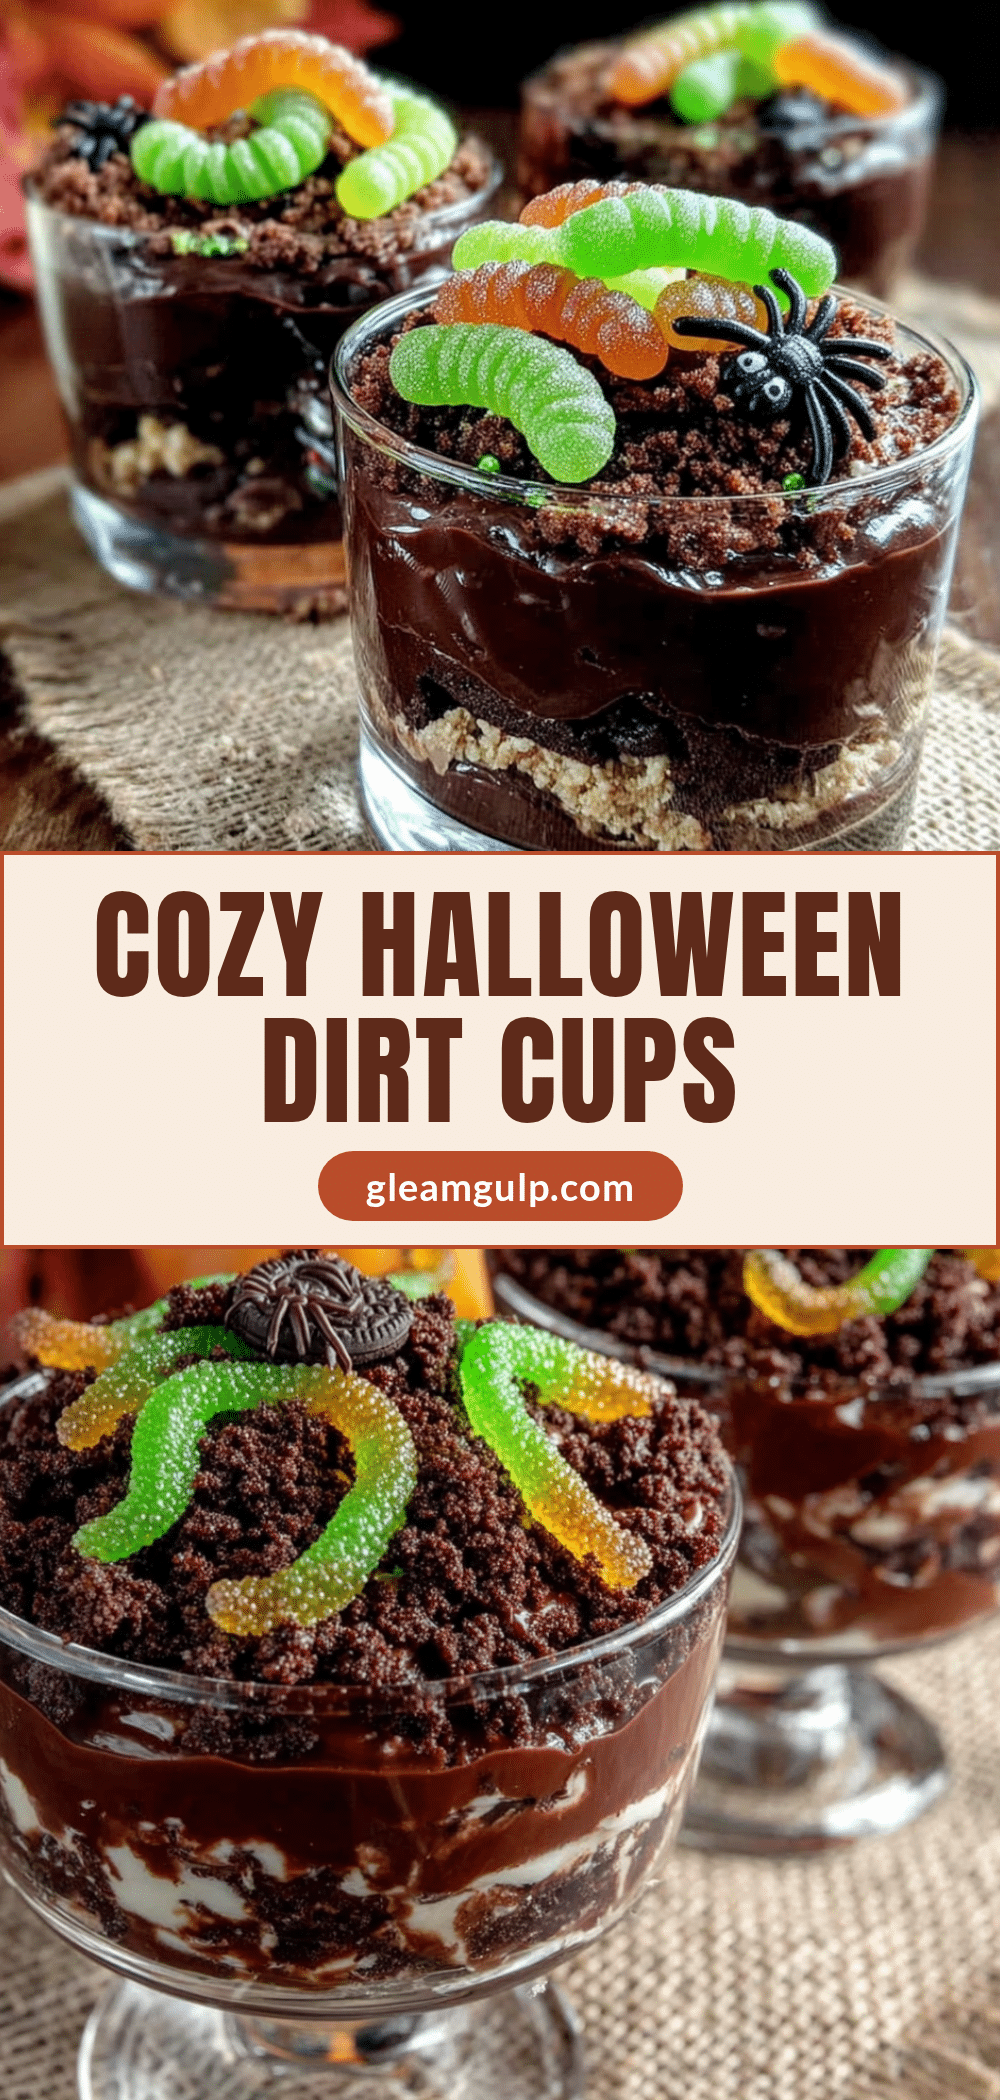
Cozy Halloween Dirt Cups with Gummy Worms
These no-bake Halloween dirt cups are a fun and easy dessert made with layers of chocolate pudding, crushed Oreos, and gummy worms. Perfect for parties, potlucks, or a cozy night in, they come together in under 20 minutes with simple pantry ingredients.
- Prep Time: 15 minutes
- Cook Time: 0 minutes
- Total Time: 45 minutes (includes 30 minutes chilling)
- Yield: 8 servings 1x
- Category: Dessert
- Cuisine: American
Ingredients
- 1 (3.9 oz) box instant chocolate pudding mix
- 2 cups cold whole milk
- 1 (14.3 oz) package Oreo cookies (about 24 cookies)
- 1 (4 oz) bag gummy worms
- Optional: 4-6 chocolate sandwich cookies, crushed finer for top garnish
- 6 to 8 small clear plastic cups (about 5 oz each)
Instructions
- Crush the Oreos: Place the entire package of Oreos (cream filling and all) in a large zip-top bag. Seal tight and use a rolling pin to crush them into fine crumbs (a mix of fine powder and tiny pebbles). Set aside about 1/4 cup of the finest crumbs for the top garnish.
- Make the pudding: In a medium bowl, whisk together the instant chocolate pudding mix and 2 cups of cold milk. Whisk for about 2 minutes until it starts to thicken. Let it sit for 5 minutes to fully set.
- Layer the cups: Start with a layer of crushed Oreos at the bottom of each cup—about 2 tablespoons per cup. Press it down gently with the back of a spoon.
- Add the pudding: Spoon or pour the chocolate pudding over the Oreo layer, filling each cup about halfway. Tap the cup gently on the counter to settle the pudding and remove air bubbles.
- Add the worms: Stick 2 or 3 gummy worms into the pudding layer, letting them poke out at odd angles. Don’t push them all the way in.
- Top with more ‘dirt’: Sprinkle another layer of crushed Oreos over the pudding, covering it completely. Use about 2 tablespoons per cup. Use the reserved fine crumbs for a nicer finish.
- Add the final worms: Poke 1 or 2 more gummy worms into the top layer of crumbs, arranging them to look like they’re emerging from the dirt.
- Chill: Place the cups in the refrigerator for at least 30 minutes before serving.
- Serve cold: Enjoy straight from the fridge.
Notes
For best results, use cold milk and let the pudding set fully before layering. The chilling step is non-negotiable for proper texture. To keep gummy worms from getting soggy, place them into the pudding layer and cover with crumbs. For dairy-free, use oat milk or full-fat coconut milk and dairy-free pudding mix. For gluten-free, use gluten-free chocolate sandwich cookies. These are best enjoyed the day they are made but can be stored covered in the refrigerator for up to 3 days.
Nutrition
- Serving Size: 1 cup
- Calories: 285
- Sugar: 30
- Sodium: 320
- Fat: 11
- Saturated Fat: 4
- Carbohydrates: 42
- Fiber: 1
- Protein: 5
Keywords: Halloween dirt cups, gummy worms, chocolate pudding, Oreo dessert, no-bake, easy Halloween dessert, kids party treat


