Love this? Save it for later!
Share the inspiration with your friends
I was digging through a box of old cookbooks at a dusty estate sale last fall when the owner—a retired plumber named Earl with flour dust still on his work boots—started talking about bread. I wasn’t expecting cooking advice from a man who spent his days fixing pipes, but there I was, knee-deep in yellowed pages, listening to him describe exactly how to make a pumpkin-shaped cheese bread that his wife used to bring to every potluck. “She’d string it with kitchen twine so it looked like a real pumpkin,” he said, wiping his hands on his jeans. “People would fight over the last piece.” I bought the entire box for five dollars and spent the next weekend figuring out his wife’s trick.
Honestly, I burned the first attempt. The twine slipped, the cheese oozed everywhere, and my kitchen looked like a dairy explosion. But that second batch? Let me tell you, it was pure magic. The golden crust pulled apart in buttery, cheesy strands, and the pumpkin shape made everyone at my table smile before they even took a bite. You know that feeling when a recipe just works? This was it.
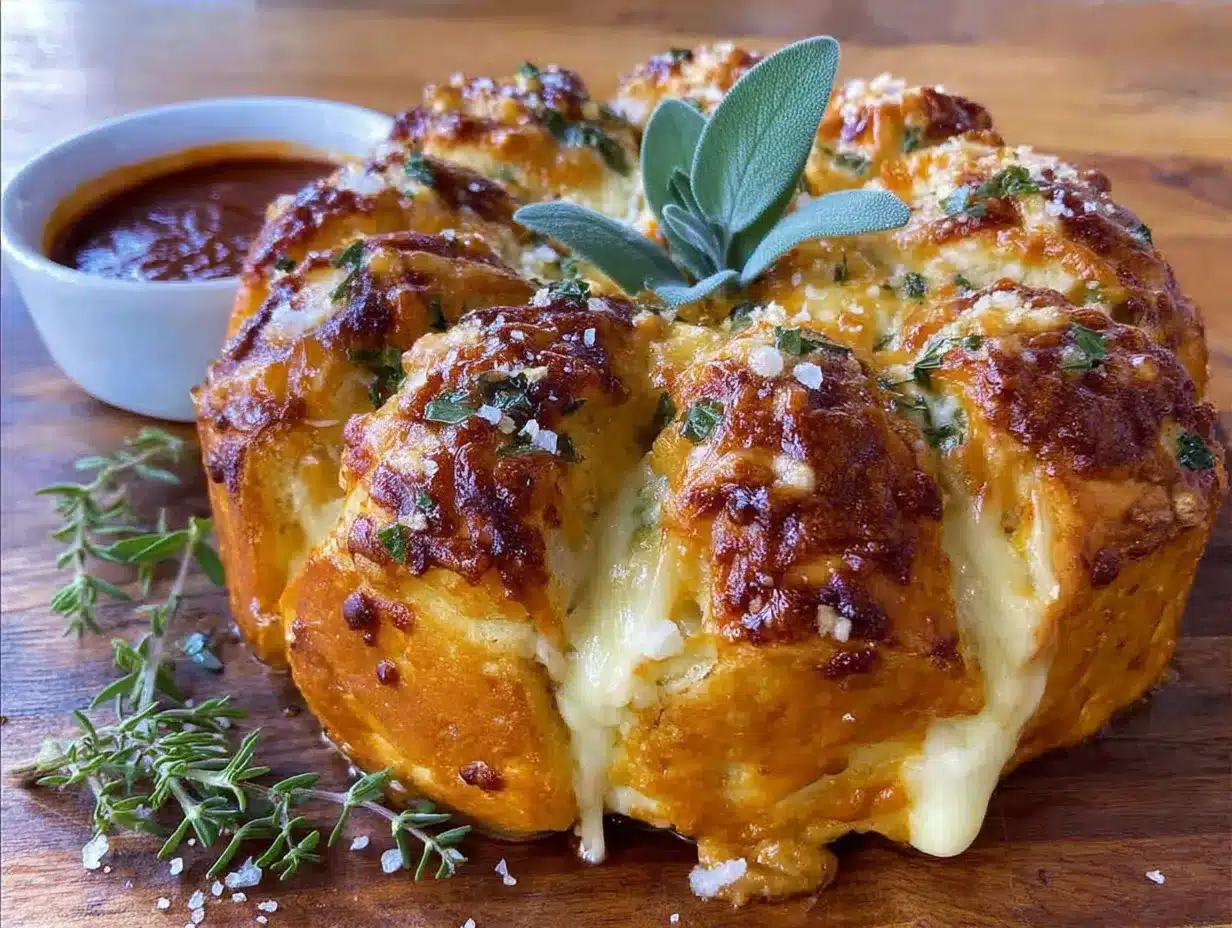
This Best Pumpkin Shaped Pull-Apart Cheese Bread isn’t just adorable—it’s the kind of showstopper that makes you look like a culinary genius with minimal effort. The bread is soft, fluffy, and loaded with melted cheese in every nook and cranny. It’s perfect for fall gatherings, Halloween parties, or Thanksgiving dinners when you want something savory to balance all the sweets. I’ve made this for three different dinner parties now, and every single time, someone asks for the recipe. It’s the bread that keeps on giving—literally, because you just pull off another piece and keep going.
Why You’ll Love This Recipe
This isn’t just another cheese bread recipe. I’ve tested this at least eight times to get the texture just right—soft enough to pull apart, sturdy enough to hold its pumpkin shape, and packed with enough cheese to satisfy the biggest cravings. Here’s why this one stands out:
- Showstopper Presentation: The pumpkin shape is a guaranteed conversation starter at any gathering. Guests will snap photos before they even taste it.
- Perfect for Hosting: You can prep the dough ahead of time, tie the twine, and bake it while guests arrive. The smell alone will have everyone hovering in your kitchen.
- Simple Ingredients: No fancy grocery store trips. You probably already have flour, yeast, butter, and cheese in your kitchen right now.
- Crowd-Pleaser: Kids love pulling apart the “pumpkin slices,” and adults appreciate the savory, cheesy goodness. It disappears fast.
- Foolproof Method: Even if you’re new to bread making, the step-by-step process is forgiving. I’ve had beginners nail this on their first try.
What makes this recipe different from all the other cheese breads out there is the technique. Instead of just shaping dough into a ball, you use kitchen twine to create those classic pumpkin ridges. The twine doesn’t just create visual appeal—it also creates pockets where cheese can pool and caramelize during baking. The result is a bread that’s crispy on the outside, pillowy on the inside, and studded with golden, gooey cheese in every bite.
This is the kind of bread that makes people close their eyes after the first bite. It’s comfort food reimagined—familiar enough to feel like home, but special enough to impress your most discerning dinner guests. Perfect for when you want to serve something memorable without spending all day in the kitchen.
What Ingredients You Will Need
This recipe uses simple, wholesome ingredients to deliver bold flavor and satisfying texture without the fuss. Most of these are pantry staples, which makes this bread perfect for last-minute hosting emergencies—like when your neighbor texts that she’s bringing over the book club. True story.
For the Dough
- 3 ½ cups all-purpose flour (plus extra for dusting) – I prefer King Arthur Flour for consistent results, but any brand works
- 1 packet active dry yeast (2 ¼ teaspoons) – Make sure it’s fresh; expired yeast is the number one reason bread fails
- 1 cup warm milk (110°F-115°F) – Whole milk gives the richest flavor, but 2% works fine too
- 3 tablespoons unsalted butter, melted – Adds richness and helps create that soft, tender crumb
- 1 large egg, room temperature – Cold eggs can shock the yeast and slow down rising
- 1 tablespoon sugar – Feeds the yeast and adds a hint of sweetness to balance the cheese
- 1 teaspoon salt – Don’t skip this; salt controls yeast activity and enhances flavor
For the Cheese Filling
- 2 cups shredded mozzarella cheese – Low-moisture mozzarella melts beautifully without making the bread soggy
- 1 cup shredded cheddar cheese – Sharp cheddar adds that tangy punch mozzarella lacks (I recommend Tillamook or Cabot)
- ½ cup grated Parmesan cheese – Adds a salty, nutty depth that takes this bread to the next level
- 2 tablespoons melted butter – Brushed on top before baking for that golden, glossy crust
- 1 teaspoon garlic powder – Optional, but highly recommended for extra savory flavor
- 1 teaspoon dried oregano or rosemary – Adds an herby note that complements the cheese perfectly
For Assembly
- Kitchen twine (100% cotton, unflavored) – This is non-negotiable for creating the pumpkin shape. Don’t use synthetic twine—it can melt in the oven
- 1 tablespoon olive oil – For greasing the bowl and your hands while shaping
Ingredient Selection Tips: For the best texture, use block cheese and shred it yourself. Pre-shredded cheese contains anti-caking agents that prevent smooth melting. I learned this the hard way when my first attempt turned out grainy. Also, if you’re using fresh herbs instead of dried, double the amount—fresh herbs are more subtle.
Substitution Guidance: Need a gluten-free version? Use a 1:1 gluten-free baking flour blend, but expect a slightly denser texture. For a dairy-free option, use vegan butter and dairy-free cheese shreds (I’ve had good luck with Violife mozzarella). The bread won’t be as stretchy, but it’s still delicious.
Equipment Needed
You don’t need a professional bakery setup for this recipe. Here’s what you’ll actually use:
- Large mixing bowl – Glass or stainless steel works best; avoid plastic as it can retain odors
- Stand mixer with dough hook – Makes kneading effortless, but you can absolutely knead by hand (it’s a great arm workout)
- Measuring cups and spoons – Precision matters in bread baking, so use proper measuring tools
- Kitchen thermometer – Not strictly necessary, but it takes the guesswork out of checking water temperature for the yeast
- Kitchen twine – 100% cotton, about 3-4 feet long per loaf
- Baking sheet – Line it with parchment paper for easy cleanup
- Pastry brush – For brushing butter on the dough before and after baking
- Clean kitchen towel – For covering the dough while it rises
- Sharp scissors – For cutting the twine after baking (don’t use your good fabric scissors—ask me how I know)
Budget-Friendly Options: If you don’t have a stand mixer, a large bowl and a strong wooden spoon work fine. You’ll knead for about 8-10 minutes by hand instead of 5-6 with the mixer. No pastry brush? Use a paper towel dipped in melted butter. No kitchen thermometer? The water should feel like warm bath water—not hot enough to burn your finger.
Preparation Method
This recipe takes about 2 hours total, including rising time. Most of that is hands-off, so you can prep other dishes while the dough does its thing.
Step 1: Activate the Yeast (5 minutes)
In a small bowl, combine the warm milk (110°F-115°F) with the sugar and yeast. Give it a gentle stir and let it sit for 5-7 minutes until it becomes frothy and smells like bread. If it doesn’t foam up, your yeast is dead—start over with fresh yeast. I once skipped this step and ended up with a dense brick that looked nothing like bread.
Step 2: Make the Dough (10 minutes)
In the bowl of your stand mixer, whisk together the flour and salt. Add the frothy yeast mixture, melted butter, and egg. Mix on low speed with the dough hook until a shaggy dough forms, about 2 minutes. Increase speed to medium and knead for 5-6 minutes until the dough is smooth and elastic. It should pull away from the sides of the bowl and feel slightly tacky but not sticky. If it’s too sticky, add flour one tablespoon at a time. Too dry? Add warm milk one teaspoon at a time.
Step 3: First Rise (45-60 minutes)
Lightly oil a large bowl with olive oil. Place the dough in the bowl, turning it once to coat all sides. Cover with a clean kitchen towel and let it rise in a warm, draft-free spot until doubled in size. I usually put mine in the microwave (turned off) or on top of the fridge where it’s warm. The dough is ready when you poke it gently and the indentation stays.
Step 4: Prepare the Cheese Filling (5 minutes)
While the dough rises, combine the shredded mozzarella, cheddar, Parmesan, garlic powder, and dried herbs in a medium bowl. Toss everything together with your hands so the flavors distribute evenly. Set aside at room temperature.
Step 5: Shape and Fill the Dough (15 minutes)
Punch down the risen dough and turn it out onto a lightly floured surface. Roll it into a rectangle about 12×16 inches. Sprinkle the cheese mixture evenly over the surface, leaving a 1-inch border around the edges. Starting from the long side, roll the dough tightly into a log, pinching the seam to seal. Cut the log into 8 equal pieces—each piece will become a “wedge” of the pumpkin.
Step 6: Assemble the Pumpkin Shape (10 minutes)
Grease a baking sheet or line it with parchment paper. Arrange the 8 dough pieces in a circle, cut sides facing up, with the pieces touching in the center. You want them snug but not squished—they’ll expand as they rise. Take your kitchen twine and tie it around the entire assembled bread, creating the pumpkin ridges. Wrap the twine around the bread 4-5 times, crossing at the top and bottom to create sections. Tie it loosely enough that the bread can expand, but tight enough to hold the shape.
Step 7: Second Rise (30 minutes)
Cover the shaped bread loosely with the kitchen towel and let it rise for 30 minutes. It should puff up noticeably but not double. While it rises, preheat your oven to 375°F (190°C).
Step 8: Bake (25-30 minutes)
Brush the top of the bread with melted butter. Bake for 25-30 minutes until the bread is golden brown and sounds hollow when tapped on the bottom. The cheese will bubble and create crispy edges—this is the best part. If the top browns too quickly, tent loosely with foil for the last 10 minutes.
Step 9: Cool and Serve (10 minutes)
Let the bread cool on the baking sheet for 5 minutes. Carefully cut and remove the kitchen twine using sharp scissors. Pull the pieces apart gently—they should separate easily. Serve warm while the cheese is still stretchy. The twine will leave beautiful ridges that make it look like a real pumpkin.
Cooking Tips & Techniques
After making this bread more times than I care to admit, here are the tricks I wish someone had told me from the start:
Don’t Overthink the Twine: The first time I made this, I spent 20 minutes trying to make perfect, symmetrical twine wraps. The bread doesn’t care. Just wrap it around 4-5 times in a cross pattern and tie it off. The imperfections make it look more like a real pumpkin anyway.
Cheese Placement Matters: Spread the cheese evenly across the dough rectangle. If you pile it all in the center, some pieces will be cheese bombs while others are plain bread. I learned this when my sister got a piece with zero cheese and gave me that look.
Watch the Oven Temperature: Every oven runs differently. If your bread is browning too fast on top but still doughy in the center, drop the temperature to 350°F and bake longer. Patience is the secret ingredient here.
Multitasking Strategy: While the dough does its first rise, prep your cheese mixture and line your baking sheet. During the second rise, preheat the oven and clean up your workspace. This way, you’re never standing around waiting.
The Finger Test: Not sure if your dough is fully kneaded? Poke it with your finger. If the dough springs back slowly, it’s ready. If it springs back immediately, keep kneading. If the indentation stays, you’ve over-kneaded—but honestly, that’s hard to do by hand.
Common Mistake Alert: Don’t skip the second rise. I know it’s tempting to rush, but that second rise is what gives the bread its light, airy texture. Without it, you’ll end up with dense, heavy bread that doesn’t pull apart nicely.
Variations & Adaptations
One of the best things about this recipe is how flexible it is. Here are some variations I’ve tried and loved:
Spicy Jalapeño Popper Version
Add ½ cup chopped pickled jalapeños and 4 ounces cream cheese (cut into small cubes) to the cheese mixture. The cream cheese melts into creamy pockets that contrast beautifully with the sharp cheddar. I made this for a football party and it was gone before halftime.
Herb & Garlic Lover’s Twist
Skip the garlic powder and instead mix 2 tablespoons minced fresh rosemary, 1 tablespoon fresh thyme leaves, and 3 cloves minced garlic into the melted butter. Brush this mixture over the dough before and after baking. The fresh herbs make the bread smell incredible—your whole house will smell like an Italian bakery.
Everything Bagel Pumpkin Bread
Before the second rise, brush the shaped dough with an egg wash (1 egg beaten with 1 tablespoon water) and sprinkle generously with everything bagel seasoning. The sesame seeds, poppy seeds, and garlic flakes create a crunchy, flavorful crust that’s absolutely addictive.
Gluten-Free Adaptation
Use a high-quality 1:1 gluten-free flour blend that contains xanthan gum. The dough will be stickier and harder to shape, so wet your hands with olive oil before handling it. Bake at 350°F for 30-35 minutes. The texture won’t be as fluffy, but the flavor is still fantastic.
Dairy-Free Version
Substitute vegan butter and dairy-free cheese shreds. I’ve found that Violife mozzarella and Follow Your Heart cheddar melt reasonably well. The bread will be slightly less stretchy, but the pumpkin shape works beautifully. Brush with olive oil instead of butter for the golden crust.
Serving & Storage Suggestions
This bread is best served warm, straight from the oven, when the cheese is still melty and the crust is perfectly crisp. Place the whole pumpkin on a wooden cutting board or a pretty platter in the center of the table. Let guests pull off their own pieces—it’s interactive and fun, especially at dinner parties or holiday gatherings.
What to Serve Alongside: This bread pairs beautifully with a bowl of tomato soup for dipping, a fresh green salad with balsamic vinaigrette, or roasted vegetables. For a heartier meal, serve it alongside a big bowl of chili or pasta e fagioli. The bread is also fantastic with a glass of red wine—I personally love it with a medium-bodied Merlot.
Storage Instructions: Leftover bread (if there is any) can be stored in an airtight container at room temperature for up to 2 days. To reheat, wrap individual pieces in foil and warm them in a 350°F oven for 5-7 minutes. The microwave works in a pinch, but the bread will be softer and less crispy.
Freezer Tips: You can freeze the baked bread for up to 3 months. Let it cool completely, wrap tightly in plastic wrap, then foil, and place in a freezer bag. To serve, thaw overnight in the refrigerator and reheat in a 350°F oven for 10-15 minutes. The cheese flavor actually deepens after freezing—it’s weird but true.
Make-Ahead for Hosting: Assemble the bread completely (including the twine) up to the second rise, then cover tightly with plastic wrap and refrigerate overnight. The next day, let it sit at room temperature for 30 minutes before baking. This is my go-to strategy when I’m hosting a dinner party—I can focus on other dishes while the bread bakes.
Nutritional Information & Benefits
While this is definitely an indulgence, the bread does offer some nutritional perks. Here’s the estimated breakdown per serving (one of the 8 pieces):
| Nutrient | Amount per Serving |
|---|---|
| Calories | 310 |
| Total Fat | 14g |
| Saturated Fat | 8g |
| Carbohydrates | 34g |
| Protein | 13g |
| Fiber | 1g |
| Sugar | 3g |
| Sodium | 480mg |
Health Benefits: The cheese provides a good amount of calcium and protein, which helps keep you full and satisfied. The milk and butter add vitamin A and D. If you use whole wheat flour (substitute up to half the all-purpose flour), you’ll add fiber and B vitamins. The herbs in the filling also offer antioxidants—rosemary and oregano are particularly rich in anti-inflammatory compounds.
Dietary Considerations: This recipe contains gluten, dairy, and eggs. For a lower-carb option, you can reduce the sugar to ½ teaspoon (the yeast will still activate, just more slowly). The bread is vegetarian-friendly as written.
Personal Perspective: I don’t pretend this is health food, but I do believe that food made with love and shared with people matters more than counting every calorie. One piece of this bread at a gathering is worth more than a week of perfectly “clean” eating. Balance, right?
Frequently Asked Questions
Can I use instant yeast instead of active dry yeast?
Yes, absolutely. If using instant yeast, you can skip the activation step and mix it directly with the flour. Reduce the warm milk to 105°F-110°F and add it with the other wet ingredients. The rising time may be slightly shorter, so keep an eye on the dough.
My dough isn’t rising. What went wrong?
Most likely, the milk was too hot and killed the yeast, or the yeast was expired. Check your milk temperature with a thermometer—anything above 130°F will kill yeast. If your yeast didn’t foam during activation, start over with fresh yeast and cooler milk.
Can I make this bread without kitchen twine?
Technically yes, but it won’t look like a pumpkin. Without the twine, you’ll have a round, pull-apart bread that’s still delicious but lacks the signature ridges. You can use dental floss (unflavored, unwaxed) as a substitute in a pinch, but cotton kitchen twine works best.
How do I prevent the cheese from burning on the bottom?
Place your baking sheet on the middle rack of the oven, not the bottom. If you’re worried about the bottom burning, you can place a second baking sheet underneath to diffuse the heat. Also, make sure your dough pieces are sealed well so cheese doesn’t leak out during baking.
Can I add meat to this bread?
Definitely. Cooked and crumbled bacon, diced ham, or crumbled Italian sausage all work beautifully. Just make sure any meat is fully cooked and drained of excess fat before adding it to the cheese mixture. I love adding crispy bacon bits and chopped chives for a loaded baked potato vibe.
Conclusion
This Best Pumpkin Shaped Pull-Apart Cheese Bread is more than just a recipe—it’s the kind of dish that makes people stop mid-conversation and ask, “Wait, did you make that?” It’s impressive without being complicated, delicious without being fussy, and fun without being childish. Whether you’re hosting a Halloween party, a Thanksgiving dinner, or just a casual get-together with friends, this bread will steal the show.
I love this recipe because it reminds me that the best cooking often comes from unexpected places—like a retired plumber at an estate sale who just wanted to share his wife’s legacy. Every time I tie that twine around the dough and watch it transform in the oven, I think of Earl and his wife, and I hope they’d be proud of how many people have enjoyed their bread.
Now it’s your turn. Try this recipe, make it your own, and don’t be shy about showing it off. Tag me in your photos, leave a comment telling me how it turned out, and let me know what variations you tried. I can’t wait to see your pumpkin bread creations—honestly, it makes my day every single time. Happy baking!
Pin This Recipe!
Best Pumpkin Shaped Pull-Apart Cheese Bread Recipe

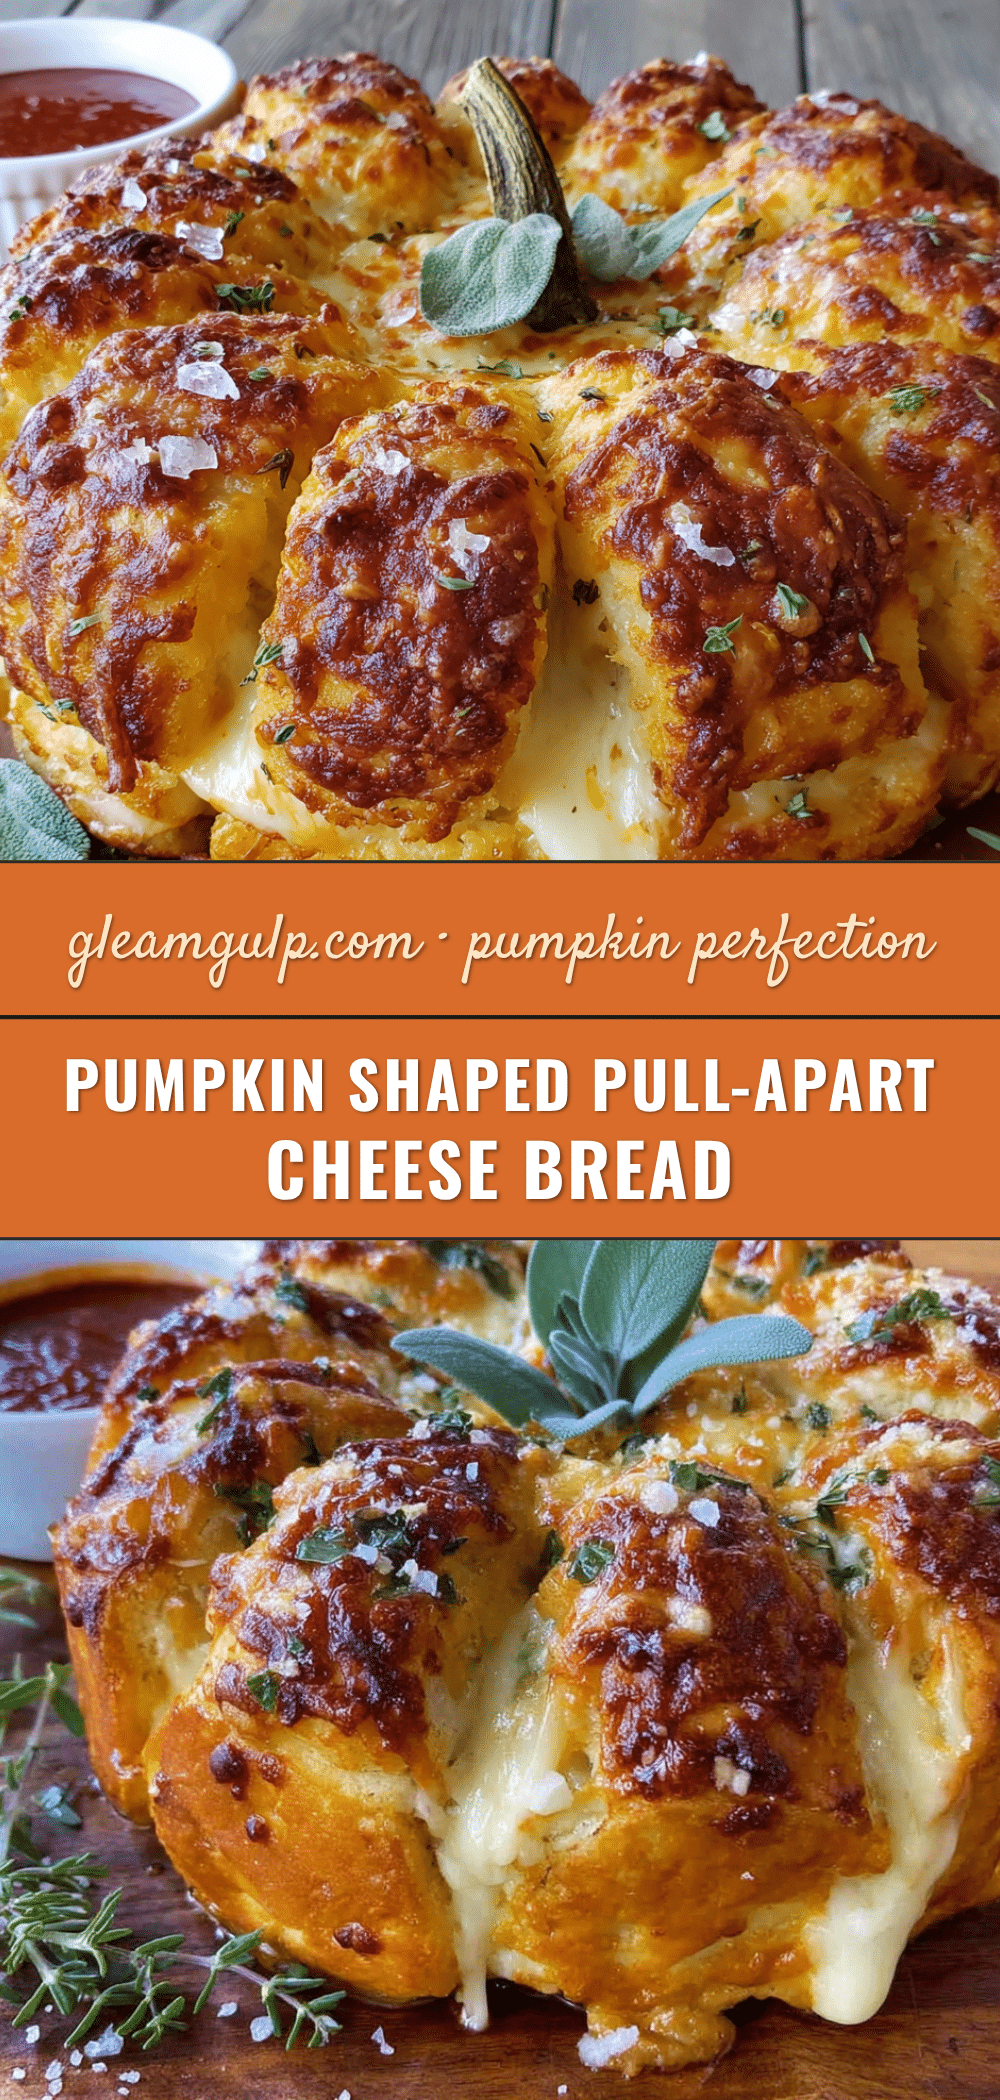
This Best Pumpkin Shaped Pull-Apart Cheese Bread is a showstopper for fall gatherings, Halloween parties, or Thanksgiving dinners. Soft, fluffy bread loaded with melted cheese in every nook and cranny, shaped like a pumpkin using kitchen twine for a stunning presentation.
- Prep Time: 30 minutes
- Cook Time: 30 minutes
- Total Time: 2 hours
- Yield: 8 servings 1x
- Category: Appetizer
- Cuisine: American
Ingredients
- 3 ½ cups all-purpose flour (plus extra for dusting)
- 1 packet active dry yeast (2 ¼ teaspoons)
- 1 cup warm milk (110°F-115°F)
- 3 tablespoons unsalted butter, melted
- 1 large egg, room temperature
- 1 tablespoon sugar
- 1 teaspoon salt
- 2 cups shredded mozzarella cheese
- 1 cup shredded cheddar cheese
- ½ cup grated Parmesan cheese
- 2 tablespoons melted butter (for brushing)
- 1 teaspoon garlic powder
- 1 teaspoon dried oregano or rosemary
- Kitchen twine (100% cotton, unflavored)
- 1 tablespoon olive oil
Instructions
- Activate the yeast: In a small bowl, combine warm milk (110°F-115°F) with sugar and yeast. Let sit for 5-7 minutes until frothy.
- Make the dough: In a stand mixer bowl, whisk together flour and salt. Add frothy yeast mixture, melted butter, and egg. Mix on low speed with dough hook until shaggy dough forms (about 2 minutes). Increase to medium and knead for 5-6 minutes until smooth and elastic.
- First rise: Lightly oil a large bowl with olive oil. Place dough in bowl, turning to coat. Cover with a clean kitchen towel and let rise in a warm, draft-free spot until doubled in size (45-60 minutes).
- Prepare cheese filling: In a medium bowl, combine shredded mozzarella, cheddar, Parmesan, garlic powder, and dried herbs. Toss to distribute evenly.
- Shape and fill: Punch down dough and turn onto a lightly floured surface. Roll into a 12×16 inch rectangle. Sprinkle cheese mixture evenly over surface, leaving a 1-inch border. Starting from the long side, roll tightly into a log, pinching seam to seal. Cut into 8 equal pieces.
- Assemble pumpkin shape: Grease a baking sheet or line with parchment. Arrange 8 dough pieces in a circle, cut sides up, touching in the center. Tie kitchen twine around assembled bread 4-5 times, crossing at top and bottom to create sections. Tie loosely enough for expansion.
- Second rise: Cover shaped bread loosely with kitchen towel and let rise for 30 minutes. Preheat oven to 375°F (190°C).
- Bake: Brush top with melted butter. Bake for 25-30 minutes until golden brown and hollow when tapped. If top browns too quickly, tent with foil for last 10 minutes.
- Cool and serve: Let cool on baking sheet for 5 minutes. Carefully cut and remove kitchen twine. Pull pieces apart gently. Serve warm.
Notes
Use block cheese and shred yourself for best melting. Don’t skip the second rise. The twine creates ridges that look like a real pumpkin. For gluten-free, use 1:1 gluten-free flour blend. For dairy-free, use vegan butter and dairy-free cheese. Can be assembled ahead and refrigerated overnight before baking.
Nutrition
- Serving Size: 1 piece (1/8 of brea
- Calories: 310
- Sugar: 3
- Sodium: 480
- Fat: 14
- Saturated Fat: 8
- Carbohydrates: 34
- Fiber: 1
- Protein: 13
Keywords: pumpkin bread, pull-apart bread, cheese bread, fall recipe, Halloween bread, Thanksgiving bread, savory bread, party bread


