Love this? Save it for later!
Share the inspiration with your friends
My neighbor, Mrs. Gable, watched me wrestling a bag of candy corn into my shopping cart at the grocery store last October. She didn’t say anything at first. Then she leaned over and whispered, “Save the candy corn for the eggs.” I thought she meant for a sweet breakfast scramble, which honestly sounded terrible. She laughed—a warm, crinkly-eyed laugh—and told me to come by her porch later that afternoon. She handed me a plate of the strangest, most wonderful deviled eggs I had ever seen. They looked exactly like candy corn. The whites were bright white, the filling was a perfect gradient of yellow to orange, and a tiny dollop of red-orange sat on top. My kids, who usually poke at deviled eggs with suspicion, grabbed two each before I could even say thank you. Mrs. Gable just winked and said, “Halloween magic.”
That conversation changed our Halloween parties forever. I mean, let’s be honest—deviled eggs are already a crowd-pleaser. But turning them into candy corn? That’s the kind of trick that feels like a treat. I went home and immediately messed up my first batch. The filling was too runny, the colors bled into each other, and they looked more like sad traffic lights than festive eggs. But Mrs. Gable’s recipe, once I got the hang of it, became my secret weapon. It’s the dish that makes adults do a double-take and kids giggle. Maybe you’ve been there—standing in the party aisle, wondering what to bring that isn’t another bag of chips or a store-bought pumpkin pie. This is it. This is the thing that disappears first, and people ask for the recipe before they even finish chewing. Honestly, I keep making them because they make me feel like a kitchen wizard, and all it takes is hard-boiled eggs, a little food coloring, and a neighbor who knows a good trick.
Why You’ll Love This Recipe
These Kid-Friendly Candy Corn Deviled Eggs for Halloween are not just a gimmick. I have tested this recipe at four different Halloween parties, two school potlucks, and one very skeptical family dinner. Every single time, they were the first plate emptied. Here is why this version stands out from the usual deviled egg recipe.
- Quick & Easy: The active prep time is about 20 minutes. The hardest part is waiting for the eggs to boil and cool. This is perfect for busy Halloween mornings when you are also trying to wrangle costumes and carve pumpkins.
- Simple Ingredients: You need eggs, mayonnaise, mustard, vinegar, salt, pepper, and a few drops of yellow and red food coloring. No fancy grocery trips needed. You likely already have everything in your kitchen except maybe the candy corn for garnish.
- Perfect for Halloween Parties: These are the ultimate conversation starter. They look like candy but taste like a classic savory appetizer. They fit right in with spooky snacks and creepy treats without being overly sweet.
- Crowd-Pleaser: Kids love the candy corn look. Adults love the classic deviled egg taste. Picky eaters who “don’t like eggs” will try one because it looks fun. I have watched this happen at least six times.
- Unbelievably Delicious: The texture is creamy and smooth. The flavor is tangy from the mustard and vinegar, balanced by the richness of the yolks. The candy corn on top adds a tiny, unexpected crunch and sweetness that somehow works perfectly.
What makes this recipe different from the rest is the technique for getting that perfect gradient. I tried piping the filling in layers and letting them set in the fridge. I tried mixing three separate bowls of filling. I even tried using a toothpick to blend the colors directly on the egg. The method I am sharing with you—using a piping bag and a steady hand—gives you clean, distinct stripes every time. It is not just another version of deviled eggs. It is your best version for Halloween. This recipe is the kind that makes you close your eyes after the first bite, not because it is fancy, but because it is perfect comfort food disguised as a party trick.
What Ingredients You Will Need
This recipe uses simple, wholesome ingredients to deliver bold flavor and a festive look without the fuss. Most of these are pantry staples, and the food coloring is the only special addition. Here is everything you need.
- 12 large eggs (hard-boiled and peeled, room temperature works best for smooth filling)
- 1/3 cup mayonnaise (I prefer Hellmann’s or Duke’s for a creamy, tangy base)
- 1 tablespoon yellow mustard (adds color and a classic deviled egg zing)
- 1 teaspoon white vinegar (brightens the flavor and helps the texture)
- 1/2 teaspoon salt (fine sea salt dissolves better)
- 1/4 teaspoon black pepper (freshly ground if you have it)
- Yellow food coloring (gel or liquid, gel gives more vibrant color with less liquid)
- Red food coloring (to make orange, you will mix yellow and red)
- Candy corn pieces (for garnish, about 12-24 pieces depending on how many eggs you decorate)
- Paprika (optional, for a light dusting on the white part for extra color contrast)
For the food coloring, I recommend using gel colors from a brand like Wilton or AmeriColor. They are more concentrated than the liquid drops you find at the grocery store. This means you need less to achieve a bright orange, and the consistency of your filling stays thick and pipeable. If you only have liquid food coloring, that works too—just add it drop by drop and be careful not to thin out the mixture too much.
If you want a completely natural version, you can use turmeric for yellow and a mix of turmeric and paprika for orange. The color will be more muted, but it works for a cleaner label. Just be aware that turmeric has a distinct earthy flavor that changes the taste slightly. I tried it once for a friend with artificial dye sensitivities, and while the eggs were still good, they did not have that bright, candy-like pop that makes kids smile.
Equipment Needed
You do not need any fancy gadgets for this recipe, but a few specific tools make the process much smoother. Here is what I use.
- Large pot (for boiling eggs, big enough to hold 12 eggs in a single layer)
- Mixing bowls (one medium for the yolks, one small for each color if you are mixing separately)
- Fork or potato masher (for mashing the yolks until smooth)
- Piping bags (disposable ones are easiest, or a sturdy zip-top bag with the corner snipped off)
- Piping tips (a large round tip or star tip works well; I use a Wilton 1M for a pretty swirl)
- Small offset spatula or butter knife (for smoothing the filling if needed)
- Egg platter or serving tray (something with a bit of a lip to keep the eggs from sliding)
- Toothpicks (for blending colors or fixing small mistakes)
If you do not have piping bags, do not worry. A zip-top bag works perfectly. Just fill it with the yolk mixture, squeeze out the air, seal it, and snip off a corner. The cut does not have to be perfect. Start with a small cut and make it larger if needed. I have used this trick many times when I ran out of disposable bags mid-recipe. It is not as pretty, but it gets the job done. For the piping tip, a simple round tip is fine, but a star tip gives the filling a nice texture that mimics the ridges of a real candy corn. I bought a set of basic tips for under ten dollars years ago, and they are still going strong.
Preparation Method
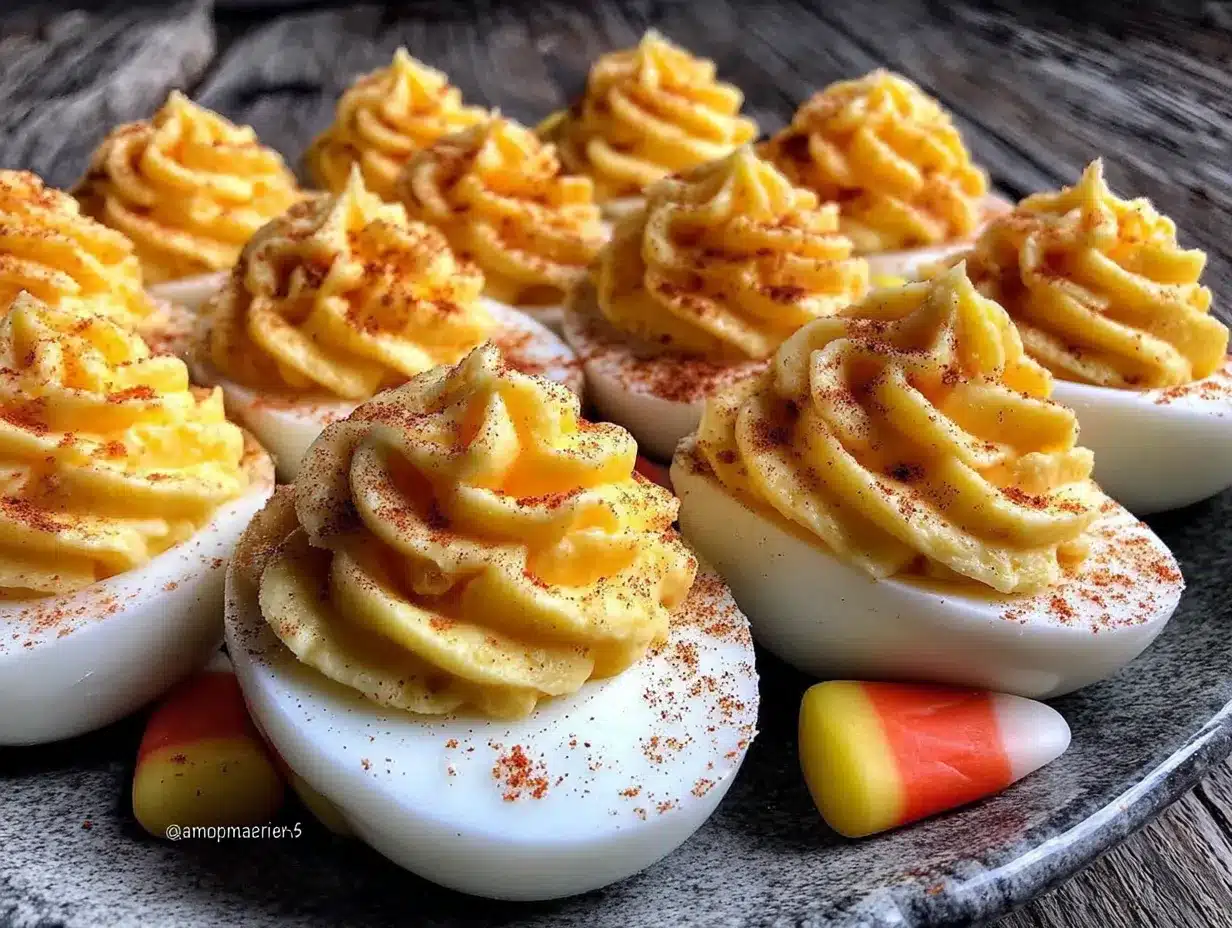
Follow these steps carefully, and you will have a platter of perfect Candy Corn Deviled Eggs that look like they came from a professional kitchen. Take your time with the coloring step—it is the most important part for the visual effect.
- Hard-boil the eggs. Place 12 large eggs in a single layer in a large pot. Cover them with cold water by about an inch. Bring the water to a rolling boil over high heat. Once boiling, cover the pot, turn off the heat, and let the eggs sit for exactly 12 minutes. While they sit, prepare an ice bath—a large bowl filled with cold water and a tray of ice cubes. After 12 minutes, transfer the eggs to the ice bath using a slotted spoon. Let them cool completely for at least 10 minutes. This shocking step makes the eggs easy to peel and prevents that ugly green ring around the yolk.
- Peel and halve the eggs. Gently tap each egg on the counter to crack the shell all over. Start peeling from the wider end where the air pocket is—the membrane comes off easier there. Rinse the peeled eggs under cool water to remove any tiny shell fragments. Pat them dry with a paper towel. Using a sharp knife, slice each egg in half lengthwise. Carefully pop out the yolks into a medium mixing bowl. Arrange the 24 white halves on your serving platter, cut side up.
- Make the base filling. Mash the yolks with a fork or potato masher until they resemble fine crumbs with no large lumps. Add 1/3 cup mayonnaise, 1 tablespoon yellow mustard, 1 teaspoon white vinegar, 1/2 teaspoon salt, and 1/4 teaspoon black pepper. Stir everything together until the mixture is smooth and creamy. Taste it and adjust the salt or mustard to your preference. This is your blank canvas.
- Divide and color the filling. Split the yolk mixture into three separate small bowls. You will have about 1/3 of the filling in each bowl. Leave the first bowl plain—this will be the yellow bottom stripe. To the second bowl, add 2-3 drops of yellow food coloring and 1 drop of red. Stir well. You are aiming for a bright, true orange color, like a pumpkin or a candy corn middle stripe. To the third bowl, add 1-2 drops of red food coloring and 1 drop of yellow. Mix until you get a deep red-orange, like the tip of a candy corn. If the colors are too pale, add one more drop at a time until you are happy.
- Prepare your piping bags. Fit three piping bags with large round tips or simply snip off the corners of three zip-top bags. Spoon each colored filling into its own bag. Twist the tops to seal and push the filling down toward the tip. If you only have one piping bag, you can do this in stages—pipe the yellow, then clean the bag, then pipe the orange, then clean again. It is more work, but it is doable.
- Pipe the first layer (yellow bottom). Take one egg white half. Using the bag with the yellow filling, pipe a small amount into the bottom of the cavity, filling it about one-third of the way up. Do not overfill. You want to leave room for the other colors. Repeat this for all 24 egg halves.
- Pipe the second layer (orange middle). Take the bag with the orange filling. Pipe a layer directly on top of the yellow, filling the cavity to about two-thirds full. The orange should sit right on top of the yellow without mixing. If the colors start to blend, your filling might be too warm. Pop the eggs in the fridge for 5 minutes to firm up the yellow layer before adding the orange.
- Pipe the third layer (red-orange top). Finally, use the red-orange filling to pipe a small dollop on top of the orange. This is the tip of your candy corn. It should be a small peak, not a full layer. You want it to look like the pointed end of a real candy corn.
- Add the garnish. Gently press one piece of candy corn into the red-orange tip of each deviled egg. The candy corn should stand upright, mimicking the shape of the filling. If you want a more subtle look, you can skip the candy corn and just leave the piped tip. I like the candy corn because it gives a little crunch and sweetness, plus it reinforces the Halloween theme.
- Chill and serve. Place the platter of finished deviled eggs in the refrigerator for at least 30 minutes before serving. This allows the filling to set and the flavors to meld. The eggs are best served cold. They will hold their shape beautifully on the platter.
Cooking Tips & Techniques
I have made these eggs at least a dozen times, and I have learned a few things the hard way. Here are my best tips to save you from the same mistakes.
Use older eggs for easier peeling. Fresh eggs are a nightmare to peel. The membranes cling to the white, and you end up with pockmarked eggs that look like they lost a fight. Eggs that are a week or two old have a higher pH, which makes the shell separate from the white more easily. If you only have fresh eggs, add a teaspoon of baking soda to the boiling water. It helps loosen the shells.
Do not overcook the eggs. I know I said 12 minutes of resting in hot water. That is for large eggs at room temperature. If your eggs are cold from the fridge, let them rest for 13 minutes. If you are using extra-large eggs, add a minute. Overcooked yolks turn green and crumbly, and they will not mash into a smooth filling. The texture will be gritty, and nobody wants that.
Keep the filling cold. Warm filling is runny filling. If your kitchen is hot or your hands are warm, the mayonnaise can soften, and the colors will bleed into each other. I like to chill my mixing bowls and piping bags in the fridge for 10 minutes before I start assembling. It makes a noticeable difference in how clean the stripes look.
Practice your piping on a plate first. Before you pipe directly into the egg whites, squeeze a tiny test swirl onto a clean plate. This lets you see if the color is right and if the consistency is thick enough. If the test swirl flattens out immediately, your filling is too thin. Add a little more mashed yolk or a pinch of cornstarch to thicken it up.
Clean up mistakes with a damp paper towel. If you accidentally smear orange filling onto the white part of the egg, do not panic. Dip a clean paper towel in cold water, wring it out well, and gently dab the smudge. The moisture will lift the filling without damaging the egg white. Let the spot air dry for a minute before continuing.
Variations & Adaptations
This recipe is surprisingly flexible. Here are a few ways I have adapted it for different diets and occasions.
Vegan Version: I made these for a friend who avoids animal products. Use 24 ounces of silken tofu, drained and pressed, instead of egg yolks. Mash it with 1/4 cup vegan mayonnaise, 1 tablespoon yellow mustard, 1 teaspoon apple cider vinegar, 1/2 teaspoon black salt (kala namak, which gives an eggy flavor), and 1/4 teaspoon turmeric for color. The texture is slightly softer than traditional deviled eggs, but the look is identical. Pipe the colored layers into hollowed-out potato halves or bell pepper boats instead of egg whites.
Spicy Kick: My husband loves heat, so I sometimes add 1/2 teaspoon of cayenne pepper or a few dashes of hot sauce to the orange layer. It gives the eggs a subtle warmth that balances the creamy mayonnaise. The kids still eat them because the spice is mild, but adults notice the extra depth.
Bacon Addition: For a heartier version, crumble 4 slices of cooked bacon and mix half into the yellow layer. Sprinkle the remaining bacon bits on top of the finished eggs before adding the candy corn. The salty, smoky flavor is incredible with the tangy mustard. I tried this for a football party, and they were gone in ten minutes.
Avocado Twist: Swap half the mayonnaise for mashed ripe avocado. The filling becomes a beautiful pale green under the orange and yellow layers. The avocado adds healthy fats and a silky texture. Just be aware that the filling will brown faster, so these need to be served within a few hours of making them. Squeeze a little lime juice into the avocado to slow down the browning.
Serving & Storage Suggestions
These deviled eggs are best served cold, straight from the fridge. The filling firms up nicely after a good chill, and the flavors taste brighter. Arrange them on a flat platter in concentric circles or rows. If you are bringing them to a party, transport the platter carefully and keep it level. A bumpy car ride can ruin your perfect stripes.
For a Halloween party spread, I like to serve these alongside other spooky snacks. They pair beautifully with a bowl of chili, some black bean dip, or a platter of mummy hot dogs (you know, the ones wrapped in crescent roll strips). For drinks, a cold apple cider or a pumpkin spice latte works well. The savory eggs balance the sweetness of typical Halloween treats.
Storage: Leftover deviled eggs can be stored in an airtight container in the refrigerator for up to 3 days. Place a layer of paper towels on the bottom of the container to absorb any excess moisture. Do not freeze deviled eggs. The mayonnaise separates when thawed, and the texture becomes watery and unpleasant.
Reheating: You do not need to reheat these. They are meant to be served cold. If you prefer them at room temperature, let them sit out for 15 minutes before serving. Do not leave them out for more than 2 hours, especially if you are serving them at a party. Food safety matters, even with Halloween fun.
The flavors actually develop and meld together after a day in the fridge. I sometimes make these a full 24 hours ahead of time. The colors stay bright, and the taste is even better. Just wait to add the candy corn garnish until right before serving, or the candy will soften and lose its crunch.
Nutritional Information & Benefits
Here is the approximate nutritional breakdown for one deviled egg half (based on 24 servings, using regular mayonnaise and no additional salt beyond the recipe).
- Calories: 65
- Total Fat: 5g
- Saturated Fat: 1g
- Cholesterol: 95mg
- Sodium: 95mg
- Total Carbohydrates: 1g
- Protein: 4g
Eggs are a fantastic source of high-quality protein and essential nutrients like choline, which supports brain health. The yolks contain vitamin D, vitamin B12, and selenium. This recipe is naturally gluten-free and low in carbohydrates, making it a good option for guests with celiac disease or those following a low-carb lifestyle. The candy corn garnish adds a small amount of sugar, but you can skip it if you are watching your intake.
I personally love that this recipe feels indulgent without being overly heavy. It is a protein-packed appetizer that satisfies hunger without ruining your dinner. For a Halloween party, that is a win in my book. If you have guests with egg allergies, be sure to label the platter clearly. The vegan variation I mentioned earlier works well as an alternative.
Conclusion
These Kid-Friendly Candy Corn Deviled Eggs for Halloween are more than just a pretty plate. They are a conversation starter, a memory maker, and a genuinely delicious appetizer that happens to look like a childhood candy. I have brought them to countless gatherings, and they never fail to make people smile. The best part? They are incredibly easy to make once you know the trick. You do not need to be a professional chef or a Pinterest-perfect host. You just need a dozen eggs, a little food coloring, and the willingness to try something fun.
I encourage you to make this recipe your own. Adjust the mustard level. Swap the candy corn for a tiny sprinkle of black sesame seeds for a more “spooky” look. Use a star tip for a fancier swirl. The base recipe is forgiving, and the results are always impressive. Honestly, the first time I made these, I texted a photo to Mrs. Gable. She replied with a single crying-laughing emoji and the words “Told you so.” She was right, and I am so glad she shared that secret with me in the grocery store aisle.
If you try this recipe, I would love to hear about it. Leave a comment below and let me know how your eggs turned out. Did your kids love them? Did your coworkers devour them at the office party? Share a photo on Pinterest and tag me—I cannot wait to see your candy corn creations. Happy Halloween, and happy cooking!
Frequently Asked Questions
Can I make these deviled eggs a day ahead of time?
Yes, absolutely. You can prepare the eggs completely up to 24 hours in advance. Store them in an airtight container in the refrigerator. Wait to add the candy corn garnish until just before serving, or the candy will absorb moisture and become sticky.
Why did my filling colors bleed into each other?
This usually happens when the filling is too warm or too thin. Make sure your mayonnaise and eggs are cold before you start mixing. If the yellow layer seems soft, chill the eggs for 10 minutes after piping it before adding the orange layer. Also, avoid over-mixing the colors—gentle folding keeps the texture thick.
Can I use natural food coloring instead of artificial?
Yes, you can. Use turmeric powder for yellow and a mix of turmeric and paprika for orange. The colors will be more muted and earthy, not as bright as artificial dyes. The flavor will also change slightly. I have tested this, and the eggs are still delicious, just less visually striking.
How do I get perfectly smooth filling without lumps?
The key is to mash the yolks thoroughly while they are still warm from boiling. Use a fork or a potato masher and press them through a fine-mesh sieve if you want ultra-smooth results. I have also used a food processor in a pinch, but be careful not to over-process or the mayonnaise will break.
Can I freeze these deviled eggs?
No, I do not recommend freezing deviled eggs. The mayonnaise-based filling will separate when thawed, becoming watery and grainy. The texture will be unpleasant. These are best made fresh or up to one day ahead and stored in the refrigerator.
Pin This Recipe!
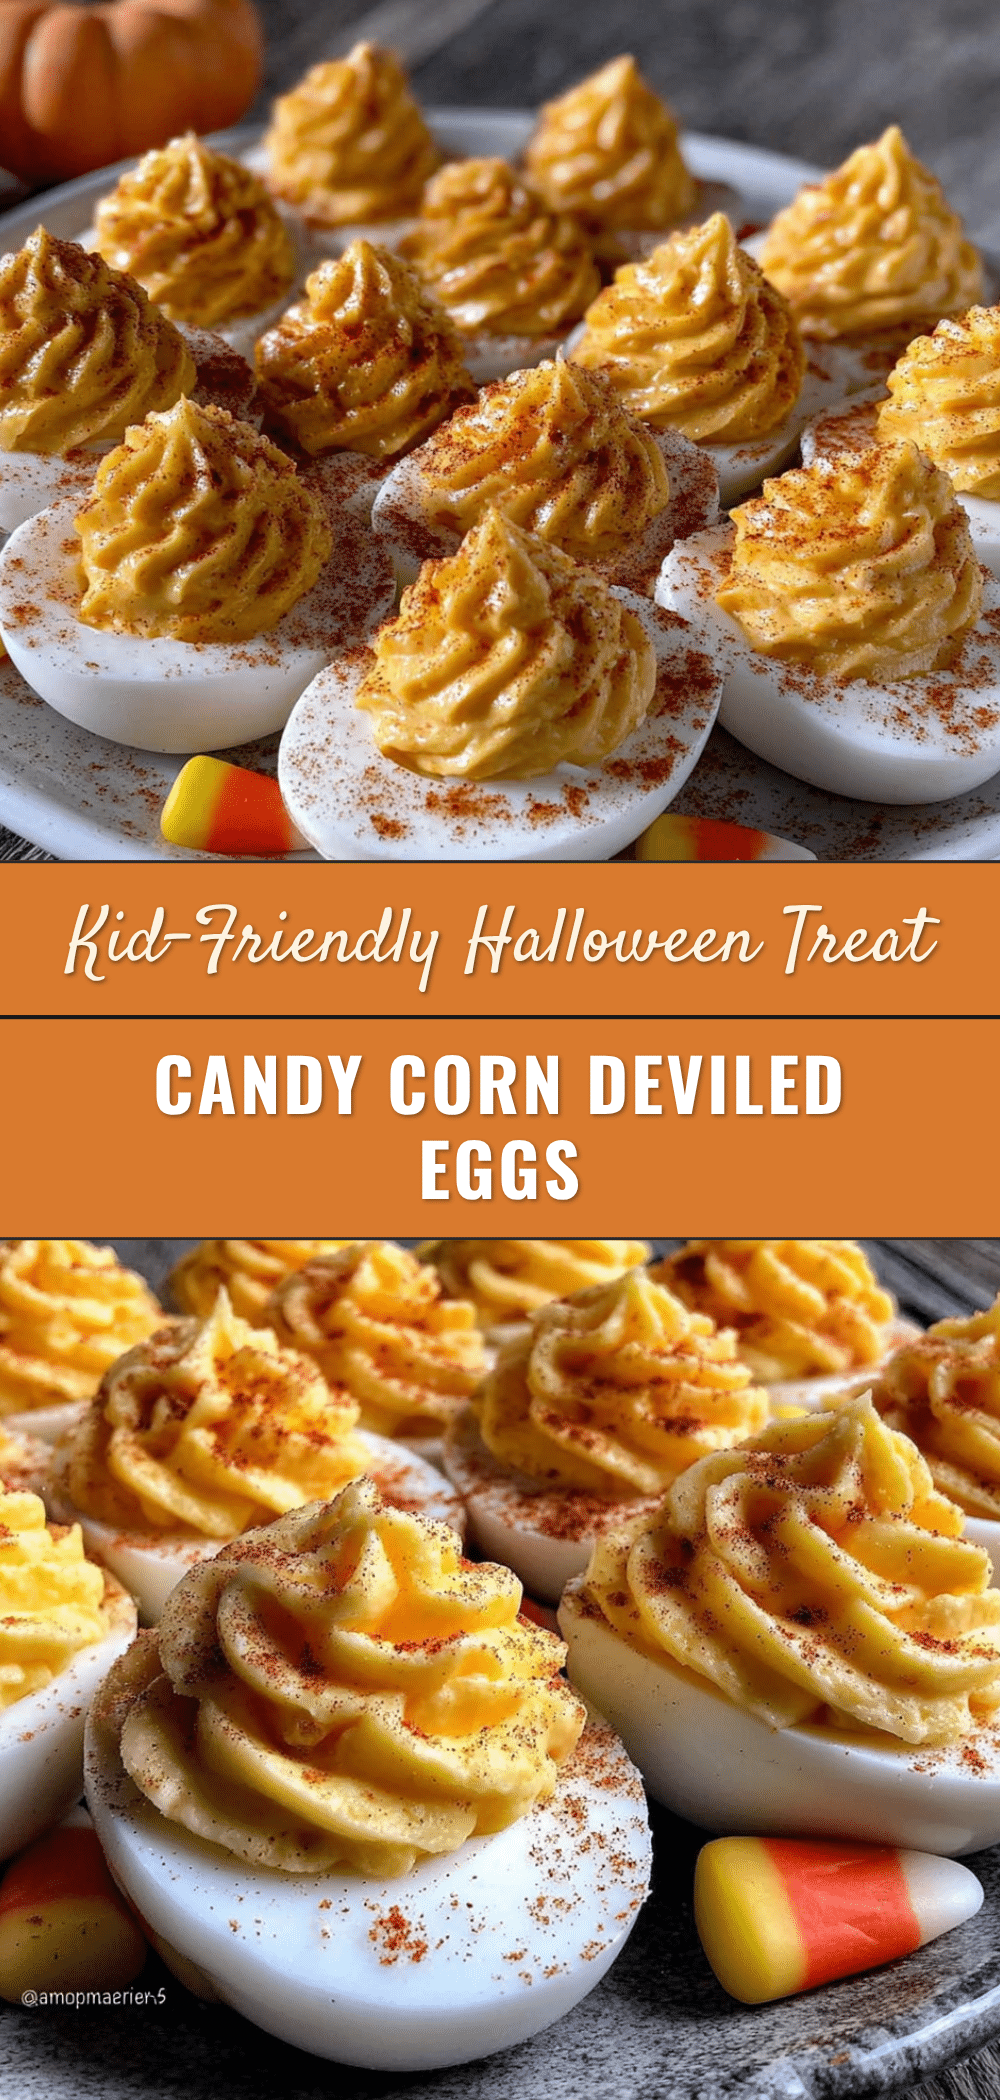
Best Candy Corn Deviled Eggs – Easy Halloween Recipe
These Kid-Friendly Candy Corn Deviled Eggs for Halloween are a crowd-pleaser that looks like candy but tastes like a classic savory appetizer. With a creamy, tangy filling and a festive gradient of yellow to orange, they are the ultimate conversation starter for any Halloween party.
- Prep Time: 20 minutes
- Cook Time: 12 minutes
- Total Time: 1 hour 2 minutes (including cooling and chilling)
- Yield: 24 servings 1x
- Category: Appetizer
- Cuisine: American
Ingredients
- 12 large eggs (hard-boiled and peeled, room temperature works best for smooth filling)
- 1/3 cup mayonnaise (I prefer Hellmann’s or Duke’s for a creamy, tangy base)
- 1 tablespoon yellow mustard (adds color and a classic deviled egg zing)
- 1 teaspoon white vinegar (brightens the flavor and helps the texture)
- 1/2 teaspoon salt (fine sea salt dissolves better)
- 1/4 teaspoon black pepper (freshly ground if you have it)
- Yellow food coloring (gel or liquid, gel gives more vibrant color with less liquid)
- Red food coloring (to make orange, you will mix yellow and red)
- Candy corn pieces (for garnish, about 12-24 pieces depending on how many eggs you decorate)
- Paprika (optional, for a light dusting on the white part for extra color contrast)
Instructions
- Hard-boil the eggs. Place 12 large eggs in a single layer in a large pot. Cover them with cold water by about an inch. Bring the water to a rolling boil over high heat. Once boiling, cover the pot, turn off the heat, and let the eggs sit for exactly 12 minutes. While they sit, prepare an ice bath—a large bowl filled with cold water and a tray of ice cubes. After 12 minutes, transfer the eggs to the ice bath using a slotted spoon. Let them cool completely for at least 10 minutes.
- Peel and halve the eggs. Gently tap each egg on the counter to crack the shell all over. Start peeling from the wider end where the air pocket is—the membrane comes off easier there. Rinse the peeled eggs under cool water to remove any tiny shell fragments. Pat them dry with a paper towel. Using a sharp knife, slice each egg in half lengthwise. Carefully pop out the yolks into a medium mixing bowl. Arrange the 24 white halves on your serving platter, cut side up.
- Make the base filling. Mash the yolks with a fork or potato masher until they resemble fine crumbs with no large lumps. Add 1/3 cup mayonnaise, 1 tablespoon yellow mustard, 1 teaspoon white vinegar, 1/2 teaspoon salt, and 1/4 teaspoon black pepper. Stir everything together until the mixture is smooth and creamy. Taste it and adjust the salt or mustard to your preference.
- Divide and color the filling. Split the yolk mixture into three separate small bowls. Leave the first bowl plain—this will be the yellow bottom stripe. To the second bowl, add 2-3 drops of yellow food coloring and 1 drop of red. Stir well for a bright orange. To the third bowl, add 1-2 drops of red food coloring and 1 drop of yellow. Mix until you get a deep red-orange.
- Prepare your piping bags. Fit three piping bags with large round tips or simply snip off the corners of three zip-top bags. Spoon each colored filling into its own bag. Twist the tops to seal and push the filling down toward the tip.
- Pipe the first layer (yellow bottom). Take one egg white half. Using the bag with the yellow filling, pipe a small amount into the bottom of the cavity, filling it about one-third of the way up. Repeat for all 24 egg halves.
- Pipe the second layer (orange middle). Take the bag with the orange filling. Pipe a layer directly on top of the yellow, filling the cavity to about two-thirds full. If the colors start to blend, pop the eggs in the fridge for 5 minutes to firm up the yellow layer before adding the orange.
- Pipe the third layer (red-orange top). Finally, use the red-orange filling to pipe a small dollop on top of the orange. This is the tip of your candy corn.
- Add the garnish. Gently press one piece of candy corn into the red-orange tip of each deviled egg.
- Chill and serve. Place the platter of finished deviled eggs in the refrigerator for at least 30 minutes before serving. The eggs are best served cold.
Notes
Use older eggs for easier peeling. Do not overcook the eggs to avoid green yolks. Keep the filling cold to prevent colors from bleeding. Practice piping on a plate first. Clean up mistakes with a damp paper towel. For a vegan version, use silken tofu and vegan mayonnaise. For a spicy kick, add cayenne pepper or hot sauce. For a bacon addition, mix crumbled bacon into the yellow layer. For an avocado twist, swap half the mayonnaise for mashed avocado.
Nutrition
- Serving Size: 1 deviled egg half
- Calories: 65
- Sodium: 95
- Fat: 5
- Saturated Fat: 1
- Carbohydrates: 1
- Protein: 4
Keywords: candy corn deviled eggs, Halloween deviled eggs, easy Halloween recipe, kid-friendly Halloween appetizer, spooky deviled eggs


