Love this? Save it for later!
Share the inspiration with your friends
My brother-in-law, Mark, had claimed for years that he “didn’t do” pumpkin desserts. Pumpkin pie was a no-go, pumpkin bread was “fine for other people,” and pumpkin spice lattes were apparently a personal affront to his entire existence. For three Thanksgivings straight, I watched him pass the pumpkin roll without a second glance. Then, last October, I was testing this recipe for a dinner party I was hosting. I had a batch cooling on the counter while I ran to the store for more cinnamon. When I came back, I found him standing at the kitchen island, mid-chew, with powdered sugar on his shirt and a look of pure betrayal on his face. “These are… okay,” he mumbled, reaching for another one. Honestly, that was the highest praise I had ever gotten from him. I mean, catching a pumpkin dessert skeptic red-handed is a moment you don’t forget. The combination of nutty browned butter, warm pumpkin spice, and that signature crackly cinnamon-sugar coating was just too good for even a hardened pumpkin-hater to resist. Maybe you’ve been there, trying to win over a picky eater at a gathering. This cookie is your secret weapon. It’s the one that stays with you, the one you’ll be asked to bring to every single fall get-together from now on.
Why You’ll Love This Recipe
As a food blogger who has tested hundreds of cookie recipes, I can tell you this one is different. It’s not just another pumpkin cookie that turns out cakey and bland. This is a chewy, buttery, spice-forward cookie that actually delivers on flavor and texture. I’ve spent years perfecting the balance of moisture and structure, and this version is the result of countless trials.
- Unbelievably Delicious: The browned butter adds a deep, nutty complexity that plain butter just can’t match. It’s the kind of flavor that makes people close their eyes after the first bite.
- Crowd-Pleaser: I’ve brought these to potlucks, dinner parties, and holiday cookie swaps. They disappear faster than almost anything else on the table. Even people who claim they don’t love pumpkin end up reaching for a second one.
- Perfect for Hosting: The dough can be made a day ahead, which is a lifesaver when you’re trying to impress guests without spending the whole party in the kitchen. Just scoop, roll in cinnamon sugar, and bake when your guests arrive. The smell alone will set the mood.
- Simple Ingredients: No weird specialty flours or hard-to-find extracts. You likely have most of these in your pantry already, minus maybe the pumpkin puree.
- Chef-Tested Technique: Browning the butter might sound fancy, but it’s a simple 5-minute step that pays off in huge flavor dividends. It’s a little trick I learned from a pastry chef friend, and it’s never let me down.
This recipe isn’t just good—it is the kind that makes you feel like a rockstar host without the stress. It’s comfort food reimagined for a gathering, with that same soul-soothing satisfaction but with a show-stopping twist.
What Ingredients You Will Need
This recipe uses simple, wholesome ingredients to deliver that signature snickerdoodle tang and pumpkin warmth. Most of these are pantry staples, which makes this a great last-minute dessert for unexpected guests.
- For the Cookies:
- 1 cup (2 sticks) unsalted butter (I prefer Kerrygold for its rich flavor, especially when browning)
- 1/2 cup granulated sugar
- 1/2 cup packed light brown sugar (adds moisture and a deeper molasses note)
- 1/2 cup pumpkin puree (not pumpkin pie filling—look for 100% pure pumpkin)
- 1 large egg yolk (the yolk adds richness and chewiness; save the white for another use)
- 2 teaspoons vanilla extract
- 2 cups all-purpose flour (spooned and leveled for accuracy)
- 1 teaspoon baking soda
- 1/2 teaspoon cream of tartar (this is the secret to the classic snickerdoodle tang—don’t skip it)
- 1/2 teaspoon salt
- 2 teaspoons pumpkin pie spice (I like the blend from Simply Organic, or you can make your own)
- 1/2 teaspoon ground cinnamon
- 1/4 teaspoon ground nutmeg (freshly grated if you have it)
- For the Cinnamon-Sugar Coating:
- 1/4 cup granulated sugar
- 1 tablespoon ground cinnamon
- Pinch of pumpkin pie spice (optional, but it adds a lovely extra layer)
For the pumpkin puree, I recommend Libby’s brand for consistent texture and flavor. If you’re using a different brand, just make sure it’s not too watery—you can blot it with a paper towel if needed. For a dairy-free option, you can use a high-quality vegan butter stick, but the browning step might not work as well. I’ve tried it with Miyoko’s, and it was passable but not as nutty.
Equipment Needed
You don’t need a fancy kitchen to pull these off, but a few specific tools will make your life easier. Here’s what I use:
- Light-colored saucepan or skillet: This is crucial for browning the butter. A dark pan makes it hard to see the color change, and you might end up with burnt butter. I use a stainless steel saucepan.
- Stand mixer or hand mixer: A stand mixer with the paddle attachment is ideal, but a hand mixer works just fine. You could mix by hand, but it will take some arm muscle to get the butter and sugars properly creamed.
- Large baking sheets: I recommend rimmed baking sheets. I’ve had good luck with Nordic Ware brand—they don’t warp in the oven.
- Parchment paper or silicone baking mats: This is non-negotiable for soft, chewy cookies. It prevents sticking and helps with even browning.
- Medium cookie scoop: A 1.5-tablespoon scoop ensures all your cookies are the same size, which means they’ll bake evenly. I love my OXO scoop.
- Cooling rack: A wire rack lets air circulate around the cookies so they cool properly without getting soggy on the bottom.
If you don’t have a stand mixer, just use a large bowl and a hand mixer. It’s a bit more work, but the results are the same. And if you’re on a budget, dollar-store baking sheets work fine—just watch your baking times closely, as they might heat differently.
Preparation Method
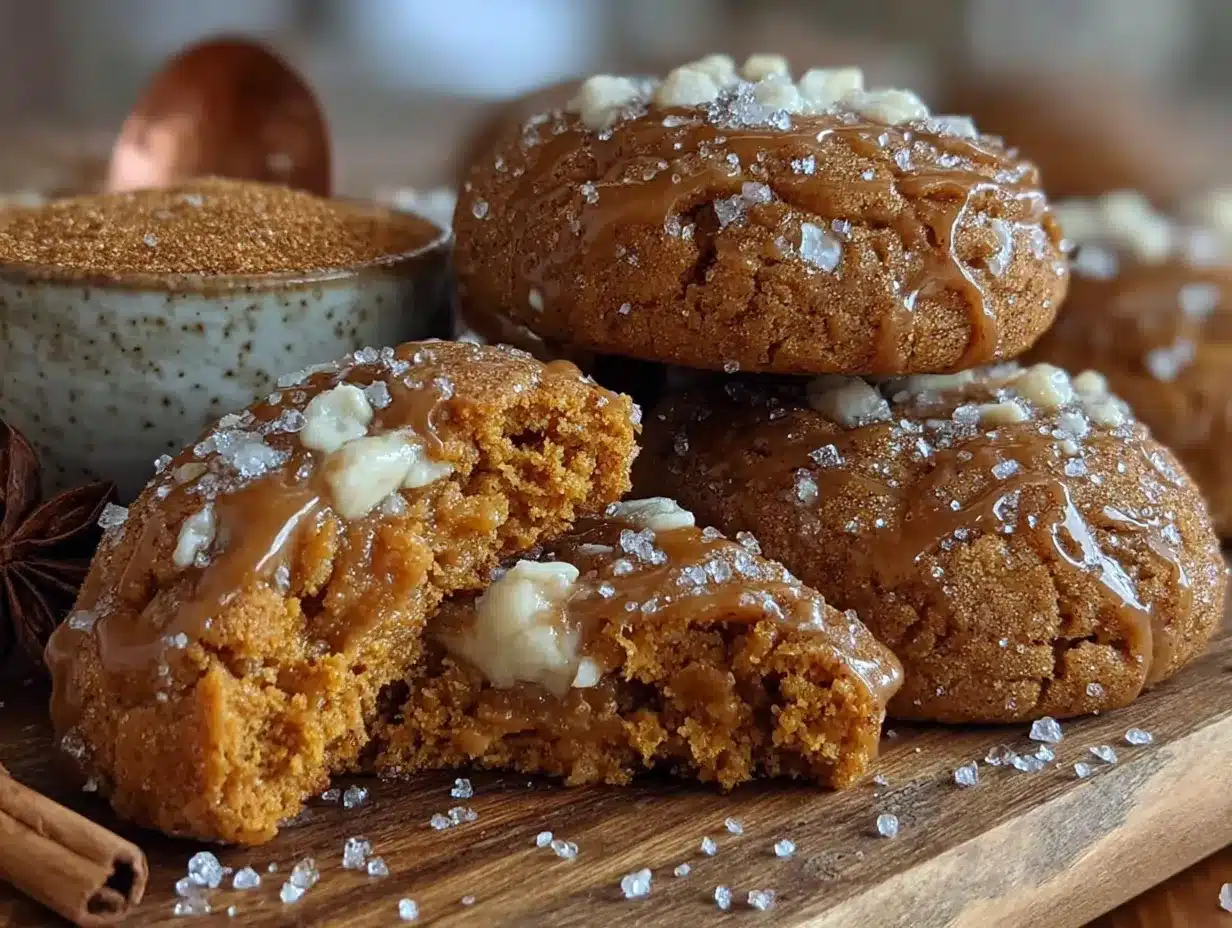
This method is broken down into clear steps. Take your time with the first step—it’s the most important for flavor. I’ve included time estimates and sensory cues to help you know when you’ve nailed it.
Step 1: Brown the Butter (10 minutes)
Cut the butter into even pieces and place them in your light-colored saucepan over medium heat. Stir constantly with a spatula or wooden spoon. The butter will melt, then foam up, then start to turn golden. You’ll see little brown specks forming at the bottom—that’s the milk solids toasting. Keep stirring until the butter smells nutty and looks like the color of amber honey. This usually takes about 5-7 minutes. Immediately pour the browned butter into a heatproof bowl (like a glass measuring cup) to stop the cooking process. Let it cool for about 10 minutes. Don’t skip this cooling step, or your cookies will spread too much.
Step 2: Cream the Butter and Sugars (3 minutes)
Pour the cooled browned butter into your mixing bowl. Add the granulated sugar and brown sugar. Beat on medium speed for about 2-3 minutes until the mixture looks smooth and slightly lighter in color. It won’t get fluffy like room-temperature butter, but it should be well combined and glossy.
Step 3: Add Wet Ingredients (2 minutes)
Add the pumpkin puree, egg yolk, and vanilla extract. Beat on low speed until just combined. The mixture might look a little curdled or separated at this point—don’t panic. That’s totally normal when you add pumpkin to butter. It will come together once you add the dry ingredients.
Step 4: Combine Dry Ingredients (1 minute)
In a separate medium bowl, whisk together the flour, baking soda, cream of tartar, salt, pumpkin pie spice, cinnamon, and nutmeg. Make sure there are no lumps, especially from the baking soda and cream of tartar.
Step 5: Mix the Dough (2 minutes)
Gradually add the dry ingredients to the wet ingredients, mixing on low speed. Stop as soon as the flour disappears. Over-mixing will make the cookies tough. The dough will be soft, slightly sticky, and very fragrant. Scrape down the sides of the bowl with a spatula to make sure everything is incorporated.
Step 6: Chill the Dough (30 minutes minimum)
This is my most important tip. Cover the bowl with plastic wrap and refrigerate the dough for at least 30 minutes. Chilling firms up the butter and allows the flavors to meld. If you skip this step, the cookies will spread into flat, greasy puddles. I’ve made that mistake before, and it was heartbreaking. You can chill the dough for up to 2 days—just let it sit at room temperature for 10 minutes before scooping if it’s rock hard.
Step 7: Preheat and Prep (10 minutes)
Preheat your oven to 350°F (175°C). Line two large baking sheets with parchment paper or silicone mats. In a small shallow bowl, whisk together the coating sugar, cinnamon, and pinch of pumpkin pie spice.
Step 8: Scoop and Coat (5 minutes)
Use your cookie scoop to portion out rounded tablespoons of dough. Roll each portion between your palms to form a smooth ball. Then roll each ball generously in the cinnamon-sugar mixture until fully coated. Place them on the prepared baking sheets, spacing them about 2 inches apart. They will spread a bit, so give them room.
Step 9: Bake (10-12 minutes)
Bake one sheet at a time on the center rack. The cookies are done when the edges are set and lightly golden, but the centers still look slightly soft and puffed. They will look underdone in the middle—that’s what you want. For a chewier cookie, bake for 10 minutes. For a slightly crisper edge, go to 12 minutes. My oven runs hot, so I usually check at 10 minutes.
Step 10: Cool (5 minutes on sheet, then transfer)
Let the cookies cool on the baking sheet for 5 minutes. This allows them to set up without breaking. Then transfer them to a wire rack to cool completely. The centers will sink slightly and develop that signature crinkly top. If you try to move them too soon, they’ll fall apart.
Cooking Tips & Techniques
I’ve made this recipe more times than I can count, and I’ve learned a few things the hard way. Here are my top tips for success, especially when you’re cooking for a crowd.
Don’t Over-Brown the Butter. I know I said to look for amber color, but there’s a fine line between nutty and burnt. The first time I made these, I got distracted by a phone call and ended up with black butter. The cookies tasted bitter and smoky. Trust your nose—when it smells like toasted hazelnuts, it’s done. If you see black specks, you’ve gone too far.
Room Temperature Matters. The egg yolk should be at room temperature so it emulsifies properly with the butter. If you forget to take it out of the fridge, just place it in a bowl of warm water for 5 minutes. The pumpkin puree can be cold from the can—that’s fine—but the egg yolk needs to be warm.
Chill the Dough. I cannot stress this enough. If you’re in a rush, you can pop the dough in the freezer for 15 minutes instead of the fridge for 30, but don’t skip it entirely. I once tried to bake these immediately after mixing, and the cookies spread into thin, greasy disks. It was a waste of good butter and pumpkin.
Use a Cookie Scoop for Consistency. When you’re baking for a party, you want all the cookies to look the same. A scoop ensures even baking and a professional appearance. If you’re using two spoons, try to make each ball the same size.
Bake One Sheet at a Time. I know it’s tempting to cram two sheets in the oven, but the heat circulation gets messed up. The top sheet will brown too fast, and the bottom sheet will be pale. Bake them in batches—the extra 10 minutes is worth it for perfectly baked cookies.
Check for Doneness with Your Finger. Gently touch the center of a cookie. If it feels slightly firm but still gives a little, it’s done. If it feels completely soft and squishy, give it another minute. The cookies will continue to bake on the hot sheet after you pull them out.
Variations & Adaptations
One of the best things about this recipe is how flexible it is. I’ve tried several variations over the years, and they’ve all been hits at different gatherings. Here are a few ideas to make it your own.
Gluten-Free Version: Substitute the all-purpose flour with a 1:1 gluten-free baking flour blend. I’ve had good results with King Arthur Measure for Measure. The texture will be slightly more delicate, so handle the dough gently. Add an extra tablespoon of flour if the dough feels too sticky.
Dairy-Free Version: Use a high-quality vegan butter stick for browning. As I mentioned, the browning won’t be as dramatic, but the flavor will still be lovely. I’ve also used coconut oil (solid, not melted), but the cookies were a bit greasy. Vegan butter is your best bet.
Spice It Up: If you love a warm, spicy cookie, add 1/4 teaspoon of ground ginger and a pinch of cloves to the dry ingredients. It gives the cookies a chai-like warmth that’s perfect for a cozy fall dinner party.
Add a Filling: For a show-stopping dessert, sandwich two cookies with a cream cheese frosting. Beat 4 ounces of cream cheese with 2 tablespoons of softened butter, 1 cup of powdered sugar, and 1/2 teaspoon of vanilla. It’s indulgent but incredible.
Make Them Mini: For a cookie platter or dessert table, use a smaller scoop (about 1 tablespoon) and bake for 8-9 minutes. Mini cookies are perfect for grazing at parties.
Pumpkin Seed Topping: Before baking, press a few pepitas (pumpkin seeds) into the top of each coated dough ball. It adds a nice crunch and a visual pop that guests love.
Serving & Storage Suggestions
These cookies are best served slightly warm, when the edges are still a little soft and the center is gooey. If you’re hosting a dinner party, I recommend baking them right before your guests arrive. The smell of browned butter and cinnamon will fill your house and set a welcoming tone.
Presentation Tips: Arrange the cookies on a large wooden board or a decorative cake stand. Dust them lightly with extra cinnamon sugar for a snowy effect. They look beautiful alongside a pitcher of spiced apple cider or a pot of hot mulled wine. For a dessert table, stack them on a tiered tray with other fall treats like apple cider donuts or caramel popcorn.
What to Serve Alongside: These cookies pair wonderfully with a scoop of vanilla bean ice cream or a dollop of whipped cream. For a more sophisticated pairing, serve them with a glass of bourbon or a dark rum old-fashioned. The warm spices in the cookie complement the oaky notes in the liquor.
Storage Instructions: Store the cookies in an airtight container at room temperature for up to 5 days. Place a piece of bread in the container to keep them soft—the cookies will absorb the moisture from the bread. I learned this trick from my grandmother, and it works like magic.
Freezing Instructions: You can freeze the baked cookies for up to 3 months. Place them in a single layer on a baking sheet, freeze until solid, then transfer to a freezer-safe bag. To thaw, let them sit at room temperature for about 30 minutes. You can also freeze the unbaked dough balls. Scoop and roll them in the cinnamon sugar, then freeze on a baking sheet. Once frozen, transfer to a bag. Bake from frozen, adding 2-3 minutes to the baking time.
Flavor Development: Honestly, these cookies taste even better the next day. The spices have time to meld, and the texture becomes perfectly chewy. So if you’re baking a day ahead for a party, you’re actually doing yourself a favor.
Nutritional Information & Benefits
While these cookies are definitely a treat, they do offer a few redeeming qualities. Here’s the estimated nutritional breakdown per cookie (based on 24 cookies):
Calories: 165 | Fat: 9g | Carbohydrates: 21g | Fiber: 1g | Sugar: 12g | Protein: 2g
The pumpkin puree is a good source of Vitamin A and fiber, which helps with digestion. It also adds moisture without requiring extra fat, so these cookies are actually a bit lighter than a traditional snickerdoodle. The cinnamon in the coating has anti-inflammatory properties and can help regulate blood sugar levels—though let’s be honest, the sugar coating probably cancels that out a little.
These cookies are vegetarian and can be made gluten-free and dairy-free with the substitutions mentioned above. They do contain eggs and wheat in the standard version. If you have nut allergies, rest assured there are no nuts in the recipe (unless you add the pepita topping).
From my perspective, these cookies are about balance. They’re a special-occasion dessert that brings joy and comfort, not an everyday snack. I believe in enjoying food without guilt, and these are worth every single calorie.
Conclusion
So there you have it—the recipe that turned a pumpkin skeptic into a secret fan. These Brown Butter Pumpkin Snickerdoodle Cookies are everything you want in a fall dessert: nutty, spiced, chewy, and absolutely irresistible. They’re perfect for hosting a dinner party, bringing to a potluck, or just treating yourself after a long week.
I encourage you to make them your own. Play with the spices, try a different coating, or sandwich them with frosting. The best recipes are the ones that evolve with you. And honestly, the joy of baking is in the sharing—so don’t be shy about passing this recipe along to a friend who needs a little pumpkin magic in their life.
If you make these, I’d love to hear about it. Leave a comment below and tell me how they turned out, or tag me in your photos on social media. Did you convert a pumpkin hater like I did? Did you try a fun variation? Let’s keep the conversation going. Happy baking, and here’s to cookies that steal the show at every gathering!
Frequently Asked Questions
Can I use pumpkin pie filling instead of pumpkin puree?
No, please don’t. Pumpkin pie filling is pre-sweetened and spiced, which will throw off the sugar and spice balance in the recipe. Stick with 100% pure pumpkin puree for the best results. If you only have pie filling, you can try it, but your cookies will be much sweeter and might spread more.
Why did my cookies turn out flat?
Flat cookies usually happen for one of two reasons: the butter was too warm when you mixed the dough, or you skipped the chilling step. Make sure your browned butter has cooled to room temperature before creaming it with the sugars. And never skip the 30-minute chill time—it’s non-negotiable for thick, chewy cookies.
Can I make the dough ahead of time?
Absolutely. The dough can be refrigerated for up to 2 days. Just wrap it tightly in plastic wrap to prevent it from drying out. When you’re ready to bake, let it sit at room temperature for about 10 minutes so it’s soft enough to scoop. You can also freeze the dough balls for up to 3 months.
How do I know when the cookies are done?
The edges should be set and lightly golden, but the centers will still look soft and slightly puffed. They will continue to bake on the hot sheet for a few minutes after you pull them out. If you like chewier cookies, pull them out at the 10-minute mark. For crisper edges, go to 12 minutes.
Can I double this recipe for a party?
Yes, this recipe doubles beautifully. Just make sure you have a large enough mixing bowl—the dough will be quite voluminous. You might need to brown the butter in two batches to avoid overcrowding the pan. And remember to bake one sheet at a time for even results.
Pin This Recipe!
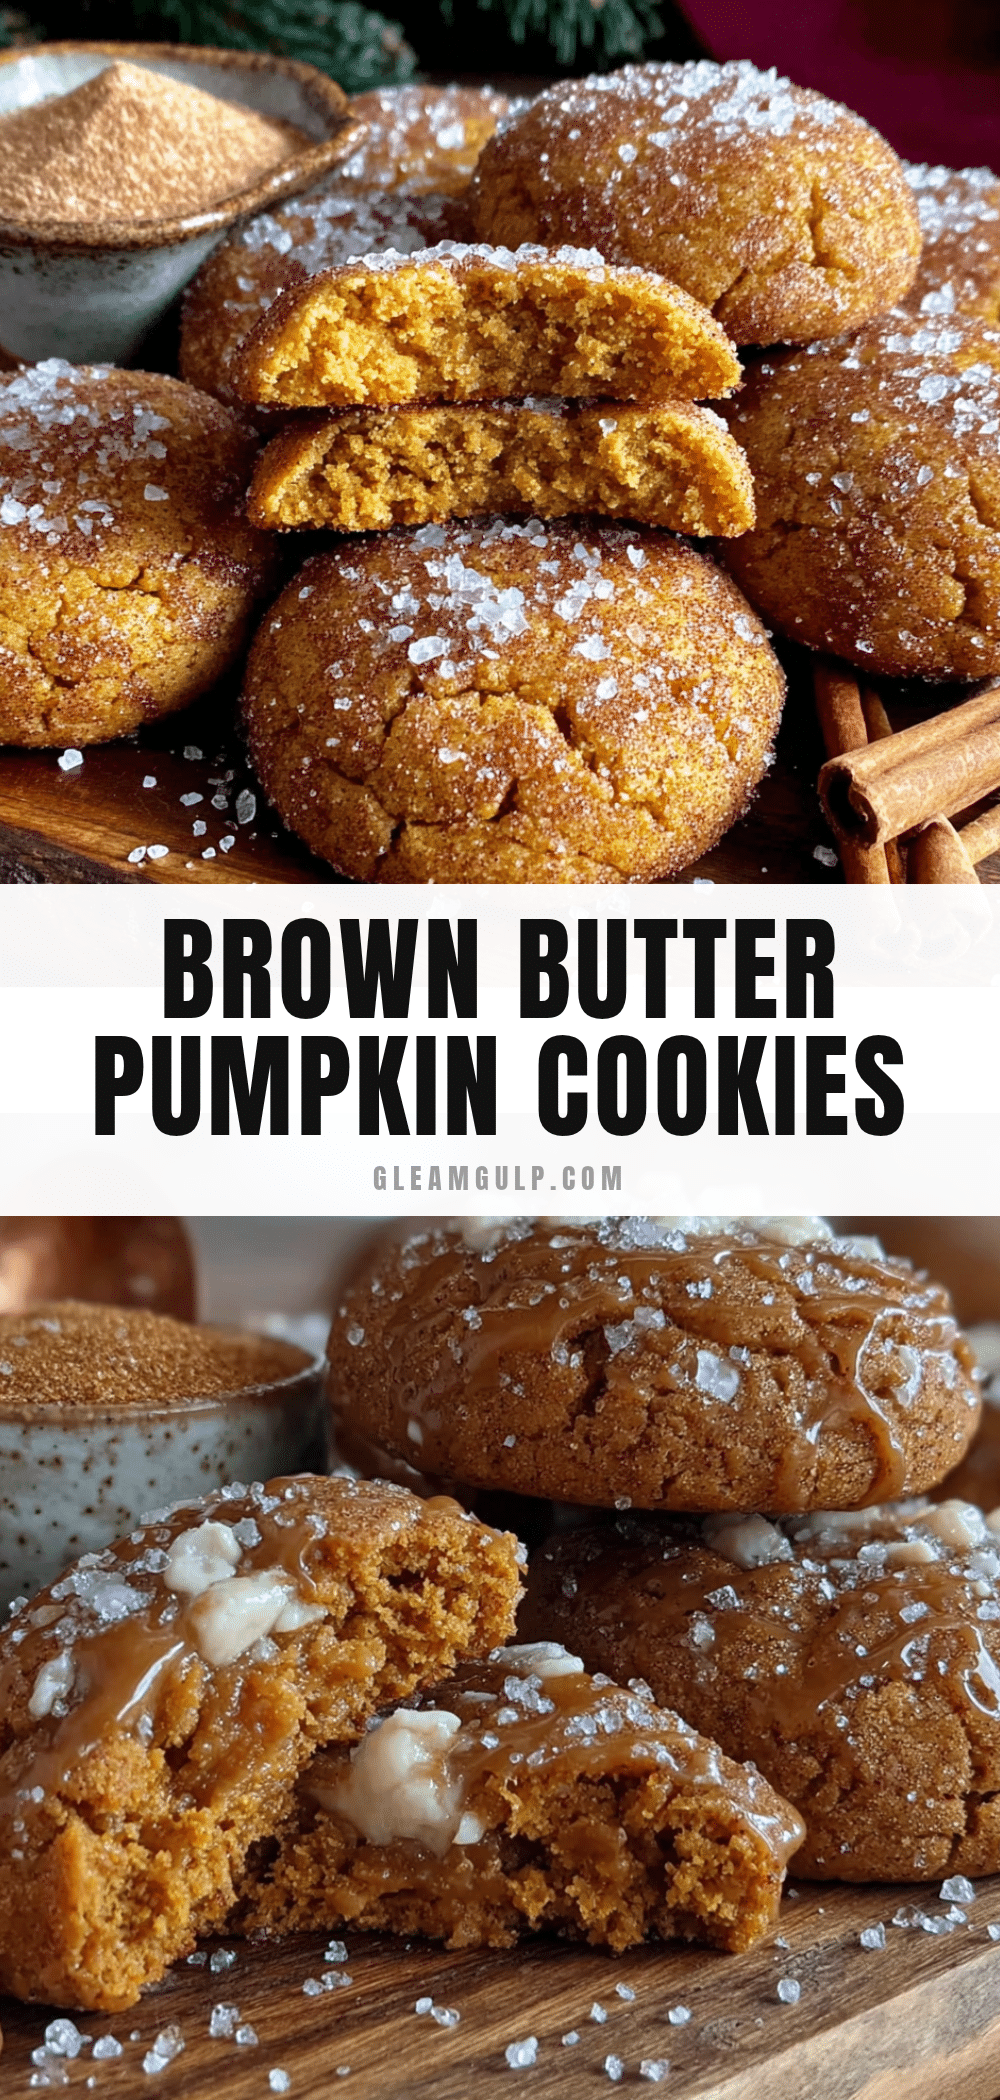
Best Brown Butter Pumpkin Snickerdoodle Cookies
These Brown Butter Pumpkin Snickerdoodle Cookies are chewy, buttery, and spice-forward, featuring nutty browned butter and a crackly cinnamon-sugar coating. Perfect for fall gatherings, they’re a crowd-pleaser that even pumpkin skeptics love.
- Prep Time: 15 minutes
- Cook Time: 12 minutes
- Total Time: 1 hour 7 minutes (including chilling)
- Yield: 24 cookies 1x
- Category: Dessert
- Cuisine: American
Ingredients
- 1 cup (2 sticks) unsalted butter
- 1/2 cup granulated sugar
- 1/2 cup packed light brown sugar
- 1/2 cup pumpkin puree (not pumpkin pie filling)
- 1 large egg yolk
- 2 teaspoons vanilla extract
- 2 cups all-purpose flour (spooned and leveled)
- 1 teaspoon baking soda
- 1/2 teaspoon cream of tartar
- 1/2 teaspoon salt
- 2 teaspoons pumpkin pie spice
- 1/2 teaspoon ground cinnamon
- 1/4 teaspoon ground nutmeg
- For the Cinnamon-Sugar Coating:
- 1/4 cup granulated sugar
- 1 tablespoon ground cinnamon
- Pinch of pumpkin pie spice (optional)
Instructions
- Brown the butter: Cut butter into even pieces and place in a light-colored saucepan over medium heat. Stir constantly until butter melts, foams, and turns amber with brown specks (about 5-7 minutes). Immediately pour into a heatproof bowl and let cool for 10 minutes.
- Cream the butter and sugars: Pour cooled browned butter into a mixing bowl. Add granulated sugar and brown sugar. Beat on medium speed for 2-3 minutes until smooth and slightly lighter in color.
- Add wet ingredients: Add pumpkin puree, egg yolk, and vanilla extract. Beat on low speed until just combined (mixture may look curdled).
- Combine dry ingredients: In a separate bowl, whisk together flour, baking soda, cream of tartar, salt, pumpkin pie spice, cinnamon, and nutmeg.
- Mix the dough: Gradually add dry ingredients to wet ingredients, mixing on low speed until just combined. Dough will be soft and slightly sticky.
- Chill the dough: Cover bowl with plastic wrap and refrigerate for at least 30 minutes (up to 2 days).
- Preheat and prep: Preheat oven to 350°F (175°C). Line two large baking sheets with parchment paper or silicone mats. In a small bowl, whisk together coating sugar, cinnamon, and optional pumpkin pie spice.
- Scoop and coat: Use a cookie scoop to portion rounded tablespoons of dough. Roll into smooth balls, then roll generously in cinnamon-sugar mixture. Place on prepared sheets, spacing 2 inches apart.
- Bake: Bake one sheet at a time on center rack for 10-12 minutes, until edges are set and lightly golden but centers still look soft and puffed.
- Cool: Let cookies cool on baking sheet for 5 minutes, then transfer to a wire rack to cool completely.
Notes
Chilling the dough is essential to prevent spreading. For best flavor, use high-quality butter like Kerrygold. The dough can be made a day ahead. Cookies taste even better the next day.
Nutrition
- Serving Size: 1 cookie
- Calories: 165
- Sugar: 12
- Sodium: 120
- Fat: 9
- Saturated Fat: 5
- Carbohydrates: 21
- Fiber: 1
- Protein: 2
Keywords: pumpkin snickerdoodle, brown butter cookies, fall cookies, pumpkin dessert, snickerdoodle recipe


