Love this? Save it for later!
Share the inspiration with your friends
I was at the hardware store last October, of all places, waiting in line with a bag of lightbulbs and a new whisk I definitely didn’t need. The woman ahead of me—probably in her seventies, wearing a sweater with a cat embroidered on the pocket—turned around and asked if I was baking for Halloween. I blinked. I was just grabbing a whisk because the handle on mine had snapped mid-batch the night before. But she didn’t wait for an answer. She just started describing these black cat sugar cookies she’d been making for forty years. No recipe card, no notes. She just knew it by heart.
I honestly forgot about the lightbulbs. I stood there, holding my broken whisk, listening to her explain how to get the ears just right and why you shouldn’t overwork the dough. She told me about the first time she made them—her son was three, and he kept trying to eat the raw dough before the cookies even hit the pan. I laughed, and I told her about the time I accidentally used cocoa powder instead of black food coloring and ended up with gray, sad-looking cats. She grinned and said, “That’s how you learn.”
Maybe you’ve been there—standing in an unexpected place, getting cooking advice from a complete stranger who turns out to be a goldmine of kitchen wisdom. That’s exactly how these adorable black cat sugar cookies came into my life. They’re not too sweet, they hold their shape perfectly, and they’re just the right amount of spooky for Halloween without being scary. I’ve tweaked her original recipe just a little—added a pinch more salt, swapped in a bit of almond extract—but the soul of it is still hers. And honestly? I keep making them because they remind me that the best recipes don’t come from cookbooks. They come from a woman in a cat sweater at the hardware store.
Why You’ll Love This Recipe
These aren’t your average sugar cookies. I’ve tested this dough at least six times to get the balance right—crisp edges, soft centers, and a flavor that doesn’t get lost under the frosting. You can taste the butter, the vanilla, and that tiny hint of almond that makes people ask, “What’s in this?”
- Quick & Easy: From start to finish, you’re looking at about 45 minutes of active time. The rest is chilling and cooling.
- Simple Ingredients: Butter, sugar, flour, eggs, vanilla, almond extract, and black food coloring. That’s it. No weird specialty items.
- Perfect for Halloween: These little guys are the star of any Halloween party, classroom treat, or spooky movie night. Kids go nuts for them.
- Crowd-Pleaser: I brought a batch to a friend’s Halloween gathering last year, and they disappeared before the pumpkin carving even started. Adults love them too—they’re not overly sweet.
- Unbelievably Delicious: The texture is this perfect middle ground between a soft sugar cookie and a slightly crisp shortbread. It’s comfort food, but make it spooky.
What makes this recipe different from the rest? It’s the almond extract. Most sugar cookie recipes rely on vanilla alone, but that little splash of almond gives it a warmth that pairs perfectly with the black cocoa in the frosting. Plus, the dough is forgiving—you can roll it out, reroll the scraps, and it still bakes up beautifully. I’ve even frozen the cut-out shapes and baked them straight from frozen with zero issues.
This recipe isn’t just good—it’s the kind that makes you close your eyes after the first bite. It’s Halloween baking without the stress. Just pure, cookie-shaped joy.
What Ingredients You Will Need
This recipe uses simple, pantry-friendly ingredients to create cookies that are both delicious and easy to decorate. No fancy flours or hard-to-find extracts here—just the basics, plus a little black magic for the frosting.
- Unsalted butter, softened (1 cup / 226g) – I always use unsalted to control the salt level. Let it sit out for about 30 minutes before you start.
- Granulated sugar (1 cup / 200g) – Regular white sugar. No need for organic or raw options here.
- Large egg (1) – Room temperature. If you forget to take it out early, just place it in a bowl of warm water for 5 minutes.
- Vanilla extract (2 teaspoons) – Pure vanilla, not imitation. It makes a difference in the depth of flavor.
- Almond extract (½ teaspoon) – This is my secret weapon. It adds a subtle nuttiness that makes these cookies memorable.
- All-purpose flour (2 ½ cups / 312g) – Spoon and level it. Don’t scoop straight from the bag or you’ll end up with dry dough.
- Baking powder (1 teaspoon) – Helps the cookies spread just a little without losing their shape.
- Salt (½ teaspoon) – I prefer fine sea salt. It balances the sweetness perfectly.
- Black gel food coloring (for the dough, optional) – I use Americolor Super Black. Liquid food coloring won’t give you the same deep shade.
- Powdered sugar (2 cups / 240g) – For the frosting. Sift it if it’s lumpy.
- Unsalted butter, softened (¼ cup / 57g) – For the frosting base.
- Milk (2-3 tablespoons) – Whole milk works best, but any kind will do. Add slowly to reach your desired consistency.
- Black cocoa powder (2 tablespoons) – This is different from regular cocoa. It gives the frosting that deep, Oreo-like color and flavor. I recommend King Arthur Flour’s black cocoa.
- Vanilla extract (½ teaspoon, for frosting) – Just a touch to round out the flavor.
- Candy eyes (for decoration) – You can find these at any craft store or online. Wilton makes good ones.
- Black sprinkles or sanding sugar (optional, for extra sparkle)
Equipment Needed
You don’t need a professional bakery setup for these. Most of this stuff is probably already in your kitchen.
- Stand mixer or hand mixer – I’ve made this dough with both. The stand mixer is faster, but a hand mixer works just fine. Just make sure your butter is truly softened so you don’t burn out the motor.
- Cat-shaped cookie cutter – I found mine at a baking supply store for $4. Amazon has tons of options. Look for one that’s about 3 inches wide for the best size.
- Rolling pin – I prefer a French-style rolling pin without handles, but any rolling pin works. If you don’t have one, a clean wine bottle can save the day (I’ve done it).
- Baking sheets (2) – Light-colored aluminum sheets give the most even bake. Dark sheets can cause the bottoms to brown too quickly.
- Parchment paper or silicone baking mat – Parchment is cheaper and disposable. Silicone mats are reusable and non-stick. Both work great.
- Cooling rack – Essential for letting the cookies cool completely before frosting. If you frost them while they’re warm, the frosting will slide right off.
- Piping bags or zip-top bags – For the frosting. A zip-top bag with the corner snipped off works perfectly if you don’t have piping bags.
- Small offset spatula – Makes spreading frosting so much easier. But a butter knife works in a pinch.
- Plastic wrap – For chilling the dough. Don’t skip this step—it prevents the cookies from spreading into blobs.
Preparation Method
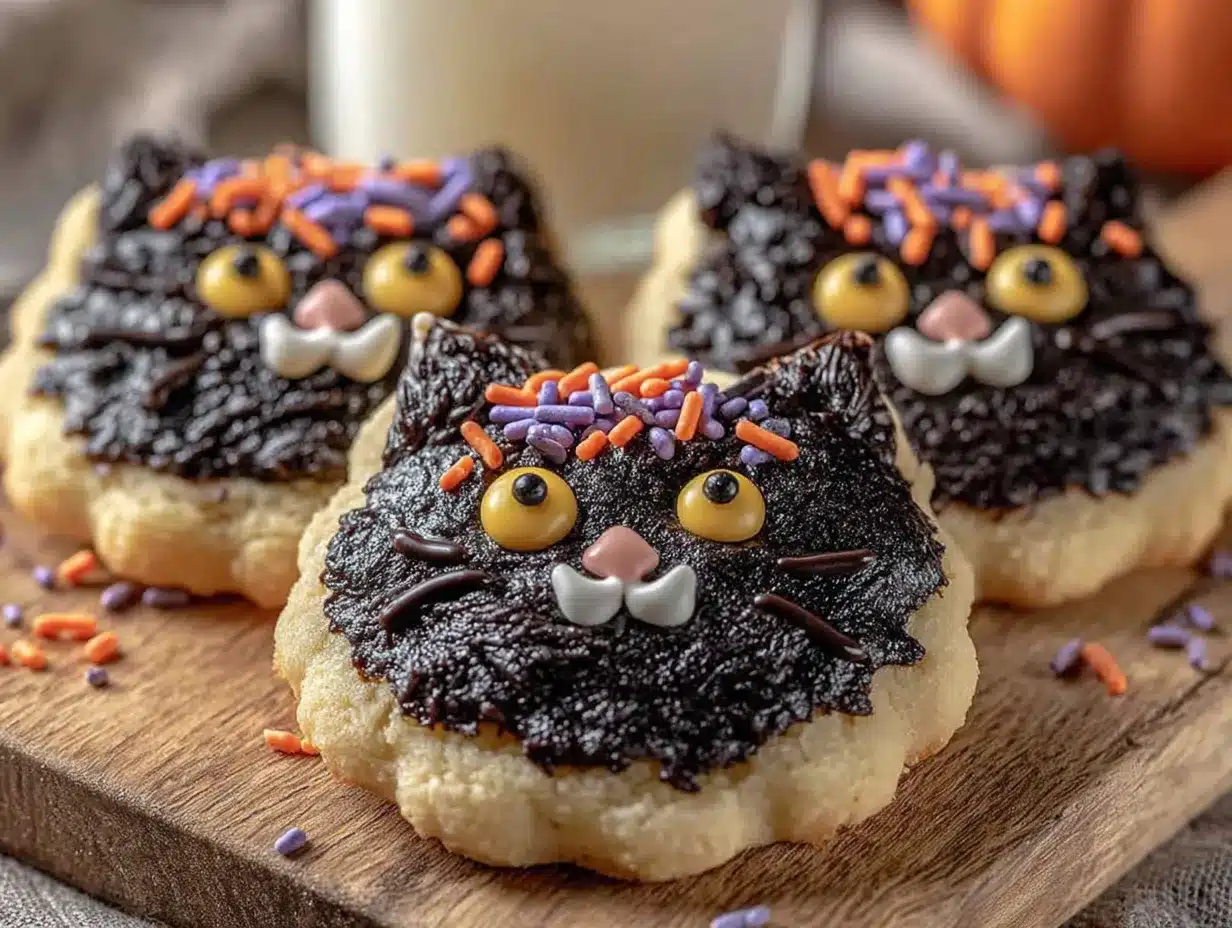
- Cream the butter and sugar – In your mixer bowl, beat the softened butter and granulated sugar together on medium speed until light and fluffy, about 3 minutes. Scrape down the sides once. You want it to look pale and airy. This is where the texture starts.
- Add the wet ingredients – Beat in the egg, vanilla extract, and almond extract until combined. It might look a little curdled at this point—don’t panic. That’s normal. Just make sure everything is incorporated.
- Mix the dry ingredients – In a separate bowl, whisk together the flour, baking powder, and salt. Gradually add this to the wet mixture, mixing on low speed. Stop as soon as the dough comes together. Overmixing will make the cookies tough.
- Color the dough (optional but fun) – If you want black cookies (not just chocolate-colored ones), add about 1 teaspoon of black gel food coloring and mix on low until the color is even. Add more if needed. The color will deepen slightly as the dough chills.
- Chill the dough – Divide the dough in half, flatten each half into a disc, wrap tightly in plastic wrap, and refrigerate for at least 1 hour. Overnight is even better. This step is non-negotiable—warm dough spreads and loses its shape.
- Preheat and prep – When you’re ready to bake, preheat your oven to 350°F (175°C). Line your baking sheets with parchment paper or silicone mats.
- Roll and cut – On a lightly floured surface, roll one disc of dough to about ¼-inch thickness. Flour your rolling pin if it sticks. Cut out cat shapes and transfer them to the prepared baking sheet, spacing them about 2 inches apart. Reroll the scraps once—after that, the dough gets tough.
- Bake – Bake for 8-10 minutes, or until the edges are just barely golden. The centers should look set but not brown. Let them cool on the baking sheet for 5 minutes, then transfer to a cooling rack to cool completely.
- Make the frosting – While the cookies cool, beat together the softened butter, powdered sugar, black cocoa powder, vanilla extract, and 2 tablespoons of milk. Add more milk a teaspoon at a time until the frosting is smooth and spreadable but not runny.
- Frost and decorate – Once the cookies are completely cool, spread or pipe the frosting onto each cat. Press two candy eyes into the frosting while it’s still soft. Add a small dot of frosting for a nose, or use a black sprinkle. Let the frosting set for about 30 minutes before stacking.
Pro tip: If you’re short on time, you can skip coloring the dough and just use the black cocoa frosting. The cookies will be a lighter color underneath, but the frosting makes them look just as adorable.
Cooking Tips & Techniques
I’ve made these cookies at least a dozen times, and I’ve learned a few things the hard way. Let me save you some trouble.
Don’t skip the chill time. I know it’s tempting to rush, but warm dough is sticky dough. It will spread in the oven, and your cats will look more like blobs with ears. If your kitchen is warm, pop the cut-out shapes back in the fridge for 10 minutes before baking.
Flour your cutter. Dip your cookie cutter in flour between cuts. It prevents the dough from sticking and tearing the edges. I learned this after my first batch came out looking like sad, earless potatoes.
Watch the bake time. Ovens vary wildly. My old oven baked these in exactly 9 minutes. My new one takes 8. Start checking at 7 minutes. The cookies are done when the edges are just barely golden—if the centers look wet, give them another minute. Remember, they continue to bake on the hot sheet after you pull them out.
Use gel food coloring, not liquid. Liquid food coloring will mess with the dough’s moisture balance. Gel is concentrated and won’t make the dough sticky. I once used liquid out of desperation and ended up adding an extra half cup of flour to fix it. The cookies were dry and sad.
Let the frosting set. If you stack the cookies too soon, the frosting will smudge and the eyes will slide off. Give them at least 30 minutes at room temperature. If you’re impatient (like me), pop them in the fridge for 15 minutes.
Variations & Adaptations
One of the best things about this recipe is how flexible it is. Here are a few ways I’ve adapted it over the years.
- Gluten-Free Version: Swap the all-purpose flour for a 1:1 gluten-free baking flour (I like Bob’s Red Mill). Add an extra tablespoon of milk to the dough because gluten-free flour tends to be more absorbent. The texture will be slightly more tender, but still delicious.
- Vegan Option: Use vegan butter (I recommend Miyoko’s) and a flax egg (1 tablespoon ground flaxseed mixed with 3 tablespoons water, let sit for 5 minutes). The cookies will be a bit more delicate, so handle them gently when transferring to the baking sheet.
- Chocolate Lovers’ Twist: Add 2 tablespoons of regular cocoa powder to the dough along with the flour. You’ll need a little extra black food coloring to keep them dark, but the double-chocolate flavor is incredible.
- Different Shapes: Don’t limit yourself to cats. This dough works beautifully with any Halloween cutter—ghosts, pumpkins, bats. Just adjust the baking time slightly if the shapes are much smaller or larger.
- Spiced Version: Add ½ teaspoon of cinnamon and ¼ teaspoon of nutmeg to the dry ingredients. It gives the cookies a subtle warmth that pairs perfectly with a cup of hot apple cider.
Serving & Storage Suggestions
These cookies are best served at room temperature. The frosting firms up nicely, so they’re easy to handle and stack on a platter.
How to serve: Arrange them on a black or orange platter for maximum Halloween vibes. They’re perfect alongside a glass of cold milk, a warm pumpkin spice latte, or a mug of hot chocolate. I’ve also served them with vanilla ice cream for a spooky sundae situation—just crumble a cookie on top.
Storage: Store the unfrosted cookies in an airtight container at room temperature for up to 5 days. Frosted cookies can be stored in a single layer (or stacked with parchment paper between layers) in an airtight container for up to 4 days. If your kitchen is warm, the fridge is better—just let them come to room temperature before serving.
Freezer instructions: You can freeze the baked, unfrosted cookies for up to 3 months. Wrap them tightly in plastic wrap and place them in a freezer bag. Thaw at room temperature before frosting. You can also freeze the dough discs for up to 3 months—just thaw in the fridge overnight before rolling and cutting.
Flavor development: Honestly, these cookies taste even better the next day. The flavors meld together, and the texture softens just slightly. If you can resist eating them all on day one, you’re in for a treat on day two.
Nutritional Information & Benefits
Let’s be real—these are cookies. They’re a treat, not a health food. But here’s the breakdown so you know what you’re working with.
Per cookie (based on 24 cookies): Approximately 180 calories, 8g fat, 26g carbohydrates, 2g protein, 15g sugar. These numbers will vary based on your exact ingredients and how much frosting you use.
Health highlights: The black cocoa powder in the frosting is rich in antioxidants (yes, really). And if you use almond extract, you get a little dose of that warm, nutty flavor without any extra sugar. Plus, baking these yourself means you control the ingredients—no preservatives, no artificial flavors (except the food coloring, but that’s your call).
Dietary considerations: This recipe contains gluten, dairy, and eggs. For a gluten-free or vegan version, see the variations section above. The black cocoa powder is naturally dairy-free, so the frosting can easily be made vegan with plant-based butter and milk.
Allergen note: The almond extract is a potential allergen for those with tree nut allergies. You can omit it and add an extra teaspoon of vanilla extract instead. The cookies will still be delicious, just slightly less complex in flavor.
I’m not a nutritionist, but I believe in balance. These cookies are meant to be enjoyed—shared with friends, eaten after a long day, or used as a bribe to get the Halloween decorations up faster. Life’s too short for boring cookies.
Conclusion
These adorable black cat sugar cookies are more than just a Halloween treat—they’re a little piece of unexpected joy. They came to me from a stranger in a hardware store, and now they’re a staple in my kitchen every October. The dough is forgiving, the frosting is rich and glossy, and the final result is just plain fun.
I hope you make these your own. Add a little extra almond extract if you’re feeling bold. Use orange frosting instead of black for a twist. Let your kids go wild with the candy eyes. The best part of baking is making a recipe yours.
If you try these, I’d love to hear about it. Drop a comment below and tell me how they turned out—did you use the candy eyes? Did your cat-shaped cookies actually look like cats? (Mine took a few tries, no judgment.) Share a photo if you’re feeling proud. And if you have a recipe story of your own, from a hardware store or anywhere else, I’m all ears.
Happy Halloween, and happy baking. May your cookies be spooky, your frosting be smooth, and your kitchen smell like butter and vanilla.
Frequently Asked Questions
Can I use regular cocoa powder instead of black cocoa?
Yes, but the color will be more of a dark brown than true black. The flavor will also be less intense and slightly more bitter. If you want that deep, Oreo-like color and taste, black cocoa is worth the purchase. You can find it in most baking supply stores or online.
Why did my cookies spread too much?
This usually happens for one of three reasons: the dough wasn’t chilled long enough, the butter was too soft, or the baking sheet was too warm. Make sure your dough chills for at least an hour, and let your baking sheets cool completely between batches. If your kitchen is hot, pop the cut-out shapes in the fridge for 10 minutes before baking.
Can I make the dough ahead of time?
Absolutely. You can make the dough up to 3 days in advance and keep it wrapped in the fridge. You can also freeze the dough discs for up to 3 months. Just thaw in the fridge overnight before rolling. This is actually my preferred method—it makes Halloween baking day so much less stressful.
How do I get the frosting perfectly smooth?
Sift your powdered sugar before adding it to the butter. Lumps in the sugar create lumps in the frosting. Also, make sure your butter is truly softened but not melted. If the frosting seems too thick, add milk one teaspoon at a time. If it’s too thin, add a little more powdered sugar. And don’t overbeat—once it’s smooth, stop.
Can I use a different cookie cutter shape?
Definitely. This dough works with any shape, but keep an eye on the bake time. Smaller shapes will bake faster (check at 6 minutes), and larger shapes may need an extra minute or two. Just watch for those lightly golden edges—that’s your cue.
Pin This Recipe!
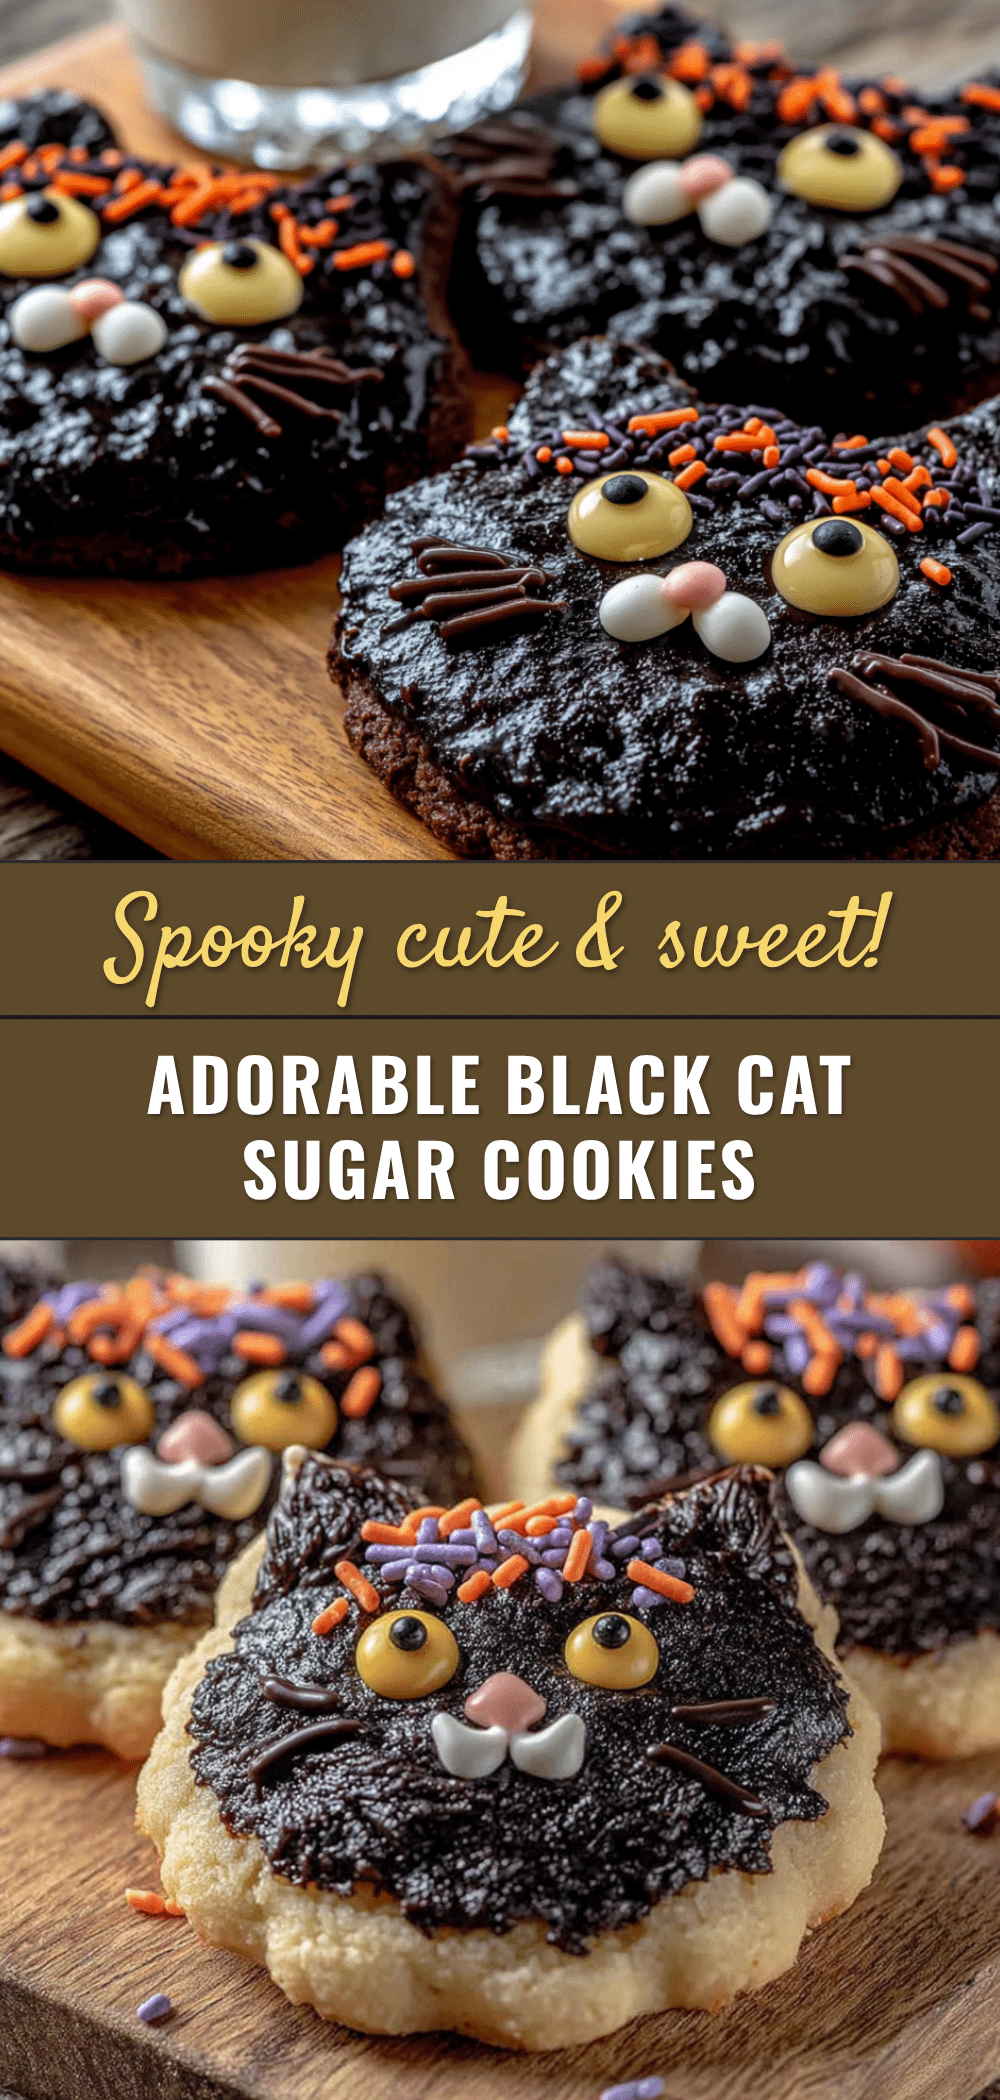
Adorable Black Cat Sugar Cookies: Easy Halloween Treats

These adorable black cat sugar cookies are not too sweet, hold their shape perfectly, and are just the right amount of spooky for Halloween. With crisp edges, soft centers, and a hint of almond extract, they’re a crowd-pleaser for parties, classrooms, or spooky movie nights.
- Prep Time: 45 minutes
- Cook Time: 10 minutes
- Total Time: 1 hour 55 minutes (includes 1 hour chilling)
- Yield: 24 cookies 1x
- Category: Dessert
- Cuisine: American
Ingredients
- 1 cup (226g) unsalted butter, softened
- 1 cup (200g) granulated sugar
- 1 large egg, room temperature
- 2 teaspoons vanilla extract
- ½ teaspoon almond extract
- 2 ½ cups (312g) all-purpose flour
- 1 teaspoon baking powder
- ½ teaspoon fine sea salt
- Black gel food coloring (optional, e.g., Americolor Super Black)
- 2 cups (240g) powdered sugar, sifted if lumpy
- ¼ cup (57g) unsalted butter, softened (for frosting)
- 2–3 tablespoons milk (whole milk preferred)
- 2 tablespoons black cocoa powder (e.g., King Arthur Flour)
- ½ teaspoon vanilla extract (for frosting)
- Candy eyes (for decoration)
- Black sprinkles or sanding sugar (optional)
Instructions
- Cream the butter and sugar: In a mixer bowl, beat the softened butter and granulated sugar together on medium speed until light and fluffy, about 3 minutes. Scrape down the sides once.
- Add the wet ingredients: Beat in the egg, vanilla extract, and almond extract until combined. It may look slightly curdled—this is normal.
- Mix the dry ingredients: In a separate bowl, whisk together the flour, baking powder, and salt. Gradually add to the wet mixture on low speed, mixing just until the dough comes together. Do not overmix.
- Color the dough (optional): Add about 1 teaspoon of black gel food coloring and mix on low until evenly colored. Add more if needed. The color will deepen as the dough chills.
- Chill the dough: Divide the dough in half, flatten each half into a disc, wrap tightly in plastic wrap, and refrigerate for at least 1 hour (overnight is better).
- Preheat and prep: Preheat oven to 350°F (175°C). Line baking sheets with parchment paper or silicone mats.
- Roll and cut: On a lightly floured surface, roll one disc of dough to about ¼-inch thickness. Cut out cat shapes and transfer to prepared baking sheets, spacing 2 inches apart. Reroll scraps once only.
- Bake: Bake for 8-10 minutes, until edges are just barely golden. Centers should look set but not brown. Cool on baking sheet for 5 minutes, then transfer to a cooling rack to cool completely.
- Make the frosting: Beat together the softened butter, powdered sugar, black cocoa powder, vanilla extract, and 2 tablespoons of milk. Add more milk a teaspoon at a time until smooth and spreadable but not runny.
- Frost and decorate: Once cookies are completely cool, spread or pipe frosting onto each cat. Press two candy eyes into the frosting while soft. Add a small dot of frosting for a nose or use a black sprinkle. Let frosting set for about 30 minutes before stacking.
Notes
Don’t skip the chill time—warm dough spreads and loses shape. Flour your cookie cutter between cuts to prevent sticking. Start checking cookies at 7 minutes; ovens vary. Use gel food coloring, not liquid, to avoid altering dough moisture. Let frosting set for at least 30 minutes before stacking. Cookies taste even better the next day.
Nutrition
- Serving Size: 1 cookie
- Calories: 180
- Sugar: 15
- Sodium: 95
- Fat: 8
- Saturated Fat: 5
- Carbohydrates: 26
- Fiber: 1
- Protein: 2
Keywords: black cat sugar cookies, Halloween cookies, sugar cookies, easy Halloween treats, black cocoa cookies, cat-shaped cookies


