Love this? Save it for later!
Share the inspiration with your friends
The summer I turned thirty, I found myself standing in the middle of a dusty antique shop in upstate New York, holding a dented pie plate that looked like it had seen better decades. I wasn’t supposed to be there. My car had overheated on the way to a friend’s lake house, and the only garage for miles was backed up until Tuesday. So there I was, killing time among chipped teacups and old linens, when the shop owner—a woman named Gladys with silver hair and a no-nonsense apron—started talking about cheesecake.
“You look like someone who needs a good recipe,” she said, not asking. She handed me a handwritten card, the ink smudged in places, with “Caramel Apple Cheesecake Bars” scrawled across the top. I almost laughed. I mean, here I was, stranded, sweaty, and definitely not in the mood for baking. But Gladys insisted. “It’s my grandmother’s,” she said. “But I lightened it up. No baking, no guilt.” I took the card, thanked her, and honestly forgot about it until I got home three days later.
That first batch I made was a mess. I used the wrong kind of apples, the caramel seized up, and I may have cried a little when I tried to lift the bars out of the pan. But the second time? Something clicked. The crust held together. The apples softened just right. And that caramel—let me tell you, it was like liquid gold. I tweaked the recipe over the next few weeks, swapping in Greek yogurt for cream cheese and cutting the sugar without losing that rich, buttery taste. The result is what I’m sharing today: these Lighter No-Bake Caramel Apple Cheesecake Bars.
Maybe you’ve been there, craving something decadent but not wanting the heavy feeling afterward. That’s exactly why this recipe stuck with me. It’s the kind of dessert that feels like a hug but doesn’t leave you regretting that second slice. Every time I make them, I think of Gladys and her dented pie plate, and I smile. Honestly, I hope these bars become that kind of memory for you too.
Why You’ll Love This Recipe
These Lighter No-Bake Caramel Apple Cheesecake Bars are the kind of dessert that makes you wonder why you ever bothered with the oven. They’re creamy, crunchy, and sweet—everything you want in a fall-inspired treat, but without the heavy feeling that usually follows. I’ve tested this recipe more times than I can count, tweaking the ratios until every layer worked in perfect harmony. Trust me, this isn’t just another no-bake recipe that falls apart or tastes like diet food.
- No Oven Required – Perfect for those warm days when turning on the oven feels like a crime. These bars come together on the stovetop and in the fridge.
- Lighter but Still Indulgent – By using reduced-fat cream cheese, Greek yogurt, and a touch less sugar, you get that rich cheesecake flavor without the calorie bomb.
- Simple Ingredients – You probably already have most of these in your pantry. No fancy extracts or hard-to-find specialty items here.
- Make-Ahead Friendly – These bars actually taste better after a few hours in the fridge, making them perfect for parties or meal prep.
- Totally Customizable – Swap the apples for pears, use a gluten-free crust, or drizzle on extra caramel. This recipe is forgiving.
What makes these different from every other no-bake cheesecake bar out there? It’s the texture. The crust is buttery and firm, not crumbly and sad. The filling is silky but holds its shape when you cut into it. And the apples—they’re cooked just enough to soften but still have a little bite. I’ve tried versions that use raw apples, and honestly, they just get watery. This method, with a quick stovetop sauté, is the secret. Plus, the caramel is made from scratch with real butter and brown sugar, so it tastes like something from a fancy bakery, not a jar.
I remember the first time I brought these to a potluck. A friend took one bite, closed her eyes, and said, “This is dangerous.” That’s exactly the reaction you want. These bars feel like a cheat meal, but they’re not. They’re comfort food reimagined—healthier, faster, but with the same soul-soothing satisfaction. Whether you’re making them for a holiday gathering or just a Tuesday night treat, they deliver every single time.
What Ingredients You Will Need
This recipe uses simple, wholesome ingredients to create layers of flavor and texture. Most of these are pantry staples, and I’ve included notes on substitutions so you can adapt based on what you have on hand.
For the Crust
- 1 ½ cups graham cracker crumbs (about 12 full sheets) – You can crush them yourself in a bag or use a food processor. For a gluten-free version, use certified gluten-free graham crackers.
- ¼ cup granulated sugar – Adds just enough sweetness to balance the salty butter.
- 6 tablespoons unsalted butter, melted – I prefer unsalted so I can control the salt level. If you only have salted, skip the pinch of salt in the crust.
- Pinch of salt – Enhances the buttery flavor.
For the Cheesecake Filling
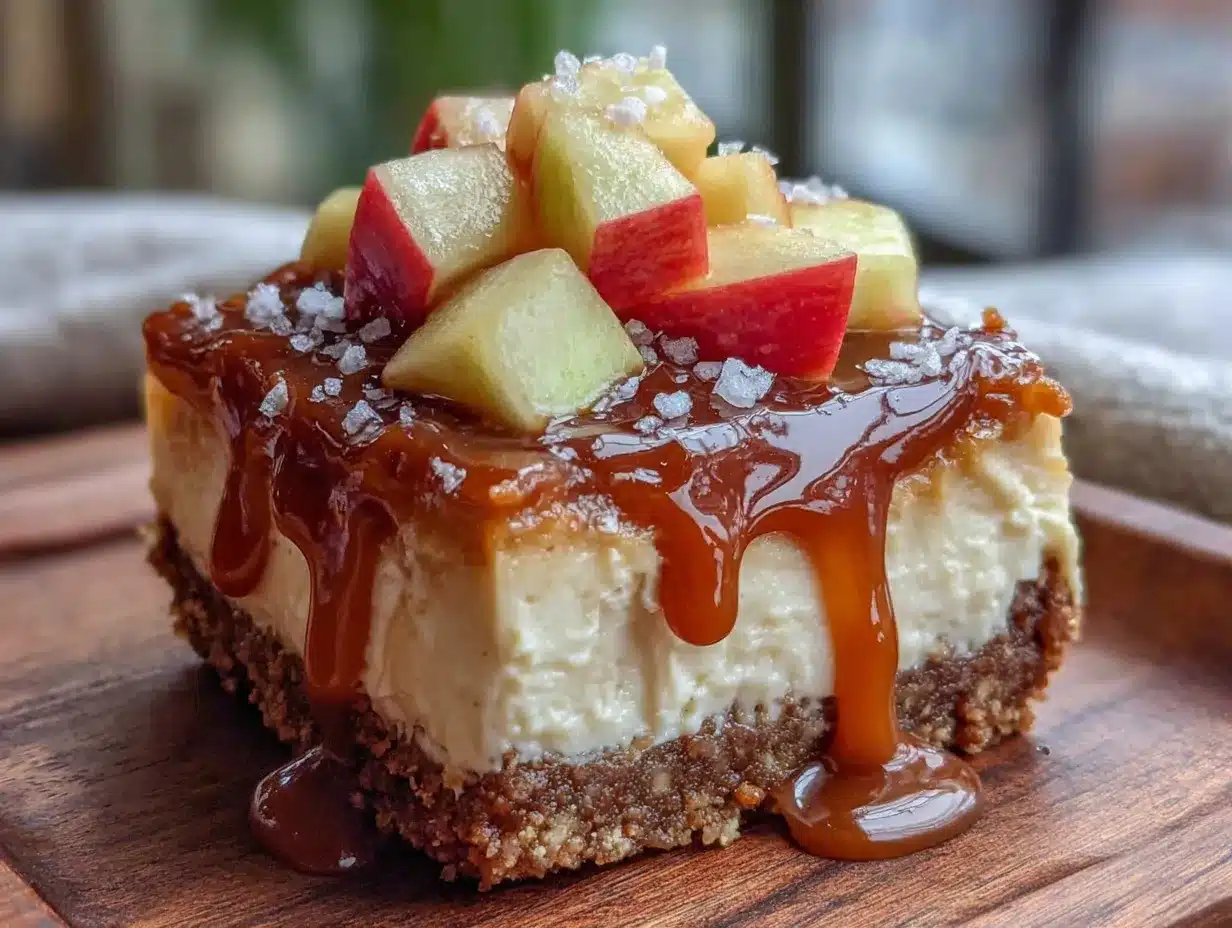
- 16 ounces reduced-fat cream cheese, softened – Full-fat works too, but the reduced-fat version keeps things lighter without sacrificing creaminess. I recommend Philadelphia for the best texture.
- ½ cup plain Greek yogurt – This adds tang and lightness. Use full-fat or 2% for the creamiest result. Dairy-free coconut yogurt works in a pinch.
- ½ cup powdered sugar – Dissolves easily into the filling, keeping it smooth.
- 1 teaspoon vanilla extract – Pure vanilla makes a difference here. Avoid imitation if you can.
- 1 tablespoon lemon juice – Brightens the flavor and helps the filling set.
For the Caramel Apple Layer
- 3 medium apples, peeled and diced – I use Honeycrisp or Granny Smith. Honeycrisp adds natural sweetness, while Granny Smith gives a tart contrast. Both work beautifully.
- 2 tablespoons unsalted butter – For sautéing the apples.
- ¼ cup brown sugar, packed – Light or dark both work. Dark adds a deeper molasses flavor.
- 1 teaspoon cinnamon – The essential fall spice. Freshly ground is best.
- ¼ teaspoon nutmeg – Optional but lovely.
- Pinch of salt – Balances the sweetness.
For the Caramel Drizzle
- ¼ cup unsalted butter – Cut into cubes for even melting.
- ½ cup brown sugar, packed – Light or dark, your choice.
- ¼ cup heavy cream – For richness. You can use half-and-half, but the caramel will be slightly thinner.
- 1 teaspoon vanilla extract – Added at the end for maximum flavor.
- Pinch of salt – A flaky sea salt on top is amazing if you have it.
Ingredient Tips: For the apples, dice them into small, even pieces—about ¼-inch cubes. This ensures they cook evenly and distribute well across the bars. If you’re short on time, you can use store-bought caramel sauce, but homemade is so much better and only takes 5 minutes. I also recommend using a good-quality vanilla extract; it really shines in the no-bake filling.
Equipment Needed
You don’t need a fancy kitchen to make these bars, but a few key tools will make the process smoother. Here’s what I use:
- 9×9-inch baking pan – This is the perfect size for thick bars. An 8×8 works too, but the bars will be slightly taller. Line it with parchment paper for easy removal.
- Food processor or zip-top bag and rolling pin – For crushing graham crackers. I prefer the food processor because it’s faster and gives a consistent crumb.
- Medium skillet – For sautéing the apples. A non-stick skillet works best to prevent sticking.
- Small saucepan – For the caramel sauce. Use a heavy-bottomed pan to prevent burning.
- Electric hand mixer or stand mixer – For beating the cream cheese filling until smooth. A whisk and some elbow grease work too, but it takes longer.
- Rubber spatula – For scraping down the bowl and spreading the filling evenly.
- Sharp knife – For clean cuts. Run it under hot water and wipe it dry between slices for neat edges.
If you don’t have a food processor, no worries. Place the graham crackers in a zip-top bag, seal it, and crush them with a rolling pin. It’s a great stress reliever, honestly. And if you don’t have a 9×9 pan, you can use a loaf pan for thicker bars or a 9×13 for thinner ones—just adjust the chilling time accordingly.
Preparation Method
Making these Lighter No-Bake Caramel Apple Cheesecake Bars is easier than you think. Follow these steps, and you’ll have a dessert that looks like it took hours of work.
- Prepare the crust. In a medium bowl, combine the graham cracker crumbs, sugar, and salt. Pour in the melted butter and stir with a fork until the mixture looks like wet sand. Press it firmly into the bottom of your parchment-lined 9×9 pan. Use the bottom of a measuring cup to really pack it down. Pop it in the fridge while you make the filling. (About 10 minutes)
- Make the cheesecake filling. In a large bowl, beat the softened cream cheese with an electric mixer until smooth and fluffy—about 2 minutes. Add the Greek yogurt, powdered sugar, vanilla extract, and lemon juice. Beat on medium speed until everything is combined and creamy. Scrape down the sides of the bowl with a rubber spatula. Taste it. Yes, it’s that good. Spread the filling evenly over the chilled crust. Smooth the top with the spatula. Return the pan to the fridge.
- Cook the apples. In a medium skillet over medium heat, melt the 2 tablespoons of butter. Add the diced apples, brown sugar, cinnamon, nutmeg, and a pinch of salt. Stir to coat. Cook for 5-7 minutes, stirring occasionally, until the apples are tender but not mushy. You want them to hold their shape. Remove from heat and let them cool for 5 minutes. If they’re too hot, they’ll melt the cheesecake layer.
- Make the caramel sauce. In a small saucepan over medium heat, melt the ¼ cup of butter. Add the brown sugar and cream, whisking constantly. Bring the mixture to a gentle boil, then reduce the heat to low. Let it simmer for 2-3 minutes, whisking often, until it thickens slightly. Remove from heat and stir in the vanilla and a pinch of salt. Let it cool for 5 minutes. It will thicken more as it cools.
- Assemble the layers. Spoon the cooked apples evenly over the cheesecake filling. Gently press them down with the back of a spoon. Drizzle about half of the caramel sauce over the apples. Reserve the rest for serving. Use a toothpick or knife to swirl the caramel into the apples a little, but don’t overdo it—you want distinct layers.
- Chill the bars. Cover the pan with plastic wrap and refrigerate for at least 4 hours, but overnight is best. The filling needs time to set properly. I know it’s hard to wait, but trust me, the texture is so much better after a full night in the fridge.
- Slice and serve. When ready to serve, lift the bars out of the pan using the parchment paper. Place them on a cutting board. Use a sharp knife to cut into 16 squares. For clean slices, wipe the knife between cuts. Drizzle with the remaining caramel sauce and a sprinkle of flaky sea salt if you’re feeling fancy.
Pro tip: If the caramel sauce gets too thick while it sits, just microwave it for 10-15 seconds to loosen it up. And if you’re in a hurry, you can speed up the chilling process by placing the pan in the freezer for 1-2 hours, but watch it closely—you don’t want it frozen solid.
Cooking Tips & Techniques
After making these bars more times than I can count, I’ve learned a few things the hard way. Here are my best tips to ensure success every time.
Don’t skip the lemon juice. It might seem like a small detail, but the acid in the lemon juice helps the cream cheese filling set properly. Without it, the filling can be a bit loose. Plus, it brightens the flavor and balances the sweetness.
Use room temperature cream cheese. This is non-negotiable. Cold cream cheese will leave you with lumpy filling. Take it out of the fridge about 30 minutes before you start. If you forget, you can microwave it in 10-second bursts until soft, but be careful not to melt it.
Pack the crust firmly. A loose crust will crumble when you cut the bars. Use the bottom of a measuring cup or a flat glass to really press it down. I’ve made the mistake of being too gentle, and I ended up with crust all over my cutting board. Learn from my failure.
Cool the apples completely. I know it’s tempting to pile warm apples onto the cheesecake layer, but heat will melt the filling and create a messy, soupy layer. Let them sit for at least 5-10 minutes. If they’re still warm, spread them on a plate and pop them in the fridge for a few minutes.
Patience with the caramel. Caramel can be finicky. Don’t walk away from the saucepan. Whisk constantly to prevent burning. If you see any dark spots forming, reduce the heat immediately. And remember, the caramel will continue to thicken as it cools, so don’t cook it too long on the stove.
Use a wet knife for clean slices. Run your knife under hot water, wipe it dry, then cut. Repeat between each slice. This gives you those beautiful, clean edges that look like they came from a bakery. Honestly, it’s the little things that make a big difference.
I once tried to rush the chilling process and cut the bars after only 2 hours. They were a disaster—the filling oozed out, and the layers mixed together. It still tasted good, but it looked like a mess. So learn from my impatience. Give them the full 4 hours, or better yet, overnight.
Variations & Adaptations
One of the best things about this recipe is how flexible it is. Here are some variations I’ve tried and loved.
Gluten-Free Version
Swap the graham crackers for gluten-free graham crackers or use crushed gluten-free shortbread cookies. The rest of the recipe is naturally gluten-free, so this is an easy fix. I’ve used the Schär brand graham crackers, and they work perfectly.
Vegan Option
Use vegan cream cheese and dairy-free Greek yogurt for the filling. Replace the butter in the crust with melted coconut oil. For the caramel, use coconut cream instead of heavy cream and vegan butter. The texture will be slightly different, but it’s still delicious. I’ve tested this with Kite Hill cream cheese, and it turned out great.
Low-Carb/Keto Adaptation
For a lower-carb version, use almond flour and butter for the crust, sweeten the filling with a monk fruit or erythritol-based powdered sweetener, and skip the apples or use a small amount of diced pears. The caramel can be made with a sugar-free brown sugar substitute. It won’t be exactly the same, but it satisfies that craving.
Seasonal Twists
In the fall, add a tablespoon of pumpkin purée to the cheesecake filling for a pumpkin apple combo. In the summer, swap the apples for fresh peaches or nectarines. In winter, try pears with a pinch of ginger. The possibilities are endless.
Flavor Boost
Add a teaspoon of bourbon or dark rum to the caramel sauce for a grown-up twist. Or mix a tablespoon of caramel sauce into the cheesecake filling before spreading it. I once added a layer of chopped pecans between the crust and filling, and it added a lovely crunch.
My personal favorite variation? I made these for a Fourth of July barbecue and used a mix of apples and fresh blueberries. The blueberries burst in the skillet and created this gorgeous purple swirl. It was a hit. Don’t be afraid to experiment—this recipe is forgiving.
Serving & Storage Suggestions
These bars are best served cold, straight from the fridge. The filling is firm but creamy, and the caramel is at the perfect consistency. If you let them sit at room temperature for too long, the crust can get soggy, so keep them chilled until you’re ready to serve.
Serving Ideas: I love to serve these bars with a dollop of whipped cream and an extra drizzle of caramel. A sprinkle of flaky sea salt on top takes them to another level. For a complete dessert board, pair them with fresh apple slices, cinnamon sticks, and a cup of hot cider or coffee. They also go beautifully with a scoop of vanilla ice cream or a drizzle of warm caramel.
Storage: Store any leftovers in an airtight container in the refrigerator for up to 5 days. The bars actually get better after a day or two as the flavors meld together. If you need to stack them, place a piece of parchment paper between layers to prevent sticking.
Freezing Instructions: These bars freeze beautifully. Wrap the entire slab (or individual bars) tightly in plastic wrap, then in aluminum foil. Freeze for up to 3 months. To thaw, transfer them to the refrigerator overnight. Don’t thaw at room temperature, or the crust might get mushy. I’ve frozen them for a month and they tasted just as good as fresh.
Reheating Tips: I usually eat these cold, but if you prefer a softer texture, let them sit at room temperature for 10-15 minutes before serving. You can also microwave individual bars for 10-15 seconds to soften the caramel slightly. Just don’t overdo it, or the filling will warm up too much.
One thing I’ve noticed is that the caramel sauce can get absorbed into the apples after a day or two. If that happens, just drizzle a little extra fresh caramel on top before serving. It revives the whole dessert.
Nutritional Information & Benefits
These Lighter No-Bake Caramel Apple Cheesecake Bars are a treat, but they’re made with a few smart swaps that make them a better choice than traditional cheesecake bars. Here’s the approximate nutritional breakdown per bar (based on 16 servings):
- Calories: 245
- Fat: 14g
- Saturated Fat: 8g
- Carbohydrates: 28g
- Fiber: 1g
- Sugar: 20g
- Protein: 4g
Health Benefits: The apples provide dietary fiber and vitamin C, while the Greek yogurt adds protein and probiotics for gut health. Using reduced-fat cream cheese cuts the saturated fat without sacrificing creaminess. The cinnamon in the apple layer is known for its anti-inflammatory properties and can help regulate blood sugar. Compared to a traditional no-bake cheesecake bar, this version has about 30% fewer calories and less sugar.
Dietary Considerations: This recipe is vegetarian. For a gluten-free option, use gluten-free graham crackers. For a lower-sugar version, reduce the sugar in the filling and caramel by half, or use a sugar substitute. The recipe contains dairy and gluten (unless modified), so keep that in mind for allergies.
I’m not a nutritionist, but I do believe in balance. These bars are a dessert, not a health food, but they’re made with real ingredients and less sugar than most. That’s a win in my book. If you’re watching your portions, one bar is plenty satisfying—they’re rich and decadent without being heavy.
Conclusion
These Lighter No-Bake Caramel Apple Cheesecake Bars are proof that you can have something indulgent without the guilt. They’re creamy, crunchy, sweet, and tangy all at once, and they come together without ever turning on the oven. Whether you’re making them for a fall gathering, a summer barbecue, or just a quiet night in, they deliver every single time.
I love this recipe because it reminds me that good food doesn’t have to be complicated. It came from a stranger in an antique shop, and now it’s become a staple in my kitchen. I hope you’ll make it your own—add your favorite apples, swap in a different spice, or double the caramel. There’s no wrong way to enjoy these bars.
If you make these, I’d love to hear about it. Drop a comment below and let me know how they turned out. Did you try a variation? Did your family love them? Share your photos and tag me on social media. I can’t wait to see what you create. And if you’re looking for more lighter dessert ideas, check out my healthy no-bake desserts collection. Happy cooking, friend!
Frequently Asked Questions
Can I use store-bought caramel instead of making my own?
Absolutely. If you’re short on time, a high-quality store-bought caramel sauce works perfectly. Just look for one made with real butter and cream for the best flavor. Warm it slightly before drizzling so it spreads easily.
Can I make these bars dairy-free?
Yes. Use dairy-free cream cheese, coconut yogurt, and vegan butter. For the caramel, use coconut cream and vegan butter. The texture will be a bit different, but it’s still delicious. I’ve tested it with Kite Hill brand cream cheese, and it worked well.
How long do these bars need to chill?
At least 4 hours, but overnight is best. The filling needs time to set properly. If you’re in a rush, you can freeze them for 1-2 hours, but watch them closely—you don’t want them frozen solid. The longer they chill, the cleaner the slices.
What kind of apples are best for this recipe?
I recommend Honeycrisp for sweetness or Granny Smith for tartness. Both hold their shape well when cooked. Avoid soft apples like Red Delicious, as they can turn mushy. A mix of sweet and tart apples is also lovely.
Can I double this recipe for a larger crowd?
Yes. Double all the ingredients and use a 9×13-inch pan. The chilling time may need to be extended by an hour or two to ensure the center sets properly. You’ll get about 24 bars from a doubled batch. Perfect for parties!
Pin This Recipe!
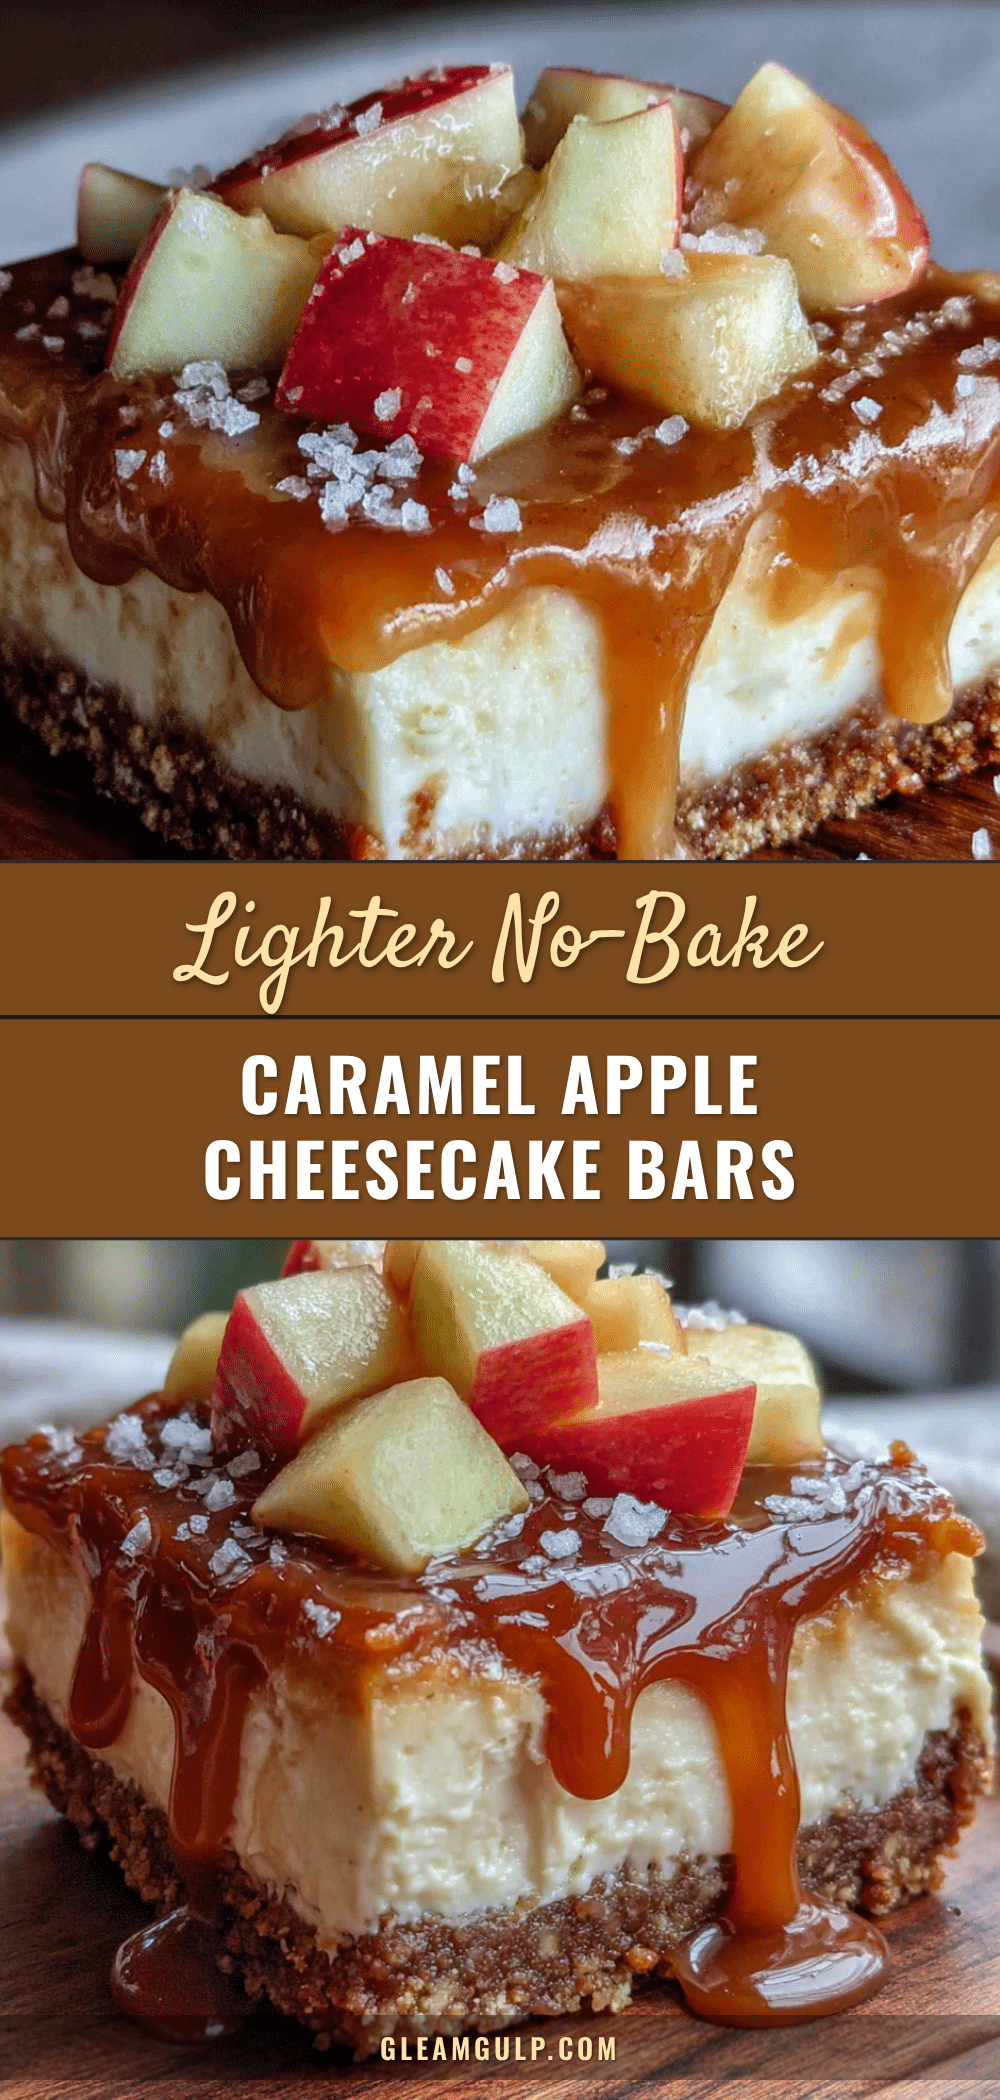
Best No-Bake Caramel Apple Cheesecake Bars
These Lighter No-Bake Caramel Apple Cheesecake Bars are creamy, crunchy, and sweet—everything you want in a fall-inspired treat, but without the heavy feeling. They come together on the stovetop and in the fridge, using simple ingredients for a guilt-free indulgence.
- Prep Time: 20 minutes
- Cook Time: 15 minutes
- Total Time: 4 hours 35 minutes (includes chilling)
- Yield: 16 servings 1x
- Category: Dessert
- Cuisine: American
Ingredients
- 1 ½ cups graham cracker crumbs (about 12 full sheets)
- ¼ cup granulated sugar
- 6 tablespoons unsalted butter, melted
- Pinch of salt
- 16 ounces reduced-fat cream cheese, softened
- ½ cup plain Greek yogurt
- ½ cup powdered sugar
- 1 teaspoon vanilla extract
- 1 tablespoon lemon juice
- 3 medium apples, peeled and diced (Honeycrisp or Granny Smith)
- 2 tablespoons unsalted butter
- ¼ cup brown sugar, packed
- 1 teaspoon cinnamon
- ¼ teaspoon nutmeg (optional)
- Pinch of salt
- ¼ cup unsalted butter, cut into cubes
- ½ cup brown sugar, packed
- ¼ cup heavy cream
- 1 teaspoon vanilla extract
- Pinch of salt
Instructions
- Prepare the crust: In a medium bowl, combine graham cracker crumbs, sugar, and salt. Pour in melted butter and stir with a fork until the mixture looks like wet sand. Press firmly into the bottom of a parchment-lined 9×9-inch pan. Refrigerate for about 10 minutes.
- Make the cheesecake filling: In a large bowl, beat softened cream cheese with an electric mixer until smooth and fluffy (about 2 minutes). Add Greek yogurt, powdered sugar, vanilla extract, and lemon juice. Beat on medium speed until combined and creamy. Spread evenly over the chilled crust. Return to fridge.
- Cook the apples: In a medium skillet over medium heat, melt 2 tablespoons butter. Add diced apples, brown sugar, cinnamon, nutmeg, and a pinch of salt. Cook for 5-7 minutes, stirring occasionally, until apples are tender but not mushy. Remove from heat and let cool for 5 minutes.
- Make the caramel sauce: In a small saucepan over medium heat, melt ¼ cup butter. Add brown sugar and cream, whisking constantly. Bring to a gentle boil, then reduce heat to low. Simmer for 2-3 minutes, whisking often, until slightly thickened. Remove from heat and stir in vanilla and a pinch of salt. Let cool for 5 minutes.
- Assemble the layers: Spoon cooked apples evenly over the cheesecake filling. Gently press down with the back of a spoon. Drizzle about half of the caramel sauce over the apples. Reserve the rest for serving. Swirl caramel into apples with a toothpick or knife, but keep distinct layers.
- Chill the bars: Cover the pan with plastic wrap and refrigerate for at least 4 hours, preferably overnight.
- Slice and serve: Lift bars out of pan using parchment paper. Cut into 16 squares with a sharp knife (wipe knife between cuts). Drizzle with remaining caramel sauce and sprinkle with flaky sea salt if desired.
Notes
For clean slices, run knife under hot water and wipe dry between cuts. If caramel thickens, microwave for 10-15 seconds. For quicker chill, freeze for 1-2 hours but watch closely. Use room temperature cream cheese for smooth filling. Cool apples completely before adding to prevent melting the cheesecake layer.
Nutrition
- Serving Size: 1 bar
- Calories: 245
- Sugar: 20
- Sodium: 180
- Fat: 14
- Saturated Fat: 8
- Carbohydrates: 28
- Fiber: 1
- Protein: 4
Keywords: no-bake, caramel apple, cheesecake bars, lighter, fall dessert, easy dessert


