Love this? Save it for later!
Share the inspiration with your friends
There used to be a tiny, sun-faded health food store on the corner of Elm and 4th that made these unbelievable peanut butter protein balls. When they closed after the owner retired, I felt a little lost. I mean, those little bites got me through a solid year of afternoon slumps. After 12 tries—some crumbly disasters, one that was basically peanut butter soup—I finally got it.
I remember standing in my kitchen, staring at a bowl of oats and peanut butter, trying to channel that old store’s magic. The secret, I learned, wasn’t in some fancy superfood powder. It was in the ratio—that perfect balance where everything sticks together without being sticky, you know? These easy high-protein peanut butter balls are the result of that obsession, and honestly, they’re better than the originals.
Maybe you’ve been there too. You find that one snack that just works, and then poof—it’s gone. These no-bake protein balls are my answer to that problem. They come together in about 15 minutes, and the best part is that you probably already have everything you need in your pantry. Let me tell you, the first time I rolled one of these and took a bite, I actually laughed out loud. It was that good. This recipe stayed with me because it’s the kind of snack that solves real problems—hunger, time crunches, and that craving for something that actually tastes like a treat but fuels you like a meal.
Why You’ll Love These Easy High-Protein Peanut Butter Balls
I’ve tested this recipe more times than I care to admit, and here’s the honest truth: these are the best no-bake protein balls I’ve ever made. They check every single box for what a great snack should be.
- Quick & Easy: We’re talking 15 minutes from start to finish. No oven, no baking sheet, no waiting around. Just mix, roll, and eat.
- Simple Ingredients: You need oats, peanut butter, honey, protein powder, and a few mix-ins. No weird stuff you have to order online or hunt down at a specialty store.
- Perfect for Busy Days: These are my go-to for pre-workout fuel, post-lunch cravings, and those 3 PM slumps when you need something to keep you going until dinner.
- Crowd-Pleaser: I’ve brought these to potlucks, road trips, and family gatherings. Kids love them, adults love them, and nobody ever guesses they’re packed with protein.
- Unbelievably Delicious: The texture is this perfect balance of chewy and soft, with little crunchy bits from the mix-ins. It’s comfort food that actually does something good for your body.
What makes these different from every other protein ball recipe out there? It’s the technique. I blend the oats just slightly before mixing them in, which gives the balls a more cohesive texture without turning them into dust. And I use a specific ratio of wet to dry ingredients that took me way too many batches to figure out. Trust me, this isn’t just another version—it’s the version I reach for every single week.
These easy high-protein peanut butter balls are the kind of snack that makes you feel good about eating something that tastes this good. It’s comfort food reimagined—healthier, faster, but with the same soul-soothing satisfaction you get from a real treat.
What Ingredients You Will Need
This recipe uses simple, wholesome ingredients to deliver bold peanut butter flavor and satisfying texture without any fuss. These are all pantry staples that you probably have on hand right now.
For the Protein Balls
- 1 cup old-fashioned rolled oats (use certified gluten-free if needed; quick oats work too, but the texture will be a bit softer)
- 1/2 cup creamy peanut butter (I recommend natural peanut butter with just peanuts and salt—no added sugar or oils—for the best texture and flavor; brands like Smucker’s Natural or Justin’s work great)
- 1/3 cup honey (or maple syrup for a vegan option; the honey adds a nice floral sweetness that balances the peanut butter perfectly)
- 1/2 cup vanilla or unflavored protein powder (I use Orgain Simple or Vega for clean ingredients; whey protein gives a firmer texture, while plant-based protein makes them slightly softer)
- 1/4 cup mini chocolate chips (optional but highly recommended; Enjoy Life makes a great dairy-free option)
- 1 tablespoon chia seeds or flaxseed meal (adds extra fiber and helps bind everything together; both work equally well)
- 1/4 teaspoon salt (skip this if your peanut butter is already salted; a little salt really makes the flavors pop)
- 1-2 tablespoons water or milk of choice (only if needed to help the mixture come together; start with 1 tablespoon and add more if the dough feels too dry)
Ingredient Tips and Substitutions
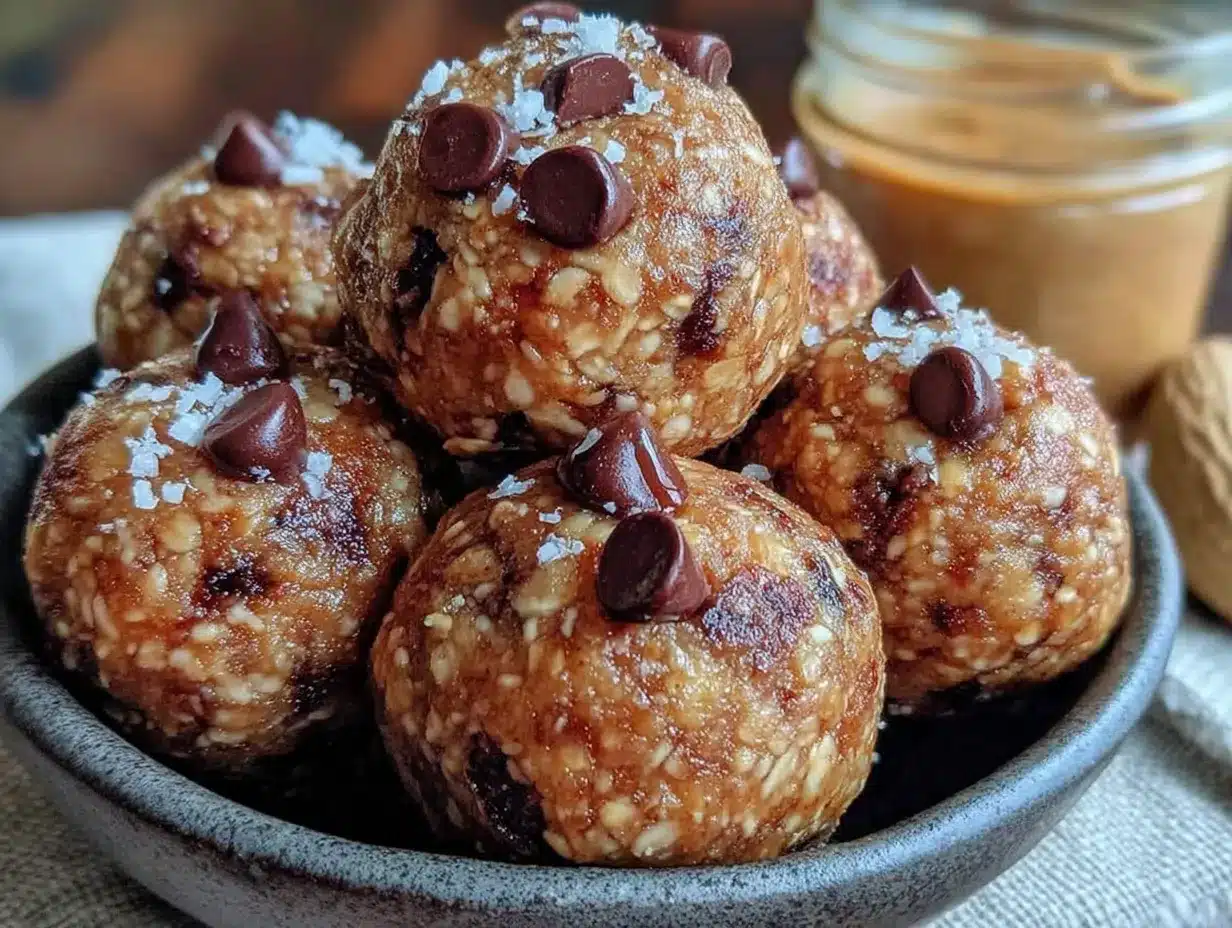
If you’re using a really thick natural peanut butter, you might need to add a splash of water to help everything mix. I’ve found that cheaper peanut butters with added oils actually make the balls too greasy, so stick with the good stuff. For a nut-free version, try sunflower seed butter—it works beautifully, though the color will be a bit greener (don’t worry, that’s normal!).
I prefer old-fashioned oats over quick oats because they give the balls a nicer chew. But if all you have are quick oats, go ahead and use them—just know the texture will be a little softer and less distinct. And if you want to skip the protein powder altogether, you can add an extra 1/2 cup of oats and 2 tablespoons of peanut butter instead. They won’t be as high in protein, but they’ll still taste amazing.
Equipment Needed
You don’t need much to make these easy high-protein peanut butter balls, which is honestly one of my favorite things about this recipe.
- Large mixing bowl (any size works, but you want enough room to get your hands in there)
- Measuring cups and spoons (I use a 1/4 cup measure for portioning the balls, but a cookie scoop works even better)
- Rubber spatula or wooden spoon (for the initial mixing before you get your hands dirty)
- Parchment paper or wax paper (to line your baking sheet or plate for chilling)
- Baking sheet or large plate (something flat that fits in your fridge)
- Food processor or blender (optional, but I love pulsing the oats a few times to get a finer texture; you can skip this step entirely if you prefer chunkier balls)
- Cookie scoop or small ice cream scoop (a 1-tablespoon scoop makes perfectly uniform balls; I got mine for like $8 on Amazon and it’s one of my most-used tools)
If you don’t have a food processor, no worries at all. Just use the oats as they are. I actually made these for years without one, and they turned out great. The only tool you absolutely need is a bowl and a spoon—everything else is just for convenience.
Preparation Method
These no-bake protein balls come together fast, so I like to have everything measured out and ready to go before I start. Trust me, it makes the process so much smoother.
- Prep the oats (optional but recommended): Add the rolled oats to your food processor or blender and pulse 5-6 times, just until they’re broken down a bit. You want some texture still—don’t grind them into flour. This step makes the balls hold together better and gives them a more uniform texture. If you’re skipping this step, just move on to the next one.
- Mix the dry ingredients: In a large mixing bowl, combine the pulsed oats, protein powder, chia seeds or flaxseed meal, and salt. Whisk them together with a fork until everything is evenly distributed. This ensures you don’t get pockets of plain protein powder in your balls—I learned that one the hard way.
- Add the wet ingredients: Add the peanut butter and honey to the bowl. Use a rubber spatula or wooden spoon to start mixing everything together. It’ll look dry and crumbly at first—don’t panic. Keep stirring and pressing the mixture against the sides of the bowl. After about a minute, it should start coming together.
- Check the consistency: The mixture should hold together when you squeeze a bit in your hand. If it feels too dry and crumbly, add water or milk one tablespoon at a time, mixing well after each addition. If it feels too sticky or wet, add a tablespoon of oats or protein powder. The perfect texture is like a soft cookie dough—firm but pliable.
- Fold in the chocolate chips: Once the base mixture is well combined, gently fold in the mini chocolate chips. Make sure they’re evenly distributed throughout the dough. This is the moment when you start to get really excited about what you’re making.
- Chill the mixture (optional but helpful): If your kitchen is warm or your hands run hot, pop the bowl in the fridge for 15-20 minutes. This makes the dough easier to handle and prevents the balls from being too sticky. I usually skip this step in winter but always do it in summer.
- Roll into balls: Using a cookie scoop or a tablespoon, portion out the dough and roll it between your palms into smooth balls. I aim for about 1 to 1.5 tablespoons per ball—big enough to be satisfying, small enough to be a snack. You should get 12-14 balls depending on the size.
- Place on a lined baking sheet: Arrange the balls on a parchment-lined baking sheet or plate. Leave a little space between them so they don’t stick together if they’re still slightly warm.
- Chill to set: Refrigerate the balls for at least 30 minutes before eating. This helps them firm up and makes the texture perfect. I know it’s hard to wait, but trust me—it’s worth it.
Your kitchen should smell like peanut butter and honey at this point, and the dough should feel smooth and slightly cool in your hands. The chocolate chips will be visible little speckles throughout the balls. When you bite into one, you should get a soft, chewy texture with little bursts of sweetness from the chocolate.
Cooking Tips & Techniques
I’ve made these easy high-protein peanut butter balls more times than I can count, and I’ve definitely learned a few things along the way. Here are my best tips for getting them perfect every time.
Use room temperature ingredients. Cold peanut butter straight from the fridge is a nightmare to mix. Let it sit out for 15-20 minutes before you start, or microwave it for 10 seconds to soften it up. This makes a huge difference in how easily everything comes together.
Don’t overmix. Once you add the wet ingredients, mix just until everything is combined. Overmixing can make the oats release too much starch, which makes the balls dense and gummy. You want them tender, not tough.
Wet your hands slightly. If the dough is sticking to your palms while you roll, dampen your hands with a little water. This trick works like magic. Just don’t use too much water, or the balls will get soggy.
Chill between rolling if needed. If you’re making a double batch and the dough starts getting too soft, pop it back in the fridge for 10 minutes. Warm hands can really soften the mixture, especially in summer.
Use a cookie scoop for uniform size. This isn’t just about aesthetics—uniform balls chill at the same rate and have consistent texture. Plus, it makes portioning easier if you’re tracking macros.
I once made a batch where I forgot the protein powder entirely. It was a total disaster—the balls were so sticky I couldn’t even roll them. I ended up just eating the mixture with a spoon, which honestly wasn’t the worst thing in the world. But that mistake taught me how important the protein powder is for structure. Don’t skip it!
Variations & Adaptations
One of the best things about this recipe is how easy it is to change up. Here are some of my favorite variations that I’ve tested and loved.
Chocolate Peanut Butter Protein Balls
Swap 2 tablespoons of the oats for 2 tablespoons of unsweetened cocoa powder. The chocolate and peanut butter combination is absolutely irresistible. You might need an extra tablespoon of honey to balance the bitterness of the cocoa.
Vegan Protein Balls
Use maple syrup instead of honey, and choose a plant-based protein powder. Make sure your chocolate chips are dairy-free. Everything else stays the same, and they taste just as amazing.
Crunchy Peanut Butter Version
Swap the creamy peanut butter for crunchy peanut butter. The little bits of peanut add amazing texture and make each bite more interesting. This is my husband’s favorite version.
Low-Carb/Keto Option
Replace the oats with almond flour or coconut flour, and use a sugar-free sweetener like monk fruit or erythritol instead of honey. Use a low-carb protein powder. The texture will be a bit different—denser and more crumbly—but still delicious.
Add-In Ideas
Try shredded coconut, dried cranberries, chopped nuts, or even a pinch of cinnamon. I once added a tablespoon of instant coffee granules for a mocha flavor, and it was incredible. Don’t be afraid to experiment!
Serving & Storage Suggestions
These easy high-protein peanut butter balls are best served cold or at room temperature. I personally love them straight out of the fridge—they’re firm and chewy, with a satisfying bite. If you prefer a softer texture, let them sit at room temperature for 5-10 minutes before eating.
They’re perfect for so many occasions: pre-workout fuel, a quick breakfast on the go, an afternoon snack, or even a healthier dessert. I love packing them in lunchboxes for my kids, and they’re a lifesaver on road trips. Pair them with a piece of fruit or a glass of milk for a more substantial snack.
Storage Instructions:
- Refrigerator: Store in an airtight container for up to 2 weeks. I like to layer them between sheets of parchment paper so they don’t stick together.
- Freezer: These freeze beautifully. Place the balls in a single layer on a baking sheet and freeze for 1 hour, then transfer to a freezer-safe bag or container. They’ll keep for up to 3 months. You can eat them straight from the freezer—they’re like little protein ice cream bites!
- Room Temperature: If you’re taking them on the go, they’ll be fine at room temperature for a day or two. Just keep them in a cool, dry place away from direct sunlight.
The flavors actually develop and meld together after a day or two in the fridge. I honestly think they taste even better on day two than they do on day one. The oats soften slightly, and everything just comes together perfectly.
Nutritional Information & Benefits
Here’s the approximate nutritional breakdown for one protein ball (based on 12 servings, using the recipe as written):
- Calories: 145-165
- Protein: 8-10 grams
- Carbohydrates: 16-18 grams
- Fiber: 3-4 grams
- Fat: 7-9 grams
- Sugar: 8-10 grams (naturally occurring from honey and chocolate chips)
These numbers can vary based on the specific brands of protein powder and peanut butter you use, so check your labels if you’re tracking closely.
The health benefits here are pretty impressive. Peanut butter provides healthy monounsaturated fats and plant-based protein that keeps you full and satisfied. Oats are packed with fiber that supports digestion and helps stabilize blood sugar. Chia seeds add omega-3 fatty acids and extra fiber, while the protein powder gives your muscles what they need for recovery and growth.
This recipe is naturally gluten-free if you use certified gluten-free oats, and it can easily be made dairy-free by choosing appropriate chocolate chips. They’re perfect for anyone looking for a balanced, nutrient-dense snack that actually tastes like a treat.
Conclusion
These easy high-protein peanut butter balls are more than just a snack—they’re a solution. They solve the problem of what to eat when you’re hungry but busy, when you need energy but don’t want junk, and when you crave something sweet but want it to actually do something good for your body.
I love this recipe because it’s forgiving, flexible, and completely foolproof. Whether you’re a seasoned meal prepper or someone who’s never made a protein ball in your life, you can make these. They’re the kind of recipe that becomes a habit, the one you find yourself making every Sunday without even thinking about it.
I’d love to hear how yours turn out! Did you try any fun variations? Did you add something unexpected that worked? Drop a comment below and let me know—I read every single one and I love getting inspired by your creativity. And if you loved these, don’t forget to share this post with a friend who needs a better snack in their life. Happy rolling, friend!
Frequently Asked Questions
Can I make these without protein powder?
Absolutely! Just replace the protein powder with an extra 1/2 cup of oats and 2 tablespoons of peanut butter. They won’t have as much protein, but they’ll still taste great and hold together well.
Why are my protein balls too dry and crumbly?
This usually happens when the peanut butter is too thick or the protein powder is very dry. Add water or milk one tablespoon at a time until the mixture holds together when squeezed. Also, make sure your peanut butter is at room temperature before mixing.
How long do these protein balls last?
They’ll keep in the fridge for up to 2 weeks in an airtight container, or in the freezer for up to 3 months. I honestly don’t think they’ve ever lasted that long in my house, though!
Can I use crunchy peanut butter instead of creamy?
Yes, and it’s delicious! The texture will be a bit different with the peanut pieces, but the recipe works exactly the same. You might need an extra tablespoon of honey or water to help everything stick together.
Are these protein balls kid-friendly?
Absolutely! My kids devour these. They’re the perfect size for little hands, and they taste like a treat. Just be mindful of the protein powder you use—some can have a strong taste that kids might not love. Vanilla-flavored protein powder is usually a safe bet.
Pin This Recipe!
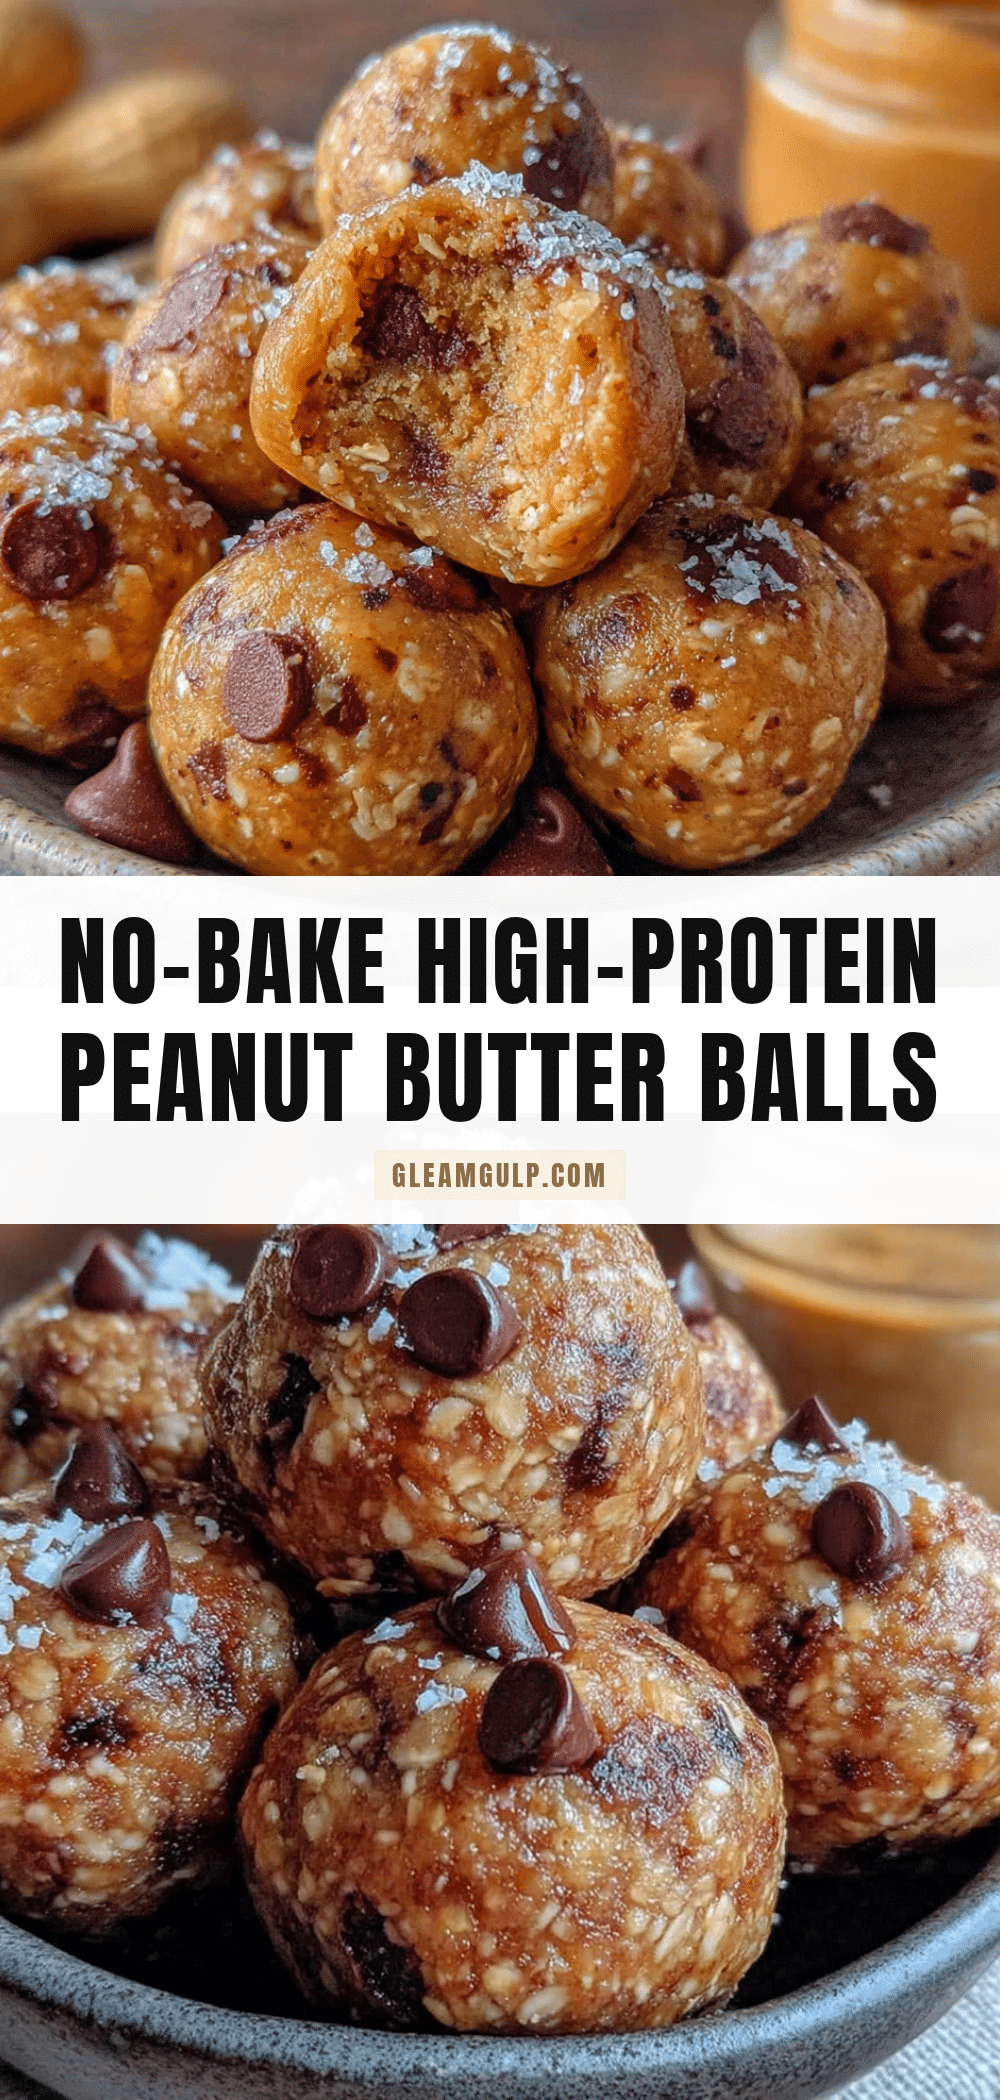
Easy High-Protein Peanut Butter Balls: Best No-Bake Snack
These easy high-protein peanut butter balls are the perfect no-bake snack, ready in just 15 minutes. Made with simple pantry ingredients like oats, peanut butter, honey, and protein powder, they’re chewy, delicious, and ideal for busy days, pre-workout fuel, or a healthy treat.
- Prep Time: 15 minutes
- Cook Time: 0 minutes
- Total Time: 45 minutes (includes 30 minutes chilling time)
- Yield: 12-14 servings 1x
- Category: Snack
- Cuisine: American
Ingredients
- 1 cup old-fashioned rolled oats (use certified gluten-free if needed; quick oats work too, but the texture will be a bit softer)
- 1/2 cup creamy peanut butter (natural peanut butter with just peanuts and salt recommended; brands like Smucker’s Natural or Justin’s work great)
- 1/3 cup honey (or maple syrup for a vegan option)
- 1/2 cup vanilla or unflavored protein powder (Orgain Simple or Vega recommended; whey gives firmer texture, plant-based makes them softer)
- 1/4 cup mini chocolate chips (optional; Enjoy Life makes a great dairy-free option)
- 1 tablespoon chia seeds or flaxseed meal
- 1/4 teaspoon salt (skip if peanut butter is already salted)
- 1–2 tablespoons water or milk of choice (only if needed to help mixture come together)
Instructions
- Prep the oats (optional but recommended): Add the rolled oats to your food processor or blender and pulse 5-6 times, just until they’re broken down a bit. You want some texture still—don’t grind them into flour. This step makes the balls hold together better and gives them a more uniform texture. If you’re skipping this step, just move on to the next one.
- Mix the dry ingredients: In a large mixing bowl, combine the pulsed oats, protein powder, chia seeds or flaxseed meal, and salt. Whisk them together with a fork until everything is evenly distributed.
- Add the wet ingredients: Add the peanut butter and honey to the bowl. Use a rubber spatula or wooden spoon to start mixing everything together. It’ll look dry and crumbly at first—don’t panic. Keep stirring and pressing the mixture against the sides of the bowl. After about a minute, it should start coming together.
- Check the consistency: The mixture should hold together when you squeeze a bit in your hand. If it feels too dry and crumbly, add water or milk one tablespoon at a time, mixing well after each addition. If it feels too sticky or wet, add a tablespoon of oats or protein powder. The perfect texture is like a soft cookie dough—firm but pliable.
- Fold in the chocolate chips: Once the base mixture is well combined, gently fold in the mini chocolate chips. Make sure they’re evenly distributed throughout the dough.
- Chill the mixture (optional but helpful): If your kitchen is warm or your hands run hot, pop the bowl in the fridge for 15-20 minutes. This makes the dough easier to handle and prevents the balls from being too sticky. I usually skip this step in winter but always do it in summer.
- Roll into balls: Using a cookie scoop or a tablespoon, portion out the dough and roll it between your palms into smooth balls. I aim for about 1 to 1.5 tablespoons per ball—big enough to be satisfying, small enough to be a snack. You should get 12-14 balls depending on the size.
- Place on a lined baking sheet: Arrange the balls on a parchment-lined baking sheet or plate. Leave a little space between them so they don’t stick together if they’re still slightly warm.
- Chill to set: Refrigerate the balls for at least 30 minutes before eating. This helps them firm up and makes the texture perfect.
Notes
Use room temperature ingredients for easier mixing. If dough is too sticky, dampen hands slightly with water when rolling. For uniform size, use a cookie scoop. Store in refrigerator for up to 2 weeks or freeze for up to 3 months. Flavors develop and meld together after a day or two in the fridge.
Nutrition
- Serving Size: 1 protein ball
- Calories: 145165
- Sugar: 810
- Sodium: 80120
- Fat: 79
- Saturated Fat: 1.52
- Carbohydrates: 1618
- Fiber: 34
- Protein: 810
Keywords: high-protein peanut butter balls, no-bake protein balls, easy protein snack, healthy peanut butter balls, gluten-free protein balls, vegan protein balls, meal prep snack


