Easy High-Protein Peanut Butter Balls: Best No-Bake Snack
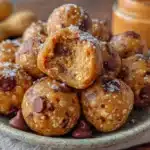
These easy high-protein peanut butter balls are the perfect no-bake snack, ready in just 15 minutes. Made with simple pantry ingredients like oats, peanut butter, honey, and protein powder, they’re chewy, delicious, and ideal for busy days, pre-workout fuel, or a healthy treat.
- Prep Time: 15 minutes
- Cook Time: 0 minutes
- Total Time: 45 minutes (includes 30 minutes chilling time)
- Yield: 12-14 servings 1x
- Category: Snack
- Cuisine: American
Ingredients
- 1 cup old-fashioned rolled oats (use certified gluten-free if needed; quick oats work too, but the texture will be a bit softer)
- 1/2 cup creamy peanut butter (natural peanut butter with just peanuts and salt recommended; brands like Smucker’s Natural or Justin’s work great)
- 1/3 cup honey (or maple syrup for a vegan option)
- 1/2 cup vanilla or unflavored protein powder (Orgain Simple or Vega recommended; whey gives firmer texture, plant-based makes them softer)
- 1/4 cup mini chocolate chips (optional; Enjoy Life makes a great dairy-free option)
- 1 tablespoon chia seeds or flaxseed meal
- 1/4 teaspoon salt (skip if peanut butter is already salted)
- 1–2 tablespoons water or milk of choice (only if needed to help mixture come together)
Instructions
- Prep the oats (optional but recommended): Add the rolled oats to your food processor or blender and pulse 5-6 times, just until they’re broken down a bit. You want some texture still—don’t grind them into flour. This step makes the balls hold together better and gives them a more uniform texture. If you’re skipping this step, just move on to the next one.
- Mix the dry ingredients: In a large mixing bowl, combine the pulsed oats, protein powder, chia seeds or flaxseed meal, and salt. Whisk them together with a fork until everything is evenly distributed.
- Add the wet ingredients: Add the peanut butter and honey to the bowl. Use a rubber spatula or wooden spoon to start mixing everything together. It’ll look dry and crumbly at first—don’t panic. Keep stirring and pressing the mixture against the sides of the bowl. After about a minute, it should start coming together.
- Check the consistency: The mixture should hold together when you squeeze a bit in your hand. If it feels too dry and crumbly, add water or milk one tablespoon at a time, mixing well after each addition. If it feels too sticky or wet, add a tablespoon of oats or protein powder. The perfect texture is like a soft cookie dough—firm but pliable.
- Fold in the chocolate chips: Once the base mixture is well combined, gently fold in the mini chocolate chips. Make sure they’re evenly distributed throughout the dough.
- Chill the mixture (optional but helpful): If your kitchen is warm or your hands run hot, pop the bowl in the fridge for 15-20 minutes. This makes the dough easier to handle and prevents the balls from being too sticky. I usually skip this step in winter but always do it in summer.
- Roll into balls: Using a cookie scoop or a tablespoon, portion out the dough and roll it between your palms into smooth balls. I aim for about 1 to 1.5 tablespoons per ball—big enough to be satisfying, small enough to be a snack. You should get 12-14 balls depending on the size.
- Place on a lined baking sheet: Arrange the balls on a parchment-lined baking sheet or plate. Leave a little space between them so they don’t stick together if they’re still slightly warm.
- Chill to set: Refrigerate the balls for at least 30 minutes before eating. This helps them firm up and makes the texture perfect.
Notes
Use room temperature ingredients for easier mixing. If dough is too sticky, dampen hands slightly with water when rolling. For uniform size, use a cookie scoop. Store in refrigerator for up to 2 weeks or freeze for up to 3 months. Flavors develop and meld together after a day or two in the fridge.
Nutrition
- Serving Size: 1 protein ball
- Calories: 145165
- Sugar: 810
- Sodium: 80120
- Fat: 79
- Saturated Fat: 1.52
- Carbohydrates: 1618
- Fiber: 34
- Protein: 810
Keywords: high-protein peanut butter balls, no-bake protein balls, easy protein snack, healthy peanut butter balls, gluten-free protein balls, vegan protein balls, meal prep snack