Love this? Save it for later!
Share the inspiration with your friends
There used to be a little lunch counter called The Silver Spoon in my hometown that made the most incredible mini sliders. When they closed down back in 2018 after forty years of business, I honestly felt like I lost a piece of my childhood. After twelve tries — including one batch that turned into a soggy mess and another where the buns completely fell apart — I finally got it. These mini turkey and cheese sliders capture that same buttery, savory magic from my memories, but they’re actually easier to make and way more practical for packing in lunchboxes.
You know that feeling when you’re standing in the kitchen at 6 AM, staring at the clock, wondering how you’re going to get everyone fed and out the door? I’ve been there more times than I can count. Last Tuesday morning, I actually dropped an entire container of cherry tomatoes on the floor while trying to assemble these. The dog was thrilled, but I was not. That’s exactly why I needed a recipe that comes together fast without sacrificing flavor. These sliders are my solution to that chaotic morning scramble.
What makes these mini turkey and cheese sliders so special is how they hold up in a lunchbox. They don’t get soggy, they taste amazing at room temperature, and kids actually eat them. I mean, honestly, that’s the real win right there. The first time I packed these for my nephew’s school lunch, he came home asking for more — and this is a kid who usually trades his lunch away. Maybe you’ve been there too, wondering if there’s a lunch option that actually makes it back uneaten. These sliders are that answer.
The buttery glaze on top creates this slightly crispy, golden crust that keeps everything together while adding incredible flavor. It’s the kind of recipe that makes you look like you spent way more time than you actually did. And honestly, after all those failed attempts at recreating The Silver Spoon’s magic, I can confidently say this version is even better for busy families.
Why You’ll Love This Recipe
Let me tell you why these mini turkey and cheese sliders have become my go-to for school lunches and quick dinners. I’ve tested this recipe with different types of bread, various cheese combinations, and multiple cooking methods. After all that trial and error, this version came out on top every single time.
- Quick & Easy: These come together in under 20 minutes from start to finish. That’s faster than waiting for takeout and way more satisfying.
- Simple Ingredients: You probably have most of these items in your kitchen right now. No fancy grocery trips or specialty stores required.
- Perfect for Meal Prep: Make a batch on Sunday and you’ve got lunches sorted for the whole week. They actually taste better the next day.
- Crowd-Pleaser: Kids love them, adults sneak them, and everyone asks for the recipe. I’ve never had leftovers from these.
- Lunchbox-Friendly: They hold up beautifully in a lunchbox without getting mushy or falling apart. No more sad, squished sandwiches.
What sets this recipe apart from other slider recipes is the secret to keeping the buns perfectly soft on the inside while getting that golden, buttery crust on top. I figured out the exact butter-to-seasoning ratio after one particularly disastrous batch where the buns turned into greasy sponges. Trust me, I learned that lesson the hard way so you don’t have to.
This isn’t just another slider recipe — it’s the one that makes you close your eyes after the first bite and remember why simple food done right is the best food. It’s comfort food reimagined for busy mornings and hectic weeknights, with the same soul-soothing satisfaction as those diner sliders from my childhood.
What Ingredients You Will Need
This recipe uses simple, wholesome ingredients that work together to create something truly special. Most of these items are pantry staples, which makes these sliders perfect for those weeks when you haven’t made it to the grocery store yet.
For the Sliders
- 12-count package of sweet Hawaiian rolls — These are my absolute favorite for sliders. The slight sweetness balances perfectly with the savory turkey and cheese. King’s Hawaiian works great, but store brands work fine too.
- 1 pound deli-sliced turkey breast — Look for oven-roasted or honey-roasted turkey from the deli counter. Pre-packaged works in a pinch, but freshly sliced has better texture.
- 8 slices of Swiss cheese — Swiss melts beautifully and has that mild nutty flavor that kids actually like. You can also use provolone or havarti if that’s what you have.
- 4 tablespoons unsalted butter, melted — This creates that gorgeous golden top. Salted butter works fine, just reduce the added salt in the seasoning mix.
- 1 tablespoon Dijon mustard — Adds a subtle tang that cuts through the richness. Yellow mustard works too, but Dijon has a more sophisticated flavor.
- 1 teaspoon Worcestershire sauce — This is the secret ingredient that adds depth and umami. Don’t skip it, it makes a real difference.
- 1 teaspoon poppy seeds — For that classic slider look and a tiny bit of crunch. Sesame seeds work as a substitute.
- 1/2 teaspoon garlic powder — Not garlic salt, we want the flavor without extra sodium.
- 1/2 teaspoon onion powder — Adds savory notes that complement the turkey perfectly.
For the Glaze
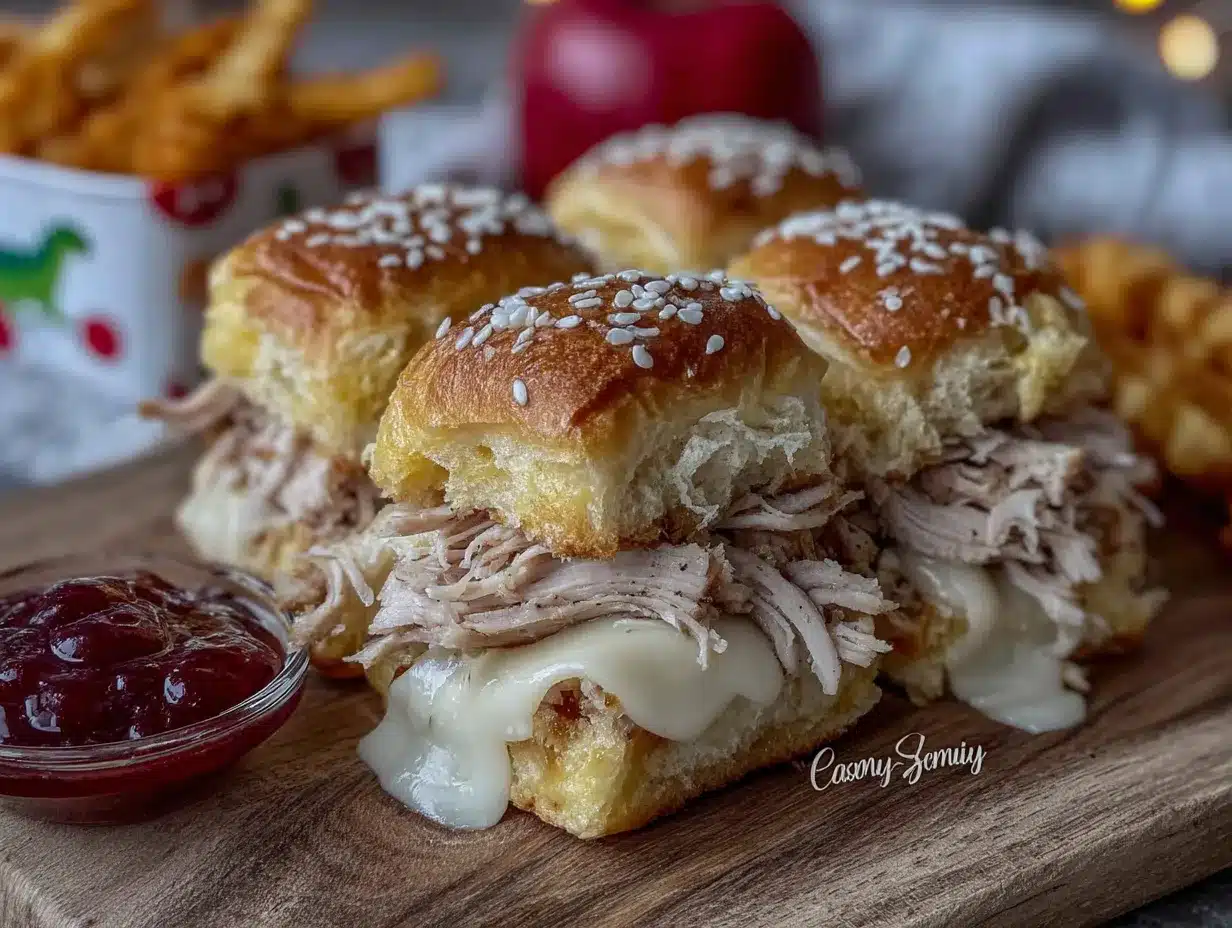
- 2 tablespoons melted butter — For brushing on top before baking.
- 1 teaspoon brown sugar — Just a touch to help with caramelization and that beautiful golden color.
- Pinch of salt — Balances the sweetness and enhances all the flavors.
When I’m choosing my turkey, I always ask the deli counter to slice it medium-thick — not paper thin where it disintegrates, and not so thick that it overwhelms the bun. This is one of those small details that makes a big difference in the final texture. For the cheese, I recommend buying it from the block and slicing it yourself if possible. Pre-sliced cheese often has anti-caking agents that prevent it from melting as smoothly.
If you’re feeding someone with dietary restrictions, feel free to swap in gluten-free rolls or dairy-free cheese. I’ve tested this with both and while the texture changes slightly, the flavor is still fantastic. Just keep an eye on the baking time since alternative products can behave differently.
Equipment Needed
You don’t need a fancy kitchen to make these sliders. Honestly, the equipment list is pretty minimal, which is exactly what you want for a busy morning recipe.
- 9×13-inch baking dish — This is the perfect size for 12 sliders in a single layer. Any similar sized dish works, just make sure the sliders fit snugly.
- Small saucepan or microwave-safe bowl — For melting the butter. I use a small saucepan because I always manage to splash butter everywhere in the microwave.
- Pastry brush — For evenly coating the tops with butter. A silicone brush works great and is easier to clean than natural bristle ones.
- Sharp knife — For slicing the rolls in half without squishing them. A serrated knife works best for this.
- Cutting board — Any sturdy surface for assembly.
- Measuring spoons — For the seasonings and glaze ingredients.
- Aluminum foil — For covering the sliders during the first part of baking to prevent the tops from burning.
If you don’t have a pastry brush, you can use a paper towel to dab the butter on, or even just drizzle it and spread it around with the back of a spoon. I’ve done all three methods in a pinch, and honestly, they all work fine. The key is just getting that butter evenly distributed so every slider gets that golden top.
One tip I learned the hard way — use a dish that’s just big enough to hold all the rolls snugly. If the dish is too big, the butter pools around the edges and the outer sliders get soggy while the middle ones stay dry. A tight fit means even distribution and perfect results every time.
Preparation Method
Alright, let me walk you through exactly how to make these mini turkey and cheese sliders. I’ve broken this down into clear steps with all the little details that make the difference between good sliders and unforgettable ones.
- Preheat your oven to 350°F (175°C). Getting the temperature right is important because you want the cheese to melt slowly and the tops to get golden without burning. While the oven heats, you can prep everything else.
- Prepare the baking dish. Lightly grease your 9×13-inch dish with butter or non-stick spray. This prevents sticking and makes cleanup easier. I forgot to do this once and spent twenty minutes scrubbing cheese off the bottom of the dish.
- Slice the rolls in half horizontally. Keep all the tops connected and all the bottoms connected — this makes assembly so much faster. Use a serrated knife with a gentle sawing motion to avoid squishing the soft rolls. Place the bottom half in your prepared baking dish.
- Layer the turkey. Arrange half of your turkey slices evenly over the bottom layer of rolls. Overlap them slightly to make sure every bite has plenty of meat. Don’t pile it too thick in the center or the sliders won’t hold together well.
- Add the cheese. Place all 8 slices of Swiss cheese over the turkey. If the slices are large, you can tear them in half to fit better. The cheese should cover most of the turkey layer — this helps hold everything together when you cut the sliders.
- Add the remaining turkey. Layer the rest of the turkey slices over the cheese. This double layer of meat is what makes these sliders satisfying and substantial enough for a school lunch.
- Place the tops back on. Carefully put the top half of the rolls back on, keeping them connected as one piece. Gently press down to help everything settle together.
- Make the butter mixture. In a small bowl or saucepan, combine the 4 tablespoons melted butter, Dijon mustard, Worcestershire sauce, poppy seeds, garlic powder, and onion powder. Whisk until everything is well combined. The mixture should look smooth and slightly thickened.
- Pour the mixture over the rolls. Slowly drizzle the butter mixture evenly over the tops of the rolls. Use a pastry brush to spread it around so every roll gets coated. Don’t rush this step — even coverage means every slider gets that delicious golden crust.
- Cover and bake. Cover the dish with aluminum foil and bake for 15 minutes. The foil traps steam and helps the cheese melt without drying out the rolls. This is the step that keeps the insides soft and fluffy.
- Remove foil and add glaze. After 15 minutes, carefully remove the foil. In a small bowl, mix the 2 tablespoons melted butter with the brown sugar and pinch of salt. Brush this glaze over the tops of the rolls.
- Finish baking. Return the dish to the oven, uncovered, for another 5-7 minutes, or until the tops are golden brown and the edges are bubbly. Watch them closely during this last step — ovens vary and you don’t want the tops to burn.
- Let them rest. Remove from the oven and let the sliders rest for 5 minutes before cutting. This resting time is crucial — it lets the cheese set slightly so the sliders hold their shape when you cut them. I know it’s hard to wait, but trust me on this one.
- Cut and serve. Use a sharp knife to cut between the rolls, separating them into individual sliders. Serve warm or let them cool completely before packing for lunch.
The sliders should look golden and glossy on top with cheese just starting to peek out at the edges. When you cut into one, the cheese should be perfectly melted and the turkey warm throughout. If the tops are getting too dark before the cheese is fully melted, tent loosely with foil for the last few minutes.
Cooking Tips & Techniques
After making these sliders more times than I care to count, I’ve picked up some tricks that make the process smoother and the results more consistent. Let me share what I’ve learned.
Don’t overbake them. This is probably the most common mistake I see. The sliders are done when the cheese is fully melted and the tops are golden brown. Overbaking dries out the rolls and makes the edges hard. If your oven runs hot, check them a few minutes early.
Let the butter mixture sit. After you mix the butter with the seasonings, let it sit for a minute or two. This allows the flavors to meld and the garlic and onion powder to hydrate slightly. The difference is subtle, but it makes the flavor more rounded and less harsh.
Use room temperature ingredients. Cold turkey straight from the fridge can make the sliders take longer to heat through, which means the tops might burn before the center is warm. Let your turkey sit out for 10-15 minutes while you prep everything else.
Cut with confidence. When you’re separating the sliders after baking, use a sharp knife and cut with one smooth motion. Sawing back and forth will tear the soft rolls and make a mess. A chef’s knife or a long serrated knife works best for this.
I once made the mistake of using cold butter straight from the fridge for the glaze. It seized up when I tried to brush it on and left clumpy patches on top of the rolls. Now I always make sure my butter is fully melted and slightly warm before mixing it with the other ingredients. Small details like this really do matter.
If you’re making these for a crowd, you can easily double the recipe and use two baking dishes. Just make sure they’re not crowded in the oven — leave at least an inch of space between dishes for proper air circulation. Rotate the pans halfway through baking if your oven has hot spots.
Variations & Adaptations
One of the best things about this recipe is how adaptable it is. I’ve experimented with all sorts of variations, and honestly, most of them turned out great. Here are some of my favorites.
Cheese Swap: Not a fan of Swiss? Try provolone for a milder flavor, cheddar for sharpness, or pepper jack for a little heat. Each cheese brings something different to the table. My personal favorite alternative is havarti — it melts like a dream and has a buttery flavor that pairs beautifully with the turkey.
Meat Variations: While turkey is my go-to, these sliders work great with ham, roast beef, or even shredded chicken. If you’re using leftover rotisserie chicken, just make sure it’s well-drained so it doesn’t make the buns soggy. For a vegetarian version, try thick slices of portobello mushroom or seasoned tofu.
Add Veggies: Thinly sliced red onion, roasted red peppers, or even a handful of fresh spinach can add color and nutrition. If you’re adding vegetables, pat them dry first to remove excess moisture. Nobody wants soggy sliders.
Gluten-Free Option: Use gluten-free Hawaiian rolls or your favorite gluten-free dinner rolls. The baking time might need to be reduced by a few minutes since gluten-free breads tend to dry out faster. Keep an eye on them and check early.
Dairy-Free Version: Substitute the butter with vegan butter or olive oil, and use dairy-free cheese slices. I’ve found that the dairy-free cheese melts differently, so you might need to add an extra minute or two of covered baking time.
Last Thanksgiving, I made these with leftover turkey and cranberry sauce spread on the bottom layer. It was incredible — like a mini Thanksgiving sandwich in slider form. That’s the beauty of this recipe; once you have the basic technique down, you can really make it your own.
Serving & Storage Suggestions
These sliders are incredibly versatile when it comes to serving. They’re delicious warm straight from the oven, but they also taste amazing at room temperature, which makes them perfect for packed lunches.
Serving Temperature: For school lunches, let the sliders cool completely before packing. They actually taste better after they’ve rested for a while because the flavors have time to meld together. For dinners or parties, serve them warm with the cheese still gooey and melted.
What to Serve With: These sliders pair beautifully with a simple side salad, fresh fruit, or vegetable sticks. For a heartier meal, serve them with sweet potato fries or a cup of tomato soup. My nephew loves them with apple slices and a handful of baby carrots.
Storage Instructions: Store leftover sliders in an airtight container in the refrigerator for up to 4 days. Place a paper towel in the bottom of the container to absorb any excess moisture. I like to layer them with parchment paper between each row to prevent sticking.
Freezing: These freeze beautifully! Wrap each slider individually in plastic wrap, then place them in a freezer-safe bag. They’ll keep for up to 3 months. To thaw, transfer to the refrigerator overnight. Reheat in a 350°F oven for about 10 minutes, or microwave for 30-45 seconds.
Reheating: The best way to reheat these is in the oven or toaster oven at 350°F for 5-7 minutes. This restores the crispy top while keeping the inside soft. The microwave works in a pinch, but the tops will be softer. If you’re packing them for lunch, they don’t need reheating at all — they’re delicious cold or at room temperature.
The flavors actually develop and deepen over time. I’ve found that day-old sliders have a more pronounced savory flavor, and the butter glaze has had time to soak into the rolls just enough. They’re honestly even better the next day for lunch.
Nutritional Information & Benefits
These mini turkey and cheese sliders offer a balanced combination of protein, carbohydrates, and healthy fats that make them a satisfying lunch option. Here’s the approximate nutritional breakdown per slider.
| Nutrient | Amount Per Slider |
|---|---|
| Calories | 245 |
| Protein | 18g |
| Carbohydrates | 22g |
| Fat | 10g |
| Saturated Fat | 5g |
| Cholesterol | 45mg |
| Sodium | 510mg |
| Fiber | 1g |
| Sugar | 6g |
Turkey breast is an excellent source of lean protein, which helps keep kids full and focused throughout the school day. Swiss cheese provides calcium for strong bones and teeth, while the whole grain buns (if you choose that option) add fiber for digestive health.
One of the things I love about this recipe is that it’s naturally lower in saturated fat than traditional beef sliders. By using lean turkey and moderate amounts of cheese, you get all the satisfaction of a comfort food classic without the heavy feeling afterward. If you’re watching your sodium intake, look for low-sodium turkey and reduced-sodium cheese options.
These sliders are not suitable for those with dairy allergies or celiac disease unless substitutions are made. Always check your ingredient labels for hidden allergens, especially in pre-made products like the Hawaiian rolls and deli meat.
Conclusion
These mini turkey and cheese sliders have become a staple in my kitchen for good reason. They’re quick enough for busy mornings, delicious enough for special occasions, and versatile enough to adapt to whatever you have on hand. Whether you’re packing school lunches, feeding a hungry family, or looking for an easy appetizer for game day, this recipe delivers every single time.
I love that this recipe brings back those nostalgic memories of The Silver Spoon while being so much more practical for real life. It’s proof that sometimes the best recipes come from trying to recreate something you loved, even if it takes a dozen tries to get it right. The best part is that you don’t have to go through all those failed attempts — I’ve done the hard work so you can jump straight to the good stuff.
I’d love to hear how these turn out for you! Did you try any fun variations? Do your kids gobble them up as fast as mine do? Drop a comment below and let me know. And if you’re looking for more lunchbox-friendly recipes, check out my easy chicken salad wraps or these make-ahead breakfast burritos for more make-ahead meal ideas. Happy cooking, friends!
Frequently Asked Questions
Can I make these sliders ahead of time?
Absolutely! You can assemble the sliders completely, cover them, and refrigerate for up to 24 hours before baking. Just add an extra 5 minutes to the covered baking time since they’ll be starting from cold. This is actually my preferred method for busy mornings.
Can I use a different type of bread?
Yes, but the results will vary. Sweet Hawaiian rolls work best because they’re soft, slightly sweet, and hold up well to the butter glaze. Dinner rolls, brioche buns, or even slider buns from the bakery section can work, but you might need to adjust the baking time slightly.
How do I keep the sliders from getting soggy?
The key is not overdoing the butter mixture and making sure your turkey isn’t too wet. Pat the turkey slices dry with a paper towel if they seem moist. Also, letting the sliders rest for 5 minutes after baking allows excess moisture to evaporate before you cut them.
Can I freeze these sliders?
Yes, they freeze wonderfully! Bake them completely, let them cool, then wrap individually in plastic wrap and store in a freezer bag. They’ll keep for up to 3 months. Thaw in the refrigerator overnight and reheat in a 350°F oven for about 10 minutes.
What if I don’t have poppy seeds?
No problem at all! You can skip them entirely, or substitute with sesame seeds, everything bagel seasoning, or even a sprinkle of flaky sea salt. The poppy seeds are mostly for visual appeal and a tiny bit of texture, so the sliders will still taste great without them.
Pin This Recipe!
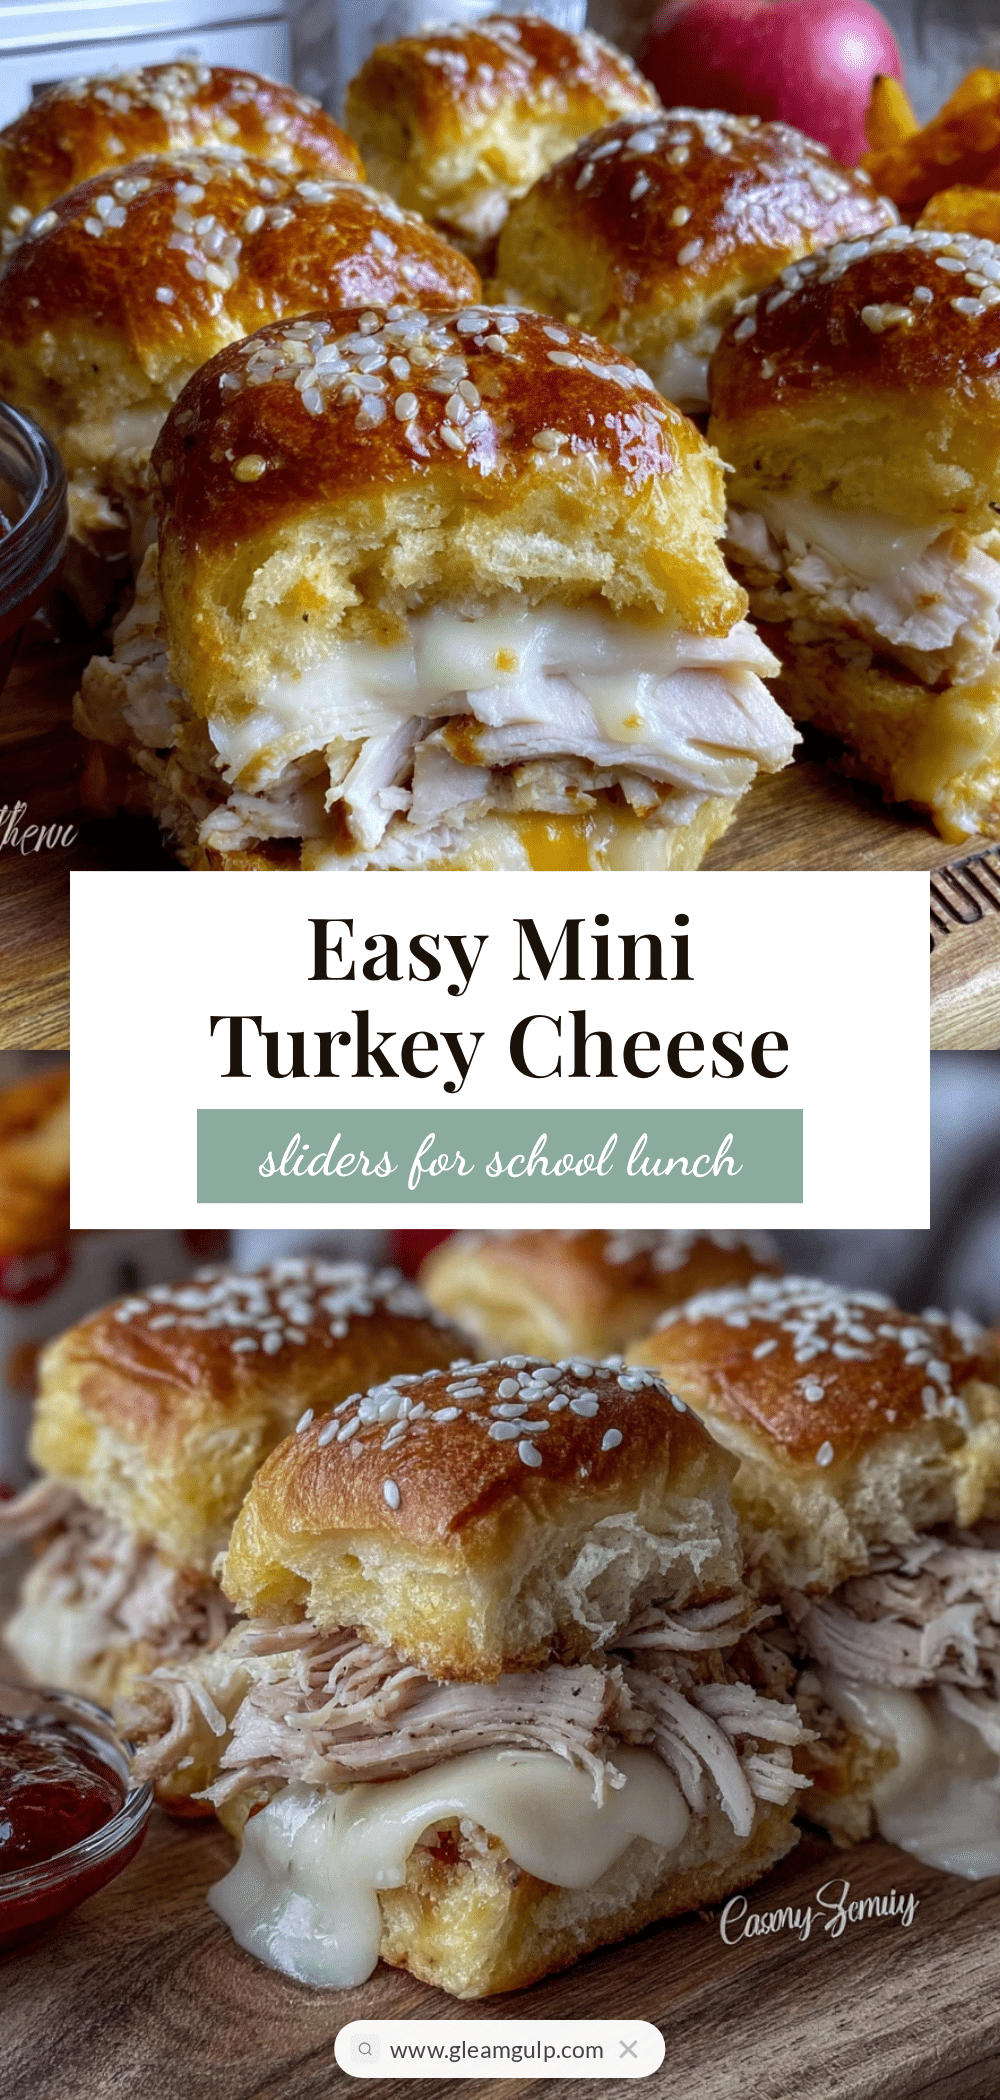
Best Easy Mini Turkey Cheese Sliders for School Lunch

These mini turkey and cheese sliders capture the buttery, savory magic of classic diner sliders but are easier to make and perfect for packing in lunchboxes. They hold up beautifully without getting soggy and taste amazing at room temperature.
- Prep Time: 10 minutes
- Cook Time: 20 minutes
- Total Time: 30 minutes
- Yield: 12 sliders 1x
- Category: Main Course
- Cuisine: American
Ingredients
- 12-count package of sweet Hawaiian rolls
- 1 pound deli-sliced turkey breast
- 8 slices of Swiss cheese
- 4 tablespoons unsalted butter, melted
- 1 tablespoon Dijon mustard
- 1 teaspoon Worcestershire sauce
- 1 teaspoon poppy seeds
- 1/2 teaspoon garlic powder
- 1/2 teaspoon onion powder
- 2 tablespoons melted butter (for glaze)
- 1 teaspoon brown sugar
- Pinch of salt
Instructions
- Preheat your oven to 350°F (175°C).
- Lightly grease a 9×13-inch baking dish with butter or non-stick spray.
- Slice the rolls in half horizontally, keeping all tops connected and all bottoms connected. Place the bottom half in the prepared dish.
- Arrange half of the turkey slices evenly over the bottom layer of rolls, overlapping slightly.
- Place all 8 slices of Swiss cheese over the turkey, tearing slices if needed to cover.
- Layer the remaining turkey slices over the cheese.
- Place the top half of the rolls back on, keeping them connected. Gently press down.
- In a small bowl, combine 4 tablespoons melted butter, Dijon mustard, Worcestershire sauce, poppy seeds, garlic powder, and onion powder. Whisk until smooth.
- Slowly drizzle the butter mixture evenly over the tops of the rolls. Use a pastry brush to spread it around.
- Cover the dish with aluminum foil and bake for 15 minutes.
- After 15 minutes, remove the foil. In a small bowl, mix 2 tablespoons melted butter with brown sugar and a pinch of salt. Brush this glaze over the tops.
- Return to the oven, uncovered, for another 5-7 minutes, until tops are golden brown and edges are bubbly.
- Remove from oven and let rest for 5 minutes before cutting.
- Use a sharp knife to cut between the rolls, separating into individual sliders. Serve warm or let cool completely for lunch packing.
Notes
Let the butter mixture sit for a minute after mixing to allow flavors to meld. Use room temperature turkey for even heating. For best results, cut sliders with one smooth motion using a sharp knife. Sliders can be assembled up to 24 hours ahead and refrigerated before baking (add 5 minutes to covered baking time).
Nutrition
- Serving Size: 1 slider
- Calories: 245
- Sugar: 6
- Sodium: 510
- Fat: 10
- Saturated Fat: 5
- Carbohydrates: 22
- Fiber: 1
- Protein: 18
Keywords: turkey sliders, mini sliders, school lunch, easy lunch, cheese sliders, turkey cheese sliders, lunchbox recipe


