Love this? Save it for later!
Share the inspiration with your friends
I was standing in the spice aisle at the grocery store last Tuesday when it hit me—that warm, slightly sharp smell of someone opening a fresh container of ground ginger near me. And just like that, I was seven years old, sitting cross-legged on the cold linoleum floor of my aunt Rita’s kitchen, watching her crush gingersnap cookies with a rolling pin. She’d hum something off-key while the crumbs flew everywhere, and I’d sneak bits of cream cheese off the counter when she wasn’t looking. She passed away a few years back, and I honestly hadn’t thought about those afternoons in ages. But that scent, man—it grabbed me by the collar. I bought the ginger, the cream cheese, the pumpkin puree, and a box of gingersnaps before I even knew what I was making. Maybe you’ve had that happen, where a random smell just yanks you backward in time and you can’t do anything but follow it.
I got home and started messing around, trying to capture that feeling of her kitchen but make it something I could pull off on a Tuesday night after work. Because let’s face it—I don’t have her patience, her time, or her ability to make everything from scratch while wearing a dress and heels. What I do have is a craving for that gingersnap-pumpkin-cream cheese magic and about forty-five minutes to make it happen. These Easy Pumpkin Pie Cheesecake Bars with Gingersnap Crust are the result of that kitchen experiment. They taste like fall and nostalgia and a little bit of love, but they come together without any fuss. I mean, the hardest part is waiting for them to chill. Honestly, that’s the kind of recipe I need in my life, and maybe you do too.
The first time I made these, I forgot to set a timer and the crust got a little too toasty on the edges. But you know what? It still tasted incredible. And that’s the thing about this recipe—it’s forgiving. It doesn’t need perfection, just good ingredients and a little bit of patience. It’s the kind of dessert that makes people close their eyes when they take a bite, and that’s why I keep making it.
Why You’ll Love These Easy Pumpkin Pie Cheesecake Bars with Gingersnap Crust
These bars aren’t just another fall dessert floating around the internet. I’ve tested this recipe six times (yes, six) to get the ratios exactly right—enough pumpkin flavor to feel like Thanksgiving, enough cheesecake tang to keep it interesting, and a crust that stays crunchy even after a day in the fridge. Here’s why they work so well for real life:
- Quick & Easy : From start to finish, you’re looking at about 30 minutes of active work. The oven does the rest. Perfect for a weeknight when you need dessert but don’t want to spend hours in the kitchen.
- Simple Ingredients : No weird extracts or hard-to-find spices. You probably have most of this in your pantry right now, especially if you’re a halfway decent fall cook.
- Perfect for Fall Gatherings : Whether it’s a Friendsgiving, a potluck, or just a random Tuesday that needs some cheering up, these bars travel well and slice cleanly. No one will believe you didn’t slave over them.
- Crowd-Pleaser : I brought these to a work event and three different people asked for the recipe. One guy who “doesn’t like pumpkin” ate two. Two!
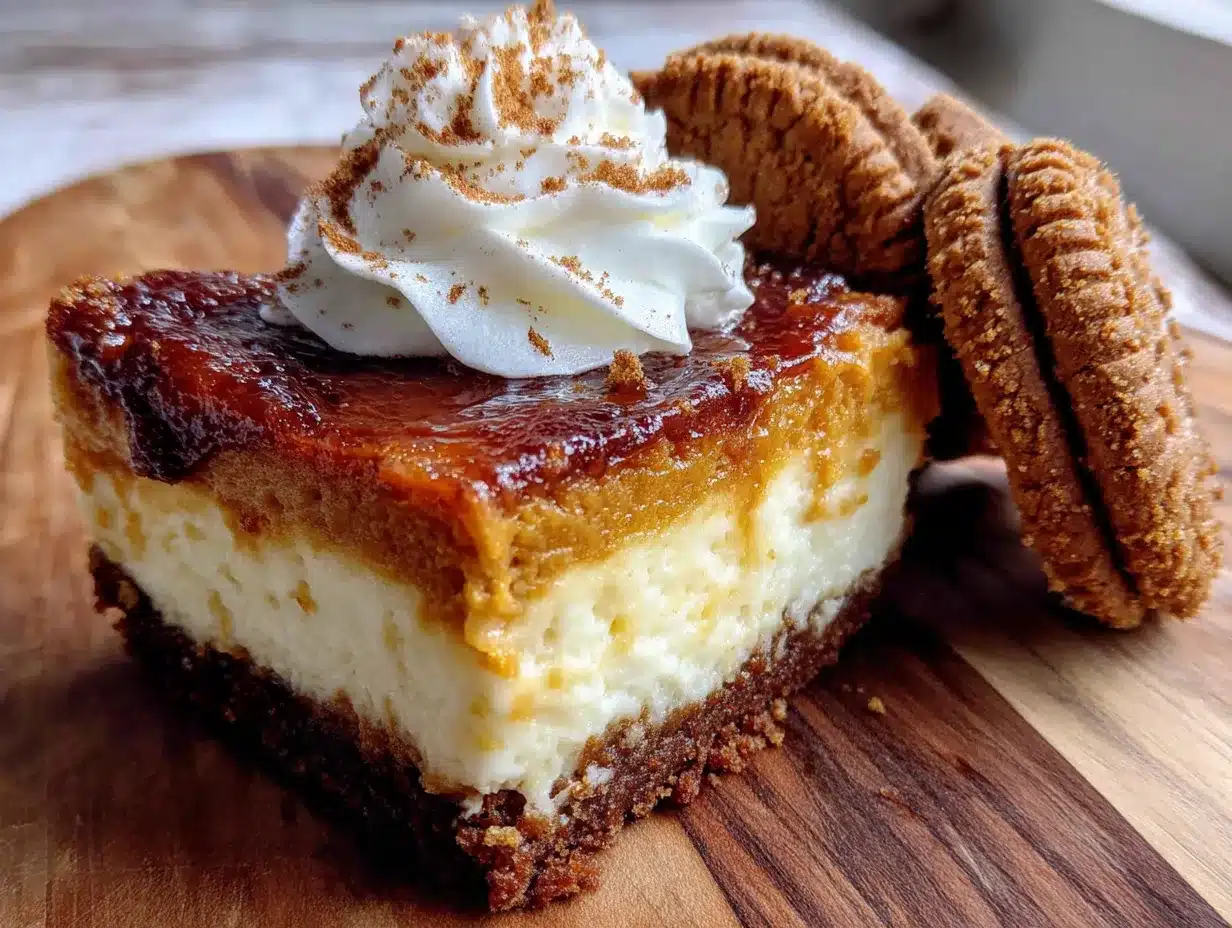
- Unbelievably Delicious : The texture is what gets you. The creamy cheesecake layer, the spiced pumpkin layer, the crunchy gingersnap base—it’s a trio that just works. You get the comfort of pumpkin pie without the fuss of a traditional crust.
What makes these bars different from the dozens of other pumpkin cheesecake recipes out there? It’s the crust, honestly. Most recipes use a standard graham cracker base, but gingersnaps bring that extra layer of warmth and spice that makes the pumpkin filling sing. Plus, I use a slightly higher ratio of cream cheese to pumpkin, so the bars stay creamy and rich instead of turning into a dense pumpkin brick. They’re not too sweet, either—the tanginess of the cream cheese cuts through the sugar, so you get that perfect balance in every bite. This isn’t just another version of pumpkin cheesecake bars. It’s the one I’d make for my own Thanksgiving table, and I don’t say that lightly.
What Ingredients You Will Need
This recipe uses simple, honest ingredients that come together to create something greater than the sum of their parts. Most of these are pantry staples for fall baking, and I’ve included notes on substitutions where they actually work.
For the Gingersnap Crust
- 2 cups (about 200g) gingersnap cookie crumbs — I use Nabisco brand for consistent texture, but any sturdy gingersnap works. You want them finely ground, almost like sand. Pulse them in a food processor or crush them in a zip-top bag with a rolling pin. (Pro tip: crush them while you’re waiting for the cream cheese to soften—multitasking!)
- 1/4 cup (50g) granulated sugar — Just a touch to sweeten the crust. Brown sugar works too, but it makes the crust slightly softer.
- 6 tablespoons (85g) unsalted butter, melted — Use real butter here, not margarine. It makes a difference in both flavor and how well the crust holds together. I let it cool slightly before mixing so it doesn’t melt the sugar.
- 1/4 teaspoon salt — Balances the sweetness and brings out the spice in the gingersnaps.
For the Cheesecake Layer
- 16 ounces (450g) cream cheese, softened — Full-fat is non-negotiable here. Low-fat cream cheese has too much water and will make the bars weepy. I recommend Philadelphia brand for the creamiest results. Let it sit on the counter for at least 30 minutes before you start.
- 1/2 cup (100g) granulated sugar — Just enough to sweeten without overpowering the tanginess.
- 2 large eggs, room temperature — Cold eggs will seize up the cream cheese mixture and leave you with lumps. If you forgot to take them out early, place them in a bowl of warm water for 5 minutes.
- 1 teaspoon vanilla extract — Pure vanilla extract, not imitation. It makes a difference in the depth of flavor.
- 1/4 cup (60g) sour cream — This is my secret ingredient. It adds moisture and a slight tang that bridges the cheesecake and pumpkin layers beautifully.
For the Pumpkin Layer
- 1 cup (245g) pumpkin puree — Not pumpkin pie filling. Make sure you grab the 100% pure pumpkin. Libby’s is my go-to for consistent thickness and flavor.
- 1/4 cup (50g) granulated sugar — Keeps it sweet but not cloying.
- 1/4 cup (50g) packed light brown sugar — Adds that molasses-y depth that pairs so well with the gingersnaps.
- 1 large egg — Binds the pumpkin layer and gives it structure.
- 1 teaspoon pumpkin pie spice — If you don’t have this, mix 1/2 teaspoon cinnamon, 1/4 teaspoon ginger, 1/8 teaspoon nutmeg, and a pinch of cloves. I actually prefer making my own blend—it lets me control the intensity.
- 1/2 teaspoon ground cinnamon — Because you can never have too much cinnamon in a fall dessert.
- 1/4 teaspoon salt — Don’t skip this. Salt makes the spices pop and balances the sweetness.
That’s it. No heavy cream, no cornstarch, no complicated ingredients. Just good, honest baking staples that come together into something truly special.
Equipment Needed
You don’t need a fancy kitchen to pull these off. Here’s what you’ll actually use:
- 9×9-inch baking pan — I use a metal one for even baking, but glass works too. If you use glass, reduce the oven temperature by 25°F and check for doneness a few minutes earlier.
- Parchment paper — This is your best friend. Cut two strips that overlap in the pan, leaving overhang on all sides. It creates a sling that lets you lift the bars out cleanly. I’ve forgotten this step before and spent twenty minutes chiseling bars out of the pan. Learn from my mistakes.
- Food processor or zip-top bag and rolling pin — For crushing the gingersnaps. The food processor is faster and gives a more even crumb, but the bag-and-rolling-pin method works fine and honestly feels more satisfying.
- Electric hand mixer or stand mixer — You need this for the cream cheese layer. Trying to mix softened cream cheese and sugar by hand is a recipe for arm fatigue and lumpy bars. A hand mixer works perfectly.
- Medium mixing bowls (2-3) — One for the crust, one for the cheesecake layer, one for the pumpkin layer.
- Rubber spatula — For scraping every last bit of batter into the pan. Don’t use a wooden spoon for this—you’ll leave too much behind.
- Measuring cups and spoons — Standard baking equipment. Nothing fancy.
If you don’t have a food processor, no worries. The bag-and-rolling pin method is actually how my aunt Rita did it, and her crusts were always perfect. Just make sure you crush the cookies thoroughly—no big chunks or the crust won’t hold together.
Preparation Method
- Preheat your oven to 350°F (175°C). Line your 9×9-inch baking pan with parchment paper, leaving overhang on two opposite sides. This creates handles that let you lift the finished bars out cleanly. Lightly grease the parchment with butter or non-stick spray.
- Make the crust. In a medium bowl, combine 2 cups of finely ground gingersnap crumbs, 1/4 cup sugar, and 1/4 teaspoon salt. Pour in 6 tablespoons of melted butter and stir with a fork until the mixture looks like wet sand and holds together when you squeeze it in your fist. Press this mixture firmly and evenly into the bottom of your prepared pan. I use the bottom of a measuring cup to really pack it down—a loose crust will fall apart when you slice the bars. Bake for 10 minutes, then set aside to cool slightly while you make the fillings. Your kitchen is going to smell amazing right about now.
- Make the cheesecake layer. In a large bowl, beat 16 ounces of softened cream cheese with an electric mixer on medium speed until smooth and fluffy—about 2 minutes. Scrape down the sides of the bowl with a rubber spatula. Add 1/2 cup sugar and beat for another minute until well combined. Add 2 room-temperature eggs, one at a time, beating on low speed after each addition just until incorporated. Overmixing at this stage adds too much air and can cause cracks. Stir in 1 teaspoon vanilla extract and 1/4 cup sour cream. The mixture should be smooth, thick, and slightly glossy. Set aside.
- Make the pumpkin layer. In a separate medium bowl, whisk together 1 cup pumpkin puree, 1/4 cup granulated sugar, 1/4 cup packed brown sugar, 1 egg, 1 teaspoon pumpkin pie spice, 1/2 teaspoon cinnamon, and 1/4 teaspoon salt. Whisk until completely smooth—no streaks of egg white or lumps of brown sugar. The mixture should be thick but pourable, like a loose pudding.
- Assemble the layers. Pour the cheesecake mixture over the pre-baked crust and spread it into an even layer with a spatula. Then, carefully spoon the pumpkin mixture over the cheesecake layer in dollops. Use a butter knife or offset spatula to gently swirl the two layers together. Don’t over-swirl, or you’ll lose the distinct layers. About 5-6 figure-eight motions should do it. You want ribbons of pumpkin running through the cheesecake, not a fully blended mixture.
- Bake. Place the pan in the preheated oven and bake for 35-40 minutes. The edges should be set and slightly puffed, but the center should still jiggle slightly when you gently shake the pan. That jiggle is your friend—it means the bars will be creamy, not dry. If the center looks completely firm, you’ve overbaked them.
- Cool completely. Place the pan on a wire rack and let it cool to room temperature, about 1 hour. This is important—if you try to refrigerate the bars while they’re still warm, condensation will form on the surface and make them watery. Once cool, cover the pan with plastic wrap and refrigerate for at least 4 hours, but overnight is better. The bars need time to set up properly, and the flavors meld and deepen overnight.
- Slice and serve. When you’re ready to serve, use the parchment sling to lift the entire block of bars out of the pan. Place it on a cutting board and use a sharp chef’s knife to slice into 16 squares. Wipe the knife clean between cuts for the neatest slices. Serve cold or at room temperature.
Cooking Tips & Techniques
Let me save you some trouble. I’ve made these bars more times than I care to count, and I’ve messed up just about every step at least once. Here’s what I learned:
Room temperature ingredients matter more than you think. I know, I know—you’re busy and you forgot to take the cream cheese out. But cold cream cheese creates lumps that no amount of beating will fully smooth out. Same goes for the eggs. If they’re cold, they’ll seize up the fat in the cream cheese and leave you with a grainy texture. Set everything out 30-45 minutes before you start. While you’re waiting, you can crush the gingersnaps and line the pan. See? Productive waiting.
Don’t overmix the cheesecake batter. This was my biggest mistake early on. I’d beat the cream cheese and sugar until it was super light and fluffy, then beat in the eggs with enthusiasm. What I got was a cheesecake layer that puffed up like a soufflé during baking and then collapsed into a cracked, uneven mess. Beat the cream cheese and sugar until smooth, then add the eggs on low speed just until they disappear. Less air means fewer cracks.
The water bath myth. Traditional cheesecakes need a water bath to bake gently and prevent cracking. These bars don’t. Because they’re shallower and have the pumpkin layer on top, they bake more evenly without one. I’ve tested it both ways, and honestly, the water bath just adds an extra step and a risk of water seeping into the pan. Skip it.
The jiggle test. When you think the bars are done, gently shake the pan. The edges should be set and the center should jiggle like Jell-O, not slosh like soup. If the center looks liquid, give it another 5 minutes. If it looks firm, take it out immediately. Every oven runs a little differently—mine runs hot, so I start checking at 30 minutes.
Patience with chilling. I know you want to eat these immediately. I get it. The smell alone is torture. But cutting into warm bars will give you a gooey mess. The bars need at least 4 hours in the fridge to set up properly. Overnight is ideal—the flavors deepen, the texture firms up, and you get those clean, beautiful slices that make people think you’re a professional baker. Trust the process.
Variations & Adaptations
One of the best things about this recipe is how flexible it is. Here are some variations I’ve tried and loved:
Gluten-Free Option : Swap the regular gingersnaps for gluten-free gingersnaps. Most major brands offer a gluten-free version now, and they work exactly the same. Just make sure to check the label if you’re serving someone with celiac disease—cross-contamination can be an issue with some brands.
Dairy-Free Adaptation : Use dairy-free cream cheese (I like Kite Hill or Miyoko’s) and a dairy-free butter substitute in the crust. The texture will be slightly less creamy, but the flavor is still fantastic. Use a dairy-free sour cream alternative or just omit it and add an extra tablespoon of the dairy-free cream cheese.
Maple Pumpkin Version : Replace the granulated sugar in the pumpkin layer with maple syrup, and reduce the brown sugar to 2 tablespoons. The maple flavor pairs beautifully with the gingersnap crust. Just note that the bars will be slightly softer because maple syrup adds more moisture. Increase the baking time by 3-5 minutes.
Chocolate Gingersnap Crust : This is my personal favorite twist. Use chocolate gingersnaps instead of regular ones for the crust. The chocolate-spice combination is absolutely killer with the pumpkin and cheesecake. I found chocolate gingersnaps at a specialty grocery store, but you can also make your own by adding 2 tablespoons of cocoa powder to the regular gingersnap crumbs.
Mini Bar Version : Line a muffin tin with paper liners and press about 1 tablespoon of crust mixture into each cup. Fill with the cheesecake and pumpkin mixtures as directed, and bake for 18-22 minutes. These are perfect for parties or portion control. Just reduce the chilling time to 2 hours since they’re smaller.
Pecan Praline Topping : After the bars have chilled and been sliced, drizzle with a simple pecan praline sauce. Melt 1/4 cup butter with 1/2 cup brown sugar, stir in 1/2 cup chopped pecans, and cook for 2 minutes. Let it cool slightly before drizzling. This adds a wonderful crunch and extra layer of flavor.
Serving & Storage Suggestions
These bars are versatile in how you serve them. Here’s what works best:
Serving Temperature : I prefer them cold, straight from the fridge. The cheesecake layer is firm and creamy, and the crust stays nice and crunchy. But they’re also delicious at room temperature—just let them sit out for about 15 minutes before serving. If you want to get fancy, serve them with a dollop of lightly sweetened whipped cream and a sprinkle of cinnamon on top. The contrast of the cold bar and the fluffy cream is perfect.
What to Serve With Them : A cup of strong black coffee or chai tea is my go-to pairing. The spices in the bars and the tea complement each other beautifully. For a dessert spread, they go great with a simple apple crisp or a plate of fresh pear slices. If you’re serving these at a fall gathering, a glass of hard cider or a bourbon cocktail is a wonderful match.
Storage : Store the bars in an airtight container in the refrigerator for up to 5 days. Place a layer of parchment paper between stacked bars to prevent them from sticking together. The bars actually taste better on day two or three—the flavors have more time to meld and deepen. Just don’t leave them out at room temperature for more than 2 hours, especially if you’re serving them at a party.
Freezing : These bars freeze beautifully. Once they’re fully chilled and sliced, arrange them in a single layer on a baking sheet and freeze for 1 hour. Then transfer the frozen bars to a freezer-safe container or zip-top bag, separating layers with parchment paper. They’ll keep for up to 3 months. To thaw, transfer them to the refrigerator overnight or let them sit at room temperature for about 30 minutes. I always keep a batch in the freezer during fall for unexpected guests or late-night cravings.
Flavor Development : Something magical happens to these bars after 24 hours in the fridge. The gingersnap crust softens slightly (in a good way, like a cookie that’s been dunked in milk), and the pumpkin and cheesecake layers become one cohesive flavor. If you can plan ahead, make these a day before you need them. Your future self will thank you.
Nutritional Information & Benefits
Let’s be real—these are a treat, not a health food. But knowing what’s in them helps you enjoy them mindfully. Here’s the approximate nutritional breakdown for one bar (based on 16 servings):
| Nutrient | Amount per Serving |
|---|---|
| Calories | 285 |
| Total Fat | 18g |
| Saturated Fat | 10g |
| Cholesterol | 85mg |
| Sodium | 220mg |
| Total Carbohydrates | 28g |
| Dietary Fiber | 1g |
| Sugars | 19g |
| Protein | 5g |
On the plus side, pumpkin is packed with vitamin A (one serving provides about 70% of your daily needs), which is great for eye health and immune function. The cream cheese adds a decent amount of calcium, and the eggs provide high-quality protein. The gingersnaps contain ginger, which has anti-inflammatory properties. So while these bars aren’t exactly a health food, they’re not empty calories either. They’re a seasonal treat made with real ingredients, and that counts for something.
If you’re watching your sugar intake, you can reduce the sugar in the cheesecake layer to 1/3 cup without affecting the texture too much. The pumpkin layer needs the full amount for proper structure, though. And for a lower-fat version, you can use Neufchâtel cheese (which has about a third less fat than regular cream cheese) with decent results. Just don’t go for fat-free cream cheese—the texture becomes rubbery and the bars won’t set properly.
Conclusion
These Easy Pumpkin Pie Cheesecake Bars with Gingersnap Crust are the kind of recipe that makes you look like a hero with minimal effort. They’ve got that nostalgic flavor that reminds you of fall afternoons in someone’s warm kitchen, but they come together in under an hour and don’t require any special skills. The gingersnap crust adds a spicy crunch that standard graham crackers just can’t touch, and the creamy cheesecake-pumpkin swirl is pure comfort in every bite.
I love this recipe because it’s forgiving—even my early, slightly burnt version was delicious. It’s the kind of dessert you can make for a holiday dinner or a random Tuesday, and it’ll be a hit either way. Plus, it freezes like a dream, so you can always have a taste of fall waiting for you in the freezer.
I’d love to hear how these turn out for you. Did you try any of the variations? Did you add your own twist? Drop a comment below and let me know—I read every single one and I’m always looking for new ideas to try. And if you loved these bars, share this recipe with a friend who needs a little fall comfort in their life. Happy baking!
Frequently Asked Questions
Can I use a different type of cookie for the crust?
Absolutely. While gingersnaps are my favorite for their spicy kick, you can use graham crackers, vanilla wafers, or even shortbread cookies. Just keep in mind that the flavor profile will change. If you use graham crackers, consider adding 1/2 teaspoon of ground ginger and 1/4 teaspoon of cinnamon to the crust mixture to maintain that fall spice element.
Why did my cheesecake layer crack?
Cracks usually happen from overbaking or overmixing. Make sure you’re not beating too much air into the cream cheese mixture—mix on low speed once you add the eggs. Also, pull the bars out when the center still has a slight jiggle. If you’ve already got cracks, don’t worry! A dollop of whipped cream or a drizzle of caramel sauce covers them beautifully.
Can I make these bars ahead of time for a party?
Yes, and I actually recommend it. These bars need at least 4 hours to chill, but they’re even better after 24 hours in the fridge. Make them a day ahead, keep them covered in the refrigerator, and slice them just before serving. They’ll taste better and you’ll have one less thing to worry about on party day.
How do I get clean slices without the bars falling apart?
Use a sharp chef’s knife and wipe it clean between each cut. For the absolute cleanest slices, chill the bars for at least 6 hours or overnight. You can also run the knife under hot water and dry it before cutting—the heat helps the knife glide through the cheesecake layer without dragging.
Can I use fresh pumpkin instead of canned?
You can, but you’ll need to cook and strain it first. Fresh pumpkin has more water than canned puree, which can make the bars soggy. If you’re using fresh, roast the pumpkin until tender, puree it, and then strain it through a cheesecloth-lined sieve for at least an hour to remove excess liquid. Start with about 1 1/2 cups of fresh puree to end up with 1 cup of strained pumpkin. Honestly, for this recipe, canned works perfectly and saves you a lot of time.
Pin This Recipe!
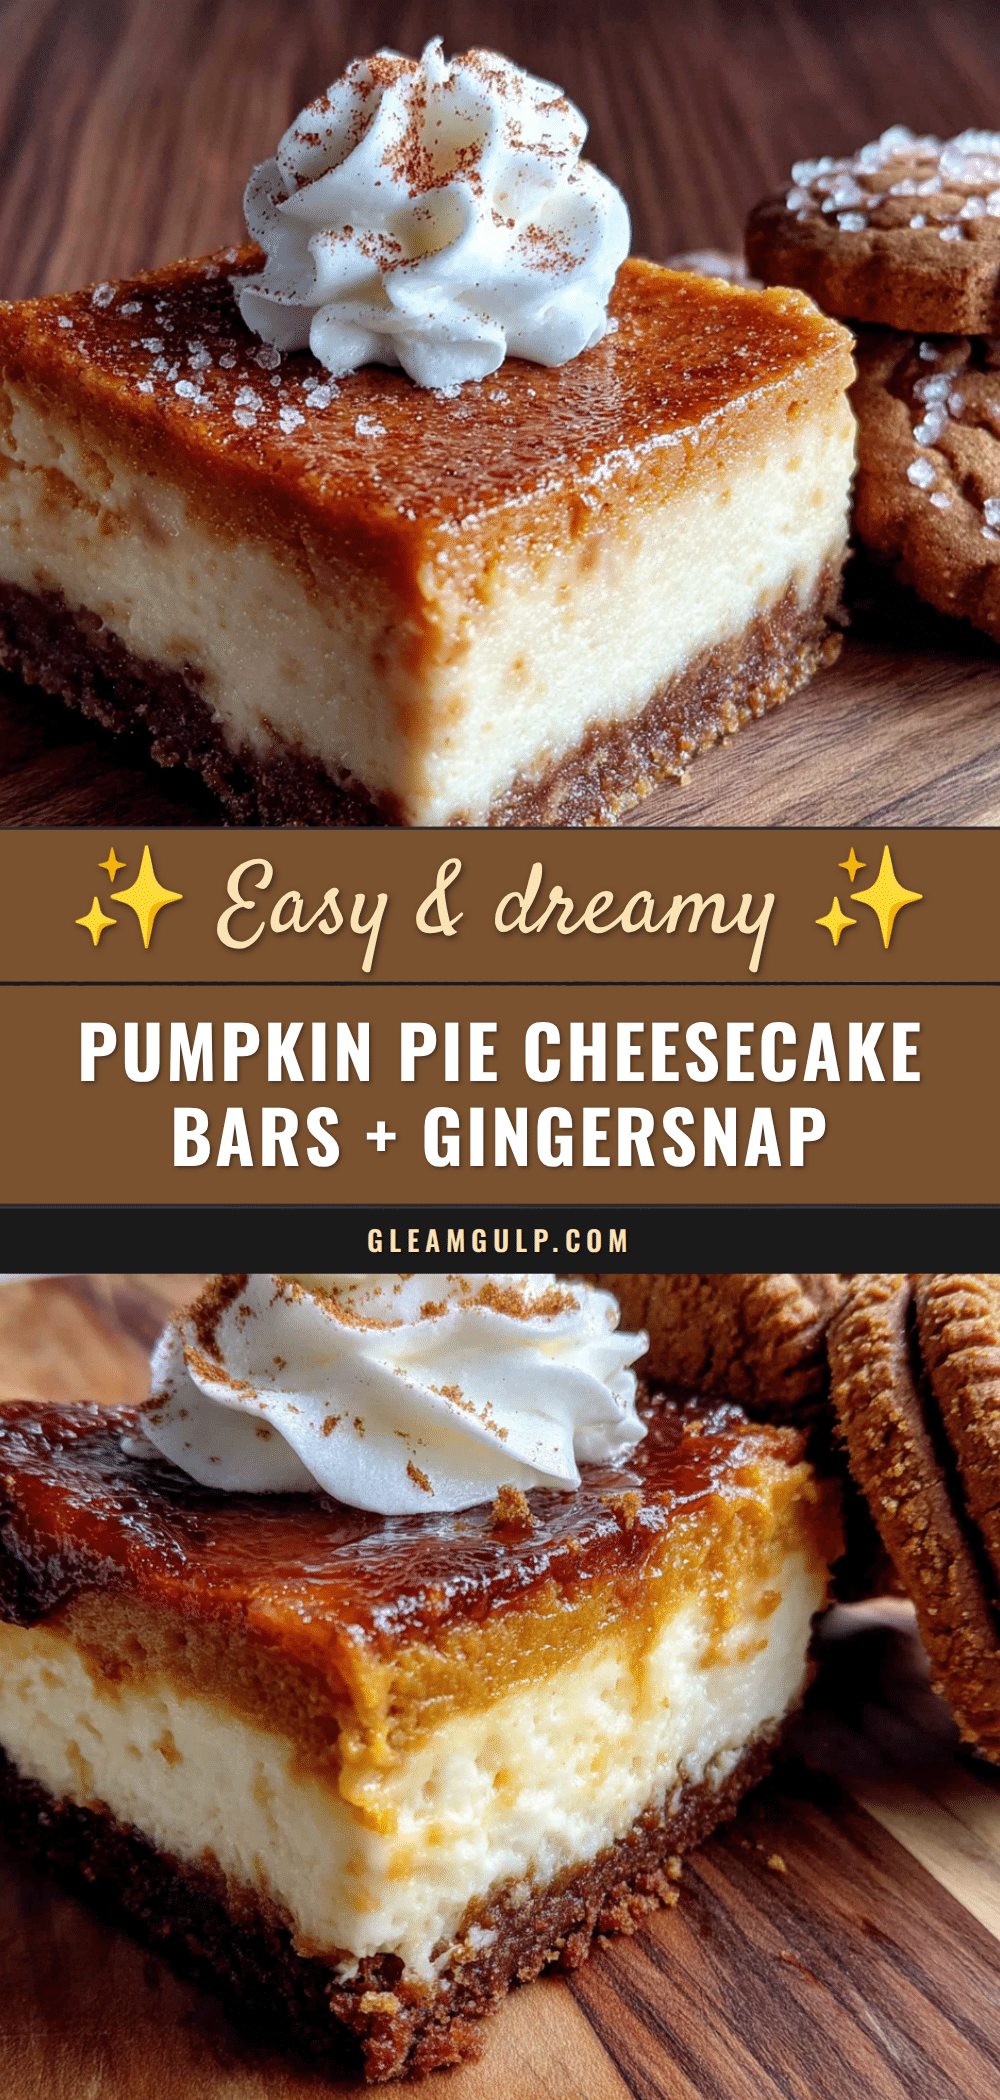
Easy Pumpkin Pie Cheesecake Bars with Gingersnap Crust
These Easy Pumpkin Pie Cheesecake Bars with Gingersnap Crust are a quick and forgiving fall dessert that combines a spicy gingersnap crust, creamy cheesecake, and spiced pumpkin layers. Perfect for weeknights or gatherings, they come together in under an hour and taste even better the next day.
- Prep Time: 30 minutes
- Cook Time: 35-40 minutes
- Total Time: 1 hour 10 minutes (plus 4 hours chilling)
- Yield: 16 servings 1x
- Category: Dessert
- Cuisine: American
Ingredients
- 2 cups (about 200g) gingersnap cookie crumbs
- 1/4 cup (50g) granulated sugar
- 6 tablespoons (85g) unsalted butter, melted
- 1/4 teaspoon salt
- 16 ounces (450g) cream cheese, softened
- 1/2 cup (100g) granulated sugar
- 2 large eggs, room temperature
- 1 teaspoon vanilla extract
- 1/4 cup (60g) sour cream
- 1 cup (245g) pumpkin puree
- 1/4 cup (50g) granulated sugar
- 1/4 cup (50g) packed light brown sugar
- 1 large egg
- 1 teaspoon pumpkin pie spice
- 1/2 teaspoon ground cinnamon
- 1/4 teaspoon salt
Instructions
- Preheat your oven to 350°F (175°C). Line your 9×9-inch baking pan with parchment paper, leaving overhang on two opposite sides. Lightly grease the parchment with butter or non-stick spray.
- Make the crust: In a medium bowl, combine 2 cups of finely ground gingersnap crumbs, 1/4 cup sugar, and 1/4 teaspoon salt. Pour in 6 tablespoons of melted butter and stir with a fork until the mixture looks like wet sand and holds together when squeezed. Press this mixture firmly and evenly into the bottom of your prepared pan. Bake for 10 minutes, then set aside to cool slightly.
- Make the cheesecake layer: In a large bowl, beat 16 ounces of softened cream cheese with an electric mixer on medium speed until smooth and fluffy—about 2 minutes. Scrape down the sides. Add 1/2 cup sugar and beat for another minute. Add 2 room-temperature eggs, one at a time, beating on low speed after each addition just until incorporated. Stir in 1 teaspoon vanilla extract and 1/4 cup sour cream. Set aside.
- Make the pumpkin layer: In a separate medium bowl, whisk together 1 cup pumpkin puree, 1/4 cup granulated sugar, 1/4 cup packed brown sugar, 1 egg, 1 teaspoon pumpkin pie spice, 1/2 teaspoon cinnamon, and 1/4 teaspoon salt until completely smooth.
- Assemble the layers: Pour the cheesecake mixture over the pre-baked crust and spread into an even layer. Carefully spoon the pumpkin mixture over the cheesecake layer in dollops. Use a butter knife or offset spatula to gently swirl the two layers together with about 5-6 figure-eight motions.
- Bake for 35-40 minutes. The edges should be set and slightly puffed, but the center should still jiggle slightly when gently shaken.
- Cool completely on a wire rack, about 1 hour. Once cool, cover with plastic wrap and refrigerate for at least 4 hours, but overnight is better.
- Slice and serve: Use the parchment sling to lift the bars out of the pan. Slice into 16 squares with a sharp chef’s knife, wiping the knife clean between cuts. Serve cold or at room temperature.
Notes
Room temperature ingredients are crucial for a smooth texture. Don’t overmix the cheesecake batter to avoid cracks. The jiggle test is key for doneness. Chilling overnight is ideal for best flavor and clean slices.
Nutrition
- Serving Size: 1 bar
- Calories: 285
- Sugar: 19
- Sodium: 220
- Fat: 18
- Saturated Fat: 10
- Carbohydrates: 28
- Fiber: 1
- Protein: 5
Keywords: pumpkin cheesecake bars, gingersnap crust, fall dessert, easy pumpkin dessert, cheesecake bars, pumpkin pie bars