Love this? Save it for later!
Share the inspiration with your friends
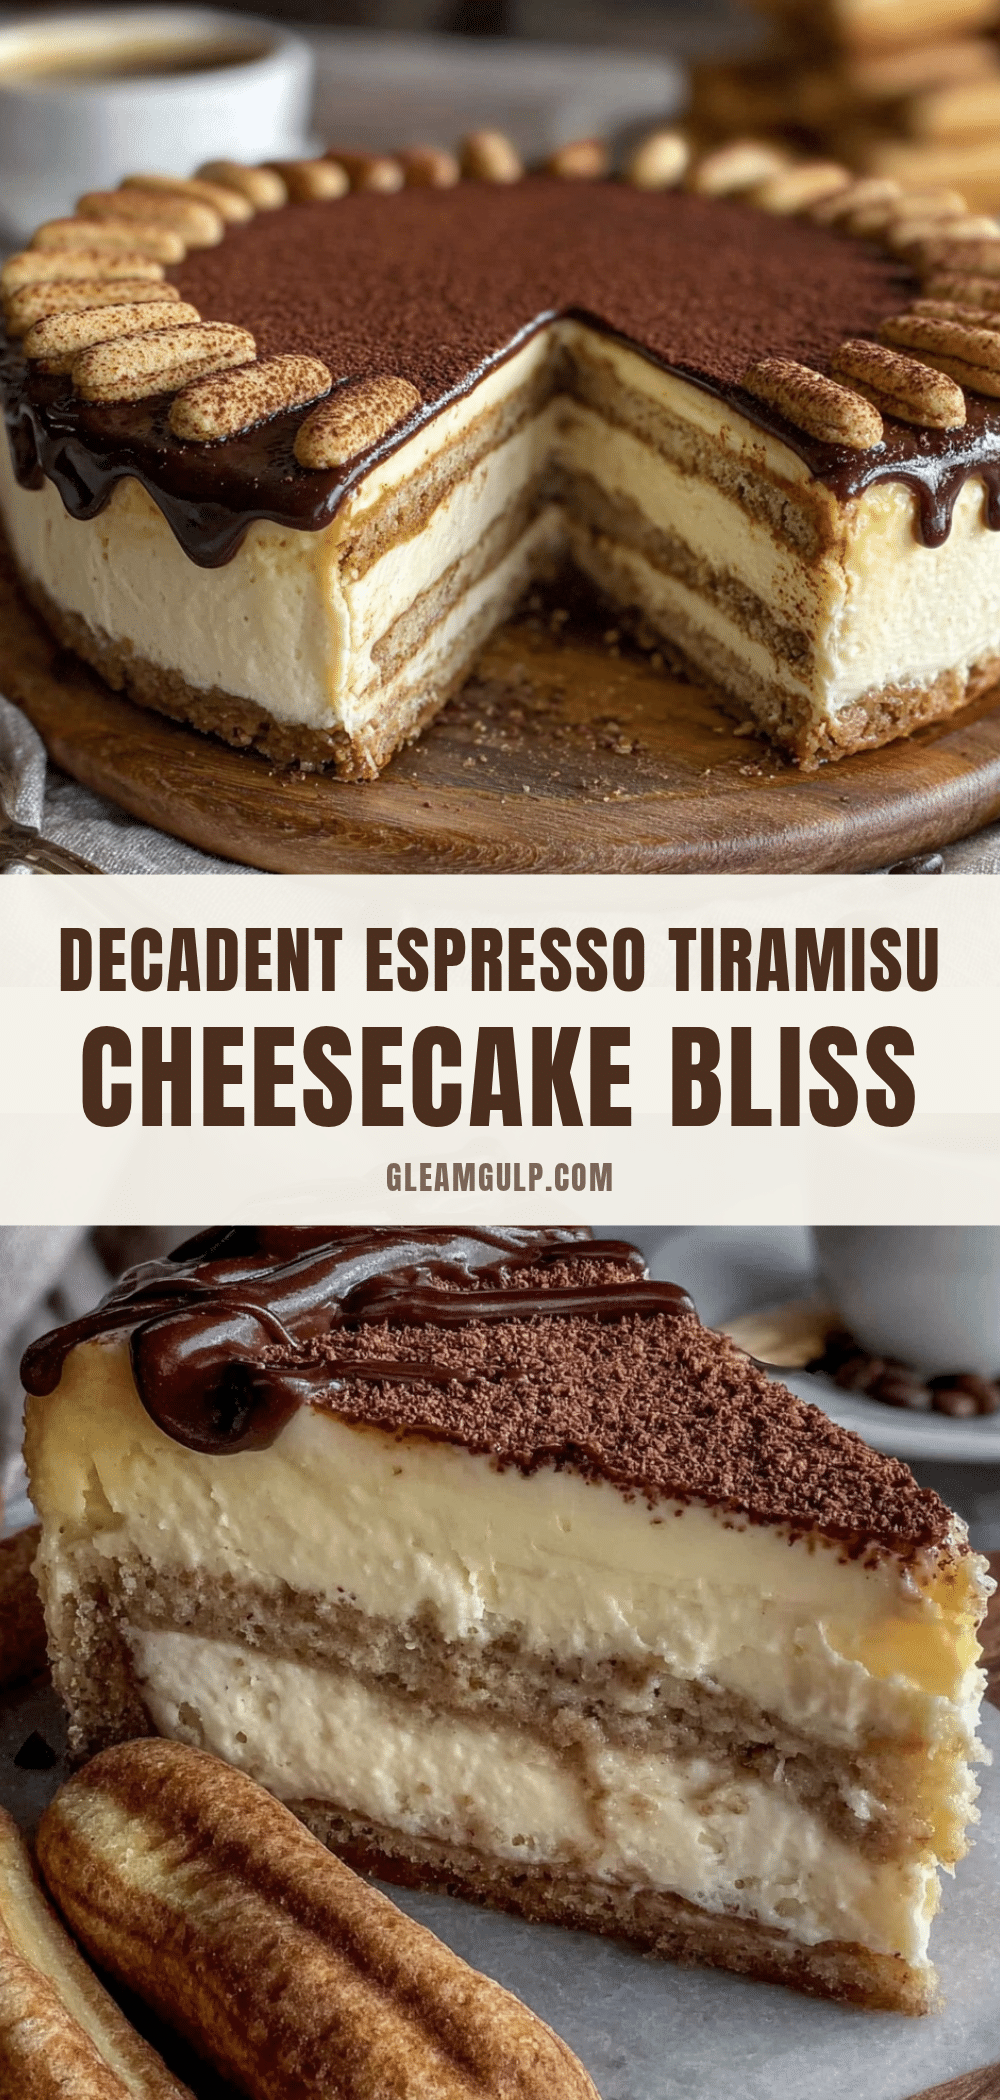
“You know, I never thought cheesecake could get any better until I accidentally combined it with tiramisu,” my neighbor Tom confessed last June while we were chatting over the fence. It was a casual Friday afternoon, and honestly, I wasn’t expecting a culinary revelation from Tom, who’s more known for his knack with lawn care than desserts. Yet there he was, talking about this decadent espresso tiramisu cheesecake he whipped up for Father’s Day last year that had everyone begging for seconds.
The story goes that Tom was trying to impress his dad, a self-proclaimed espresso addict, with a dessert that packed both the rich creaminess of cheesecake and the bold coffee kick of tiramisu. What started as a happy accident—mixing leftover mascarpone into his usual cheesecake batter—ended up creating a luscious, velvety treat that’s become a staple in their family celebrations. I remember him showing me a cracked springform pan, laughing about how he almost ruined the whole thing but somehow pulled it off at the last minute.
Maybe you’ve been there, scrambling to pull together something special for someone you care about without a recipe in sight. That’s exactly the vibe this decadent espresso tiramisu cheesecake gives me. It’s rich, comforting, and just a little rebellious—perfect for honoring dads who deserve something extraordinary but without the fuss. Let me tell you, this recipe stayed with me ever since that conversation, and I keep making it whenever I want to impress and indulge. So, let’s get into why this Father’s Day dessert might just steal the spotlight at your table.
Why You’ll Love This Recipe
Having tested this espresso tiramisu cheesecake recipe multiple times (yes, there were some trial runs involving a very patient cat and a nearly empty espresso pot), I can confidently say it’s a winner for many reasons. Here’s why you’ll find yourself coming back to it:
- Quick & Easy: Comes together in under 45 minutes of active prep time, leaving you plenty of room to relax before guests arrive.
- Simple Ingredients: Uses pantry staples along with a few special treats like mascarpone and espresso powder—nothing too complicated or exotic.
- Perfect for Father’s Day or Special Occasions: This dessert feels fancy without the stress, making it ideal for celebrations or weekend indulgences.
- Crowd-Pleaser: The creamy texture paired with the bold coffee flavor wins over both cheesecake lovers and tiramisu fans alike.
- Unbelievably Delicious: The way the espresso cuts through the richness is pure magic—you’ll close your eyes after the first bite, trust me.
What sets this recipe apart is the subtle layering technique that gives it depth without extra effort. The mascarpone adds that silky tiramisu authenticity, and the espresso-soaked ladyfinger crust is a stroke of genius that makes the whole thing sing. Honestly, it’s the kind of dessert that makes you look like a pro without breaking a sweat, perfect for impressing Dad or anyone who adores a good coffee kick.
What Ingredients You Will Need
This decadent espresso tiramisu cheesecake recipe uses simple, wholesome ingredients to deliver bold flavor and satisfying texture without the fuss. Most of these you probably have on hand or can easily find at your local grocery store.
- For the Crust:
- 7 oz (200 g) ladyfinger biscuits (savoiardi) — I prefer Loacker brand for crispness
- 3 tbsp strong brewed espresso or coffee, cooled
- 2 tbsp unsalted butter, melted
- For the Cheesecake Filling:
- 16 oz (450 g) cream cheese, softened (Philadelphia brand works well)
- 8 oz (225 g) mascarpone cheese, room temperature (adds that authentic tiramisu creaminess)
- 3/4 cup (150 g) granulated sugar
- 3 large eggs, room temperature
- 2 tbsp espresso powder (use Medaglia D’Oro for a bold flavor)
- 1 tsp vanilla extract
- 1/4 cup (60 ml) heavy cream
- For the Topping:
- Unsweetened cocoa powder, for dusting
- Chocolate shavings or curls (optional, for garnish)
Substitutions: Feel free to swap the heavy cream with full-fat coconut cream for a dairy-free twist, or use almond flour in place of ladyfingers for a gluten-free base. Just keep the espresso punch strong to maintain that tiramisu vibe!
Equipment Needed
- 8-inch (20 cm) springform pan — essential for easy removal and neat slices
- Electric mixer or stand mixer — helps get that silky smooth cheesecake batter
- Mixing bowls — at least two, medium and large
- Fine mesh sieve or sifter — for dusting cocoa powder evenly
- Spatula — preferably silicone for scraping bowls clean
- Coffee maker or espresso machine — but strong brewed coffee works just fine too
If you don’t have a springform pan, a regular cake pan lined with parchment paper can work, though removing the cheesecake might be trickier. When I first made this, I used a regular pan and ended up with a bit of a mess, so trust me on the springform.
Preparation Method

- Prepare the crust: Preheat your oven to 350°F (175°C). Lightly grease the springform pan. Crush the ladyfinger biscuits into fine crumbs using a food processor or by placing them in a zip-top bag and pounding with a rolling pin. Transfer crumbs to a bowl.
- Add the cooled espresso and melted butter to the crumbs. Mix well until the mixture resembles wet sand. Press this evenly into the bottom of your prepared pan, creating a firm base. Bake for 10 minutes, then remove and let cool completely while you prepare the filling.
- Make the filling: In a large bowl, beat the softened cream cheese and mascarpone cheese with an electric mixer on medium speed until smooth and creamy, about 3 minutes. Add the sugar gradually and continue beating until fully incorporated.
- Add the eggs one at a time, mixing well after each addition. Stir in the espresso powder and vanilla extract until evenly distributed. Finally, pour in the heavy cream and mix on low speed just until combined. Be careful not to overmix; the batter should be silky but not runny.
- Assemble and bake: Pour the cheesecake filling over the cooled crust, smoothing the top with a spatula. Tap the pan gently on the counter to release any air bubbles.
- Bake for 50-60 minutes at 325°F (160°C). The center should be slightly jiggly but set around the edges. If the top starts browning too quickly, tent loosely with foil.
- Turn off the oven, crack the door, and let the cheesecake cool inside for 1 hour. This prevents cracking and helps it set perfectly.
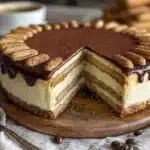
- Refrigerate the cheesecake for at least 4 hours, preferably overnight, before serving. Just before serving, dust the top generously with unsweetened cocoa powder and garnish with chocolate shavings if you like.
Pro tip: If you notice cracks after baking, don’t worry! Dusting cocoa powder and adding garnish cleverly hides imperfections. Oh, and be sure to bring the cheesecake to room temperature about 15 minutes before slicing for the best texture.
Cooking Tips & Techniques
Making a tiramisu cheesecake might sound intimidating, but a few tricks from my kitchen can make it a breeze:
- Room temperature ingredients: This is key. Cold cream cheese or eggs can cause lumps. Take them out about an hour before starting.
- Don’t overmix the batter: Overmixing introduces air, which can lead to cracks or a grainy texture. Mix until just combined for that ultra-smooth finish.
- Espresso powder vs. brewed espresso: Using espresso powder ensures a concentrated coffee flavor without adding too much liquid, keeping the batter balanced.
- Baking temperature and cooling: Low and slow is your friend here. Baking at 325°F (160°C) and cooling gradually reduces cracking risk.
- Water bath option: For extra creamy results, you can bake the cheesecake in a water bath. Wrap the pan’s bottom in foil and place it in a larger pan filled halfway with hot water.
Trust me, I learned these the hard way. One batch ended up with a cracked, dry cheesecake that I had to disguise with whipped cream and lots of cocoa dusting. After a few tweaks, it’s now my go-to dessert for impressing guests.
Variations & Adaptations
- Decaf version: Use decaffeinated espresso powder and coffee so everyone can enjoy it, even after dinner without the jitters.
- Chocolate lovers: Fold in mini chocolate chips into the batter or swirl in some melted dark chocolate before baking for a mocha twist.
- Nutty addition: Add finely chopped toasted hazelnuts or almonds to the crust for a crunchy texture contrast.
- Dairy-free adaptation: Swap cream cheese and mascarpone with plant-based alternatives like cashew cream cheese, and use coconut cream instead of heavy cream.
- Seasonal twist: Try swapping espresso powder with a teaspoon of pumpkin spice or cinnamon during fall for a cozy flavor upgrade.
One time, I experimented by soaking the ladyfingers in amaretto along with the espresso, and it was a hit at a dinner party. Don’t be afraid to tweak it to your taste or what you have on hand!
Serving & Storage Suggestions
This decadent espresso tiramisu cheesecake shines when served chilled but not ice-cold. Let it sit out for 10-15 minutes after removing from the fridge to soften slightly for the best mouthfeel.
Pair it with a fresh cup of espresso or a glass of dessert wine like Vin Santo to match the coffee notes perfectly. For a lighter touch, fresh berries or a mint sprig can add a pop of color and freshness.
Store leftover cheesecake tightly covered in the refrigerator for up to 4 days. You can also freeze it: wrap slices in plastic wrap and foil, then freeze for up to 2 months. Thaw overnight in the fridge and dust with fresh cocoa before serving.
Flavors actually deepen after a day or two in the fridge, so if you have the patience, make it ahead of time for a more harmonious taste.
Nutritional Information & Benefits
This espresso tiramisu cheesecake is indulgent, but here’s a quick nutritional snapshot per serving (based on 12 servings): approximately 350 calories, 28g fat, 18g carbohydrates, and 6g protein.
The espresso powder adds antioxidants, and mascarpone provides calcium and vitamin A. While it’s not a low-calorie dessert, it’s a great occasional treat for celebrations.
If you’re mindful of gluten, swapping out ladyfingers for gluten-free biscuits keeps it accessible for gluten-sensitive folks. Using natural sweeteners or reducing sugar slightly can also lighten it up.
As a former nutritionist once told me, food is about joy and balance—this recipe hits that sweet spot for me.
Conclusion
If you’re looking for a Father’s Day dessert that combines the creamy richness of cheesecake with the bold coffee essence of tiramisu, this decadent espresso tiramisu cheesecake is your answer. It’s impressive yet approachable, making it perfect for both seasoned bakers and those who just want to whip up something special without fuss.
Feel free to adjust the espresso intensity or sweetness to suit your dad’s taste buds—after all, customization is part of the fun. Honestly, this recipe has become a small tradition in my neighborhood, and I can’t wait for you to make it your own.
Give it a try, and let me know how it turns out! Comments, tweaks, or stories about your own Father’s Day baking adventures are always welcome here. Happy baking and happy Father’s Day celebrations!
FAQs
Can I make this espresso tiramisu cheesecake ahead of time?
Absolutely! It actually tastes better after chilling overnight, allowing flavors to meld perfectly. Just cover and refrigerate until serving.
What if I don’t have a springform pan?
You can use a regular cake pan lined with parchment paper, but removing the cheesecake might be trickier. Chill well before slicing to help.
Can I use instant coffee instead of espresso powder?
Yes, instant coffee works, but espresso powder generally gives a richer, more authentic coffee flavor.
Is it possible to make this recipe gluten-free?
Definitely! Substitute the ladyfingers with gluten-free biscuits or almond flour crust for a similar texture without gluten.
How long does this cheesecake keep in the fridge?
Stored properly in an airtight container, it stays fresh for up to 4 days. Freezing is also an option for longer storage.
Pin This Recipe!
Decadent Espresso Tiramisu Cheesecake Recipe for Father’s Day Celebration
A rich and creamy cheesecake that combines the bold coffee flavor of tiramisu with the smooth texture of cheesecake, perfect for special occasions like Father’s Day.
- Prep Time: 45 minutes
- Cook Time: 1 hour 10 minutes
- Total Time: 5 hours 55 minutes
- Yield: 12 servings 1x
- Category: Dessert
- Cuisine: Italian-American
Ingredients
- 7 oz (200 g) ladyfinger biscuits (savoiardi)
- 3 tbsp strong brewed espresso or coffee, cooled
- 2 tbsp unsalted butter, melted
- 16 oz (450 g) cream cheese, softened
- 8 oz (225 g) mascarpone cheese, room temperature
- 3/4 cup (150 g) granulated sugar
- 3 large eggs, room temperature
- 2 tbsp espresso powder
- 1 tsp vanilla extract
- 1/4 cup (60 ml) heavy cream
- Unsweetened cocoa powder, for dusting
- Chocolate shavings or curls (optional, for garnish)
Instructions
- Preheat your oven to 350°F (175°C). Lightly grease the springform pan.
- Crush the ladyfinger biscuits into fine crumbs using a food processor or by placing them in a zip-top bag and pounding with a rolling pin. Transfer crumbs to a bowl.
- Add the cooled espresso and melted butter to the crumbs. Mix well until the mixture resembles wet sand.
- Press this evenly into the bottom of your prepared pan, creating a firm base. Bake for 10 minutes, then remove and let cool completely.
- In a large bowl, beat the softened cream cheese and mascarpone cheese with an electric mixer on medium speed until smooth and creamy, about 3 minutes.
- Add the sugar gradually and continue beating until fully incorporated.
- Add the eggs one at a time, mixing well after each addition.
- Stir in the espresso powder and vanilla extract until evenly distributed.
- Pour in the heavy cream and mix on low speed just until combined. Be careful not to overmix.
- Pour the cheesecake filling over the cooled crust, smoothing the top with a spatula. Tap the pan gently on the counter to release any air bubbles.
- Bake for 50-60 minutes at 325°F (160°C). The center should be slightly jiggly but set around the edges. Tent loosely with foil if the top browns too quickly.
- Turn off the oven, crack the door, and let the cheesecake cool inside for 1 hour.
- Refrigerate the cheesecake for at least 4 hours, preferably overnight, before serving.
- Just before serving, dust the top generously with unsweetened cocoa powder and garnish with chocolate shavings if desired.
Notes
Use room temperature ingredients to avoid lumps. Do not overmix the batter to prevent cracks. Baking at a low temperature and cooling gradually helps reduce cracking. A water bath can be used for extra creamy results. Bring cheesecake to room temperature 15 minutes before slicing for best texture. Substitutions include coconut cream for dairy-free and almond flour for gluten-free options.
Nutrition
- Serving Size: 1 slice (1/12 of che
- Calories: 350
- Fat: 28
- Carbohydrates: 18
- Protein: 6
Keywords: espresso tiramisu cheesecake, Father’s Day dessert, tiramisu cheesecake, coffee cheesecake, mascarpone cheesecake, easy cheesecake recipe


