Love this? Save it for later!
Share the inspiration with your friends
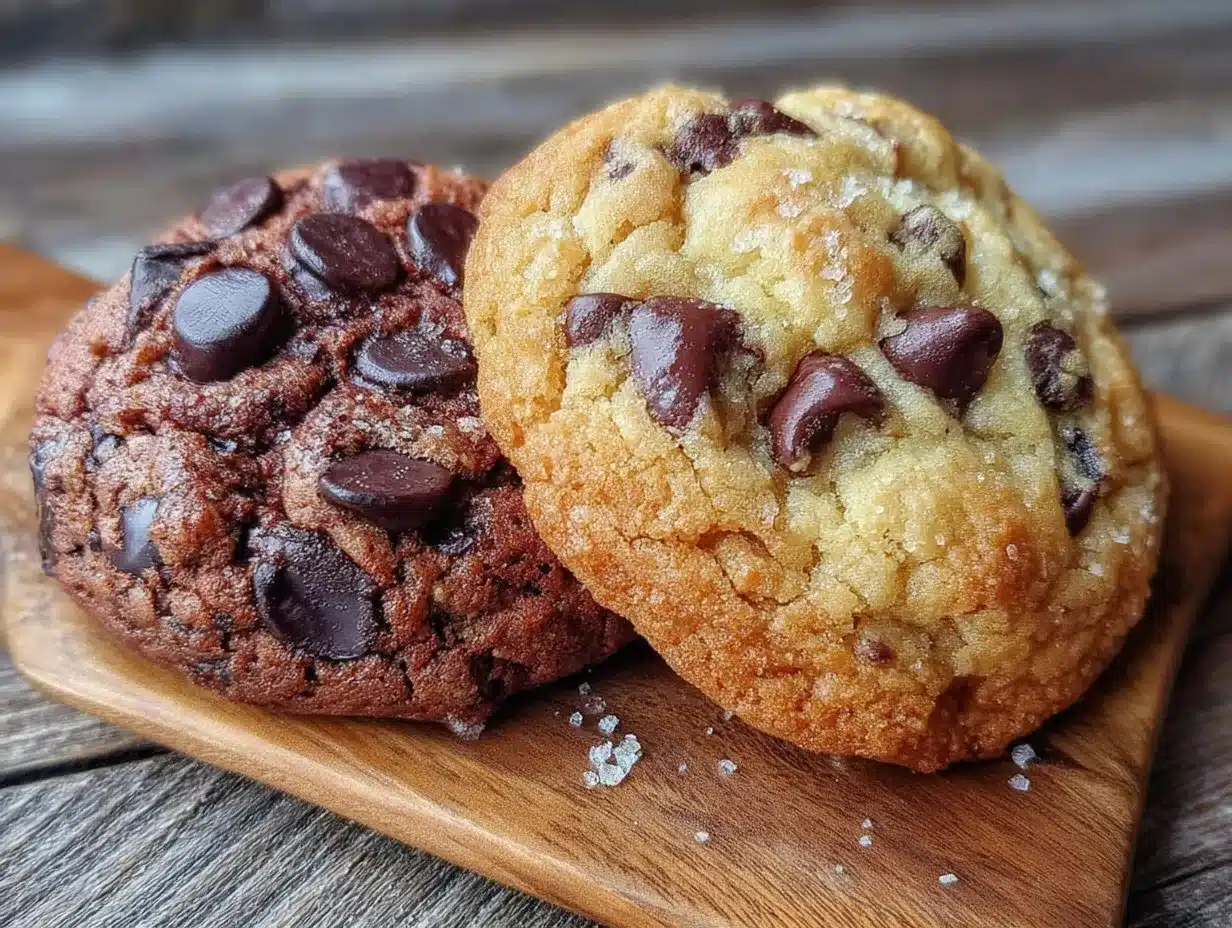
“You know that moment when you bite into a cookie, and it’s either delightfully crisp or perfectly chewy? Well, I wasn’t always sure how to get that right. One rainy Saturday afternoon, I found myself staring down at what was supposed to be a batch of classic chocolate chip cookies. I’d followed a recipe I’d scribbled from a random conversation with a barista at my local coffee shop—yes, the very same place where I spilled half a cup of coffee on my notebook (classic me!).
That day, something unexpected happened. Half the cookies came out golden and crackly at the edges, while the other half stayed soft and tender in the middle. It was like a cookie personality split! I honestly didn’t know which texture I preferred at first, but that accidental batch sparked a curiosity to really understand how to control cookie texture every time I baked.
This recipe guide on mastering crispy vs chewy cookies is the result of months of testing, tweaking, and tasting. Whether you crave that satisfying snap or the tender, melt-in-your-mouth chew, I’ll walk you through the exact steps and secrets to get it just right. Plus, I’ll share a few kitchen mishaps and practical tips I picked up along the way. So, if you’ve ever wrestled with cookie texture and ended up with something unexpected, you’re not alone—and this post is for you.
Why You’ll Love This Recipe
Honestly, mastering the difference between crispy and chewy cookies feels like unlocking a secret club in baking. After experimenting with countless batches (and yes, eating way too many in the process), I’m confident this method will help you nail your preferred texture with ease.
- Quick & Easy: Comes together in about 30 minutes, perfect for whipping up a batch before a movie night or last-minute guests.
- Simple Ingredients: You likely have everything in your pantry—no need for fancy or hard-to-find items.
- Perfect for Any Occasion: Whether it’s a cozy afternoon treat or a holiday cookie swap, these recipes fit the bill.
- Crowd-Pleaser: From kids who love that chewy softness to adults who crave crispy edges, this recipe satisfies all cookie lovers.
- Unbelievably Delicious: The balance of flavor and texture will have you closing your eyes after the first bite — that’s a promise.
What sets this guide apart? It’s not just about listing ingredients or baking times. I share how tiny tweaks in butter temperature, sugar ratios, and baking duration affect the final texture. For example, using brown sugar for chewiness or chilling dough for crispiness isn’t just hearsay—it’s what I’ve tested over and over. This recipe isn’t just another cookie guide; it’s like having a baking coach in your kitchen.
Let me tell you, once you get this down, you won’t be guessing anymore. Plus, it’s a blast to experiment with, and maybe you’ll even discover your own signature cookie style.
What Ingredients You Will Need
This recipe uses simple, wholesome ingredients to deliver bold flavor and satisfying texture without any fuss. Most are pantry staples, and you can swap a few to suit your taste or dietary needs.
- All-purpose flour – 2 ¼ cups (280g) (provides the structure; I prefer King Arthur for consistent results)
- Baking soda – 1 teaspoon (leavens and spreads the cookies evenly)
- Salt – ½ teaspoon (balances sweetness and enhances flavor)
- Unsalted butter – 1 cup (226g), softened (for chewiness, use fully softened; for crispiness, slightly chilled works best)
- Granulated sugar – ¾ cup (150g) (adds crunch and helps with crisp edges)
- Brown sugar – ¾ cup packed (165g) (the moisture here is key for chewiness)
- Large eggs – 2, room temperature (binds ingredients and adds moisture)
- Pure vanilla extract – 2 teaspoons (flavor enhancer; Nielsen-Massey is my go-to)
- Chocolate chips or chunks – 1 ½ cups (270g) (I recommend semi-sweet for balance, but dark or milk works too)
- Optional add-ins: chopped nuts, oats, or dried fruit (great for texture variation)
Substitution tips: Use coconut oil instead of butter for a dairy-free version, or swap all-purpose flour with a gluten-free blend (measure carefully for moisture differences). For brown sugar, light or dark both work, but dark gives a deeper molasses flavor.
Equipment Needed
- Mixing bowls: One large for dry ingredients and one medium for wet ingredients (glass or stainless steel preferred)
- Electric mixer or stand mixer: Helpful for creaming butter and sugar smoothly, but a sturdy wooden spoon works too if you’re patient
- Measuring cups and spoons: Accurate measurements make or break texture
- Baking sheets: Heavy-gauge or insulated cookie sheets give even baking; avoid dark pans that can cause burning
- Parchment paper or silicone baking mats: Prevent sticking and promote even browning
- Cooling racks: Essential for cooling cookies properly and retaining crispness
If you don’t have a stand mixer, no worries—I’ve made these with just a hand whisk and elbow grease. Also, keeping your baking sheet in good shape helps; I recommend wiping clean after each batch and rotating sheets halfway through baking for even color.
Preparation Method
- Preheat your oven to 350°F (175°C). Line two baking sheets with parchment paper or silicone mats. This ensures cookies bake evenly without sticking.
- Mix dry ingredients: In a large bowl, whisk together 2 ¼ cups (280g) all-purpose flour, 1 teaspoon baking soda, and ½ teaspoon salt. Set aside. This helps distribute the leavening agent and salt evenly through the dough.
- Cream butter and sugars: In a separate bowl, beat 1 cup (226g) softened unsalted butter with ¾ cup (150g) granulated sugar and ¾ cup (165g) packed brown sugar until light and fluffy—about 3 to 5 minutes. This step traps air, giving cookies a lovely lift.
- Add eggs and vanilla: Beat in 2 large eggs, one at a time, then stir in 2 teaspoons pure vanilla extract. Make sure eggs are at room temperature to avoid curdling the butter mixture.
- Combine wet and dry ingredients: Gradually mix the flour mixture into the butter mixture. Don’t overmix—stop once you see no more flour streaks. Overworking dough can make cookies tough.
- Fold in chocolate chips: Gently stir 1 ½ cups (270g) chocolate chips (or chunks) into the dough. If you want to add nuts or oats, toss them in here.
- Shape your cookies: For uniform size, use a cookie scoop or spoon to drop rounded tablespoons of dough onto the baking sheets, spacing about 2 inches apart.
- Bake: For chewy cookies, bake 9-11 minutes until edges are set but centers look slightly underbaked. For crispy cookies, bake 12-14 minutes until golden brown all over. Keep an eye on the first batch to adjust timing for your oven.
- Cool: Let cookies cool on the baking sheet for 5 minutes, then transfer to wire racks to cool completely. This step helps cookies firm up without getting soggy.
Pro tip: If you want extra crispiness, chill your dough for 30 minutes before baking. Also, using a mix of sugars (granulated and brown) is key to controlling moisture and texture. If you notice your cookies spreading too much, try a slightly cooler oven or less butter next time.
Cooking Tips & Techniques
Getting cookie texture just right can be tricky, but a few tricks make all the difference.
- Butter temperature matters: For chewy cookies, use fully softened butter so it blends smoothly. For crispy cookies, cooler butter slows spreading and gives that crackly edge.
- Measure flour correctly: Spoon and level your flour instead of scooping directly from the bag to avoid packing it, which can dry out your cookies.
- Don’t overmix: Once you add flour, stir just until combined. Overmixing develops gluten, leading to tough cookies.
- Use baking soda for spread: Baking soda helps cookies spread and brown properly. Double-check your leavening is fresh.
- Chill your dough: Even 30 minutes in the fridge makes a big difference, especially for crispy cookies. It firms up fat and prevents excessive spreading.
- Adjust baking time: Tiny oven differences matter. If your cookies bake quickly on the edges but stay doughy inside, try lowering the temp by 10-15°F (5-8°C).
My own kitchen mishap was baking cookies straight from fridge dough without adjusting time—ended up with rock-hard cookies! Lesson learned: baking is part science, part art.
Variations & Adaptations
Feel free to customize your cookie texture and flavor with these fun variations:
- Gluten-free option: Use a 1-to-1 gluten-free baking flour blend. Add an extra egg yolk for chewiness if needed.
- Vegan adaptation: Substitute butter with coconut oil and eggs with flax eggs (1 tablespoon flaxseed meal + 3 tablespoons water per egg).
- Flavor twists: Add cinnamon or espresso powder for depth; swap chocolate chips with butterscotch or white chocolate.
- Healthier swap: Replace half the flour with oat flour and add chopped nuts for extra fiber and crunch.
- Seasonal inspiration: In fall, incorporate pumpkin puree and warm spices for a chewy pumpkin cookie delight.
I once tried adding a sprinkle of sea salt on top right before baking for a sweet-salty crispy cookie that vanished in minutes—highly recommend!
Serving & Storage Suggestions
Serve cookies warm or at room temperature. For chewy cookies, warm them slightly to enjoy that soft center; crispy cookies are best cooled completely to hold their crunch.
Pair with a glass of cold milk, coffee, or even a scoop of vanilla ice cream to turn your cookie into a dessert experience.
To store, keep cookies in an airtight container at room temperature up to 5 days. For chewy cookies, adding a slice of bread to the container helps retain moisture. Crispy cookies stay best if stored separately or with a paper towel to absorb humidity.
You can freeze cookie dough balls for up to 3 months—bake directly from frozen, adding a minute or two to baking time. Leftover baked cookies freeze well too; thaw at room temperature or warm briefly in the oven.
Over time, flavors deepen, especially if you use extracts or spices—so letting cookies rest a day before serving can be a nice touch.
Nutritional Information & Benefits
Each cookie (based on 24 cookies per batch) contains approximately:
| Calories | 150-170 |
|---|---|
| Fat | 8-10g |
| Carbohydrates | 20-22g |
| Protein | 2g |
| Sugar | 12-14g |
Using brown sugar adds some minerals like calcium and potassium from molasses. Including nuts or oats boosts fiber and healthy fats. These cookies fit well in a balanced diet as an occasional treat.
For dietary needs, gluten-free or vegan adaptations make this recipe accessible to many. Just watch ingredient swaps for texture changes.
Personally, I find baking cookies a wonderful way to bring joy and calm after a hectic day—something sweet, homemade, and shared is good for the soul.
Conclusion
Whether you lean toward crispy edges or chewy centers, this guide helps you master cookie texture every single time. Baking is a bit like a science experiment with delicious results, and tweaking small details makes all the difference.
Feel free to make this recipe your own by adjusting sugars, chilling time, or even the mix-ins. I love this recipe because it’s forgiving, fun, and consistently yields crowd-pleasing cookies that bring smiles.
If you try these tips, I’d love to hear how your cookies turned out or any twists you discovered. Sharing your baking stories always brightens my day.
So go ahead—grab your mixing bowl, preheat that oven, and get ready to bake cookies that are just the way you like them. Happy baking!
FAQs
What’s the key difference between crispy and chewy cookies?
It mostly comes down to the ratio of sugars, butter temperature, and baking time. More granulated sugar and slightly chilled dough promote crispiness, while brown sugar and softened butter yield chewiness.
Can I make cookies crispy after baking?
Yes! You can pop slightly soft cookies back into a 300°F (150°C) oven for a few minutes to crisp them up, but watch closely to avoid burning.
Why do my cookies spread too much?
Too warm butter, too little flour, or a hot oven can cause spreading. Try chilling dough before baking and double-check your measurements.
Can I freeze cookie dough and bake later?
Absolutely! Freeze dough balls on a tray, then store in a freezer bag for up to 3 months. Bake from frozen, adding a couple extra minutes to baking time.
How do I store cookies to keep them fresh?
Store in an airtight container at room temperature. For chewy cookies, add a slice of bread to keep moisture. For crispy, keep separated from moist items or add a paper towel.
Pin This Recipe!
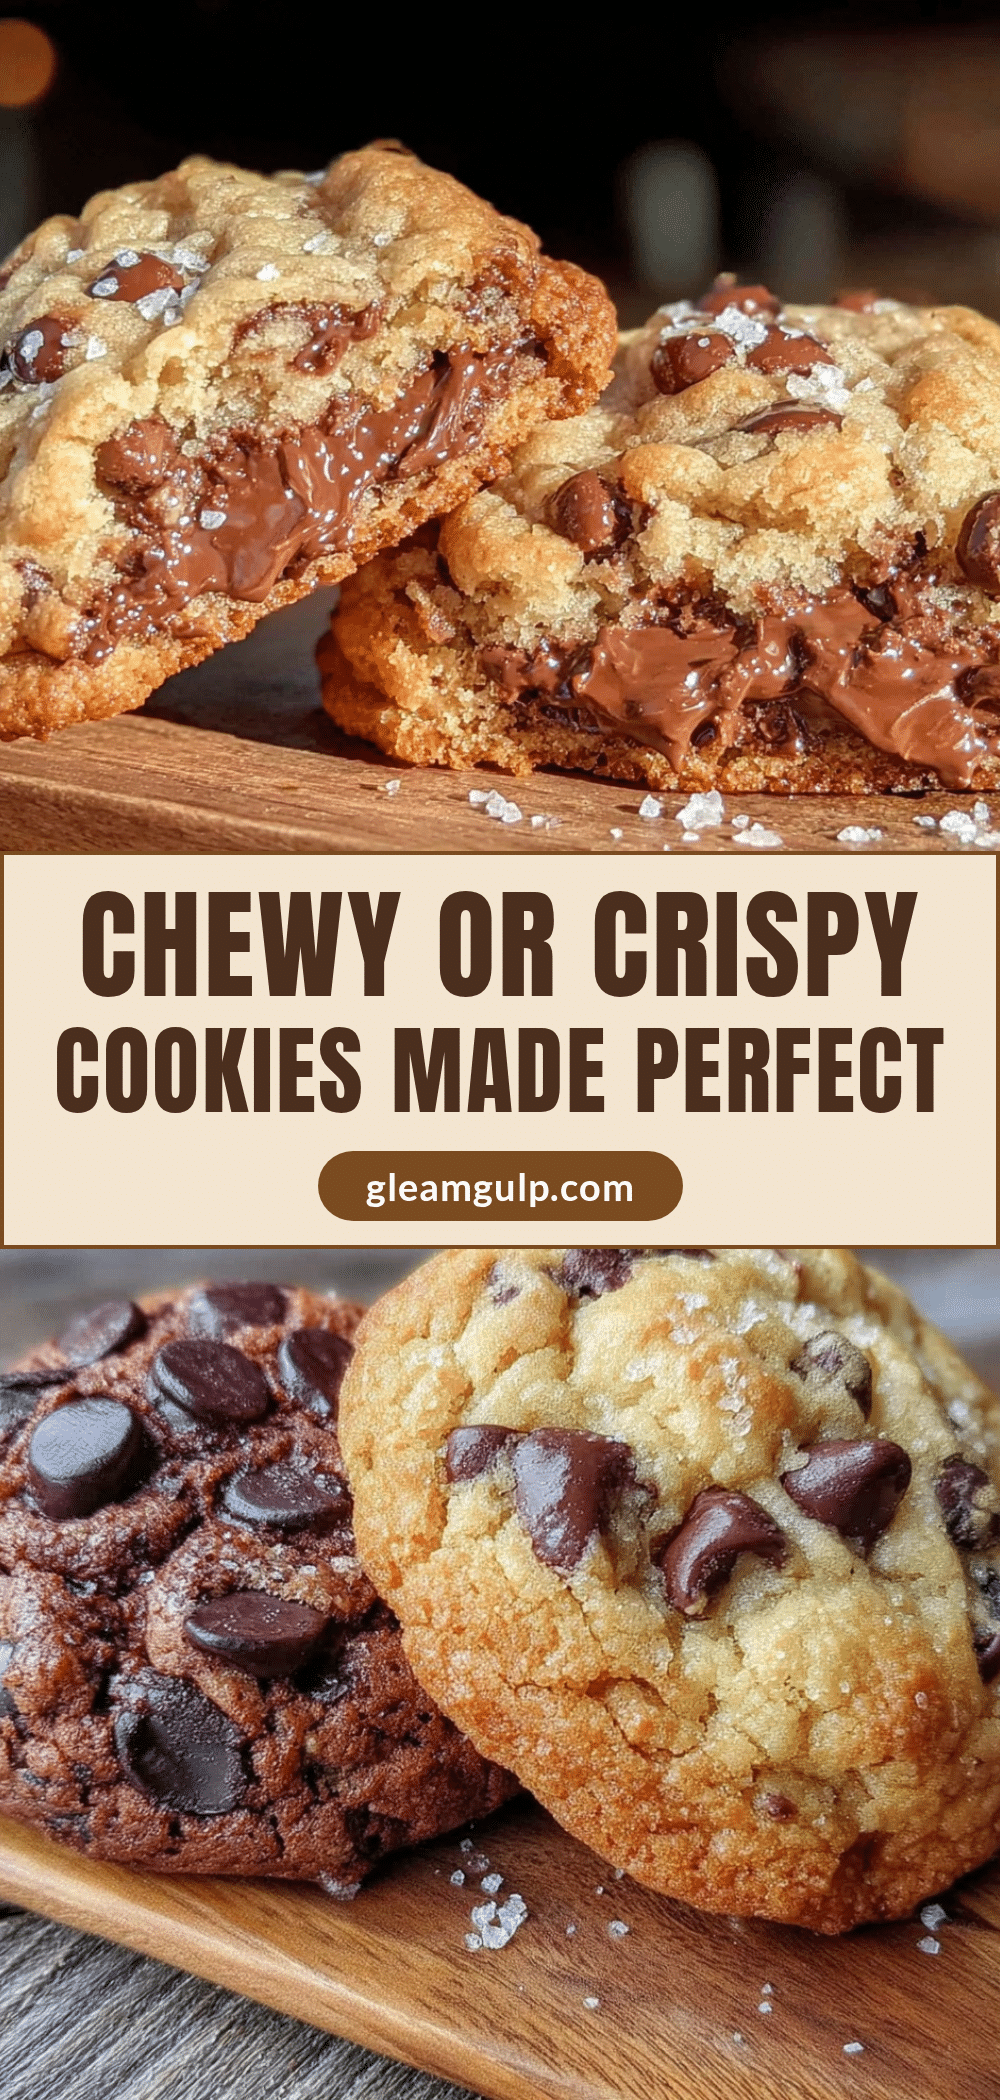
Crispy vs Chewy Cookies: How to Master Perfect Texture Easily
This recipe guide helps you master the difference between crispy and chewy cookies with simple ingredients and easy techniques, ensuring perfect texture every time.
- Prep Time: 15 minutes
- Cook Time: 12 minutes
- Total Time: 27 minutes
- Yield: 24 cookies 1x
- Category: Dessert
- Cuisine: American
Ingredients
- 2 ¼ cups (280g) all-purpose flour
- 1 teaspoon baking soda
- ½ teaspoon salt
- 1 cup (226g) unsalted butter, softened (fully softened for chewiness, slightly chilled for crispiness)
- ¾ cup (150g) granulated sugar
- ¾ cup packed (165g) brown sugar
- 2 large eggs, room temperature
- 2 teaspoons pure vanilla extract
- 1 ½ cups (270g) chocolate chips or chunks (semi-sweet recommended)
- Optional add-ins: chopped nuts, oats, or dried fruit
Instructions
- Preheat your oven to 350°F (175°C). Line two baking sheets with parchment paper or silicone mats.
- In a large bowl, whisk together the flour, baking soda, and salt. Set aside.
- In a separate bowl, beat the softened butter with granulated sugar and brown sugar until light and fluffy, about 3 to 5 minutes.
- Beat in the eggs one at a time, then stir in the vanilla extract.
- Gradually mix the dry ingredients into the wet ingredients until just combined. Do not overmix.
- Fold in the chocolate chips and any optional add-ins.
- Drop rounded tablespoons of dough onto the prepared baking sheets, spacing about 2 inches apart.
- For chewy cookies, bake 9-11 minutes until edges are set but centers look slightly underbaked. For crispy cookies, bake 12-14 minutes until golden brown all over.
- Let cookies cool on the baking sheet for 5 minutes, then transfer to wire racks to cool completely.
Notes
For extra crispiness, chill dough for 30 minutes before baking. Use fully softened butter for chewy cookies and slightly chilled butter for crispy cookies. Avoid overmixing dough to prevent tough cookies. Adjust baking time based on your oven. Store chewy cookies with a slice of bread to retain moisture; store crispy cookies separately with a paper towel to absorb humidity.
Nutrition
- Serving Size: 1 cookie
- Calories: 150170
- Sugar: 1214
- Fat: 810
- Carbohydrates: 2022
- Protein: 2
Keywords: cookies, crispy cookies, chewy cookies, chocolate chip cookies, baking, cookie texture, easy cookies, homemade cookies


