Love this? Save it for later!
Share the inspiration with your friends
My neighbor, a retired carpenter named Frank who I swear can fix anything but has never once baked a thing in his life, asked me why I couldn’t just skip the step of creaming the butter and sugar for my usual muffin recipe. I started to explain the science of it all—the air incorporation, the texture, the whole reason baking is a precise art. Then I stopped. Honestly, I had no good reason except that’s how I’d always done it. So, on a random Tuesday afternoon, with the first real chill of autumn settling into my kitchen, I threw the butter and sugar in a bowl, handed Frank the mixer, and let him go to town for thirty seconds. The muffins were fine. They were more than fine. They were the fluffiest, most tender things I’d made in weeks.
That little moment of being wrong stuck with me. It got me thinking about all the other rules I follow without question, especially when it comes to fall baking. We get so caught up in the “right way” that we forget the whole point is to make something delicious that makes us feel good. These Cozy Pumpkin Oat Muffins with Honey are the result of that mindset shift. They’re not fussy, they don’t require a stand mixer or a degree in pastry arts, and they taste like everything you love about autumn in a single, perfectly domed bite. Maybe you’ve been there, staring at a recipe and wondering why you’re doing something a certain way. Trust me, I get it.
The first time I made these, I was trying to use up a half-can of pumpkin puree and a jar of honey that was starting to crystallize. I figured, what’s the worst that could happen? I accidentally used oat flour instead of rolled oats because I grabbed the wrong bag from the pantry—a classic Tuesday move. The muffins were a little denser, but the honey and pumpkin kept them so moist that nobody noticed. I spilled batter on the stovetop and forgot to set a timer, pulling them out by the smell alone. And you know what? They were still the best thing I’d baked all season. That’s when I knew this recipe was a keeper. It’s forgiving, it’s flexible, and it makes your whole house smell like a candle shop in the best possible way.
Why You’ll Love This Recipe
Let me tell you why these muffins have earned a permanent spot in my fall rotation. I’ve tested this recipe at least eight times—with different oats, different sweeteners, even different pans—and every single time, people ask for the recipe before they’ve finished their first muffin. That’s the kind of trust I’m talking about.
- Quick & Easy: From start to finish, these muffins are on your table in about 30 minutes. No complicated techniques, no waiting for dough to chill. Mix, scoop, bake, done.
- Simple Ingredients: You probably have most of these in your kitchen right now. Pumpkin puree, oats, honey, eggs, flour, butter—nothing fancy, nothing hard to find.
- Perfect for Fall Mornings: These are made for cozy weekends, lazy breakfasts, or grabbing one as you head out the door with a thermos of coffee. They’re also fantastic for Thanksgiving brunch or a Halloween party treat.
- Crowd-Pleaser: My picky-eating nephew devoured three in one sitting. My neighbor who “doesn’t like pumpkin” asked for the recipe. Kids and adults alike go crazy for them.
- Unbelievably Delicious: The texture is what gets people. The oats add a chewy, hearty bite while the honey keeps everything tender and moist. The pumpkin flavor is there but not overwhelming—it’s balanced, cozy, and deeply satisfying.
What makes this recipe different from every other pumpkin muffin out there? It’s the combination of oat flour and rolled oats. Most recipes use one or the other, but using both gives you this incredible texture that’s soft in the middle with a little chewiness throughout. Plus, the honey adds a floral sweetness that pairs perfectly with pumpkin in a way that granulated sugar just can’t match. It’s not just another pumpkin muffin—it’s the one you’ll keep coming back to all season long.
This recipe isn’t just good—it is the kind that makes you close your eyes after the first bite. It’s comfort food reimagined: healthier with whole grains and natural sweetener, faster than a complicated coffee shop pastry, but with the same soul-soothing satisfaction. Perfect for impressing guests without stress, or turning a simple Tuesday morning into something memorable.
What Ingredients You Will Need
This recipe uses simple, wholesome ingredients to deliver bold flavor and satisfying texture without the fuss. Most of these are pantry staples, especially if you do any fall baking at all.
For the Muffins
- 1 ½ cups all-purpose flour (190g) – You can use whole wheat pastry flour for a heartier texture, but all-purpose gives the softest crumb.
- 1 cup rolled oats (90g) – Not quick oats! Rolled oats give that perfect chewy texture. I use Bob’s Red Mill old-fashioned oats.
- ½ cup oat flour (60g) – You can buy this or make your own by blitzing rolled oats in a food processor until powdery.
- 1 teaspoon baking soda
- 1 ½ teaspoons pumpkin pie spice – Or make your own with ½ tsp cinnamon, ¼ tsp nutmeg, ¼ tsp ginger, and ⅛ tsp cloves.
- ½ teaspoon salt
- 1 cup pumpkin puree (240g) – Not pumpkin pie filling! Make sure it’s 100% pure pumpkin. Libby’s is my go-to.
- ⅓ cup honey (113g) – Use a mild honey like clover or orange blossom so the flavor doesn’t overpower the pumpkin. If your honey is crystallized, warm the jar in a bowl of hot water.
- ¼ cup unsalted butter (56g), melted and cooled slightly
- ¼ cup milk (60ml) – Any milk works. I use whole milk for richness, but oat milk or almond milk are great too.
- 2 large eggs, room temperature
- 1 teaspoon vanilla extract
For the Topping (Optional but Highly Recommended)
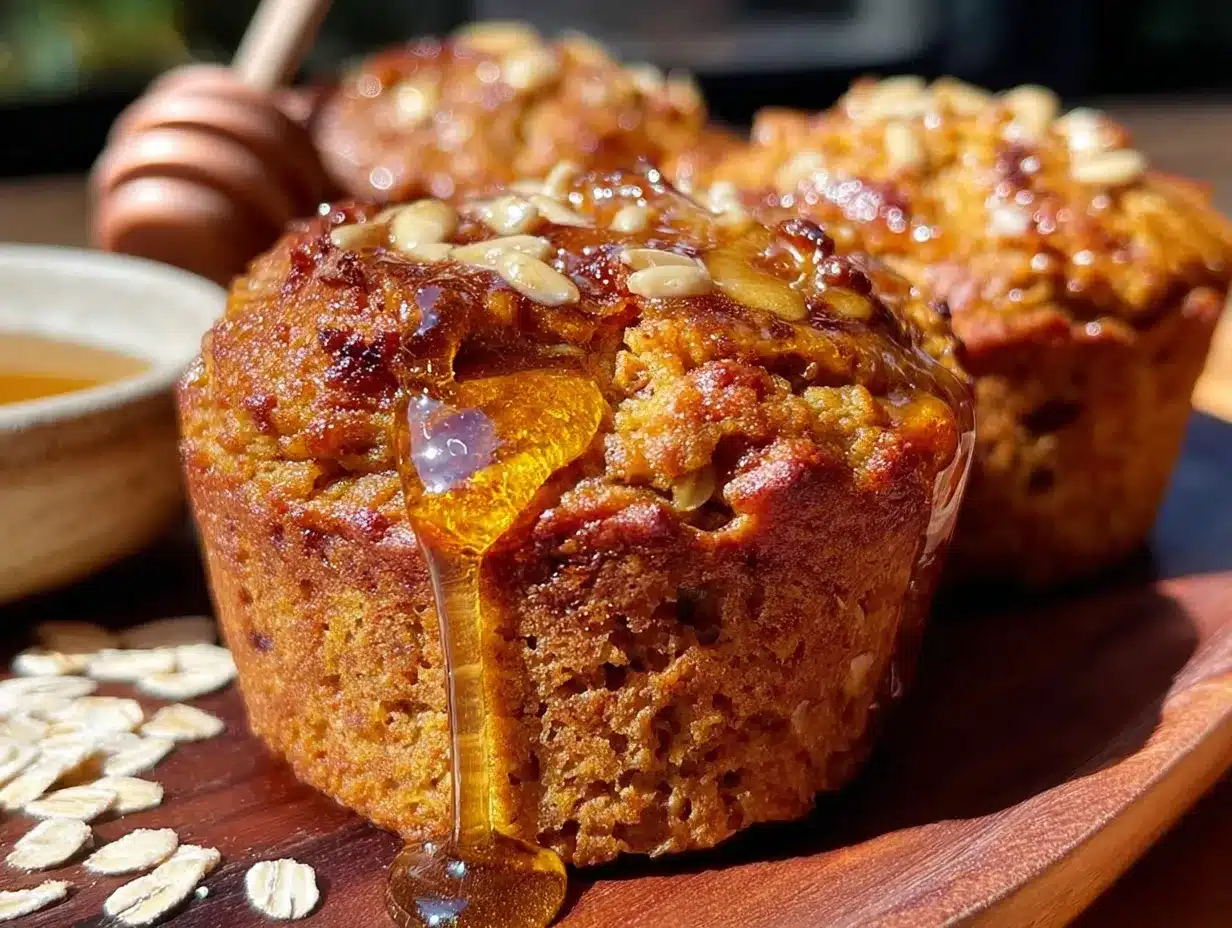
- 2 tablespoons rolled oats
- 1 tablespoon honey – Drizzle over the tops before baking for a slightly crunchy, caramelized finish.
- Optional: A sprinkle of coarse sugar or a pinch of flaky sea salt right before they go in the oven.
Ingredient Selection Tips: When choosing pumpkin puree, look for cans that say “100% pure pumpkin” and avoid anything labeled “pumpkin pie mix” which has added sugar and spices. For the oats, stick with old-fashioned rolled oats—they hold their shape better and give the muffins that hearty texture. If you only have quick oats, the muffins will be softer and less chewy, but they’ll still taste great.
Substitution Guidance: For a gluten-free version, use a 1:1 gluten-free flour blend in place of the all-purpose flour and make sure your oats are certified gluten-free. Swap the butter with coconut oil (melted) for a dairy-free option. If you’re out of honey, maple syrup works beautifully—just reduce the milk by a tablespoon since maple syrup is thinner.
Equipment Needed
You don’t need a fancy bakery setup for these muffins. Here’s what I use:
- 12-cup muffin pan – Standard size works best. I love my USA Pan for even baking and easy release.
- Paper liners – Or you can grease the pan well with butter or non-stick spray.
- Two mixing bowls – One large, one medium. Glass or stainless steel works great.
- Whisk – For mixing dry ingredients and smoothing out the wet mixture.
- Rubber spatula – For folding everything together without overmixing.
- Measuring cups and spoons – I prefer metal measuring cups for dry ingredients and glass for liquids.
- Kitchen scale – Honestly, this is a game-changer for baking. It’s more accurate and means fewer dishes. I use my Escali scale every single time.
- Cooling rack – Essential for letting the muffins cool evenly so they don’t get soggy on the bottom.
Budget-Friendly Options: Don’t have a muffin pan? You can use a standard 8×8 baking dish and make muffin-top style bars—just reduce the baking time by a few minutes and watch closely. No cooling rack? A wire oven rack works in a pinch, or just let them cool in the pan for 10 minutes then transfer to a plate.
Preparation Method
Alright, let’s get baking. I promise this is easier than you think.
- Preheat your oven to 375°F (190°C). Position the rack in the center of the oven. Line your muffin pan with paper liners or grease the cups well. I like using paper liners because they make cleanup a breeze and the muffins come out perfectly every time.
- In a large bowl, whisk together the dry ingredients: all-purpose flour, rolled oats, oat flour, baking soda, pumpkin pie spice, and salt. Give it a good stir to make sure everything is evenly distributed. This takes about 30 seconds and is worth it—nobody wants a pocket of baking soda in their muffin.
- In a medium bowl, combine the wet ingredients: pumpkin puree, honey, melted butter, milk, eggs, and vanilla extract. Whisk until smooth and well combined. The mixture should be a beautiful deep orange color and smell amazing already. If your butter was too hot and cooked the eggs a little, don’t panic—just whisk faster and it’ll be fine. (Ask me how I know.)
- Pour the wet ingredients into the dry ingredients. Use a rubber spatula to fold everything together gently. Stir just until you no longer see streaks of flour—about 10 to 12 strokes. A few lumps are totally fine. Overmixing will make the muffins tough, and we want them tender and fluffy.
- Let the batter rest for 5 minutes. This is a trick I learned from a baker friend. Letting the oats absorb some of the liquid makes the muffins more tender and gives the oat flour time to hydrate. It’s a small step that makes a big difference.
- Scoop the batter into the prepared muffin cups. Fill each cup about three-quarters full. I use a ⅓-cup scoop for even portions. If you want bakery-style domed tops, fill them a little fuller—just be careful they don’t overflow.
- Add the topping if using. Sprinkle a few rolled oats over each muffin, then drizzle a tiny bit of honey on top. If you’re feeling fancy, add a pinch of flaky sea salt or coarse sugar. This gives the muffins a beautiful, slightly crunchy top that contrasts perfectly with the soft interior.
- Bake for 16 to 20 minutes. Start checking at 16 minutes. The muffins are done when a toothpick inserted into the center comes out clean or with just a few moist crumbs. The tops should be golden brown and spring back when lightly touched. My oven runs hot, so I always check at 15 minutes just to be safe.
- Cool in the pan for 5 minutes. This allows the muffins to set and makes them easier to remove. Then transfer them to a wire rack to cool completely. If you try to move them too soon, they might fall apart—trust me, I’ve been there.
Sensory Cues: During baking, your kitchen will fill with the most incredible smell—like pumpkin pie and oatmeal cookies had a baby. The muffins will puff up and turn a deep golden brown. When you tap the top, it should feel firm but springy. If you pull one out and the top sinks slightly, that’s okay—it just means they’re extra moist.
Cooking Tips & Techniques
After making these muffins more times than I can count, I’ve picked up a few tricks that I wish I’d known from the start.
Room temperature ingredients matter. I know, I know, it’s annoying to wait for eggs to warm up. But cold eggs can seize the melted butter and make the batter lumpy. If you forget to take them out ahead of time, place the eggs in a bowl of warm water for 5 minutes. Works like a charm.
Don’t overmix the batter. This is the number one mistake I see people make. Mix until just combined—a few streaks of flour are okay. Overmixing develops the gluten and makes the muffins dense and rubbery. You want them light and tender.
Use a cookie scoop for even muffins. A ⅓-cup scoop gives you perfectly portioned muffins that bake evenly. If you don’t have one, use two spoons to divide the batter. Uneven muffin sizes mean some will be overdone while others are underdone.
Check for doneness with a toothpick. Insert it into the center of a muffin—if it comes out clean or with a few moist crumbs, they’re done. If it’s wet with batter, give them another 2 minutes and check again. Every oven is different, so trust the toothpick over the timer.
Let them cool properly. I know it’s tempting to tear into a warm muffin right away, but letting them cool for at least 10 minutes on a wire rack helps the texture set. Warm muffins are delicious, but they can be a bit fragile. Patience pays off.
My biggest failure? I once forgot the baking soda entirely. The muffins came out flat, dense, and sad—like little hockey pucks. I still ate them because I hate wasting food, but it was a reminder that baking soda is not optional. Always double-check your ingredients before you start mixing.
Variations & Adaptations
This recipe is incredibly flexible. Here are some of my favorite ways to change it up:
- Chocolate Chip Pumpkin Oat Muffins: Fold in ½ cup of chocolate chips (dark, milk, or white all work) along with the wet ingredients. The chocolate adds a rich, melty surprise in every bite.
- Vegan Version: Replace the eggs with flax eggs (2 tablespoons ground flaxseed mixed with 6 tablespoons water, let sit for 5 minutes), use melted coconut oil instead of butter, and choose a plant-based milk. The texture will be slightly denser but still delicious.
- Nutty Crunch: Add ½ cup of chopped pecans or walnuts to the batter. Toast them first for extra flavor—just spread them on a baking sheet and bake at 350°F for 5-7 minutes until fragrant.
- Spiced Up: Add ¼ teaspoon of cardamom or a pinch of black pepper to the spice mix. Cardamom adds a floral, citrusy note that’s incredible with pumpkin.
- Apple Pumpkin Combo: Fold in ½ cup of finely diced apple (peeled) for a fresh, juicy pop in every bite. Honeycrisp or Granny Smith work great.
- Gluten-Free: Use a 1:1 gluten-free flour blend and certified gluten-free oats. I’ve tested this with King Arthur Measure for Measure and it works perfectly.
One of my personal variations is adding a tablespoon of orange zest to the batter. The bright citrus flavor cuts through the richness of the pumpkin and honey beautifully. I tried it on a whim one morning when I had an orange about to go bad, and now it’s my secret trick for making these muffins feel extra special.
Serving & Storage Suggestions
These muffins are best served warm, but they’re absolutely delicious at room temperature too. Here’s how to make the most of them:
Serving: For the ultimate cozy experience, warm a muffin in the microwave for 10-15 seconds and spread it with a pat of salted butter or a drizzle of extra honey. They’re perfect with a hot cup of coffee, a chai latte, or a glass of cold milk. For a fall brunch spread, serve them alongside a pumpkin spice latte and a bowl of fresh fruit.
Storage: Store leftover muffins in an airtight container at room temperature for up to 3 days. To keep them extra moist, place a paper towel in the bottom of the container and another on top of the muffins. This absorbs excess moisture without drying them out. Do not refrigerate—the fridge will dry them out and make them stale faster.
Freezing: These muffins freeze beautifully. Let them cool completely, then place them in a single layer in a freezer-safe bag or container. They’ll keep for up to 3 months. To thaw, leave them at room temperature for about an hour, or microwave for 20-30 seconds. I always make a double batch and stash half in the freezer for busy mornings.
Reheating: For that fresh-from-the-oven taste, reheat a muffin in a 350°F oven for 5-7 minutes or in the microwave for 15-20 seconds. If you’re reheating from frozen, add an extra minute in the microwave or 10 minutes in the oven.
Flavor Development: Honestly, these muffins taste even better the next day. The flavors meld together overnight, and the honey’s sweetness becomes more subtle and integrated. If you can resist eating them all on day one, you’re in for a treat on day two.
Nutritional Information & Benefits
Here’s the estimated nutritional breakdown for one muffin (based on 12 muffins, without optional topping):
| Nutrient | Amount |
|---|---|
| Calories | 195 |
| Total Fat | 6g |
| Saturated Fat | 3g |
| Cholesterol | 42mg |
| Sodium | 210mg |
| Total Carbohydrates | 32g |
| Dietary Fiber | 3g |
| Sugars | 14g |
| Protein | 5g |
Health Benefits: Pumpkin is packed with vitamin A (great for eye health and immunity), fiber, and antioxidants. Oats provide soluble fiber that helps lower cholesterol and keeps you full longer. Honey offers natural antibacterial properties and is a lower-glycemic sweetener than refined sugar. These muffins are a great way to get more whole grains and vegetables into your day without feeling like you’re eating health food.
Dietary Considerations: This recipe is naturally vegetarian and can be made vegan, dairy-free, and gluten-free with the substitutions listed above. It’s also nut-free if you skip the optional nuts. The muffins contain wheat, dairy (unless substituted), and eggs (unless using flax eggs).
Personal Perspective: I love that these muffins feel indulgent but are actually pretty wholesome. They’re sweet enough to satisfy a craving but not so sugary that I feel guilty eating one for breakfast. It’s the kind of recipe that makes you feel good about what you’re eating—and that’s a win in my book.
Conclusion
These Cozy Pumpkin Oat Muffins with Honey are everything I want in a fall recipe: easy, forgiving, and deeply satisfying. They come together in under 30 minutes with ingredients you probably already have, and they make your whole house smell like autumn. Whether you’re baking for a crowd, meal-prepping for the week, or just craving something warm and cozy, these muffins deliver every single time.
I love that this recipe is flexible enough to adapt to whatever you have on hand. Swap the honey for maple syrup, add chocolate chips or nuts, make them gluten-free—it all works. The base is so solid that you can play around without worrying about ruining it. That’s the kind of recipe I keep coming back to, and I hope it becomes a staple in your kitchen too.
I’d love to hear how yours turn out! Leave a comment below and let me know if you tried any variations, or tag me in your photos on social media. Happy baking, friends—here’s to a cozy, delicious fall season.
Frequently Asked Questions
Can I use quick oats instead of rolled oats?
Yes, you can! The muffins will be softer and less chewy since quick oats are more finely processed. They’ll still taste great, just with a different texture. If you only have quick oats, go ahead and use them—no need to make a special trip to the store.
Can I make these muffins ahead of time?
Absolutely. You can bake them up to 3 days in advance and store them in an airtight container at room temperature. They also freeze beautifully for up to 3 months. I often make a double batch on Sunday and have breakfast ready all week.
Can I use pumpkin pie filling instead of pumpkin puree?
I wouldn’t recommend it. Pumpkin pie filling has added sugar and spices, which will throw off the sweetness and texture of the muffins. Stick with 100% pure pumpkin puree for the best results. If you only have pie filling, reduce the honey by half and skip the pumpkin pie spice.
Why did my muffins turn out dense?
This usually happens from overmixing the batter. Mix just until the dry ingredients are incorporated—a few lumps are fine. Overmixing develops the gluten and makes the muffins tough. Another culprit could be expired baking soda, which loses its leavening power over time. Always check the date on your baking soda!
Can I make these into mini muffins?
Yes! Mini muffins are perfect for snacking or parties. Bake them at the same temperature (375°F) but reduce the time to 10-12 minutes. Start checking at 10 minutes with a toothpick. You’ll get about 24 mini muffins from this recipe.
Pin This Recipe!
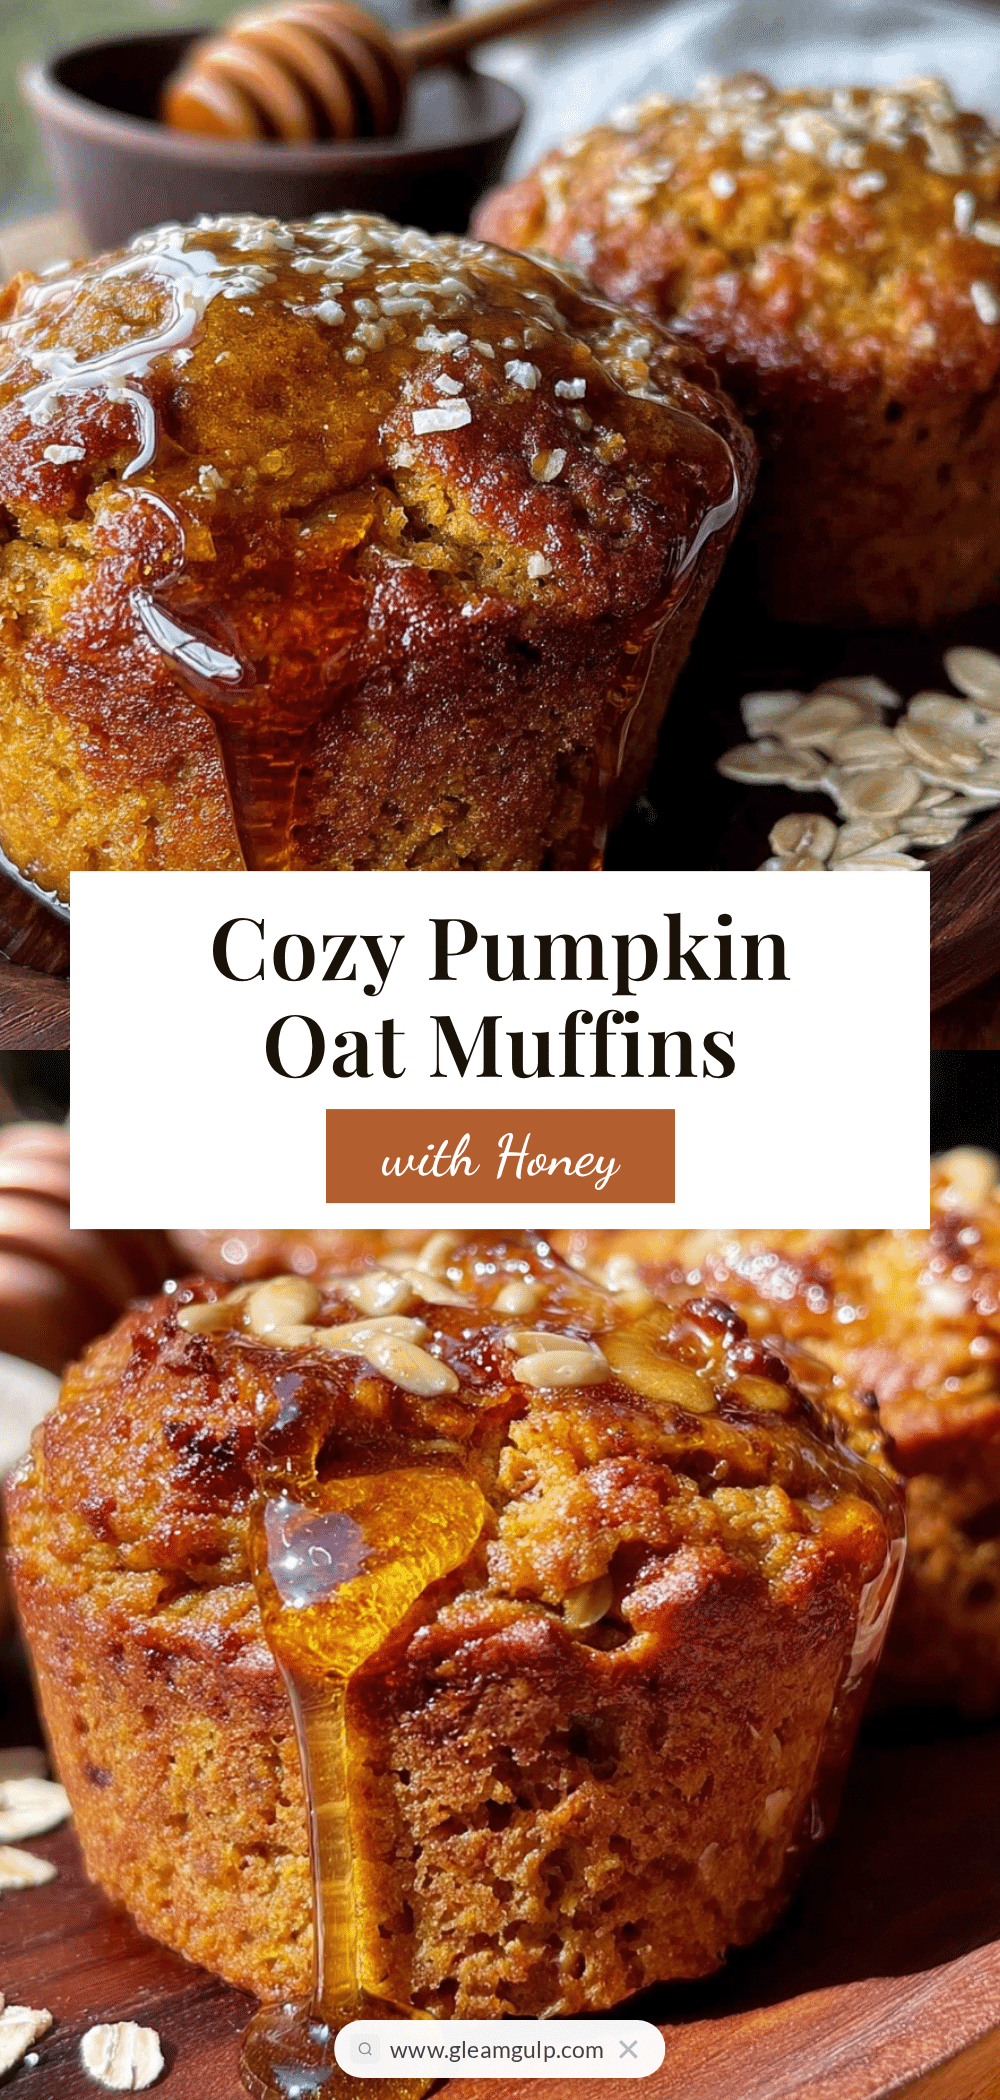
Cozy Pumpkin Oat Muffins with Honey – Easy Fall Recipe
These Cozy Pumpkin Oat Muffins with Honey are easy, forgiving, and deeply satisfying. They come together in under 30 minutes with simple ingredients and taste like everything you love about autumn.
- Prep Time: 10 minutes
- Cook Time: 18 minutes
- Total Time: 28 minutes
- Yield: 12 muffins 1x
- Category: Breakfast
- Cuisine: American
Ingredients
- 1 ½ cups all-purpose flour (190g)
- 1 cup rolled oats (90g)
- ½ cup oat flour (60g)
- 1 teaspoon baking soda
- 1 ½ teaspoons pumpkin pie spice
- ½ teaspoon salt
- 1 cup pumpkin puree (240g)
- ⅓ cup honey (113g)
- ¼ cup unsalted butter (56g), melted and cooled slightly
- ¼ cup milk (60ml)
- 2 large eggs, room temperature
- 1 teaspoon vanilla extract
- 2 tablespoons rolled oats (for topping, optional)
- 1 tablespoon honey (for topping, optional)
- Optional: coarse sugar or flaky sea salt for topping
Instructions
- Preheat your oven to 375°F (190°C). Position the rack in the center of the oven. Line your muffin pan with paper liners or grease the cups well.
- In a large bowl, whisk together the dry ingredients: all-purpose flour, rolled oats, oat flour, baking soda, pumpkin pie spice, and salt.
- In a medium bowl, combine the wet ingredients: pumpkin puree, honey, melted butter, milk, eggs, and vanilla extract. Whisk until smooth and well combined.
- Pour the wet ingredients into the dry ingredients. Use a rubber spatula to fold everything together gently. Stir just until you no longer see streaks of flour—about 10 to 12 strokes. A few lumps are fine.
- Let the batter rest for 5 minutes.
- Scoop the batter into the prepared muffin cups. Fill each cup about three-quarters full.
- Add the topping if using: Sprinkle a few rolled oats over each muffin, then drizzle a tiny bit of honey on top. Optionally add a pinch of flaky sea salt or coarse sugar.
- Bake for 16 to 20 minutes. Start checking at 16 minutes. The muffins are done when a toothpick inserted into the center comes out clean or with just a few moist crumbs.
- Cool in the pan for 5 minutes, then transfer to a wire rack to cool completely.
Notes
For gluten-free, use a 1:1 gluten-free flour blend and certified gluten-free oats. For dairy-free, swap butter with melted coconut oil and use plant-based milk. For vegan, use flax eggs (2 tbsp ground flaxseed + 6 tbsp water) and coconut oil. Muffins can be stored at room temperature for up to 3 days or frozen for up to 3 months.
Nutrition
- Serving Size: 1 muffin
- Calories: 195
- Sugar: 14
- Sodium: 210
- Fat: 6
- Saturated Fat: 3
- Carbohydrates: 32
- Fiber: 3
- Protein: 5
Keywords: pumpkin muffins, oat muffins, honey muffins, fall baking, easy muffin recipe, pumpkin oat muffins