Love this? Save it for later!
Share the inspiration with your friends
The neighborhood cookie swap was in three hours and I’d completely forgotten. Everyone else would be bringing those elaborate, multi-day creations—you know the ones. Hand-piped gingerbread snowflakes, perfectly layered French macarons, chocolate truffles that looked like they came from a fancy Parisian shop. And me? I had a half-empty can of pumpkin puree, some butter that was about to expire, and honestly, a little bit of panic.
I stared at my pantry like it might magically produce something impressive. It didn’t. But what it did have was flour, sugar, some warming spices I’d bought on a whim last fall, and that lonely can of pumpkin. Let me tell you, I almost just brought store-bought cookies. I mean, who would blame me, right? But then I thought about the brown butter I’d learned to make a few weeks back—that nutty, almost caramel smell that fills your whole kitchen. And something clicked.
I threw together this pumpkin loaf without even measuring properly. I was rushing so much I spilled flour on my favorite sweater. The glaze? I whisked it in a cereal bowl because all my good mixing bowls were dirty. When I walked into that swap with my humble loaf, I actually apologized. “It’s just something I threw together,” I said, feeling my face get hot.
Well, that “just something” won the whole thing. People kept coming back for slice after slice, asking for the recipe, and I kept saying, “It’s really nothing special.” But honestly? It kind of is. Maybe you’ve been there—showing up with something simple while everyone else went all out, only to realize that sometimes the simplest things are the ones that stick with you. That’s this loaf. It’s the recipe that taught me you don’t need fancy techniques or a dozen ingredients. You just need a little trust in the process and maybe a little desperation.
Why You’ll Love This Pumpkin Loaf
This isn’t just another pumpkin bread recipe floating around the internet. I’ve tested this one about seven times—yes, seven—to get the texture exactly right. Not too dense, not too crumbly, with that perfect moist crumb that makes you close your eyes on the first bite. And that brown butter glaze? It’s the kind of thing that makes people think you spent hours in the kitchen when really, you just browned some butter and stirred in powdered sugar.
- Quick & Easy: From start to finish, you’re looking at about an hour. Most of that is baking time where you can do other things.
- Simple Ingredients: No weird extracts or hard-to-find items. If you’ve baked anything before, you probably have 90% of this already.
- Perfect for Fall Gatherings: Whether it’s a Thanksgiving potluck, a cozy brunch, or just a Tuesday that needs some warmth, this loaf fits right in.
- Crowd-Pleaser: I’ve served this to kids who “don’t like pumpkin” and adults who ate three slices. It’s that good.
- Unbelievably Delicious: The combination of warm spices with that nutty, rich brown butter glaze is honestly next-level comfort food.
What makes this recipe different from the rest is the technique. Most pumpkin loaves turn out either too wet or too dry—there’s no in-between. I’ve found that the trick is in how you handle the pumpkin puree and the temperature of your ingredients. Plus, that brown butter glaze isn’t just a decoration. It soaks into the warm loaf just enough to make every bite taste like the best part of fall. This is comfort food reimagined—faster, simpler, but with the same soul-soothing satisfaction that makes you want to curl up with a slice and a cup of coffee.
What Ingredients You Will Need
This recipe uses simple, wholesome ingredients that work together to create something truly special. Most of these are pantry staples, so you might not even need a grocery run.
For the Pumpkin Loaf
- All-purpose flour, 1 ¾ cups (220g) – I use King Arthur Flour for consistent results, but any brand works fine
- Granulated sugar, 1 cup (200g) – Adds sweetness and helps with that tender crumb
- Brown sugar, ½ cup (100g), packed – This is where the depth of flavor comes from
- Pumpkin puree, 1 cup (240g) – Make sure it’s 100% pumpkin, not pumpkin pie filling. Libby’s is my go-to
- Vegetable oil, ½ cup (120ml) – Keeps the loaf incredibly moist. You can substitute melted coconut oil
- Large eggs, 2, at room temperature – Room temperature eggs mix more evenly into the batter
- Vanilla extract, 1 teaspoon – Pure vanilla makes a difference here
- Baking soda, 1 teaspoon – For lift and structure
- Baking powder, ½ teaspoon – Works with the baking soda for the perfect rise
- Salt, ½ teaspoon – Balances the sweetness and brings out the spices
- Ground cinnamon, 1 ½ teaspoons – The backbone of the spice blend
- Ground nutmeg, ½ teaspoon – Freshly grated if you have it, but pre-ground works too
- Ground ginger, ½ teaspoon – Adds a little warmth and zing
- Ground cloves, ¼ teaspoon – Just a touch, it’s potent stuff
For the Brown Butter Glaze
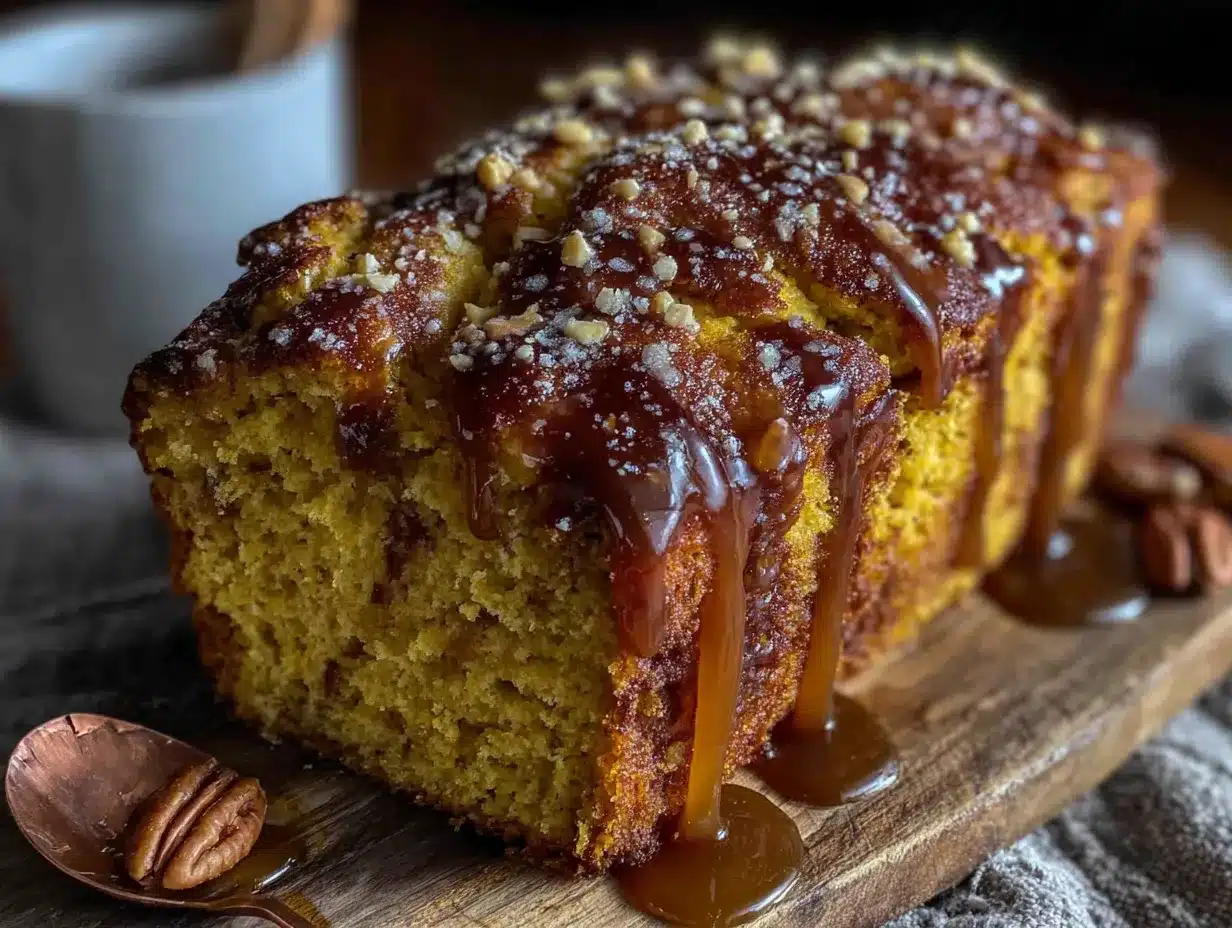
- Unsalted butter, ¼ cup (½ stick or 57g) – Don’t use salted here, you want to control the salt level
- Powdered sugar, 1 cup (120g), sifted – Sifting prevents lumps in your glaze
- Vanilla extract, ½ teaspoon
- Milk, 2-3 tablespoons – Whole milk gives the richest glaze, but any milk works. Start with 2 tablespoons and add more if needed
- Pinch of salt – Just a tiny one to balance the sweetness
One thing I’ve learned about pumpkin puree—don’t buy the big can unless you’re making multiple loaves. The 15-ounce can is perfect for one loaf with maybe a tablespoon left over. And for the spices, I know it’s tempting to use pumpkin pie spice, but trust me on this one. Using individual spices gives you a much more complex, layered flavor. You can adjust each one to your taste, which you can’t do with a pre-mixed blend.
If you’re out of brown sugar, you can make your own by mixing ½ cup granulated sugar with 1 tablespoon molasses. It’s not quite the same, but it works in a pinch. For a dairy-free version, use melted coconut oil instead of butter in the loaf, and for the glaze, use a plant-based butter and your favorite non-dairy milk.
Equipment Needed
You don’t need a professional kitchen for this recipe. Here’s what you’ll need:
- 9×5-inch loaf pan – The standard size. If you use an 8×4, your loaf will be taller and可能需要 more baking time
- Parchment paper – Not strictly necessary, but it makes lifting the loaf out so much easier. I learned this the hard way after a stuck loaf incident
- Large mixing bowl – For the dry ingredients
- Medium mixing bowl – For the wet ingredients
- Whisk – For mixing everything together
- Rubber spatula – For folding and scraping the bowl clean
- Small saucepan – For browning the butter. A light-colored pan helps you see the color change
- Cooling rack – Lets air circulate so your loaf doesn’t get soggy on the bottom
- Measuring cups and spoons – For accuracy
- Kitchen scale – Optional, but I find it more accurate for flour. If you spoon and level your flour, you’ll be fine without one
I use a basic Nordic Ware loaf pan that cost me about $12, and it works perfectly. You don’t need anything fancy. If you don’t have a cooling rack, you can use the inverted rack from your oven—just make sure it’s clean. And for browning butter, any small pan works, but I prefer a stainless steel one because I can see the color change clearly. My first time browning butter, I used a dark nonstick pan and burned it because I couldn’t see what was happening. Learn from my mistakes!
Preparation Method
- Preheat your oven to 350°F (175°C). Position the rack in the center of the oven. While it’s heating, line your loaf pan with parchment paper, leaving some overhang on the long sides. This creates little handles for lifting the loaf out later. Spray the parchment lightly with nonstick spray for extra insurance.
- Make the brown butter first. Cut your ¼ cup of butter into pieces and place them in a small saucepan over medium heat. Stir occasionally with a rubber spatula. The butter will melt, then foam, then start to crackle and pop. This is normal—don’t panic. After a few minutes, the foam will subside and you’ll see little brown specks forming at the bottom of the pan. The butter will smell nutty and amazing. As soon as it turns a golden amber color—think the color of a hazelnut—remove it from the heat immediately. Pour it into a small heatproof bowl to stop the cooking process. Let it cool while you make the loaf batter.
- Whisk the dry ingredients together. In your large bowl, combine the flour, baking soda, baking powder, salt, cinnamon, nutmeg, ginger, and cloves. Whisk them together until evenly distributed. This takes about 30 seconds. I like to do this step first so I don’t forget any spices.
- Mix the wet ingredients. In your medium bowl, whisk together the pumpkin puree, granulated sugar, brown sugar, vegetable oil, eggs, and vanilla extract. Whisk until smooth and well combined. The mixture should be a beautiful deep orange color. Make sure there are no lumps of brown sugar hiding at the bottom.
- Combine wet and dry. Pour the wet ingredients into the dry ingredients. Use your rubber spatula to fold everything together gently. Here’s the important part—mix just until you don’t see any more streaks of flour. Overmixing will make your loaf tough and dense. A few small lumps are totally fine. The batter will be thick and smell incredible already.
- Pour the batter into the prepared pan. Use your spatula to spread it evenly into the corners. Give the pan a gentle tap on the counter to release any air bubbles. The batter should come about three-quarters of the way up the pan.
- Bake for 50-60 minutes. Start checking at 50 minutes. The loaf is done when a toothpick inserted into the center comes out with just a few moist crumbs attached—not wet batter. The top should be golden brown and spring back when you gently press it. Every oven is different, so trust the toothpick test more than the time. My oven runs hot, so mine is usually done at 52 minutes.
- Cool in the pan for 10 minutes. This is important—if you try to take it out too soon, it might fall apart. After 10 minutes, use the parchment paper handles to lift the loaf out and transfer it to a cooling rack. Let it cool completely before adding the glaze. I know it’s tempting to glaze it warm, but the glaze will just run right off and soak in completely. Patience, my friend.
- Make the glaze. While the loaf cools, finish the glaze. Take your cooled brown butter—it should be solid but soft, like room temperature butter. In a medium bowl, beat the brown butter with the sifted powdered sugar, vanilla, and a pinch of salt. Add milk one tablespoon at a time, stirring after each addition, until you reach a thick but pourable consistency. You want it to drizzle off the spoon in a ribbon but still hold its shape slightly on the loaf.
- Glaze the loaf. Once the loaf is completely cool, drizzle the glaze over the top. Let it cascade down the sides naturally—don’t try to spread it with a knife. Let the glaze set for about 15 minutes before slicing. This gives it time to firm up just enough.
One thing I want to mention—if your glaze seems too thin, add a little more powdered sugar. If it’s too thick, add a splash more milk. Glaze consistency is easy to adjust, so don’t stress about it.
Cooking Tips & Techniques
Let me share some things I’ve learned the hard way so you don’t have to. The first time I made this loaf, I forgot to check the temperature of my ingredients. Cold eggs and cold pumpkin puree don’t mix well with room temperature butter—well, in this case, oil. But still, room temperature ingredients create a smoother, more emulsified batter. Take your eggs and pumpkin out about 30 minutes before you start.
Browning butter seems intimidating, but it’s really just about watching and waiting. The key is to not walk away from the pan. I’ve burned butter more times than I care to admit because I thought I could chop vegetables while it browned. You can’t. Stand there, watch it, swirl the pan occasionally. The moment it turns amber and smells nutty, it’s done. If you see black specks, you’ve gone too far. Start over—it’s only a few minutes and a quarter cup of butter.
For the most consistent loaf, measure your flour correctly. The spoon-and-level method is your friend: fluff the flour with a spoon, spoon it into your measuring cup, then level it off with a flat edge. Scooping directly from the bag packs the flour down and you can end up with 20-30% more flour than you need. That’s the difference between a moist loaf and a dry one.
Here’s a mistake I made last fall—I opened the oven door too many times to check on the loaf. Every time you open that door, the temperature drops and your loaf can sink in the middle. Use the oven light and the window to check progress. Only open the door when you’re ready to test with a toothpick.
If your loaf is browning too quickly on top but isn’t done in the center, tent it loosely with aluminum foil. Just lay a piece over the top around the 40-minute mark. This stops the top from burning while the inside continues to bake.
For consistent slices, use a serrated knife and a gentle sawing motion. A regular knife will just squish the loaf. And if you want those picture-perfect slices, chill the loaf for about 20 minutes before cutting. It firms up just enough for clean cuts.
Variations & Adaptations
One of the best things about this recipe is how flexible it is. Here are some variations I’ve tried and loved:
Gluten-Free Version: Substitute the all-purpose flour with a 1:1 gluten-free baking flour blend. I’ve used Bob’s Red Mill with great results. The texture is slightly more delicate, so let the loaf cool completely before slicing. Don’t skip the cooling step with this version—it needs the extra time to set properly.
Vegan Adaptation: Replace the eggs with flax eggs (2 tablespoons ground flaxseed mixed with 6 tablespoons water, let sit for 5 minutes). Use melted coconut oil instead of vegetable oil if you want, and for the glaze, use vegan butter and your favorite plant-based milk. The loaf will be slightly denser but still delicious. I made this for my sister who’s vegan, and she said it was better than any bakery pumpkin bread she’d had.
Chocolate Chip Pumpkin Loaf: Fold in ½ cup of semi-sweet chocolate chips right before pouring the batter into the pan. The chocolate pairs amazingly with the pumpkin and spices. I like to toss the chocolate chips in a tablespoon of flour first to prevent them from sinking to the bottom. This version is dangerous—I’ve eaten half a loaf in one sitting before.
Nutty Crunch Variation: Add ½ cup of chopped pecans or walnuts to the batter. Toast them first in a dry pan for 3-4 minutes to bring out their flavor. You can also sprinkle some on top of the glaze for a pretty presentation. My neighbor swears by the pecan version and makes it every Thanksgiving.
Spice It Up: If you like things spicy, add ¼ teaspoon of cardamom and a pinch of black pepper to the spice blend. Black pepper actually enhances the flavor of pumpkin—it’s a weird but true fact. I discovered this by accident when I dropped pepper into my batter and decided to just go with it. Best accident ever.
Pumpkin Cream Cheese Swirl: Before baking, drop spoonfuls of a cream cheese mixture (4 oz softened cream cheese, 2 tablespoons sugar, 1 egg yolk, ½ teaspoon vanilla) into the batter and swirl with a knife. This makes it feel extra fancy for brunch guests.
Serving & Storage Suggestions
This pumpkin loaf is best served at room temperature or slightly warm. If you want to reheat individual slices, pop them in the microwave for 10-15 seconds. The glaze will get a little melty, which is honestly my favorite way to eat it.
For a cozy fall presentation, slice the loaf and arrange it on a wooden board. Dust with a little cinnamon or powdered sugar. Serve with hot coffee, spiced chai, or a warm apple cider. It’s also incredible with a scoop of vanilla ice cream or a dollop of whipped cream—don’t judge me, it’s amazing.
For storage, wrap the loaf tightly in plastic wrap or keep it in an airtight container at room temperature. It will stay fresh for up to 4 days. The flavors actually get better on day two—the spices have time to meld together. I’ve found that the glaze stays prettiest for the first day, but it still tastes great after that.
To freeze, wrap the unglazed loaf tightly in plastic wrap, then in aluminum foil. It will keep in the freezer for up to 3 months. When you’re ready to enjoy it, thaw it overnight in the refrigerator, then bring it to room temperature before glazing. I usually make two loaves at once—one to eat now and one to freeze for later. Future me is always grateful.
If you’ve already glazed the loaf and want to freeze leftovers, place the slices in a single layer on a baking sheet and freeze until solid, then transfer to a freezer bag. You can pull out individual slices whenever you want a little taste of fall. They thaw in about 20 minutes at room temperature.
Nutritional Information & Benefits
Here’s the approximate nutritional breakdown for one slice (based on 10 slices per loaf):
- Calories: 320
- Total Fat: 16g
- Saturated Fat: 5g
- Cholesterol: 45mg
- Sodium: 220mg
- Total Carbohydrates: 42g
- Dietary Fiber: 2g
- Sugars: 27g
- Protein: 4g
While this is definitely a treat, pumpkin itself is packed with vitamin A (great for eye health), vitamin C, and fiber. The spices—cinnamon, ginger, nutmeg—all have anti-inflammatory properties. So you’re getting a little bit of goodness with your indulgence.
For those watching their sugar intake, you can reduce the granulated sugar to ¾ cup without affecting the texture too much. The brown butter glaze is where most of the sugar lives, so you could also make a simple dusting of powdered sugar instead. Or skip the glaze entirely—the loaf is still delicious on its own, I promise.
If you have dietary restrictions, this recipe can be adapted for gluten-free and vegan diets as mentioned in the variations section. It contains dairy (butter in the glaze) and eggs, so keep that in mind for allergies.
Conclusion
This pumpkin loaf with brown butter glaze has become my go-to recipe for every fall gathering, every cozy weekend, every time I need a little comfort. It’s the recipe that taught me you don’t need to stress about impressing people with complicated techniques or fancy ingredients. Sometimes the simplest things—a humble loaf made with pantry staples and a little bit of love—are the ones that leave the biggest impression.
I hope you give this recipe a try and make it your own. Maybe you’ll add chocolate chips, or swap in some pecans, or double the spices because you love things extra warm. That’s the beauty of a good base recipe—it’s a starting point, not a strict rule. Play around with it, make mistakes, learn what you love.
I’d love to hear how it turns out for you. Did you try a variation? Did your family fight over the last slice? Did you burn the butter like I did the first time? Drop a comment below and let me know. And if you share it on social media, tag me—I want to see your beautiful loaves. Happy baking, friends. Here’s to cozy kitchens and the smell of pumpkin spice filling your home.
Frequently Asked Questions
Can I use pumpkin pie filling instead of pumpkin puree?
No, please don’t. Pumpkin pie filling has added sugar and spices, which will throw off the balance of this recipe. Stick with 100% pure pumpkin puree. If you accidentally buy pie filling, you can still use it, but reduce the sugar to ½ cup and skip the spices. The texture might be slightly different though.
Why did my pumpkin loaf sink in the middle?
This usually happens for one of three reasons: the oven temperature was too low, you opened the oven door too often during baking, or the loaf wasn’t fully baked before you took it out. Make sure your oven is preheated properly and resist the urge to peek. Use the toothpick test to check for doneness.
Can I make this into muffins instead of a loaf?
Absolutely! Grease a 12-cup muffin tin or line with paper liners. Fill each cup about ¾ full. Bake at 350°F for 18-22 minutes, until a toothpick comes out clean. You’ll get about 12-14 muffins. The glaze works perfectly drizzled over the tops too.
How do I know when the brown butter is done?
Watch for these signs: the butter will melt, foam, then the foam will subside. You’ll see brown specks forming at the bottom of the pan, and the butter will smell nutty and amazing. The color should be a golden amber—think the color of a hazelnut. The whole process takes about 5-7 minutes. Remove it from the heat immediately when you see that color.
Can I double this recipe?
Yes, this recipe doubles beautifully. Just make sure you use a large enough bowl for the dry ingredients. You can bake two loaves at the same time—just rotate the pans halfway through baking for even results. The baking time might be slightly longer since the oven is more full, so start checking at 55 minutes.
Pin This Recipe!
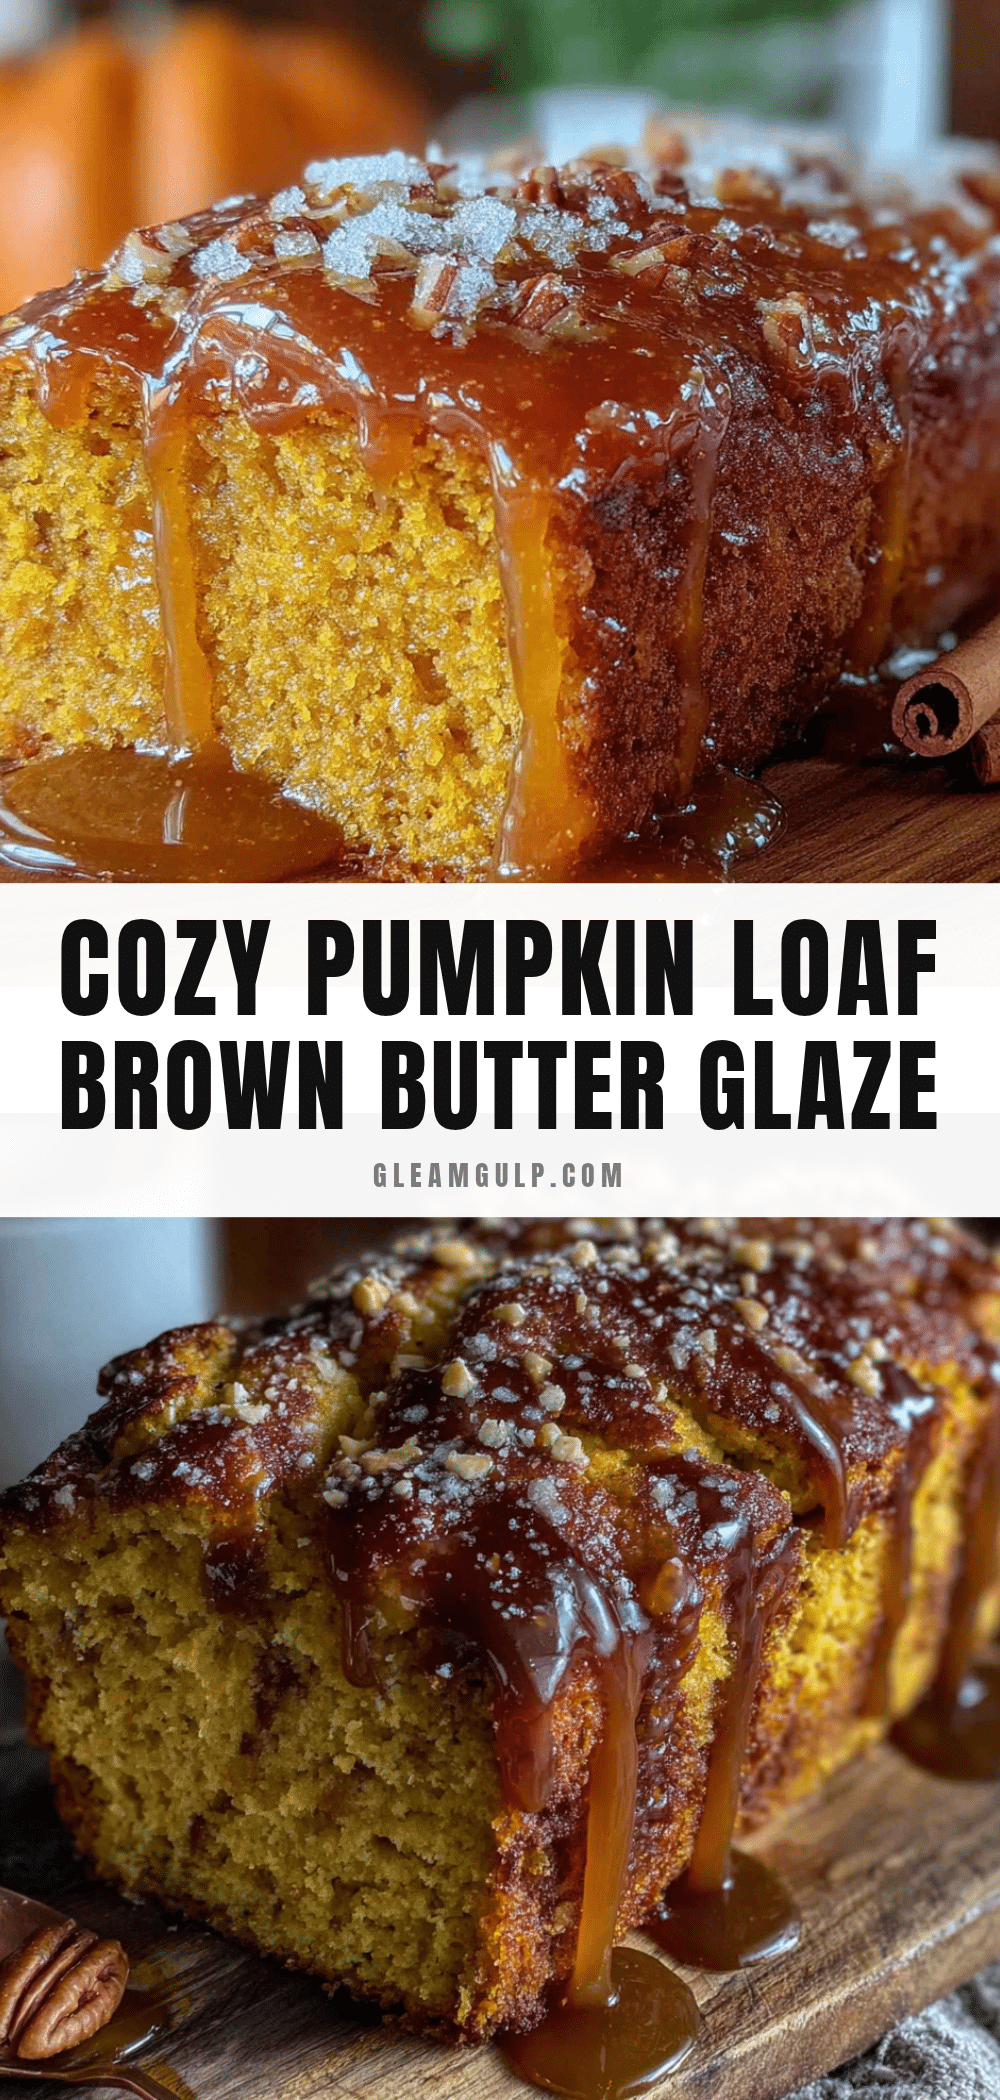
Best Easy Pumpkin Loaf Recipe with Brown Butter Glaze
This pumpkin loaf with brown butter glaze is a simple, crowd-pleasing fall treat that won a cookie swap. It’s quick to make with pantry staples and has a perfectly moist crumb.
- Prep Time: 15 minutes
- Cook Time: 50-60 minutes
- Total Time: 1 hour 15 minutes
- Yield: 10 servings 1x
- Category: Dessert
- Cuisine: American
Ingredients
- 1 ¾ cups (220g) all-purpose flour
- 1 cup (200g) granulated sugar
- ½ cup (100g) packed brown sugar
- 1 cup (240g) pumpkin puree (100% pumpkin, not pie filling)
- ½ cup (120ml) vegetable oil
- 2 large eggs, at room temperature
- 1 teaspoon vanilla extract
- 1 teaspoon baking soda
- ½ teaspoon baking powder
- ½ teaspoon salt
- 1 ½ teaspoons ground cinnamon
- ½ teaspoon ground nutmeg
- ½ teaspoon ground ginger
- ¼ teaspoon ground cloves
- ¼ cup (½ stick or 57g) unsalted butter (for glaze)
- 1 cup (120g) powdered sugar, sifted (for glaze)
- ½ teaspoon vanilla extract (for glaze)
- 2–3 tablespoons milk (for glaze)
- Pinch of salt (for glaze)
Instructions
- Preheat oven to 350°F (175°C). Line a 9×5-inch loaf pan with parchment paper, leaving overhang on the long sides. Lightly spray with nonstick spray.
- Make the brown butter: Cut ¼ cup butter into pieces and place in a small saucepan over medium heat. Stir occasionally until melted, foamy, then crackling. When foam subsides and brown specks appear, and butter turns golden amber and smells nutty, remove from heat immediately. Pour into a heatproof bowl to cool.
- In a large bowl, whisk together flour, baking soda, baking powder, salt, cinnamon, nutmeg, ginger, and cloves.
- In a medium bowl, whisk together pumpkin puree, granulated sugar, brown sugar, vegetable oil, eggs, and vanilla extract until smooth.
- Pour wet ingredients into dry ingredients. Fold gently with a rubber spatula until just combined (a few lumps are fine). Do not overmix.
- Pour batter into prepared pan and spread evenly. Tap pan gently on counter to release air bubbles.
- Bake for 50-60 minutes, until a toothpick inserted in center comes out with a few moist crumbs. If top browns too quickly, tent with foil at 40 minutes.
- Cool in pan for 10 minutes, then lift out using parchment handles and transfer to a cooling rack. Cool completely before glazing.
- Make the glaze: In a medium bowl, beat cooled brown butter with sifted powdered sugar, vanilla, and a pinch of salt. Add milk 1 tablespoon at a time until thick but pourable.
- Drizzle glaze over cooled loaf. Let set for 15 minutes before slicing.
Notes
For best results, use room temperature ingredients. Brown butter can burn quickly—watch carefully. For gluten-free, use a 1:1 gluten-free flour blend. For vegan, use flax eggs and vegan butter. Store at room temperature for up to 4 days, or freeze unglazed for up to 3 months.
Nutrition
- Serving Size: 1 slice
- Calories: 320
- Sugar: 27
- Sodium: 220
- Fat: 16
- Saturated Fat: 5
- Carbohydrates: 42
- Fiber: 2
- Protein: 4
Keywords: pumpkin loaf, brown butter glaze, easy pumpkin bread, fall dessert, pumpkin recipe