Love this? Save it for later!
Share the inspiration with your friends
My office holiday potluck was in three hours, and I’d completely forgotten. I mean, I’d even put it on my calendar, but somehow the notification had slipped right past me while I was wrangling a toddler and a leaky faucet. Everyone else would be bringing those elaborate, multi-day creations—you know the ones, the kind that look like they belong on a magazine cover. I had a half-eaten bag of semi-sweet chocolate chips, a jar of marshmallow creme that was honestly just sitting there from a forgotten s’mores project, and a growing sense of panic. “Well,” I thought, staring into my pantry like it might offer a solution, “I guess I’m making fudge.” And let me tell you, I was not confident. I’d never made fudge that didn’t turn into a grainy mess or a sticky puddle.
I grabbed the marshmallow creme (which felt like a wild idea) and just started melting things together, hoping for the best. The kitchen got a little steamy, I may have licked the spatula twice, and I definitely texted my husband a blurry photo with the caption “pray for this fudge.” I poured it into a pan, crossed my fingers, and threw it in the fridge to set while I got dressed. At the potluck, I sheepishly placed my humble, not-pretty pan next to a towering, perfectly frosted cake and a platter of artisanal cookies. I thought my fudge would be the sad, forgotten option. But then someone took a piece. Then another person. Then there was a quiet, happy murmur that grew into a chorus of “Who made this fudge?!” By the end of the night, the pan was scraped clean, and I was being asked for the recipe. I just smiled, a little embarrassed, and said, “It’s the easiest thing in the world.” I’ve been making it ever since, mostly because it’s the perfect, no-stress treat that feels like a secret weapon. Maybe you’ve been there—needing a win with zero time to spare.
Why You’ll Love This Recipe
This isn’t just another fudge recipe. After years of testing (and a few spectacular failures), I’ve landed on a version that’s foolproof, rich, and deeply satisfying. It’s the kind of recipe that makes you look like a pro, even when you’re just hoping it sets properly. Here’s why it’s a keeper:
- Quick & Easy: Comes together in about 10 minutes of active time. Perfect for last-minute holiday treats or a sudden chocolate craving. No candy thermometers, no finicky sugar syrups—just melt, stir, and chill.
- Simple Ingredients: You likely have everything in your pantry right now. No fancy trips to a specialty store. The marshmallow creme is the secret to that perfect, creamy texture that doesn’t crystallize.
- Perfect for Gifting & Gatherings: Makes a huge batch (about 2 pounds!) that’s ideal for holiday cookie plates, potlucks, or a thoughtful homemade gift. It travels beautifully and stays fresh for days.
- Crowd-Pleaser: I’ve yet to meet someone who doesn’t love this fudge. It’s a nostalgic flavor that appeals to both kids and adults. It disappears faster than almost anything else I bring to a party.
- Unbelievably Delicious: The texture is the star—it’s dense, creamy, and melts in your mouth with a perfect, rich chocolate flavor. It’s the kind of fudge that makes you close your eyes after the first bite.
This recipe is different because of the marshmallow creme. It’s not a secret ingredient for show; it genuinely changes the game. It stabilizes the fudge, prevents the sugar from crystallizing into a grainy mess, and gives it that signature silky-smooth texture that store-bought fudge just can’t touch. It’s comfort food at its finest—simple, reliable, and guaranteed to make you feel like you’ve got it all figured out.
What Ingredients You Will Need
This recipe uses simple, pantry-friendly ingredients to deliver that classic, old-fashioned fudge flavor and texture. The marshmallow creme is the hero here, acting as a stabilizer to keep the fudge perfectly smooth every single time.
- 3 cups (18 oz) Semi-Sweet Chocolate Chips: I prefer Ghirardelli or Guittard for their high cocoa butter content, which melts beautifully and gives the fudge a rich flavor. You can use milk chocolate chips for a sweeter, creamier fudge, but semi-sweet provides the perfect balance against the sweetness of the sugar and marshmallow creme.
- 1 (14 oz) can Sweetened Condensed Milk: This is non-negotiable for the classic texture. It adds sweetness and a dense, fudgy consistency. Do not substitute evaporated milk or regular milk—it will change the chemistry of the fudge completely.
- 1 (7 oz) jar Marshmallow Creme (like Marshmallow Fluff): This is the magic ingredient. It prevents the sugar from crystallizing, ensuring a smooth, creamy fudge every time. Don’t skip it or try to substitute with mini marshmallows—the texture won’t be the same.
- 1/4 cup (4 tbsp) Unsalted Butter: Adds richness and a beautiful shine to the fudge. I always use unsalted butter so I can control the salt level. If you only have salted butter, just omit the optional flaky salt at the end.
- 1 tsp Pure Vanilla Extract: Enhances the chocolate flavor. Use pure vanilla extract for the best taste, not imitation vanilla.
- 1/4 tsp Salt: Balances the sweetness and deepens the chocolate flavor. A tiny pinch makes a big difference.
- Optional: 1 cup Chopped Walnuts or Pecans: For a classic fudge texture and nutty crunch. Toast them lightly in a dry pan for 2-3 minutes to bring out their flavor before folding them in.
- Optional: Flaky Sea Salt (like Maldon): For sprinkling on top right after pouring. It adds a wonderful salty-sweet contrast that takes the fudge to the next level.
Equipment Needed
You don’t need a lot of fancy tools for this recipe, which is part of its charm. Here’s what you’ll want on hand:
- 8×8-inch Baking Pan: This is the perfect size for a thick, classic fudge. Line it with parchment paper or aluminum foil, leaving an overhang on two sides to make lifting the fudge out super easy.
- Large Heavy-Bottomed Saucepan: A heavy-bottomed pan distributes heat evenly and prevents the chocolate from scorching. A 3-quart saucepan works perfectly.
- Rubber Spatula: For stirring and scraping every last bit of fudge into the pan. A silicone spatula is heat-resistant and ideal for this job.
- Sharp Knife: For cutting the fudge into neat squares once it’s set. A chef’s knife or a long serrated knife works well. Warming the knife under hot water (and drying it) between cuts helps get clean slices.
- Measuring Cups and Spoons: For accurate ingredient measurements.
If you don’t have an 8×8 pan, a 9×9 pan will work, but your fudge will be slightly thinner. You can also use a loaf pan for a very thick, chunkier fudge. I’ve even made it in a disposable foil pan for gifting—works like a charm.
Preparation Method
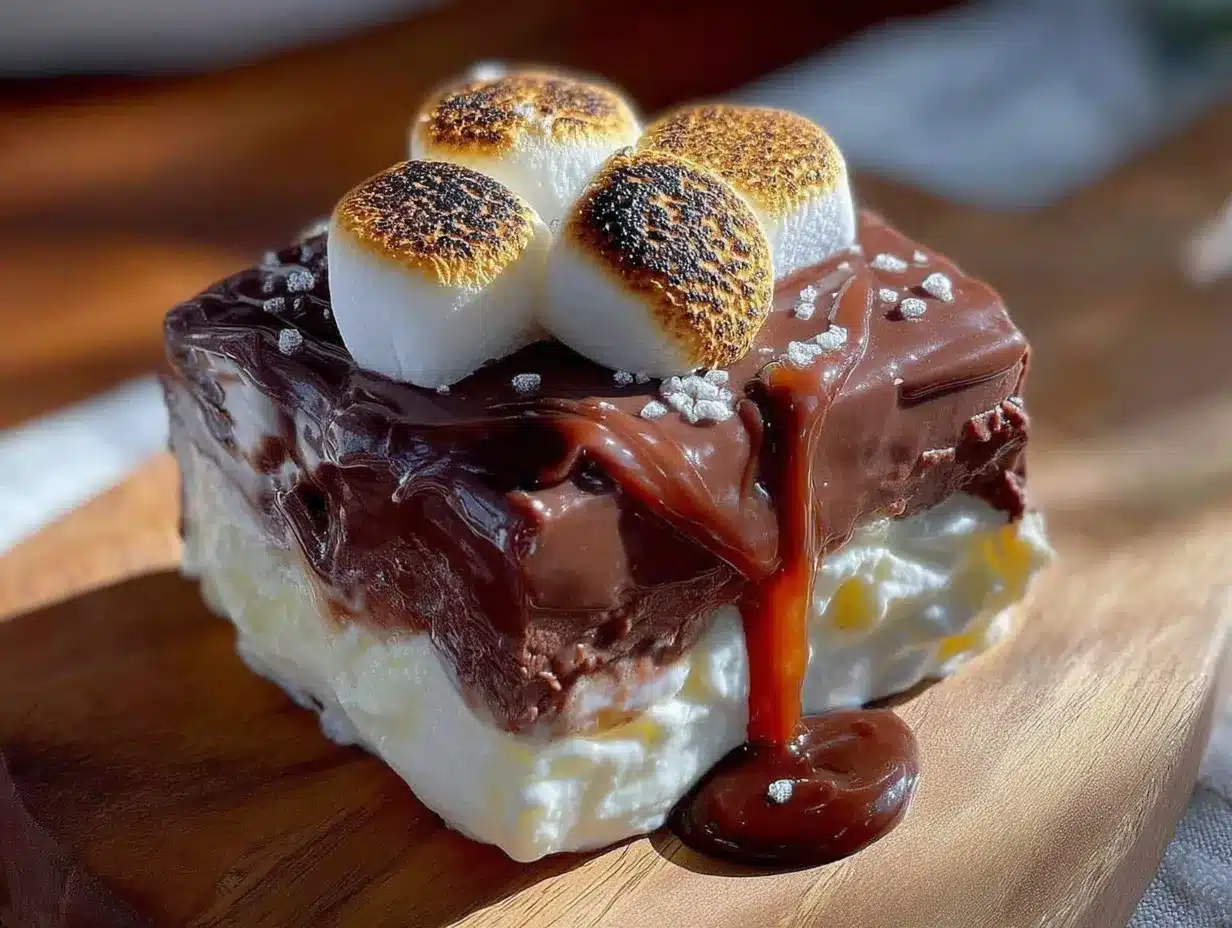
This is where the magic happens. The process is incredibly simple, but following a few key steps will guarantee perfect fudge every time. Don’t be tempted to rush the melting process—low and slow is the secret to a silky texture.
- Prepare Your Pan: Line an 8×8-inch baking pan with parchment paper or aluminum foil, leaving a 2-inch overhang on two opposite sides. This will act as handles to lift the fudge out later. Lightly grease the parchment with butter or non-stick spray for extra insurance.
- Combine the Base Ingredients: In a large, heavy-bottomed saucepan over low heat, combine the 3 cups of semi-sweet chocolate chips, the full 14-ounce can of sweetened condensed milk, the 7-ounce jar of marshmallow creme, and the 1/4 cup of unsalted butter. Stir constantly with your rubber spatula. This is not the time to walk away—low heat and constant stirring prevent the chocolate from scorching.
- Melt Until Smooth: Continue stirring gently but consistently. The mixture will look lumpy and separated at first, but as the heat works its magic, it will come together into a glossy, smooth, and thick fudge batter. This usually takes about 7-10 minutes. The key visual cue is that the mixture should be completely smooth and shiny, with no streaks of butter or marshmallow creme visible. If you see small bubbles forming at the edge, you’re getting close.
- Remove from Heat and Flavor: Once the mixture is completely smooth and glossy, immediately remove the saucepan from the heat. Stir in the 1 teaspoon of pure vanilla extract and the 1/4 teaspoon of salt. Stir until they are fully incorporated. The fudge will look very thick and luscious at this point.
- Fold in Nuts (Optional): If you’re using nuts, gently fold in the 1 cup of chopped, toasted walnuts or pecans at this point. Be careful not to overmix—just fold them in until they’re evenly distributed.
- Pour and Spread: Immediately scrape the fudge into your prepared pan. Use the rubber spatula to spread it into an even layer, pushing it into the corners. The fudge will be thick, so take your time. If you’re using flaky sea salt, sprinkle a generous pinch over the top now.
- Chill to Set: Place the pan in the refrigerator, uncovered, for at least 2-3 hours, or until the fudge is completely firm to the touch. For the cleanest cuts, I recommend chilling it for 4 hours or even overnight. Don’t rush this step—if the fudge isn’t fully set, it will be sticky and hard to cut.
- Cut and Serve: Once the fudge is firm, use the parchment overhang to lift the entire block out of the pan. Place it on a cutting board. Use a sharp knife to cut it into 1-inch squares. For the cleanest cuts, wipe the knife clean between slices. I like to cut the edges off first (those are my personal treat!) and then cut the rest into neat squares.
Cooking Tips & Techniques
Over the years, I’ve learned a few things the hard way so you don’t have to. Here are my best tips for perfect fudge every time:
- Low Heat is Non-Negotiable: I once tried to speed up the process by turning the heat to medium. The result was a scorched, grainy mess that smelled like burnt chocolate. Always, always use low heat. Patience is the secret ingredient here.
- Don’t Over-Stir (But Don’t Stop Stirring): You need to stir constantly to prevent scorching, but you don’t need to beat it vigorously. A gentle, steady stir with a rubber spatula is all you need. Over-stirring can incorporate too much air, leading to a slightly grainy texture.
- The Visual Cue is Everything: Don’t rely on a timer. The fudge is ready when it’s completely smooth, glossy, and has a uniform color. It will look like a thick, dark river of chocolate. If you see any streaks of marshmallow creme or butter, keep stirring.
- Chill for Clean Cuts: I know it’s tempting to cut into it as soon as it feels firm, but patience pays off. A full 4-hour chill (or overnight) ensures the fudge is completely set, which makes for clean, sharp squares. If you cut too early, the fudge will be sticky and messy.
- Warm Your Knife: For the absolute cleanest cuts, run your knife under hot water, dry it thoroughly, and then make your cut. Wipe the blade clean between each cut. This prevents the fudge from sticking to the knife and gives you those beautiful, professional-looking squares.
Variations & Adaptations
This fudge is a wonderful blank canvas. Here are a few ways I’ve adapted it over the years to keep things interesting:
- Peppermint Bark Fudge: This is my go-to for Christmas. Omit the nuts and stir in 1/2 cup of crushed candy canes or peppermint candies right before pouring into the pan. Sprinkle a few more crushed candies on top. The cool, minty crunch is divine.
- Rocky Road Fudge: For a truly decadent treat, fold in 1/2 cup of mini marshmallows and 1/2 cup of roughly chopped almonds (toasted!) along with the chocolate chips. The marshmallows will stay soft and pillowy, creating that classic rocky road texture.
- Peanut Butter Swirl Fudge: After pouring the fudge into the pan, dollop 1/3 cup of creamy peanut butter on top in small spoonfuls. Use a knife to gently swirl the peanut butter into the fudge, creating a beautiful marbled effect. It’s a match made in heaven.
- Dark Chocolate Sea Salt Fudge: Use dark chocolate chips (60-70% cacao) instead of semi-sweet for a more intense, less sweet fudge. The flaky sea salt on top becomes even more important here, cutting through the richness beautifully.
- Vegan & Dairy-Free Adaptation: You can make a fantastic vegan version! Use dairy-free chocolate chips, a can of full-fat coconut condensed milk (like Nature’s Charm), and vegan butter or coconut oil. The texture will be slightly different—a bit softer—but still incredibly delicious and creamy.
Serving & Storage Suggestions
This fudge is wonderful at room temperature. I like to let it sit out for about 10 minutes after taking it out of the fridge before serving—it softens just slightly, becoming perfectly creamy and melt-in-your-mouth. Serve it on a pretty plate or a holiday platter. It pairs beautifully with a cup of strong coffee, a glass of cold milk, or even a glass of red wine for a grown-up treat.
Storage: Store your fudge in an airtight container in the refrigerator for up to 2 weeks. The cool temperature keeps it firm and fresh. I actually think the flavor gets even better after a day or two as the ingredients meld together.
Freezing: This fudge freezes like a dream! Wrap the entire block or individual squares tightly in plastic wrap, then place them in a freezer-safe bag or container. It will keep for up to 3 months. To thaw, simply transfer the fudge to the refrigerator overnight. It’s perfect for having a treat on hand for unexpected guests or a late-night craving.
Gifting: This fudge makes a fantastic homemade gift. Layer the squares in a festive tin or a cellophane bag tied with a ribbon. Add a little tag with the recipe name and storage instructions—it always feels so personal and thoughtful.
Nutritional Information & Benefits
Let’s be honest—this is a treat, and it’s meant to be enjoyed as such. It’s rich, decadent, and satisfying. One 1-inch square is generally enough to hit that sweet spot. Here’s the estimated nutritional breakdown per square (assuming 64 squares from the recipe):
- Calories: ~85-100
- Fat: 5-6g
- Carbohydrates: 10-12g
- Sugar: 8-10g
- Protein: 1-2g
While it’s not a health food, there are a few bright spots. Dark chocolate (which you can use in the variation) is a source of antioxidants. The nuts, if you add them, provide healthy fats and a little protein. The main takeaway? A small piece of this fudge can be a wonderful, soul-satisfying part of a balanced life. It’s about joy, not deprivation. Just be mindful of portions—it’s incredibly easy to eat more than one!
Allergen Note: This recipe contains dairy (butter, sweetened condensed milk) and, if you add them, tree nuts (walnuts/pecans). For a dairy-free version, see the adaptation above.
Conclusion
This Homemade Old-Fashioned Marshmallow Creme Chocolate Fudge is more than just a recipe—it’s a little piece of reliable comfort. It’s the dessert you can make when you’re short on time, low on energy, or just need a guaranteed win. I love it because it’s so forgiving. It doesn’t judge you for forgetting the potluck. It doesn’t care if you’re in a rush. It just shows up, perfectly smooth and delicious, every single time.
I genuinely hope you give it a try. And please, don’t be shy about making it your own—throw in some nuts, a swirl of peanut butter, or a sprinkle of sea salt. The best recipes are the ones that become part of your own story. I’d love to hear how it turns out for you! Drop a comment below and let me know if you made any fun variations, or share a photo of your fudge on Pinterest. Happy cooking, friend—you’ve got this.
Frequently Asked Questions (FAQs)
Can I use mini marshmallows instead of marshmallow creme?
I wouldn’t recommend it. Marshmallow creme is specifically formulated to be a stabilizer, preventing sugar crystallization. Mini marshmallows have a different sugar and moisture content, which can lead to a grainy or sticky fudge that doesn’t set properly. The jar of creme is worth seeking out for the best, most reliable results.
My fudge turned out grainy. What went wrong?
Grainy fudge is almost always a sign of sugar crystallization. This usually happens if the heat was too high, or if the mixture wasn’t stirred constantly. The low, steady heat and the marshmallow creme are your best defenses against this. If it happens, don’t despair—you can try melting it down with a splash of cream and using it as a warm sauce over ice cream!
Can I make this in the microwave?
Yes, you can, but you have to be careful. Use a large, microwave-safe bowl. Heat the chocolate chips, sweetened condensed milk, marshmallow creme, and butter in 30-second intervals, stirring well after each interval, until completely smooth. The total time is usually about 2-3 minutes. Be careful not to overheat, as the chocolate can seize. I still prefer the stovetop for more control, but the microwave works in a pinch.
How do I get perfectly clean cuts on my fudge?
The secret is a combination of things. First, make sure the fudge is fully chilled—at least 4 hours. Second, use a sharp, long knife. Third, run the knife under hot water, dry it off, and make one clean cut. Wipe the blade clean with a paper towel between each cut. This prevents the fudge from sticking and dragging, giving you those beautiful, sharp edges.
Can I add different extracts or flavors?
Absolutely! Vanilla is classic, but you can experiment. A teaspoon of peppermint extract makes a wonderful holiday fudge. Almond extract pairs beautifully with chocolate, too. Just be careful with stronger extracts—start with 1/2 teaspoon and taste the warm fudge mixture before adding more. You can also add a tablespoon of bourbon or rum for an adult twist, but you may need to chill it a little longer to set.
Pin This Recipe!
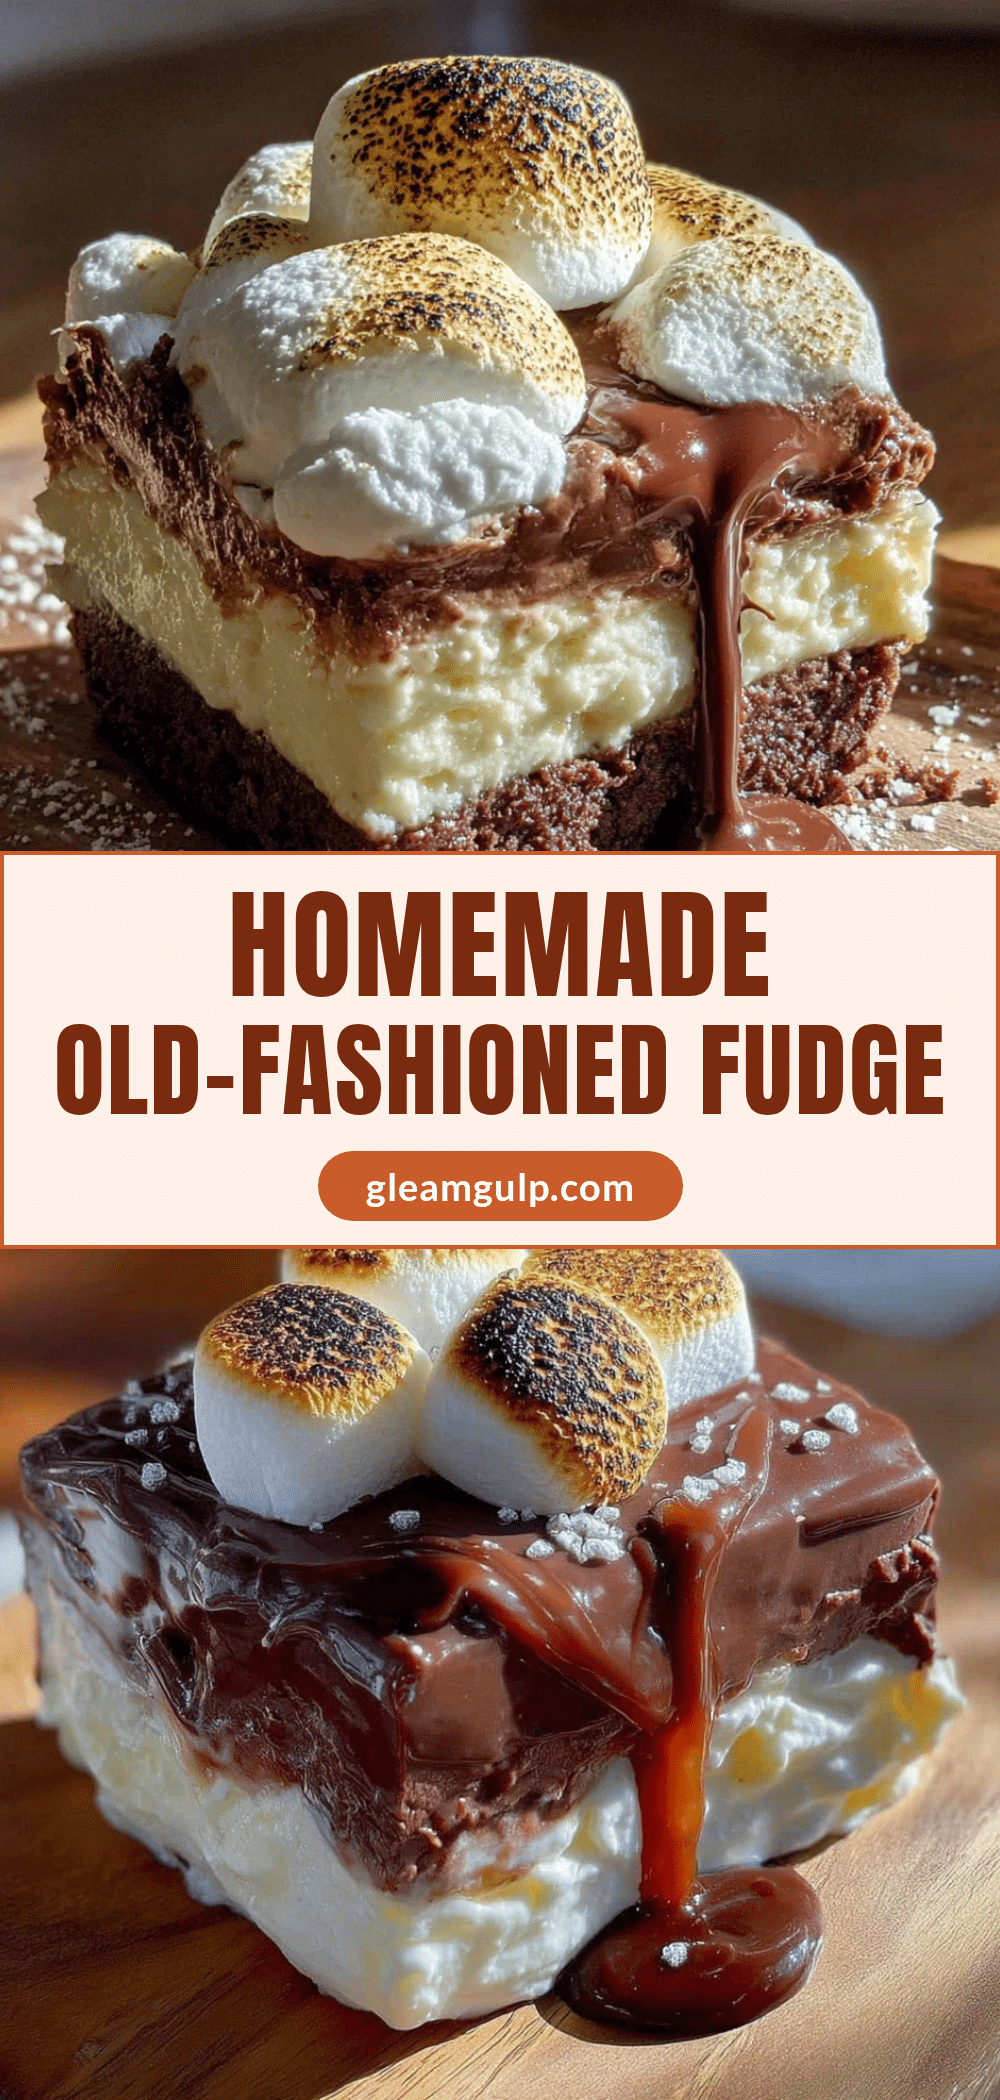
Homemade Old-Fashioned Marshmallow Creme Chocolate Fudge (Easy & Perfect)

This foolproof fudge uses marshmallow creme to ensure a perfectly smooth, creamy texture every time. It’s quick, easy, and made with simple pantry ingredients, making it ideal for last-minute holiday treats, potlucks, or homemade gifts.
- Prep Time: 10 minutes
- Cook Time: 10 minutes
- Total Time: 2 hours 20 minutes (includes chilling)
- Yield: 64 servings (1-inch squares) 1x
- Category: Dessert
- Cuisine: American
Ingredients
- 3 cups (18 oz) semi-sweet chocolate chips
- 1 (14 oz) can sweetened condensed milk
- 1 (7 oz) jar marshmallow creme (like Marshmallow Fluff)
- 1/4 cup (4 tbsp) unsalted butter
- 1 tsp pure vanilla extract
- 1/4 tsp salt
- 1 cup chopped walnuts or pecans (optional)
- Flaky sea salt (optional, for topping)
Instructions
- Line an 8×8-inch baking pan with parchment paper or aluminum foil, leaving a 2-inch overhang on two opposite sides. Lightly grease with butter or non-stick spray.
- In a large, heavy-bottomed saucepan over low heat, combine the chocolate chips, sweetened condensed milk, marshmallow creme, and butter. Stir constantly with a rubber spatula.
- Continue stirring gently but consistently until the mixture is completely smooth, glossy, and uniform in color, about 7-10 minutes. Do not let it scorch.
- Remove from heat and stir in the vanilla extract and salt until fully incorporated.
- If using nuts, gently fold in the chopped walnuts or pecans.
- Immediately scrape the fudge into the prepared pan and spread into an even layer. If using flaky sea salt, sprinkle a generous pinch on top.
- Refrigerate uncovered for at least 2-3 hours, or until completely firm (4 hours or overnight is best for clean cuts).
- Once firm, use the parchment overhang to lift the fudge out of the pan. Place on a cutting board and cut into 1-inch squares with a sharp knife, wiping the blade clean between cuts.
Notes
For clean cuts, chill the fudge for at least 4 hours or overnight. Warm the knife under hot water and dry it between cuts. The fudge can be stored in an airtight container in the refrigerator for up to 2 weeks, or frozen for up to 3 months.
Nutrition
- Serving Size: 1 square
- Calories: 85100
- Sugar: 810
- Sodium: 3040
- Fat: 56
- Saturated Fat: 34
- Carbohydrates: 1012
- Fiber: 1
- Protein: 12
Keywords: fudge, chocolate fudge, marshmallow creme fudge, old-fashioned fudge, easy fudge, holiday fudge, potluck dessert, homemade fudge


