Love this? Save it for later!
Share the inspiration with your friends
My neighbor Marcus watched me fumbling with a roasting pan two Novembers ago, sweat beading on my forehead as I tried to figure out how to fit a turkey and three casseroles in an oven meant for one. He didn’t say anything at first, just leaned against my kitchen doorway with this knowing smile. Then he said, “You’re overthinking it. Friendsgiving isn’t about the whole bird. It’s about the whole table.”
He was right, of course. Marcus had been hosting his own Friendsgiving potluck for over a decade, and he’d learned something I hadn’t yet—that the best gatherings happen when you stop trying to impress and start trying to connect. He handed me a sticky note with three words scribbled on it: “Pull apart. Sliders.” And honestly, that changed everything about how I approach holiday hosting.
These Easy Friendsgiving Pull-Apart Turkey and Stuffing Sliders aren’t just a recipe. They’re a solution to that moment when you realize you’ve got twelve people coming over and exactly one oven. They’re the answer to the text you get at 4 PM saying, “Hey, can I bring two more friends?” And let me tell you, they’re the dish that disappears first at every single gathering I’ve brought them to since that conversation with Marcus.
Maybe you’ve been there—standing in the grocery store aisle, calculator out, trying to figure out how much turkey you need per person and whether you even own a roasting pan big enough. I’ve been there too. That’s why these sliders exist. They give you all the flavor of a traditional Thanksgiving dinner packed into these little handheld bites of heaven, without the stress, without the mess, and without needing to wake up at dawn to start cooking.
The first time I made them, I accidentally used too much butter on the tops of the rolls. They came out of the oven golden and glistening, and I thought I’d ruined them. But you know what? That extra butter created this crispy, almost caramelized top that everyone fought over. Now I do it on purpose every single time. That’s the thing about cooking—sometimes the best discoveries come from happy accidents.
Why You’ll Love This Recipe
Let’s be real for a second. Friendsgiving is supposed to be fun, not a test of your culinary endurance. These sliders understand that. They’re the kind of recipe that makes you look like a hero without actually having to do heroic things in the kitchen.
- Ready in Under 30 Minutes: From fridge to table in about 25 minutes flat. No brining, no basting, no checking internal temperatures every fifteen minutes. Just assembly and bake.
- Uses Leftover Turkey (or Rotisserie Chicken): This is the ultimate leftover makeover recipe. Had a Friendsgiving party yesterday? Use the leftover turkey. Don’t have leftovers? Grab a rotisserie chicken from the store. No judgment here.
- Perfect for Feeding a Crowd: One batch makes 12 sliders. Double it for bigger gatherings. They’re the ideal finger food—no plates, no forks, just grab and go.
- All the Thanksgiving Flavors in One Bite: Turkey, stuffing, cranberry sauce, and melty cheese all stacked between soft, buttery rolls. It’s like Thanksgiving in sandwich form.
- Minimal Cleanup: One baking dish, one bowl for the butter mixture, and a knife for slicing. That’s it. No roasting pans to scrub, no gravy boats to wash.
What makes these sliders different from every other slider recipe out there is the layering technique. Most recipes just slap ingredients between rolls and call it a day. But here, we’re building layers with intention—starting with a cranberry mayo spread that adds tang and creaminess, then layering the turkey, then the stuffing, then the cheese. Each bite hits every single note of a Thanksgiving plate.
This recipe isn’t just good—it’s the kind that makes people stop mid-conversation and ask, “Who made these?” It’s comfort food reimagined for the way we actually gather these days: casually, joyfully, and without the pressure of a perfectly set table.
What Ingredients You Will Need
This recipe uses simple, crowd-pleasing ingredients to deliver all the cozy flavors of Thanksgiving without the fuss. Most of these are probably already in your fridge or pantry, especially if you’ve been doing any holiday prep.
For the Sliders
- 12 Hawaiian sweet rolls (like King’s Hawaiian) — these are non-negotiable for that soft, slightly sweet base that balances the savory fillings
- 2 cups cooked turkey, shredded or chopped — leftover turkey works beautifully, but rotisserie chicken is a fantastic shortcut (I actually prefer the dark meat here—it stays juicier)
- 1 ½ cups prepared stuffing — leftover stuffing is ideal, but you can use boxed stuffing mix prepared according to package directions (Pepperidge Farm is my go-to for quick results)
- 1 cup shredded mozzarella or provolone cheese — mozzarella gives that perfect stretchy melt, but provolone adds a sharper flavor that stands up to the turkey
- ½ cup whole berry cranberry sauce — the whole berries add texture and little bursts of sweetness; jellied works too if that’s what you have
- 3 tablespoons mayonnaise — Duke’s or Hellmann’s are my favorites; this gets mixed with the cranberry sauce for the spread
For the Topping
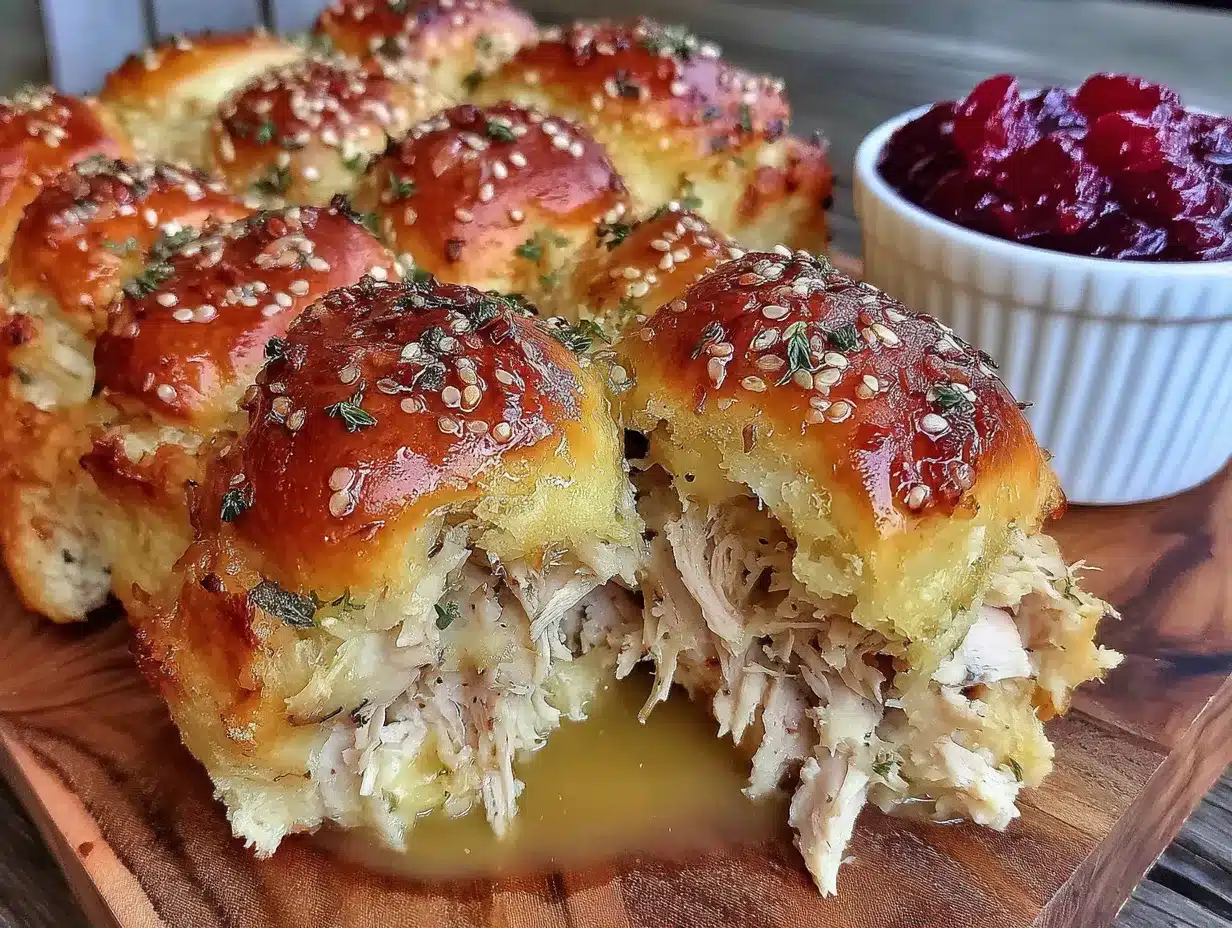
- 4 tablespoons unsalted butter, melted — don’t skimp here; this is what creates that gorgeous golden top
- 1 tablespoon Dijon mustard — adds a subtle tang that cuts through the richness
- 1 teaspoon poppy seeds — optional but adds a lovely crunch and visual appeal
- ½ teaspoon garlic powder — because everything is better with garlic
- ½ teaspoon onion powder — rounds out the savory flavors
- 1 tablespoon fresh parsley, chopped — for garnish and a pop of color
One thing I’ve learned from making these dozens of times: the quality of the rolls matters more than you’d think. Hawaiian sweet rolls have this pillowy softness that holds up to the fillings without getting soggy. If you can’t find them, brioche slider buns work as a substitute, though they’re a bit denser.
For the turkey, if you’re using leftovers, make sure it’s not too dry. I always save a little bit of turkey drippings or broth to moisten the meat before assembling. Just a tablespoon or two makes a world of difference. And if you’re buying a rotisserie chicken for this, pick one up from Costco or your local grocery store deli—they’re usually the most flavorful and cost-effective option.
As for the stuffing, I’ve made these with everything from my grandmother’s sage and sausage stuffing to a simple boxed cornbread stuffing. They all work. The key is making sure the stuffing isn’t too wet or too dry. If it’s crumbly, add a splash of chicken broth. If it’s soupy, let it sit uncovered for a few minutes to firm up.
Equipment Needed
You don’t need a fully stocked kitchen to pull these off, which is exactly the point. Here’s what you’ll need:
- 9×13-inch baking dish — this is the perfect size for 12 sliders; a slightly smaller dish works too if you want them snug together
- Sharp knife — for slicing the entire slab of rolls in half horizontally; a serrated bread knife works best to avoid squishing the rolls
- Small bowl — for mixing the butter topping and the cranberry mayo
- Pastry brush or spoon — for spreading the butter mixture over the tops
- Spatula — for spreading the cranberry mayo and for lifting the finished sliders out of the dish
- Aluminum foil — for covering the sliders during the first part of baking to prevent over-browning
If you don’t have a pastry brush, don’t worry. A spoon works just fine for drizzling the butter mixture over the tops. And if your baking dish is glass, just reduce the oven temperature by 25 degrees to prevent the bottoms from burning. I learned that one the hard way after a particularly crispy batch.
One tip: line your baking dish with parchment paper, leaving some overhang on the sides. This makes lifting the entire slab of sliders out so much easier, and cleanup becomes practically nonexistent.
Preparation Method
Alright, let’s get to the fun part. Here’s how to make these Easy Friendsgiving Pull-Apart Turkey and Stuffing Sliders step by step.
- Preheat your oven to 350°F (175°C). While it’s heating up, lightly grease your 9×13-inch baking dish with butter or non-stick spray. This prevents sticking and adds a little extra flavor to the bottoms of the rolls.
- Prepare the cranberry mayo spread. In a small bowl, mix together ½ cup whole berry cranberry sauce and 3 tablespoons mayonnaise. Stir until well combined. Set this aside. The sweetness of the cranberries combined with the tangy mayo creates this incredible spread that ties everything together.
- Slice the rolls in half horizontally. Keep all 12 rolls connected in one slab. Using a serrated knife, carefully slice through the middle of the rolls, creating a top half and a bottom half. Place the bottom half in your prepared baking dish. If the rolls are really tall, you can trim a thin layer off the top to make them more even, but honestly, I never bother.
- Spread the cranberry mayo. Using a spatula, spread the cranberry mayo mixture evenly over the bottom half of the rolls. Don’t be shy here—every bite should get some of that tangy sweetness.
- Layer the turkey. Distribute the 2 cups of shredded or chopped turkey evenly over the cranberry mayo. Press it down gently so it sticks. If your turkey seems dry, drizzle a tablespoon of warm chicken broth over it before adding the next layer.
- Add the stuffing. Spoon the 1 ½ cups of prepared stuffing over the turkey, spreading it out evenly. Try to get it in an even layer so each slider gets a good amount. I like to use my hands for this—it’s faster and I can feel if the layer is even.
- Top with cheese. Sprinkle 1 cup of shredded mozzarella or provolone over the stuffing. Again, make sure it’s evenly distributed. The cheese is what holds everything together and creates that glorious pull-apart moment.
- Place the top half of the rolls. Gently set the top half of the rolls over the fillings, cut side down. Press down lightly to help everything settle.
- Make the butter topping. In a small bowl, whisk together 4 tablespoons melted butter, 1 tablespoon Dijon mustard, 1 teaspoon poppy seeds, ½ teaspoon garlic powder, and ½ teaspoon onion powder. Brush this mixture generously over the tops of the rolls. Don’t worry if some drips down the sides—that just flavors the edges too.
- Cover and bake. Cover the dish with aluminum foil and bake for 15 minutes. This steams the sliders and ensures the fillings are heated through without the tops burning.
- Uncover and finish baking. Remove the foil and bake for another 8-10 minutes, until the tops are golden brown and the cheese is melted and bubbly around the edges. The kitchen will smell incredible at this point.
- Rest and serve. Let the sliders rest in the dish for 5 minutes before slicing. This allows the cheese to set slightly so the sliders hold their shape when you cut them. Use a sharp knife to cut between the rolls, separating them into individual sliders. Garnish with fresh parsley if desired.
A few things to watch for: if the tops are browning too quickly during the uncovered bake, tent loosely with foil. Ovens vary, and some run hotter than others. Also, if you’re using a glass baking dish, the bottoms can brown faster, so check after 5 minutes of uncovered baking.
One more thing—I always make an extra batch of the butter topping and brush it on again right when the sliders come out of the oven. It gives them this gorgeous sheen and extra flavor that makes people think you did something complicated. Our little secret.
Cooking Tips & Techniques
After making these sliders more times than I can count, I’ve picked up a few tricks that make the process smoother and the results better.
Don’t skip the rest time. I know it’s tempting to dig in right away, but letting the sliders rest for 5 minutes after baking is crucial. The cheese needs that time to set up a bit, otherwise everything slides apart when you try to pick up a slider. Trust me on this—I’ve served molten sliders before and while they tasted great, they were a mess to eat.
Use room temperature ingredients. If your turkey and stuffing are straight from the fridge, the sliders will take longer to heat through. Let them sit at room temperature for about 15 minutes before assembling. Or, if you’re in a hurry (and who isn’t during Friendsgiving prep?), you can warm the turkey and stuffing gently in the microwave before layering.
Toast the bottom half of the rolls. For extra crunch, you can toast the bottom half of the rolls in the oven for 3-4 minutes before adding the fillings. This creates a barrier that prevents sogginess. I do this when I’m making them ahead of time or if I know the fillings are particularly wet.
Watch the cheese. Different cheeses melt at different rates. Mozzarella melts beautifully but can get rubbery if over-baked. Provolone browns nicely. If you’re mixing cheeses, keep an eye on the oven during the last few minutes. You want the cheese melted and bubbly, not browned and tough.
Make them ahead. These sliders are perfect for make-ahead prep. Assemble them completely (without the butter topping), cover tightly, and refrigerate for up to 24 hours. When you’re ready to bake, add the butter topping and bake as directed, adding 5-7 minutes to the covered baking time since you’re starting from cold.
One mistake I made early on: I used too much stuffing. It sounds like a good problem to have, but too much stuffing makes the sliders hard to bite into and causes the fillings to squish out the sides. Stick to about 2 tablespoons of stuffing per slider, which is roughly 1 ½ cups total for 12 sliders.
Variations & Adaptations
These sliders are incredibly flexible. Here are some ways to make them your own:
Vegetarian Version: Skip the turkey and use roasted portobello mushrooms or a plant-based turkey alternative instead. I’ve also made these with caramelized onions and roasted butternut squash, and they were absolutely delicious. The sweetness of the squash pairs beautifully with the cranberry mayo.
Spicy Kick: Add a tablespoon of sriracha or your favorite hot sauce to the cranberry mayo mixture. Or sprinkle some red pepper flakes over the turkey before adding the stuffing. My friend Jenna adds pickled jalapeños to hers, and honestly, it’s genius—the acidity cuts through the richness perfectly.
Different Cheeses: While mozzarella and provolone are my go-to choices, you can experiment with other cheeses. Smoked gouda adds a lovely smoky depth. Sharp cheddar gives a more pronounced flavor. Even brie works if you’re feeling fancy—just remove the rind and slice it thin.
Breakfast Version: Yes, you read that right. Swap the turkey for breakfast sausage or bacon, use a maple-flavored stuffing, and replace the cranberry mayo with a maple-Dijon spread. It’s incredible for brunch gatherings or even Thanksgiving morning while the turkey roasts.
Gluten-Free Option: Use gluten-free Hawaiian rolls or slider buns, and make sure your stuffing is gluten-free (many boxed stuffings contain wheat). The rest of the ingredients are naturally gluten-free. I’ve tested this with Schär’s gluten-free rolls and they worked surprisingly well.
My personal favorite variation? I add a thin layer of leftover mashed potatoes between the turkey and the stuffing. It makes the sliders extra creamy and indulgent. It’s not traditional, but neither is Friendsgiving, right?
Serving & Storage Suggestions
These sliders are best served warm, right when the cheese is still stretchy and the tops are golden. Arrange them on a large platter, garnished with fresh parsley or even some fresh cranberries for a pop of color. They’re perfect for self-serve—guests can just grab and go.
What to serve alongside: These sliders are a meal in themselves, but if you want to round things out, a simple green salad with a tangy vinaigrette cuts through the richness nicely. Roasted Brussels sprouts or green bean casserole also work beautifully. For drinks, a crisp apple cider or a light beer like a pilsner complements the flavors without overwhelming them.
Storage: Leftover sliders (if you have any!) can be stored in an airtight container in the refrigerator for up to 3 days. The rolls will soften a bit, but the flavor is still fantastic. To reheat, pop them in a 350°F oven for 8-10 minutes, or until warmed through. You can also microwave them, but the rolls won’t be as crispy.
Freezing: These sliders freeze beautifully. Assemble them completely (without the butter topping), wrap tightly in plastic wrap and then foil, and freeze for up to 2 months. When you’re ready to serve, thaw overnight in the refrigerator, add the butter topping, and bake as directed. They’re a lifesaver for unexpected gatherings.
One thing I love about these sliders is that the flavors actually get better after a day in the fridge. The cranberry mayo seeps into the rolls, the stuffing softens, and everything melds together. I’ve been known to make a batch specifically for leftovers—they’re that good cold, straight from the fridge, at 11 PM.
Nutritional Information & Benefits
While these sliders are definitely a comfort food indulgence, they do offer some nutritional benefits worth noting. Here’s an approximate breakdown per slider:
| Nutrient | Amount per Slider |
|---|---|
| Calories | 280-320 |
| Protein | 18-22g |
| Carbohydrates | 28-32g |
| Fat | 12-15g |
| Fiber | 2-3g |
| Sodium | 450-550mg |
The turkey provides a good source of lean protein, which helps keep you full and satisfied. Cranberries are packed with antioxidants and vitamin C, while the onions and garlic in the stuffing offer prebiotic benefits for gut health. The cheese adds calcium, and the whole wheat in some rolls provides a bit of fiber.
If you’re watching your sodium, use low-sodium stuffing and unsalted butter. You can also reduce the cheese by half without sacrificing too much flavor. And for a lower-carb option, serve the fillings in lettuce wraps instead of rolls—it’s actually pretty delicious.
Honestly, though? Friendsgiving isn’t the time to count calories. These sliders are about connection, celebration, and enjoying food with people you love. One slider won’t derail your healthy habits, and the joy they bring is worth every bite.
Conclusion
These Easy Friendsgiving Pull-Apart Turkey and Stuffing Sliders are proof that you don’t need a full Thanksgiving spread to capture the magic of the holiday. They’re quick, they’re forgiving, and they’re absolutely packed with flavor. Whether you’re hosting a crowd of twelve or just want to turn leftover turkey into something special, these sliders deliver every single time.
I love this recipe because it honors the spirit of Friendsgiving—casual, communal, and full of heart. It’s not about perfection. It’s about showing up with food that makes people feel cared for. And honestly, there’s no better feeling than watching your friends reach for seconds and thirds, knowing you made something that brought them together.
So go ahead and make these for your next gathering. Customize them, mess them up, learn from them. That’s what cooking is all about. And when someone asks for the recipe—and they will—send them my way. I’d love to hear how your version turned out.
Drop a comment below and let me know what variations you tried or how these sliders became part of your Friendsgiving tradition. Happy cooking, and happy gathering!
Frequently Asked Questions
Can I make these sliders ahead of time?
Absolutely! Assemble the sliders completely (without the butter topping), cover tightly, and refrigerate for up to 24 hours. When ready to bake, add the butter topping and bake as directed, adding 5-7 minutes to the covered baking time since you’re starting from cold.
What can I use instead of Hawaiian rolls?
Brioche slider buns are the best substitute, though they’re a bit denser. You can also use regular dinner rolls or even croissants for a flakier texture. Just make sure whatever you use is soft enough to absorb the flavors without getting soggy.
Can I freeze these sliders?
Yes! Assemble them completely (without the butter topping), wrap tightly in plastic wrap and then foil, and freeze for up to 2 months. Thaw overnight in the refrigerator, add the butter topping, and bake as directed. They’re a lifesaver for unexpected gatherings.
How do I prevent the sliders from getting soggy?
Toast the bottom half of the rolls for 3-4 minutes before adding the fillings. This creates a barrier that prevents sogginess. Also, make sure your stuffing isn’t too wet—if it’s soupy, let it sit uncovered for a few minutes to firm up before assembling.
Can I use a different type of cheese?
Absolutely! Smoked gouda, sharp cheddar, provolone, and even brie all work beautifully. Just keep in mind that different cheeses melt at different rates, so keep an eye on the oven during the last few minutes of baking. You want the cheese melted and bubbly, not browned and tough.
Pin This Recipe!
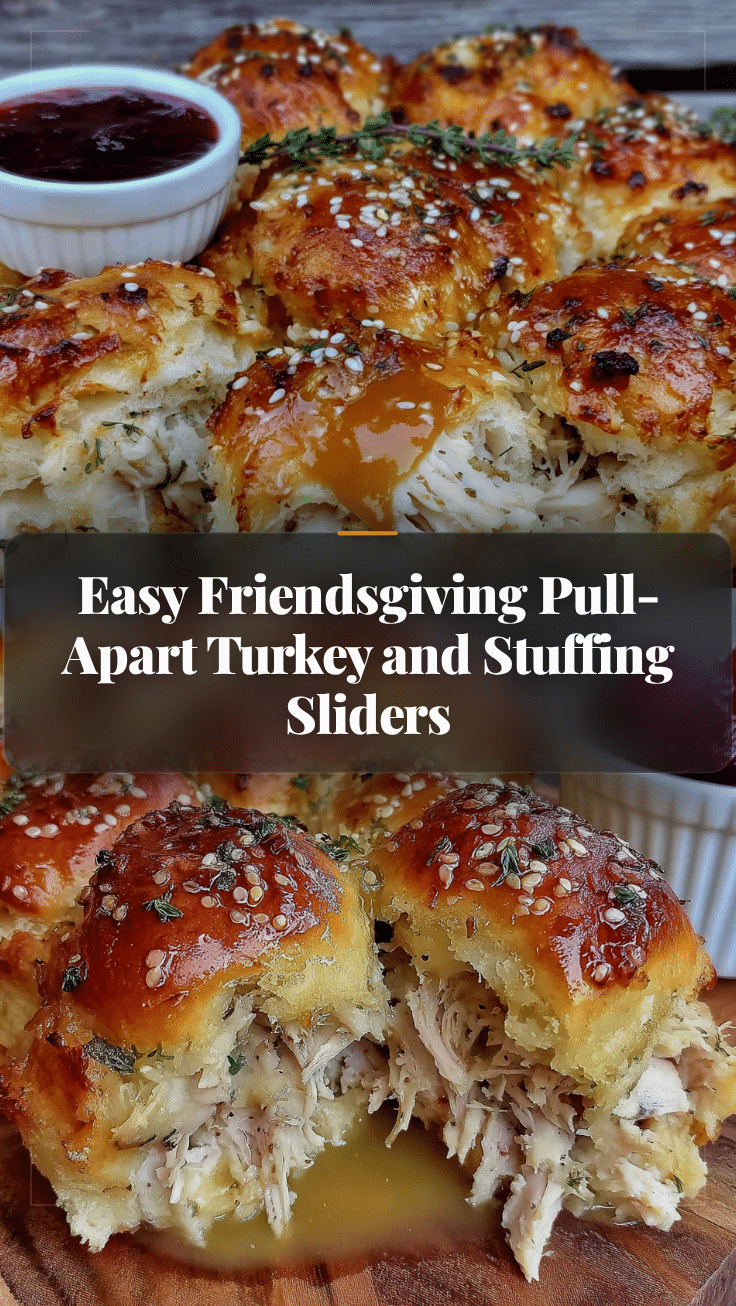
Easy Friendsgiving Pull-Apart Turkey Sliders
These Easy Friendsgiving Pull-Apart Turkey and Stuffing Sliders are a solution to holiday hosting stress, delivering all the flavors of Thanksgiving in a handheld bite. Ready in under 30 minutes, they’re perfect for feeding a crowd with minimal cleanup.
- Prep Time: 10 minutes
- Cook Time: 25 minutes
- Total Time: 35 minutes
- Yield: 12 servings 1x
- Category: Main Course
- Cuisine: American
Ingredients
- 12 Hawaiian sweet rolls (like King’s Hawaiian)
- 2 cups cooked turkey, shredded or chopped
- 1 ½ cups prepared stuffing
- 1 cup shredded mozzarella or provolone cheese
- ½ cup whole berry cranberry sauce
- 3 tablespoons mayonnaise
- 4 tablespoons unsalted butter, melted
- 1 tablespoon Dijon mustard
- 1 teaspoon poppy seeds
- ½ teaspoon garlic powder
- ½ teaspoon onion powder
- 1 tablespoon fresh parsley, chopped
Instructions
- Preheat your oven to 350°F (175°C). Lightly grease a 9×13-inch baking dish with butter or non-stick spray.
- Prepare the cranberry mayo spread: In a small bowl, mix together ½ cup whole berry cranberry sauce and 3 tablespoons mayonnaise until well combined. Set aside.
- Slice the rolls in half horizontally, keeping all 12 rolls connected in one slab. Place the bottom half in the prepared baking dish.
- Spread the cranberry mayo mixture evenly over the bottom half of the rolls.
- Layer the 2 cups of shredded or chopped turkey evenly over the cranberry mayo. Press down gently.
- Spoon the 1 ½ cups of prepared stuffing over the turkey, spreading it out evenly.
- Sprinkle 1 cup of shredded mozzarella or provolone over the stuffing.
- Place the top half of the rolls over the fillings, cut side down. Press down lightly.
- Make the butter topping: In a small bowl, whisk together 4 tablespoons melted butter, 1 tablespoon Dijon mustard, 1 teaspoon poppy seeds, ½ teaspoon garlic powder, and ½ teaspoon onion powder. Brush this mixture generously over the tops of the rolls.
- Cover the dish with aluminum foil and bake for 15 minutes.
- Remove the foil and bake for another 8-10 minutes, until the tops are golden brown and the cheese is melted and bubbly around the edges.
- Let the sliders rest in the dish for 5 minutes before slicing. Use a sharp knife to cut between the rolls, separating them into individual sliders. Garnish with fresh parsley if desired.
Notes
For extra crunch, toast the bottom half of the rolls for 3-4 minutes before adding fillings. If using a glass baking dish, reduce oven temperature by 25°F. For make-ahead, assemble without butter topping, cover, and refrigerate up to 24 hours; add butter topping and bake as directed, adding 5-7 minutes to covered baking time. For freezing, assemble without butter topping, wrap tightly, and freeze up to 2 months; thaw overnight in refrigerator, add butter topping, and bake as directed.
Nutrition
- Serving Size: 1 slider
- Calories: 300
- Sugar: 12
- Sodium: 500
- Fat: 13.5
- Saturated Fat: 6
- Carbohydrates: 30
- Fiber: 2.5
- Protein: 20
Keywords: Friendsgiving, turkey sliders, pull-apart sliders, Thanksgiving leftovers, easy appetizer, holiday appetizer, slider recipe


