Love this? Save it for later!
Share the inspiration with your friends
It was 11:47 PM on a random Wednesday in October, and I was hit with a craving so specific it almost felt like my body was trying to tell me something. I didn’t want the usual comfort food — no pasta, no chocolate, no bowl of cereal eaten over the sink in the dark. I wanted something warm and savory, something that tasted like autumn had been simmering on the stove for hours. The problem was, I didn’t have the ingredients for the elaborate roasted squash dish I had in my head. I had one lonely honeynut squash rolling around in the crisper drawer, a stick of butter, and a bunch of sage that was starting to look a little sad. Honestly, I almost gave up and ordered takeout. But something about the late hour made me stubborn. I grabbed that butter and thought, “Let’s just see what happens.”
I mean, there was a moment where I stood in front of the open fridge, the cold air hitting my face, and I almost laughed at myself. A brown butter sauce at nearly midnight? Who does that? But the quiet of the house, the way the kitchen light made everything feel small and safe — it felt like permission to try something weird. I sliced that squash into thick rings, not bothering with anything fancy, and I let the butter brown until it smelled like toasted nuts and honey. The sage leaves hit the pan and sizzled like a tiny applause. Maybe you’ve been there — that feeling of making something up as you go along, and it just working.
That night, I ate the whole thing sitting on the kitchen counter, fork in one hand, the pan balanced on my knee. It was messy, it was impulsive, and it was the best thing I’d tasted all season. The squash came out tender and sweet, the brown butter added this deep, almost caramel-like richness, and the crispy sage was like little crunchy flavor bombs. I’ve made it about a dozen times since then, and I keep coming back because it feels like a secret I accidentally discovered. This cozy brown butter honeynut squash with crispy sage is what happens when you trust your late-night instincts.
Why You’ll Love This Recipe
Let me tell you why this dish has earned a permanent spot in my fall rotation. I’ve tested it on picky family members, skeptical friends, and even my neighbor who claims she “doesn’t like squash.” Every single time, it gets the same reaction — a pause, then a surprised “wait, this is actually amazing.”
- Quick & Easy: You can have this on the table in about 30 minutes flat. No complicated steps, no fancy equipment. It’s weeknight-friendly but feels special enough for a dinner party.
- Simple Ingredients: You only need a handful of things — honeynut squash, butter, fresh sage, and a few pantry staples. No weird specialty items or trips to three different stores.
- Perfect for Fall Gatherings: Whether it’s a cozy Thanksgiving side dish, a simple Sunday dinner, or a weeknight treat that tastes like autumn, this recipe fits the bill every time.
- Crowd-Pleaser: Even people who think they don’t like squash end up going back for seconds. The brown butter does something magical — it makes everything taste irresistible.
- Unbelievably Delicious: The combo of sweet, tender squash with nutty, toasty brown butter and crispy sage is pure comfort. It’s the kind of dish that makes you close your eyes after the first bite.
What makes this version different from the rest? It’s all about the technique. I don’t just roast the squash and drizzle butter on top. I take the time to properly brown the butter until it smells like toasted hazelnuts, then I let the sage leaves get perfectly crispy in that golden foam. The squash gets roasted until it’s caramelized on the edges and soft in the middle. Every element works together to create something that’s greater than the sum of its parts. This isn’t just another roasted squash recipe — it’s my best version, perfected through trial and error in my own kitchen.
What Ingredients You Will Need
This recipe uses simple, wholesome ingredients to deliver bold flavor and satisfying texture without any fuss. Most of these are probably already in your kitchen, especially if you’ve been stockpiling fall produce like I do.
- Honeynut squash (2 medium or 3 small) — These little guys are sweeter and creamier than butternut squash, with a thinner skin that’s totally edible after roasting. Look for ones that feel heavy for their size with no soft spots. If you can’t find honeynut, butternut squash works great too — just peel it first.
- Unsalted butter (4 tablespoons, about 56 grams) — I use unsalted so I can control the salt level. The browning process is where the magic happens, so don’t skimp here. I prefer Kerrygold or Plugrà for their higher fat content, which browns beautifully.
- Fresh sage leaves (10-12 leaves) — Fresh is non-negotiable for this recipe. Dried sage just won’t give you that crispy texture or bright, peppery flavor. Look for leaves that are vibrant green and not wilted.
- Kosher salt (1 teaspoon, plus more for finishing) — I use Diamond Crystal. It’s less salty by volume than other brands, so adjust if you’re using something else. Flaky sea salt for finishing is a game-changer.
- Black pepper (½ teaspoon, freshly ground) — Freshly ground makes a difference here. The floral notes in fresh pepper complement the brown butter beautifully.
- Maple syrup (1 tablespoon, optional but recommended) — This adds a subtle sweetness that plays off the brown butter. Use pure maple syrup, not pancake syrup. Grade A dark amber has a more robust flavor that works well.
- Red pepper flakes (¼ teaspoon, optional) — Just a pinch for a tiny kick of heat. It’s not enough to make the dish spicy, but it adds a lovely warmth that balances the sweetness.
- Flaky sea salt (for finishing, like Maldon) — This is my secret weapon. That little crunch of salt on top makes everything pop.
A quick note on substitutions: If you’re dairy-free, you can use a high-quality vegan butter, though the browning won’t be as dramatic. For a nuttier flavor, you can add a tablespoon of toasted pecans or walnuts on top. And if you can’t find honeynut squash, butternut squash is the next best thing — just peel it and cut it into 1-inch cubes before roasting.
Equipment Needed
You don’t need a professional kitchen to make this dish. Here’s what I use, plus some alternatives if you’re working with what you’ve got.
- Baking sheet (half-sheet size, 18×13 inches) — A rimmed baking sheet is ideal to catch any butter drips. I’ve used a jelly roll pan in a pinch, and it worked fine. Just make sure it’s not too crowded.
- Parchment paper (or aluminum foil) — For easy cleanup. I’m a parchment paper loyalist because nothing sticks to it. Foil works too, but you might get a bit more sticking.
- Small saucepan (1-2 quart) — For browning the butter. A light-colored pan is actually better here because you can see the butter solids turn golden. My favorite is a stainless steel saucepan, but a nonstick one works too.
- Sharp chef’s knife (8-inch is my go-to) — Honeynut squash can be tough to cut, especially when it’s cold. A sharp knife makes all the difference. I learned this the hard way after almost losing a finger to a dull blade.
- Cutting board — A sturdy one that won’t slide around. I put a damp paper towel under mine for extra grip.
- Spatula or tongs — For flipping the squash and transferring the crispy sage. Silicone tongs are great because they won’t scratch your pan.
- Measuring spoons — For the maple syrup and salt. Eyeballing is fine for most things, but the salt measurement matters here.
Budget-friendly tip: You don’t need a fancy baking sheet. I bought mine at a restaurant supply store for like eight bucks, and it’s been going strong for years. Same with the saucepan — a basic one from the grocery store works perfectly.
Preparation Method
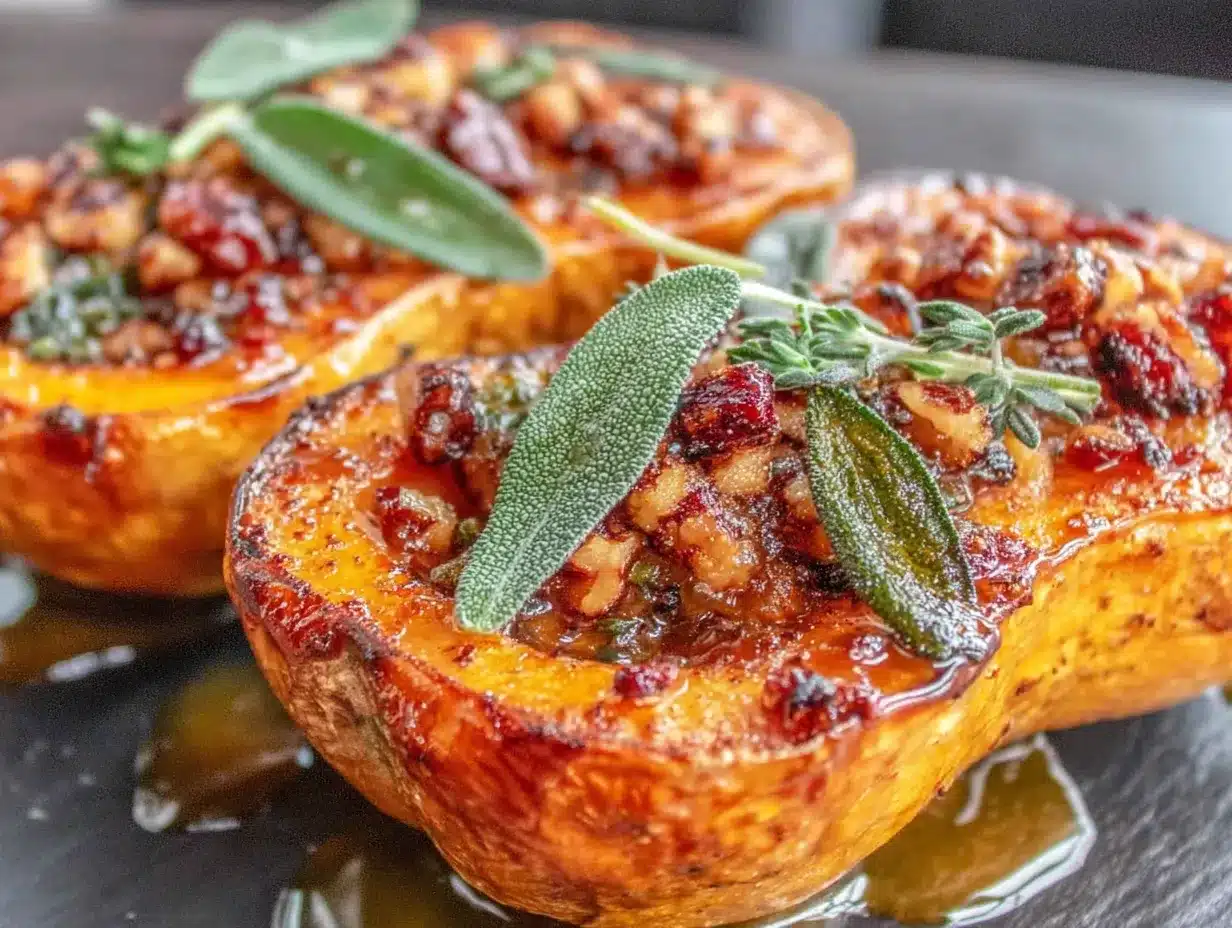
Alright, let’s get cooking. I’ve broken this down into clear steps so you don’t miss anything. Trust me, I’ve made every mistake possible so you don’t have to.
- Preheat your oven to 400°F (200°C). Line a baking sheet with parchment paper. Getting the oven hot before you start is key — you want that squash to start caramelizing immediately.
- Prepare the squash. Wash the honeynut squash well — the skin is edible, so you want it clean. Using a sharp chef’s knife, carefully trim off the stem end. Then slice the squash crosswise into ½-inch thick rings. Don’t worry about being perfect — rustic is fine. If you hit seeds in the middle, just scoop them out with a spoon. I usually get about 4-5 rings per medium squash.
- Season the squash. Arrange the squash rings in a single layer on the prepared baking sheet. Drizzle with about 1 tablespoon of olive oil (or melted butter if you want extra richness). Sprinkle with ½ teaspoon of kosher salt and ¼ teaspoon of black pepper. Toss gently with your hands to coat everything evenly, then spread them back out in a single layer. Don’t overcrowd the pan — if the rings are touching, they’ll steam instead of roast. Use two sheets if you need to.
- Roast the squash. Place the baking sheet in the preheated oven and roast for 15 minutes. After 15 minutes, flip each ring over using a spatula or tongs. Return to the oven and roast for another 10-15 minutes, until the squash is tender when pierced with a fork and the edges are golden brown and caramelized. The total time is usually 25-30 minutes, but ovens vary, so start checking at the 20-minute mark.
- Make the brown butter. While the squash is roasting, make the brown butter. Place the 4 tablespoons of unsalted butter in a small saucepan over medium heat. Let it melt completely, then continue cooking, swirling the pan occasionally. The butter will start to foam and bubble — this is normal. After about 3-4 minutes, the foam will subside, and you’ll see little golden specks forming at the bottom of the pan. The butter will smell nutty and toasty. This is your cue to move quickly.
- Add the sage. As soon as the butter is golden and fragrant, drop in the fresh sage leaves. They’ll sizzle immediately. Let them cook for about 30 seconds, flipping once, until they’re dark green and crispy. Be careful not to burn them — they go from perfect to bitter in about 10 seconds. Use a fork or tongs to transfer the crispy sage leaves to a paper towel-lined plate. They’ll crisp up more as they cool.
- Finish the butter. Remove the saucepan from the heat. Stir in the maple syrup (if using) and the red pepper flakes (if using). Give it a quick whisk to combine. Taste and add a pinch of salt if needed. Set aside while the squash finishes roasting.
- Assemble the dish. When the squash is done, transfer the rings to a serving platter. Drizzle the brown butter sauce generously over the top — use every last drop, trust me. Arrange the crispy sage leaves on top. Finish with a sprinkle of flaky sea salt and a few cracks of fresh black pepper.
- Serve immediately. This dish is best served hot, while the brown butter is still warm and the sage is crispy. The squash will soften as it sits, so don’t let it hang around too long.
A few notes from my trials: If your squash rings are different thicknesses, the thinner ones will cook faster. I usually check the thinnest ring first to avoid overcooking. Also, don’t skip the flaky sea salt at the end — it really does make a difference. The contrast between the sweet squash, nutty butter, and salty crunch is what makes this dish sing.
Cooking Tips & Techniques
I’ve made this recipe more times than I can count, and I’ve definitely had my share of failures. Here’s what I’ve learned so you can skip the mistakes.
Watch the butter like a hawk. Brown butter can go from perfect to burnt in seconds. The first time I made this, I got distracted by my phone and ended up with butter that looked like dark chocolate. It tasted bitter and awful. Now I make brown butter with no distractions — no music, no podcasts, just me and the pan. The color should be a deep amber, like a well-worn penny, and it should smell like toasted nuts. When you see those little brown specks forming and the foam starts to subside, take it off the heat immediately.
Don’t crowd the pan. I know it’s tempting to cram all the squash onto one baking sheet, but please don’t. If the rings are too close together, they’ll steam and release water instead of caramelizing. You want those edges to get dark and sticky. Use two sheets if you need to, and rotate them halfway through for even cooking.
Dry the sage leaves thoroughly. Wet sage leaves will sputter and pop in the hot butter, and they won’t crisp up properly. Pat them dry with a paper towel before they go in the pan. Also, make sure the butter is hot enough — it should sizzle immediately when the sage hits the pan. If it doesn’t sizzle, wait another 30 seconds.
Season in layers. This is a pro tip I picked up from a chef friend. Season the squash before roasting, season the brown butter while it’s warm, and season the finished dish with flaky salt. Each layer of seasoning builds on the last, giving you a more complex, well-rounded flavor.
Make extra crispy sage. Seriously, make double what you think you need. The sage leaves shrink as they cook, and everyone fights over them. I’ve started frying up a whole bunch and keeping them in an airtight container for snacking. They’re amazing on salads, soups, and even popcorn.
Variations & Adaptations
One of the best things about this recipe is how flexible it is. Here are some ways I’ve adapted it depending on what I have on hand or who I’m cooking for.
Vegan version: Use vegan butter for the brown butter sauce. Miyoko’s or Country Crock Plant Butter work well — they brown reasonably well, though not quite as intensely as dairy butter. For the crispy sage, you can fry the leaves in olive oil instead. It’s not exactly the same, but it’s still delicious.
Gluten-free: This recipe is naturally gluten-free, so no changes needed. Just make sure your maple syrup and any other add-ins are certified gluten-free if that’s a concern.
Spicy variation: Add an extra ½ teaspoon of red pepper flakes to the brown butter, or throw in a small dried chili while the butter is browning. I did this once when I had a cold and wanted something warming, and it was fantastic. The heat cuts through the richness beautifully.
Herb swap: Not a fan of sage? No problem. Try fresh thyme or rosemary instead. Rosemary is especially good — it gets crispy and fragrant in the butter. I’ve also used a combination of sage and thyme, and it was lovely.
Nutty crunch: Toast some pecans or walnuts in a dry skillet and sprinkle them over the finished dish. The crunch adds a nice textural contrast. I did this for Thanksgiving one year, and my aunt asked for the recipe three times.
Maple-balsamic twist: Add a teaspoon of balsamic vinegar along with the maple syrup. The acidity brightens everything up and balances the sweetness. This is my go-to version when I’m serving this alongside a rich roast or braised meat.
Serving & Storage Suggestions
This dish is best served immediately, while the brown butter is still warm and the sage is crispy. But I’ve also eaten it cold straight from the fridge, and I’m not ashamed to admit it was still pretty great.
Serving temperature: Serve hot, right out of the oven. The brown butter should be warm and fluid, not solidified. If it’s been sitting for a while, you can reheat the butter sauce gently on the stovetop or in the microwave.
What to serve with it: This squash is incredibly versatile. It works as a side dish for roasted chicken, pork chops, or steak. I love it alongside a simple roast chicken with pan juices. It’s also fantastic on a holiday table — I’ve served it for Thanksgiving and Christmas, and it always gets compliments. For a vegetarian main, pair it with a grain salad or creamy polenta. The combination is pure comfort.
Storage: Leftover squash can be stored in an airtight container in the refrigerator for up to 3 days. The crispy sage will lose its crunch, but the flavors will still be great. I’ve been known to chop up leftover squash and toss it into salads or grain bowls for lunch the next day.
Reheating: The best way to reheat is in a 350°F oven for about 5-7 minutes, until warmed through. The microwave works in a pinch, but the squash will be softer and the texture won’t be as nice. If you’re reheating, consider making a fresh batch of crispy sage to top it off.
Freezing: I don’t recommend freezing this dish. The squash will become watery and mushy when thawed. If you have a lot of honeynut squash, it’s better to roast it plain and freeze that, then make the brown butter fresh when you’re ready to serve.
Nutritional Information & Benefits
Here’s the approximate nutritional breakdown for one serving (about half a medium squash with brown butter sauce). Keep in mind that these are estimates and can vary based on exact ingredients and portion sizes.
- Calories: 220-250
- Fat: 16-18g (mostly from butter)
- Carbohydrates: 18-22g (natural sugars from squash and maple syrup)
- Fiber: 3-4g
- Protein: 2-3g
- Vitamin A: Over 100% of daily value (honeynut squash is packed with beta-carotene)
- Vitamin C: About 20% of daily value
- Potassium: Good source
Honeynut squash is a nutritional powerhouse. It’s loaded with vitamin A for eye health and immune function, plus fiber for digestive health. The brown butter adds richness and fat-soluble vitamins, while the sage brings antioxidants and anti-inflammatory compounds. Honestly, this is one of those dishes that feels indulgent but is actually pretty good for you. I love that I can serve it to my family and feel great about it.
Dietary considerations: This recipe is naturally gluten-free and vegetarian. For a dairy-free version, use vegan butter. It’s also low in sugar — the maple syrup is optional, and the sweetness comes mainly from the squash itself.
Conclusion
This cozy brown butter honeynut squash with crispy sage has become my go-to fall dish for a reason. It’s simple enough for a quiet Tuesday night but impressive enough to bring to a holiday gathering. The combination of sweet, tender squash with nutty, toasty brown butter and crunchy, fragrant sage is something you’ll want to make again and again.
I love that this recipe came from a late-night whim, a moment of stubborn creativity in my kitchen. It reminds me that some of the best things happen when you stop following the rules and start trusting your instincts. Maybe you’ll make it exactly as written, or maybe you’ll add your own twist — a sprinkle of cinnamon, a drizzle of honey, a handful of toasted nuts. That’s the beauty of cooking, you know? It’s yours to play with.
If you make this recipe, I’d love to hear about it. Leave a comment below and tell me how it turned out — did you add your own twist? Did your family fight over the crispy sage? Share your photos on Pinterest and tag me so I can see your beautiful creations. And if you’re looking for more cozy fall recipes, be sure to check out my creamy butternut squash soup for another seasonal favorite. Happy cooking, friends!
Frequently Asked Questions
Can I use butternut squash instead of honeynut?
Absolutely! Butternut squash is the closest substitute. Just peel it first since the skin is tougher than honeynut skin. Cut it into 1-inch cubes or ½-inch thick slices and follow the same roasting instructions. You may need to add 5-10 minutes to the roasting time depending on the size of your pieces.
Can I make the brown butter ahead of time?
You can make brown butter up to a week in advance and store it in an airtight container in the refrigerator. When you’re ready to use it, gently reheat it on the stovetop or in the microwave until it’s liquid again. I recommend making the crispy sage fresh right before serving for the best texture.
Do I have to peel the honeynut squash?
Nope! The skin of honeynut squash is thin and tender, especially after roasting. It’s completely edible and adds a nice bit of texture. Just make sure to wash the squash thoroughly before slicing. If you really don’t like the skin, you can peel it, but I think you’ll miss out on some of the rustic charm.
Can I double this recipe for a crowd?
Definitely. Just make sure you use two baking sheets so the squash isn’t crowded. You may need to roast in batches or on two racks, rotating the sheets halfway through. The brown butter recipe can be doubled as well — just use a slightly larger saucepan and keep a close eye on it as it browns.
What can I do with leftover brown butter?
So many things! Drizzle it over roasted vegetables, toss it with pasta and Parmesan, use it in place of regular butter for pancakes or waffles, or spoon it over popcorn with a sprinkle of salt. I’ve even used leftover brown butter in cookie dough for an extra-nutty flavor. It keeps in the fridge for about a week.
Pin This Recipe!

Cozy Brown Butter Honeynut Squash with Crispy Sage

Tender honeynut squash roasted until caramelized, then drizzled with nutty brown butter and topped with crispy sage leaves. A quick and easy fall side dish that’s perfect for weeknights or holiday gatherings.
- Prep Time: 10 minutes
- Cook Time: 30 minutes
- Total Time: 40 minutes
- Yield: 4 servings 1x
- Category: Side Dish
- Cuisine: American
Ingredients
- 2 medium or 3 small honeynut squash
- 4 tablespoons unsalted butter (about 56 grams)
- 10–12 fresh sage leaves
- 1 teaspoon kosher salt, plus more for finishing
- ½ teaspoon freshly ground black pepper
- 1 tablespoon maple syrup (optional but recommended)
- ¼ teaspoon red pepper flakes (optional)
- Flaky sea salt for finishing (like Maldon)
- 1 tablespoon olive oil (or melted butter for extra richness)
Instructions
- Preheat your oven to 400°F (200°C). Line a baking sheet with parchment paper.
- Wash the honeynut squash well. Using a sharp chef’s knife, trim off the stem end. Slice the squash crosswise into ½-inch thick rings. Scoop out seeds with a spoon if needed.
- Arrange the squash rings in a single layer on the prepared baking sheet. Drizzle with about 1 tablespoon of olive oil (or melted butter). Sprinkle with ½ teaspoon of kosher salt and ¼ teaspoon of black pepper. Toss gently to coat, then spread back into a single layer. Do not overcrowd the pan.
- Roast for 15 minutes. Flip each ring over, then roast for another 10-15 minutes until tender and edges are golden brown (total 25-30 minutes).
- While the squash roasts, make the brown butter: Place 4 tablespoons unsalted butter in a small saucepan over medium heat. Melt completely, then continue cooking, swirling occasionally. After 3-4 minutes, the butter will foam and then subside, with golden specks forming at the bottom. The butter will smell nutty and toasty.
- As soon as the butter is golden and fragrant, add the fresh sage leaves. They will sizzle immediately. Cook for about 30 seconds, flipping once, until dark green and crispy. Transfer crispy sage leaves to a paper towel-lined plate.
- Remove the saucepan from heat. Stir in the maple syrup (if using) and red pepper flakes (if using). Whisk to combine. Taste and add a pinch of salt if needed.
- When the squash is done, transfer rings to a serving platter. Drizzle the brown butter sauce generously over the top. Arrange crispy sage leaves on top. Finish with a sprinkle of flaky sea salt and a few cracks of fresh black pepper.
- Serve immediately while the brown butter is warm and the sage is crispy.
Notes
Watch the butter carefully as it browns; it can go from perfect to burnt in seconds. Do not crowd the baking sheet to ensure caramelization. Dry sage leaves thoroughly before adding to butter. Season in layers for best flavor. Make extra crispy sage as it shrinks and is highly coveted.
Nutrition
- Serving Size: 1 serving (about hal
- Calories: 235
- Sugar: 8
- Sodium: 580
- Fat: 17
- Saturated Fat: 10
- Carbohydrates: 20
- Fiber: 3.5
- Protein: 2.5
Keywords: brown butter, honeynut squash, crispy sage, fall side dish, roasted squash, easy recipe, vegetarian, gluten-free


