Love this? Save it for later!
Share the inspiration with your friends
The neighborhood block party was in three hours and I’d completely forgotten. Everyone else would be bringing those elaborate, multi-layered desserts—the kind you see on fancy baking shows. I had a block of cream cheese, a package of Biscoff cookies I’d bought on a whim, and maybe forty-five minutes before I needed to shower and look presentable. Honestly, I almost just grabbed a bag of chips from the pantry. But then I remembered this no-bake cheesecake bar recipe I’d been tinkering with—the one that uses a fraction of the cream cheese and heavy cream you’d normally see. I mean, it sounded good in theory, but would it hold up against the neighbor’s famous chocolate torte? I whipped it together in a mild panic, my kitchen looking like a cookie explosion had gone off, and threw it in the freezer. Let me tell you, when I sheepishly placed my simple pan next to the elaborate displays, I wasn’t expecting much. But then I saw it—the empty pan. Not a crumb left. Someone actually asked me for the recipe before I’d even had a bite. That’s how I knew these Light No-Bake Biscoff Cheesecake Bars were something special. They’re the underdog that wins every time, and I think you’re going to love them too.
Why You’ll Love This Recipe
These aren’t your average cheesecake bars. I’ve spent more time than I care to admit testing ratios of cream cheese to yogurt, trying to find that perfect balance of creamy richness without the heavy, gut-busting feeling. After a dozen trials (and some very understanding neighbors), I landed on this version. It’s the one I keep coming back to, and here is why it works.
- Quick & Easy: From pantry to freezer in about 30 minutes. No oven, no water bath, no fussing. Perfect for those moments when you need a dessert, like, yesterday.
- Simple Ingredients: You probably have most of this in your kitchen right now. No hunting down obscure specialty items at three different stores.
- Perfect for Warm Weather: Since there is no baking involved, you won’t heat up your kitchen. These are my go-to for summer picnics, potlucks, and hot afternoons.
- Surprisingly Light: This is the part that gets people. By swapping out some of the heavy cream for Greek yogurt, you get that luscious cheesecake texture without the dense, heavy feeling. It is a dessert you can feel good about eating.
- Unbelievably Delicious: The combination of the spiced, crunchy Biscoff crust with the smooth, tangy filling and that silky Biscoff spread on top? It is pure magic. It tastes decadent, but it doesn’t weigh you down.
What truly sets these bars apart is the texture. Most no-bake cheesecakes rely on a ton of cream cheese and whipped cream, which can feel a bit… much. Here, the Greek yogurt adds a beautiful tang and a lighter mouthfeel, while still delivering that signature creamy slice. It is comfort food, reimagined. It’s the kind of dessert that makes you close your eyes after the first bite, not because it’s overly rich, but because it hits that perfect sweet-spot of satisfaction.
What Ingredients You Will Need
This recipe uses simple, wholesome ingredients to deliver that bold Biscoff flavor and a satisfying, creamy texture without all the fuss. Most of these are pantry staples or easy to find at any grocery store.
- For the Crust:
- 250g (about 2 cups) Biscoff cookies, crushed into fine crumbs (I love using the original ones for that classic spiced flavor)
- 85g (6 tablespoons) unsalted butter, melted
- 1 tablespoon granulated sugar (optional, but I find it helps the crust bind a little better)
- For the Cheesecake Filling:
- 340g (12 oz) block-style cream cheese, softened to room temperature (I recommend Philadelphia for the smoothest, creamiest result)
- 100g (1/2 cup) granulated sugar
- 1 teaspoon vanilla extract
- 240g (1 cup) plain Greek yogurt (I use 2% or full-fat for the best texture; avoid non-fat as it can be too watery)
- 120ml (1/2 cup) heavy cream, cold
- 3 tablespoons Biscoff cookie butter, melted (for swirling into the filling)
- For the Topping:
- 120g (1/2 cup) Biscoff cookie butter, melted (for that gorgeous, glossy top layer)
- Additional Biscoff cookies, crushed, for garnish
Ingredient Tips: For the creamiest filling, make sure your cream cheese is truly at room temperature. A cold block will leave you with lumps. I also prefer the texture of full-fat Greek yogurt, but a 2% will work in a pinch. If you are dairy-free, you can use a high-quality dairy-free cream cheese and coconut yogurt, though the texture will be slightly different. And for the cookie butter, the smooth, creamy version is best for melting and swirling.
Equipment Needed
You don’t need a fancy pastry kitchen for these bars. A few basic tools will get the job done beautifully.
- 8×8-inch baking pan: This is the perfect size for thick, satisfying bars. Line it with parchment paper for easy removal.
- Food processor or zip-top bag and rolling pin: For crushing the Biscoff cookies into fine crumbs. A food processor is faster and gives a more even crumb, but a bag and rolling pin work great if you need a little arm workout.
- Medium mixing bowls: One for the crust, one for the filling.
- Electric hand mixer or stand mixer: A hand mixer is perfect here. You need to whip the cream and beat the cream cheese until smooth, and doing it by hand would be a real workout.
- Rubber spatula: For folding and scraping every last bit of filling into the pan.
- Measuring cups and spoons: For accuracy.
Budget-Friendly Tip: If you don’t have a food processor, no worries! Place the cookies in a sturdy zip-top bag, squeeze out the air, and go to town with a rolling pin. It’s a great way to let out some frustration, and the crumbs are just as good.
Preparation Method
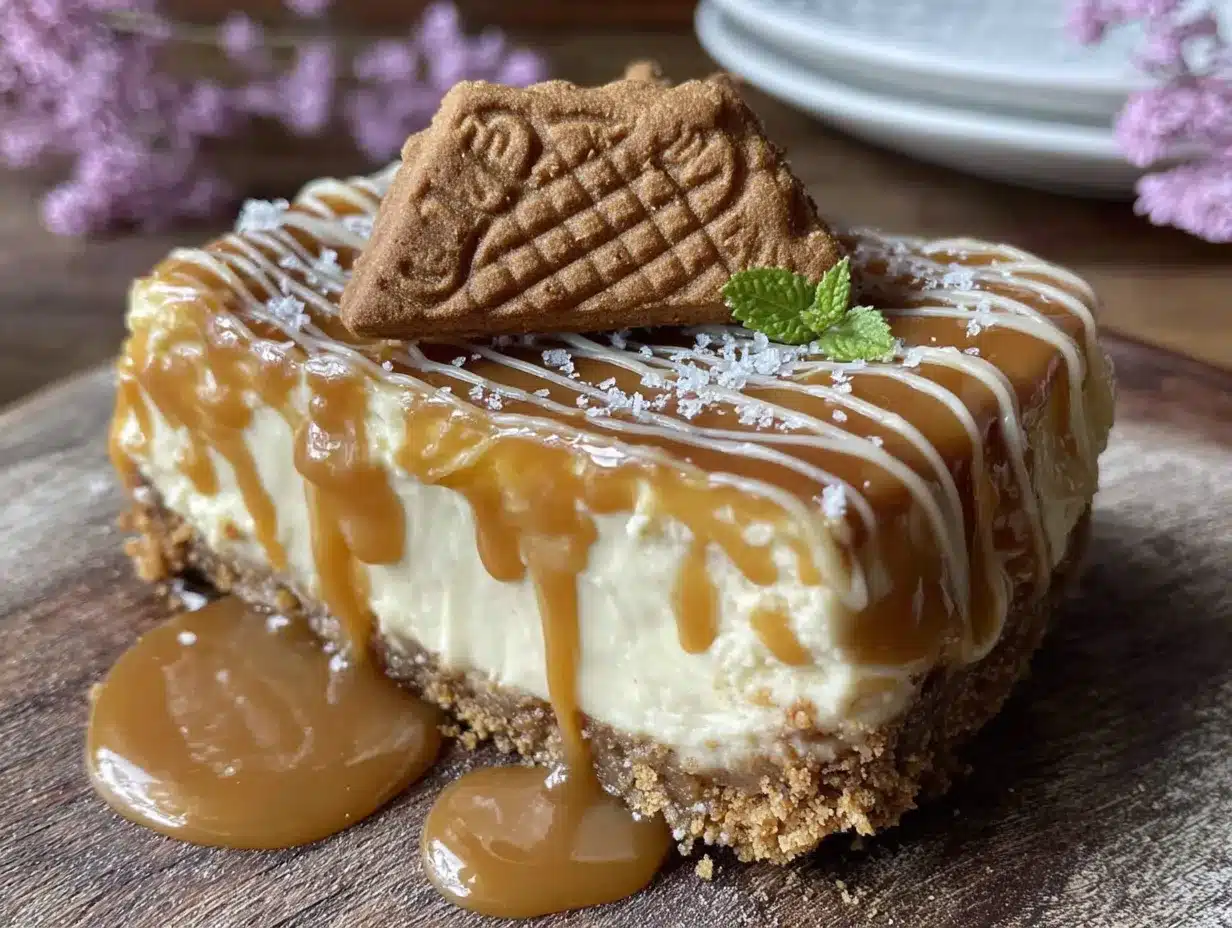
Alright, let’s get to the fun part. The whole process takes about 30 minutes of active time, plus a few hours to chill. It is incredibly forgiving, so don’t stress.
- Make the Crust: Start by lining your 8×8-inch pan with parchment paper, leaving a bit of overhang on two sides—this will be your handles to lift the bars out later. In your food processor, pulse the 250g of Biscoff cookies until they are fine crumbs. You should have about 2 cups. Pour the crumbs into a medium bowl, then add the 85g of melted butter and the 1 tablespoon of sugar (if using). Stir with a fork until every crumb is moistened and the mixture looks like wet sand. Press this mixture firmly and evenly into the bottom of your prepared pan. I use the bottom of a flat measuring cup to really pack it down. Pop this in the fridge to set while you make the filling.
- Start the Filling: In a large mixing bowl, beat the 340g of softened cream cheese with the 100g of sugar and 1 teaspoon of vanilla extract until it is completely smooth and fluffy. This should take about 2-3 minutes with a hand mixer on medium speed. Scrape down the sides and bottom of the bowl with your spatula to make sure there are no lumps. Seriously, get in there.
- Add the Yogurt: Add the 240g of Greek yogurt to the cream cheese mixture and beat again until it is fully incorporated and smooth. The mixture will look thick and luscious. Set this aside for a moment.
- Whip the Cream: In a separate, clean bowl (make sure it’s chilled for best results), pour in the 120ml of cold heavy cream. Using your hand mixer with clean beaters, whip the cream on medium-high speed until stiff peaks form. This means when you lift the beaters, the cream stands up in a peak that doesn’t flop over. Be careful not to overwhip it into butter!
- Fold It All Together: This is the most important step for a light texture. Take about a third of the whipped cream and stir it into the cream cheese mixture. This loosens the batter up a bit. Then, gently fold in the remaining whipped cream using your rubber spatula. Fold until just combined—you don’t want to deflate all that air you just whipped in. You should have a beautifully smooth, airy filling.
- Add the Swirl: Melt the 3 tablespoons of Biscoff cookie butter in a small bowl in the microwave (about 20-30 seconds, stirring halfway). Pour about half of the filling onto the chilled crust and spread it evenly. Drizzle about half of the melted cookie butter over the filling, then gently swirl it in with a knife or skewer. Top with the remaining filling and spread it smooth. Drizzle the remaining melted cookie butter on top and give it another gentle swirl. Don’t over-swirl, or you’ll lose the pretty marbled effect.
- Chill: Cover the pan with plastic wrap and place it in the refrigerator for at least 6 hours, but overnight is best. This is the hardest part—the waiting. The bars need this time to set up properly so you can get clean slices.
- Finish and Serve: Once the bars are fully chilled and firm, prepare the topping. Melt the 120g of Biscoff cookie butter in a microwave-safe bowl. Let it cool for just a minute so it isn’t piping hot, then pour it over the top of the chilled cheesecake. Use an offset spatula to spread it into an even, glossy layer. Immediately sprinkle with the crushed Biscoff cookies. Return the pan to the fridge for about 30 minutes to let the topping set. Then, use the parchment paper overhang to lift the entire block out of the pan. Place it on a cutting board and use a sharp, clean knife to slice into 9 or 16 bars. For the cleanest cuts, wipe the knife clean between each slice.
Cooking Tips & Techniques
After making these bars more times than I can count (and learning from a few minor disasters), I’ve picked up some tricks that make the process foolproof.
Room Temperature is Non-Negotiable: I cannot stress this enough. If your cream cheese is cold, you will end up with a lumpy filling. No amount of beating will fix it perfectly. Take it out of the fridge at least an hour before you start. If you’re in a rush, cut it into small cubes and let it sit on the counter for 20 minutes.
The Great Over-Mixing Mistake: When you fold in the whipped cream, be gentle. I once got distracted and mixed it vigorously, and the filling deflated completely. The bars came out dense and heavy instead of light and airy. Fold slowly and stop as soon as you don’t see any more white streaks.
Patience is a Virtue: I know it is tempting to dig in after a few hours, but trust me on the overnight chill. The first time I made these, I tried to slice them after only 4 hours, and they were a mess. The filling was still too soft to hold its shape. Giving them a full 8-10 hours (or overnight) allows the filling to set up perfectly, making for those beautiful, clean slices you see in photos.
Clean Knife, Clean Cuts: For the prettiest bars, use a large, sharp chef’s knife and wipe it clean with a damp paper towel between each cut. This prevents the topping from smearing and gives you those Instagram-worthy edges.
Variations & Adaptations
One of the best things about this recipe is how easy it is to tweak. Here are a few of my favorite variations.
- Gluten-Free Version: This is an easy one! Simply use certified gluten-free Biscoff cookies (they are widely available) for the crust and topping. The rest of the ingredients are naturally gluten-free. I’ve made this for friends with celiac disease, and they couldn’t tell the difference.
- Chocolate Biscoff Dream: For a richer twist, add 2 tablespoons of unsweetened cocoa powder to the crust mixture along with the melted butter. You can also drizzle a little melted dark chocolate over the top along with the Biscoff spread. The combo of chocolate and spiced cookie butter is incredible.
- No-Bake Berry Swirl: Before adding the final layer of filling, swirl in 1/4 cup of your favorite berry jam (raspberry or strawberry works beautifully). The tartness of the berries cuts through the sweetness of the Biscoff perfectly. This is my go-to summer version when berries are at their peak.
- Make it a Pie: If you don’t have an 8×8 pan, you can press the crust into a 9-inch pie dish and pour the filling in. The chill time might be slightly shorter, and you’ll get a beautiful, tall pie instead of bars. Adjust your slicing accordingly.
Serving & Storage Suggestions
These bars are best served cold, straight from the refrigerator. The texture is firm yet creamy, and the topping has a lovely, fudge-like snap to it.
How to Serve: I like to let the bars sit at room temperature for about 5 minutes after slicing. This takes the chill off just enough to make the filling extra creamy without it getting soft. A small dollop of lightly sweetened whipped cream on the side is never a bad idea, but honestly, they are perfect on their own.
Storage: These bars store beautifully. Place any leftovers in an airtight container in the refrigerator. They will stay fresh for up to 5 days, though I doubt they will last that long. The flavor actually deepens and melds together after a day or two.
Can You Freeze Them? Absolutely! In fact, I often make a double batch and freeze one for later. Wrap the entire block (or individual bars) tightly in plastic wrap, then again in aluminum foil. They will keep in the freezer for up to 3 months. When you’re ready to enjoy them, thaw them overnight in the refrigerator. The texture remains perfect.
Nutritional Information & Benefits
While I wouldn’t call these a health food, they are a much lighter take on a classic indulgence. The swap of some heavy cream for Greek yogurt is a game-changer.
- Estimated per bar (based on 16 servings): Calories: 280, Fat: 18g, Carbs: 28g, Protein: 4g, Sugar: 18g
- Lighter on the Gut: The Greek yogurt provides protein and probiotics, which help with digestion and make you feel more satisfied than a standard, heavy cheesecake.
- Portion Control: Because these are cut into bars, it is easier to enjoy a single, satisfying serving without going overboard.
- Dietary Considerations: This recipe can be made gluten-free with a simple swap. It is also vegetarian.
- Allergen Note: This recipe contains dairy, gluten (unless GF cookies are used), and wheat. Always check your Biscoff cookie packaging for specific allergen information.
Conclusion
These Light No-Bake Biscoff Cheesecake Bars are more than just a quick dessert—they are proof that you don’t need to spend hours in the kitchen or use a pound of cream cheese to create something truly special. They are the recipe you’ll turn to again and again, whether you need a last-minute contribution to a party or a simple, satisfying treat for a Tuesday night. I love how they let the unique flavor of Biscoff shine, all while feeling light and fresh. I really hope you give them a try. Play around with the variations, make them your own, and please, come back and let me know how they turned out in the comments! Your feedback and creative twists always inspire me and the rest of our little baking community.
Frequently Asked Questions
Can I use low-fat cream cheese or Greek yogurt?
You can, but the texture will be slightly different. Low-fat cream cheese has a higher water content, which can make the filling less firm. For the best results, I recommend using full-fat block cream cheese and at least 2% Greek yogurt. Non-fat yogurt can make the filling a bit watery and grainy.
My crust is falling apart. What did I do wrong?
This usually happens if the crumbs aren’t packed firmly enough into the pan. You really need to press them down with authority. Also, make sure your butter is fully melted and mixed in. If the mixture looks dry, add another tablespoon of melted butter. Chilling the crust for at least 15 minutes before adding the filling helps it set up.
How long do these bars actually need to chill?
I know it is tempting to rush this, but 6 hours is the absolute minimum. For the best, cleanest slices, I highly recommend chilling them overnight. This gives the filling time to fully set and allows the flavors to meld together beautifully.
Can I use a different cookie for the crust?
Absolutely! Graham crackers, speculoos cookies, or even vanilla wafers would work wonderfully. The flavor will change, of course, but the technique is the same. If you use a less sweet cookie, you might want to add a tablespoon or two of sugar to the crust mixture.
My Biscoff spread is too thick to drizzle. How do I thin it out?
Biscoff spread can be quite thick at room temperature. Simply microwave it in a microwave-safe bowl in 15-second intervals, stirring after each, until it is smooth and pourable. Be careful not to overheat it, or it can seize up. A splash of coconut oil or heavy cream can also help thin it out if needed.
Pin This Recipe!
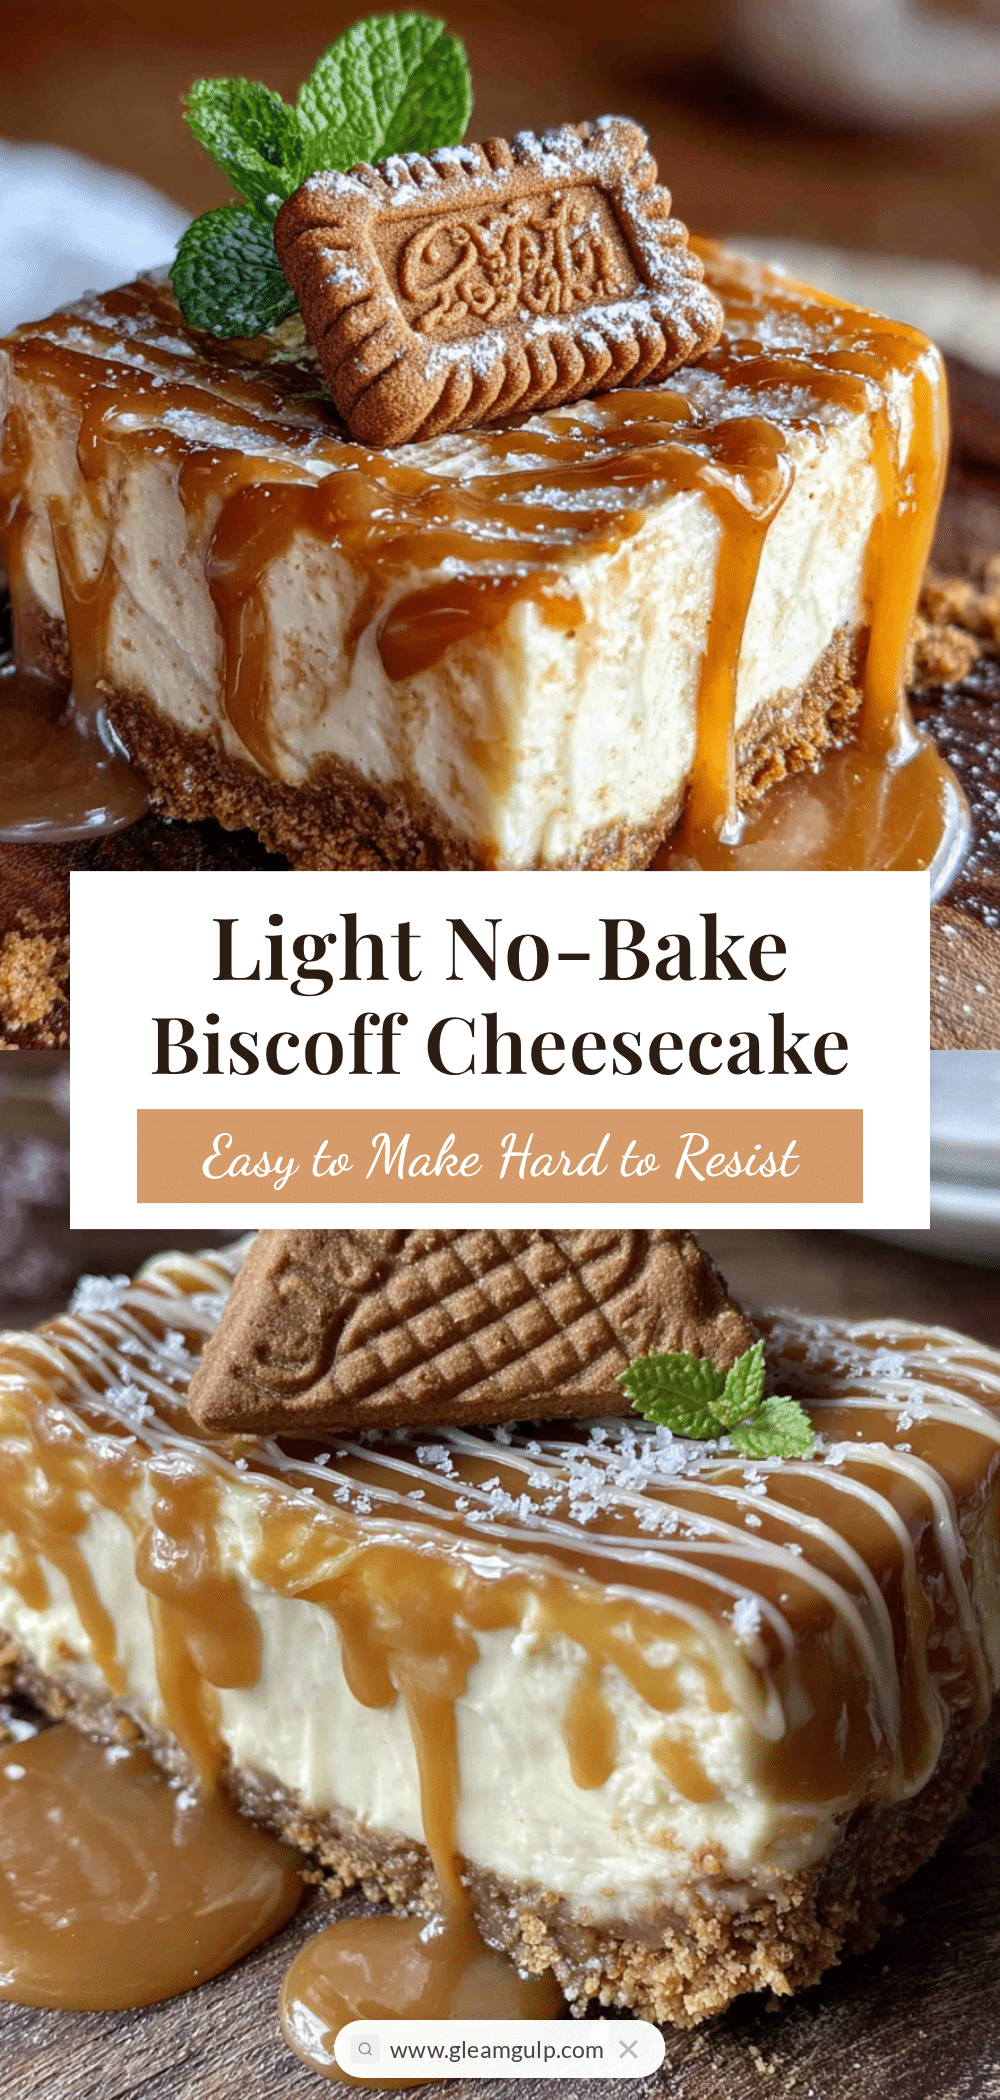
Light No-Bake Biscoff Cheesecake Bars
These no-bake cheesecake bars feature a spiced Biscoff cookie crust, a light and creamy filling made with Greek yogurt, and a silky Biscoff topping. They come together in just 30 minutes and are perfect for warm weather or last-minute desserts.
- Prep Time: 30 minutes
- Cook Time: 0 minutes
- Total Time: 6 hours 30 minutes (includes chilling)
- Yield: 16 servings 1x
- Category: Dessert
- Cuisine: American
Ingredients
- 250g (about 2 cups) Biscoff cookies, crushed into fine crumbs
- 85g (6 tablespoons) unsalted butter, melted
- 1 tablespoon granulated sugar (optional)
- 340g (12 oz) block-style cream cheese, softened to room temperature
- 100g (1/2 cup) granulated sugar
- 1 teaspoon vanilla extract
- 240g (1 cup) plain Greek yogurt (2% or full-fat)
- 120ml (1/2 cup) heavy cream, cold
- 3 tablespoons Biscoff cookie butter, melted (for swirling)
- 120g (1/2 cup) Biscoff cookie butter, melted (for topping)
- Additional Biscoff cookies, crushed, for garnish
Instructions
- Line an 8×8-inch baking pan with parchment paper, leaving overhang on two sides.
- Pulse 250g Biscoff cookies in a food processor until fine crumbs form. Transfer to a bowl and mix with 85g melted butter and 1 tablespoon sugar (if using) until moistened. Press firmly into the bottom of the pan. Refrigerate while making the filling.
- In a large bowl, beat 340g softened cream cheese, 100g sugar, and 1 teaspoon vanilla extract until smooth and fluffy (2-3 minutes). Scrape down the bowl.
- Add 240g Greek yogurt and beat until fully incorporated and smooth.
- In a separate chilled bowl, whip 120ml cold heavy cream until stiff peaks form.
- Fold about one-third of the whipped cream into the cream cheese mixture to loosen it, then gently fold in the remaining whipped cream until just combined.
- Melt 3 tablespoons Biscoff cookie butter. Spread half the filling over the chilled crust, drizzle with half the melted cookie butter, and swirl gently. Top with remaining filling, spread smooth, and drizzle with remaining melted cookie butter. Swirl again.
- Cover and refrigerate for at least 6 hours, preferably overnight.
- Once set, melt 120g Biscoff cookie butter and let cool slightly. Pour over the top and spread evenly. Sprinkle with crushed Biscoff cookies. Refrigerate for 30 minutes.
- Lift the bars out using the parchment overhang. Slice into 9 or 16 bars with a clean, sharp knife, wiping the knife between cuts.
Notes
For best results, use room temperature cream cheese to avoid lumps. Chill overnight for clean slices. Wipe knife clean between cuts for neat edges. Can be frozen for up to 3 months.
Nutrition
- Serving Size: 1 bar (based on 16 s
- Calories: 280
- Sugar: 18
- Sodium: 180
- Fat: 18
- Saturated Fat: 10
- Carbohydrates: 28
- Fiber: 1
- Protein: 4
Keywords: no-bake cheesecake, Biscoff cheesecake bars, easy dessert, no-bake dessert, light cheesecake, Greek yogurt cheesecake, 30-minute dessert


