Love this? Save it for later!
Share the inspiration with your friends
I was standing in the baking aisle last October, staring at a box of pre-made sugar cookie mix that cost nearly eight dollars, when the smell of cheap vanilla extract hit me—and suddenly I was seven years old, standing on a wobbly stool in my Aunt Carol’s cramped kitchen, watching her pour a whole bottle of the stuff into a bowl of flour and butter. She always said vanilla was the secret to happiness, and honestly, she wasn’t wrong. Her kitchen was the only place where everything felt simple and safe, and her sugar cookies were the centerpiece of every Halloween party we ever had. But here’s the thing: I never actually learned her recipe. She passed away a few years ago, and I’ve been chasing that exact taste ever since, trying to recreate it from a memory that’s more feeling than fact. I mean, how do you measure a memory? You can’t. So last year, I decided to stop trying to replicate something I couldn’t fully remember and instead create something new—something that captured the same spirit but was easier, cheaper, and way more kid-friendly. These Easy Halloween Sugar Cookie Bars are the result of that happy accident. They’re not Aunt Carol’s cookies, but they have that same buttery, vanilla warmth that makes you close your eyes for a second. And the best part? No rolling, no cutting, no fuss. Maybe you’ve been there, staring at a complicated recipe and wondering if it’s worth the mess. Trust me, this one is. Let me show you how to make it without breaking the bank or your sanity.
Why You’ll Love This Recipe
These sugar cookie bars are the kind of recipe that makes you look like a hero without actually doing much work. I’ve tested this version at least six times (my family has been very patient), and I can honestly say it’s the most forgiving, foolproof cookie bar I’ve ever made. Here’s why this one stands out:
- Quick & Easy: From mixing to frosting, you’re looking at about 35 minutes total. No chilling dough, no rolling pins, no cookie cutters to wash.
- Simple Ingredients: You probably already have butter, sugar, flour, and vanilla in your pantry. No specialty items, no expensive extracts, no trips to three different stores.
- Perfect for Halloween Parties: These bars are sturdy enough to pack in lunchboxes, pretty enough for a classroom treat, and easy enough to make with little helpers.
- Crowd-Pleaser: I’ve brought these to two school events and a neighborhood potluck, and they disappeared faster than anything else on the table. Kids love the frosting, adults love the soft texture.
- Unbelievably Delicious: The texture is this perfect middle ground between a soft sugar cookie and a chewy blondie. The frosting sets just enough to hold sprinkles but stays creamy.
What makes this recipe different from all the other sugar cookie bars out there? It’s the ratio. I spent a whole weekend testing butter-to-sugar ratios because I wanted something that tasted rich without being greasy. The secret is using melted butter instead of softened—it gives you that dense, fudgy texture without the extra step of creaming. And the frosting? It’s a simple buttercream that uses milk instead of heavy cream, which saves money and still tastes amazing. This isn’t just another version of sugar cookie bars—it’s the version that works every single time, even when you’re distracted by a toddler asking for candy at 4 PM.
What Ingredients You Will Need
This recipe uses basic pantry staples to create something that feels special. I’ve tested these ingredients with budget-friendly brands and premium ones, and honestly, the difference is minimal—so save your money for the sprinkles.
- For the Cookie Bars:
- 1 cup (2 sticks) unsalted butter, melted and slightly cooled (I use Land O’Lakes because it’s consistent, but store brands work fine)
- 1 ½ cups granulated sugar (adds sweetness and helps create that chewy edge)
- 2 large eggs, room temperature (cold eggs will seize the melted butter)
- 2 teaspoons vanilla extract (pure is better, but imitation works in a pinch)
- 3 cups all-purpose flour (spoon and level—don’t scoop directly from the bag)
- 1 teaspoon baking powder
- ½ teaspoon baking soda
- ½ teaspoon salt
- Orange and black food coloring (gel works best; liquid is fine but you’ll need more)
- For the Frosting:
- ½ cup (1 stick) unsalted butter, softened
- 2 cups powdered sugar
- 2 tablespoons milk (whole milk gives the creamiest texture, but 2% works)
- 1 teaspoon vanilla extract
- Pinch of salt
- Orange gel food coloring (optional, but fun for Halloween)
- For Decoration:
- Halloween sprinkles (I buy the big tub from Walmart for under $3)
- Candy eyeballs (optional, but kids lose their minds over these)
One thing I’ve learned the hard way: don’t skip the salt. It balances the sweetness and makes the vanilla flavor pop. And if you’re using salted butter (which I sometimes do when I’m out of unsalted), just reduce the added salt to ¼ teaspoon. Also, a quick note on food coloring—gel colors are more concentrated and won’t mess with the consistency of your dough or frosting. I’ve made the mistake of using liquid coloring and ended up with runny frosting that wouldn’t hold its shape. Stick with gel if you can find it.
Equipment Needed
You don’t need a fancy kitchen to pull these off. Here’s what you’ll actually use:
- 9×13-inch baking pan (metal pans give the best golden edges; glass works but takes longer to bake)
- Parchment paper (non-negotiable—it makes lifting the bars out so much easier)
- Large mixing bowl
- Medium mixing bowl
- Whisk
- Spatula (silicone is my favorite for scraping every last bit of dough)
- Electric hand mixer or stand mixer (for the frosting; you can whisk by hand but your arm will hate you)
- Cooling rack
- Offset spatula (for spreading frosting evenly—a butter knife works in a pinch)
If you don’t have a 9×13 pan, you can use two 8×8 square pans, but reduce the baking time by about 5 minutes. I’ve also made these in a disposable foil pan when I needed to bring them to a party and didn’t want to worry about getting my pan back—they turned out perfectly fine. Just keep an eye on the edges because foil pans tend to brown faster.
Preparation Method
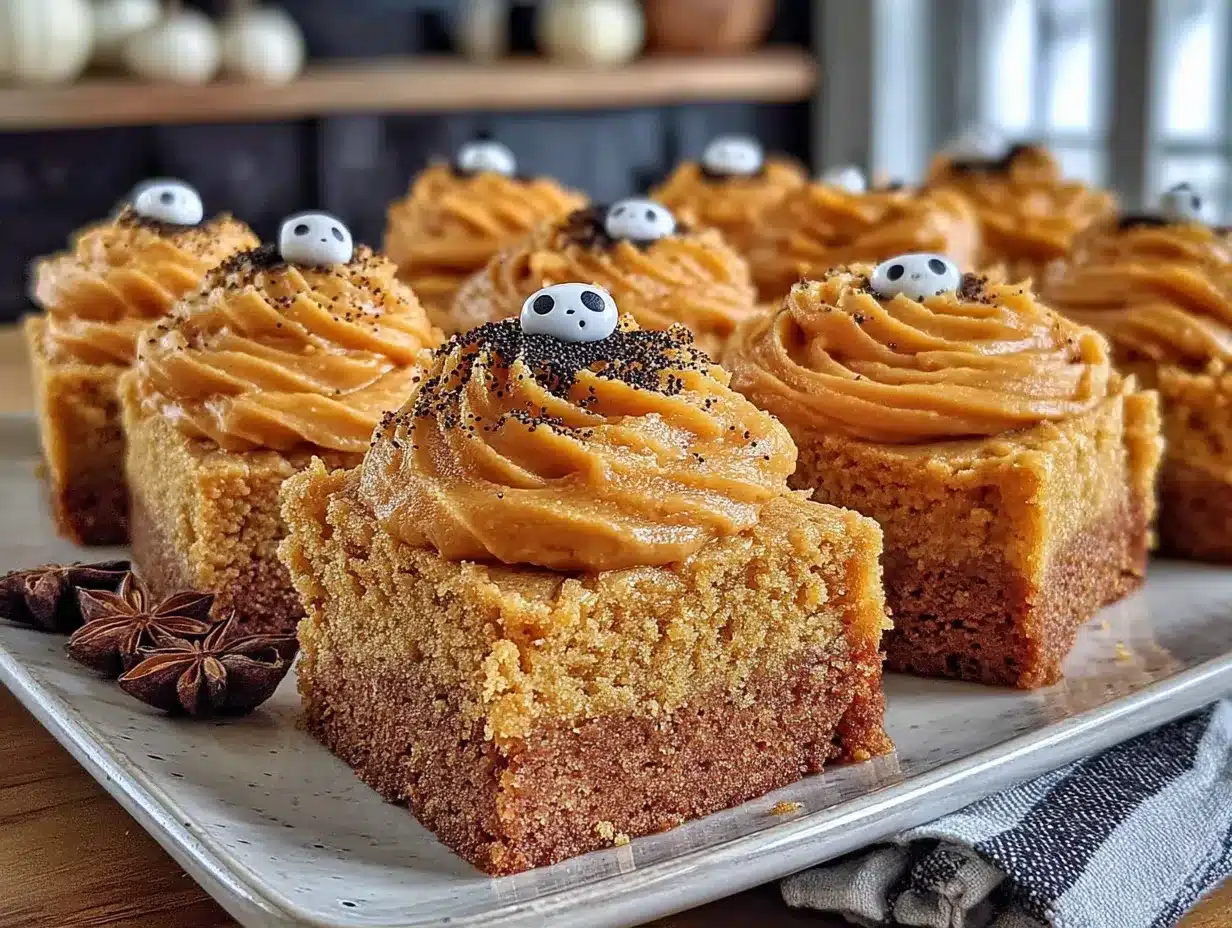
Alright, let’s get to the fun part. Here’s exactly how to make these Easy Halloween Sugar Cookie Bars without any drama.
- Preheat your oven to 350°F (175°C). Line a 9×13-inch baking pan with parchment paper, leaving some overhang on the long sides. This will be your lifeline for lifting the bars out later. Lightly grease the parchment with cooking spray.
- Melt the butter in a microwave-safe bowl or on the stovetop. Let it cool for about 5 minutes—you don’t want it hot enough to cook the eggs when you mix them in. While it cools, measure out your sugar and flour.
- In a large bowl, whisk together the melted butter and sugar until well combined. It should look like wet sand. Add the eggs one at a time, whisking after each addition until smooth. Stir in the vanilla extract. The mixture should be glossy and slightly thick.
- In a separate medium bowl, whisk together the flour, baking powder, baking soda, and salt. This step ensures the leavening agents are evenly distributed so you don’t end up with a weird salty bite in one corner of the pan.
- Gradually add the dry ingredients to the wet ingredients, stirring with a spatula until just combined. Do not overmix—stop as soon as you don’t see any more streaks of flour. Overmixing will make the bars tough instead of tender.
- Divide the dough in half. Leave one half plain. Add orange gel food coloring to the other half and stir until evenly colored. If you want a marbled effect, you can swirl the two colors together in the pan instead of layering them.
- Spread the plain dough evenly into the prepared pan. Use a spatula or your fingers (lightly greased) to press it into an even layer. Then dollop the orange dough on top and gently spread it out. If you’re going for a marbled look, use a knife to swirl the two colors together.
- Bake for 18-22 minutes, or until the edges are lightly golden and the center looks set but still soft. A toothpick inserted in the center should come out with a few moist crumbs, not wet batter. My oven runs hot, so I start checking at 16 minutes. The bars will continue to cook in the pan as they cool.
- Let the bars cool completely in the pan on a wire rack. This takes about 45 minutes to an hour. Do not rush this step—if you frost them while they’re warm, the frosting will melt into a puddle and you’ll have a sweet soup situation. Trust me, I’ve done it.
- While the bars cool, make the frosting. In a medium bowl, beat the softened butter with an electric mixer until creamy. Gradually add the powdered sugar, one cup at a time, beating on low speed. Add the milk, vanilla, and salt, then increase speed to medium-high and beat for 2-3 minutes until light and fluffy. If you want orange frosting, add gel food coloring a drop at a time until you reach your desired shade.
- Once the bars are completely cool, lift them out of the pan using the parchment overhang. Spread the frosting evenly over the top using an offset spatula. Decorate with Halloween sprinkles and candy eyeballs immediately, before the frosting sets.
- Let the frosting set for about 15 minutes before cutting into bars. Use a sharp knife and wipe it clean between cuts for neat edges. I like to cut them into 24 squares, but you can go bigger or smaller depending on your crowd.
Cooking Tips & Techniques
I’ve made these bars at least a dozen times, and here are the things I wish someone had told me before my first attempt. First, don’t skip the parchment paper. I know it feels like an extra step, but I promise you, trying to pry a stuck bar out of a pan is not the kind of Halloween fright you want. Second, if your dough feels too sticky to spread, lightly wet your fingers with water—it helps smooth the surface without adding extra flour that would dry out the bars.
One mistake I made early on: I overbaked them because I was waiting for the center to look fully set. Sugar cookie bars are meant to be soft, so pull them out when the edges are golden and the center still looks slightly underdone. They’ll set up perfectly as they cool. Another thing—if you’re baking with kids (which I highly recommend), let them help with the sprinkles. It’s messy, it’s imperfect, and that’s exactly what makes homemade treats special. My four-year-old once dumped half a container of sprinkles on one corner, and honestly, that corner was the most popular at the party.
For multitasking: while the bars are baking, clean up your mixing bowls and measure out the frosting ingredients. That way, by the time the bars are cool enough to frost, you’re ready to go. Also, if you’re short on time, you can make the frosting while the bars are in the oven and just let it sit at room temperature—it’ll be fine for a few hours.
Variations & Adaptations
These bars are incredibly forgiving, so feel free to play around. Here are some variations I’ve tried and loved:
- Gluten-Free Version: Substitute the all-purpose flour with a 1:1 gluten-free baking flour blend. I’ve used Bob’s Red Mill with great results—just add an extra tablespoon of milk to the dough because gluten-free flours absorb more moisture.
- Dairy-Free Option: Use vegan butter (I like Country Crock Plant Butter) and substitute the milk in the frosting with oat milk or almond milk. The texture will be slightly less tender, but still delicious.
- Chocolate Swirl: Melt ¼ cup of semi-sweet chocolate chips and swirl it into the plain dough before baking. It gives a nice chocolate-vanilla contrast that kids go crazy for.
- Spiced Version: Add 1 teaspoon of pumpkin pie spice to the flour mixture for a fall twist. It pairs beautifully with the vanilla and makes the kitchen smell amazing.
- Mini Bites: Press the dough into a mini muffin tin (greased) and bake for 10-12 minutes for bite-sized treats. Perfect for classroom parties or snack bags.
I once made a batch with leftover candy corn pressed into the top before baking—it melted into these little caramel pockets that were surprisingly good. Not my proudest moment, but my kids thought I was a genius.
Serving & Storage Suggestions
These bars are best served at room temperature, but honestly, I’ve eaten them straight from the fridge and they’re still fantastic. For presentation, I like to arrange them on a platter lined with orange or black napkins—it makes the sprinkles pop and feels festive without much effort. They pair wonderfully with a glass of cold milk, a warm cup of apple cider, or even a scoop of vanilla ice cream if you’re feeling extra indulgent.
For storage, place the bars in an airtight container at room temperature for up to 4 days. If you stack them, put a sheet of parchment paper between layers to keep the frosting from smudging. You can also refrigerate them for up to a week, but let them sit out for 10 minutes before serving so the frosting softens up again. These bars freeze beautifully—wrap individual squares in plastic wrap, then place them in a freezer-safe bag. They’ll keep for up to 3 months. To thaw, just leave them on the counter for about 30 minutes. The frosting might look a little dull after freezing, but a fresh sprinkle of Halloween sprinkles fixes that right up.
One thing I love about these bars: the flavor actually gets better after a day. The vanilla and butter meld together, and the texture becomes even softer. So if you can, make them a day ahead—your future self will thank you.
Nutritional Information & Benefits
Let’s be real: these are a treat, not a health food. But that doesn’t mean they can’t fit into a balanced lifestyle. One bar (based on 24 servings) contains approximately 210 calories, 10g fat, 28g carbohydrates, 2g protein, and 15g sugar. The butter provides a small amount of vitamin A, and the eggs add a bit of protein and choline. If you use organic or pasture-raised eggs and butter, you’ll get a slightly better nutrient profile, but for most of us, the joy of a homemade treat is worth more than the numbers.
For those with dietary restrictions, this recipe can easily be adapted (see variations above). It contains gluten, dairy, and eggs, so it’s not suitable for those with allergies unless substitutions are made. I personally find that making treats from scratch, even if they’re indulgent, feels more intentional than buying a box of processed snacks. There’s something about knowing exactly what went into the bowl that makes that first bite taste even better.
Conclusion
These Easy Halloween Sugar Cookie Bars have become my go-to for every fall celebration, and I honestly don’t see that changing anytime soon. They’re the kind of recipe that brings people together without adding stress to your day. Whether you’re making them for a classroom party, a family movie night, or just because you want the house to smell like vanilla and butter, they deliver every single time. I love that I can make them with my kids, that they don’t require any fancy equipment, and that they taste like something much more complicated than they actually are. That’s the magic of a good recipe, isn’t it? It makes you feel like you pulled off something amazing, even when it was actually pretty simple.
I’d love to hear how yours turn out. Did you add candy corn? Did your kids go wild with the sprinkles? Share your photos and stories in the comments below—I read every single one and I always learn something new from this community. And if you’re looking for more budget-friendly, kid-approved treats, check out my easy pumpkin muffins or these no-bake chocolate oat bars. Happy Halloween, friends—now go make some memories in the kitchen.
Frequently Asked Questions
Can I use pre-made sugar cookie dough for these bars?
You can, but the texture won’t be the same. Pre-made dough often has more preservatives and less butter, so the bars will be denser and less tender. If you’re in a pinch, press the dough into the pan and bake for 15-18 minutes, then frost as directed. It’s a decent shortcut, but homemade really is worth the extra 10 minutes.
How do I prevent the bars from sticking to the pan?
Parchment paper is your best friend here. Line the pan with it, leaving overhang on two sides, and lightly grease the parchment. If you don’t have parchment, grease the pan thoroughly with butter or cooking spray, then dust with flour. But honestly, parchment is foolproof and saves you from the heartbreak of a broken bar.
Can I freeze these sugar cookie bars?
Yes! Freeze unfrosted bars for up to 3 months wrapped tightly in plastic wrap and foil. Thaw at room temperature, then frost and decorate. If you freeze them already frosted, the frosting might get a bit grainy, but they’re still perfectly edible. Just add fresh sprinkles after thawing to revive the look.
What if I don’t have gel food coloring?
Liquid food coloring works, but you’ll need more drops to achieve a vibrant orange, which can thin out your frosting or make the dough stickier. Start with 10-12 drops of liquid coloring and add more as needed. For a natural alternative, you can mix a pinch of turmeric with a drop of red coloring—it gives a warm orange hue without artificial dyes.
Why did my bars turn out dry?
Dry bars usually mean they were overbaked or overmixed. Pull them out of the oven when the center is still soft and the edges are just golden. Also, make sure you’re measuring your flour correctly—scooping directly from the bag packs in too much flour. Spoon it into the measuring cup and level it off with a knife for the right amount.
Pin This Recipe!
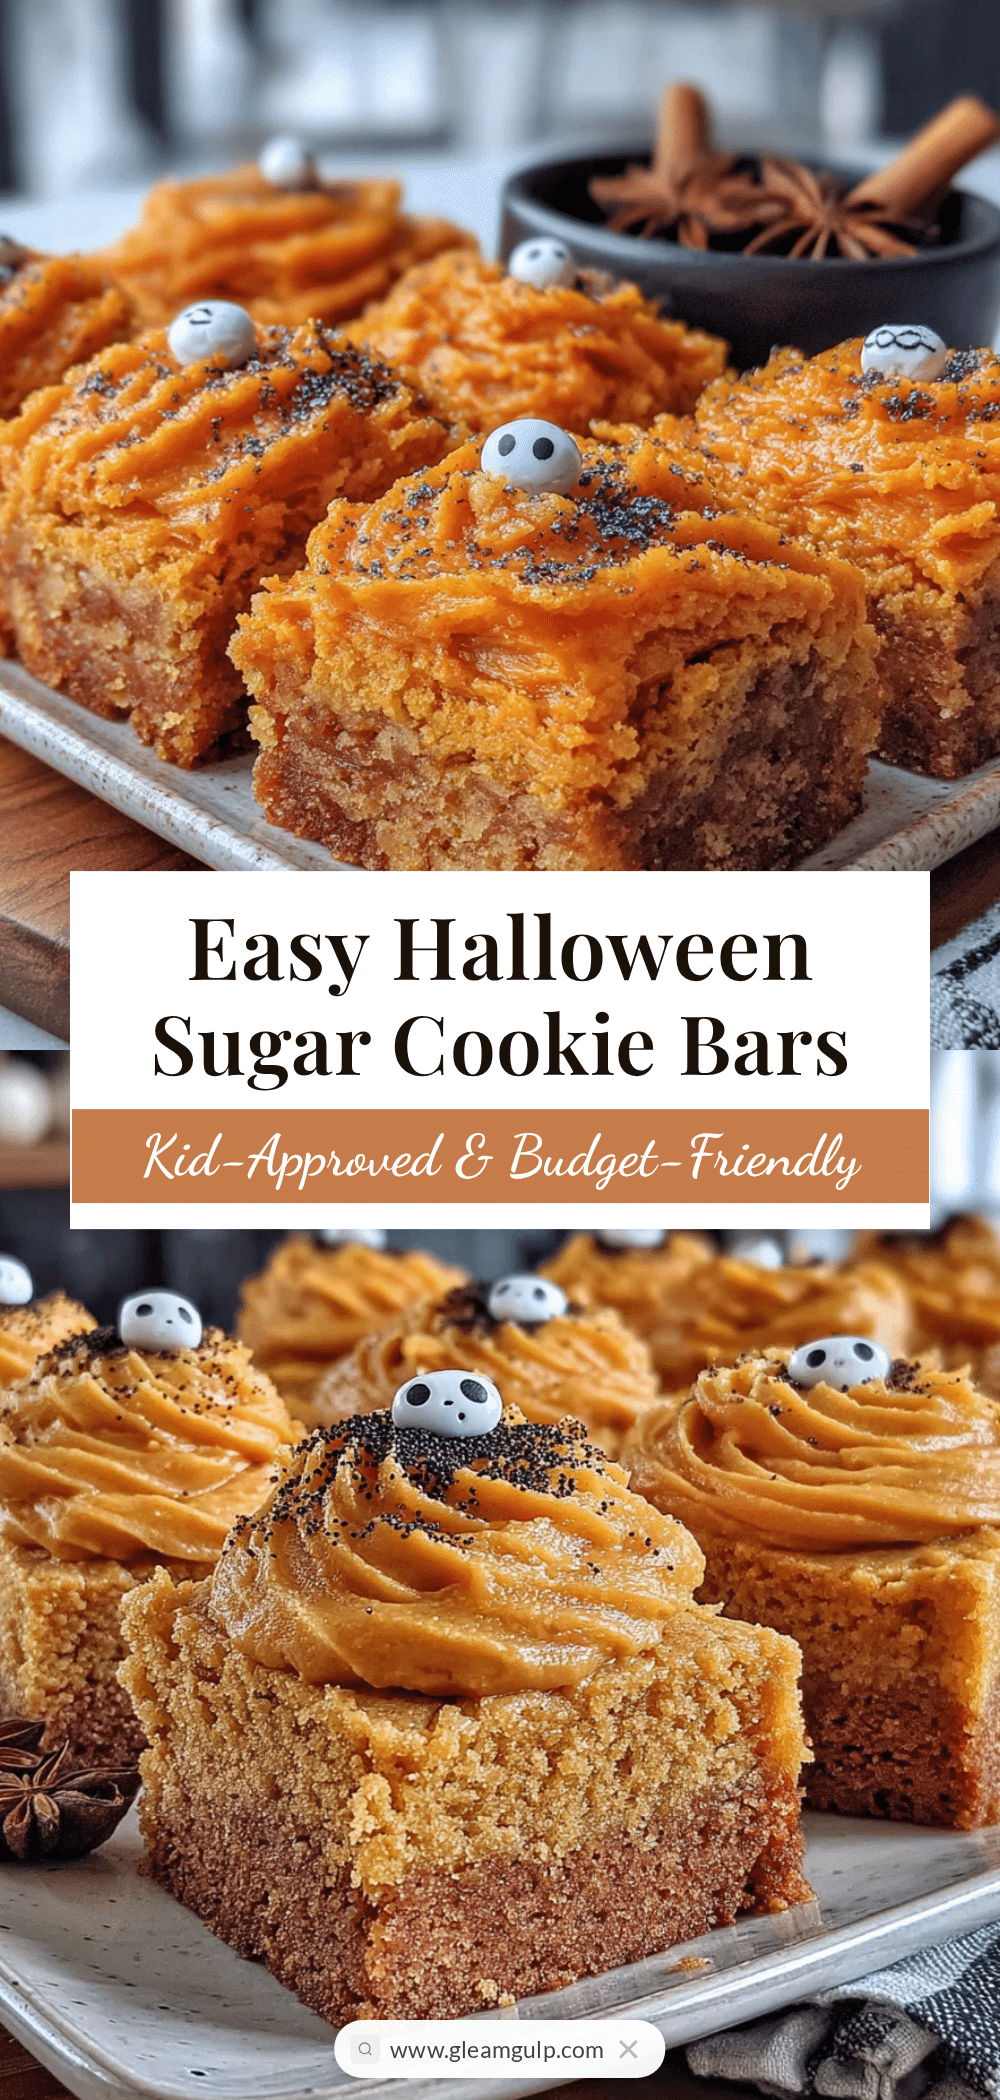
Easy Halloween Sugar Cookie Bars: Best Budget-Friendly Recipe
These Easy Halloween Sugar Cookie Bars are a budget-friendly, no-fuss treat perfect for Halloween parties. With a soft, buttery texture and creamy frosting, they come together in about 35 minutes without any rolling or cutting.
- Prep Time: 15 minutes
- Cook Time: 20 minutes
- Total Time: 35 minutes
- Yield: 24 servings 1x
- Category: Dessert
- Cuisine: American
Ingredients
- 1 cup (2 sticks) unsalted butter, melted and slightly cooled
- 1 ½ cups granulated sugar
- 2 large eggs, room temperature
- 2 teaspoons vanilla extract
- 3 cups all-purpose flour (spoon and leveled)
- 1 teaspoon baking powder
- ½ teaspoon baking soda
- ½ teaspoon salt
- Orange and black food coloring (gel preferred)
- ½ cup (1 stick) unsalted butter, softened (for frosting)
- 2 cups powdered sugar (for frosting)
- 2 tablespoons milk (for frosting)
- 1 teaspoon vanilla extract (for frosting)
- Pinch of salt (for frosting)
- Orange gel food coloring (optional, for frosting)
- Halloween sprinkles (for decoration)
- Candy eyeballs (optional, for decoration)
Instructions
- Preheat oven to 350°F (175°C). Line a 9×13-inch baking pan with parchment paper, leaving overhang on the long sides. Lightly grease the parchment with cooking spray.
- Melt the butter and let it cool for about 5 minutes.
- In a large bowl, whisk together the melted butter and sugar until well combined. Add eggs one at a time, whisking after each addition. Stir in vanilla extract.
- In a separate medium bowl, whisk together flour, baking powder, baking soda, and salt.
- Gradually add dry ingredients to wet ingredients, stirring with a spatula until just combined. Do not overmix.
- Divide the dough in half. Leave one half plain. Add orange gel food coloring to the other half and stir until evenly colored.
- Spread the plain dough evenly into the prepared pan. Dollop the orange dough on top and gently spread it out. For a marbled look, swirl with a knife.
- Bake for 18-22 minutes, until edges are lightly golden and center looks set but still soft. A toothpick inserted in center should come out with a few moist crumbs.
- Let bars cool completely in the pan on a wire rack (about 45 minutes to 1 hour).
- While bars cool, make frosting: In a medium bowl, beat softened butter with an electric mixer until creamy. Gradually add powdered sugar, one cup at a time, beating on low. Add milk, vanilla, and salt, then beat on medium-high for 2-3 minutes until light and fluffy. Add orange gel food coloring if desired.
- Once bars are completely cool, lift them out using parchment overhang. Spread frosting evenly over the top. Decorate with Halloween sprinkles and candy eyeballs immediately.
- Let frosting set for about 15 minutes before cutting into bars. Cut into 24 squares.
Notes
Don’t skip the parchment paper—it makes lifting the bars out easy. For best texture, pull bars out when center still looks slightly underdone; they will set as they cool. If dough is too sticky, lightly wet fingers with water to spread. Bars can be made a day ahead; flavor improves after a day. Store in airtight container at room temperature for up to 4 days, or refrigerate for up to a week. Freeze unfrosted bars for up to 3 months.
Nutrition
- Serving Size: 1 bar
- Calories: 210
- Sugar: 15
- Sodium: 120
- Fat: 10
- Saturated Fat: 6
- Carbohydrates: 28
- Protein: 2
Keywords: Halloween sugar cookie bars, easy sugar cookie bars, budget-friendly Halloween treats, soft sugar cookie bars, Halloween dessert


