Love this? Save it for later!
Share the inspiration with your friends
There used to be this tiny bakery tucked behind a bookstore in Portland called The Gilded Acorn that made the most incredible pumpkin patch dessert cups I have ever tasted. When they closed their doors three winters ago—honestly, it was a sad Tuesday in November that I still remember too clearly—I felt like I lost a little piece of my favorite season. After twelve tries—some were soupy disasters, let me tell you—I finally cracked the code on their cozy pumpkin patch pudding cups with Oreo dirt.
I spent months obsessing over what made those cups so special. Was it the silky pumpkin pudding? The way the crushed Oreos mimicked fresh garden soil? Or maybe it was the little gummy worm peeking out from the top that made adults giggle like kids? Turns out, it was all of it combined. The secret was in the balance—not too sweet, not too rich, just perfectly cozy with that nostalgic Halloween-meets-Thanksgiving vibe.
You know that feeling when you take a bite of something and it instantly transports you somewhere happy? That is exactly what happens with these pudding cups. My neighbor Karen actually teared up when I handed her one last October—she said it reminded her of making mud pies with her grandkids. I mean, if that is not a sign you have nailed a recipe, I do not know what is.
These little cups have become my go-to for fall gatherings, Halloween parties, and those quiet evenings when you just want something that tastes like a warm hug. They are ridiculously easy to make, look absolutely adorable on a dessert table, and honestly taste even better than the original. Let me show you how to make them.
Why You Will Love This Recipe
Let me be real with you—I have tested this recipe more times than I care to admit, and every single batch disappeared faster than I expected. Here is why these cozy pumpkin patch pudding cups with Oreo dirt are about to become your new fall obsession:
- Quick & Easy : Comes together in under 30 minutes, perfect for last-minute Halloween parties or surprise guests dropping by for coffee.
- Simple Ingredients : No fancy grocery trips needed—pumpkin puree, pudding mix, cream cheese, and Oreos are all you need. You probably have most of this in your kitchen right now.
- Perfect for Fall Gatherings : Great for Halloween parties, Thanksgiving dessert tables, pumpkin carving nights, or even classroom treats. Kids and adults both go crazy for them.
- Crowd-Pleaser : I have brought these to three different potlucks and never brought a single one home. People literally fight over the last cup.
- Unbelievably Delicious : The creamy pumpkin pudding paired with crunchy Oreo dirt and silky cream cheese layer is next-level comfort food. It is like fall in a cup.
What makes this recipe different from all the other pumpkin desserts out there? It is the texture combination, honestly. You get that smooth, velvety pumpkin pudding, a tangy cream cheese layer that cuts through the sweetness, and then that crunchy, chocolatey Oreo dirt on top. Every spoonful has something different happening, and that keeps you coming back for more.
This recipe is not just good—it is the kind that makes you close your eyes after the first bite. It is comfort food reimagined—faster than baking a pie, easier than making a cake, but with the same soul-soothing satisfaction. Perfect for impressing guests without stress, or turning a simple Tuesday night into something memorable.
What Ingredients You Will Need
This recipe uses simple, wholesome ingredients that come together to create something truly magical. Most of these are pantry staples during fall, but I have included substitution notes so you can adapt based on what you have on hand.
For the Pumpkin Pudding Layer
- 1 can (15 oz) pumpkin puree (not pumpkin pie filling—make sure you grab the pure stuff. I prefer Libby’s for consistent texture)
- 1 box (3.4 oz) instant vanilla pudding mix (Jell-O brand works perfectly, but store brands are fine too)
- 1 cup cold whole milk (adds richness—use 2% if that is what you have, but avoid skim or the pudding won’t set properly)
- 1/2 cup heavy cream (for extra creaminess, optional but highly recommended)
- 1 teaspoon pumpkin pie spice (or make your own with cinnamon, nutmeg, ginger, and cloves)
- 1/2 teaspoon vanilla extract (pure vanilla makes a difference here)
For the Cream Cheese Layer
- 8 oz cream cheese, softened (full-fat works best, but Neufchâtel is a lighter option)
- 1/2 cup powdered sugar (adjust to taste—I like mine less sweet)
- 1/2 teaspoon vanilla extract
- 2 tablespoons milk (to thin it out to spreading consistency)
For the Oreo Dirt
- 1 package (14.3 oz) Oreo cookies (regular or double stuff—both work great)
- 2 tablespoons melted butter (helps the crumbs stick together slightly)
For Decoration
- Gummy worms (the classic touch—look for the colorful sour ones)
- Green sprinkles or shredded coconut dyed green (for grass effect)
- Small pumpkin candies or candy corn (optional, for extra cuteness)
Substitution Notes: For a gluten-free version, use gluten-free chocolate sandwich cookies and ensure your pudding mix is certified gluten-free. For dairy-free, use full-fat coconut cream in place of cream cheese, almond milk for the pudding, and dairy-free butter for the Oreo dirt. The texture will be slightly different but still delicious.
Equipment Needed
You do not need anything fancy to make these cozy pumpkin patch pudding cups. Here is what you will need:
- 6-8 small clear cups or jars (8 oz size works perfectly—I use mason jars or clear plastic cups so you can see the layers)
- Mixing bowls (at least 2 medium-sized ones)
- Hand mixer or stand mixer (you can whisk by hand, but it takes some elbow grease for the cream cheese layer)
- Food processor or rolling pin (for crushing Oreos—I prefer the food processor for consistent crumbs)
- Measuring cups and spoons
- Spatula (for scraping every last bit of that cream cheese goodness)
- Piping bag or zip-top bag (for neat layering, but a spoon works fine too)
If you do not have a food processor, just put the Oreos in a zip-top bag and go at them with a rolling pin. It is oddly satisfying, honestly. I have done it both ways, and the bag method gives you chunkier pieces, which some people actually prefer for texture.
Preparation Method
Alright, let us get to the fun part. Follow these steps, and you will have the cutest little pumpkin patch desserts on your table in no time.
Step 1: Make the Oreo Dirt
Start by crushing your Oreos. If you are using a food processor, pulse until you get fine crumbs with some small chunks remaining—you want it to look like real garden dirt, not dust. If using the bag method, give it about 20 good whacks with a rolling pin. Transfer the crumbs to a bowl and stir in the melted butter until evenly coated. Set aside. This takes about 5 minutes total.
Step 2: Prepare the Pumpkin Pudding
In a medium bowl, whisk together the instant vanilla pudding mix and cold milk. Whisk for about 2 minutes until it starts to thicken. Add the pumpkin puree, heavy cream, pumpkin pie spice, and vanilla extract. Whisk until everything is smooth and well combined. The mixture will be thick and luscious—like a pumpkin cloud. Pop it in the fridge while you work on the next layer. This takes about 5 minutes of active time, plus chilling.
Step 3: Make the Cream Cheese Layer
In a separate bowl, beat the softened cream cheese with an electric mixer until smooth and fluffy—about 2 minutes. Add the powdered sugar and vanilla extract, and beat again until combined. Add the milk, one tablespoon at a time, beating after each addition until you reach a smooth, spreadable consistency. You want it thick but not stiff. This takes about 5 minutes.
Step 4: Assemble the Cups
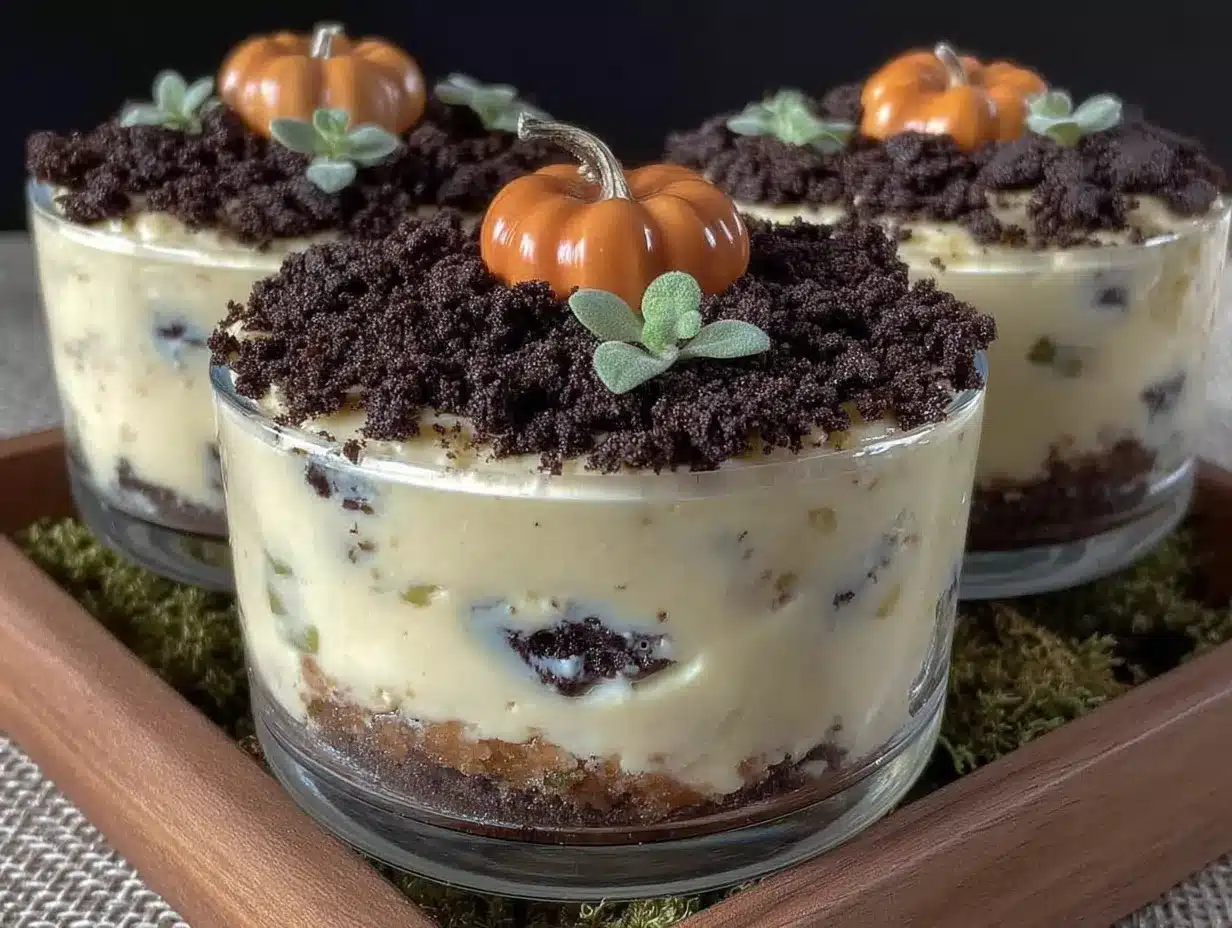
Now for the fun part—layering! Grab your clear cups or jars. Start with a layer of Oreo dirt at the bottom—about 2 tablespoons per cup. This creates the “soil” base of your pumpkin patch. Next, add a layer of the cream cheese mixture—about 2-3 tablespoons, depending on your cup size. Use a spoon or piping bag to spread it evenly. Then add the pumpkin pudding layer—another 3-4 tablespoons. Finally, top with another generous layer of Oreo dirt, making sure to cover the entire surface so it looks like a tiny patch of earth.
Step 5: Decorate
Here is where you get creative. Gently press a gummy worm into the Oreo dirt so it looks like it is crawling out of the ground. Add a few green sprinkles or dyed coconut around the edges for grass. If you have pumpkin candies, nestle one on top. The goal is to make each cup look like a tiny, whimsical pumpkin patch scene. This takes about 5-10 minutes depending on how detailed you get.
Step 6: Chill and Serve
Cover the cups with plastic wrap or lids and refrigerate for at least 2 hours before serving. This allows the layers to set and the flavors to meld together. Honestly, they taste even better the next day—the Oreo dirt softens slightly and the pumpkin flavor deepens. Serve cold straight from the fridge.
Pro tip: If you are making these for a party, assemble them the night before. The gummy worms will soften a bit and look even more realistic, like they have been tunneling through the dirt all night.
Cooking Tips & Techniques
After twelve attempts at perfecting this recipe, I learned a few things the hard way. Let me save you some trouble.
Do not skip softening the cream cheese. I know, I know—you are in a hurry, and cold cream cheese seems fine. Trust me, it is not. Cold cream cheese will give you lumpy, uneven layers. Leave it on the counter for 30 minutes before starting, or microwave it in 10-second bursts until it is soft to the touch.
Let the pudding set properly. The instant pudding needs about 5 minutes to thicken after whisking before you add the pumpkin. If you rush this step, your pumpkin layer will be runny and won’t hold up in the cups. I learned this the hard way on attempt number three—it was a soupy mess.
Crush the Oreos consistently. You want a mix of fine crumbs and small chunks. Too fine, and it turns into mud rather than dirt. Too chunky, and it does not look realistic. Pulse the food processor in short bursts and check frequently.
Layer strategically. Start with a thin layer of Oreo dirt at the bottom—this prevents the cream cheese from sticking to the cup and makes for a cleaner presentation. End with a generous layer on top so it looks like actual soil.
Timing is everything. These cups need at least 2 hours to set, but 4-6 hours is ideal. If you are short on time, you can speed things up by placing them in the freezer for 30 minutes, but watch them carefully—you do not want frozen pudding.
Variations & Adaptations
One of the best things about this recipe is how flexible it is. Here are some ways to make it your own:
Seasonal Variations
- Spring Garden Version : Swap pumpkin pudding for lemon or vanilla pudding, use crushed graham crackers for dirt, and top with flower-shaped candies.
- Summer Berry Patch : Use strawberry or cheesecake pudding, crushed chocolate wafer cookies for dirt, and top with fresh berries and mint leaves.
Dietary Adaptations
- Gluten-Free : Use gluten-free chocolate sandwich cookies and ensure your pudding mix is certified gluten-free. Everything else is naturally gluten-free.
- Dairy-Free/Vegan : Use full-fat coconut cream whipped with powdered sugar for the cream cheese layer, almond or oat milk for the pudding, and dairy-free butter for the Oreo dirt. The texture will be slightly different but still delicious.
- Lower Sugar : Use sugar-free pudding mix, reduce the powdered sugar in the cream cheese layer, and use reduced-fat Oreos.
Flavor Twists
- Pumpkin Cheesecake Version : Add 1/4 cup pumpkin puree to the cream cheese layer for extra pumpkin flavor throughout.
- Chocolate Pumpkin : Use chocolate pudding instead of vanilla for a richer, more decadent version.
- Spiced Up : Add a pinch of cayenne or chili powder to the pumpkin layer for a sweet-heat surprise.
I personally love the chocolate pumpkin version—it feels even more indulgent and pairs beautifully with the Oreo dirt. My kids prefer the classic version with extra gummy worms, so we usually make both.
Serving & Storage Suggestions
These cozy pumpkin patch pudding cups are best served cold, straight from the fridge. The contrast between the chilled, creamy pudding and the slightly softened Oreo dirt is absolutely perfect. I recommend serving them in clear cups so everyone can admire the layers before digging in.
Presentation Tips: Arrange the cups on a wooden board or a tray lined with fall leaves for a rustic look. Add a small sign that says “Pumpkin Patch” for parties. If you are serving these at a Halloween gathering, scatter some plastic spiders around for a spooky touch.
What to Serve With Them: These cups are rich enough to stand alone, but they pair beautifully with a warm apple cider, pumpkin spice latte, or a simple cup of hot coffee. For a full fall dessert spread, serve alongside pumpkin bread or apple crisp.
Storage: Cover the cups tightly with plastic wrap or lids and store in the refrigerator for up to 4 days. The Oreo dirt will soften over time, which actually makes it taste more like real dirt—some people prefer it that way. I do not recommend freezing these, as the pudding texture changes upon thawing.
Reheating: Do not reheat these—they are meant to be served cold. If you have leftovers that have been sitting out for more than 2 hours, discard them for food safety.
One thing I love about this recipe is that the flavors actually get better after a day in the fridge. The pumpkin spice melds with the cream cheese, and the Oreo dirt absorbs just enough moisture to become perfectly crumbly. Make them a day ahead for best results.
Nutritional Information & Benefits
While these cozy pumpkin patch pudding cups are definitely a treat, they do offer some surprising nutritional perks. Here is a rough breakdown per serving (based on 8 servings):
| Nutrient | Amount Per Serving |
|---|---|
| Calories | 385 |
| Total Fat | 22g |
| Saturated Fat | 12g |
| Cholesterol | 55mg |
| Sodium | 420mg |
| Total Carbohydrates | 44g |
| Dietary Fiber | 3g |
| Sugars | 32g |
| Protein | 6g |
| Vitamin A | 190% DV |
| Calcium | 8% DV |
Health Highlights: Pumpkin is packed with vitamin A, which supports eye health and immune function. The cream cheese provides calcium for bone health, and believe it or not, the Oreos contain a small amount of iron. This dessert is a fun way to sneak some vegetable-based nutrition into a treat—though let us be honest, we are eating it because it tastes amazing.
Dietary Considerations: This recipe contains dairy, gluten, and soy (from the Oreos). For allergen-friendly options, check the variations section above. This is not a low-calorie dessert, but it is perfect for special occasions when you want something indulgent and memorable.
Conclusion
These cozy pumpkin patch pudding cups with Oreo dirt are everything I hoped they would be when I started my mission to recreate that bakery memory. They are fun, delicious, and honestly kind of magical to watch people eat—there is something about that first spoonful that makes everyone smile.
I love that this recipe brings a little bit of whimsy to the table. It is not just dessert; it is an experience. Kids love the gummy worms and the dirt effect, and adults appreciate the sophisticated pumpkin flavor and creamy texture. It is rare to find a recipe that pleases both groups equally, but this one does it effortlessly.
I want to hear about your pumpkin patch creations! Did you add extra gummy worms? Try a different cookie for the dirt? Leave a comment below and tell me how yours turned out. And if you loved this recipe, share it with a friend who needs a little fall fun in their life. Happy fall, friends—go make some dirt!
Frequently Asked Questions
Can I make these pumpkin patch pudding cups ahead of time?
Absolutely! In fact, they taste even better the next day. Assemble them up to 24 hours in advance and keep them covered in the refrigerator. The Oreo dirt will soften slightly, which makes it look even more realistic.
Can I use homemade pumpkin puree instead of canned?
Yes, but you will need to strain it well to remove excess moisture. Homemade pumpkin puree tends to be more watery than canned, which can make the pudding layer runny. Drain it through cheesecloth for about 30 minutes before using.
What can I use instead of Oreos for the dirt?
Any chocolate sandwich cookie works well. You can also use chocolate graham crackers, chocolate wafer cookies, or even crushed chocolate cereal like Cocoa Pebbles for a different texture.
How long do these pudding cups last in the fridge?
They will keep for up to 4 days when stored covered in the refrigerator. The texture changes slightly over time as the Oreos soften, but many people prefer them this way.
Can I freeze these pumpkin patch cups?
I do not recommend freezing them. The pudding and cream cheese layers can become grainy and separate upon thawing, and the Oreo dirt will turn mushy. Stick to refrigeration for best results.
Pin This Recipe!
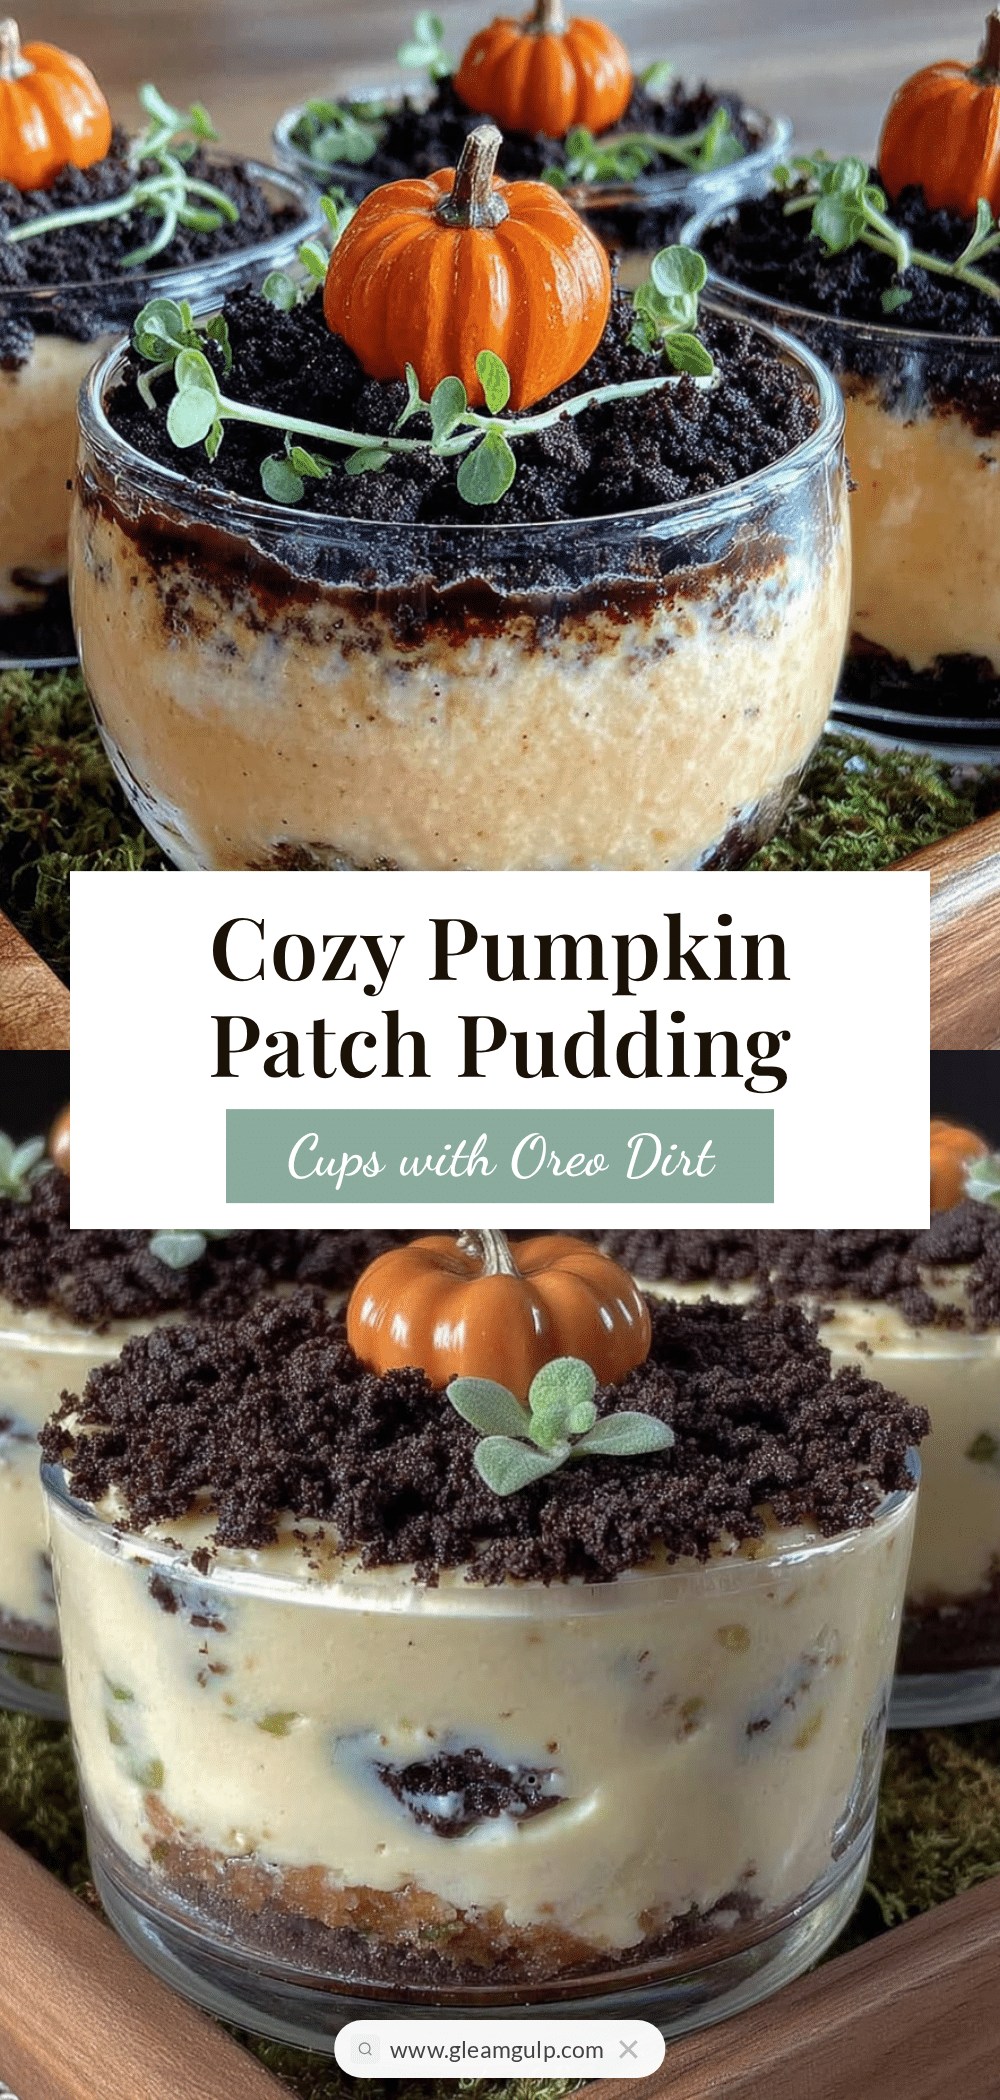
Cozy Pumpkin Patch Pudding Cups Recipe with Oreo Dirt
These adorable pumpkin patch pudding cups feature layers of creamy pumpkin pudding, tangy cream cheese, and crunchy Oreo dirt, topped with gummy worms for a fun fall treat that kids and adults love.
- Prep Time: 20 minutes
- Cook Time: 0 minutes
- Total Time: 2 hours 20 minutes (includes chilling)
- Yield: 8 servings 1x
- Category: Dessert
- Cuisine: American
Ingredients
- 1 can (15 oz) pumpkin puree
- 1 box (3.4 oz) instant vanilla pudding mix
- 1 cup cold whole milk
- 1/2 cup heavy cream
- 1 teaspoon pumpkin pie spice
- 1/2 teaspoon vanilla extract
- 8 oz cream cheese, softened
- 1/2 cup powdered sugar
- 1/2 teaspoon vanilla extract
- 2 tablespoons milk
- 1 package (14.3 oz) Oreo cookies
- 2 tablespoons melted butter
- Gummy worms (for decoration)
- Green sprinkles or shredded coconut dyed green (for decoration)
- Small pumpkin candies or candy corn (optional, for decoration)
Instructions
- Crush Oreos into fine crumbs with some small chunks. Stir in melted butter until evenly coated. Set aside.
- In a medium bowl, whisk together instant vanilla pudding mix and cold milk for 2 minutes until thickened. Add pumpkin puree, heavy cream, pumpkin pie spice, and vanilla extract. Whisk until smooth. Refrigerate while preparing next layer.
- In a separate bowl, beat softened cream cheese with an electric mixer until smooth and fluffy (about 2 minutes). Add powdered sugar and vanilla extract, beat until combined. Add milk one tablespoon at a time, beating after each addition until smooth and spreadable.
- In clear cups or jars, layer: 2 tablespoons Oreo dirt at the bottom, then 2-3 tablespoons cream cheese mixture, then 3-4 tablespoons pumpkin pudding, then a generous layer of Oreo dirt on top.
- Decorate by pressing gummy worms into the Oreo dirt, adding green sprinkles or dyed coconut for grass, and optional pumpkin candies.
- Cover cups and refrigerate for at least 2 hours (preferably 4-6 hours or overnight) before serving. Serve cold.
Notes
For best results, assemble the cups the night before serving. The gummy worms will soften and look more realistic. Do not skip softening the cream cheese to avoid lumps. Let the pudding set for 5 minutes before adding pumpkin to prevent a runny layer. Store covered in the refrigerator for up to 4 days. Do not freeze.
Nutrition
- Serving Size: 1 cup
- Calories: 385
- Sugar: 32
- Sodium: 420
- Fat: 22
- Saturated Fat: 12
- Carbohydrates: 44
- Fiber: 3
- Protein: 6
Keywords: pumpkin pudding cups, Oreo dirt, fall dessert, Halloween dessert, pumpkin patch dessert, no-bake dessert