Love this? Save it for later!
Share the inspiration with your friends
My neighbor asked why I couldn’t just use candy corn instead of regular marshmallows for a fall treat. I started to explain why that wouldn’t work—the texture would be all wrong, the sugar ratio would be off, it just wasn’t a good idea. Then I stopped. I was standing in her kitchen, holding a bag of candy corn she’d bought on a whim, and I realized I had absolutely no good reason why not. So I shrugged and said, “Let’s find out.”
Honestly, I expected a sticky mess. I figured the candy corn would seize up, or turn into a weird grainy syrup, or just refuse to melt at all. I’ve been doing this long enough to know when an idea is probably a bad one. But last Tuesday, with a bag of candy corn and a box of Rice Krispies staring me down, I decided to let myself be wrong. And let me tell you—I was really, really wrong.
The first batch came out looking like autumn in a pan. That beautiful gradient of orange and yellow, the way the candy corn melted into the butter and marshmallows, the faint vanilla-honey scent that filled the kitchen. My neighbor took one bite and just closed her eyes. Maybe you’ve been there, where a recipe you had zero faith in turns out to be the one you can’t stop thinking about. That’s these treats. They’re not fancy, they’re not complicated, but they have this way of making a gray afternoon feel a little bit golden.
Why You’ll Love This Recipe
These Homemade Candy Corn Rice Krispie Treats are the kind of recipe that makes you look like a kitchen genius with almost no effort. I tested this about four times to get the ratio just right—too much candy corn and they get sticky, too little and you lose that signature color. The version I’m sharing is the sweet spot.
- Quick & Easy: From start to finish, you’re looking at about 15 minutes of active work. Perfect for a last-minute classroom treat or a lazy Sunday afternoon project.
- Simple Ingredients: You need butter, marshmallows, candy corn, Rice Krispies cereal, and a pinch of salt. That’s it. No weird specialty items.
- Perfect for Fall: These are basically Halloween in dessert form. Great for parties, trick-or-treat bags, or just because the weather turned chilly.
- Crowd-Pleaser: Kids love the candy corn flavor, adults love the nostalgia, and everyone loves a Rice Krispie treat.
- Unbelievably Delicious: The candy corn melts down into a creamy, honey-like sweetness that coats every single puff of cereal. It’s next-level comfort food.
What makes this different from every other Rice Krispie treat recipe out there is the technique. Instead of just tossing candy corn on top as decoration, you melt it right into the marshmallow mixture. This gives the whole treat that warm, buttery, candy-corn flavor throughout—not just on top. It’s the kind of recipe that makes you close your eyes after the first bite. Honestly, it’s comfort food reimagined—faster, easier, but with the same soul-soothing satisfaction.
What Ingredients You Will Need
This recipe uses simple, pantry-friendly ingredients to deliver big fall flavor without the fuss. Most of these are probably already in your kitchen, especially if you bought candy corn for Halloween and forgot about it. (I know I did.)
- Unsalted butter, 3 tablespoons (adds richness and helps prevent sticking)
- Marshmallows, 10 ounces (standard bag, about 4 cups mini or 40 large—use a brand you trust, I like Jet-Puffed for consistent melting)
- Candy corn, 1 cup (look for fresh, soft candy corn—stale ones won’t melt as smoothly)
- Rice Krispies cereal, 6 cups (or any crispy rice cereal, store brand works fine here)
- Vanilla extract, 1/2 teaspoon (pure, not imitation, for the warmest flavor)
- Salt, 1/4 teaspoon (balances the sweetness, don’t skip it)
- Optional: Orange and yellow food coloring, a few drops (for extra vibrant layers, totally optional)
A few notes from my testing: If your candy corn feels hard or crunchy, it might be old. Fresh candy corn is soft and almost chewy, and it melts beautifully. I recommend Brach’s for the most reliable melt. If you’re gluten-free, double-check your marshmallows and cereal—most are, but some brands add wheat starch. Also, you can swap the butter for a vegan stick if needed, just make sure it’s the baking kind, not spreadable.
Equipment Needed
You don’t need anything fancy here, which is part of the charm. Here’s what you’ll want:
- Large pot (at least 4-quart, to give you room to stir without flinging cereal everywhere)
- Rubber spatula (silicone is best, it won’t scratch your pot and it scrapes every bit of marshmallow goo)
- 9×13-inch baking pan (glass or metal both work, just grease it well)
- Parchment paper (optional but helpful for lifting the treats out cleanly)
- Butter knife or offset spatula (for pressing the mixture into the pan without it sticking to your hands)
- Measuring cups and spoons
- Cooling rack (if you have one, it helps them set faster)
If you don’t have a 9×13 pan, an 8×8 will work—your treats will just be thicker. I’ve used both and honestly prefer the thicker ones for a chewier bite. Just adjust your press time so they’re evenly distributed. And if you don’t have parchment paper, just grease the pan really well with butter. Like, really well.
Preparation Method
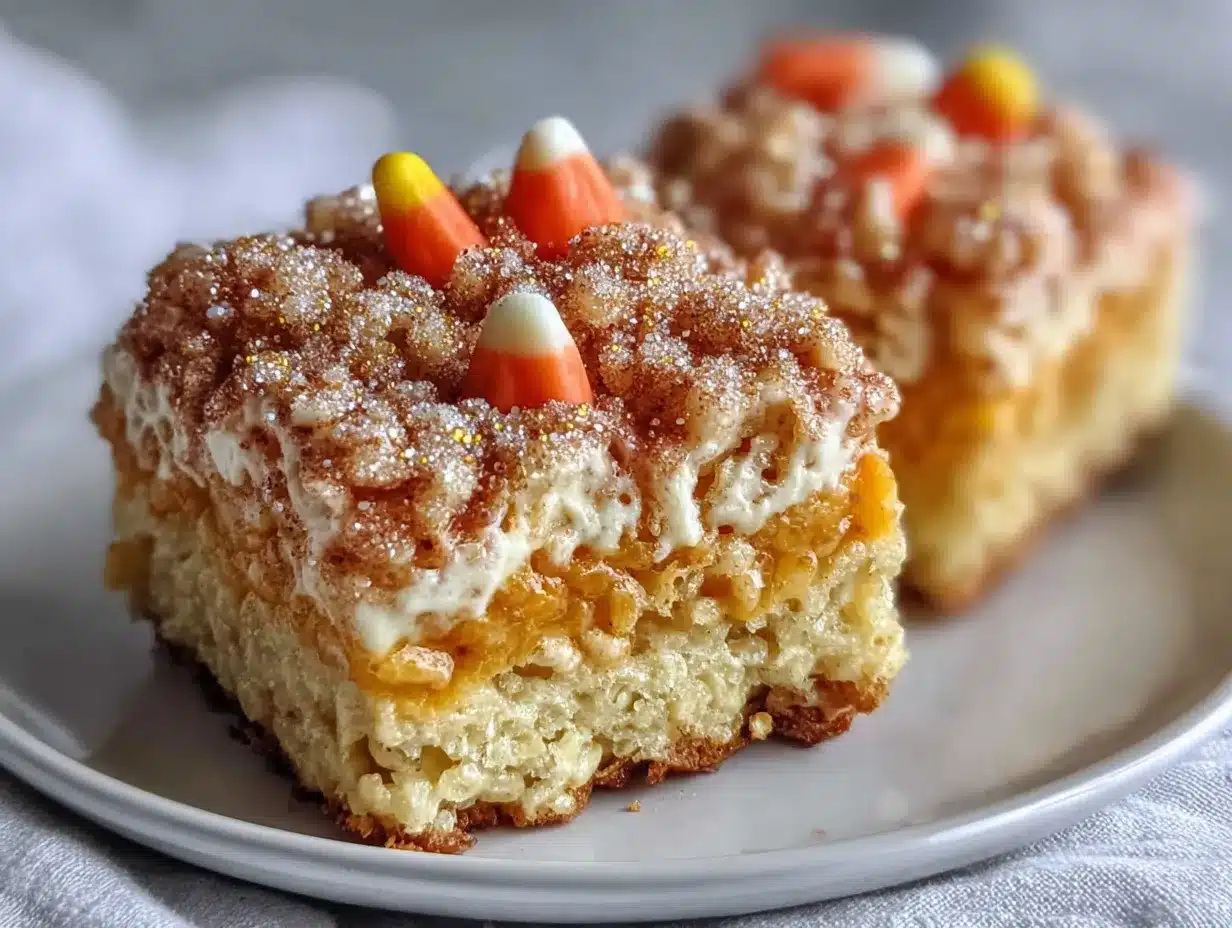
- Prep your pan. Grease a 9×13-inch baking pan with butter or line it with parchment paper, leaving some overhang on two sides for easy lifting. Set it aside.
- Melt the butter. In a large pot over medium-low heat, melt 3 tablespoons of unsalted butter. Swirl it around until it’s fully liquid and just starting to bubble. Don’t let it brown—you want it golden, not nutty.
- Add the marshmallows. Dump in your 10 ounces of marshmallows and stir constantly with your rubber spatula. They’ll start to melt in about a minute. Keep stirring until they’re completely smooth and glossy, about 2-3 minutes total.
- Add the candy corn. This is the magic step. Pour in 1 cup of candy corn and keep stirring. At first it’ll look like a mess—chunks of orange and yellow floating in white marshmallow. Don’t panic. Keep stirring over low heat. After about 2 minutes, the candy corn will start to break down and the whole mixture will turn a soft, peachy orange. It’s beautiful.
- Add vanilla and salt. Stir in 1/2 teaspoon of vanilla extract and 1/4 teaspoon of salt. The salt is crucial here—it cuts the sweetness and makes the candy corn flavor pop. Give it one good stir to combine.
- Remove from heat. Take the pot off the burner. Let it sit for about 30 seconds. If you add the cereal while the mixture is too hot, your treats will be hard and brittle. Let it cool just slightly.
- Add the cereal. Pour in 6 cups of Rice Krispies cereal. Fold it gently with your spatula until every puff is coated. Don’t stir too hard or you’ll crush the cereal—you want those satisfying crispy bites. It should take about 10-12 folds.
- Press into the pan. Scrape the mixture into your prepared pan. Grease your hands or your spatula with a little butter, then press the mixture evenly into the pan. Don’t press too hard or the treats will be dense. Just gentle, even pressure.
- Let them set. Let the treats cool at room temperature for at least 30 minutes. If you’re impatient like me, you can pop them in the fridge for 15 minutes. Just don’t leave them too long or they’ll get hard.
- Cut and serve. Lift the treats out using the parchment overhang, then cut them into squares. A sharp knife works best—wipe it clean between cuts for neat edges.
One thing I learned the hard way: if the mixture starts to get too stiff while you’re pressing it, don’t force it. Just warm it up for 10 seconds in the microwave. And if your treats come out a little sticky, that’s okay—it means the candy corn is doing its job.
Cooking Tips & Techniques
I messed up the first batch of these pretty badly. I added the candy corn too early, before the marshmallows were fully melted, and ended up with lumpy, grainy treats that tasted more like burnt sugar than candy corn. Here’s what I learned so you don’t have to repeat my mistakes.
Low and slow is your friend. Keep the heat on medium-low the whole time. High heat will scorch the marshmallows and make the candy corn seize up. If you see any browning on the bottom of the pot, you’ve gone too hot. Just pull it off the burner and stir until it cools down a bit.
Fresh candy corn matters. I tried this with an old bag I found in the back of my pantry, and the candy corn never fully melted. It stayed in little chewy chunks that were weirdly tough. Fresh candy corn is soft and pliable—if yours cracks when you bend it, it’s too old.
Don’t over-stir the cereal. I know it’s tempting to keep mixing until everything looks perfect, but over-stirring crushes the Rice Krispies and turns your treats into dense, hard bricks. Fold gently, about 10 times, and stop when you don’t see any white marshmallow patches.
Timing is everything. Once you add the cereal, you have about 2-3 minutes to get it into the pan before the mixture starts to set. Work quickly but calmly. If it does start to harden, a 10-second zap in the microwave will soften it right up.
For clean cuts, use a hot knife. Run your knife under hot water, wipe it dry, then cut. The heat glides through the sticky marshmallow without dragging. Wipe the blade between each cut for perfect squares.
Variations & Adaptations
One of the best things about this recipe is how easy it is to play with. Here are a few ways I’ve tried it and loved it:
Layered Candy Corn Treats: Divide the mixture into three bowls after step 5. Dye one bowl orange, one yellow, and leave one white. Press the white layer into the pan first, then the yellow, then the orange. Let each layer set for 5 minutes before adding the next. You get a beautiful striped effect that looks just like candy corn.
Chocolate Drizzle: Melt 1/2 cup of dark chocolate chips with a teaspoon of coconut oil and drizzle it over the top. The bitterness of the dark chocolate cuts the sweetness perfectly. I did this for a Halloween party and they disappeared in ten minutes.
Peanut Butter Swirl: Warm up 1/4 cup of peanut butter and swirl it into the marshmallow mixture right before you add the cereal. The salty peanut flavor is amazing with the honeyed candy corn. Just don’t over-swirl or you’ll lose the marbled effect.
Vegan Version: Use vegan butter and vegan marshmallows (Dandies brand works great). The candy corn is naturally dairy-free, so you’re good there. The texture will be slightly softer, so let them set an extra 15 minutes before cutting.
Spiced Fall Treats: Add 1/2 teaspoon of pumpkin pie spice to the marshmallow mixture along with the vanilla. It gives the treats a warm, cozy flavor that feels like autumn in a bite. I tried this last week and honestly, it might be my new favorite version.
Serving & Storage Suggestions
These treats are best served at room temperature. The texture is soft and chewy, with just a little bit of give when you bite into them. If they’ve been in the fridge, let them sit out for about 10 minutes before serving—they’ll be much more enjoyable.
For presentation, I like to cut them into squares and arrange them on a white platter or a wooden board. The orange and yellow colors pop beautifully against a neutral background. You can also cut them into triangles or use a cookie cutter for fun shapes—pumpkins and ghosts are perfect for Halloween.
Storage is simple. Keep them in an airtight container at room temperature for up to 3 days. I don’t recommend the fridge for longer storage—it dries them out and makes them hard. If you need to keep them longer, freeze them instead.
To freeze: Wrap each square individually in plastic wrap, then place them in a freezer-safe bag. They’ll keep for up to 3 months. When you’re ready to eat, let them thaw at room temperature for about 30 minutes. The texture comes back beautifully—I’ve tested this twice.
One thing to note: these treats get stickier on day two. The candy corn continues to absorb moisture from the marshmallows, making them softer and a little more gooey. Some people prefer them this way. I’m a day-one person myself, but my kids fight over the day-two leftovers.
Nutritional Information & Benefits
I’m not going to pretend these are health food—they’re a treat, and that’s okay. But here’s what you’re looking at per square (assuming 12 servings):
| Nutrient | Amount |
|---|---|
| Calories | 215 |
| Total Fat | 6g |
| Saturated Fat | 3.5g |
| Carbohydrates | 40g |
| Sugar | 27g |
| Protein | 1g |
| Sodium | 120mg |
Pin This Recipe!
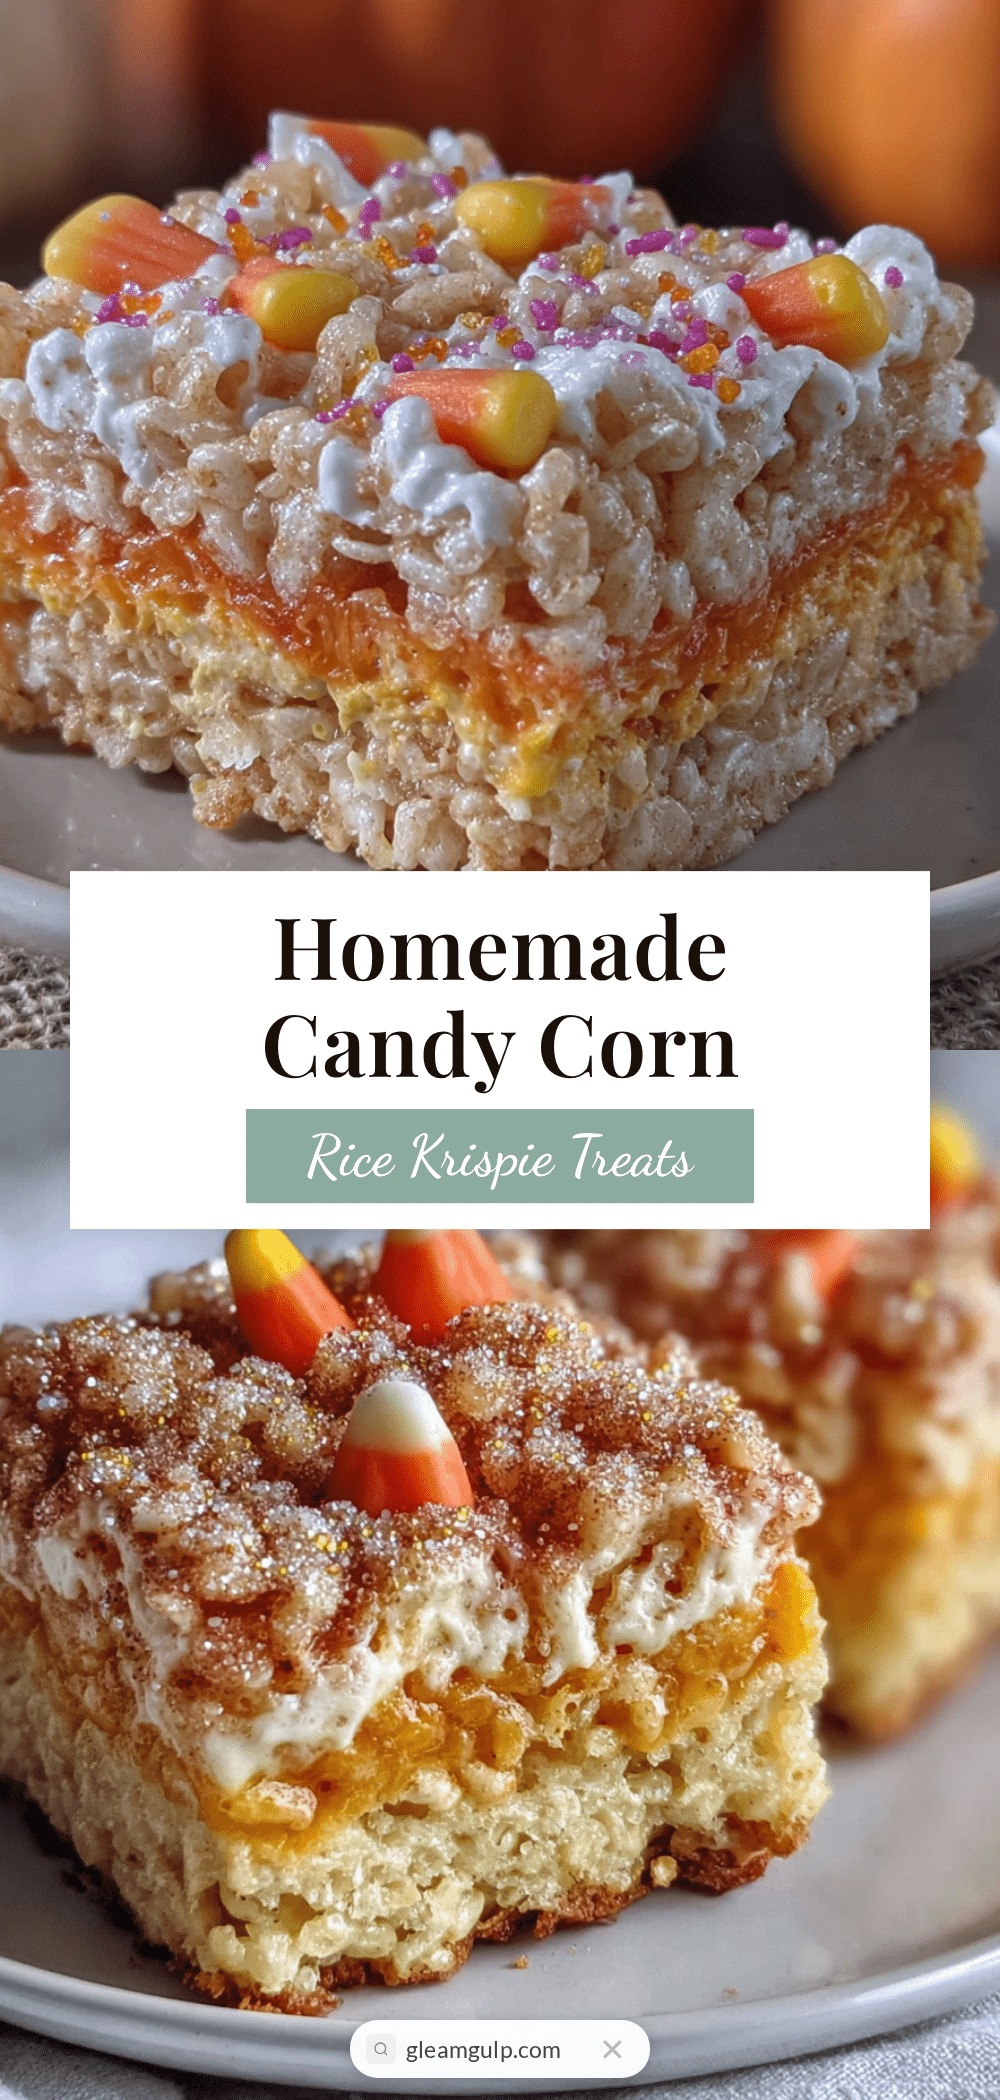
Easy Homemade Candy Corn Rice Krispie Treats
These Homemade Candy Corn Rice Krispie Treats are the kind of recipe that makes you look like a kitchen genius with almost no effort. Candy corn melts into the marshmallow mixture for a warm, buttery, candy-corn flavor throughout.
- Prep Time: 15 minutes
- Cook Time: 10 minutes
- Total Time: 25 minutes
- Yield: 12 servings 1x
- Category: Dessert
- Cuisine: American
Ingredients
- 3 tablespoons unsalted butter
- 10 ounces marshmallows (about 4 cups mini or 40 large)
- 1 cup candy corn (fresh, soft)
- 6 cups Rice Krispies cereal
- 1/2 teaspoon vanilla extract (pure)
- 1/4 teaspoon salt
- Optional: orange and yellow food coloring (a few drops)
Instructions
- Prep your pan. Grease a 9×13-inch baking pan with butter or line it with parchment paper, leaving some overhang on two sides for easy lifting. Set it aside.
- Melt the butter. In a large pot over medium-low heat, melt 3 tablespoons of unsalted butter. Swirl it around until it’s fully liquid and just starting to bubble. Don’t let it brown—you want it golden, not nutty.
- Add the marshmallows. Dump in your 10 ounces of marshmallows and stir constantly with your rubber spatula. They’ll start to melt in about a minute. Keep stirring until they’re completely smooth and glossy, about 2-3 minutes total.
- Add the candy corn. This is the magic step. Pour in 1 cup of candy corn and keep stirring. At first it’ll look like a mess—chunks of orange and yellow floating in white marshmallow. Don’t panic. Keep stirring over low heat. After about 2 minutes, the candy corn will start to break down and the whole mixture will turn a soft, peachy orange. It’s beautiful.
- Add vanilla and salt. Stir in 1/2 teaspoon of vanilla extract and 1/4 teaspoon of salt. The salt is crucial here—it cuts the sweetness and makes the candy corn flavor pop. Give it one good stir to combine.
- Remove from heat. Take the pot off the burner. Let it sit for about 30 seconds. If you add the cereal while the mixture is too hot, your treats will be hard and brittle. Let it cool just slightly.
- Add the cereal. Pour in 6 cups of Rice Krispies cereal. Fold it gently with your spatula until every puff is coated. Don’t stir too hard or you’ll crush the cereal—you want those satisfying crispy bites. It should take about 10-12 folds.
- Press into the pan. Scrape the mixture into your prepared pan. Grease your hands or your spatula with a little butter, then press the mixture evenly into the pan. Don’t press too hard or the treats will be dense. Just gentle, even pressure.
- Let them set. Let the treats cool at room temperature for at least 30 minutes. If you’re impatient like me, you can pop them in the fridge for 15 minutes. Just don’t leave them too long or they’ll get hard.
- Cut and serve. Lift the treats out using the parchment overhang, then cut them into squares. A sharp knife works best—wipe it clean between cuts for neat edges.
Notes
If the mixture starts to get too stiff while pressing, warm it up for 10 seconds in the microwave. If treats come out a little sticky, that’s okay—it means the candy corn is doing its job. For clean cuts, use a hot knife.
Nutrition
- Serving Size: 1 square
- Calories: 215
- Sugar: 27
- Sodium: 120
- Fat: 6
- Saturated Fat: 3.5
- Carbohydrates: 40
- Protein: 1
Keywords: candy corn, rice krispie treats, fall dessert, Halloween treats, easy dessert


