Love this? Save it for later!
Share the inspiration with your friends
My niece asked why I couldn’t just shape the cheese ball like a spider instead of making it look fancy. I started to explain that cheese balls are supposed to be elegant, rolled in nuts, served with fancy crackers. Then I stopped. She was eight, and she was holding a bag of pretzel sticks with this look on her face that said she knew something I didn’t.
Honestly, I almost kept explaining. I had this whole vision of a beautiful herb-crusted cheese ball with fig jam, the kind you see in magazines. But something about her confidence made me hand her the cream cheese. “Fine,” I said, “you show me.” And let me tell you—she did. She shaped it into a round body, stuck eight pretzel legs into the sides, and used two olive slices for eyes. It looked ridiculous. It looked perfect. And every single person at that Halloween party went straight for her creation before touching anything else on the table.
That night, I learned something I probably should have figured out years ago. Sometimes the best recipes aren’t the ones that impress with technique or fancy ingredients. Sometimes they’re the ones that make people smile before they even take a bite. This Wholesome Spooky Spider Cheese Ball with Crackers is exactly that—a recipe that brings pure joy to the table, and honestly, it tastes amazing too.
Maybe you’ve been there, overthinking a recipe when a simpler idea was right in front of you. That’s what this cheese ball is all about. It’s creamy, it’s packed with flavor, and it looks like something that crawled out of a Halloween storybook in the best way possible. I keep making it because it reminds me that cooking doesn’t always have to be serious. Sometimes it just has to be fun.
Why You’ll Love This Recipe
This Wholesome Spooky Spider Cheese Ball with Crackers has become my go-to Halloween appetizer, and I think you’re going to feel the same way once you try it. I’ve tested this recipe at three different parties now, tweaked the seasoning, adjusted the texture, and I can honestly say it’s the version I’m most proud of.
- Quick & Easy: Comes together in under 20 minutes of active prep time, then just needs a quick chill. Perfect for last-minute Halloween gatherings or when the kids are already in costume and hungry.
- Simple Ingredients: No fancy grocery trips needed. Cream cheese, cheddar, a few seasonings, and pretzels. You probably have most of this in your kitchen right now.
- Perfect for Halloween: This isn’t just another dip. It’s a centerpiece that gets people talking. Kids love it, adults love it, and it photographs beautifully for those Instagram stories.
- Crowd-Pleaser: I’ve watched people who claim they don’t like cheese balls go back for seconds. The creamy texture and savory seasoning combo just works.
- Actually Wholesome: Unlike store-bought cheese spreads loaded with preservatives, you control exactly what goes in here. I use quality ingredients and you can too.
What makes this recipe different from the dozens of other cheese ball recipes out there? It’s the perfect balance of creamy and firm, so it holds its spider shape without being too stiff to spread. The seasoning blend is my secret weapon—a little garlic, a touch of onion, and just enough Worcestershire to make people ask what’s in it. Plus, the spider design is genuinely doable. You don’t need any special tools or artistic talent.
This is the kind of recipe that makes you feel like a kitchen hero without spending hours in the kitchen. It’s comfort food with a Halloween twist—creamy, savory, and absolutely unforgettable.
What Ingredients You Will Need
This recipe uses simple, wholesome ingredients that come together to create something truly special. Most of these are pantry staples, which makes this perfect for those moments when Halloween sneaks up on you.
For the Cheese Ball Base
- 16 ounces cream cheese, softened to room temperature (I recommend Philadelphia for the smoothest texture; the store brands can sometimes be a bit grainy)
- 2 cups sharp cheddar cheese, finely shredded (buy a block and shred it yourself—pre-shredded cheese has anti-caking agents that affect the texture)
- 1/4 cup sour cream (adds creaminess and a slight tang; Greek yogurt works perfectly if you want extra protein)
- 1 teaspoon garlic powder (not garlic salt—we’re controlling the salt separately)
- 1/2 teaspoon onion powder
- 1 teaspoon Worcestershire sauce (this is the secret ingredient that gives it that savory depth)
- 1/4 teaspoon black pepper, freshly ground
- 1/4 teaspoon salt (optional, depending on how salty your cheddar is)
For the Spider Decoration
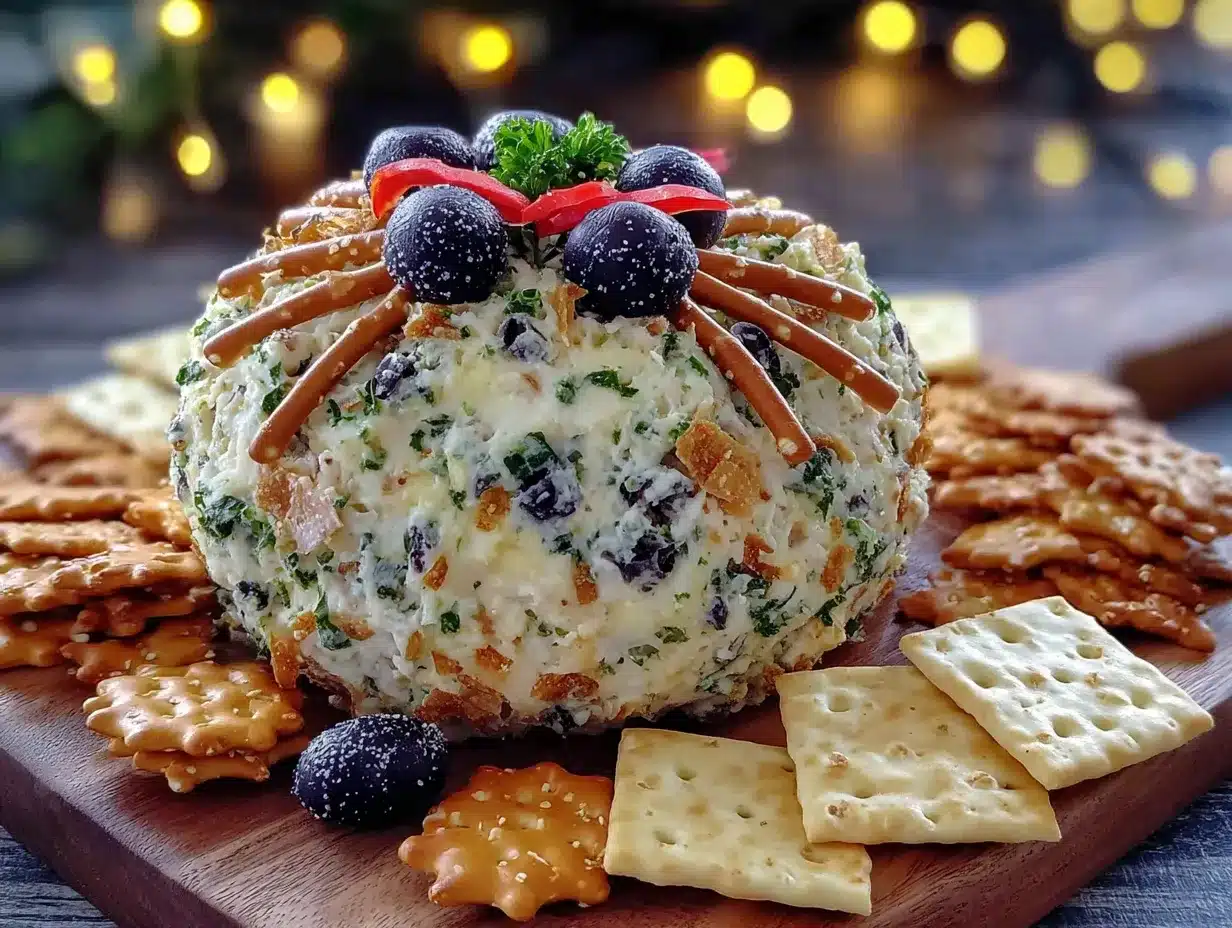
- 8 pretzel sticks, broken in half (these become the spider legs; I use Snyder’s because they’re sturdy and don’t break easily)
- 2 black olives, sliced into rounds (for the eyes; you can also use capers or small black beans)
- Optional: fresh chives or parsley for garnish around the base
For Serving
- Assorted crackers (I love a mix of buttery rounds, whole wheat squares, and something with a bit of salt on top)
- Vegetable sticks like carrot and celery (for a lighter option that still tastes great)
One thing I’ve learned through testing—don’t skip letting the cream cheese come to room temperature. Cold cream cheese creates lumps that are nearly impossible to smooth out. Leave it on the counter for about 30 minutes before you start. Trust me on this one.
If you’re looking for a dairy-free version, there are some excellent plant-based cream cheeses on the market now. I’ve tested this with Kite Hill’s cream cheese alternative and it worked beautifully, though the texture is slightly softer so you’ll want to chill it a bit longer.
Equipment Needed
You don’t need a professional kitchen to make this spider cheese ball. Here’s what you’ll need:
- Large mixing bowl (any kind works, but I prefer a glass or ceramic bowl because the cream cheese warms up more evenly)
- Hand mixer or stand mixer (you can do this by hand with a wooden spoon, but a mixer makes it much smoother and faster)
- Rubber spatula for scraping down the sides of the bowl
- Plastic wrap for wrapping the cheese ball while it chills
- Serving platter or board (a dark-colored board makes the spider really pop visually)
- Small offset spatula or butter knife for shaping
If you don’t have a hand mixer, you can absolutely do this with a strong arm and a fork. It’ll take a few extra minutes and you’ll get a bit of a workout, but it works. I actually made my first version of this recipe by hand because my mixer was in storage, and it turned out fine—just make sure your cream cheese is really soft.
For serving, I recommend a board or platter that’s at least 12 inches wide so you have room for the crackers around the spider. I found a simple wooden cutting board at a thrift store for three dollars, and it works perfectly for Halloween entertaining.
Preparation Method
Let’s make this spooky spider cheese ball. I’ll walk you through every step so you feel confident, even if you’ve never made a cheese ball before.
- Soften the cream cheese. Take your cream cheese out of the fridge about 30 minutes before you start. Cut it into cubes to speed things up. You want it soft enough that you can press your finger into it easily, but not so warm that it’s greasy.
- Mix the base. In your large mixing bowl, combine the softened cream cheese, sour cream, and Worcestershire sauce. Beat with your hand mixer on medium speed until completely smooth—about 2 minutes. Scrape down the sides of the bowl with your spatula halfway through. You shouldn’t see any lumps at this point.
- Add the seasonings. Sprinkle in the garlic powder, onion powder, black pepper, and salt (if using). Beat again on low speed just until combined. Taste it at this point—I always do. This is your chance to adjust the seasoning before the cheddar goes in. I once added too much garlic powder and had to start over, so learn from my mistake and go easy.
- Incorporate the cheddar. Add the shredded cheddar cheese in two batches, mixing on low speed after each addition. You want the cheese evenly distributed but you don’t want to overmix, which can make the texture dense. Stop as soon as you don’t see white streaks anymore.
- Chill the mixture. This step is crucial. Scrape the cheese mixture onto a large piece of plastic wrap. Form it into a rough ball shape, then wrap it tightly. Refrigerate for at least 2 hours, or up to overnight. I’ve made the mistake of skipping this step and trying to shape a warm cheese ball—it was a sticky, frustrating mess. The chilling firms everything up and makes shaping actually possible.
- Shape the spider body. After chilling, unwrap the cheese mixture and place it on your serving board. Use your hands to form it into a round, slightly domed shape. Don’t worry about perfection—spiders aren’t perfectly round anyway. If the mixture starts sticking to your hands, lightly dampen them with cold water.
- Add the legs. This is the fun part. Take your pretzel sticks and gently press them into the sides of the cheese ball—four on each side. Angle them slightly so they look like spider legs reaching out. Press them in far enough that they’re secure, but not so far that they disappear into the cheese. About an inch deep is perfect.
- Create the eyes. Place two olive slices on the front of the spider body. You can use a tiny bit of cream cheese as “glue” if they don’t stick on their own. For extra spookiness, you can add a tiny dot of olive in the center of each slice for the pupil.
- Final chill. Once assembled, refrigerate the whole thing for another 20-30 minutes. This helps everything set and makes the pretzels less likely to wiggle loose when people start reaching for crackers.
- Serve and enjoy. Arrange your crackers and vegetable sticks around the spider. I like to create a little “web” pattern with the crackers radiating outward. Then stand back and watch people’s faces light up.
Cooking Tips & Techniques
After making this spider cheese ball more times than I care to count, I’ve picked up a few tricks that make the process smoother and the results better.
Temperature is everything. I cannot stress this enough. Cream cheese that’s too cold will leave you with lumpy, frustrating results. Cream cheese that’s too warm will be a sticky mess that won’t hold its shape. The sweet spot is when it yields to gentle pressure but still feels cool to the touch. If you forgot to take it out of the fridge, you can microwave it in 10-second bursts, but flip it over between each burst so it heats evenly. I’ve nuked cream cheese into a melted puddle before—don’t be like me.
Shred your own cheese. I know it’s tempting to buy the bagged shredded cheese. I’ve been there. But the anti-caking powders they use really do affect the texture of a cheese ball. Freshly shredded cheddar melts into the cream cheese more smoothly and gives you a creamier final product. It takes an extra three minutes and it’s absolutely worth it.
Chill between steps. If you’re making this ahead of time for a party, here’s my strategy: Make the cheese mixture the night before, shape it into a plain ball, and refrigerate it wrapped tightly. The next day, let it sit at room temperature for about 10 minutes to soften slightly, then shape it into the spider and add the legs and eyes. This two-step chilling approach gives you the cleanest, most professional-looking result.
Pretzel placement matters. I learned this the hard way at a party when two of my spider legs fell off mid-event. Push the pretzels in at a slight downward angle, not straight horizontally. This gives them more surface area contacting the cheese and makes them much more secure. Also, use whole pretzel sticks—don’t break them in half. The full length looks more spider-like anyway.
Don’t overwork the mixture. Once you add the cheddar, mix just until combined. Overmixing can make the cheese ball dense and almost greasy. You want it light and creamy. When in doubt, stop mixing a little earlier than you think you should.
Variations & Adaptations
One of the best things about this recipe is how flexible it is. Here are some variations I’ve tried and loved.
Spicy Spider: Add 1/4 teaspoon of cayenne pepper and a tablespoon of finely chopped jalapeño to the cheese mixture. The heat cuts through the creaminess beautifully and gives the spider some attitude. I made this version for a Halloween party with my spice-loving friends and it disappeared faster than the original.
Herb Garden Spider: Mix in 2 tablespoons of fresh chopped herbs—chives, parsley, and dill work wonderfully. Roll the finished cheese ball in additional chopped herbs before adding the pretzels. This gives it a beautiful green speckled look that’s surprisingly elegant for a Halloween dish.
Bacon Lover’s Spider: Cook 4 slices of bacon until crispy, crumble them finely, and mix them into the cheese. The smoky, salty flavor pairs perfectly with the creamy base. Just make sure the bacon is completely cool before you add it, or it’ll make the cheese mixture greasy.
Dairy-Free Adaptation: Use plant-based cream cheese and vegan cheddar shreds. I’ve tested this with Kite Hill brand and it worked well, though the texture is slightly softer. Add an extra tablespoon of nutritional yeast to boost the cheesy flavor. Chill for an extra 30 minutes to help it firm up.
Sweet Spider Surprise: This one sounds weird but trust me—add 2 tablespoons of honey to the cheese mixture. The sweetness contrasts with the savory cheddar and garlic in a way that’s surprisingly addictive. I discovered this by accident when I grabbed honey instead of Worcestershire sauce one time. Best mistake I ever made.
Serving & Storage Suggestions
This spider cheese ball is at its best when served slightly chilled but not cold straight from the fridge. Take it out about 15 minutes before your guests arrive. This lets the flavors bloom and makes the texture perfectly spreadable.
What to serve with it: I love a variety of crackers for texture contrast. Buttery round crackers, whole wheat squares, and something with a bit of salt on top create a nice spread. Vegetable sticks like carrot, celery, and bell pepper strips are great for a lighter option. And honestly, I’ve eaten this spread on pretzel chips and it was incredible.
Beverage pairings: A crisp white wine like Sauvignon Blanc cuts through the richness beautifully. For beer drinkers, a light lager or pilsner works well. And for the kids (or the adults who want something fun), apple cider is a surprisingly good match.
Storage: If you have leftovers, wrap the cheese ball tightly in plastic wrap and store it in the refrigerator. It will keep for up to 5 days. The pretzels will soften over time, so if you’re storing for more than a day, I recommend removing the pretzel legs and storing them separately. Add fresh pretzels when you’re ready to serve again.
Freezing: You can freeze the plain cheese mixture (without the pretzels and olives) for up to 2 months. Wrap it tightly in plastic wrap and then in foil. Thaw in the refrigerator overnight, then shape and decorate when you’re ready to serve. The texture will be slightly softer after freezing, so give it a good stir before shaping.
Flavor development: Here’s something interesting—the flavor actually improves after a day in the fridge. The garlic and onion powders meld with the cheese and cream cheese, creating a more rounded, savory taste. So making this a day ahead isn’t just convenient; it actually makes it taste better.
Nutritional Information & Benefits
While this is definitely a treat rather than a health food, there are some nutritional bright spots worth mentioning. Per serving (about 2 tablespoons of cheese mixture with crackers), here’s the estimated breakdown:
- Calories: Approximately 180-200
- Protein: 6-7 grams
- Fat: 14-16 grams
- Carbohydrates: 8-10 grams
The cream cheese and cheddar provide a good amount of calcium, which is essential for bone health. The protein content makes this more satisfying than many other party dips. And because you’re making it from scratch, you’re avoiding the preservatives and artificial ingredients found in many store-bought cheese spreads.
If you’re watching your sodium intake, you can use low-sodium cream cheese and reduce or omit the added salt. The Worcestershire sauce and cheddar provide plenty of flavor on their own. I’ve made a reduced-sodium version for my father-in-law who has high blood pressure, and he honestly couldn’t tell the difference.
For those following a gluten-free diet, just make sure to use gluten-free crackers and check that your Worcestershire sauce is gluten-free (Lea & Perrins is, but some generic brands aren’t). The cheese mixture itself contains no gluten.
Conclusion
This Wholesome Spooky Spider Cheese Ball with Crackers has become my favorite Halloween tradition. It’s the recipe that taught me to stop overthinking and start having fun in the kitchen. Every time I make it, I think about my niece and her confident little hands shaping that first spider, completely sure it was going to be amazing. She was right.
I hope you give this recipe a try, whether you’re hosting a Halloween party, bringing something to a potluck, or just want to make a Tuesday night feel a little more special. Don’t stress about making it perfect—spiders are supposed to look a little rough around the edges. That’s part of their charm.
If you make this, I’d love to hear how it turned out. Drop a comment below and tell me about your spider creation. Did your kids help? Did your guests love it? Did you come up with your own variation? Share your photos and tag me—I genuinely get excited seeing other people’s versions of this recipe.
Happy Halloween, friends. May your cheese balls be creepy, your crackers be plentiful, and your kitchen be full of laughter.
Frequently Asked Questions
Can I make this spider cheese ball ahead of time?
Absolutely. You can prepare the cheese mixture up to 2 days in advance and keep it wrapped in the refrigerator. Add the pretzel legs and olive eyes on the day you plan to serve it for the best presentation. The pretzels will soften if they sit in the cheese for too long.
How do I keep the pretzel legs from falling off?
Insert the pretzels at a slight downward angle rather than straight horizontally. This gives them more surface area contacting the cheese. Also, make sure your cheese ball is well-chilled before adding the legs—cold cheese holds them more securely. If you’re really worried, you can use a dab of cream cheese as “glue” around each pretzel insertion point.
Can I use a different cheese instead of cheddar?
Yes! Monterey Jack, Gouda, or even a smoked cheese work beautifully. Just make sure whatever cheese you choose is finely shredded so it incorporates smoothly. I’ve made a version with smoked Gouda and it was incredible—the smoky flavor paired perfectly with the creamy base.
What if I don’t have Worcestershire sauce?
You can substitute with soy sauce or tamari, though the flavor will be slightly different. Another option is to use a teaspoon of Dijon mustard mixed with a splash of water. The Worcestershire adds depth, but the recipe will still be delicious without it.
How many people does this recipe serve?
This recipe makes about 2 cups of cheese mixture, which comfortably serves 10-12 people as part of a party spread. If you’re serving it as a main appetizer with fewer other options, it might serve 6-8. I usually double the recipe for larger gatherings because it goes fast.
Pin This Recipe!
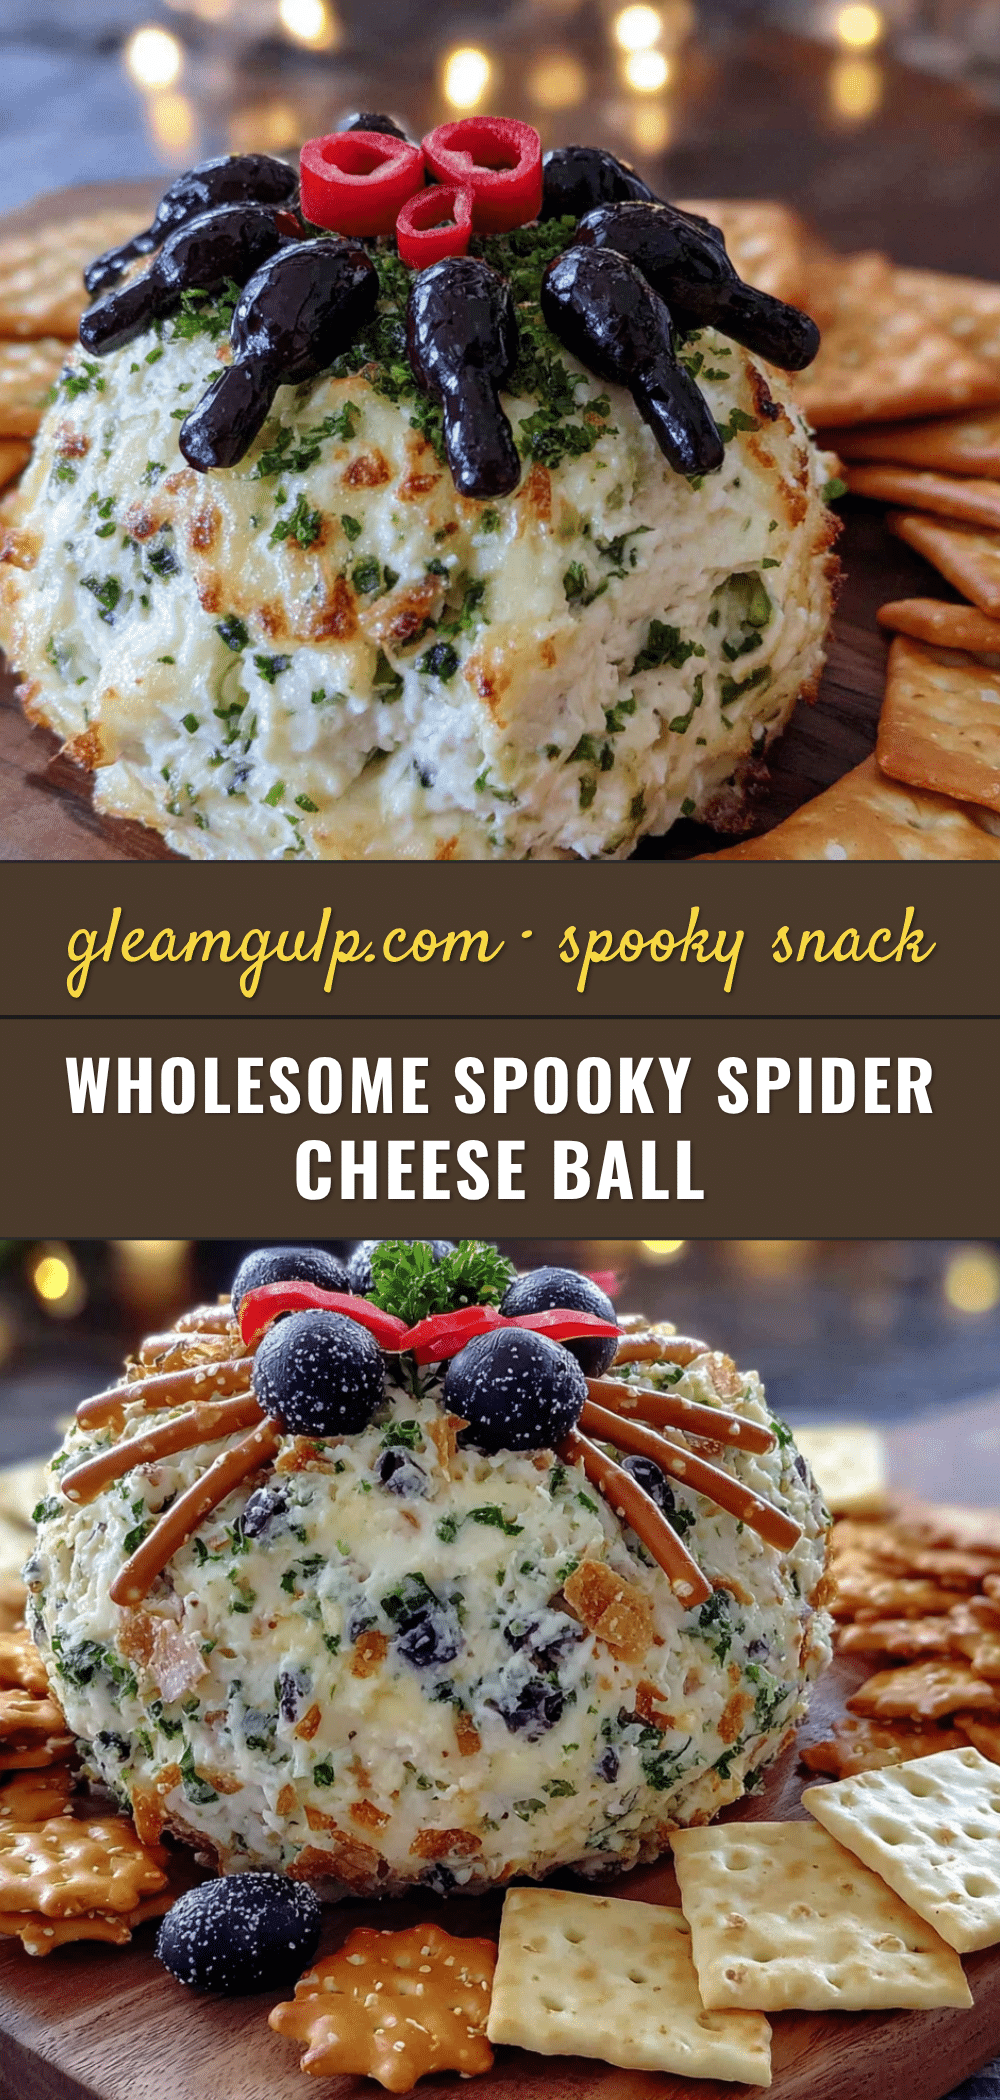
Wholesome Spooky Spider Cheese Ball with Crackers – Easy Halloween Appetizer
A creamy, savory cheese ball shaped like a spider with pretzel legs and olive eyes, perfect for Halloween parties. This fun and easy appetizer is a crowd-pleaser that brings joy to the table.
- Prep Time: 20 minutes
- Cook Time: 0 minutes
- Total Time: 2 hours 50 minutes (includes chilling)
- Yield: 10-12 servings 1x
- Category: Appetizer
- Cuisine: American
Ingredients
- 16 ounces cream cheese, softened to room temperature
- 2 cups sharp cheddar cheese, finely shredded
- 1/4 cup sour cream
- 1 teaspoon garlic powder
- 1/2 teaspoon onion powder
- 1 teaspoon Worcestershire sauce
- 1/4 teaspoon black pepper, freshly ground
- 1/4 teaspoon salt (optional)
- 8 pretzel sticks, broken in half
- 2 black olives, sliced into rounds
- Optional: fresh chives or parsley for garnish
- Assorted crackers for serving
- Vegetable sticks like carrot and celery (optional)
Instructions
- Soften the cream cheese: Take cream cheese out of fridge 30 minutes before starting. Cut into cubes to speed up softening.
- Mix the base: In a large mixing bowl, combine softened cream cheese, sour cream, and Worcestershire sauce. Beat with hand mixer on medium speed until completely smooth, about 2 minutes. Scrape down sides halfway through.
- Add the seasonings: Sprinkle in garlic powder, onion powder, black pepper, and salt (if using). Beat on low speed just until combined. Taste and adjust seasoning.
- Incorporate the cheddar: Add shredded cheddar cheese in two batches, mixing on low speed after each addition until just combined and no white streaks remain.
- Chill the mixture: Scrape cheese mixture onto a large piece of plastic wrap. Form into a rough ball shape, wrap tightly, and refrigerate for at least 2 hours or up to overnight.
- Shape the spider body: After chilling, unwrap and place on serving board. Use hands to form into a round, slightly domed shape. If sticky, lightly dampen hands with cold water.
- Add the legs: Gently press pretzel sticks into sides of cheese ball—four on each side. Angle them slightly downward and press about an inch deep.
- Create the eyes: Place two olive slices on the front of the spider body. Use a tiny bit of cream cheese as ‘glue’ if needed.
- Final chill: Refrigerate assembled spider for another 20-30 minutes to set.
- Serve and enjoy: Arrange crackers and vegetable sticks around the spider. Serve slightly chilled.
Notes
Let cream cheese come to room temperature for smooth texture. Shred your own cheddar for best results. Chill between steps for easier shaping. Insert pretzels at a slight downward angle to prevent falling off. Flavor improves after a day in the fridge.
Nutrition
- Serving Size: 2 tablespoons of che
- Calories: 190
- Sugar: 2
- Sodium: 320
- Fat: 15
- Saturated Fat: 9
- Carbohydrates: 9
- Protein: 6
Keywords: Halloween appetizer, spider cheese ball, cheese ball, easy Halloween recipe, spooky snack, party appetizer, cream cheese, pretzel spider


