Love this? Save it for later!
Share the inspiration with your friends
My friend Leo had a very firm rule about Halloween parties. No themed food. “I’m not eating fake eyeballs made of mozzarella,” he’d announce every October, arms crossed. “And I refuse to eat anything that looks like a severed finger.” For five years, I respected this. I made normal dips, normal crackers, normal cheese plates. I watched everyone else have fun with their creepy charcuterie while I played it safe. Then last year, I got a little reckless.
I made this skull board “just for myself” for a small gathering. I figured Leo could eat the regular snacks I’d set aside. But I caught him, about twenty minutes in, standing over the table with a cracker in one hand and a piece of prosciutto draped over his finger. He was staring at the skull platter. “Okay,” he said, not looking at me. “This is… acceptable.”
Honestly, I think that’s the highest compliment I’ve ever gotten from him. And that’s the thing about this spooky easy Halloween skull charcuterie board. It’s not trying to be gross or gimmicky. It’s just a really good cheese board that happens to look like it belongs in a haunted castle. You get the olives arranged like creepy little eyes, the salami roses that look surprisingly gothic, and the cheese cubes stacked in a way that feels just a little bit sinister. But everything tastes normal—delicious, even. There’s no fake blood or weird gelatin molds here.
Maybe you’ve been there, right? You want to do something festive for Halloween, but you also want to serve food people actually want to eat. This is that board. It’s the one that converts the skeptics. It’s the one that makes people laugh and then reach for another slice of baguette. And honestly? It’s the easiest thing I’ll make all month.
Why You’ll Love This Recipe
I’ve tested this board about six times now, tweaking the layout and the cheese-to-meat ratio until it felt just right. Here’s why I keep coming back to it:
- Quick & Easy: You can assemble this in under 20 minutes. No cooking, no baking, no stress. It’s perfect for those last-minute Halloween gatherings where you forgot to plan anything.
- Simple Ingredients: Everything comes from a regular grocery store. No speciality Halloween candy or weird shaped pasta required. You probably have most of this stuff in your fridge right now.
- Perfect for Parties: This board feeds a crowd and looks impressive without any actual cooking skills. It’s great for Halloween parties, spooky movie nights, or even a fun dinner before trick-or-treating.
- Crowd-Pleaser: I’ve served this to kids, adults, picky eaters, and even my friend Leo. Everyone finds something they love. The olives disappear first, I’m telling you.
- Unbelievably Delicious: The combination of salty cured meats, creamy cheese, sweet grapes, and tangy pickles is just perfect. It’s comfort food in board form, with a spooky twist.
What makes this different from every other Halloween snack board? It’s the skull platter. That one piece changes the whole vibe. You don’t need to arrange things into a face or use cookie cutters. The platter does the work for you. You just fill it with good food, and suddenly it’s a centerpiece. It’s the kind of thing that makes people stop and say, “Wait, where did you get that?” And then they take a picture before they even eat anything.
This isn’t just another cheese board. It’s the one that makes Halloween feel special without making you spend hours in the kitchen. It’s the one that lets you enjoy the party too.
What Ingredients You Will Need
This recipe uses simple, crowd-pleasing ingredients that deliver big flavor without any fuss. The key is choosing items that look good together and offer variety in color, texture, and taste. Here’s what you’ll need to fill your skull platter:
- Cheeses (about 3-4 varieties):
- Sharp cheddar, cubed (adds a classic, bold flavor)
- Smoked gouda, sliced (gives a slightly spooky, smoky vibe)
- Brie, whole or sliced (creates a soft, creamy element)
- Optional: Blue cheese or goat cheese for a tangy kick
- Cured Meats (about 2-3 varieties):
- Prosciutto, thinly sliced (makes beautiful, delicate roses)
- Salami, sliced (I prefer Genoa or peppered salami for the dark color)
- Pepperoni or soppressata (adds a spicier option)
- Fresh Elements:
- Red or green grapes, small clusters (adds sweetness and color)
- Fresh figs, halved (if in season; they look gorgeous)
- Blackberries or raspberries (the dark color fits the theme perfectly)
- Apple slices, brushed with lemon juice (adds crunch and prevents browning)
- Crunchy & Salty Items:
- Olives, mixed (black olives look especially spooky; I like kalamata and castelvetrano)
- Cornichons or small pickles (adds acidity to cut through the richness)
- Roasted almonds or Marcona almonds (adds a nice salty crunch)
- Spiced pecans or candied walnuts (for a sweet-savory option)
- Bread & Crackers:
- Baguette, sliced and lightly toasted (my go-to; it’s sturdy and looks rustic)
- Crackers, assorted (I recommend water crackers and a buttery cracker like Ritz)
- Breadsticks or grissini (they look like little bones, honestly)
- For the Spooky Vibe (optional but fun):
- Edible flowers or herbs (rosemary sprigs look like little trees)
- Pomegranate seeds (they look like tiny jewels or blood drops, depending on your mood)
- Candy eyeballs (for a playful touch, but keep them separate if kids are around)
A few notes from my experience: I always use at least one soft cheese and one hard cheese for texture contrast. For the meats, I roll the prosciutto into loose roses and fold the salami into quarters. It looks more intentional that way. If you can find a skull-shaped cheese or a skull-shaped cracker, grab it—it adds a fun touch. And don’t skip the olives. They’re the most Halloween-looking ingredient you can buy without trying.
Equipment Needed
You don’t need much for this board, which is part of its charm. Here’s what I use:
- Skull-shaped platter or serving board: This is the star of the show. I got mine at a home goods store for about $15. You can also use a regular round or rectangular board and arrange the food in a skull shape, but the platter makes it effortless.
- Small bowls or ramekins: For olives, pickles, nuts, or any wet ingredients. I use three small ceramic bowls that fit inside the skull’s eye sockets and nose area. It’s a nice effect.
- Cheese knives or spreaders: At least two, so people can switch between soft and hard cheeses without mixing flavors.
- Tongs or small spoons: For serving olives and pickles.
- Cutting board and sharp knife: For slicing cheese, fruit, and bread.
- Paper towels or a clean kitchen towel: For blotting excess moisture from olives or pickles before placing them on the board.
If you don’t have a skull platter, don’t worry. A large wooden cutting board or a marble slab works perfectly. Just arrange the ingredients in a rough skull shape—round for the head, narrower at the chin. I’ve done it both ways, and honestly, the regular board works almost as well. The platter is just more fun.
Preparation Method
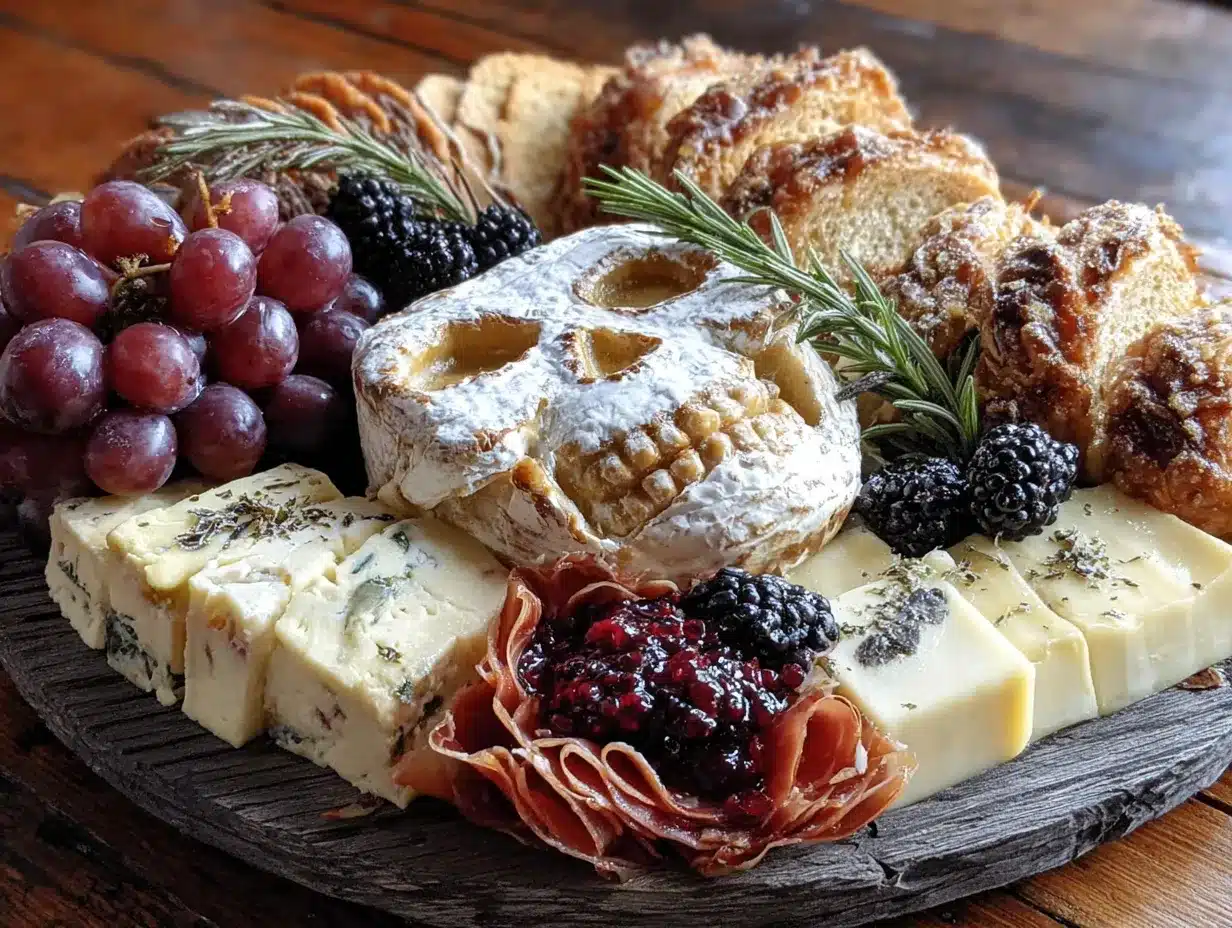
Here’s how I assemble this board. It takes about 15-20 minutes, depending on how fancy you want to get with the meat roses.
- Prepare the platter (2 minutes): Place your skull platter on a flat surface. If using a regular board, visualize where the skull’s head, eyes, nose, and mouth will go. I like to place the small bowls in the eye sockets and nose cavity first. This creates the skull’s face and keeps wet ingredients contained.
- Arrange the cheese (3 minutes): Start with the largest items. Place the brie in the center of the forehead area. Cube the sharp cheddar and arrange it in a line down the center of the skull, like a spine. Slice the smoked gouda and fan it out on one side of the “spine.” This gives the board structure and height.
- Fold the meats (4 minutes): For prosciutto roses, take a slice and fold it in half lengthwise. Roll it loosely from one end, then gently pull the edges back to form petals. Place these roses in the cheek areas of the skull. For salami, fold each slice in half, then in half again, and arrange them in a overlapping pattern near the jawline. Pepperoni can be scattered around the edges.
- Add the fresh elements (3 minutes): Place small clusters of grapes near the top of the skull, like a crown. Tuck blackberries and raspberries into any gaps. Halved figs look beautiful placed near the brie. Arrange apple slices in a fan pattern along one side of the board.
- Fill the bowls (2 minutes): Pour olives into one eye socket bowl, cornichons into the other, and almonds into the nose cavity. This creates the skull’s face in a playful way. If you have a mouth-shaped area, fill it with something colorful like pomegranate seeds or halved cherry tomatoes.
- Add the bread and crackers (2 minutes): Arrange baguette slices along the bottom edge of the board, like a jawline. Place crackers in any remaining empty spaces. I like to tuck breadsticks on the sides, pointing outward—they look like ribs or bones.
- Final touches (2 minutes): Sprinkle pomegranate seeds or edible flowers over the board for a pop of color. Add a few rosemary sprigs for a gothic, herbal look. If using candy eyeballs, place them around the board (but warn guests if they’re not edible). Step back and adjust anything that looks uneven.
A few things I’ve learned the hard way: Don’t overcrowd the board. Leave a little space between items so people can grab things easily. Also, place the cheese knives and spreaders near the cheeses they’re meant for. And if you’re making this ahead of time, cover it loosely with plastic wrap and keep it in the fridge. Take it out 20 minutes before serving so the cheese comes to room temperature.
Cooking Tips & Techniques
I’ve made this board enough times to know a few tricks that make it better. Here they are:
- Room temperature cheese is better: I know this is basic, but it makes such a difference. Take the cheese out of the fridge 30 minutes before you start assembling. The flavors are so much more pronounced.
- Don’t slice the brie too thin: Leave it in wedges or even a whole wheel. It looks more dramatic and holds up better on the board. Thin slices just get lost.
- Use a variety of textures: Creamy brie, crumbly cheddar, crunchy almonds, chewy dried figs, crisp apple slices. Every bite should be different. If everything is soft, the board feels flat.
- Think about color contrast: Dark olives next to white cheese, red grapes next to green herbs. The more contrast, the more visually appealing the board is. I once made a board with all beige food, and it looked like a sad potato platter. Never again.
- Make the meat roses the night before: If you’re short on time, roll the prosciutto roses and store them in an airtight container in the fridge. They hold their shape well and save you a few minutes on party day.
- Keep wet and dry items separate: Olives and pickles can make crackers soggy if they sit too long. That’s why I use the small bowls. It keeps everything crisp and tidy.
My biggest failure? I once put the grapes directly on the board without washing them first. The little stems and dirt got on everything. Now I always wash and thoroughly dry all produce before assembling. It’s a small step, but it makes a big difference.
Variations & Adaptations
This board is endlessly customizable. Here are a few ways I’ve changed it up:
- Vegetarian Version: Skip the cured meats and add more cheese varieties, marinated artichoke hearts, roasted red peppers, and grilled vegetables. I’ve also added stuffed grape leaves and marinated mushrooms for extra flavor.
- Spicy Board: Use spicy salami, add jalapeño-stuffed olives, include pepper jack cheese, and add a small bowl of hot honey for drizzling. The sweet and spicy combo is addictive.
- Sweet & Savory Board: Add dark chocolate squares, dried apricots, candied ginger, and honeycomb. The chocolate pairs beautifully with the cheese and salty meats. This version is great for a dessert course.
- Gluten-Free Option: Use gluten-free crackers or vegetable chips, and add extra fresh vegetables like cucumber rounds, bell pepper strips, and cherry tomatoes. The board works perfectly without bread.
- Seasonal Twist: In fall, add roasted pumpkin seeds, sliced apples, and a small bowl of fig jam. In summer, use fresh peaches, cherries, and basil leaves. The skull platter works year-round, honestly.
My personal favorite variation is the sweet and savory one. I made it for a Halloween movie marathon, and the dark chocolate with the smoked gouda was a revelation. It sounds weird, but trust me, it works.
Serving & Storage Suggestions
This board is best served at room temperature, so take it out of the fridge about 20 minutes before you’re ready to eat. Arrange it on a large table or counter where people can gather around and graze. I like to set it in the center of the party, with napkins and small plates nearby.
For drinks, this board pairs beautifully with a crisp white wine like Sauvignon Blanc or a light red like Pinot Noir. If you’re serving non-alcoholic options, sparkling water with a splash of cranberry juice fits the Halloween theme perfectly. A dark beer or hard cider also works well with the salty, savory flavors.
Leftovers? Here’s what I do: Separate the cheeses, meats, and fruits into individual airtight containers. The cheese and meats will keep in the fridge for 3-4 days. The grapes and berries should be eaten within a day or two. The crackers and bread will go stale, so store them in a sealed bag or container at room temperature. I don’t recommend freezing anything from this board—the texture just isn’t the same after thawing.
One thing I’ve noticed: The flavors actually get better after a few hours. The cheese softens, the meats release a little oil, and everything melds together. If you’re making this for a party, assemble it an hour ahead and let it sit at room temperature (covered) until guests arrive. It’s even better that way.
Nutritional Information & Benefits
This board is more of a grazing experience than a meal, but here’s a rough estimate per serving (about 1/8 of the board):
- Calories: 350-450
- Protein: 15-20g
- Fat: 25-30g
- Carbohydrates: 20-25g
- Fiber: 3-5g
- Sugar: 10-15g (mostly from fruit)
- Sodium: 600-800mg (varies by meat and cheese choices)
The health benefits here come from the variety. Cheese provides calcium and protein. Nuts offer healthy fats and fiber. Grapes and berries are packed with antioxidants. The olives contain heart-healthy monounsaturated fats. Even the cured meats have some B vitamins and iron, though they’re higher in sodium.
This board can be adapted for different dietary needs. For a lower-sodium version, choose low-sodium cheeses and meats, and load up on fresh fruits and vegetables. For a lower-fat option, use reduced-fat cheese and skip the nuts. But honestly? This is a party board. I don’t worry too much about the numbers. I focus on making it delicious and fun, and I balance it with lighter meals the rest of the week.
Conclusion
This spooky easy Halloween skull charcuterie board is the kind of recipe that makes you look like a party planning genius without any actual effort. It’s festive, it’s delicious, and it’s adaptable to whatever you have on hand. The skull platter does all the heavy lifting—you just fill it with good food and let the presentation speak for itself.
I love this board because it brings people together. There’s something about standing around a table, picking at cheese and olives, that makes conversation flow. And when the board looks like a skull? It adds a layer of fun and surprise that makes everyone smile. Even my friend Leo, the anti-themed-food crusader, admitted it was “acceptable.” And honestly, that’s a win in my book.
So go ahead and make this for your Halloween gathering. Customize it with your favorite cheeses and meats. Add a spooky touch with black olives and pomegranate seeds. And don’t forget to take a picture before everyone digs in—it’s worth remembering.
I’d love to hear how yours turns out. Drop a comment below and let me know what ingredients you used, or tag me in your photos on social media. Happy Halloween, and happy snacking!
Frequently Asked Questions
Can I make this board ahead of time?
Yes, you can assemble the board up to 4 hours in advance. Cover it loosely with plastic wrap and store it in the refrigerator. Take it out 20 minutes before serving to let the cheese come to room temperature. I wouldn’t recommend making it the night before, as the crackers and bread can get soft.
What if I can’t find a skull-shaped platter?
No problem at all. Use a large round or rectangular wooden board or a marble slab. Arrange the ingredients in a rough skull shape—round for the head, tapering at the chin. Use small bowls for the eyes and nose. It will look just as impressive, I promise.
How many people does this board serve?
This board serves about 8-10 people as an appetizer or snack. If you’re serving it as a main course for a light meal, it serves 4-6. I usually double the recipe for larger parties, using two skull platters or one very large board.
Can I make this board dairy-free or vegan?
Absolutely. Use dairy-free cheeses (there are some great options now, like cashew-based brie or almond-based cheddar), skip the cured meats, and load up on fresh fruits, vegetables, nuts, and vegan crackers. I’ve made a vegan version with marinated mushrooms, roasted vegetables, and hummus, and it was a hit.
How do I keep the apple slices from turning brown?
Brush them with a little lemon juice or lime juice right after slicing. You can also use a solution of one part lemon juice to three parts water. The acid prevents oxidation and keeps the apples looking fresh for hours. I’ve also used apple cider vinegar in a pinch, and it worked fine.
Pin This Recipe!
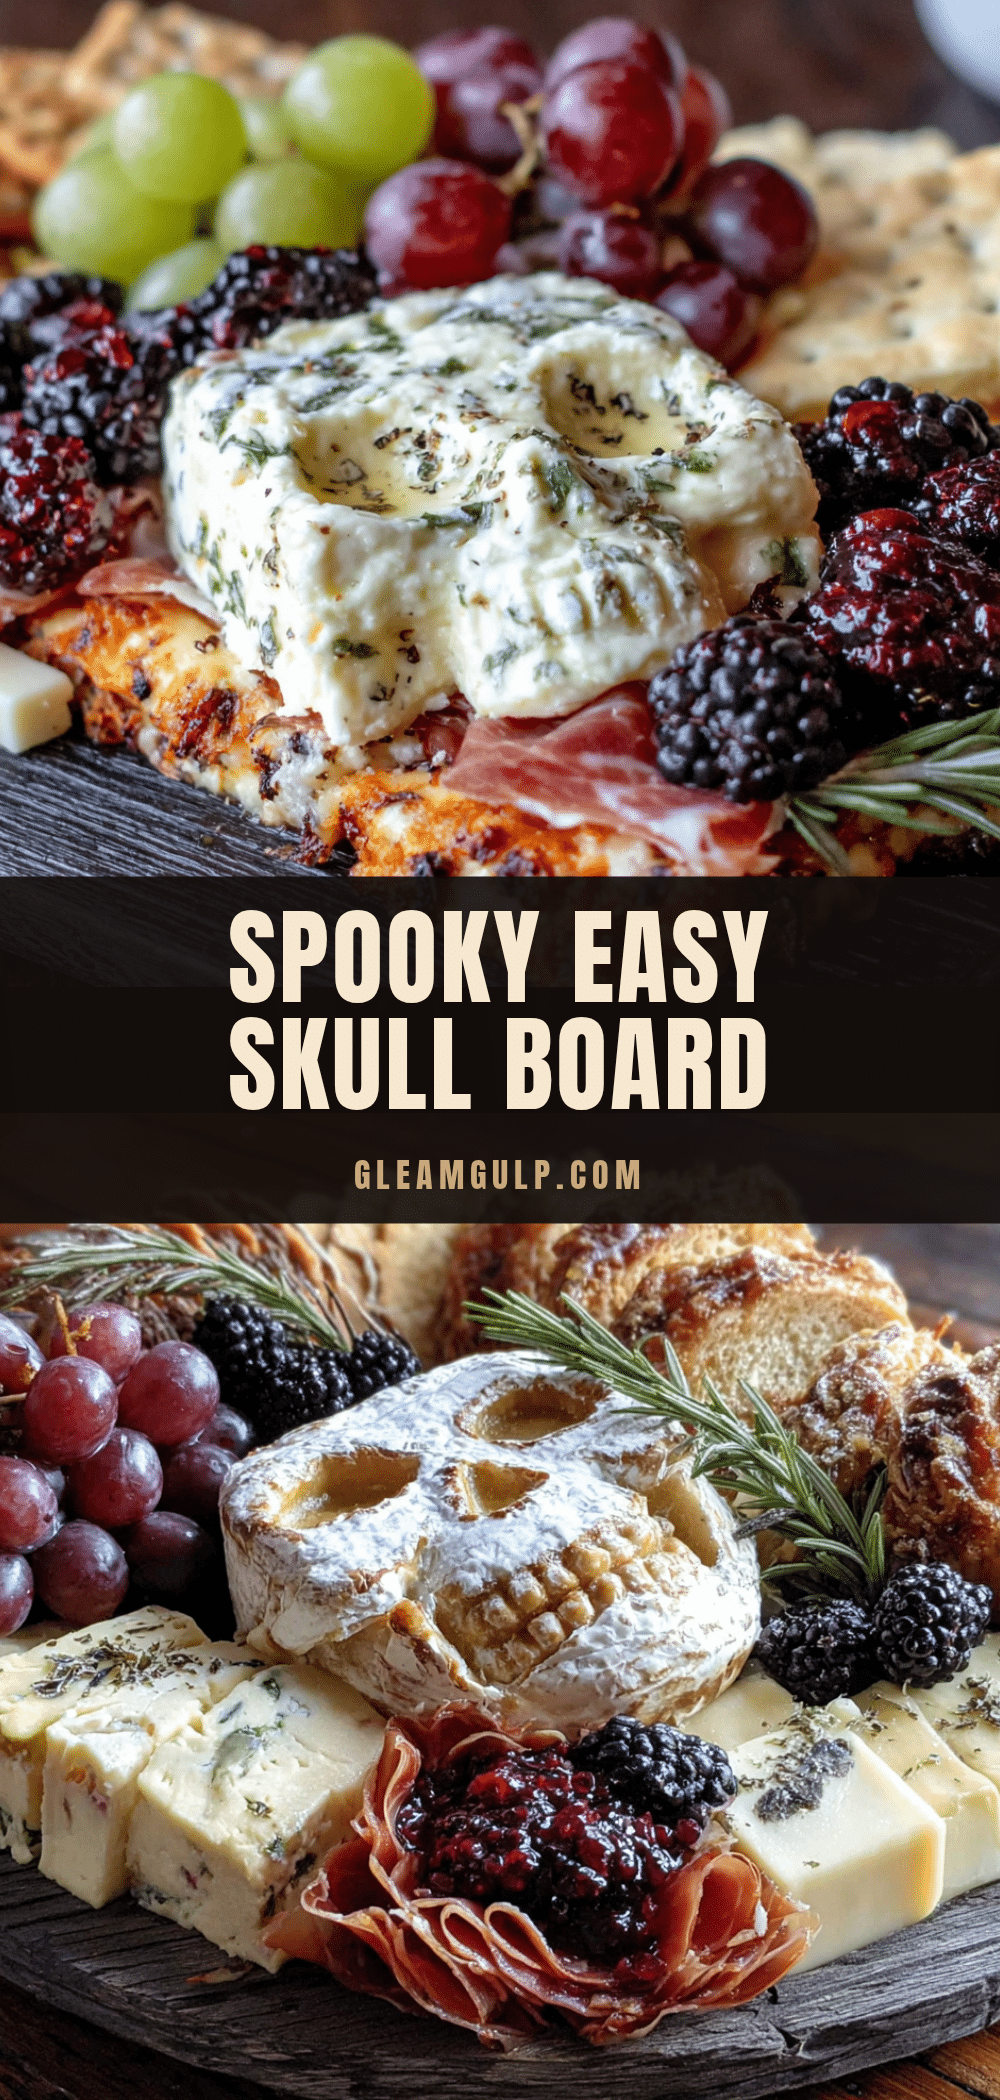
Spooky Easy Halloween Skull Charcuterie Board
A festive and delicious Halloween charcuterie board shaped like a skull, featuring a variety of cheeses, cured meats, fresh fruits, and crunchy snacks. Easy to assemble in under 20 minutes, it’s perfect for parties and converts even the skeptics.
- Prep Time: 15 minutes
- Cook Time: 0 minutes
- Total Time: 15 minutes
- Yield: 8-10 servings
- Category: Appetizer
- Cuisine: American
Ingredients
- Sharp cheddar, cubed
- Smoked gouda, sliced
- Brie, whole or sliced
- Blue cheese or goat cheese (optional)
- Prosciutto, thinly sliced
- Salami, sliced (Genoa or peppered)
- Pepperoni or soppressata
- Red or green grapes, small clusters
- Fresh figs, halved (if in season)
- Blackberries or raspberries
- Apple slices, brushed with lemon juice
- Olives, mixed (kalamata and castelvetrano)
- Cornichons or small pickles
- Roasted almonds or Marcona almonds
- Spiced pecans or candied walnuts
- Baguette, sliced and lightly toasted
- Crackers, assorted (water crackers and buttery crackers like Ritz)
- Breadsticks or grissini
- Edible flowers or herbs (rosemary sprigs)
- Pomegranate seeds
- Candy eyeballs (optional)
Instructions
- Prepare the platter: Place your skull platter on a flat surface. If using a regular board, visualize where the skull’s head, eyes, nose, and mouth will go. Place small bowls in the eye sockets and nose cavity first.
- Arrange the cheese: Place the brie in the center of the forehead area. Cube the sharp cheddar and arrange it in a line down the center of the skull, like a spine. Slice the smoked gouda and fan it out on one side of the ‘spine.’
- Fold the meats: For prosciutto roses, fold a slice in half lengthwise, roll loosely from one end, then gently pull the edges back to form petals. Place roses in the cheek areas. For salami, fold each slice in half, then in half again, and arrange near the jawline. Scatter pepperoni around the edges.
- Add the fresh elements: Place small clusters of grapes near the top of the skull. Tuck blackberries and raspberries into gaps. Halved figs look beautiful near the brie. Arrange apple slices in a fan pattern along one side.
- Fill the bowls: Pour olives into one eye socket bowl, cornichons into the other, and almonds into the nose cavity. If there is a mouth-shaped area, fill it with pomegranate seeds or halved cherry tomatoes.
- Add the bread and crackers: Arrange baguette slices along the bottom edge of the board, like a jawline. Place crackers in any remaining empty spaces. Tuck breadsticks on the sides, pointing outward.
- Final touches: Sprinkle pomegranate seeds or edible flowers over the board. Add a few rosemary sprigs. If using candy eyeballs, place them around the board. Step back and adjust anything that looks uneven.
Notes
Take cheese out of the fridge 30 minutes before assembling for best flavor. Don’t overcrowd the board; leave space between items. Keep wet and dry items separate to prevent sogginess. For a vegetarian version, skip the meats and add more cheese, marinated artichoke hearts, and roasted vegetables.
Nutrition
- Serving Size: 1/8 of the board
- Calories: 350450
- Sugar: 1015
- Sodium: 600800
- Fat: 2530
- Saturated Fat: 1015
- Carbohydrates: 2025
- Fiber: 35
- Protein: 1520
Keywords: Halloween charcuterie board, skull platter, easy appetizer, party snack, spooky cheese board


