Love this? Save it for later!
Share the inspiration with your friends
There used to be a tiny bakery on the corner of 7th and Elm in my old neighborhood that made these impossibly charming Halloween pretzels every October. When they closed—just a handwritten sign taped to the door one Tuesday saying “Thanks for the memories”—I honestly felt a little lost. Those witch finger pretzel bites had become my annual tradition, the thing I looked forward to as the leaves started turning. After twelve tries—and some truly terrifying-looking failures that my kids still tease me about—I finally got it.
The thing about those original pretzel bites was how perfectly they walked that line between creepy and cute. They weren’t trying to be gross or gory. They were just clever little snacks that made you smile before you bit into them. And the almond nails? That was the genius touch that made them actually look like little witch fingers instead of just oddly shaped breadsticks. I spent weeks trying to figure out how they got that glossy, slightly spooky finish without making the almonds fall off during baking.
My first attempt looked less like witch fingers and more like something that had crawled out of a swamp. The dough was too sticky, the almonds kept sliding off, and honestly, I was ready to give up. But then I remembered how the baker at that little shop used to talk about resting the dough just long enough for the gluten to relax. That small detail changed everything. Now these lighter witch finger pretzel bites with almond nails are my go-to Halloween treat, and maybe you’ve been there—wanting to recreate something that felt special without spending all day in the kitchen. Let me tell you, this version is way easier than it looks.
Why You’ll Love This Recipe
I’ve tested this recipe more times than I care to admit, and every version taught me something new about getting that perfect pretzel texture without all the heavy butter and salt that traditional recipes call for. These lighter witch finger pretzel bites with almond nails have become my most-requested Halloween recipe, and here’s why they work so well:
- Quick & Easy : From start to finish, you’re looking at about 45 minutes. That’s fast enough for a school morning Halloween party or a last-minute spooky movie night.
- Simple Ingredients : You probably have most of these in your pantry right now. No weird specialty flours or hard-to-find Halloween sprinkles needed.
- Perfect for Halloween Parties : These are the kind of treats that make people do a double-take before they laugh and grab one. Kids love them, adults love them, everyone wins.
- Crowd-Pleaser : I’ve brought these to three different Halloween gatherings now, and they always disappear before the cupcakes do.
- Unbelievably Delicious : The combination of soft, chewy pretzel with that slight crunch from the almond nail plus the salty-sweet finish? It’s next-level comfort food disguised as something creepy.
What makes this version different from all those other witch finger recipes out there is the lighter dough. Most recipes use a ton of butter and sugar, but I found that a simple yogurt-based dough gives you that same soft pretzel texture without feeling heavy. Plus, the almond nails stay put because of a little trick I figured out—brushing them with egg wash before baking creates a natural glue that holds everything together. This isn’t just another Halloween treat recipe; it’s the one you’ll come back to year after year.
Honestly, the first time I made these for my neighbor’s Halloween party, I was nervous. Would people think they were too weird? Would the almonds fall off and ruin the effect? But then I watched a grown man carefully pick one up, examine it with exaggerated suspicion, and then take a bite with this huge grin on his face. “These are genius,” he said, reaching for another. That’s when I knew I’d cracked it.
What Ingredients You Will Need
This recipe uses simple, wholesome ingredients to create that perfect pretzel texture and spooky appearance without any fuss. Most of these are pantry staples, and I’ve included notes on substitutions where they work well.
For the Dough
- 2 cups all-purpose flour (I prefer King Arthur for consistent results, but any brand works fine)
- 1 packet active dry yeast (about 2 1/4 teaspoons—check the expiration date, trust me on this)
- 1/2 cup warm water (around 110°F—warm but not hot enough to hurt your finger)
- 1 tablespoon honey (adds a touch of sweetness and helps the yeast activate)
- 1/4 cup plain Greek yogurt (this is my secret for a lighter, tender dough without extra butter)
- 1/2 teaspoon salt
- 1 tablespoon olive oil (or any neutral oil you have on hand)
For the Witch Finger Shape
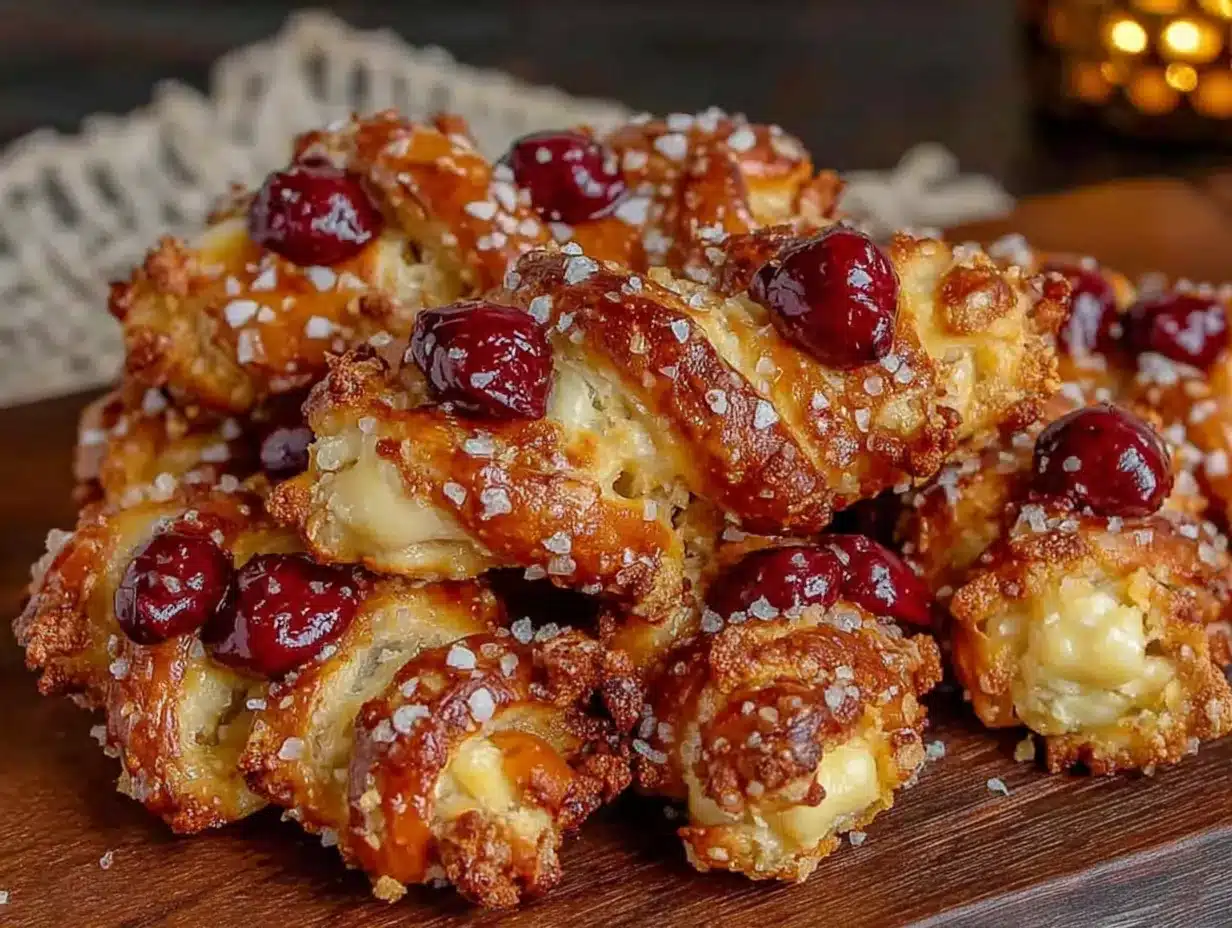
- 24 whole almonds (look for raw almonds with pointed tips—they look most like fingernails)
- 1 large egg (for the egg wash that keeps the almonds in place)
- 1 tablespoon water (to thin the egg wash)
For the Pretzel Bath and Topping
- 6 cups water
- 2 tablespoons baking soda (this is what gives pretzels their distinctive chewy crust)
- Coarse sea salt (for sprinkling—don’t use table salt, it’ll dissolve and you’ll lose the effect)
- Optional: 1 tablespoon melted butter (for brushing after baking if you want that classic pretzel shine)
The Greek yogurt is the real hero here. I know it sounds weird in a pretzel recipe, but it adds moisture and a slight tang without the fat of traditional recipes. I’ve tested this with non-dairy yogurt too, and it works—just make sure it’s plain and unsweetened. For the almonds, I’ve tried sliced almonds and even slivered ones, but whole almonds with their natural pointed shape look the most like actual fingernails. Look for ones that aren’t too dark or roasted, because you want that pale nail color to show through.
One thing I learned the hard way: don’t skip the baking soda bath. I tried to shortcut it once, and the pretzels came out pale and soft, more like breadsticks than actual pretzels. That bath is what gives them that signature chewy crust and deep golden color. Just be careful—the baking soda makes the water alkaline, and it can irritate your skin if you splash it. I usually use a slotted spoon to lower the pretzels in and fish them out.
Equipment Needed
You don’t need any fancy equipment for these lighter witch finger pretzel bites with almond nails, which is part of why I love making them for Halloween parties.
- Large mixing bowl (glass or stainless steel works best)
- Measuring cups and spoons
- Whisk (for combining dry ingredients)
- Wooden spoon or dough whisk (for mixing the dough)
- Baking sheet (lined with parchment paper or a silicone baking mat)
- Large pot (for the baking soda bath—at least 4 quarts)
- Slotted spoon or spider strainer (for transferring pretzels from the bath)
- Pastry brush (for the egg wash)
- Sharp knife or bench scraper (for cutting the dough)
- Clean kitchen towel (for covering the dough while it rises)
If you don’t have a pastry brush, you can use a clean paper towel dipped in egg wash. And honestly, I’ve used a regular dinner spoon as a slotted spoon in a pinch—it’s not elegant, but it works. The one thing I wouldn’t skip is the parchment paper or silicone mat, because the baking soda bath makes the pretzels sticky, and they can really bond to an unlined baking sheet.
Preparation Method
Let me walk you through this step by step. I’ve included all the little details I wish someone had told me the first time I made these.
- Activate the yeast. In your large mixing bowl, combine the warm water and honey. Sprinkle the yeast on top and let it sit for 5-7 minutes until it gets foamy and smells like bread. If it doesn’t foam, your yeast might be dead—start over with fresh yeast. I learned this one the hard way during attempt number four.
- Make the dough. Add the Greek yogurt, olive oil, and salt to the yeast mixture. Stir until combined. Add the flour one cup at a time, mixing with a wooden spoon until a shaggy dough forms. Turn it out onto a lightly floured surface and knead for about 5-7 minutes until smooth and elastic. The dough should feel soft and slightly tacky but not sticky. If it’s too sticky, add a tablespoon of flour at a time until it feels right.
- Let it rise. Place the dough in a lightly oiled bowl, cover with a clean kitchen towel, and let it rise in a warm spot for about 30 minutes. It should double in size. I usually put mine in the microwave (turned off) with a cup of hot water next to it—the steam and warmth create the perfect environment.
- Preheat and prepare. Preheat your oven to 425°F (220°C). Line your baking sheet with parchment paper. In your large pot, bring 6 cups of water to a boil, then carefully stir in the baking soda. It will bubble up dramatically, so be careful—I’ve had it overflow on me before, and cleaning baking soda water off the stove is not fun.
- Shape the fingers. Punch down the risen dough and divide it into 24 equal pieces. Roll each piece into a thin log about 4 inches long, tapering one end slightly to look like a fingertip. Place each finger on the prepared baking sheet as you go. Don’t worry if they look a little uneven—actual witch fingers aren’t perfectly uniform anyway.
- Add the nails. In a small bowl, whisk together the egg and 1 tablespoon of water. Using your pastry brush, lightly brush the tip of each dough finger. Press one almond onto the brushed tip, pointed end facing outward, to create the fingernail. The egg wash acts as glue, so don’t skip this step—I tried just pressing them on dry, and they slid right off during the bath.
- Create the knuckles. Use a sharp knife to make 2-3 shallow cuts across each finger at the “knuckle” positions. This is what makes them look like actual fingers instead of weird breadsticks. Press gently into the dough—you want an indentation, not a cut all the way through.
- Bathe the pretzels. Using your slotted spoon, carefully lower 3-4 pretzel fingers at a time into the boiling baking soda water. Let them bathe for 20-30 seconds, then remove them and place them back on the baking sheet. They’ll look slightly puffy and pale—that’s exactly right.
- Bake. Sprinkle the bathed pretzels with coarse sea salt. Bake for 12-15 minutes until they’re deep golden brown and slightly puffed. The almonds will darken a bit, which actually makes them look more like real nails—a happy accident I discovered during attempt number seven.
- Finish and serve. Let them cool on the baking sheet for 5 minutes, then transfer to a wire rack. If you want that classic pretzel shine, brush them with melted butter while they’re still warm. Serve warm or at room temperature.
The whole process takes about 45 minutes from start to finish, and honestly, the shaping is the most time-consuming part. I like to put on a Halloween playlist and just get into the rhythm of it. There’s something meditative about rolling all those little fingers.
Cooking Tips & Techniques
After twelve attempts and countless batches, I’ve collected some tricks that make these lighter witch finger pretzel bites with almond nails turn out perfectly every time.
Don’t over-knead the dough. I know it’s tempting to keep working it until it’s perfectly smooth, but over-kneading makes the pretzels tough. Stop as soon as the dough feels elastic and springs back when you poke it. The yogurt in the dough makes it more forgiving than traditional pretzel dough, so you have a little wiggle room, but still—less is more here.
The baking soda bath timing matters. Twenty seconds is the sweet spot. Less than that and the pretzels won’t develop that chewy crust. More than that and they can develop a metallic taste from the baking soda. I set a timer on my phone because I’ve definitely lost track of time and ended up with pretzels that tasted like they’d been brined in the ocean.
Keep the almonds pointed. When you’re pressing the almonds onto the dough, make sure the pointed end is facing outward. I made the mistake of pressing them on randomly during my third attempt, and they looked more like weird growths than fingernails. Also, make sure the almond is firmly pressed into the egg wash—give it a little wiggle to make sure it’s stuck.
Multitasking is your friend. While the dough is rising, get your water boiling and line your baking sheet. While the pretzels are baking, clean up your workspace. This recipe moves fast once you start, so having everything ready beforehand makes the process smooth and stress-free.
One mistake I always make: I forget to flour my hands before shaping the dough. The dough is soft and slightly sticky, and unfloured hands will leave you with dough stuck under your fingernails (ironic, I know). Keep a small bowl of flour nearby and dip your hands in it between shaping each finger.
Variations & Adaptations
Over the years, I’ve played around with this recipe quite a bit, and here are some variations that have worked really well:
Gluten-Free Version: Substitute the all-purpose flour with a good 1:1 gluten-free baking flour. I’ve had the best luck with Bob’s Red Mill brand. The dough will be slightly more delicate, so handle it gently when shaping. The baking soda bath still works perfectly, and honestly, most people won’t notice the difference.
Vegan Adaptation: Replace the Greek yogurt with plain coconut yogurt (unsweetened) and use a flax egg (1 tablespoon ground flaxseed mixed with 3 tablespoons water, let sit for 5 minutes) instead of the egg wash. The almond nails might not stick quite as well, so press them in firmly. Brush with melted vegan butter after baking for that shiny finish.
Spicy Witch Fingers: Add 1/2 teaspoon of cayenne pepper and 1/2 teaspoon of smoked paprika to the flour mixture. This gives the pretzels a subtle heat that pairs surprisingly well with the salt and almond crunch. My brother-in-law requests these every year now.
Sweet Version: Skip the salt on top and instead brush the baked pretzels with melted butter and sprinkle with cinnamon sugar. The almond nails still work visually, and the sweet-salty combination is actually really good. My kids prefer these, and I’ve started making a batch of both for Halloween parties.
Different Nail Options: If you don’t have almonds or have a nut allergy in the house, try using sliced water chestnuts (they have a similar shape and pale color) or even small pieces of white chocolate that you press on before baking. Neither looks quite as realistic as almonds, but they still get the point across.
Serving & Storage Suggestions
These lighter witch finger pretzel bites with almond nails are best served warm, right after baking, when the texture is soft and chewy and the almonds have that slight crunch. I like to arrange them on a dark platter or black serving board to make the fingers stand out. For extra Halloween atmosphere, you can place them around a small pumpkin or scatter some fake spider webs around the serving dish.
If you’re serving them at a party, set out a small bowl of mustard or cheese dip on the side. The tangy mustard actually complements the pretzel flavor really well, and it gives people something to dip into, which makes the whole experience more interactive. I’ve also served them with a warm beer cheese dip, and let me tell you, that combination disappears fast.
Storage: These are best eaten the day they’re made, but you can store leftovers in an airtight container at room temperature for up to 2 days. The texture will soften slightly, but they’re still delicious. I wouldn’t recommend refrigerating them, as the fridge tends to dry out baked goods.
Reheating: To bring back that fresh-baked texture, pop them in a 350°F oven for 3-5 minutes. The microwave will make them rubbery, so avoid it if you can. If you’re in a hurry, a toaster oven works great too—just watch them closely so the almonds don’t burn.
Freezer Instructions: You can freeze the unbaked, shaped pretzel fingers before the baking soda bath. Place them on a baking sheet in the freezer until solid, then transfer to a freezer bag. When you’re ready to bake, thaw them in the refrigerator overnight, then proceed with the baking soda bath and baking as directed. The texture is almost as good as fresh.
One thing I’ve noticed: these actually taste better the next day if you’re serving them at room temperature. The flavors meld together, and the texture becomes more uniform. So don’t stress if you need to make them a day ahead—they’ll still be fantastic.
Nutritional Information & Benefits
Since these are lighter witch finger pretzel bites, I wanted to give you a realistic picture of what you’re working with. Each pretzel bite (without butter brushing) contains approximately:
- Calories: 85-95
- Carbohydrates: 14g
- Protein: 3g
- Fat: 2.5g
- Fiber: 1g
- Sugar: 2g
The Greek yogurt in the dough adds protein and calcium without the saturated fat you’d get from butter, and the almonds provide healthy monounsaturated fats and vitamin E. Plus, since these are portion-controlled as individual fingers, it’s easier to enjoy them without overdoing it—though I won’t judge you if you eat six in one sitting.
For anyone watching their sodium, you can reduce or skip the coarse salt on top. The baking soda bath adds some sodium to the exterior, but it’s significantly less than traditional pretzel recipes that use a lye bath or heavy salting. These are also naturally nut-free if you skip the almonds and use a different nail option, and they can easily be made dairy-free with the substitutions I mentioned earlier.
Honestly, I feel good about serving these at Halloween parties because they’re not loaded with sugar like most holiday treats. They feel indulgent without the sugar crash, and that’s a win in my book.
Conclusion
These lighter witch finger pretzel bites with almond nails have become my Halloween signature, and I hope they become yours too. They’re creepy enough to impress at a costume party, delicious enough that people forget they’re supposed to be gross, and simple enough that you can whip up a batch on a Tuesday night just because you’re in the mood for something fun.
What I love most about this recipe is how it brings people together. There’s something about handing someone a plate of edible witch fingers that just makes everyone laugh and relax. It breaks the ice at parties, it makes kids giggle, and honestly, it just feels good to make something that brings a little joy into the world—even if that joy comes in the form of a pretzel shaped like a creepy finger.
So go ahead and make a batch. Experiment with the variations, find your favorite dipping sauce, and don’t stress if some of them look a little wonky. The imperfect ones always taste just as good, and they actually look more authentic that way. If you try these, I’d love to hear how they turned out—drop a comment below and let me know your favorite Halloween treat tradition!
Frequently Asked Questions
Can I make these ahead of time for a Halloween party?
Absolutely! You can shape the pretzel fingers and freeze them before the baking soda bath. When you’re ready to serve, thaw them overnight in the fridge, then do the baking soda bath and bake as directed. They’ll taste almost as fresh as the day you made them.
Why did my almonds fall off during baking?
This usually happens if you didn’t use enough egg wash or if the almonds weren’t pressed firmly enough. Make sure you brush the tip of each finger generously with egg wash before pressing the almond on, and give the almond a little wiggle to make sure it’s stuck. Also, don’t skip the baking soda bath—it helps the dough set around the almond.
Can I use instant yeast instead of active dry yeast?
Yes, you can substitute instant yeast 1:1. If using instant yeast, you can skip the activation step and mix it directly with the flour. The rise time might be slightly shorter, so keep an eye on the dough.
How do I make these look more realistic?
For extra creepiness, press a small almond sliver into the “knuckle” indentation to look like a wrinkle. You can also brush the finished pretzels with a tiny bit of food coloring (green or gray) for a more witchy appearance, though I prefer keeping them natural-looking.
Can I use pretzel salt instead of coarse sea salt?
Yes, pretzel salt works perfectly and actually looks more authentic. If you don’t have either, kosher salt is a good substitute—just use a little less since the flakes are smaller than coarse sea salt.
Pin This Recipe!
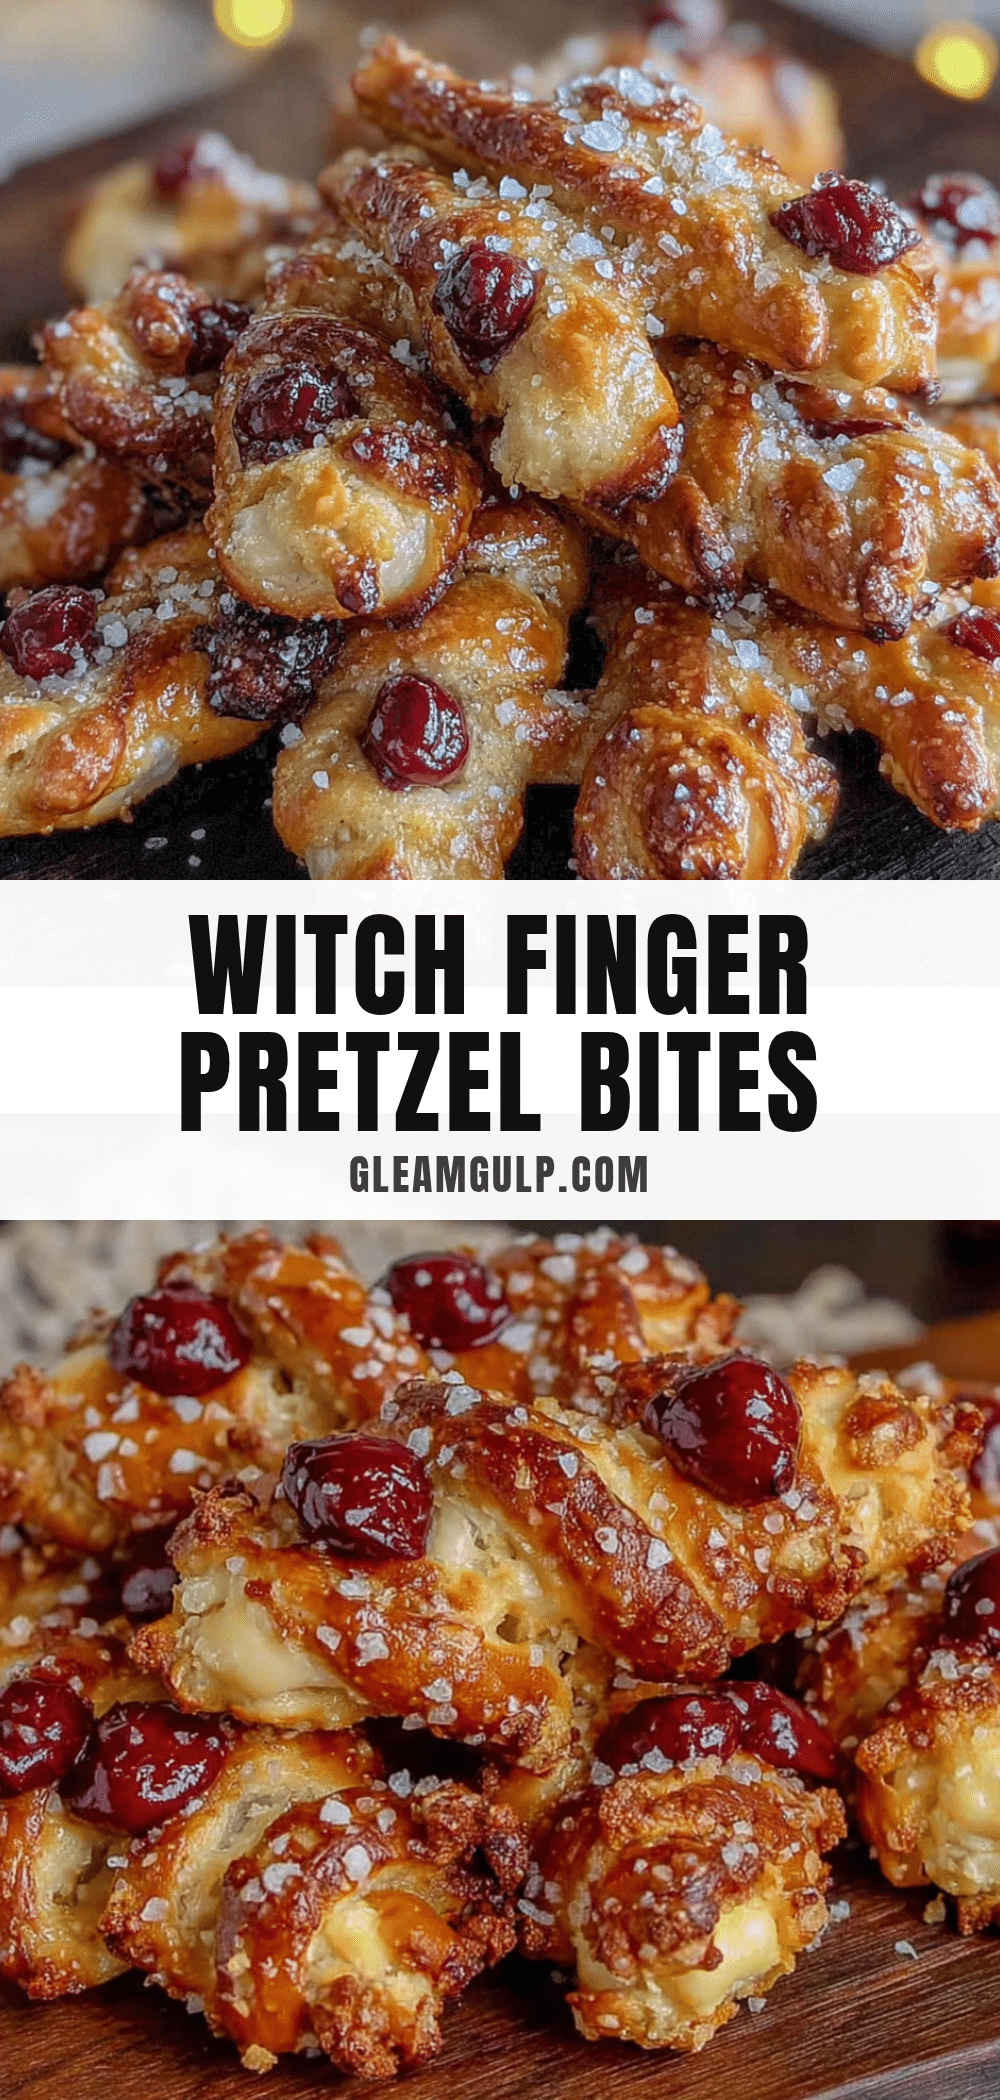
Lighter Witch Finger Pretzel Bites: Easy Halloween Treat
These lighter witch finger pretzel bites with almond nails are the perfect Halloween treat—creepy yet cute, quick to make, and deliciously soft with a satisfying crunch from the almond nails.
- Prep Time: 15 minutes
- Cook Time: 15 minutes
- Total Time: 45 minutes
- Yield: 24 servings 1x
- Category: Appetizer
- Cuisine: American
Ingredients
- 2 cups all-purpose flour
- 1 packet active dry yeast (about 2 1/4 teaspoons)
- 1/2 cup warm water (around 110°F)
- 1 tablespoon honey
- 1/4 cup plain Greek yogurt
- 1/2 teaspoon salt
- 1 tablespoon olive oil
- 24 whole almonds (raw, pointed tips)
- 1 large egg
- 1 tablespoon water
- 6 cups water
- 2 tablespoons baking soda
- Coarse sea salt (for sprinkling)
- Optional: 1 tablespoon melted butter (for brushing after baking)
Instructions
- Activate the yeast: In a large mixing bowl, combine the warm water and honey. Sprinkle the yeast on top and let it sit for 5-7 minutes until foamy.
- Make the dough: Add the Greek yogurt, olive oil, and salt to the yeast mixture. Stir until combined. Add the flour one cup at a time, mixing with a wooden spoon until a shaggy dough forms. Turn out onto a lightly floured surface and knead for 5-7 minutes until smooth and elastic.
- Let it rise: Place the dough in a lightly oiled bowl, cover with a clean kitchen towel, and let it rise in a warm spot for about 30 minutes until doubled in size.
- Preheat and prepare: Preheat oven to 425°F (220°C). Line a baking sheet with parchment paper. In a large pot, bring 6 cups of water to a boil, then carefully stir in the baking soda.
- Shape the fingers: Punch down the risen dough and divide into 24 equal pieces. Roll each piece into a thin log about 4 inches long, tapering one end slightly to look like a fingertip. Place on the prepared baking sheet.
- Add the nails: In a small bowl, whisk together the egg and 1 tablespoon of water. Brush the tip of each dough finger with egg wash. Press one almond onto the brushed tip, pointed end outward.
- Create the knuckles: Use a sharp knife to make 2-3 shallow cuts across each finger at the knuckle positions.
- Bathe the pretzels: Using a slotted spoon, carefully lower 3-4 pretzel fingers at a time into the boiling baking soda water. Let them bathe for 20-30 seconds, then remove and place back on the baking sheet.
- Bake: Sprinkle the bathed pretzels with coarse sea salt. Bake for 12-15 minutes until deep golden brown and slightly puffed.
- Finish and serve: Let cool on the baking sheet for 5 minutes, then transfer to a wire rack. If desired, brush with melted butter while still warm. Serve warm or at room temperature.
Notes
Don’t over-knead the dough; stop when elastic. The baking soda bath timing is crucial—20 seconds is ideal. Keep almonds pointed outward. Flour hands before shaping to prevent sticking. For best results, serve warm.
Nutrition
- Serving Size: 1 pretzel bite
- Calories: 90
- Sugar: 2
- Sodium: 200
- Fat: 2.5
- Saturated Fat: 0.5
- Carbohydrates: 14
- Fiber: 1
- Protein: 3
Keywords: Halloween, pretzel bites, witch fingers, almond nails, easy Halloween treat, lighter pretzel


