Love this? Save it for later!
Share the inspiration with your friends
My friend Jen asked me why I couldn’t just mix the wet ingredients directly into the flour instead of making a well. I was in the middle of explaining the importance of keeping the butter cold and not overworking the dough when I stopped. I honestly had no good reason other than “that’s how I’ve always done it.” So I handed her the bowl and let her try her way. She dumped the pumpkin puree, maple syrup, and cream right into the flour-butter mixture, stirred it about twelve times, and turned out the shaggiest, most hopeless-looking dough I had ever seen. I was already planning how to gently break the news that we’d be having store-bought muffins instead. But I patted it out anyway, cut it into triangles, and threw them in the oven. Twenty minutes later, those Homemade Maple Pumpkin Scones came out with the most perfect flaky layers I’d managed in months. The tops had cracked beautifully, and the edges were golden and crisp. I stood there holding a hot scone, feeling equal parts delighted and humbled. She just shrugged and said, “Less work, same result.” And she was right. That moment changed how I approach baking entirely. Now I make these scones every fall, sometimes twice a week, and I think of Jen every single time. Maybe you’ve had a moment like that where someone showed you a simpler way and you couldn’t believe you hadn’t tried it sooner. These scones are that lesson in edible form.
Why You’ll Love This Recipe
These Homemade Maple Pumpkin Scones are the kind of recipe that makes you feel like a hero without breaking a sweat. I’ve tested this version about seven times now, tweaking the liquid ratio and the spice blend until it was exactly right. My neighbor, who runs a small baking business, tried a batch and immediately asked for the recipe. That’s when I knew I had something worth sharing.
- Quick & Easy: From start to finish, these scones come together in under 35 minutes. No chilling the dough, no complicated folding techniques. Just mix, pat, cut, and bake.
- Simple Ingredients: You probably have most of these in your pantry right now. Canned pumpkin, maple syrup, flour, butter, and spices. No special trips to a fancy grocery store.
- Perfect for Fall Mornings: These scones are made for cozy weekend breakfasts, Thanksgiving brunch, or a quiet afternoon with a hot cup of coffee.
- Crowd-Pleaser: My kids fought over the last one last week. My husband, who claims he doesn’t like pumpkin desserts, ate three in one sitting. They disappear fast.
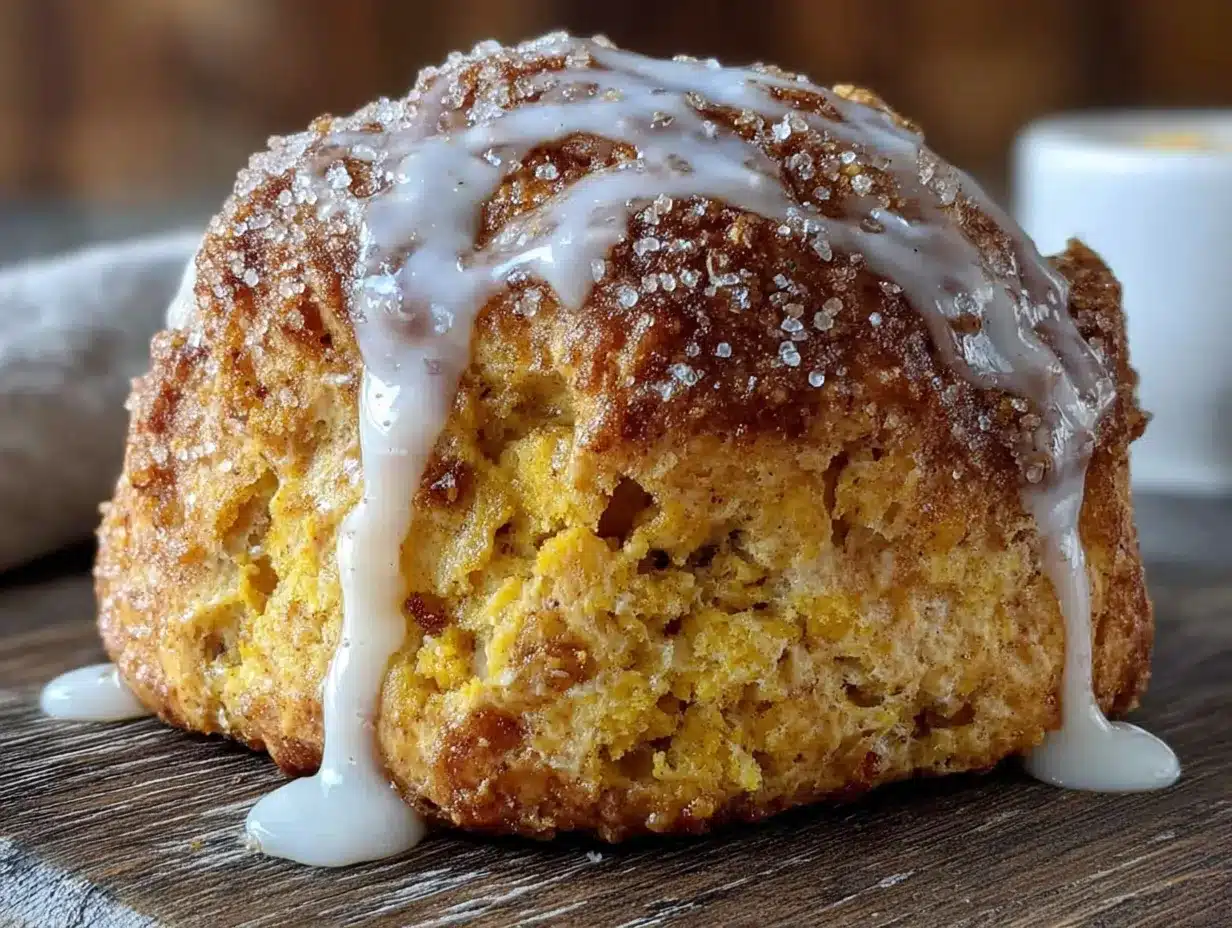
- Unbelievably Delicious: The texture is exactly what you want in a scone. Tender and flaky on the inside, slightly crisp on the outside. The maple and pumpkin flavors are balanced perfectly, and the cinnamon glaze adds that sweet finish that makes them irresistible.
What makes these different from every other pumpkin scone recipe out there is the technique. Mixing the wet ingredients directly into the flour, like Jen showed me, creates less gluten development. Less gluten means a more tender scone. It sounds backward, but it works every single time. These aren’t dry, crumbly scones that fall apart in your hand. They’re soft, moist, and full of flavor. The kind that makes you close your eyes after the first bite and forget about everything else for a minute.
What Ingredients You Will Need
This recipe uses simple, wholesome ingredients to deliver bold fall flavor without the fuss. Most of these are pantry staples, especially if you do any baking during the autumn months.
For the Scones
- All-purpose flour, 2 cups (250g) – I use Gold Medal or King Arthur for consistent results. Spoon and level your flour for the most accurate measurement.
- Granulated sugar, 1/3 cup (65g) – Adds just enough sweetness without overpowering the pumpkin and maple.
- Baking powder, 1 tablespoon – Make sure it’s fresh. Expired baking powder is the number one reason scones don’t rise properly.
- Ground cinnamon, 1 teaspoon – The warm backbone of the spice blend.
- Ground ginger, 1/2 teaspoon – Adds a little warmth and complexity.
- Ground nutmeg, 1/4 teaspoon – Freshly grated if you have it, but pre-ground works fine.
- Ground cloves, 1/8 teaspoon – Just a pinch. It rounds out the other spices beautifully.
- Salt, 1/2 teaspoon – Don’t skip this. Salt balances the sweetness and enhances the pumpkin flavor.
- Cold unsalted butter, 6 tablespoons (85g) – Cut into small cubes. The butter needs to be very cold. I pop mine in the freezer for 10 minutes before cutting.
- Pumpkin puree, 1/2 cup (120g) – Use pure pumpkin, not pumpkin pie filling. Libby’s is my go-to brand. If your pumpkin puree is very watery, blot it with a paper towel before measuring.
- Heavy cream, 1/4 cup (60ml) – Plus a little extra for brushing the tops. You can substitute whole milk in a pinch, but the scones won’t be as tender.
- Pure maple syrup, 3 tablespoons (45ml) – Use the real stuff, not pancake syrup. Grade A dark amber has the strongest maple flavor and works best here.
- Vanilla extract, 1 teaspoon – Pure vanilla, not imitation. It makes a noticeable difference.
For the Cinnamon Glaze
- Powdered sugar, 1 cup (120g) – Sift it if it’s lumpy. Nobody wants a lumpy glaze.
- Ground cinnamon, 1/2 teaspoon – Adjust to your taste. I like a strong cinnamon flavor, so I sometimes add a full teaspoon.
- Pure maple syrup, 1 tablespoon (15ml) – This reinforces the maple flavor in the scones.
- Milk, 2 to 3 tablespoons (30-45ml) – Start with 2 tablespoons and add more until the glaze reaches a drizzling consistency.
- Vanilla extract, 1/2 teaspoon – Optional, but I always add it.
Equipment Needed
You don’t need a lot of fancy equipment for these Homemade Maple Pumpkin Scones. That’s part of what makes this recipe so approachable. A large mixing bowl and a pastry cutter or two forks work perfectly for cutting the butter into the flour. If you have a food processor, you can pulse the dry ingredients with the butter in about 10 seconds, but honestly, I prefer doing it by hand. It gives you more control and less cleanup.
A sharp knife or bench scraper is helpful for cutting the dough into triangles. I use a bench scraper because it cuts cleanly without dragging the dough. A baking sheet lined with parchment paper is essential. I’ve tried using silicone baking mats, and they work fine, but parchment paper gives the scones a slightly crisper bottom. A pastry brush is nice for brushing the cream on top, but you can use your fingers in a pinch. For the glaze, a small whisk and a fork work just as well as anything fancy. I bought a cheap whisk at the grocery store five years ago, and it’s still going strong.
Preparation Method
Preheat your oven to 400°F (200°C). Line a baking sheet with parchment paper. This recipe comes together fast, so having the oven ready is important.
- Mix the dry ingredients: In a large bowl, whisk together the flour, sugar, baking powder, cinnamon, ginger, nutmeg, cloves, and salt. Make sure everything is evenly distributed. I usually whisk for about 30 seconds to aerate the flour.
- Cut in the butter: Add the cold cubed butter to the flour mixture. Use a pastry cutter or two forks to cut the butter into the flour until the mixture resembles coarse meal with some pea-sized butter pieces remaining. You want visible bits of butter throughout. This is what creates the flaky layers. Work quickly so the butter stays cold. If your hands are warm, run them under cold water first.
- Combine the wet ingredients: In a separate small bowl, whisk together the pumpkin puree, heavy cream, maple syrup, and vanilla extract until smooth. The mixture should be uniform and slightly thick.
- Mix wet into dry: Pour the wet mixture over the flour-butter mixture. Here’s where Jen’s method comes in. Stir with a fork until just combined. The dough will look shaggy and messy. There will be dry patches. Do not keep stirring. Stop as soon as the flour is mostly incorporated. Overmixing creates tough scones.
- Shape the dough: Turn the dough out onto a lightly floured surface. Gently bring it together with your hands. Pat it into a circle that’s about 3/4 inch thick and 7 inches across. Don’t use a rolling pin. Just use your hands. The warmth of your hands is enough to bring the dough together without overworking it.
- Cut the scones: Use a sharp knife or bench scraper to cut the circle into 8 equal triangles. I cut it in half, then cut each half into quarters. Press straight down when cutting. Don’t saw back and forth, which can seal the edges and prevent the scones from rising properly.
- Place on baking sheet: Transfer the scones to the prepared baking sheet, spacing them about 2 inches apart. They will spread slightly as they bake. Brush the tops with a little extra heavy cream. This helps them brown beautifully.
- Bake: Bake for 14 to 17 minutes, or until the scones are golden brown on the edges and firm to the touch. The tops should be lightly cracked and the bottoms should be golden. My oven runs hot, so I check at 14 minutes. Rotate the pan halfway through if your oven has hot spots.
- Cool: Let the scones cool on the baking sheet for 5 minutes. Then transfer them to a wire rack to cool completely before glazing. If you glaze them while they’re still warm, the glaze will melt right off.
- Make the glaze: While the scones cool, whisk together the powdered sugar, cinnamon, maple syrup, vanilla extract, and milk. Start with 2 tablespoons of milk and add more a teaspoon at a time until the glaze is thick but pourable. It should flow slowly off the whisk.
- Glaze and serve: Drizzle the glaze over the cooled scones using a spoon or a small whisk. Let the glaze set for about 10 minutes before serving. The glaze will harden slightly, creating a beautiful crackled finish.
Cooking Tips & Techniques
I’ve made about twenty batches of these Homemade Maple Pumpkin Scones over the past few months, and I’ve messed up plenty of them along the way. Let me save you some trouble.
The biggest mistake people make with scones is overmixing the dough. I did it myself for years. The more you mix, the more gluten develops, and the tougher the scone becomes. Mix until the dough just comes together. It should look rough and uneven. That’s exactly what you want. Another common mistake is using warm butter. The butter needs to be very cold. When the butter melts in the oven, it creates steam pockets that make the scones flaky. If the butter is soft before it goes in the oven, those steam pockets never form, and you get dense, flat scones.
Timing is also important. These scones bake quickly, so don’t walk away from the oven. I once got distracted by a phone call and left them in for 19 minutes. They were still edible, but they were dry and the bottoms were too dark. Set a timer for 14 minutes and check them. If they need more time, add a minute at a time. Every oven is different, so trust your eyes more than the clock.
If you want consistently shaped scones, use a bench scraper to cut the dough. A knife can drag and distort the shape. Press straight down without twisting. Twisting seals the edges and prevents the scones from rising evenly. For extra-crispy tops, brush the scones with cream and sprinkle a little coarse sugar on top before baking. The sugar adds a nice crunch that contrasts with the soft interior.
One more thing: if your dough feels too sticky to handle, dust your hands with a little flour. But don’t add extra flour to the dough itself. The wetness of pumpkin puree can vary between brands, so the dough consistency might be slightly different each time. Trust the texture, not the exact measurements.
Variations & Adaptations
These Homemade Maple Pumpkin Scones are flexible, and I’ve tried several variations depending on what I have in the kitchen or who I’m feeding.
Gluten-Free Version: I made a batch for my sister-in-law who has celiac disease. I swapped the all-purpose flour for a 1:1 gluten-free baking flour blend. Bob’s Red Mill works really well. The texture was slightly more crumbly than the original, but the flavor was spot on. Add an extra tablespoon of cream if the dough seems too dry.
Vegan Adaptation: Use cold vegan butter sticks (not the spreadable kind) and replace the heavy cream with full-fat coconut cream. The maple syrup is already vegan, so the glaze just needs a plant-based milk. I used oat milk, and it worked beautifully. The scones were a little less tender but still delicious.
Spice Variation: If you don’t have all the individual spices, use 2 teaspoons of pumpkin pie spice instead. I’ve done this when my spice drawer was a mess, and it works perfectly. You can also add a pinch of cardamom for a more complex flavor profile. I tried that last week, and it was amazing.
Add-In Options: Fold in 1/2 cup of chopped pecans or walnuts before shaping the dough. The nuts add a nice crunch and pair beautifully with the maple and pumpkin. Dried cranberries are also a great addition. I made a batch with pecans and cranberries for Thanksgiving brunch, and they disappeared within minutes.
Glaze Variations: If you want a stronger maple flavor, use maple extract instead of vanilla in the glaze. You can also make a simple powdered sugar glaze without cinnamon if you prefer a cleaner flavor. For a decadent twist, drizzle a cream cheese glaze over the scones instead. Just mix 2 ounces of softened cream cheese with 1 cup of powdered sugar and a splash of milk.
Serving & Storage Suggestions
These scones are best served warm, about 10 minutes after glazing. The glaze will be set but still soft, and the scones will be tender and fragrant. I like to serve them with a hot cup of coffee or chai tea. The spices in the scones complement the warmth of chai beautifully. For a more indulgent breakfast, serve them alongside scrambled eggs and fresh fruit. The sweetness of the scones balances the savory eggs perfectly.
If you’re serving these for a fall gathering, arrange them on a wooden board or a pretty plate. The golden color of the scones with the white glaze drizzled over top is very visually appealing. I sometimes sprinkle a little extra cinnamon on top of the glaze for a finishing touch.
For storage, keep the scones in an airtight container at room temperature for up to 2 days. The glaze will soften slightly, but they’ll still taste great. If you stack them, place a piece of parchment paper between layers to prevent the glaze from sticking. After 2 days, the scones will start to dry out, so I recommend freezing any extras.
To freeze, place the unglazed baked scones in a single layer on a baking sheet and freeze for 1 hour. Then transfer them to a freezer-safe bag or container. They’ll keep for up to 3 months. When you’re ready to eat them, thaw at room temperature and reheat in a 300°F oven for 5 to 7 minutes. Then glaze them fresh. The flavor actually improves after freezing. The spices seem to meld together more. I’ve done this several times when I wanted fresh scones without the full prep work.
To reheat a single scone, microwave it for 15 to 20 seconds. It won’t be as crisp as oven-reheated, but it’s fine for a quick breakfast. The flavors actually deepen after a day or two. I honestly prefer the scones on day two, when the maple and pumpkin have had time to meld together.
Nutritional Information & Benefits
Each scone (with glaze) contains approximately 320 calories, 14g of fat, 45g of carbohydrates, and 4g of protein. These numbers are estimates and will vary based on your specific ingredients and portion sizes.
Pumpkin is a nutritional powerhouse. It’s rich in vitamin A, which supports eye health and immune function. One serving of pumpkin provides over 200% of your daily vitamin A needs. It’s also a good source of fiber, which helps with digestion and keeps you feeling full longer. The maple syrup adds antioxidants and minerals like zinc and manganese, though it’s still sugar, so enjoy in moderation.
The butter and cream provide fat-soluble vitamins A, D, E, and K, which help your body absorb the nutrients from the pumpkin. The cinnamon in the glaze has anti-inflammatory properties and may help regulate blood sugar levels. If you’re watching your sugar intake, you can reduce the glaze or skip it entirely. The scones are still delicious without it, just slightly less sweet. For a lower-carb option, use a sugar substitute like monk fruit sweetener in the scones and glaze. I haven’t tested that myself, but several readers have reported good results.
Conclusion
These Homemade Maple Pumpkin Scones have become a staple in my kitchen for good reason. They’re simple enough for a Tuesday morning but special enough for a holiday brunch. The combination of pumpkin, maple, and warm spices is classic fall comfort food, and the cinnamon glaze takes them over the top. Every time I make them, I think of Jen standing in my kitchen, proving that sometimes the simplest approach is the best one.
I’d love to hear how these turn out for you. Did you try any variations? Did your family fight over the last one like mine did? Drop a comment below and let me know. And if you have your own tip for making scones even better, please share it. I’m always learning from this community. Until next time, happy baking, and may your kitchen smell like maple and cinnamon all season long.
Frequently Asked Questions
Can I use fresh pumpkin instead of canned?
Yes, you can use fresh pumpkin puree. Just make sure to strain it well. Fresh pumpkin tends to be more watery than canned, which can make the dough too wet. Place the puree in a cheesecloth-lined strainer over a bowl for about 30 minutes to remove excess liquid. Then measure 1/2 cup of the strained puree for the recipe.
Why did my scones turn out dry?
Dry scones are usually the result of overbaking or overmixing the dough. Check your scones at 14 minutes. They should be golden on the edges but still soft in the center. Also, make sure you’re measuring your flour correctly. Spoon it into the measuring cup and level it off. Scooping directly from the bag can pack the flour and throw off the ratio.
Can I make the dough ahead of time?
Absolutely. Shape the scones, place them on a parchment-lined baking sheet, and refrigerate for up to 24 hours. When you’re ready to bake, add a couple of minutes to the baking time since the dough will be cold. You can also freeze the shaped, unbaked scones for up to 3 months. Bake directly from frozen, adding 3 to 5 minutes to the baking time.
Can I use maple-flavored syrup instead of real maple syrup?
I don’t recommend it. Maple-flavored syrup is usually corn syrup with artificial flavoring. It won’t provide the same depth of flavor, and it can make the scones overly sweet. Real maple syrup has a more complex, less cloying sweetness that works perfectly with the pumpkin and spices. It’s worth the investment.
How do I get a thicker glaze?
If your glaze is too thin, add more powdered sugar, one tablespoon at a time, until it reaches the desired consistency. If it’s too thick, add milk a teaspoon at a time. The glaze should flow slowly off the whisk and hold its shape slightly when drizzled. Let the scones cool completely before glazing, or the glaze will melt and become runny.
Pin This Recipe!
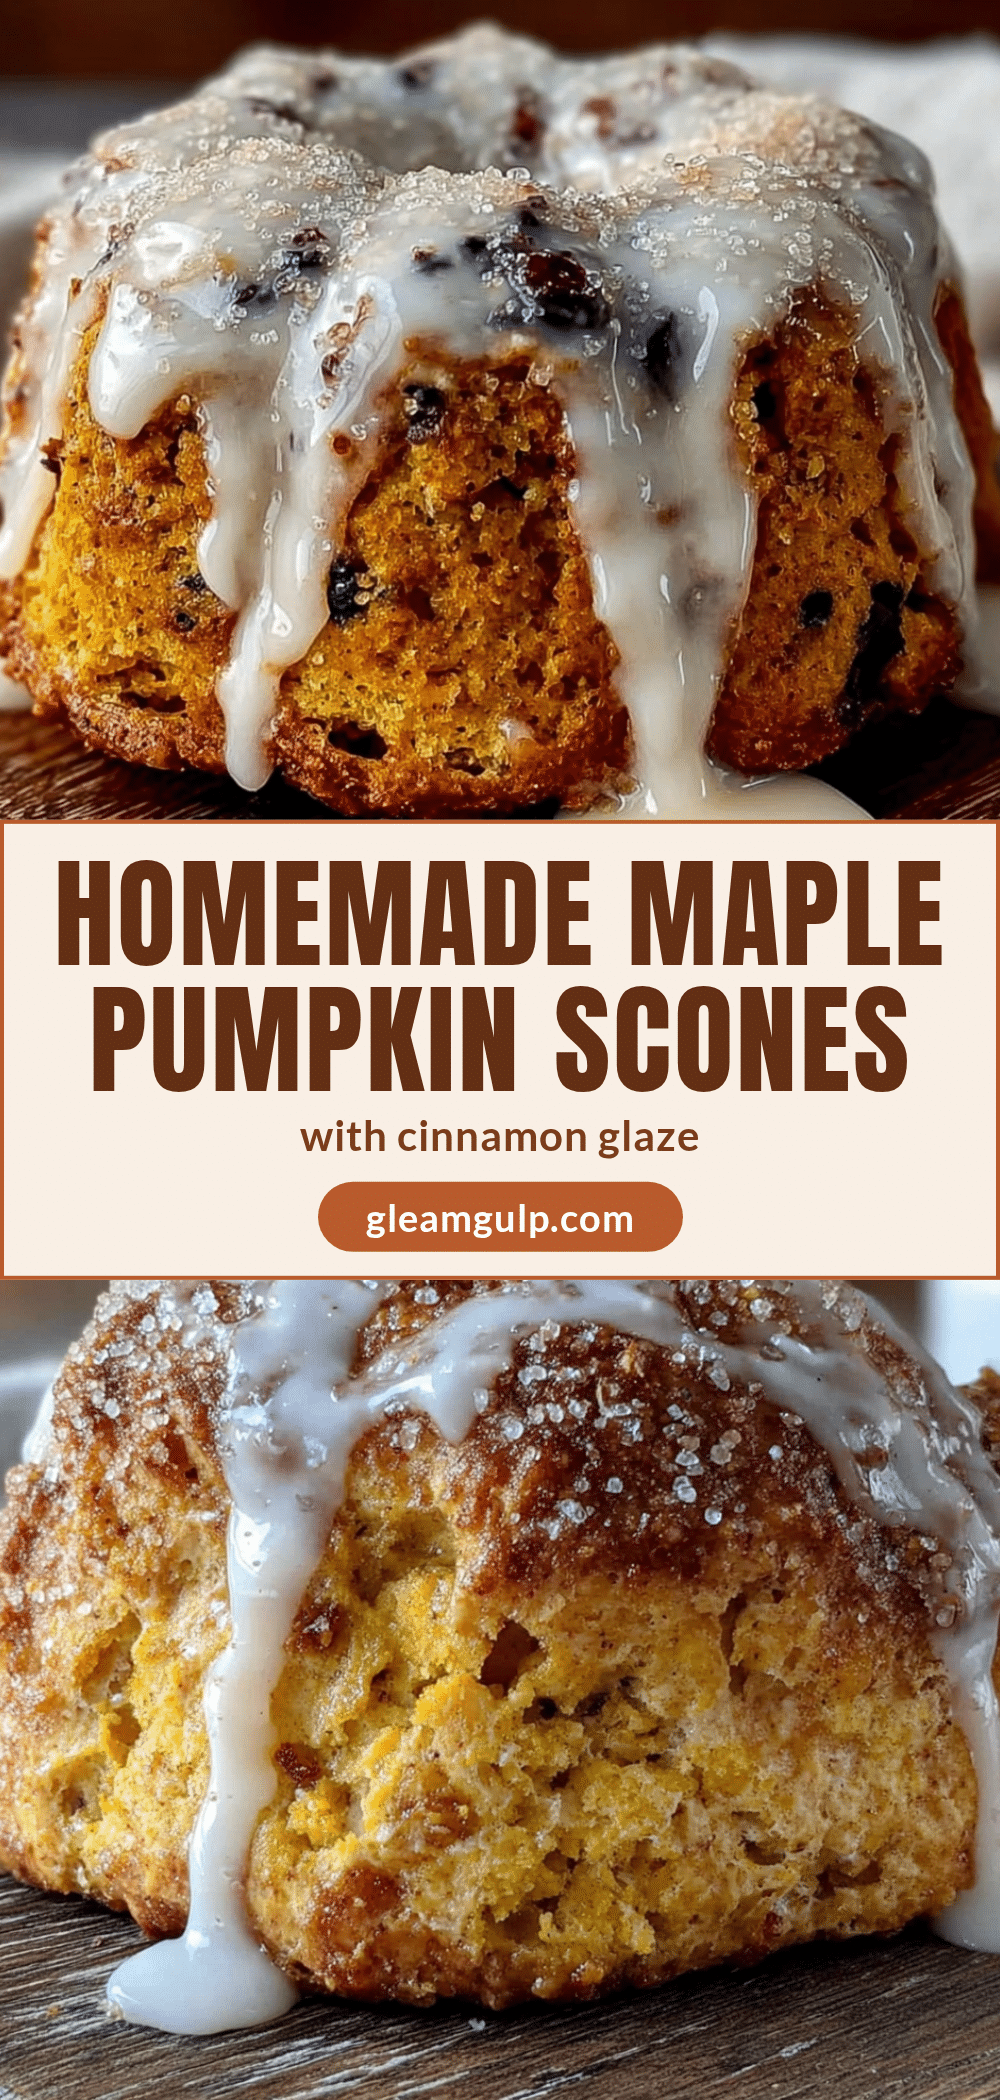
Homemade Maple Pumpkin Scones with Cinnamon Glaze
These tender, flaky scones combine pumpkin and maple with warm spices, topped with a sweet cinnamon glaze. An easy, no-chill recipe that comes together in under 35 minutes.
- Prep Time: 15 minutes
- Cook Time: 17 minutes
- Total Time: 32 minutes
- Yield: 8 servings 1x
- Category: Breakfast
- Cuisine: American
Ingredients
- 2 cups (250g) all-purpose flour
- 1/3 cup (65g) granulated sugar
- 1 tablespoon baking powder
- 1 teaspoon ground cinnamon
- 1/2 teaspoon ground ginger
- 1/4 teaspoon ground nutmeg
- 1/8 teaspoon ground cloves
- 1/2 teaspoon salt
- 6 tablespoons (85g) cold unsalted butter, cubed
- 1/2 cup (120g) pumpkin puree
- 1/4 cup (60ml) heavy cream, plus extra for brushing
- 3 tablespoons (45ml) pure maple syrup
- 1 teaspoon vanilla extract
- 1 cup (120g) powdered sugar
- 1/2 teaspoon ground cinnamon (for glaze)
- 1 tablespoon (15ml) pure maple syrup (for glaze)
- 2–3 tablespoons (30-45ml) milk (for glaze)
- 1/2 teaspoon vanilla extract (for glaze, optional)
Instructions
- Preheat oven to 400°F (200°C). Line a baking sheet with parchment paper.
- In a large bowl, whisk together flour, sugar, baking powder, cinnamon, ginger, nutmeg, cloves, and salt.
- Cut cold cubed butter into flour mixture using a pastry cutter or two forks until mixture resembles coarse meal with pea-sized butter pieces.
- In a separate bowl, whisk together pumpkin puree, heavy cream, maple syrup, and vanilla extract until smooth.
- Pour wet mixture over flour-butter mixture. Stir with a fork until just combined. Dough will look shaggy with dry patches.
- Turn dough onto a lightly floured surface. Gently bring together with hands and pat into a 3/4-inch thick, 7-inch circle.
- Cut circle into 8 equal triangles using a sharp knife or bench scraper. Press straight down without sawing.
- Transfer scones to prepared baking sheet, spacing 2 inches apart. Brush tops with extra heavy cream.
- Bake for 14-17 minutes until golden brown on edges and firm to touch. Rotate pan halfway through if needed.
- Cool on baking sheet for 5 minutes, then transfer to wire rack to cool completely.
- For glaze: Whisk together powdered sugar, cinnamon, maple syrup, vanilla, and milk. Start with 2 tablespoons milk, add more until thick but pourable.
- Drizzle glaze over cooled scones. Let set for 10 minutes before serving.
Notes
Keep butter very cold for flaky layers. Do not overmix dough. For gluten-free, use 1:1 gluten-free flour blend. For vegan, use cold vegan butter and full-fat coconut cream. Scones can be frozen unglazed for up to 3 months.
Nutrition
- Serving Size: 1 scone
- Calories: 320
- Sugar: 22
- Sodium: 280
- Fat: 14
- Saturated Fat: 8
- Carbohydrates: 45
- Fiber: 2
- Protein: 4
Keywords: pumpkin scones, maple scones, fall breakfast, pumpkin recipes, easy scones, cinnamon glaze


