Love this? Save it for later!
Share the inspiration with your friends
The woman at the community garden plot next to mine watched me struggle with an overgrown zucchini plant for a solid minute before she spoke. “You’re fighting it,” she said, not unkindly. “The squash always wins.” Her name was Margaret, and she was in her seventies, with hands that moved like they’d spent decades learning patience. She handed me a pumpkin from her own harvest that day—small, imperfect, absolutely perfect—and told me to make bread. “One bowl,” she said. “That’s all you need. Don’t complicate it.”
I’ll be honest, I forgot the cinnamon the first time I tried her method. The bread still came out golden and tender, and I realized she was right about more than just the squash. Some recipes don’t need fussing. They just need trust. This easy one-bowl pumpkin chocolate chip bread is exactly that kind of recipe—a forgiving, no-stress loaf that comes together in minutes and makes your kitchen smell like fall, even on a random Tuesday in March.
Maybe you’ve had that moment where you’re staring at a can of pumpkin puree in your pantry, wondering what to do with it that doesn’t involve a sink full of dishes. I’ve been there more times than I can count. That’s the whole point of this bread. It’s the answer to “I want something homemade but I’m too tired to deal with a mess.” One bowl, a spatula, and about ten minutes of active work. The chocolate chips do the heavy lifting on flavor, and the pumpkin keeps everything ridiculously moist without any fuss.
Why You’ll Love This Recipe
Let me tell you why this particular loaf has earned a permanent spot in my weekly rotation. It’s not just another pumpkin bread recipe—it’s the one I actually make on a Tuesday night after a long day, not just the one I photograph on a Sunday afternoon.
- One Bowl, No Mixer: You don’t need a stand mixer, a hand mixer, or any fancy equipment. Just a big bowl, a whisk, and a spatula. That means less cleanup, which honestly matters more than you’d think on a busy weeknight.
- Pantry-Friendly Ingredients: Canned pumpkin, basic baking staples, and chocolate chips. No trips to a specialty store, no hunting for buttermilk or sour cream. I’ve made this with what I had on hand more times than I can count, and it always works.
- Comes Together in Under 10 Minutes: The active prep time is genuinely short. Mix the wet ingredients, stir in the dry, fold in the chips, and you’re done. While it bakes, you can actually sit down for a minute.
- Foolproof for Beginners: This bread is incredibly forgiving. Overmix it a little? It’ll still be tender. Forget to grease the pan? Line it with parchment instead. The pumpkin keeps everything moist, so you have a lot of room for error.
- Crowd-Pleasing Flavor: The chocolate chips melt into little pockets of richness against the spiced pumpkin base. Kids love it, adults love it, and it disappears fast at any gathering. I’ve brought this to potlucks and watched it vanish before the main dishes.
What really sets this apart is the texture. Most pumpkin breads lean dense or dry, but this one stays soft for days thanks to the pumpkin’s natural moisture. The chocolate chips add just enough sweetness without making it cloying. It’s the kind of bread that works for breakfast, snack, or dessert without anyone questioning it.
I started making this version after a particularly chaotic week when I needed something reliable. No fancy techniques, no finicky steps. Just a warm, chocolate-flecked slice of comfort that reminded me why I love baking in the first place. If you’re looking for a recipe that delivers without demanding too much, this is it.
What Ingredients You Will Need
This recipe uses simple, wholesome ingredients to deliver that perfect balance of spiced pumpkin and melted chocolate. Most of these are pantry staples, which is exactly what you want on a busy weeknight when you’re already tired.
For the Bread
- 1 ¾ cups (220g) all-purpose flour – Spoon and level it for the best texture. Too much flour makes the bread dry, so don’t scoop straight from the bag.
- 1 teaspoon baking soda – This gives the bread its rise. Make sure it’s fresh—if it’s been sitting in your pantry for a year, it might not work as well.
- ½ teaspoon baking powder – Adds a little extra lift alongside the baking soda.
- ½ teaspoon salt – Balances the sweetness and brings out the pumpkin flavor. I use fine sea salt here.
- 1 ½ teaspoons ground cinnamon – The backbone of the spice blend. I prefer a good-quality cinnamon like Saigon or Ceylon for a warmer flavor.
- ½ teaspoon ground nutmeg – Freshly grated if you have it, but pre-ground works perfectly fine.
- ¼ teaspoon ground ginger – Adds a gentle warmth that complements the pumpkin without overpowering it.
- ¼ teaspoon ground cloves – Just a pinch for depth. You can skip this if you don’t have it on hand.
- 1 cup (200g) granulated sugar – White sugar keeps the texture light. You can reduce it to ¾ cup if you prefer a less sweet loaf.
- ½ cup (100g) packed light brown sugar – Adds moisture and a hint of molasses flavor. Dark brown sugar works too, but it’ll make the bread slightly darker and richer.
- 2 large eggs, at room temperature – Room temperature eggs blend more evenly into the batter. If you forgot to take them out, place them in a bowl of warm water for 5 minutes.
- 1 cup (240ml) pumpkin puree – Use canned pumpkin puree, not pumpkin pie filling. The pie filling has added sugar and spices that will throw off the balance. I usually go with Libby’s or store brand—both work well.
- ½ cup (120ml) vegetable oil – Keeps the bread incredibly moist. Canola or avocado oil also work. Melted coconut oil is fine too, just make sure it’s cooled slightly.
- 1 teaspoon vanilla extract – Pure vanilla extract adds a warm, aromatic note. Imitation vanilla works in a pinch.
- 1 cup (175g) semi-sweet chocolate chips – I prefer semi-sweet because it balances the sweetness of the bread without making it too sugary. Dark chocolate chips are also excellent here. If you only have milk chocolate, reduce the sugar slightly.
Optional Add-Ins
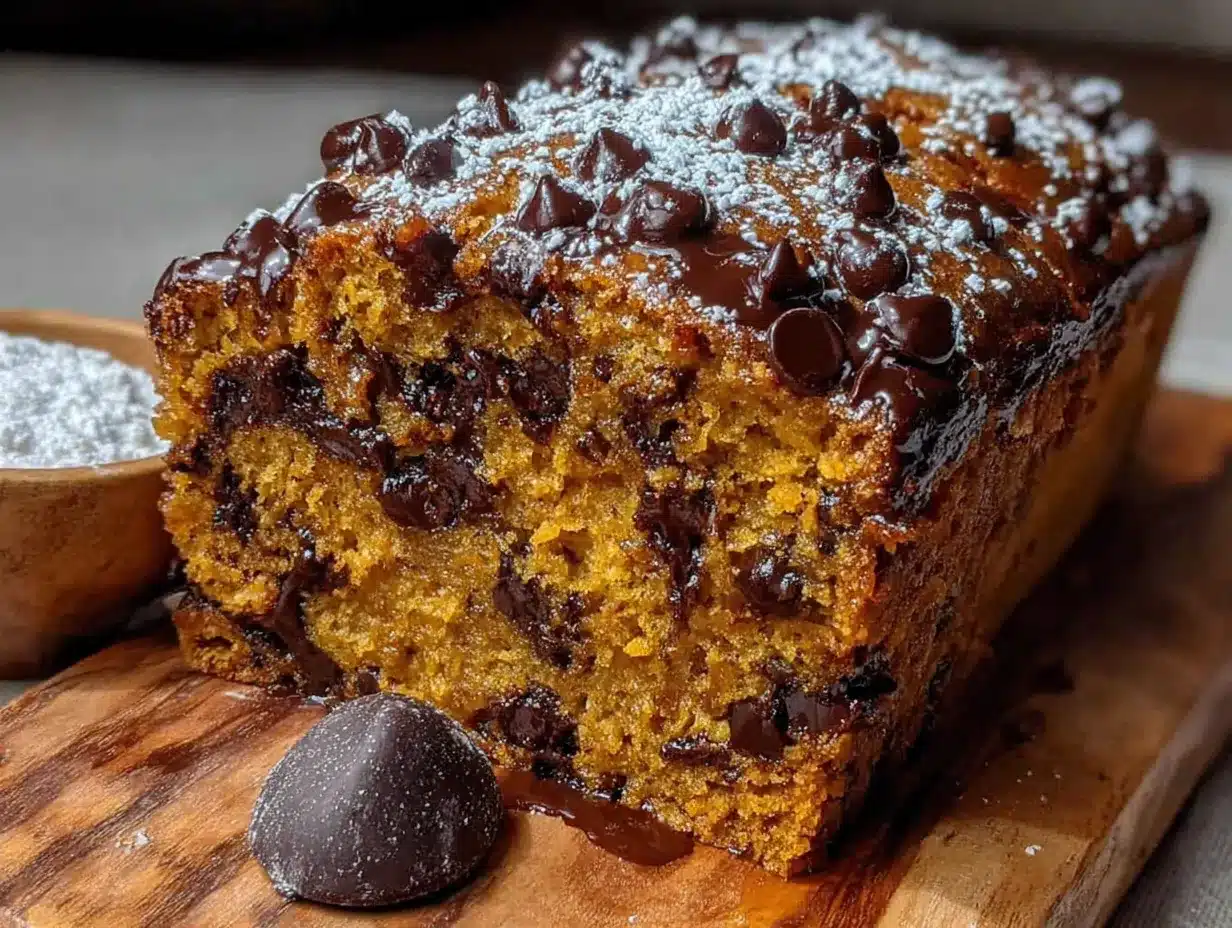
- ½ cup chopped walnuts or pecans – Adds a nice crunch if you want some texture contrast.
- 2 tablespoons turbinado sugar – Sprinkle on top before baking for a crunchy, sparkly crust.
- ¼ cup dried cranberries – A tart pop that pairs beautifully with the chocolate and pumpkin.
Ingredient Tip: For the best flavor, make sure your spices aren’t ancient. I learned this the hard way after making a batch that tasted like cardboard. Spices lose their potency after about six months, so if your cinnamon has been sitting around since last Thanksgiving, consider buying fresh.
Equipment Needed
The beauty of this recipe is how little equipment it requires. You don’t need a stand mixer, a hand mixer, or any specialty gadgets. Here’s what you’ll actually use:
- One large mixing bowl – Any big bowl works. I use a ceramic one, but glass or metal is fine. Just make sure it’s big enough to whisk without splashing.
- A whisk – For mixing the wet and dry ingredients. A fork works in a pinch, but a whisk makes it easier.
- A rubber spatula – Essential for folding in the chocolate chips and scraping every last bit of batter into the pan. I’m a fan of the sturdy silicone ones that don’t bend too much.
- A 9×5-inch loaf pan – This is the standard size. If you use an 8×4-inch pan, the bread will be taller and可能需要 bake a few minutes longer. If you use a 10-inch pan, it’ll be shorter and bake faster.
- Parchment paper – Not strictly necessary, but it makes removing the bread from the pan so much easier. I leave an overhang on two sides to use as handles.
- Cooling rack – Lets the bread cool evenly so the bottom doesn’t get soggy. If you don’t have one, you can use the oven rack turned upside down, or just let it cool in the pan for 10 minutes before turning it out.
- Measuring cups and spoons – For accuracy. I prefer dry measuring cups for flour and sugar, and a liquid measuring cup for the oil and pumpkin.
- A toothpick or skewer – For testing doneness. A thin knife works too.
Budget-Friendly Tip: If you don’t have a loaf pan, you can bake this in an 8×8-inch square pan or even a muffin tin. Just adjust the baking time—muffins will be done in about 18-22 minutes, and the square pan will need around 30-35 minutes.
Preparation Method
This is where the magic happens. The whole process is designed to be straightforward, so even if you’re tired or distracted, you’ll end up with a beautiful loaf. I’ve made this after a 10-hour workday and it still turned out perfect.
- Preheat your oven to 350°F (175°C). Position the rack in the center of the oven. While it’s heating, line your 9×5-inch loaf pan with parchment paper, leaving an overhang on the two long sides. If you don’t have parchment, grease the pan thoroughly with butter or cooking spray. I’ve forgotten to do this before and ended up with half the bread stuck to the pan—don’t be like me.
- In your large mixing bowl, whisk together the dry ingredients: flour, baking soda, baking powder, salt, cinnamon, nutmeg, ginger, and cloves. Whisk them well to make sure the spices and leavening agents are evenly distributed. This takes about 30 seconds. If you see any lumps, break them up with your whisk.
- Add both sugars to the bowl and whisk them into the flour mixture. This might seem unusual—usually you’d cream the sugar with butter—but trust the process. The sugars will dissolve slightly from the moisture in the wet ingredients later, and it keeps everything simple. I was skeptical the first time I tried this method, but it works beautifully.
- Make a well in the center of the dry ingredients. Pour in the pumpkin puree, vegetable oil, eggs, and vanilla extract. Use your whisk to stir everything together, starting from the center and working outward. Stir just until you no longer see streaks of flour. A few small lumps are totally fine—overmixing will make the bread tough. This should take about 20-30 seconds of gentle stirring.
- Fold in the chocolate chips using your rubber spatula. Use a gentle folding motion—cut through the center of the batter, scrape along the bottom, and bring the spatula up and over. Repeat about 8-10 times until the chips are evenly distributed. If you’re adding nuts or dried cranberries, fold them in now too.
- Scrape the batter into the prepared loaf pan. Use your spatula to spread it into an even layer. The batter will be thick—that’s normal. Give the pan a gentle tap on the counter to release any air bubbles. If you want a crunchy top, sprinkle the turbinado sugar evenly over the batter now.
- Bake for 50-60 minutes. Start checking at the 50-minute mark. The bread is done when a toothpick inserted into the center comes out clean or with just a few moist crumbs attached. If you hit a melted chocolate chip, try a different spot. The top should be golden brown and spring back when lightly pressed. My oven runs hot, so I usually start checking at 45 minutes—know your oven and adjust accordingly.
- Let the bread cool in the pan for 10 minutes. This allows it to set so it doesn’t fall apart when you remove it. After 10 minutes, use the parchment overhang to lift the bread out of the pan and transfer it to a cooling rack. Let it cool completely before slicing—about 1-2 hours. I know it’s tempting to cut into it warm, but it will be much cleaner and less crumbly if you wait.
Sensory Cue: When it’s done, your kitchen should smell like a cozy fall day. The top will be a deep golden brown with cracks across the surface. If you tap the loaf gently, it should feel firm but give slightly under your fingers.
Cooking Tips & Techniques
After making this bread more times than I can count, I’ve picked up a few tricks that make the process even smoother. Here are the ones that actually matter:
Don’t overmix the batter. I cannot stress this enough. When you combine wet and dry ingredients, gluten starts developing. Too much gluten makes the bread tough and dense. Stir just until the flour disappears, and accept a few lumps. I’ve ruined batches by trying to make the batter perfectly smooth—they came out rubbery and sad.
Use room temperature eggs. Cold eggs can cause the batter to seize up, especially when mixed with oil and pumpkin. If you forgot to take them out of the fridge, place them in a bowl of warm water for 5 minutes. It’s a small step that makes a noticeable difference in how evenly the batter comes together.
Check your baking soda’s freshness. Baking soda loses its potency over time. To test it, drop a teaspoon of baking soda into a small bowl of vinegar. If it fizzes vigorously, it’s good. If it barely bubbles, it’s time to buy a new box. Flat baking soda is the number one reason quick breads don’t rise properly.
Rotate the pan halfway through baking. Most ovens have hot spots, and rotating the pan ensures even browning. I set a timer for 25 minutes, spin the pan 180 degrees, and let it finish baking. This has saved me from lopsided loaves more times than I can count.
Let it cool completely before slicing. I know the smell is intoxicating, but slicing warm bread is a recipe for crumbly disaster. The bread continues to set as it cools, and the internal structure needs time to firm up. If you absolutely cannot wait (I’ve been there), use a serrated knife and saw gently rather than pressing down.
If the top is browning too quickly, tent it with foil. Around the 40-minute mark, if the top looks dark but the center isn’t done yet, loosely cover the pan with a piece of aluminum foil. This prevents the crust from burning while the inside finishes baking.
Variations & Adaptations
This recipe is incredibly flexible, and I’ve tried several variations over the years. Here are the ones that worked best:
Gluten-Free Version: Substitute the all-purpose flour with a 1:1 gluten-free baking flour blend that contains xanthan gum. I’ve used King Arthur’s Measure for Measure blend with great results. The texture will be slightly more tender and crumbly, but the flavor stays the same. Don’t use almond flour or coconut flour alone—they won’t provide the right structure.
Dairy-Free Adaptation: This recipe is already dairy-free since it uses oil instead of butter. Just make sure your chocolate chips are dairy-free. Many semi-sweet chips are, but check the label if you’re serving someone with a dairy allergy. Enjoy Life and Pascha both make excellent dairy-free options.
Lower Sugar Option: Reduce the granulated sugar to ½ cup and the brown sugar to ¼ cup. The bread will be less sweet, but the chocolate chips will still provide bursts of sweetness. I’ve made this version for friends who are watching their sugar intake, and nobody complained. You can also use a sugar substitute like monk fruit sweetener, though I haven’t tested that myself.
Pumpkin Spice Upgrade: If you love a strong spice flavor, add an extra ½ teaspoon of cinnamon and a pinch of cardamom. You can also replace the individual spices with 2 teaspoons of pumpkin pie spice blend. This version tastes like fall in a slice.
Muffin Version: Divide the batter among a 12-cup muffin tin lined with paper liners. Bake at 350°F for 18-22 minutes, or until a toothpick comes out clean. This is perfect for grab-and-go breakfasts or lunchbox treats. The muffins freeze beautifully too.
Chocolate Lover’s Twist: Swap ¼ cup of the flour for ¼ cup of unsweetened cocoa powder. Add an extra 2 tablespoons of chocolate chips on top before baking. The result is a double-chocolate pumpkin bread that’s dangerously good. I made this for a friend’s birthday and it was gone in 20 minutes.
Serving & Storage Suggestions
This bread is versatile enough to serve in multiple ways, and it stores beautifully—if it lasts that long.
Serving Temperature: This bread is excellent at room temperature, but I actually prefer it slightly warm. Pop a slice in the microwave for 10-15 seconds, and the chocolate chips get all melty and delicious. For a special treat, toast a slice in a buttered skillet for a minute on each side—the edges get crispy while the inside stays soft.
Pairing Ideas: A slice of this bread pairs beautifully with a cup of coffee or a chai latte. For a dessert option, serve it warm with a scoop of vanilla ice cream and a drizzle of caramel sauce. It also makes a fantastic breakfast when spread with a thin layer of cream cheese or butter.
Room Temperature Storage: Store the bread in an airtight container at room temperature for up to 4 days. I wrap the loaf in plastic wrap and then place it in a zip-top bag to keep it from drying out. The flavor actually improves on day two as the spices meld together.
Refrigerator Storage: If you live in a humid climate, you can store the bread in the refrigerator for up to a week. Just make sure it’s tightly wrapped to prevent it from absorbing fridge odors. Let it come to room temperature before serving for the best texture.
Freezer Storage: This bread freezes exceptionally well. Wrap the cooled loaf tightly in plastic wrap, then in a layer of aluminum foil, and place it in a freezer-safe bag. It will keep for up to 3 months. To thaw, leave it on the counter for a few hours or overnight in the refrigerator. You can also freeze individual slices for quick grab-and-go snacks—just wrap each slice in plastic wrap and store them in a freezer bag.
Reheating: For a single slice, microwave for 15-20 seconds. For a whole loaf, wrap it in foil and warm it in a 300°F oven for 10-15 minutes. The bread will taste freshly baked.
Nutritional Information & Benefits
Here’s a rough estimate of the nutritional values per slice (based on 12 slices):
| Nutrient | Amount Per Slice |
|---|---|
| Calories | 310 |
| Total Fat | 15g |
| Saturated Fat | 4g |
| Cholesterol | 35mg |
| Sodium | 250mg |
| Total Carbohydrates | 42g |
| Dietary Fiber | 2g |
| Sugars | 28g |
| Protein | 4g |
Pumpkin is the real star here from a nutritional standpoint. It’s packed with vitamin A (in the form of beta-carotene), which supports eye health and immune function. It also provides fiber, which helps with digestion and keeps you feeling full. The chocolate chips add antioxidants from cocoa, and the oil provides healthy fats that help your body absorb the fat-soluble vitamins in the pumpkin.
This bread is not low-calorie by any means, but it’s made with real ingredients and no preservatives. It’s a treat, and it’s meant to be enjoyed. If you’re looking for a lighter option, you can reduce the sugar and oil by a quarter cup each—the bread will be slightly less tender but still delicious.
Dietary Considerations: This recipe is nut-free (unless you add nuts), and can easily be made dairy-free by choosing the right chocolate chips. It is not gluten-free in its standard form, but the gluten-free variation works well. It contains eggs and wheat, so it’s not suitable for vegan or celiac diets without modification.
Conclusion
This easy one-bowl pumpkin chocolate chip bread is the kind of recipe that earns its place in your regular rotation. It’s simple enough for a Tuesday night when you’re tired and craving something homemade, but impressive enough to bring to a holiday gathering or potluck. The one-bowl method means minimal cleanup, and the forgiving batter means you don’t have to stress about technique.
What I love most about this recipe is how adaptable it is. You can dress it up with nuts and a crunchy sugar top, or keep it simple with just the chocolate chips. You can make it as muffins for breakfast or as a loaf for dessert. It meets you where you are, which is exactly what a good recipe should do.
I’d love to hear how this bread turns out for you. Did you add any fun mix-ins? Did you make it as muffins? Let me know in the comments below, and don’t forget to share a photo if you make it—I always love seeing your creations. Happy baking!
Frequently Asked Questions
Can I use fresh pumpkin instead of canned?
Yes, you can use fresh pumpkin puree. Just make sure it’s well-drained and not too watery. Roast a small sugar pumpkin at 400°F until tender, scoop out the flesh, and blend until smooth. You may need to drain it through a cheesecloth or fine-mesh strainer for about 30 minutes to remove excess moisture. Canned pumpkin is more consistent, so I usually recommend it for this recipe.
Why did my bread sink in the middle?
A sunken middle usually means the bread was underbaked or the oven temperature was too low. Make sure your oven is properly preheated to 350°F and that you’re using an oven thermometer to check accuracy. Also, don’t open the oven door during the first 30 minutes of baking—the rush of cold air can cause the bread to collapse.
Can I make this bread vegan?
I haven’t tested a vegan version, but you can try substituting the eggs with flax eggs (1 tablespoon ground flaxseed mixed with 3 tablespoons water per egg). Use dairy-free chocolate chips and a plant-based oil like coconut or avocado. The texture will be slightly denser, but it should still work. Let me know if you try it!
How do I know when the bread is fully baked?
Insert a toothpick or thin skewer into the center of the loaf. If it comes out clean or with just a few moist crumbs (not wet batter), it’s done. The top should be golden brown and spring back when lightly pressed with your finger. If the toothpick has wet batter on it, bake for another 5 minutes and check again.
Can I double this recipe?
Absolutely! Double all the ingredients and bake in two separate loaf pans. You can also bake it in a 9×13-inch pan for about 35-40 minutes. Just keep an eye on it and test for doneness with a toothpick. The one-bowl method scales up beautifully, so you can easily make two loaves at once—one to eat now and one to freeze for later.
Pin This Recipe!
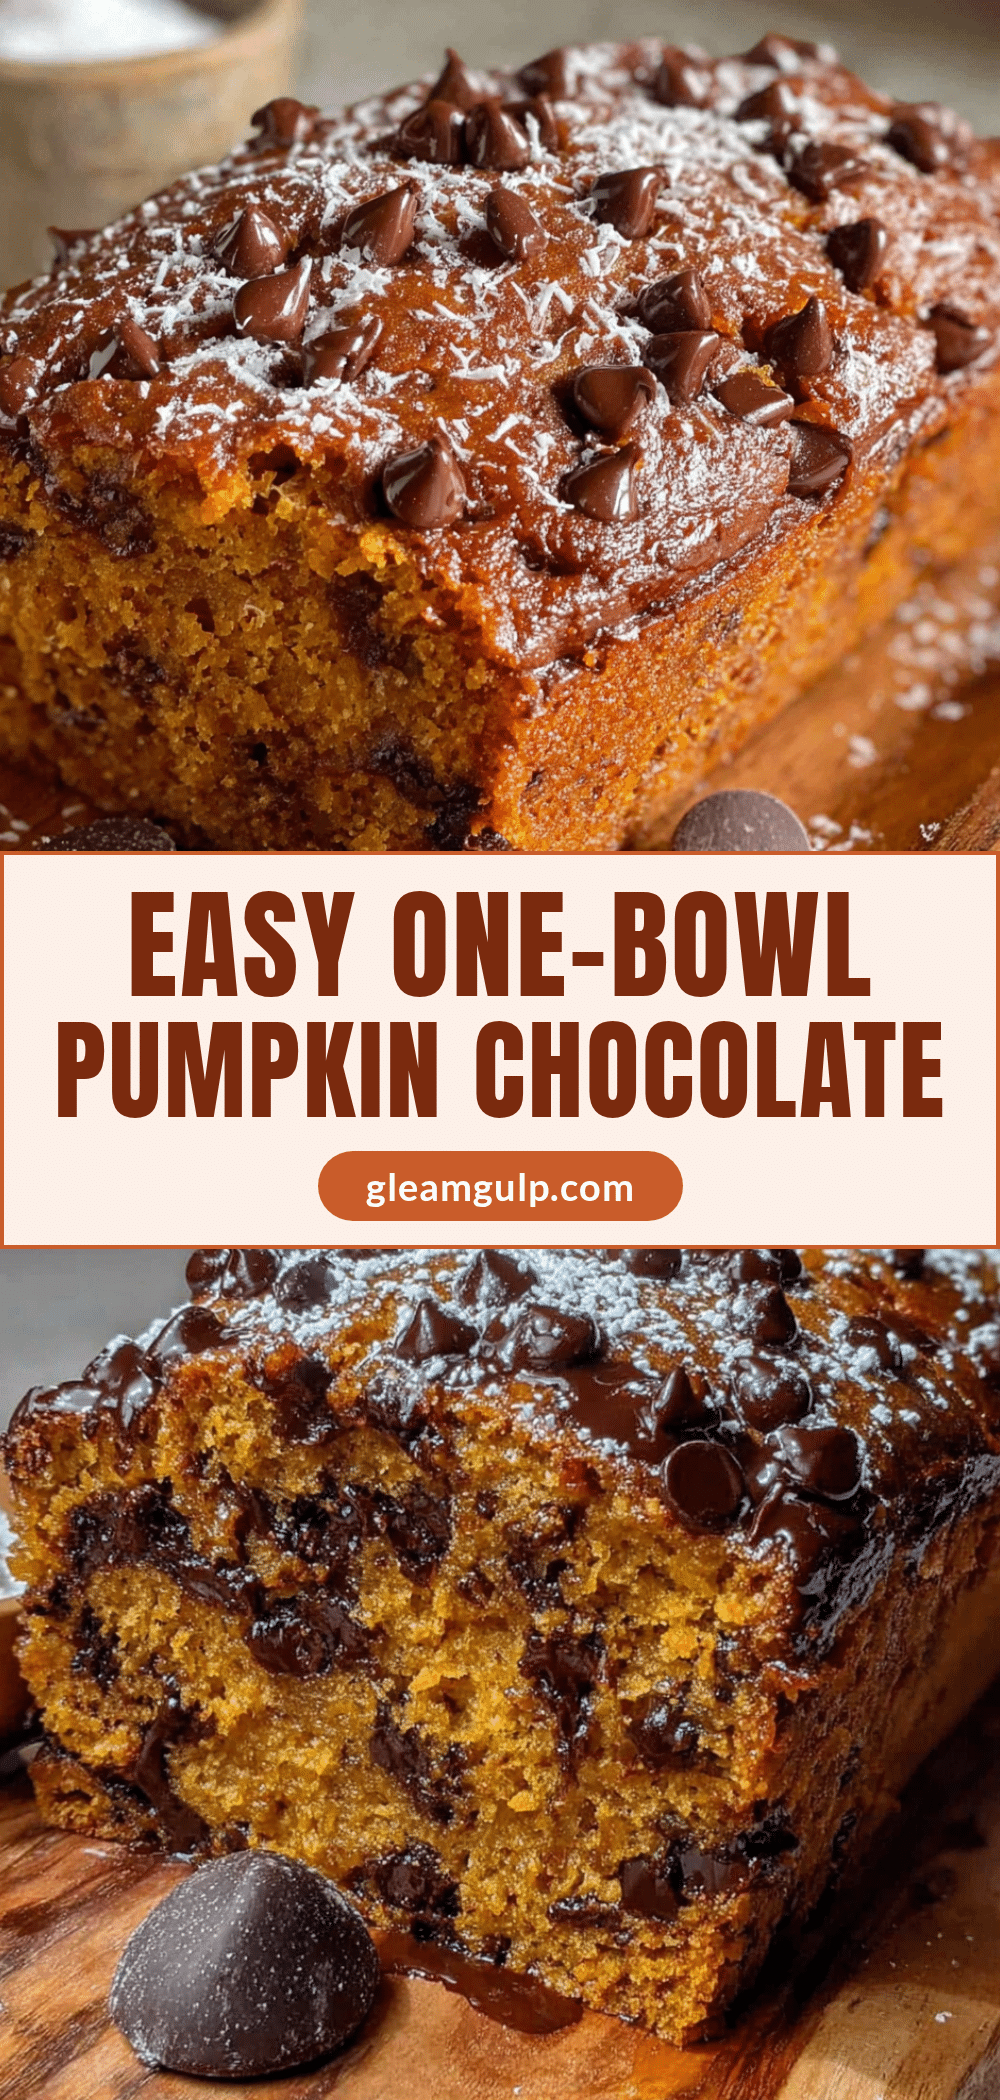
Easy One-Bowl Pumpkin Chocolate Chip Bread
A forgiving, no-stress loaf that comes together in minutes and makes your kitchen smell like fall. This one-bowl pumpkin chocolate chip bread is perfect for busy weeknights when you want something homemade without the mess.
- Prep Time: 10 minutes
- Cook Time: 55 minutes
- Total Time: 1 hour 5 minutes
- Yield: 12 servings 1x
- Category: Dessert
- Cuisine: American
Ingredients
- 1 ¾ cups (220g) all-purpose flour
- 1 teaspoon baking soda
- ½ teaspoon baking powder
- ½ teaspoon salt
- 1 ½ teaspoons ground cinnamon
- ½ teaspoon ground nutmeg
- ¼ teaspoon ground ginger
- ¼ teaspoon ground cloves
- 1 cup (200g) granulated sugar
- ½ cup (100g) packed light brown sugar
- 2 large eggs, at room temperature
- 1 cup (240ml) pumpkin puree
- ½ cup (120ml) vegetable oil
- 1 teaspoon vanilla extract
- 1 cup (175g) semi-sweet chocolate chips
- ½ cup chopped walnuts or pecans (optional)
- 2 tablespoons turbinado sugar (optional)
- ¼ cup dried cranberries (optional)
Instructions
- Preheat your oven to 350°F (175°C). Position the rack in the center of the oven. Line a 9×5-inch loaf pan with parchment paper, leaving an overhang on the two long sides. If you don’t have parchment, grease the pan thoroughly with butter or cooking spray.
- In a large mixing bowl, whisk together the dry ingredients: flour, baking soda, baking powder, salt, cinnamon, nutmeg, ginger, and cloves. Whisk well to ensure even distribution.
- Add both sugars to the bowl and whisk them into the flour mixture.
- Make a well in the center of the dry ingredients. Pour in the pumpkin puree, vegetable oil, eggs, and vanilla extract. Stir with a whisk just until no streaks of flour remain. A few small lumps are fine.
- Fold in the chocolate chips using a rubber spatula. If adding nuts or dried cranberries, fold them in now.
- Scrape the batter into the prepared loaf pan and spread it into an even layer. Give the pan a gentle tap on the counter to release air bubbles. If desired, sprinkle turbinado sugar evenly over the batter.
- Bake for 50-60 minutes. Start checking at the 50-minute mark. The bread is done when a toothpick inserted into the center comes out clean or with just a few moist crumbs attached. The top should be golden brown and spring back when lightly pressed.
- Let the bread cool in the pan for 10 minutes. Then use the parchment overhang to lift it out and transfer to a cooling rack. Cool completely before slicing, about 1-2 hours.
Notes
Don’t overmix the batter to avoid tough bread. Use room temperature eggs for best results. Check baking soda freshness by testing with vinegar. Rotate the pan halfway through baking for even browning. Let the bread cool completely before slicing for cleaner cuts. If the top browns too quickly, tent with foil around the 40-minute mark.
Nutrition
- Serving Size: 1 slice
- Calories: 310
- Sugar: 28
- Sodium: 250
- Fat: 15
- Saturated Fat: 4
- Carbohydrates: 42
- Fiber: 2
- Protein: 4
Keywords: pumpkin bread, chocolate chip bread, one bowl, easy pumpkin bread, fall baking, quick bread


