Love this? Save it for later!
Share the inspiration with your friends
I swore I didn’t need another cookie recipe. Honestly, my holiday baking lineup was already set—the same five recipes I’d been making for years, the ones my family expects. Then I found myself standing in my kitchen last December, staring at a half-eaten bar of peppermint bark someone had gifted me, and I had this ridiculous urge to crush it up and put it in cookie dough. I mean, who does that? Apparently, me. On a Tuesday. While wearing fuzzy slippers.
Let me tell you, those first batch of Perfect Peppermint Bark Crinkle Cookies came out of the oven looking like little snow-capped mountains studded with ruby jewels. The kitchen smelled like a holiday candle, and I may have eaten three before they even cooled. The thing is, I wasn’t trying to reinvent the wheel. I just had leftover candy and a restless baking impulse. But that happy accident turned into the cookie that now hijacks my entire December baking schedule. Maybe you’ve been there—standing over a mixing bowl, wondering why you ever agreed to bring cookies to yet another gathering, only to stumble onto something that makes all the mess worth it.
These cookies are the kind that disappear fast. The crinkle tops crack open as they bake, revealing deep chocolate beneath, with chunks of peppermint bark creating little pockets of minty crunch. Every bite has that perfect contrast: fudgy center, slightly crisp edges, and the cool snap of peppermint. They’re not fussy, they don’t require chilling for hours, and they make your entire kitchen smell like Christmas morning. That’s why I keep making them, year after year, even when I tell myself I’ll try something new. Some recipes just earn their spot.
Why You’ll Love This Recipe
Look, I’ve tested a lot of holiday cookies over the years. Some are gorgeous but taste like cardboard. Others taste amazing but require a culinary degree and three hours of chilling time. These Perfect Peppermint Bark Crinkle Cookies hit that sweet spot where easy meets absolutely delicious. Here’s why they’ll become your new holiday favorite:
- Quick & Easy: From start to finish, these come together in about 30 minutes. No chilling required. No complicated techniques. Just mix, scoop, bake, and watch people fight over them.
- Simple Ingredients: You probably have most of this in your pantry right now. The only special item is peppermint bark, and honestly, that’s everywhere during the holidays. No fancy extracts or hard-to-find mix-ins.
- Perfect for Cookie Swaps: These cookies look stunning on a platter—that crackled top and those red and white peppermint pieces catch everyone’s eye. Plus, they travel well and stay soft for days.
- Crowd-Pleaser: I’ve brought these to four different holiday parties this season, and each time, someone asked for the recipe before they’d even finished their first cookie. Kids love the candy pieces. Adults love the sophisticated chocolate-mint combo.
- Unbelievably Delicious: The texture is what gets me every time. That soft, fudgy center paired with the slight crunch from the peppermint bark pieces creates something special. It’s not just another chocolate cookie—it’s a whole experience.
What makes this recipe different from all the other chocolate crinkle cookies out there? It’s the peppermint bark. Most recipes use crushed candy canes, which can get sticky and melt into the dough. Peppermint bark holds its shape better, gives you that chocolate-on-chocolate depth, and creates those gorgeous white and red specks throughout. Plus, the white chocolate layer in the bark adds a subtle creaminess that balances the dark cocoa perfectly. This isn’t just another version—it’s the best version I’ve found after years of trial and error.
These cookies make me close my eyes after the first bite every single time. They’re comfort food reimagined—familiar enough to feel like tradition, but special enough to feel like a treat. Perfect for impressing guests without stress, or turning a quiet December afternoon into something memorable.
What Ingredients You Will Need
This recipe uses simple, wholesome ingredients to deliver bold flavor and satisfying texture without the fuss. Most of these are pantry staples, and the peppermint bark is easy to find during the holiday season. Here’s what you’ll need:
For the Cookie Dough
- 1 cup (226g) unsalted butter, softened – I use Kerrygold for the richness, but any good-quality butter works. Make sure it’s truly softened, not melted, for the best texture.
- 1 cup (200g) granulated sugar – Regular white sugar gives these cookies that perfect crinkle top. Don’t substitute with brown sugar here—it changes the crackle effect.
- 2 large eggs, room temperature – Cold eggs can seize the butter mixture. Let them sit on the counter for 20 minutes before starting.
- 1 teaspoon vanilla extract – Pure vanilla makes a difference. I like Nielsen-Massey, but any brand works.
- 1/2 teaspoon peppermint extract – Go easy here. Peppermint extract is potent, and you can always add more, but you can’t take it out. I’ve learned this the hard way.
- 2 cups (250g) all-purpose flour – Spoon and level your flour. Scooping straight from the bag packs it down and gives you dry cookies.
- 1/2 cup (45g) unsweetened cocoa powder – Dutch-process cocoa gives a deeper, more intense chocolate flavor. Natural cocoa works too, but the color won’t be as dark.
- 1 teaspoon baking powder – This helps the cookies puff up and create those signature crinkles.
- 1/2 teaspoon salt – Don’t skip this. Salt balances the sweetness and makes the chocolate taste more chocolatey.
For the Mix-In and Coating
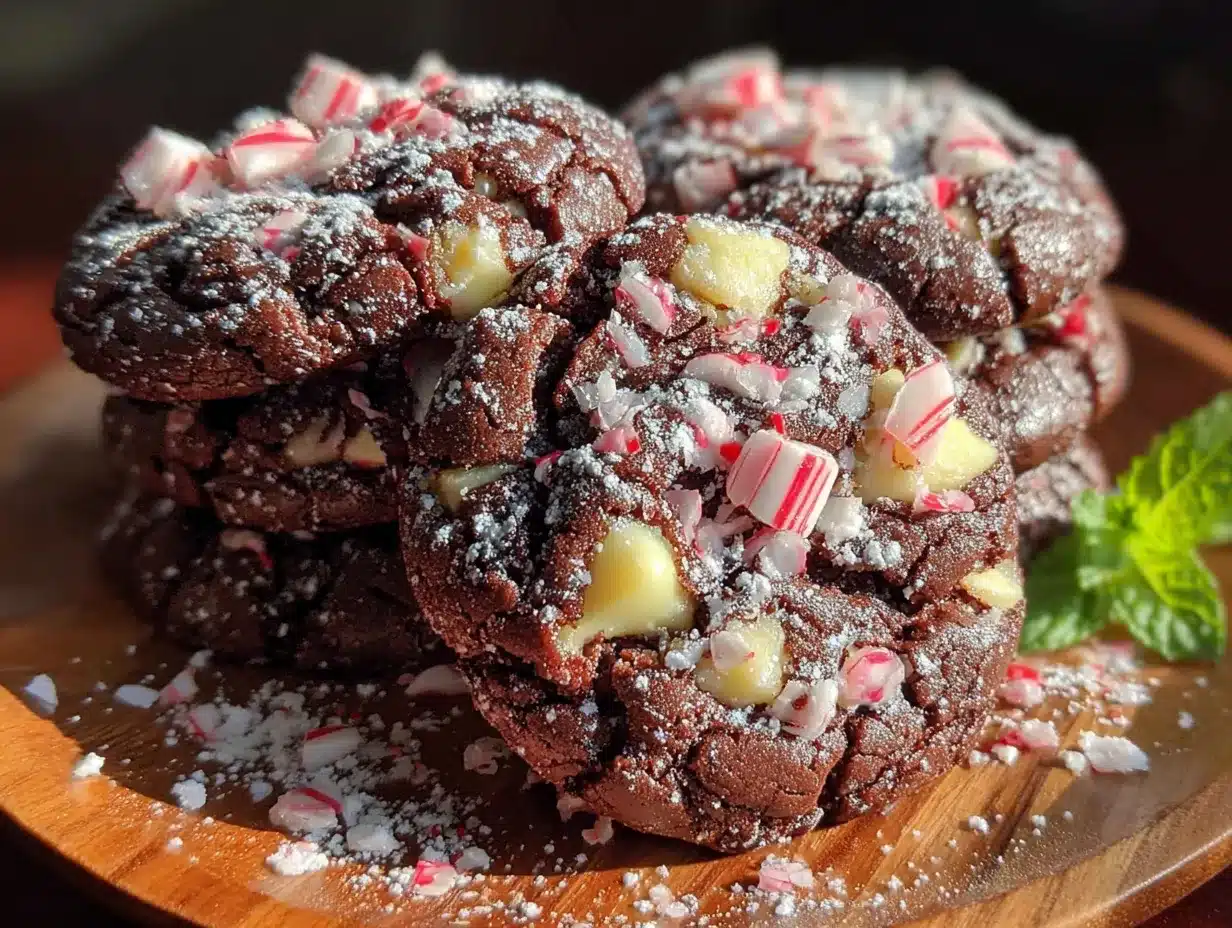
- 1 cup (170g) peppermint bark, chopped into small pieces – I prefer Ghirardelli or Williams Sonoma peppermint bark. Look for bark with distinct layers of dark chocolate, white chocolate, and crushed candy cane pieces. Chop it into 1/4-inch chunks—not too fine, or it disappears into the dough.
- 1/2 cup (100g) powdered sugar, for rolling – This is what creates that beautiful crinkle effect. Use fresh powdered sugar—old stuff can clump and won’t coat evenly.
One quick note on the peppermint bark: if you can’t find it pre-made, you can make your own by melting dark chocolate, spreading it thin, topping with crushed candy canes, then adding a layer of melted white chocolate. Let it set, then chop it up. It takes an extra 20 minutes but tastes incredible. I’ve done this when I couldn’t find good-quality bark at the store, and honestly, it’s worth the effort.
Equipment Needed
You don’t need a fancy kitchen to make these cookies. Here’s what I use:
- Stand mixer or hand mixer – A stand mixer with the paddle attachment makes creaming butter and sugar effortless, but a hand mixer works just fine. I’ve made these with both.
- Large mixing bowls – One for wet ingredients, one for dry. Glass or stainless steel works best.
- Whisk – For combining dry ingredients evenly.
- Rubber spatula – For scraping down the bowl and folding in the peppermint bark.
- Cookie scoop (1.5 tablespoon size) – This ensures uniform cookies that bake evenly. A #40 scoop is perfect. If you don’t have one, use two spoons, but the cookies won’t be as consistent.
- Baking sheets – I use Nordic Ware aluminum sheets. They conduct heat evenly and don’t warp. Avoid dark non-stick sheets—they can cause the bottoms to burn.
- Parchment paper or silicone baking mats – Parchment is my preference because it’s easy to clean up and the cookies slide right off.
- Cooling rack – Letting cookies cool on a rack prevents soggy bottoms.
- Small bowl – For the powdered sugar coating.
If you’re on a budget, skip the stand mixer and use a hand mixer. Skip the cookie scoop and use two spoons. The cookies will still taste amazing. I’ve made these in a tiny apartment kitchen with a whisk and a lot of arm strength, and they turned out perfect.
Preparation Method
Alright, let’s get baking. Here’s how to make these Perfect Peppermint Bark Crinkle Cookies step by step:
- Preheat your oven to 350°F (175°C). Line two baking sheets with parchment paper. This is important—don’t skip the parchment. The cookies spread slightly, and parchment prevents sticking without adding extra grease.
- Cream the butter and sugar. In a large mixing bowl, beat the softened butter and granulated sugar together until light and fluffy, about 3-4 minutes. You want the mixture to look pale and aerated. Scrape down the sides of the bowl halfway through. I usually set a timer because I tend to under-cream when I’m distracted.
- Add the eggs and extracts. Beat in the eggs one at a time, mixing well after each addition. Add the vanilla extract and peppermint extract, then mix until combined. The batter should look smooth and glossy. If it looks curdled, your butter was too cold or your eggs were too cold—don’t worry, it’ll still work, but next time let everything come to room temperature.
- Whisk the dry ingredients. In a separate bowl, whisk together the flour, cocoa powder, baking powder, and salt. Whisking ensures everything is evenly distributed. I’ve skipped this step before and ended up with a pocket of baking powder in one cookie—it was not pleasant.
- Combine wet and dry. Gradually add the dry ingredients to the wet mixture, mixing on low speed until just combined. Stop when you no longer see streaks of flour. Over-mixing at this stage develops gluten and makes tough cookies. Trust me, I’ve done it, and the difference is noticeable.
- Fold in the peppermint bark. Using a rubber spatula, gently fold in the chopped peppermint bark pieces. Reserve a few pieces to press onto the tops of the cookies after baking for a prettier presentation. The dough will be thick and slightly sticky—that’s perfect.
- Prepare the coating. Place the powdered sugar in a small bowl. Using your cookie scoop, portion out rounded tablespoons of dough (about 1.5 tablespoons each). Roll each portion into a ball between your palms. The dough will be a bit sticky, so lightly wet your hands if needed.
- Roll in powdered sugar. Roll each dough ball generously in the powdered sugar, coating every surface. Don’t be shy here—the sugar coating is what creates the crinkle effect. If you can see the dough through the sugar, roll it again. I usually double-coat mine for maximum crinkle.
- Place on baking sheets. Arrange the coated dough balls on the prepared baking sheets, spacing them about 2 inches apart. They’ll spread a bit, so give them room. I fit 6 cookies per standard half-sheet pan.
- Bake. Bake for 10-12 minutes. The cookies should look puffed and cracked, with the edges set but the centers still slightly soft. Don’t overbake—they continue cooking on the hot pan after you pull them out. At 10 minutes, they’ll be fudgy. At 12 minutes, they’ll be more cake-like. I prefer 11 minutes for that perfect chewy center.
- Cool and garnish. Let the cookies cool on the baking sheet for 5 minutes. Then transfer them to a wire cooling rack. While they’re still warm, gently press a few extra peppermint bark pieces onto the tops if you reserved some. This makes them look bakery-level pretty.
- Repeat. Continue with the remaining dough. Let the baking sheets cool completely between batches, or the dough will start spreading too quickly on a hot pan.
A quick note: if your cookies don’t crackle as much as you’d like, your oven might be too cool, or you didn’t roll them in enough powdered sugar. I’ve had flat, sad cookies before, and it was always because I rushed the sugar coating. Take your time with that step—it’s the secret to that gorgeous crinkle top.
Cooking Tips & Techniques
After making these cookies more times than I care to count, I’ve picked up a few tricks that make a real difference. Let me share them so you don’t have to learn the hard way:
Don’t skip the peppermint extract. The peppermint bark alone doesn’t give enough mint flavor. That little half-teaspoon of extract is what makes these cookies taste like pure holiday magic. But here’s the catch—too much peppermint extract makes cookies taste like toothpaste. Start with 1/2 teaspoon, taste the dough (it’s safe with eggs), and add a tiny bit more if you want. I once added a full teaspoon and regretted it deeply.
Chop the bark consistently. You want pieces that are about the size of a pea. Too big, and they create hollow spots in the cookies. Too small, and they disappear into the dough. I lay the bark on a cutting board and use a sharp chef’s knife to chop it all at once. A food processor pulverizes it into dust—avoid that.
Use a cookie scoop for uniform size. This isn’t just about aesthetics. Uniform cookies bake evenly. Some will be done while others are still raw if you eyeball the portions. A #40 scoop (1.5 tablespoons) is my go-to for this recipe.
Watch the oven like a hawk. Every oven runs differently. My friend’s oven bakes these in exactly 10 minutes. Mine takes 11. Your oven might need 12. Start checking at 9 minutes. The cookies are done when the edges are set and the tops are crackled but the centers still look slightly underdone. They’ll firm up as they cool.
Let them cool completely before storing. I know it’s tempting to stack them while warm, but they’ll stick together and lose their beautiful tops. Give them at least 30 minutes on the cooling rack before moving to an airtight container.
Double the batch. Seriously. These cookies disappear fast. I always make a double batch because single batches never last through the weekend. Plus, the dough freezes beautifully if you want to bake them fresh later.
Variations & Adaptations
One of the things I love about this recipe is how flexible it is. Here are some ways to make it your own:
Dark Chocolate Lovers Version: Swap the all-purpose flour for 1/4 cup less, and add 1/4 cup extra cocoa powder. Use dark chocolate peppermint bark instead of milk chocolate. The result is a deeply intense, almost fudge-like cookie that pairs beautifully with coffee.
Gluten-Free Adaptation: Substitute the all-purpose flour with a 1:1 gluten-free baking flour blend. I’ve used Bob’s Red Mill and King Arthur Measure for Measure with great results. The texture is slightly more tender, but the crinkle effect still works perfectly. Just make sure your peppermint bark is gluten-free too—some brands use wheat-based ingredients.
White Chocolate Peppermint Version: Use white chocolate peppermint bark instead of the traditional dark chocolate kind. The cookies will be lighter in color but still have that gorgeous crinkle top. Add 1/2 cup white chocolate chips for extra sweetness. My sister-in-law prefers this version and calls them “snow cookies.”
Mint-Free Option: If you’re not a peppermint fan (I know, but you exist), skip the peppermint extract and use 1 teaspoon vanilla extract instead. Replace the peppermint bark with chopped dark chocolate or toffee bits. They become simple chocolate crinkle cookies with a fun mix-in.
Vegan Version: Use vegan butter (I like Miyoko’s), replace each egg with a flax egg (1 tablespoon ground flaxseed + 3 tablespoons water per egg), and use dairy-free peppermint bark. The texture is slightly less tender, but the flavor is still amazing. I tested this for a friend who’s vegan, and she said they were the best cookies she’d had in years.
I’ve tried all of these variations, and honestly, the original is still my favorite. But the white chocolate version is a close second, especially when I want something a little different.
Serving & Storage Suggestions
These cookies are best served slightly warm when the chocolate is still a little melty and the peppermint pieces are soft. But they’re also fantastic at room temperature—the flavor actually deepens after a day or two.
Serving Ideas: Arrange them on a festive platter with a dusting of powdered sugar and a few whole candy canes for decoration. They’re perfect for cookie swaps, holiday parties, or alongside a mug of hot cocoa. I like to serve them with peppermint hot chocolate or a strong cup of coffee to balance the sweetness. For an extra touch, drizzle melted white chocolate over the top and sprinkle with crushed candy canes right before serving.
Storage: Store cooled cookies in an airtight container at room temperature for up to 5 days. Place a slice of bread in the container to keep them soft—the cookies absorb moisture from the bread. Change the bread every other day. I learned this trick from my grandmother, and it works like magic.
Freezing: These cookies freeze beautifully. Freeze baked, cooled cookies in a single layer on a baking sheet, then transfer to a freezer-safe bag or container. They’ll keep for up to 3 months. Thaw at room temperature for about 30 minutes before serving. You can also freeze the dough balls before rolling in powdered sugar. Roll them in sugar right before baking—no need to thaw first, just add 1-2 minutes to the baking time.
Flavor Development: Here’s something interesting—these cookies actually taste better on day two. The peppermint flavor mellows and blends with the chocolate, creating a more balanced taste. So if you can resist eating them all on day one, you’re in for a treat. I’ve never managed to wait that long, but I’ve heard it’s true.
Nutritional Information & Benefits
Let’s be real—these are holiday cookies, not health food. But here’s the nutritional breakdown for one cookie (based on 24 cookies per batch):
- Calories: 185
- Total Fat: 10g
- Saturated Fat: 6g
- Cholesterol: 35mg
- Sodium: 95mg
- Total Carbohydrates: 24g
- Dietary Fiber: 1g
- Sugars: 16g
- Protein: 2g
Health Highlights: The cocoa powder contains antioxidants called flavonoids that can support heart health. Dark chocolate in the peppermint bark adds more of these beneficial compounds. Peppermint itself has been shown to aid digestion and can help soothe an upset stomach—which is handy after holiday feasting.
Dietary Considerations: This recipe contains dairy (butter), eggs, and gluten (flour). For dairy-free, use vegan butter and dairy-free peppermint bark. For gluten-free, use a 1:1 gluten-free flour blend. For egg-free, use flax eggs. The texture will vary slightly, but the flavor remains delicious.
Allergen Note: Peppermint bark often contains milk, soy, and may be processed in facilities that handle nuts. Check labels if you have allergies.
I believe in balance—enjoy these cookies as a treat, savor every bite, and don’t stress about the numbers. Life’s too short for guilt over cookies.
FAQs
Can I use crushed candy canes instead of peppermint bark?
You can, but I don’t recommend it. Crushed candy canes tend to melt into the dough and create sticky, sugary spots. They also don’t hold their shape as well. Peppermint bark has a chocolate base that keeps it intact during baking. If you only have candy canes, crush them finely and toss them in a tablespoon of flour before adding to the dough to help prevent melting.
Why didn’t my cookies crinkle?
This usually happens for one of three reasons: not enough powdered sugar coating, the dough was too warm, or the oven wasn’t hot enough. Make sure you roll the dough balls generously in powdered sugar—you should see a thick, white coating. Also, chill the dough balls for 10 minutes if your kitchen is warm. And check your oven temperature with an oven thermometer—mine runs 25 degrees cooler than it says.
How do I get the cookies to stay soft?
Don’t overbake them. Pull them out when the edges are set but the centers still look slightly underdone. They’ll continue cooking on the hot pan. Also, store them with a slice of bread in the container—the cookies absorb moisture from the bread and stay soft for days. I’ve had cookies last a full week this way.
Can I make the dough ahead of time?
Absolutely. You can refrigerate the dough for up to 3 days before baking. Let it sit at room temperature for 10 minutes to soften slightly before scooping and rolling in powdered sugar. You can also freeze the dough balls (before rolling in sugar) for up to 3 months. Roll them in powdered sugar right before baking—no need to thaw first.
My cookies spread too much. What went wrong?
Too much spreading usually means the butter was too soft or the dough was too warm. Make sure your butter is softened but not melted. If your kitchen is warm, chill the dough balls for 15 minutes before baking. Also, check that your baking powder is fresh—old baking powder loses its leavening power and can cause flat cookies.
Conclusion
These Perfect Peppermint Bark Crinkle Cookies are everything I want in a holiday cookie: easy to make, absolutely delicious, and beautiful enough to impress anyone. They’ve become my go-to for cookie swaps, holiday parties, and quiet December evenings with a cup of tea. The combination of rich chocolate, cool peppermint, and that signature crackled top is just irresistible.
I hope you give these a try and make them your own. Add extra peppermint bark if you’re feeling generous. Swap in dark chocolate if that’s your thing. Drizzle them with white chocolate and go all out. The best recipes are the ones you adapt to fit your taste and your kitchen.
I’d love to hear how yours turn out! Drop a comment below and let me know if you tried any variations, or share a photo of your cookies on Pinterest. Tag me so I can see your beautiful creations. Happy baking, friend—may your kitchen smell like peppermint and chocolate all season long.
Pin This Recipe!

Perfect Peppermint Bark Crinkle Cookies Easy Holiday Recipe

These Perfect Peppermint Bark Crinkle Cookies are easy to make, absolutely delicious, and beautiful enough to impress anyone. The combination of rich chocolate, cool peppermint, and that signature crackled top is irresistible.
- Prep Time: 15 minutes
- Cook Time: 11 minutes
- Total Time: 26 minutes
- Yield: 24 servings 1x
- Category: Dessert
- Cuisine: American
Ingredients
- 1 cup (226g) unsalted butter, softened
- 1 cup (200g) granulated sugar
- 2 large eggs, room temperature
- 1 teaspoon vanilla extract
- 1/2 teaspoon peppermint extract
- 2 cups (250g) all-purpose flour
- 1/2 cup (45g) unsweetened cocoa powder
- 1 teaspoon baking powder
- 1/2 teaspoon salt
- 1 cup (170g) peppermint bark, chopped into small pieces
- 1/2 cup (100g) powdered sugar, for rolling
Instructions
- Preheat your oven to 350°F (175°C). Line two baking sheets with parchment paper.
- In a large mixing bowl, beat the softened butter and granulated sugar together until light and fluffy, about 3-4 minutes.
- Beat in the eggs one at a time, mixing well after each addition. Add the vanilla extract and peppermint extract, then mix until combined.
- In a separate bowl, whisk together the flour, cocoa powder, baking powder, and salt.
- Gradually add the dry ingredients to the wet mixture, mixing on low speed until just combined.
- Using a rubber spatula, gently fold in the chopped peppermint bark pieces. Reserve a few pieces to press onto the tops of the cookies after baking.
- Place the powdered sugar in a small bowl. Using a cookie scoop, portion out rounded tablespoons of dough (about 1.5 tablespoons each). Roll each portion into a ball between your palms.
- Roll each dough ball generously in the powdered sugar, coating every surface.
- Arrange the coated dough balls on the prepared baking sheets, spacing them about 2 inches apart.
- Bake for 10-12 minutes. The cookies should look puffed and cracked, with the edges set but the centers still slightly soft.
- Let the cookies cool on the baking sheet for 5 minutes. Then transfer them to a wire cooling rack. While they’re still warm, gently press a few extra peppermint bark pieces onto the tops if you reserved some.
- Continue with the remaining dough. Let the baking sheets cool completely between batches.
Notes
Don’t skip the peppermint extract. The peppermint bark alone doesn’t give enough mint flavor. Start with 1/2 teaspoon and add more if desired. Chop the bark consistently into pea-sized pieces. Use a cookie scoop for uniform size. Watch the oven closely; start checking at 9 minutes. Let cookies cool completely before storing. Double the batch if possible.
Nutrition
- Serving Size: 1 cookie
- Calories: 185
- Sugar: 16
- Sodium: 95
- Fat: 10
- Saturated Fat: 6
- Carbohydrates: 24
- Fiber: 1
- Protein: 2
Keywords: peppermint bark, crinkle cookies, holiday cookies, chocolate cookies, peppermint cookies, easy cookie recipe


