Love this? Save it for later!
Share the inspiration with your friends
My brother-in-law, Mark, had a strict no-slider policy for game day. For three straight football seasons, he insisted that “real food” didn’t come on tiny buns. He’d grill his steaks, smoke his wings, and look down his nose at anything that required a toothpick. Then I brought a pan of these bacon ranch pull-apart slider bites to a playoff party last January, and I caught him standing by the kitchen island, eating his fourth one in a row. He thought nobody was watching. I didn’t say a word — I just smiled into my drink and let the moment speak for itself. That’s the kind of recipe this is. It doesn’t argue with you. It just sits there, all warm and buttery and cheesy, and lets you prove yourself wrong.
Honestly, I wasn’t even trying to convert anybody that day. I was just tired of eating dry wings and wanted something that felt like a real meal but required zero plates or forks. These sliders solved that problem faster than I expected. The bacon gets crispy in the oven, the ranch seasoning soaks into every crevice of the roll, and the cheese pulls apart in these glorious, stretchy strands that make you look like a professional caterer even if you threw it together in twenty minutes. Maybe you’ve been there — standing in the grocery aisle, staring at Hawaiian rolls, wondering if they’re actually worth the hype. Let me tell you, they are. Especially when you layer them with the good stuff and watch them disappear.
What keeps me coming back to this recipe is how completely unfussy it is. There’s no marinating, no complicated sauce, no technique that requires a culinary degree. You just assemble, bake, and watch people fight over the corner pieces. I’ve made these for Super Bowl parties, birthday brunches, and random Tuesday dinners when I needed something that felt like a celebration. Every single time, the pan comes back empty. That’s not bragging — that’s just bacon ranch science.
Why You’ll Love This Recipe
These bacon ranch pull-apart slider bites have earned a permanent spot in my recipe rotation, and I think they’ll earn one in yours too. Here’s why they stand out from every other slider recipe you’ve seen:
- Quick & Easy: From start to finish, you’re looking at about 25 minutes. That’s less time than it takes to decide what to order for delivery.
- Simple Ingredients: Everything on the ingredient list is available at any regular grocery store. No specialty shops, no weird online orders.
- Perfect for Game Day or Weeknight Dinner: These sliders work for parties, sure, but they’re also fantastic when you need dinner on the table fast and nobody wants to do dishes.
- Crowd-Pleaser: I’ve served these to picky kids, diet-conscious adults, and people who claim they “don’t really like sandwiches.” The pan empties every time.
- Unbelievably Delicious: The combination of salty bacon, creamy ranch, and melted cheese on soft, buttery rolls is pure comfort food magic. You’ll close your eyes after the first bite.
What makes this version different from the rest is the method. Instead of just throwing everything together and hoping for the best, I’ve tested the layering order, the baking time, and the cheese ratio until everything came out perfect. The bacon stays crispy instead of getting soggy. The ranch flavor penetrates the rolls without making them mushy. And the cheese pull? It’s the kind that makes people reach for their phones to take a video.
This recipe is the kind that makes you look like you tried way harder than you actually did. It’s comfort food at its finest — warm, cheesy, and completely satisfying without requiring you to spend all day in the kitchen. Whether you’re hosting a crowd or just feeding your family on a busy night, these sliders deliver every single time.
What Ingredients You Will Need
This recipe uses simple, everyday ingredients to create something that tastes way more complicated than it actually is. Most of these are probably already in your kitchen, which makes this a great last-minute option when you need to feed people fast.
- 12-count package Hawaiian sweet rolls (like King’s Hawaiian) — These are non-negotiable for the right texture and sweetness. The soft, slightly sweet buns balance the salty bacon and savory ranch perfectly. Don’t substitute regular dinner rolls here — the magic is in that subtle sweetness.
- 1 pound bacon (thick-cut preferred) — Thick-cut bacon holds up better during baking and gives you that satisfying crunch in every bite. I’ve tried regular bacon too, and it works fine, but the thick-cut version is noticeably better. Cook it until it’s crispy but not burnt — about 80% of the way done since it will continue cooking in the oven.
- 1½ cups shredded sharp cheddar cheese — Sharp cheddar gives you the most flavor for your money. Pre-shredded cheese works in a pinch, but freshly shredded melts better and doesn’t have those anti-caking additives that can make the texture grainy. If you want to get fancy, mix in some Monterey Jack for extra creaminess.
- ½ cup ranch dressing (plus extra for serving) — Use a good-quality ranch here. I prefer Hidden Valley for the classic flavor, but any brand you like will work. The ranch gets brushed onto the rolls and soaks in during baking, creating that signature tangy, herby flavor.
- 3 tablespoons salted butter, melted — The butter gets mixed with ranch seasoning and brushed over the tops of the rolls. This is what gives them that gorgeous golden-brown crust and that irresistible buttery flavor.
- 1 tablespoon ranch seasoning mix (from a packet) — This goes into the melted butter for an extra layer of ranch flavor. Don’t skip it — it’s what makes the tops of the rolls taste like the best part of the whole dish.
- 2 tablespoons chopped fresh chives or green onions (optional, for garnish) — A little pop of color and freshness at the end makes these look like they came from a fancy catering kitchen. Plus, the mild onion flavor works beautifully with the bacon and ranch.
Substitution Guidance: If you need to make these gluten-free, use gluten-free Hawaiian rolls (they exist! I’ve found them at Whole Foods) and double-check your ranch seasoning packet. For a lower-fat version, turkey bacon and reduced-fat cheddar work okay, but I won’t pretend the texture is the same. If you’re dairy-free, use a dairy-free cheddar-style shred and a vegan ranch dressing — the flavor will be different but still good.
Equipment Needed
You don’t need any fancy equipment to make these bacon ranch pull-apart slider bites, which is part of why I love this recipe so much. Here’s what you’ll need:
- 9×13-inch baking dish — This is the perfect size for a 12-count package of rolls. A glass or ceramic dish works great because it heats evenly and lets you see the browning on the bottom. I use a Pyrex dish and it’s never let me down.
- Large skillet for cooking the bacon — A cast-iron skillet gives you the most even cooking, but any large non-stick or stainless steel pan works fine.
- Paper towels for draining the bacon — This seems obvious, but don’t skip this step. Excess bacon grease will make your sliders greasy instead of perfectly balanced.
- Small bowl for mixing the butter and ranch seasoning
- Pastry brush or spoon for brushing the butter mixture onto the rolls — A silicone pastry brush is my favorite because it doesn’t shed bristles, but a regular spoon works in a pinch.
- Sharp knife for slicing the rolls in half horizontally — A serrated bread knife works best here because it cuts through the soft rolls without squishing them.
- Aluminum foil for covering the dish during the first part of baking — This traps steam and helps the cheese melt evenly without burning the tops.
Budget-Friendly Alternative: If you don’t have a pastry brush, just use the back of a spoon to spread the butter mixture. If you don’t have a 9×13 dish, a large cast-iron skillet works beautifully and gives the edges an extra-crispy texture that I actually prefer sometimes.
Preparation Method
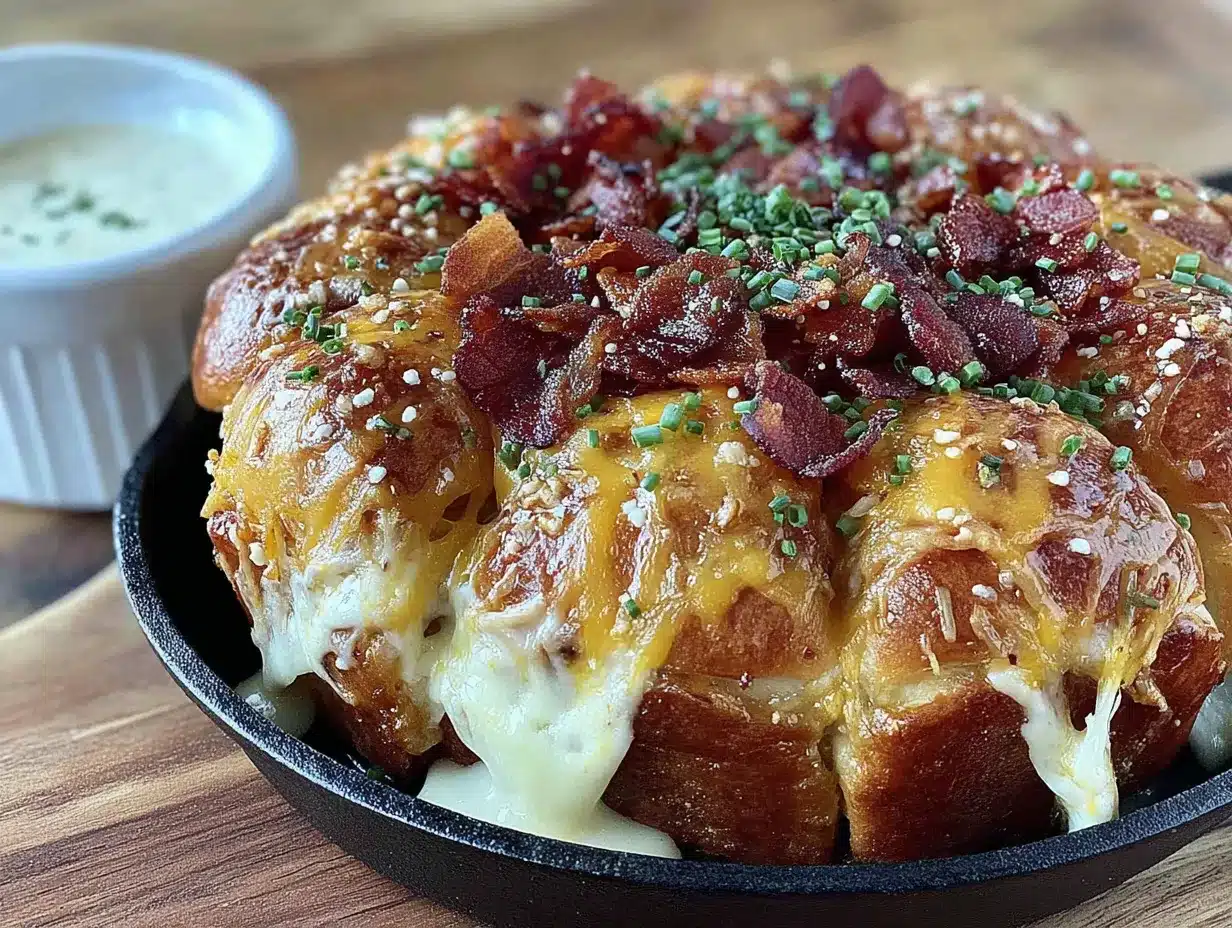
Let me walk you through exactly how to make these bacon ranch pull-apart slider bites. I’ve tested this method multiple times to get the timing and layering just right, so follow along and you’ll get perfect results every time.
-
Preheat your oven to 350°F (175°C). Give it a full 15 minutes to come to temperature. While it’s heating, you can get everything else ready. I like to position the rack in the middle of the oven so the sliders cook evenly from top and bottom.
-
Cook the bacon. Place the bacon strips in a large skillet over medium heat. Cook for 6-8 minutes, flipping once, until the bacon is crispy but not burnt. You want it about 80% done — it will finish crisping up in the oven. Transfer the cooked bacon to a paper towel-lined plate to drain. Once it’s cool enough to handle, crumble or chop it into small pieces. Set aside.
-
Prepare the rolls. Without separating the individual rolls, carefully slice the entire block of Hawaiian rolls in half horizontally. You should end up with one large top half and one large bottom half. Place the bottom half in your 9×13-inch baking dish. This is the trickiest part — use a serrated knife and a gentle sawing motion to keep the rolls together.
-
Layer the bottom half. Sprinkle about half of the crumbled bacon evenly over the bottom layer of rolls. Then sprinkle about half of the shredded cheddar cheese over the bacon. Drizzle about half of the ranch dressing over the cheese — try to distribute it as evenly as possible so every bite gets some ranch flavor.
-
Add the top half. Carefully place the top half of the rolls over the filling, pressing down gently to make everything sit flat. You want the rolls to fit snugly in the dish so they hold together when you pull them apart later.
-
Make the butter topping. In a small bowl, combine the melted butter and ranch seasoning mix. Stir until the seasoning is fully dissolved. Using a pastry brush or the back of a spoon, brush this mixture generously over the tops of the rolls. Make sure you get into all the cracks and crevices — that’s where the best flavor lives.
-
Add the remaining toppings. Sprinkle the remaining bacon and remaining cheddar cheese over the top of the buttered rolls. This double-layer approach gives you crispy bacon and melted cheese on both the inside and the outside, which is the secret to why these sliders are so good.
-
Bake covered. Cover the dish loosely with aluminum foil and bake for 10 minutes. The foil traps steam and helps the cheese melt evenly without burning the tops. Your kitchen is going to smell incredible at this point — that’s the bacon and ranch doing their thing.
-
Bake uncovered. Remove the foil and bake for another 5-7 minutes, or until the cheese is fully melted and bubbly and the tops of the rolls are golden brown. Keep an eye on them during this last stage — ovens vary, and you don’t want the edges to burn.
-
Rest and serve. Remove the dish from the oven and let it rest for 2-3 minutes. This resting period is crucial — it lets the cheese set slightly so the sliders hold their shape when you pull them apart. Sprinkle with chopped chives or green onions if you’re using them. Serve warm with extra ranch dressing on the side for dipping.
Cooking Tips & Techniques
After making these bacon ranch pull-apart slider bites more times than I care to count, I’ve picked up a few tricks that make the difference between good sliders and unforgettable ones. Let me share what I’ve learned.
Don’t overcook the bacon beforehand. This was my biggest mistake early on. I’d cook the bacon until it was fully crispy, then bake it again in the oven, and end up with bacon that was borderline burnt. Now I pull the bacon when it’s about 80% done — still slightly chewy in the center — and let the oven finish the job. The texture comes out perfect every time.
Use a serrated knife for slicing the rolls. I learned this the hard way after squishing an entire package of Hawaiian rolls with a dull chef’s knife. The soft, squishy texture of these rolls makes them prone to flattening. A serrated bread knife with a gentle sawing motion keeps the rolls intact and gives you a clean cut.
Watch the oven like a hawk during the last few minutes. Every oven runs a little differently. My old apartment oven would brown these in exactly 5 minutes uncovered. My current oven takes closer to 7. Start checking at the 4-minute mark after removing the foil, and don’t walk away. You’re looking for golden-brown tops and bubbly cheese — not burnt edges.
Let the sliders rest before serving. I know it’s tempting to dig in immediately, but that 2-3 minute rest makes a huge difference. The cheese sets just enough that the sliders hold their shape when you pull them apart. If you skip this step, you’ll end up with a delicious but messy pile of ingredients instead of neat little sandwiches.
Double the recipe for a crowd. These sliders disappear fast. If you’re serving more than 4-6 people, I strongly recommend making two pans. They reheat beautifully, so leftovers (if you have any) are a bonus.
Variations & Adaptations
One of the best things about this recipe is how adaptable it is. I’ve experimented with several variations, and here are my favorites:
Buffalo Chicken Version: Swap the bacon for shredded rotisserie chicken tossed in buffalo sauce. Use blue cheese dressing instead of ranch, and add crumbled blue cheese on top. This version is fantastic for game day and gives you that classic buffalo chicken flavor in slider form.
Vegetarian Option: Replace the bacon with sautéed mushrooms and caramelized onions. The umami from the mushrooms gives you that savory depth that bacon usually provides, and the sweetness of the caramelized onions plays perfectly with the Hawaiian rolls. Use a vegetarian-friendly ranch dressing.
Spicy Southwest Twist: Add a layer of sliced jalapeños, use pepper jack cheese instead of cheddar, and mix a teaspoon of chipotle powder into the butter topping. The heat from the jalapeños and chipotle balances the sweetness of the rolls beautifully. I made this version for a taco night once and it was a huge hit.
Breakfast Sliders: This is my personal favorite variation. Scramble 6 eggs, cook the bacon as directed, and add a layer of American cheese. Everything else stays the same. These are perfect for brunch or breakfast-for-dinner nights. I’ve served them at Easter brunch and they disappeared faster than the ham.
Gluten-Free Adaptation: Use gluten-free Hawaiian rolls (they exist and they’re surprisingly good) and double-check that your ranch seasoning is certified gluten-free. Everything else in the recipe is naturally gluten-free, so this is an easy swap.
Serving & Storage Suggestions
These bacon ranch pull-apart slider bites are best served warm, straight from the oven, with the cheese still stretchy and the tops golden brown. I like to arrange them on a large platter with a small bowl of extra ranch dressing in the center for dipping. They’re perfect for parties because people can just grab one and go — no plates or forks required.
What to serve with them: These sliders are substantial enough to be a meal on their own, but they also pair beautifully with a simple side salad, coleslaw, or a bowl of tomato soup. For game day spreads, I serve them alongside wings, nachos, and veggie platters. They’re also fantastic with a cold beer or a crisp white wine.
Storage instructions: Leftover sliders keep well in an airtight container in the refrigerator for up to 3 days. The texture changes slightly as they sit — the rolls absorb some of the moisture from the ranch and cheese — but they’re still delicious. I actually think they’re pretty good cold, straight from the fridge, as a midnight snack.
Reheating tips: The best way to reheat these is in a 350°F oven for 5-7 minutes, covered with foil to prevent the tops from burning. You can also use an air fryer at 350°F for 3-4 minutes, which actually crisps up the tops nicely. The microwave works in a pinch, but the rolls will be softer and the bacon won’t be as crispy.
Freezer instructions: You can freeze these sliders either before or after baking. To freeze before baking, assemble everything but don’t bake. Wrap the dish tightly in plastic wrap and then foil, and freeze for up to 2 months. Bake from frozen, adding about 10 minutes to the cooking time. To freeze after baking, let the sliders cool completely, then wrap and freeze. Reheat in a 350°F oven until warmed through.
Nutritional Information & Benefits
Let’s be honest — these bacon ranch pull-apart slider bites are indulgence food. They’re not pretending to be health food, and that’s okay. Sometimes you need something warm, cheesy, and satisfying, and this recipe delivers exactly that.
Per slider (based on 12 sliders): approximately 280-320 calories, 18g fat, 22g carbohydrates, 12g protein. These numbers will vary based on the specific brands you use and whether you make any substitutions.
That said, there are a few nutritional bright spots. The bacon provides protein and B vitamins. The cheese offers calcium and protein. And the Hawaiian rolls give you quick energy for whatever you’re doing — whether that’s watching football or chasing kids around the house.
Dietary considerations: This recipe contains gluten (from the rolls), dairy (from the cheese and butter), and pork (from the bacon). It’s not suitable for vegetarian, vegan, or dairy-free diets without significant modifications. For a lower-carb option, you could serve the filling in lettuce wraps or over a bed of greens, but honestly, that’s a different recipe entirely.
My personal perspective: I believe in balance. I eat salads and grilled chicken most days, but when I’m making these sliders for a party or a special occasion, I enjoy them fully and don’t feel guilty about it. Food is about more than just nutrients — it’s about connection, celebration, and joy.
Conclusion
These bacon ranch pull-apart slider bites have become my go-to recipe for almost every occasion. They’re quick enough for a weeknight dinner, impressive enough for a party, and simple enough that anyone can make them. The combination of crispy bacon, creamy ranch, melted cheese, and soft buttery rolls is one of those flavor combinations that just works — no complicated techniques or fancy ingredients required.
What I love most about this recipe is how forgiving it is. You can customize it a hundred different ways and it still turns out great. Add more cheese. Use different seasonings. Swap the fillings. The basic formula is solid, and it leaves plenty of room for your own creative touches.
I’d love to hear how these turn out for you. Did you try one of the variations? Come up with your own twist? Drop a comment below and let me know. And if you make these for your next gathering, take a picture and tag me — I always love seeing these sliders in action. Now go preheat that oven and get cooking. Your future self (and everyone you feed) will thank you.
Frequently Asked Questions
Can I make these ahead of time?
Yes! You can assemble the sliders completely, cover them, and refrigerate for up to 24 hours before baking. Add about 5 minutes to the covered baking time since you’re starting from cold. This makes them perfect for party prep.
Can I use turkey bacon instead of regular bacon?
Absolutely. Turkey bacon works fine, though it won’t get quite as crispy. Cook it a little longer in the skillet before adding it to the sliders to compensate. The flavor will be slightly different but still delicious.
What if I can’t find Hawaiian rolls?
If you can’t find Hawaiian rolls, look for any soft, slightly sweet dinner rolls. Parker House rolls or brioche rolls are good alternatives. Avoid crusty rolls or dinner rolls that are too dense — they won’t give you the same soft, pull-apart texture.
How do I prevent the bottoms from getting soggy?
The key is not overdoing the ranch dressing on the bottom layer. Use the amount specified in the recipe and spread it evenly. Also, make sure your bacon is well-drained before adding it. If you’re making these ahead, add a little extra time uncovered at the end to help crisp up the bottoms.
Can I use homemade ranch dressing instead of bottled?
Yes, and it’s actually fantastic. Mix ½ cup mayonnaise with ½ cup buttermilk or sour cream, then add 1 tablespoon of ranch seasoning mix. Homemade ranch has a fresher, tangier flavor that works beautifully in this recipe. Just make sure it’s thick enough to stay on the rolls without making them soggy.
Pin This Recipe!
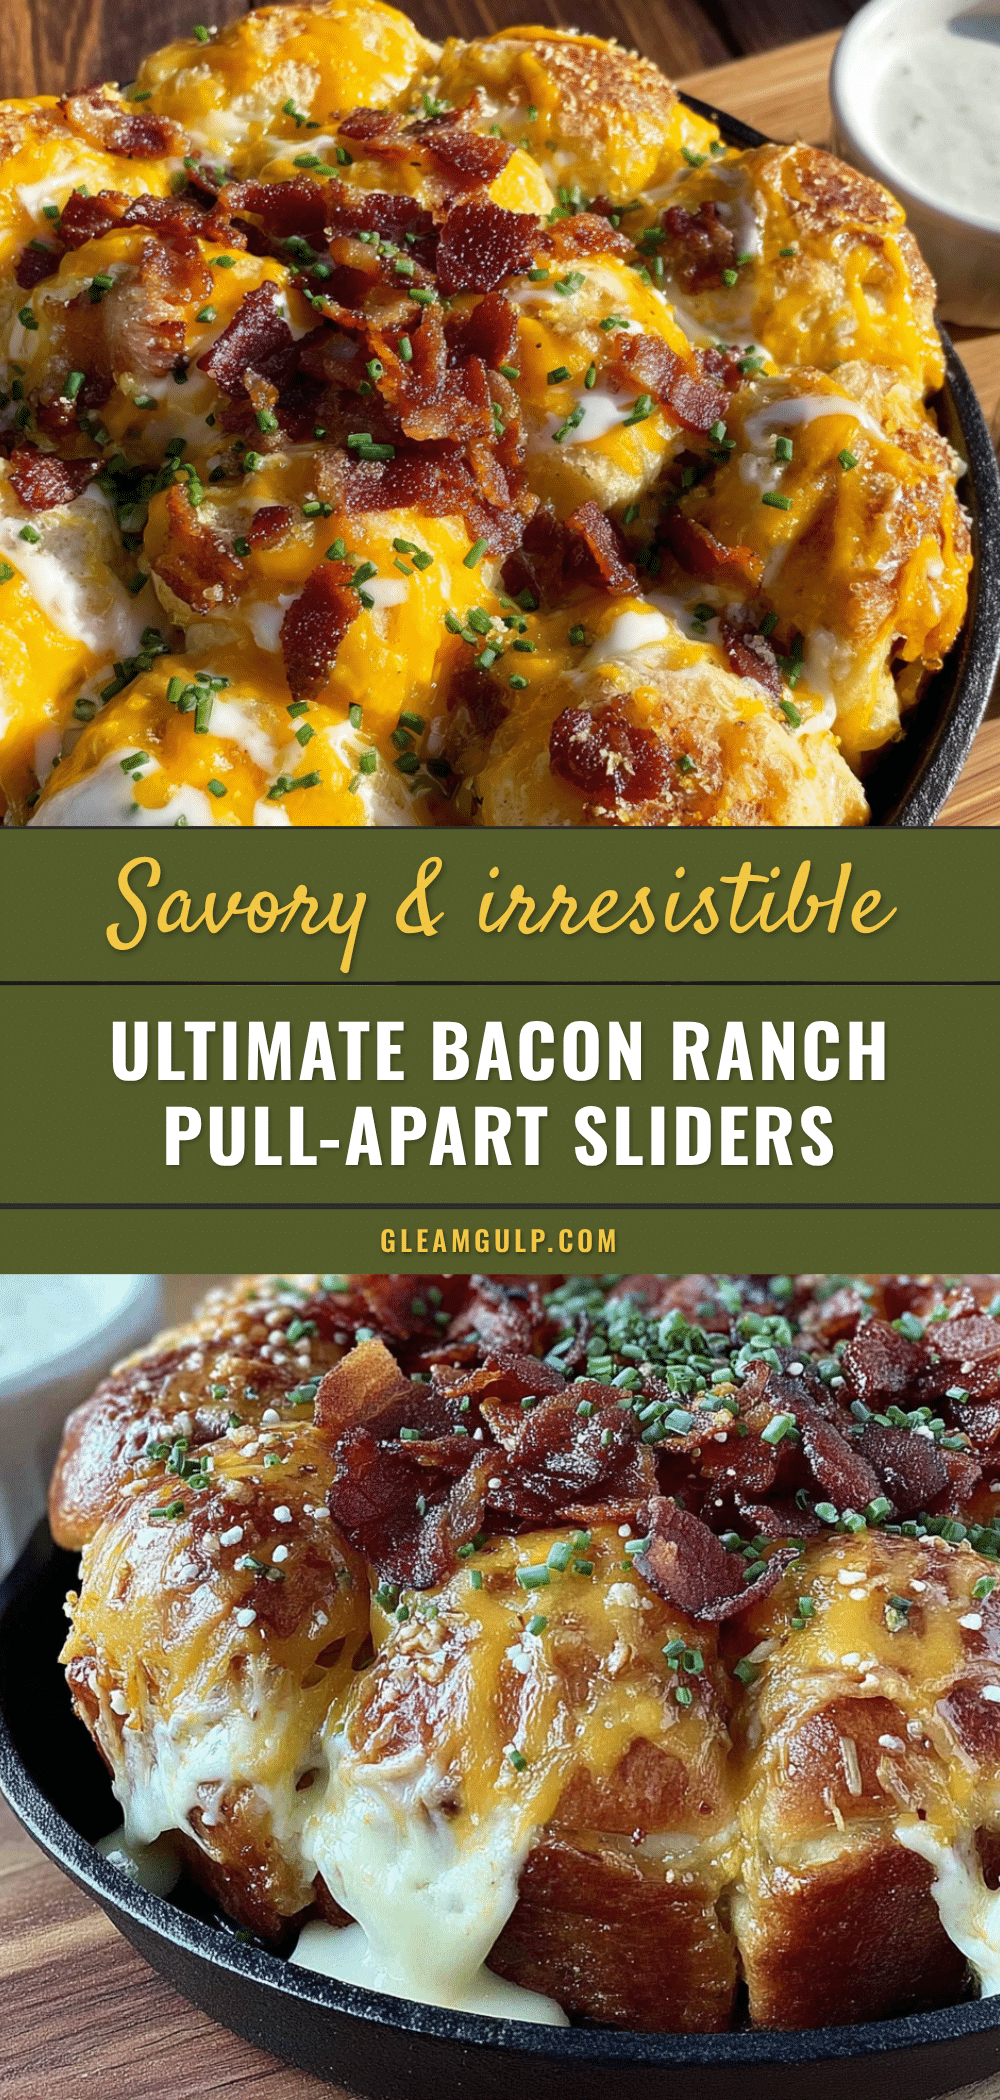
The Best Bacon Ranch Pull-Apart Slider Bites: Easy Recipe

These bacon ranch pull-apart slider bites are quick, easy, and perfect for game day or weeknight dinners. With crispy bacon, creamy ranch, and melted cheese on soft Hawaiian rolls, they’re an irresistible crowd-pleaser that comes together in about 25 minutes.
- Prep Time: 10 minutes
- Cook Time: 15 minutes
- Total Time: 25 minutes
- Yield: 12 sliders 1x
- Category: Appetizer
- Cuisine: American
Ingredients
- 12-count package Hawaiian sweet rolls (like King’s Hawaiian)
- 1 pound bacon (thick-cut preferred)
- 1½ cups shredded sharp cheddar cheese
- ½ cup ranch dressing (plus extra for serving)
- 3 tablespoons salted butter, melted
- 1 tablespoon ranch seasoning mix (from a packet)
- 2 tablespoons chopped fresh chives or green onions (optional, for garnish)
Instructions
- Preheat your oven to 350°F (175°C). Position the rack in the middle of the oven.
- Cook the bacon: Place bacon strips in a large skillet over medium heat. Cook for 6-8 minutes, flipping once, until crispy but not burnt (about 80% done). Transfer to a paper towel-lined plate to drain. Once cool, crumble or chop into small pieces. Set aside.
- Prepare the rolls: Without separating individual rolls, carefully slice the entire block of Hawaiian rolls in half horizontally. Place the bottom half in a 9×13-inch baking dish.
- Layer the bottom half: Sprinkle about half of the crumbled bacon evenly over the bottom layer of rolls. Sprinkle about half of the shredded cheddar cheese over the bacon. Drizzle about half of the ranch dressing over the cheese.
- Add the top half: Carefully place the top half of the rolls over the filling, pressing down gently.
- Make the butter topping: In a small bowl, combine melted butter and ranch seasoning mix. Stir until dissolved. Brush this mixture generously over the tops of the rolls, getting into all cracks and crevices.
- Add remaining toppings: Sprinkle remaining bacon and remaining cheddar cheese over the top of the buttered rolls.
- Bake covered: Cover the dish loosely with aluminum foil and bake for 10 minutes.
- Bake uncovered: Remove foil and bake for another 5-7 minutes, until cheese is melted and bubbly and tops are golden brown.
- Rest and serve: Remove from oven and let rest for 2-3 minutes. Sprinkle with chopped chives or green onions if using. Serve warm with extra ranch dressing for dipping.
Notes
Don’t overcook the bacon beforehand; cook until 80% done as it will finish in the oven. Use a serrated knife for slicing rolls to avoid squishing. Watch the oven closely during the last few minutes to prevent burning. Let sliders rest 2-3 minutes before serving so cheese sets. Double the recipe for a crowd. For make-ahead, assemble and refrigerate up to 24 hours before baking, adding 5 minutes to covered baking time.
Nutrition
- Serving Size: 1 slider
- Calories: 300
- Sugar: 8
- Sodium: 650
- Fat: 18
- Saturated Fat: 8
- Carbohydrates: 22
- Fiber: 1
- Protein: 12
Keywords: bacon ranch sliders, pull-apart sliders, Hawaiian roll sliders, game day appetizer, easy slider recipe, bacon cheese sliders


