Love this? Save it for later!
Share the inspiration with your friends
My neighbor Kelly wasn’t trying to impress anyone. I’d stopped by to return her hedge clippers—the ones I’d borrowed three weeks ago and felt increasingly guilty about—and the smell hit me before I even got to her screen door. Chocolate. Toast. That campfire thing you can’t quite name but know immediately. She was standing at her kitchen counter, layering something in a glass dish, wearing the same faded t-shirt she’d worn the last four times I saw her.
“Oh, that?” she said when I asked. “It’s nothing. Just something the kids inhale.” She shrugged like she’d thrown together tap water and crackers. But let me tell you—that “nothing” was these Easy No-Bake S’mores Icebox Bars for a Crowd, and I stood there watching her work, completely hypnotized. She wasn’t measuring. She wasn’t stressing. She was just… layering. Crushing graham crackers with her bare hands like it was the most natural thing in the world. And honestly? It kind of changed how I think about dessert.
Maybe you’ve been there—standing in someone else’s kitchen, realizing the best recipes don’t come from blogs or cookbooks. They come from people who don’t even know they’re making something special. That’s what these no-bake s’mores bars are. They’re the dessert you make when you need to feed twelve people and you have fifteen minutes and zero patience for turning on the oven. They’re the thing you bring to the potluck where everyone asks for the recipe and you get to shrug and say, “Oh, it’s nothing.”
I’ve made these Easy No-Bake S’mores Icebox Bars at least twenty times since that afternoon at Kelly’s house. They’ve saved me at birthday parties, backyard barbecues, and one particularly chaotic Tuesday when my sister showed up with three unexpected kids. And every single time, they disappear before anything else on the table. That’s not bragging—that’s just what happens when you combine chocolate, marshmallow, and graham cracker in a way that feels effortless but tastes like you tried.
Why You’ll Love This Recipe
Let me be honest with you. I’ve tested a lot of no-bake desserts in my time, and most of them fall into one of two categories: either they taste like compromise, or they require a dozen steps that defeat the whole purpose of not using the oven. These Easy No-Bake S’mores Icebox Bars for a Crowd are neither. They’re the real deal.
- No oven required. None. Zero. Not even for toasting. You don’t even have to turn it on. On a hot summer day, that alone is worth the price of admission.
- Perfect for a crowd. This recipe makes a full 9×13 pan of bars—enough for 12 to 16 generous servings. You can double it without breaking a sweat.
- Ready in 15 minutes. Active prep time is laughably short. The hardest part is waiting for them to chill.
- Simple ingredients. You probably already have graham crackers, butter, chocolate chips, and marshmallows in your pantry. If not, they’re all cheap and easy to find.
- Kid-approved and adult-adored. I’ve watched grown adults close their eyes while eating these. There’s something about that nostalgic s’mores flavor that hits everyone right in the childhood.
- Make-ahead friendly. You can prep these a day or two in advance. They actually get better as they sit.
- Totally customizable. Swap the chocolate, add peanut butter, use gluten-free graham crackers—the base recipe is forgiving and flexible.
What makes these different from every other s’mores bar recipe out there? Two things. First, the crust isn’t just crushed graham crackers and butter—it’s got a secret pinch of salt that makes the chocolate sing. Second, the filling uses a technique I picked up from Kelly herself: you melt the chocolate with a tiny bit of cream to create something closer to a fudge layer than a simple chocolate spread. It’s richer. It’s smoother. And it doesn’t get weirdly hard in the fridge like plain melted chocolate does.
These bars are the kind of dessert that makes you look like a hero without actually doing much work. They’re comfort food at its finest—faster, easier, and somehow more satisfying than the original campfire version.
What Ingredients You Will Need
This recipe uses simple, everyday ingredients to create something that tastes far more complicated than it is. The magic is in the layering and the proportions, not in obscure pantry items.
For the Graham Cracker Crust
- 2 ½ cups graham cracker crumbs (about 18 full sheets, crushed fine)—You can crush them in a food processor or put them in a zip-top bag and go to town with a rolling pin. I prefer the bag method because it’s oddly satisfying.
- ½ cup unsalted butter, melted—Salted butter works too, just skip the added salt in the recipe. I use Kerrygold when I’m feeling fancy, but any good butter will do.
- ¼ cup granulated sugar—Just enough to add a little sweetness and help the crust hold together.
- ¼ teaspoon salt—This is the secret. Don’t skip it. It balances the sweetness of the chocolate and marshmallow.
For the Chocolate Fudge Layer
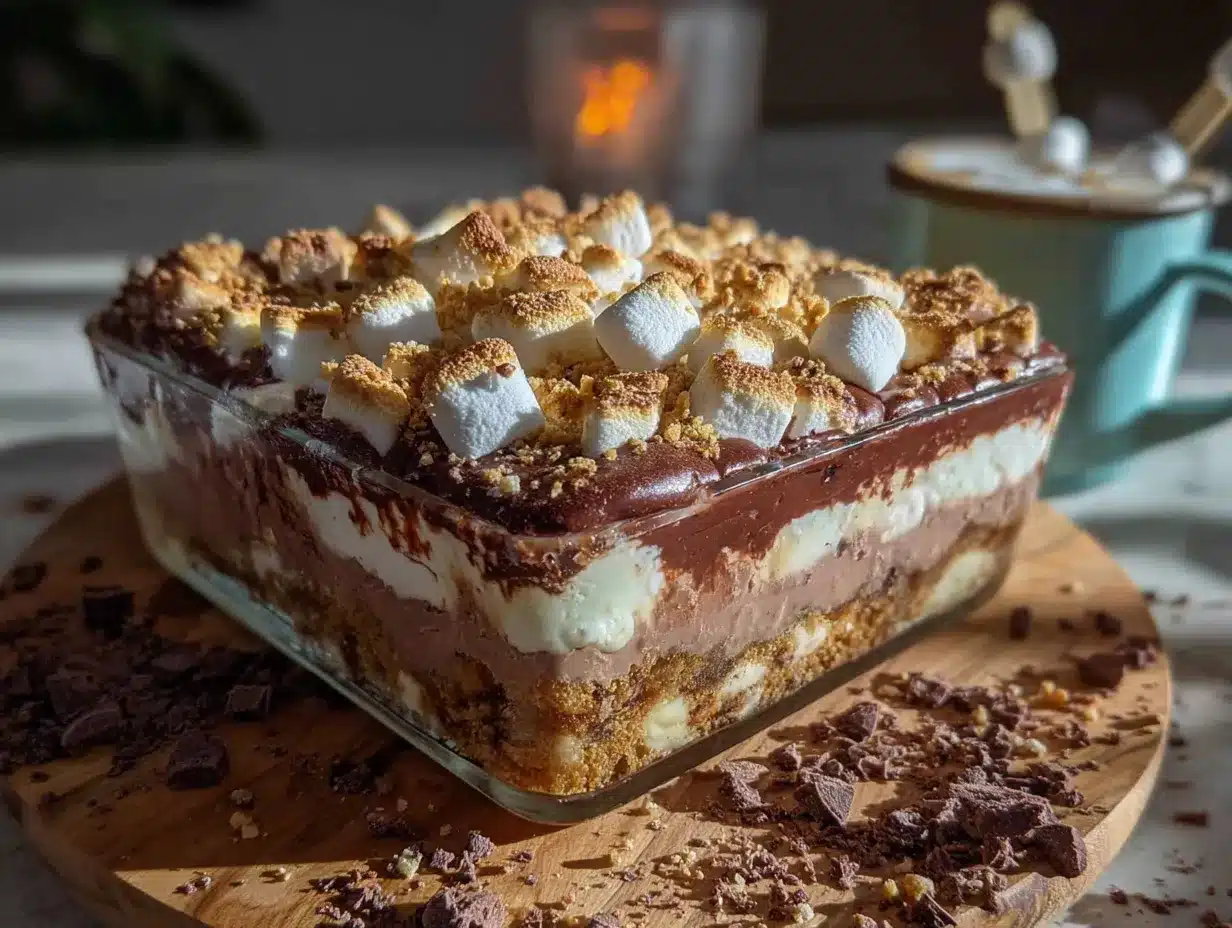
- 2 cups semi-sweet chocolate chips—I recommend Ghirardelli or Guittard for the smoothest melt. Store brands can be a little waxy.
- 1 cup heavy cream—This creates a ganache-like texture that stays soft even when chilled. You can substitute full-fat coconut milk for a dairy-free version.
- 1 teaspoon vanilla extract—Pure vanilla, not imitation. It makes a difference.
- Pinch of salt—Again, don’t skip it.
For the Marshmallow Layer
- 4 cups mini marshmallows—Regular marshmallows cut into quarters work too, but mini marshmallows distribute more evenly and look prettier.
- 1 tablespoon butter—For greasing your hands or a spatula so the marshmallows don’t stick to everything.
For the Topping
- ½ cup graham cracker crumbs—Reserve these from your initial crushing. They add texture and make the bars look finished.
- ¼ cup chocolate chips—For scattering on top. Optional, but highly recommended for visual appeal.
Ingredient tips from experience: If you’re using gluten-free graham crackers, check the texture—some brands are more crumbly than others, so you might need a little extra butter to get the crust to hold. For a dairy-free version, use vegan butter and coconut cream in place of the heavy cream. The coconut flavor is subtle and actually pairs beautifully with the chocolate and marshmallow.
Equipment Needed
You don’t need much for these Easy No-Bake S’mores Icebox Bars for a Crowd. That’s kind of the point.
- 9×13-inch baking dish—Glass or metal both work. Glass lets you see the layers, which is nice for serving.
- Parchment paper—Line the dish with two overlapping sheets, leaving some overhang on the sides. This makes lifting the bars out a dream. Trust me on this one.
- Mixing bowls—You’ll need a medium bowl for the crust and a heat-safe bowl for the chocolate.
- Rolling pin or food processor—For crushing graham crackers. A zip-top bag and your fists work too. I’ve done it both ways.
- Saucepan or microwave—For melting the chocolate and cream. A double boiler is ideal, but the microwave works fine if you’re careful.
- Spatula—A silicone spatula is best for spreading the chocolate layer without scratching your dish.
- Measuring cups and spoons—Standard kitchen stuff.
- Refrigerator—The most important piece of equipment. You need at least 4 hours of chill time, preferably overnight.
Budget-friendly tip: If you don’t have a 9×13 dish, an 8×8 pan works for a smaller batch—just halve the ingredients. A disposable aluminum pan from the grocery store is also perfectly fine for bringing these to a potluck.
Preparation Method
Alright, let’s make these bars. I’ve written this out step by step so you don’t miss anything. The whole active process takes about 15 minutes, but you’ll need patience for the chilling part.
- Prep your pan. Line a 9×13-inch baking dish with parchment paper, leaving about 2 inches of overhang on the long sides. This is your lifeline later—the parchment lets you lift the entire block of bars out in one piece for clean slicing. Lightly grease the parchment with butter or cooking spray.
- Make the crust. In a medium bowl, combine 2 ½ cups graham cracker crumbs, ¼ cup granulated sugar, and ¼ teaspoon salt. Pour in ½ cup melted butter and stir with a fork until every crumb is moistened. The mixture should look like wet sand and hold together when you squeeze it in your fist. If it’s too dry, add another tablespoon of melted butter.
- Press the crust. Transfer the crumb mixture to your prepared pan. Use the bottom of a measuring cup or a flat glass to press it down firmly and evenly. Don’t just pat it—really press. A tight, compact crust is the difference between bars that hold together and bars that fall apart. Pop the pan in the fridge while you make the chocolate layer.
- Make the chocolate fudge layer. Place 2 cups semi-sweet chocolate chips in a heat-safe bowl. In a small saucepan, heat 1 cup heavy cream over medium heat until it’s just simmering—you’ll see small bubbles around the edges, but don’t let it boil. Pour the hot cream over the chocolate chips. Let it sit for 2 minutes without stirring. Then add 1 teaspoon vanilla extract and a pinch of salt, and whisk gently until the chocolate is completely melted and the mixture is smooth and glossy. If you’re using the microwave, heat the cream for 45 seconds, pour it over the chips, and proceed the same way.
- Pour the chocolate layer. Take the crust out of the fridge. Pour the chocolate mixture over the crust and spread it evenly with a spatula. Work quickly—the chocolate will start to set as it cools. Tilt the pan gently to help it reach the corners. Place the pan back in the fridge for 15 minutes to let the chocolate firm up slightly. You want it set enough that the marshmallows won’t sink in, but still tacky enough that they’ll stick.
- Add the marshmallow layer. After 15 minutes, remove the pan from the fridge. Scatter 4 cups mini marshmallows evenly over the chocolate layer. Lightly grease your hands or a spatula with the remaining tablespoon of butter, and gently press the marshmallows into the chocolate so they adhere. Don’t squish them flat—you want those little pillows to stay pillowy. If you’re using regular marshmallows cut into pieces, arrange them in a single layer.
- Add the topping. Sprinkle the reserved ½ cup graham cracker crumbs over the marshmallows. Scatter the remaining ¼ cup chocolate chips on top. This gives the bars a finished look and adds a little crunch.
- Chill. Cover the pan with plastic wrap or aluminum foil and refrigerate for at least 4 hours. Overnight is better. I know it’s hard to wait, but the bars need this time to set properly. The chocolate layer firms up, the marshmallows soften slightly, and everything melds together into one cohesive bar that slices cleanly.
- Slice and serve. When you’re ready to serve, lift the bars out of the pan using the parchment overhang. Place the block on a cutting board. Use a sharp chef’s knife to cut into squares—I usually go for 12 big bars or 16 smaller ones. Wipe the knife clean between cuts for the neatest slices. Serve cold or at room temperature.
Visual cue: When the chocolate layer is properly set, it should look matte on top and feel firm but not hard when you press it gently with your finger. If it’s still shiny and liquidy, give it more time in the fridge before adding the marshmallows.
Cooking Tips & Techniques
I’ve made these Easy No-Bake S’mores Icebox Bars for a Crowd enough times to know where things can go wrong. Here’s what I’ve learned—sometimes the hard way.
Don’t rush the crust. The first time I made these, I was in a hurry and barely pressed the crust down. The bars fell apart when I tried to cut them. You want that crust to be compact and solid. Use the bottom of a glass or a measuring cup and really lean into it. Think of it like packing a snowball—the tighter you press, the better it holds.
Watch your chocolate temperature. If you overheat the cream or the chocolate, the ganache can seize up and turn grainy. That’s why I recommend letting the hot cream sit on the chocolate chips for a couple of minutes before stirring. Gentle heat is your friend here. If your ganache does seize, you can sometimes save it by whisking in a tablespoon of warm cream at a time until it smooths out.
Patience with the chill time. I get it—you want to eat these now. But 4 hours is the minimum for clean slices. If you try to cut them sooner, the chocolate layer will smear and the marshmallows will slide around. Overnight chilling gives you perfect, photo-worthy bars every time.
Keep your knife clean. For the prettiest presentation, run your knife under hot water and dry it between each cut. The chocolate layer can get sticky, and a clean knife means clean edges.
Room temperature vs. cold. These bars are delicious straight from the fridge, but they’re also amazing after sitting at room temperature for 10-15 minutes. The chocolate softens slightly and the marshmallows get a little chewier. Try both and see which you prefer.
My biggest failure: I once tried to speed things up by putting the pan in the freezer instead of the fridge. Big mistake. The chocolate layer got too hard and the marshmallows turned into weird, icy puffs. The texture was all wrong. Stick with the refrigerator—it’s not that long to wait.
Variations & Adaptations
One of the best things about these Easy No-Bake S’mores Icebox Bars for a Crowd is how easy they are to customize. Here are a few variations I’ve tried and loved.
Peanut Butter S’mores Bars
Melt ½ cup creamy peanut butter into the chocolate ganache along with the cream. The peanut butter adds a savory richness that pairs beautifully with the marshmallow. Use peanut butter chips instead of chocolate chips for the topping if you want to double down on the flavor.
Dark Chocolate & Sea Salt
Swap the semi-sweet chocolate chips for dark chocolate (60-70% cacao) and sprinkle flaky sea salt over the top before chilling. The salt cuts through the sweetness and makes these taste dangerously sophisticated. I brought these to a dinner party once and people thought I’d spent hours on them.
Gluten-Free Version
Use certified gluten-free graham crackers. Most major brands now make a gluten-free option that tastes nearly identical. Everything else in the recipe is naturally gluten-free, so this is an easy swap.
Vegan S’mores Bars
Use vegan butter, dairy-free chocolate chips, and full-fat coconut cream in place of the heavy cream. Most marshmallows are not vegan (they contain gelatin), but there are several vegan marshmallow brands available—Dandies is my favorite. The texture is slightly different but still delicious.
White Chocolate Raspberry
Swap the semi-sweet chocolate for white chocolate chips. After spreading the white chocolate layer, dot the surface with ½ cup raspberry jam and swirl it in with a knife before adding the marshmallows. The tart raspberry cuts the sweetness of the white chocolate beautifully.
Smoked S’mores Bars
If you have a kitchen torch, toast the marshmallows lightly after assembling the bars but before adding the graham cracker topping. Just a few seconds of flame gives you that authentic campfire flavor without actually building a fire. I did this for a backyard party and everyone lost their minds.
Serving & Storage Suggestions
These bars are wonderfully versatile when it comes to serving. Here’s how I handle them.
Serving temperature: I prefer these bars cold, straight from the fridge. The chocolate layer is firm and the marshmallows are chewy. But my husband likes them at room temperature, where everything softens up a bit. Both are valid. If you’re serving a crowd, I’d recommend letting them sit at room temperature for about 10 minutes before slicing—it makes cutting easier and the texture is more approachable for most people.
Presentation ideas: Arrange the bars on a platter and dust them with a little cocoa powder or powdered sugar for a finished look. A few fresh berries on the side add color and a tart contrast. For a summer barbecue, serve them alongside fresh watermelon slices or a scoop of vanilla ice cream.
What goes well with these bars: A cold glass of milk is the classic pairing. For adults, these are fantastic with coffee or a dark stout beer. The bitterness of the coffee or beer balances the sweetness of the bars perfectly.
Storage: Store the bars in an airtight container in the refrigerator for up to 5 days. Layer them between sheets of parchment paper so they don’t stick together. I’ve never had them last longer than 3 days in my house, but they keep well for a full week.
Freezing instructions: These bars freeze beautifully. Cut them into squares, place them on a baking sheet in a single layer, and freeze until solid (about 2 hours). Then transfer the frozen bars to a freezer-safe bag or container, separating layers with parchment. They’ll keep for up to 3 months. Thaw in the refrigerator overnight or at room temperature for about 30 minutes before serving.
How flavors develop: Honestly, these bars taste even better on day two. The flavors meld together, the marshmallows soften into the chocolate, and the crust absorbs a little moisture from the filling, making everything more cohesive. So if you can make them a day ahead, do it.
Nutritional Information & Benefits
Let’s be real—these are a treat, not a health food. But here’s the estimated nutritional breakdown for one bar (based on 12 servings):
- Calories: Approximately 380-420
- Total Fat: 22g
- Saturated Fat: 13g
- Carbohydrates: 48g
- Sugar: 32g
- Protein: 4g
- Fiber: 2g
- Sodium: 180mg
Health highlights: Dark chocolate contains antioxidants called flavonoids, which are linked to heart health. The graham crackers provide a small amount of whole grains (if you use whole wheat graham crackers). And the marshmallows… well, they make people happy, and that counts for something.
Dietary considerations: This recipe contains dairy and gluten. For dairy-free, use the substitutions mentioned in the variations section. For gluten-free, use certified gluten-free graham crackers. The recipe is egg-free and nut-free as written (though check your chocolate chips for potential cross-contamination if allergies are a concern).
My take: I believe in balance. These bars are for celebrations, gatherings, and the occasional Tuesday when you need a little joy. They’re not an everyday snack, and that’s okay. When you do make them, enjoy every single bite without guilt.
Conclusion
These Easy No-Bake S’mores Icebox Bars for a Crowd have become my go-to dessert for pretty much every occasion that calls for something sweet. They’re the recipe I bring to potlucks, the one I make for last-minute guests, and the one I teach my kids because it’s almost impossible to mess up.
What I love most about them—beyond the obvious chocolate-marshmallow-graham cracker perfection—is how they make me feel. Every time I make them, I think of Kelly standing in her kitchen in that faded t-shirt, making something extraordinary look like the easiest thing in the world. And now I get to be that person for other people. You can be that person too.
So here’s what I want you to do: make these bars. Take them somewhere. Watch people’s faces when they take that first bite. And when someone asks for the recipe (they will), you get to shrug and say, “Oh, it’s nothing.” But we’ll both know the truth.
Have you made these? I’d love to hear how they turned out. Drop a comment below and tell me about your variations, your serving ideas, or just how fast they disappeared. And if you loved them, share this recipe with a friend who needs a little dessert magic in their life.
Frequently Asked Questions
Can I use regular marshmallows instead of mini marshmallows?
Yes, absolutely. Cut each regular marshmallow into quarters with kitchen scissors or a sharp knife. It takes a few extra minutes, but the texture is nearly identical. Mini marshmallows are just more convenient and distribute more evenly.
Why did my chocolate layer turn out grainy?
This usually happens when the cream is too hot or the chocolate is overheated. Always let the hot cream sit on the chocolate chips for 2 minutes before stirring. If your ganache does get grainy, try whisking in a tablespoon of warm cream at a time until it smooths out.
Can I make these without a 9×13 pan?
Sure. An 8×8 pan works for a half batch—just halve all the ingredients. You can also use a 9×9 pan for slightly thicker bars. A disposable aluminum pan is perfect for taking these to a gathering.
How far in advance can I make these bars?
You can make them up to 3 days ahead and keep them in the refrigerator. They actually taste better after a day because the flavors have time to meld. You can also freeze them for up to 3 months.
Can I toast the marshmallows on top?
Definitely. If you have a kitchen torch, give the top of the assembled bars a quick toast before adding the graham cracker topping. You can also broil them for 30-60 seconds, but watch carefully—marshmallows burn fast under the broiler.
Pin This Recipe!
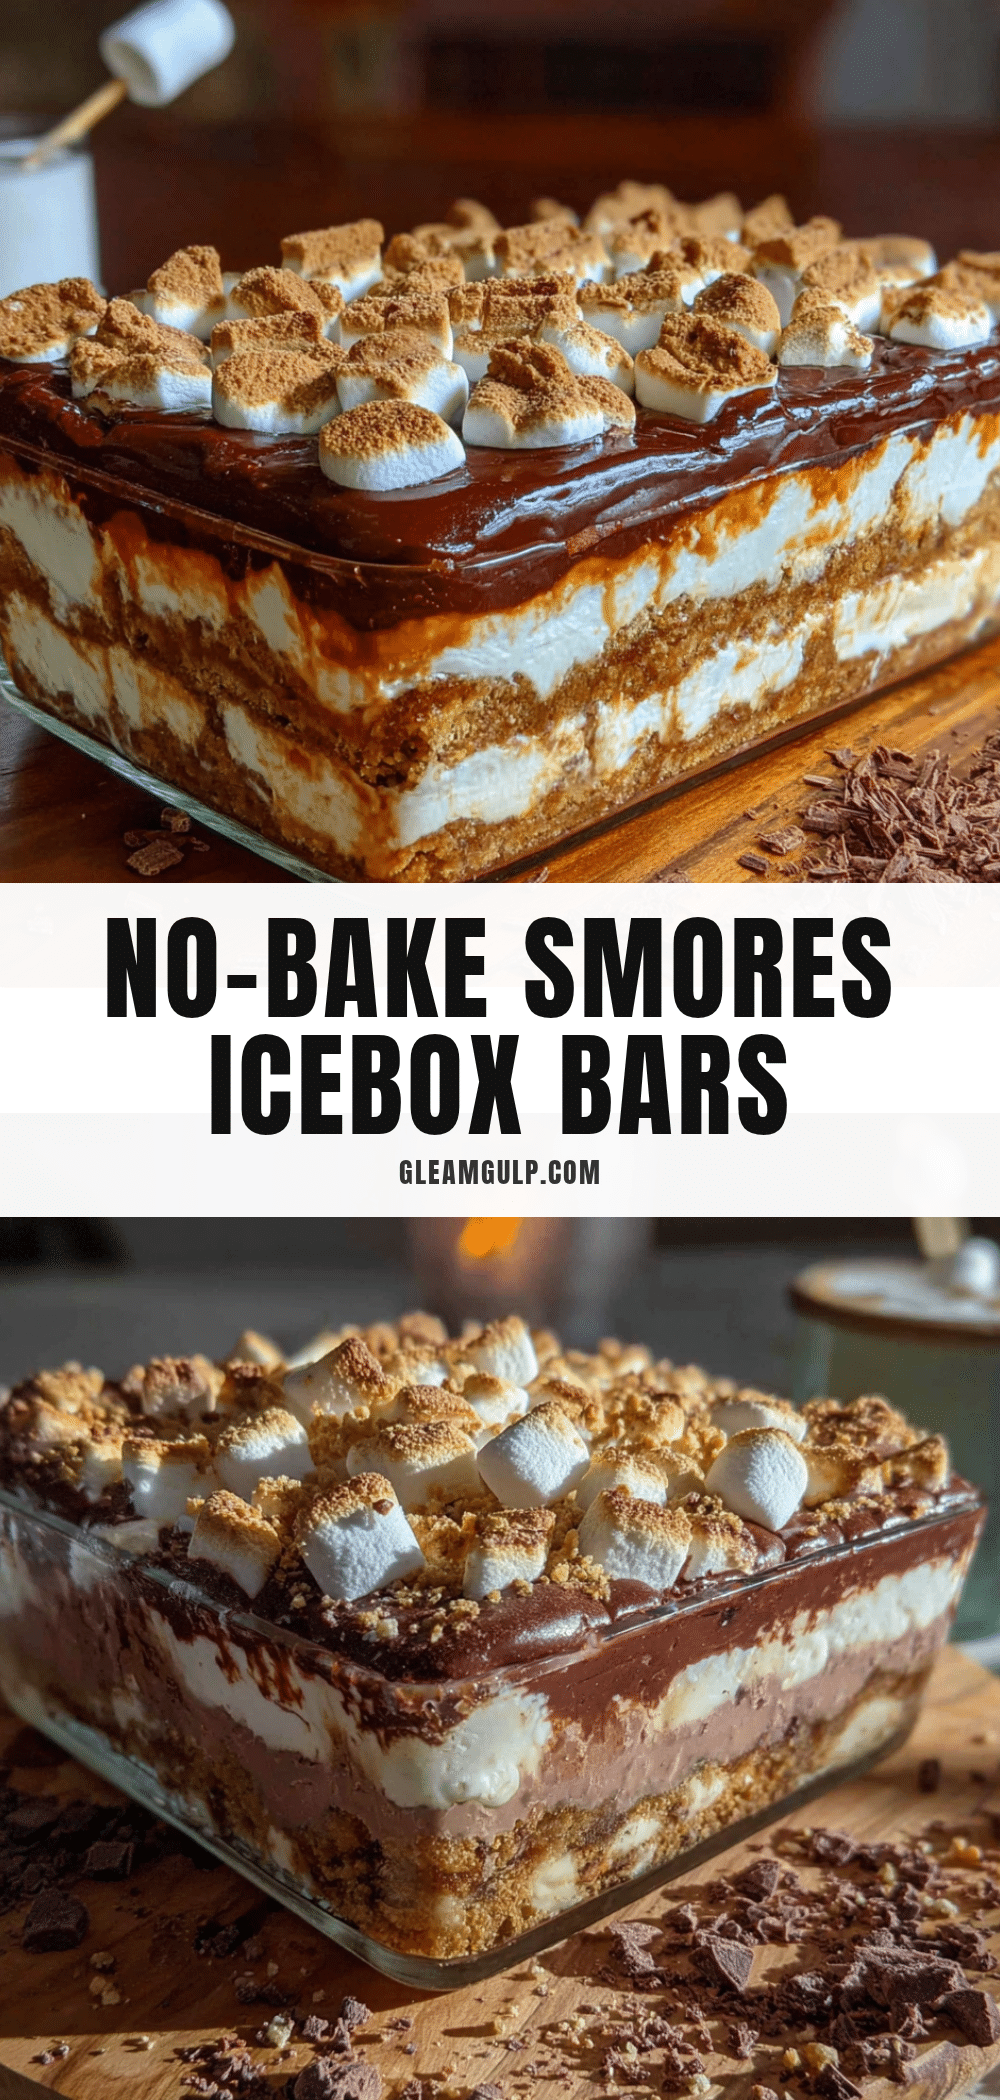
Easy No-Bake Smores Icebox Bars: Perfect Dessert for a Crowd
These no-bake s’mores icebox bars combine a buttery graham cracker crust, a rich chocolate fudge layer, and fluffy marshmallows for an effortless dessert that feeds a crowd. Ready in 15 minutes of active prep, they’re perfect for potlucks, parties, and hot summer days.
- Prep Time: 15 minutes
- Cook Time: 0 minutes
- Total Time: 4 hours 15 minutes (includes chilling)
- Yield: 12-16 servings 1x
- Category: Dessert
- Cuisine: American
Ingredients
- 2 ½ cups graham cracker crumbs (about 18 full sheets)
- ½ cup unsalted butter, melted
- ¼ cup granulated sugar
- ¼ teaspoon salt
- 2 cups semi-sweet chocolate chips
- 1 cup heavy cream
- 1 teaspoon vanilla extract
- Pinch of salt
- 4 cups mini marshmallows
- 1 tablespoon butter (for greasing)
- ½ cup graham cracker crumbs (for topping)
- ¼ cup chocolate chips (for topping)
Instructions
- Line a 9×13-inch baking dish with parchment paper, leaving about 2 inches of overhang on the long sides. Lightly grease the parchment with butter or cooking spray.
- In a medium bowl, combine 2 ½ cups graham cracker crumbs, ¼ cup granulated sugar, and ¼ teaspoon salt. Pour in ½ cup melted butter and stir until every crumb is moistened. The mixture should look like wet sand and hold together when squeezed.
- Transfer the crumb mixture to the prepared pan. Press it down firmly and evenly using the bottom of a measuring cup or a flat glass. Refrigerate while making the chocolate layer.
- Place 2 cups semi-sweet chocolate chips in a heat-safe bowl. In a small saucepan, heat 1 cup heavy cream over medium heat until just simmering (small bubbles around the edges, do not boil). Pour the hot cream over the chocolate chips. Let sit for 2 minutes without stirring. Add 1 teaspoon vanilla extract and a pinch of salt, then whisk gently until smooth and glossy.
- Remove the crust from the fridge. Pour the chocolate mixture over the crust and spread evenly with a spatula. Return to the fridge for 15 minutes to firm up slightly.
- After 15 minutes, remove the pan from the fridge. Scatter 4 cups mini marshmallows evenly over the chocolate layer. Lightly grease your hands or a spatula with 1 tablespoon butter and gently press the marshmallows into the chocolate so they adhere.
- Sprinkle the reserved ½ cup graham cracker crumbs over the marshmallows. Scatter the remaining ¼ cup chocolate chips on top.
- Cover the pan with plastic wrap or aluminum foil and refrigerate for at least 4 hours, preferably overnight.
- When ready to serve, lift the bars out of the pan using the parchment overhang. Place on a cutting board and cut into squares (12 large or 16 smaller). Wipe the knife clean between cuts for neat slices. Serve cold or at room temperature.
Notes
For clean slices, chill at least 4 hours or overnight. Run knife under hot water and dry between cuts. Bars can be stored in an airtight container in the refrigerator for up to 5 days or frozen for up to 3 months. For a dairy-free version, use vegan butter, dairy-free chocolate chips, and full-fat coconut cream. For gluten-free, use certified gluten-free graham crackers.
Nutrition
- Serving Size: 1 bar (based on 12 s
- Calories: 400
- Sugar: 32
- Sodium: 180
- Fat: 22
- Saturated Fat: 13
- Carbohydrates: 48
- Fiber: 2
- Protein: 4
Keywords: no-bake s'mores bars, icebox bars, s'mores dessert, easy dessert for a crowd, no-bake dessert, graham cracker crust, chocolate fudge, marshmallow dessert


