Love this? Save it for later!
Share the inspiration with your friends
Hand me that bowl, my neighbor said, not even looking up from the pile of leaves she was raking. I’d stopped by to return a tupperware container, and the smell of toasted ginger and cinnamon hit me before I even got to her front door. It was a Tuesday afternoon in early November, and she wasn’t trying to impress anyone. She was just making pie. Not the kind that takes over your whole kitchen for an afternoon—the kind that comes together while you’re doing something else entirely. I stood there, holding the empty container, watching her crush gingersnaps with a rolling pin on a cutting board that had seen better days. “It’s just a no-bake thing,” she said, shrugging. “My kids love it.” Let me tell you, that “just a no-bake thing” was the best pumpkin pie I’d had in years. No fuss, no oven preheating, no blind baking. Just a buttery, spicy crust and a filling so creamy and smooth it practically floated off the fork. I asked for the recipe, and she scribbled it on the back of an old grocery list. Honest to goodness, that scrap of paper is still taped to the inside of my spice cabinet. This Easy No-Bake Pumpkin Pie with Gingersnap Crust is the one I make every Thanksgiving now, and maybe you’ve been there—staring down a long list of complicated sides, wondering how you’ll fit the pie in the oven. This is your answer. It’s the pie that doesn’t ask for anything but a little patience while it chills.
Why You’ll Love This Recipe
I’ve tested a lot of pumpkin pie recipes over the years. Some are finicky. Some require a water bath. Some just don’t set right. This one? It’s different. It’s the kind of recipe that makes you look like a hero with almost zero effort.
- Quick & Easy: Comes together in about 20 minutes of active prep time. No oven required, which means you can make it while the turkey is roasting or the stuffing is baking. It’s perfect for busy weeknights or last-minute holiday cravings.
- Simple Ingredients: You won’t need to hunt down anything weird. Canned pumpkin, cream cheese, whipped topping, and a box of gingersnaps. That’s the whole list. I bet you already have most of it in your kitchen right now.
- Perfect for the Holidays: This pie is a lifesaver for Thanksgiving, Friendsgiving, or Christmas dinner. It frees up oven space and can be made a full day ahead. Honestly, it tastes even better the next day.
- Crowd-Pleaser: I’ve brought this to potlucks and family dinners, and it disappears fast. Kids love the gingersnap crunch, and adults appreciate the rich, spiced flavor without the heaviness of a baked custard.
- Unbelievably Delicious: The texture is the star here. The filling is light, airy, and creamy—almost like a pumpkin mousse—sitting on a crust that stays perfectly crisp. It’s next-level comfort food, and it’s impossible to stop at one slice.
What makes this recipe different from the rest is the technique. Most no-bake pumpkin pies use instant pudding mix to help them set. This one uses cream cheese and a bit of cold butter to create a stable, sliceable filling that still feels luxurious. It’s not just another version of pumpkin pie—it’s the best version. The one that makes you close your eyes after the first bite.
What Ingredients You Will Need
This recipe relies on a handful of simple, pantry-friendly ingredients to deliver big flavor. The magic is in the balance—spicy gingersnaps against a silky, pumpkin filling. Here’s what you’ll need:
For the Gingersnap Crust
- Gingersnap cookies: About 2 cups of crushed cookies. I recommend Nabisco or Anna’s brand for a consistent crunch. You can use store-brand, just make sure they’re crisp, not soft.
- Granulated sugar: 2 tablespoons. Just enough to sweeten the crust without overpowering the ginger.
- Unsalted butter, melted: 6 tablespoons (85g). Use real butter here—the flavor difference is huge. If you’re dairy-free, you can substitute with a plant-based butter stick (like Miyoko’s).
- Pinch of salt: Optional, but it balances the sweetness nicely.
For the Pumpkin Filling
- Cream cheese, softened: 8 ounces (226g). Full-fat is best for a rich, stable filling. Let it sit out for 30 minutes before you start so it blends smoothly.
- Powdered sugar: 1 cup (120g). No gritty texture here—powdered sugar dissolves instantly.
- Canned pumpkin puree: 1 cup (245g). Not pumpkin pie filling—just pure pumpkin. Libby’s is my go-to for consistent results.
- Pumpkin pie spice: 1 teaspoon. You can use store-bought or make your own with cinnamon, nutmeg, ginger, and cloves.
- Vanilla extract: 1 teaspoon. Pure vanilla adds warmth.
- Cold butter: 2 tablespoons (28g), cut into small cubes. This is the secret ingredient. It helps the filling firm up in the fridge without needing gelatin or pudding mix.
- Whipped topping: 1 ½ cups (about 225g). Thawed. I use Cool Whip for convenience, but you can use homemade stabilized whipped cream if you prefer.
For the Topping (Optional)
- Additional whipped topping: For piping rosettes on top.
- Crushed gingersnaps: A sprinkle for texture.
- Ground cinnamon or nutmeg: A light dusting for color.
Equipment Needed
You don’t need a fancy kitchen to pull this off. Here’s what you’ll need:
- 9-inch pie dish: Glass or ceramic works best. A metal pan can work, but it conducts cold faster, which can help the crust set.
- Food processor or rolling pin: For crushing the gingersnaps. A food processor is faster, but a rolling pin and a zip-top bag work just fine—and it’s oddly satisfying.
- Electric hand mixer or stand mixer: A whisk and some elbow grease can work, but a mixer makes the filling light and fluffy in minutes.
- Mixing bowls: One large, one medium.
- Measuring cups and spoons: For accuracy.
- Spatula: For scraping down the bowl and smoothing the filling.
- Plastic wrap: For covering the pie while it chills.
Tip: If you don’t have a food processor, place the gingersnaps in a sturdy zip-top bag and crush them with a rolling pin or even a heavy skillet. It’s a little messy, but it works like a charm.
Preparation Method
Step 1: Make the Crust
Start by crushing your gingersnaps into fine crumbs. If using a food processor, pulse until you have about 2 cups of crumbs. If using a bag and rolling pin, go for it—just make sure there are no large chunks. You want a sand-like texture. Transfer the crumbs to a medium bowl. Add the 2 tablespoons of sugar and a pinch of salt (if using). Pour in the 6 tablespoons of melted butter and stir with a fork until every crumb is moistened. It should look like wet sand and hold together when you press it in your fist.
Press the mixture firmly into the bottom and up the sides of your 9-inch pie dish. Use the bottom of a measuring cup or a glass to really pack it down. This is important—if the crust is loose, it will crumble when you slice the pie. Place the crust in the refrigerator to chill while you make the filling. At least 15 minutes, but longer is fine.
Step 2: Make the Filling
In a large mixing bowl, beat the softened cream cheese with an electric mixer on medium speed until smooth and creamy—about 1 minute. Scrape down the sides of the bowl. Add the powdered sugar and beat again until combined, about 30 seconds. The mixture should be light and fluffy.
Add the pumpkin puree, pumpkin pie spice, and vanilla extract. Beat on low speed until just combined, then increase to medium and beat for another minute until the mixture is smooth and uniform. Don’t overmix—you don’t want to incorporate too much air.
Now for the secret step: Add the cold butter cubes, one at a time, beating on low speed after each addition until incorporated. The butter will firm up as the pie chills, giving the filling a stable, sliceable texture without any weird ingredients. It takes about 2 minutes total. The mixture might look slightly grainy at this point—that’s okay.
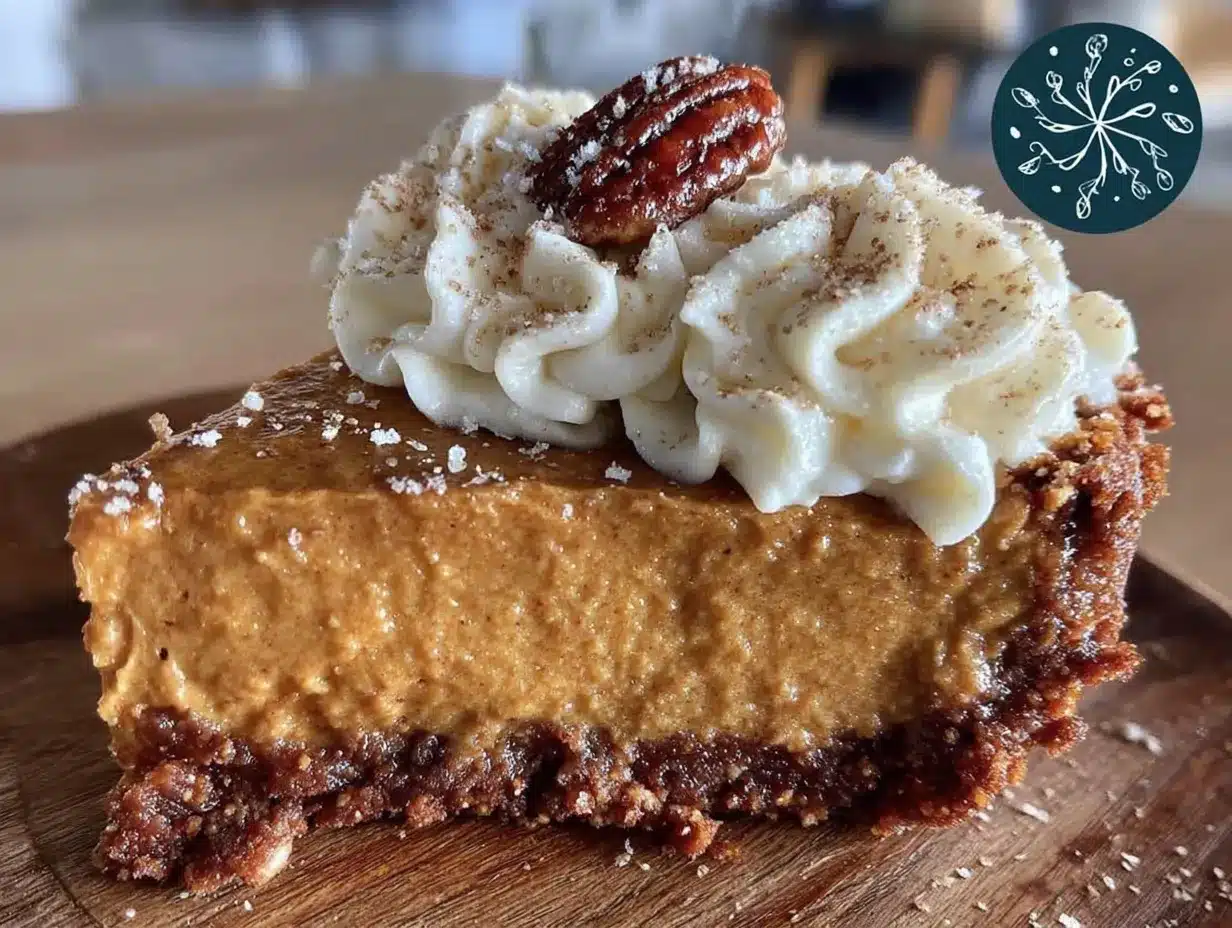
Finally, fold in the whipped topping by hand using a spatula. Gently stir until no white streaks remain. The filling should be thick, creamy, and a beautiful pale orange color.
Step 3: Assemble the Pie
Remove the crust from the refrigerator. Spoon the filling into the chilled crust and spread it evenly with a spatula. Give the pie dish a few gentle taps on the counter to release any air bubbles. Smooth the top as best you can.
Cover the pie loosely with plastic wrap and refrigerate for at least 6 hours, but overnight is best. The filling needs time to set completely. If you try to slice it too early, it will be soft and messy. Patience here pays off.
Step 4: Add Toppings and Serve
Once the pie is fully set, you can add toppings. Pipe or dollop additional whipped topping around the edges. Sprinkle crushed gingersnaps over the top and dust with a little cinnamon or nutmeg. Slice with a sharp knife, wiping the blade clean between cuts for neat slices.
Cooking Tips & Techniques
I’ve made this pie about a dozen times now, and I’ve learned a few things the hard way. Here are my best tips:
- Don’t skip the butter in the filling. I tried a version without it once, and the pie was too soft to slice cleanly. The cold butter acts as a stabilizer, helping the filling hold its shape.
- Let the cream cheese soften fully. Cold cream cheese will leave you with lumps. Set it out on the counter for 30-40 minutes before you start. If you’re in a hurry, microwave it for 10 seconds at a time, but be careful not to melt it.
- Pack the crust like you mean it. A loose crust is the most common failure point. Use the bottom of a measuring cup and really press down. The edges need love too—use your fingers or a spoon to push the crumbs up the sides.
- Chill overnight for best results. Six hours is the minimum, but 12 hours is where the magic happens. The flavors meld, the texture firms up, and the crust stays perfectly crisp.
- Use a sharp knife for slicing. Run it under hot water and wipe it dry between cuts. This gives you those beautiful, clean slices that look like they came from a bakery.
My biggest failure: The first time I made this, I was in a rush and only chilled it for 4 hours. The filling was still loose, and the crust crumbled everywhere. I ended up serving it in bowls like pudding. It still tasted great, but it wasn’t pie. Learn from my mistake—give it time.
Variations & Adaptations
This recipe is incredibly flexible. Here are some ways to make it your own:
- Gluten-Free: Use gluten-free gingersnaps for the crust. Most brands are available in the health food aisle. The filling is naturally gluten-free.
- Dairy-Free: Substitute the cream cheese with a dairy-free version (I like Kite Hill or Violife), and use a plant-based butter stick. For the whipped topping, choose a coconut-based whipped cream.
- Extra Spicy: Add an extra ½ teaspoon of ground ginger and a pinch of cayenne pepper to the filling. It gives the pie a warm, surprising kick that pairs beautifully with the gingersnap crust.
- Chocolate Twist: Drizzle melted dark chocolate over the finished pie before adding the whipped topping. The bitterness of the chocolate balances the sweet, spiced filling perfectly.
- Mini Pies: Press the crust into a 12-cup muffin tin (lined with parchment strips for easy removal) and divide the filling evenly. Chill for 4 hours. These are perfect for parties or portion control.
I tried the chocolate drizzle variation last Christmas, and honestly, it was a game-changer. The dark chocolate adds a little sophistication, and my guests couldn’t stop talking about it.
Serving & Storage Suggestions
This pie is best served cold, straight from the refrigerator. The filling is firm but luscious, and the crust stays crunchy. I like to let the pie sit out for about 5 minutes before slicing—it takes the chill off just enough to let the flavors shine.
Storage: Cover the pie tightly with plastic wrap or aluminum foil and store it in the refrigerator for up to 5 days. The crust will soften slightly over time, but the flavor actually improves after a day or two.
Freezing: You can freeze this pie for up to 2 months. Wrap it in a layer of plastic wrap, then a layer of foil. Thaw in the refrigerator overnight before serving. Do not freeze with the whipped topping—add that fresh after thawing.
Reheating: This is a no-bake pie, so there’s no need to reheat it. If you prefer a slightly softer texture, let a slice sit at room temperature for 15 minutes before eating.
What to serve with it: A dollop of freshly whipped cream, a drizzle of caramel sauce, or a cup of hot coffee. It also pairs beautifully with a scoop of vanilla or ginger ice cream.
Nutritional Information & Benefits
Here’s an approximate breakdown per slice (based on 8 servings):
- Calories: 380
- Fat: 22g
- Carbohydrates: 42g
- Protein: 5g
- Fiber: 3g
- Sugar: 28g
Pumpkin is packed with Vitamin A and fiber, which is great for your immune system and digestion. The gingersnaps add a little iron and calcium, too. While this is definitely a treat, it’s a more wholesome one compared to traditional baked pumpkin pie, which often relies on heavy cream and eggs. This version is lighter on the stomach but still delivers on flavor. If you’re watching your sugar intake, you can reduce the powdered sugar to ¾ cup—the pie will still be plenty sweet from the cookies.
Frequently Asked Questions
Can I use fresh pumpkin instead of canned?
Yes, but you’ll need to roast and puree it first, then drain off any excess liquid. Canned pumpkin is more consistent in moisture content, which is important for a no-bake pie. If using fresh, press the puree through a cheesecloth or fine-mesh sieve to remove extra water.
Why is my filling not setting?
This usually happens if the cream cheese wasn’t softened enough, or if the pie didn’t chill long enough. Make sure your cream cheese is at room temperature, and give the pie a full 6-8 hours in the fridge. If it’s still soft, pop it in the freezer for 30 minutes before serving.
Can I use a different crust?
Absolutely. A graham cracker crust or a shortbread cookie crust would work beautifully. Just adjust the sugar slightly—graham crackers are sweeter than gingersnaps, so you might want to reduce the sugar in the crust to 1 tablespoon.
How do I make this pie ahead of time?
This pie is actually better made ahead. Prepare it up to 2 days in advance and keep it covered in the fridge. Add the whipped topping and garnishes right before serving for the prettiest presentation.
Can I use homemade whipped cream instead of Cool Whip?
Yes, but you’ll need to stabilize it. Whip 1 ½ cups of heavy cream with 2 tablespoons of powdered sugar and 1 teaspoon of cornstarch until stiff peaks form. The cornstarch helps the cream hold its shape in the pie. Homemade whipped cream has a lighter texture, which is lovely, but it won’t be as firm as Cool Whip.
Conclusion
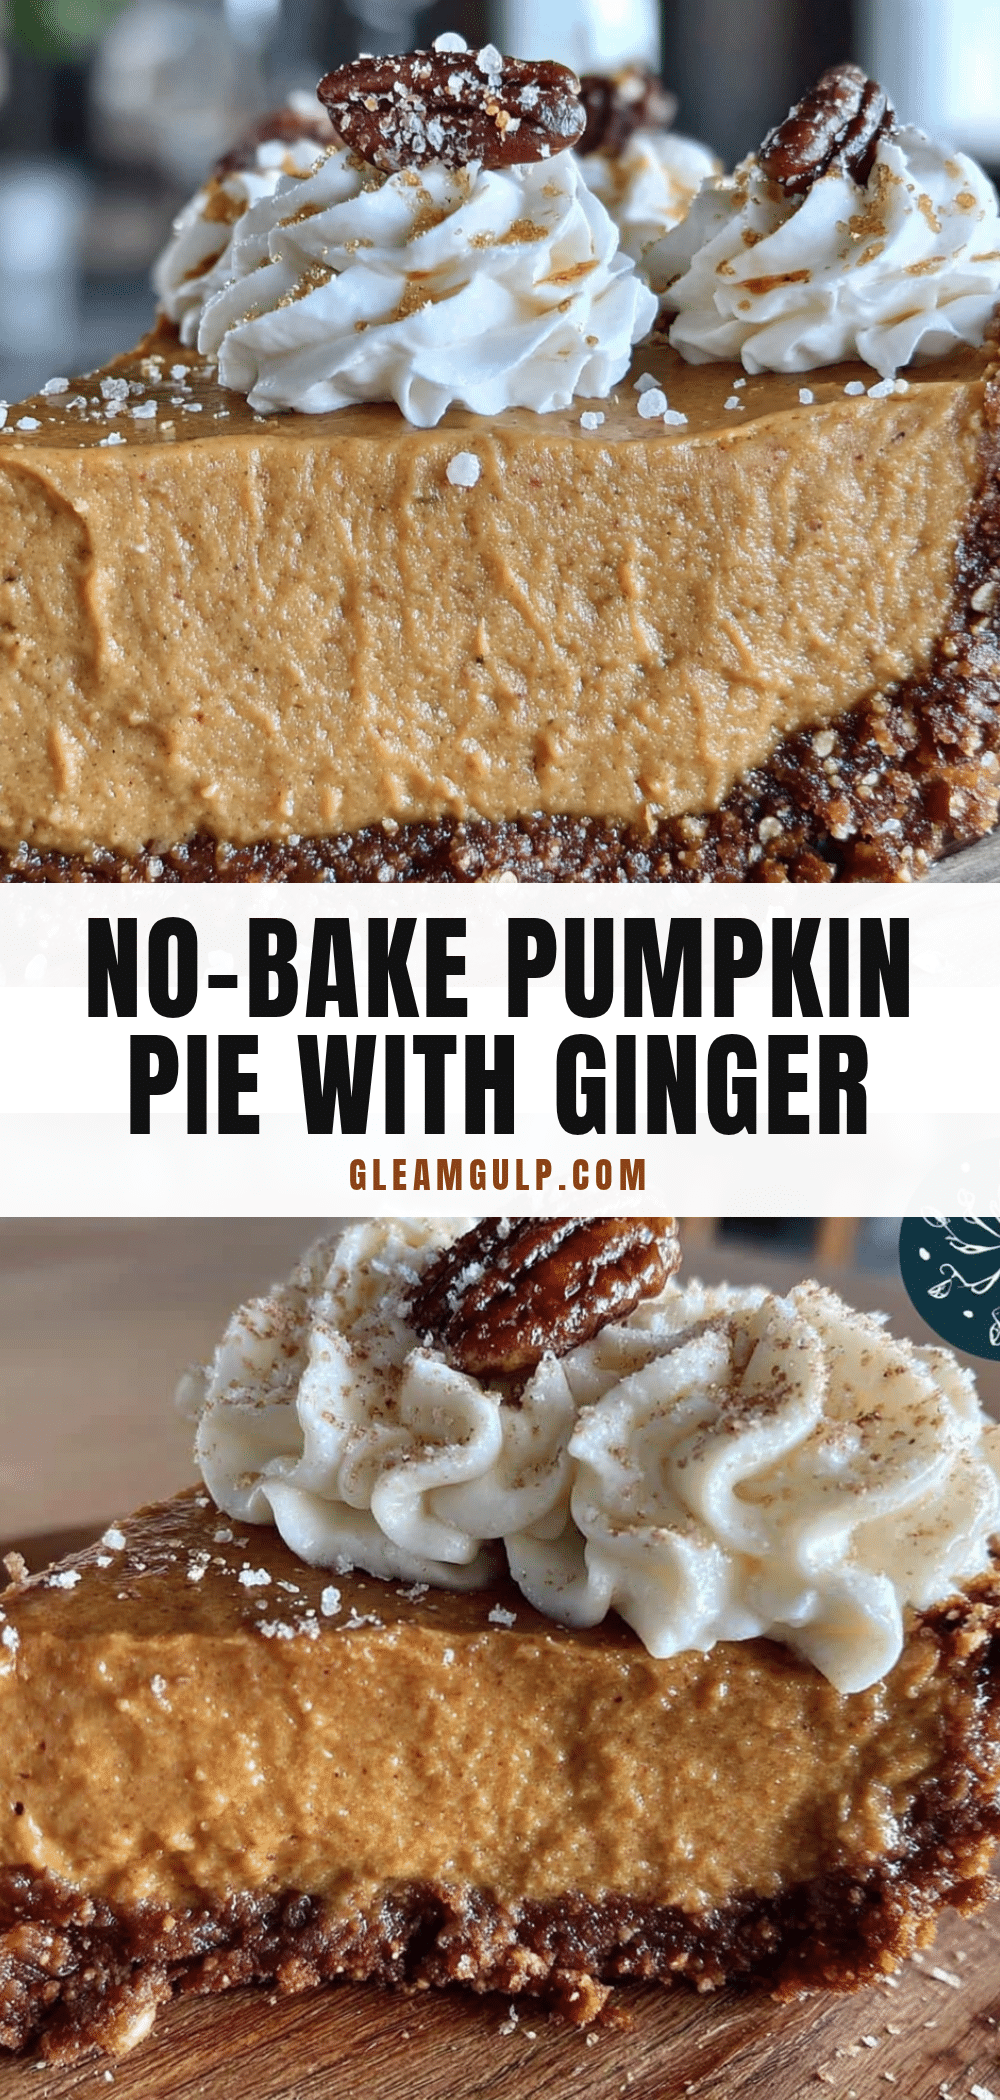
This Easy No-Bake Pumpkin Pie with Gingersnap Crust is the kind of recipe that earns a permanent spot in your holiday rotation. It’s simple enough for a Tuesday night, impressive enough for a Thanksgiving table, and forgiving enough for a beginner baker. The gingersnap crust adds a warmth that regular pastry just can’t match, and the filling is so light and creamy you’ll find yourself going back for seconds.
I love this recipe because it reminds me of that Tuesday afternoon at my neighbor’s house—how something so unassuming can be so wonderful. It’s proof that you don’t need a fancy technique or a long list of ingredients to make something truly special. You just need a little time, a few good ingredients, and the willingness to let the fridge do the work.
If you make this pie, I’d love to hear about it. Leave a comment below and let me know how it turned out—did you add a twist? Did your family devour it? Share your photos on Pinterest and tag me so I can see your beautiful creation. Happy baking (or, you know, happy chilling)!
Pin This Recipe!
Easy No-Bake Pumpkin Pie with Gingersnap Crust

A creamy, no-bake pumpkin pie with a spicy gingersnap crust that comes together in minutes. Perfect for Thanksgiving or any fall gathering, this pie frees up oven space and tastes even better the next day.
- Prep Time: 20 minutes
- Cook Time: 0 minutes
- Total Time: 6 hours 20 minutes (includes chilling)
- Yield: 8 servings 1x
- Category: Dessert
- Cuisine: American
Ingredients
- 2 cups crushed gingersnap cookies (about 200g)
- 2 tablespoons granulated sugar
- 6 tablespoons unsalted butter, melted (85g)
- Pinch of salt (optional)
- 8 ounces cream cheese, softened (226g)
- 1 cup powdered sugar (120g)
- 1 cup canned pumpkin puree (245g)
- 1 teaspoon pumpkin pie spice
- 1 teaspoon vanilla extract
- 2 tablespoons cold butter, cut into small cubes (28g)
- 1 ½ cups whipped topping, thawed (about 225g)
- Additional whipped topping for garnish (optional)
- Crushed gingersnaps for garnish (optional)
- Ground cinnamon or nutmeg for dusting (optional)
Instructions
- Crush gingersnaps into fine crumbs using a food processor or a rolling pin and zip-top bag. Transfer to a medium bowl.
- Add sugar and salt (if using) to the crumbs. Pour in melted butter and stir with a fork until all crumbs are moistened.
- Press the mixture firmly into the bottom and up the sides of a 9-inch pie dish. Use the bottom of a measuring cup to pack it down. Refrigerate for at least 15 minutes.
- In a large bowl, beat softened cream cheese with an electric mixer on medium speed until smooth, about 1 minute. Scrape down the sides.
- Add powdered sugar and beat until combined, about 30 seconds.
- Add pumpkin puree, pumpkin pie spice, and vanilla extract. Beat on low until combined, then increase to medium and beat for 1 minute until smooth.
- Add cold butter cubes one at a time, beating on low after each addition until incorporated (about 2 minutes total).
- Fold in whipped topping by hand with a spatula until no white streaks remain.
- Spoon the filling into the chilled crust and spread evenly. Tap the dish gently on the counter to release air bubbles.
- Cover loosely with plastic wrap and refrigerate for at least 6 hours, preferably overnight.
- Before serving, add optional toppings: pipe or dollop whipped topping, sprinkle crushed gingersnaps, and dust with cinnamon or nutmeg.
- Slice with a sharp knife, wiping the blade clean between cuts.
Notes
For best results, chill the pie overnight. The cold butter in the filling helps it set without gelatin. If using fresh pumpkin, drain excess moisture through a cheesecloth. For dairy-free, use plant-based cream cheese, butter, and whipped topping.
Nutrition
- Serving Size: 1 slice (1/8 of pie)
- Calories: 380
- Sugar: 28
- Sodium: 320
- Fat: 22
- Saturated Fat: 12
- Carbohydrates: 42
- Fiber: 3
- Protein: 5
Keywords: no-bake pumpkin pie, gingersnap crust, easy pumpkin pie, Thanksgiving dessert, no-bake dessert, pumpkin pie without oven


