Love this? Save it for later!
Share the inspiration with your friends
For three straight years, I swore off elderberry syrup. Not because I had anything against it, you understand—I just figured if I ate well, slept enough, and washed my hands like a normal person, I didn’t need to mess with some dark, mysterious syrup that looked like it belonged in a potion bottle. That was my stance, and I was pretty proud of it. Then my neighbor Carla showed up at my door one Tuesday morning in January, holding a mason jar filled with what looked like blackberry juice that had been through something traumatic. “Just try it,” she said, shoving it into my hands. “One spoonful. I promise you won’t gag.” I took a tiny sip—honestly, mostly to prove her wrong—and something weird happened. It tasted like dark berries and honey and a little bit like Christmas spices, but not in a fake, cough-syrup way. It was actually… good? I mean, I wasn’t about to admit that out loud. But later that week, when my kids started sniffling and that familiar dread crept in, I found myself reaching for that jar. And then ordering dried elderberries online before the jar was even empty. Maybe you’ve been there—skeptical of something that seems too “crunchy” or complicated, only to realize you were the one missing out.
This homemade immune-boosting elderberry syrup is the recipe that finally got me. It takes five minutes of active prep, uses ingredients you can find at most grocery stores or easily online, and honestly, it tastes like something you’d actually want to take. Not like medicine you have to choke down. The first time I made a batch myself, I burned the honey a little (okay, a lot) and had to start over. But the second batch? That one worked. And I’ve been making it ever since. What keeps me coming back isn’t just the immune support—though that’s nice—it’s the ritual of it. The way the kitchen smells like cloves and cinnamon while it simmers. The satisfaction of watching those deep purple berries release their color into the water. It feels like doing something good for yourself, even before you’ve taken a single spoonful. And honestly, in a world where we can’t control much, having a jar of this in the fridge feels like a small, delicious act of defiance.
Why You’ll Love This Recipe
This homemade immune-boosting elderberry syrup isn’t just another wellness trend you’ll try once and forget about. It’s the real deal, and here’s why it’s earned a permanent spot in my fridge—and probably will in yours too.
- Five Minutes of Prep: I’m not kidding. You’ll spend more time finding a jar than actually making this syrup. The stove does all the work while you go fold laundry or pretend to fold laundry.
- Simple Ingredients: No weird extracts you have to special order. Dried elderberries, honey, a few spices, and water. That’s it. You probably have most of these in your pantry right now.
- Perfect for Cold Season: Whether it’s back-to-school germs, winter sniffles, or just that coworker who refuses to stay home sick, this syrup gives your immune system a fighting chance.
- Kid-Approved: My kids actually ask for this. They think it’s a treat. I don’t correct them. It’s sweet, fruity, and nothing like the fluorescent medicines they usually run from.
- Surprisingly Delicious: The combination of tart elderberries, warm cinnamon, and floral honey creates something you’ll genuinely look forward to taking. It’s like a warm hug in a spoon.
What makes this version different from the dozens of recipes floating around the internet? For starters, I’ve tested the ratio of berries to water about seven times to get that perfect balance—concentrated enough to be effective, but not so thick you feel like you’re drinking molasses. I also add a touch of clove, which most recipes skip, but trust me, it rounds out the flavor in a way that makes the whole thing feel more sophisticated. And I use raw, local honey whenever possible, which adds its own immune-boosting benefits and keeps the syrup from being overly sweet.
This recipe isn’t just good for you—it’s the kind of thing that makes you feel taken care of. Like someone’s looking out for you, even if that someone is just you, standing over your stove, stirring berries and smiling to yourself. It’s comfort and wellness rolled into one, and honestly, we could all use a little more of that.
What Ingredients You Will Need
This homemade immune-boosting elderberry syrup relies on a short list of powerhouse ingredients that work together to support your immune system. Nothing fancy, nothing hard to find—just good, honest ingredients that do their job.
The Base
- 1 cup dried elderberries (look for organic, whole berries from a trusted brand like Starwest Botanicals or Frontier Co-op; avoid anything with added sugar or preservatives)
- 4 cups water (filtered if possible, but tap works fine in a pinch)
The Immune Boosters
- 1 cinnamon stick (adds warmth and helps balance blood sugar; use a 3-inch stick, not the ground stuff which makes the syrup cloudy)
- 1 teaspoon whole cloves (don’t skip these—they add a subtle spiciness and have their own antimicrobial properties; just don’t use ground cloves unless you want to spend hours straining)
- 1-inch piece fresh ginger, sliced (optional but highly recommended; it adds a gentle kick and extra anti-inflammatory benefits)
The Sweetener
- 1 cup raw honey (this is crucial—raw, unfiltered honey retains its natural enzymes and antibacterial properties; local honey is ideal for seasonal allergy support, but any raw honey works; do NOT use honey for children under 1 year old)
A quick note on ingredient selection: I’ve tried this recipe with both organic and conventionally grown elderberries, and honestly, I prefer organic. The flavor is deeper, and since you’re extracting everything from the berries, you want them as clean as possible. That said, if you can only find conventional, don’t let that stop you—it’ll still be delicious and effective.
For the honey, steer clear of the bear-shaped bottles at the grocery store. Those are usually pasteurized and blended, which means most of the beneficial compounds have been cooked out. Spend the extra few dollars on raw honey from a farmers’ market or health food store. Your immune system will thank you.
If you’re vegan or avoiding honey, you can substitute maple syrup or agave nectar. The flavor will change slightly, and you’ll lose some of the immune benefits, but it’ll still taste great. Just know that maple syrup makes the final product a little thinner, so you might want to simmer the berries an extra 5 minutes to compensate.
Equipment Needed
You don’t need a fancy kitchen to make this homemade immune-boosting elderberry syrup. In fact, you probably already own everything required. Here’s what you’ll need:
- Medium saucepan (2-3 quart size works perfectly; avoid aluminum or uncoated copper, which can react with the acidic berries)
- Fine-mesh strainer (a standard colander won’t catch the tiny berry particles; if you don’t have a fine-mesh strainer, you can use cheesecloth or even a clean nut milk bag)
- Mason jar or glass bottle (16-ounce size is ideal; make sure it’s thoroughly cleaned and dried before use)
- Wooden spoon or silicone spatula (for stirring; metal can sometimes leave a slight taste with the spices)
- Measuring cups and spoons (nothing fancy, just accurate)
If you don’t have a fine-mesh strainer, don’t run out and buy one just for this. I’ve used an old t-shirt in a pinch—seriously. Just wash it first, and make sure it’s clean cotton. You can also use paper coffee filters, though that takes forever. A nut milk bag works beautifully too, and they’re cheap on Amazon. The key is getting all those little berry bits out so your syrup is smooth and easy to take.
One tip: if you plan to make this regularly (and you will), invest in a good strainer. I bought a cheap one my first time, and it bent under the weight of the hot berries. Spilled elderberry syrup all over my counter. Not my finest moment. A sturdy stainless steel one will last you years.
Preparation Method
Making this homemade immune-boosting elderberry syrup is almost embarrassingly easy. Here’s how to do it, step by step, with all the little details I wish someone had told me the first time.
- Combine berries, water, and spices. In your medium saucepan, add the dried elderberries, water, cinnamon stick, cloves, and ginger slices if using. Give everything a quick stir. The berries will float at first—that’s normal. Don’t worry about it.
- Bring to a boil, then simmer. Turn the heat to high and bring the mixture to a boil. Watch it carefully—it can foam up unexpectedly and make a mess on your stove. Once it’s boiling, reduce the heat to low and let it simmer gently. You want small bubbles, not a rolling boil. Simmer for 25-30 minutes. The liquid will reduce by about half, and the kitchen will start smelling amazing. Like spiced wine, but without the hangover.
- Mash the berries (optional but helpful). After about 20 minutes, use the back of your wooden spoon to gently mash the berries against the side of the pot. This releases more of their goodness and deepens the color. Don’t go crazy—you’re not making berry paste, just encouraging them to give up their secrets.
- Strain the mixture. Place your fine-mesh strainer over a large bowl or measuring cup. Carefully pour the hot liquid through the strainer. Let it drain naturally for a few minutes, then gently press on the berries with the back of a spoon to extract every last drop. Resist the urge to squeeze too hard—you’ll push bitter compounds through if you’re aggressive.
- Cool slightly, then add honey. Let the strained liquid cool for about 10-15 minutes. It should be warm, not hot. If it’s too hot, it will destroy the beneficial enzymes in the raw honey. Pour in the honey and stir until completely dissolved. The mixture will look thin now but will thicken as it cools.
- Bottle and refrigerate. Pour the syrup into your clean mason jar or glass bottle. Let it cool completely at room temperature before putting the lid on and moving it to the fridge. It will keep for 2-3 months refrigerated.
A few things I learned the hard way: First, don’t skip the cooling step before adding honey. I ruined my first batch by pouring honey into boiling liquid—killed all the good stuff and made the syrup taste weirdly cooked. Second, your syrup will look thinner than you expect at first. That’s fine. It thickens as it chills, and honestly, a thinner syrup is easier to take by the spoonful. Third, if you want a thicker syrup, you can simmer it a little longer in step 2, but watch it carefully—it can go from perfect to sticky mess pretty fast.
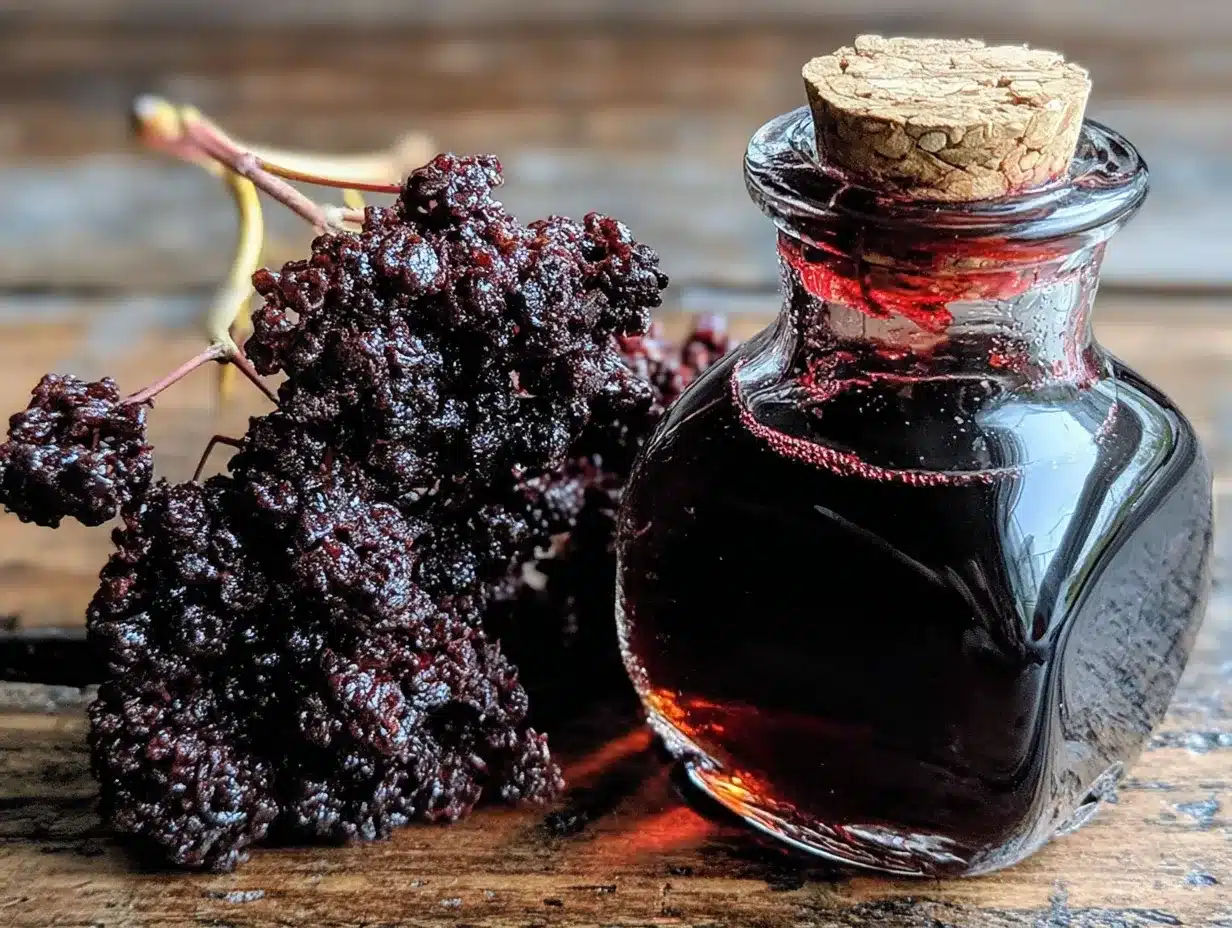
Your finished syrup should be a deep, jewel-toned purple with a glossy sheen. It should smell fruity and spicy, with no harsh or bitter notes. If it tastes sharp or medicinal, you probably simmered it too long or squeezed the berries too hard. It’ll still work, but it won’t be as pleasant to take.
Cooking Tips & Techniques
After making this homemade immune-boosting elderberry syrup more times than I can count (and messing it up plenty along the way), I’ve picked up a few tricks that make the process smoother and the final product better. Here’s what I wish I’d known from the start.
Don’t rush the simmer. I know it’s tempting to crank up the heat and speed things along, but low and slow is the way to go. A gentle simmer extracts the beneficial compounds from the berries without making the liquid bitter. Think of it like steeping tea—you wouldn’t boil your tea leaves, would you? Same principle applies here. Set a timer and walk away. Your kitchen will smell amazing, and your syrup will be better for it.
Watch your water level. Different brands of dried elderberries absorb water differently. If your liquid seems to be evaporating too quickly, add a splash more water. If it looks too thin at the end, simmer it a few extra minutes. Trust your eyes more than the clock. The first time I made this, I followed the recipe exactly but used a different brand of berries, and my syrup came out way too thick. It still worked, but it was a pain to get out of the jar.
Strain while it’s hot. Straining warm liquid is infinitely easier than straining cold, gelled syrup. I learned this the hard way when I got distracted by a phone call and let my mixture cool completely. What should have taken two minutes turned into a twenty-minute wrestling match with a spoon and a strainer. Strain immediately after simmering, and save yourself the hassle.
Use a funnel. This seems obvious, but I’ve poured elderberry syrup directly from a bowl into a jar and ended up with purple countertops. A small funnel costs a dollar and saves you a world of cleanup. If you don’t have one, you can use a measuring cup with a spout or even a clean plastic bottle cut in half. Get creative, but get a funnel.
Label your jar. This sounds silly, but elderberry syrup looks a lot like other homemade concoctions. I once accidentally used my elderberry syrup as salad dressing. Don’t ask. A simple label with the date will save you from confusion—and from some very strange-tasting salads.
Variations & Adaptations
One of the best things about this homemade immune-boosting elderberry syrup is how easy it is to customize. Here are some variations I’ve tried and loved.
Spicy Immune Shot: Add a quarter teaspoon of cayenne pepper or a few slices of fresh turmeric along with the ginger. This turns your syrup into a serious immune powerhouse that’ll clear your sinuses and warm you from the inside out. It’s not for the faint of heart, but if you’re feeling something coming on, this version hits hard.
Herbal Blend: Add a tablespoon of dried echinacea or a few sprigs of fresh thyme during the simmering stage. Both herbs have their own immune-supporting properties and complement the elderberries beautifully. Strain them out along with the berries. I tried this during a particularly rough flu season, and it felt like drinking a shield.
Citrus Twist: Add the zest of one orange and one lemon during the last 5 minutes of simmering. The citrus brightens the flavor and adds vitamin C. Skip the pith, though—that white part is bitter and will ruin your syrup. I make this version in the summer when I want something a little lighter and more refreshing.
Low-Sugar Version: If you’re watching your sugar intake, you can reduce the honey to half a cup or substitute with monk fruit sweetener. The syrup will be thinner and won’t last as long in the fridge (about 3-4 weeks instead of 2-3 months), but it’ll still be effective. I’ve also used stevia, but it leaves a slight aftertaste that I’m not crazy about.
Slow Cooker Method: Combine everything except the honey in your slow cooker and cook on low for 4-6 hours. Strain, cool, and add honey as directed. This is perfect for days when you don’t want to watch the stove. The flavor is slightly mellower, and the kitchen smells incredible all day. Just make sure your slow cooker doesn’t run too hot—you want gentle heat, not a boil.
Serving & Storage Suggestions
This homemade immune-boosting elderberry syrup is versatile enough to fit into your daily routine without feeling like a chore. Here’s how I use and store mine.
Daily Dose: Adults take 1 tablespoon daily for maintenance, or 1 tablespoon every 2-3 hours at the first sign of illness. For children ages 1-6, give 1 teaspoon daily; for ages 7-12, give 2 teaspoons. Always check with your pediatrician before giving any herbal remedy to children. I take mine straight from a spoon, but you can also mix it into tea, yogurt, or oatmeal.
Serving Temperature: The syrup is best served cold or at room temperature. If you want to warm it up (which is lovely on a cold morning), mix a tablespoon into hot water or tea. Don’t microwave it—high heat destroys the beneficial enzymes in the honey. Just stir it into something warm and let it come up to temperature naturally.
Storage: Keep your syrup in a tightly sealed glass jar in the refrigerator. It will last 2-3 months. If you see any mold, fizzing, or off smells, toss it and make a fresh batch. I’ve never had that happen, but it’s possible if your jar wasn’t perfectly clean or if you used less honey.
Freezing: You can freeze elderberry syrup in ice cube trays for individual portions. Pop out a cube and thaw it in the fridge overnight. This is great for travel or for keeping a backup supply. Frozen syrup will last 6-8 months. Just don’t refreeze it once it’s thawed.
Flavor Development: The flavor actually improves after a day or two in the fridge. The spices mellow and meld together, and the honey becomes more integrated. I always try to make mine a day before I plan to start using it. It’s not necessary, but it makes a noticeable difference.
Nutritional Information & Benefits
This homemade immune-boosting elderberry syrup isn’t just tasty—it’s packed with compounds that support your body’s natural defenses. Here’s what you’re getting in each spoonful.
Estimated Nutrition per Tablespoon (15ml):
- Calories: 35-45
- Carbohydrates: 10-12g
- Sugars: 9-11g (mostly from honey)
- Vitamin C: 2-4mg (from elderberries and ginger)
- Antioxidants: High (elderberries are among the most antioxidant-rich fruits)
Key Benefits:
- Elderberries are rich in flavonoids called anthocyanins, which have been shown to support immune function and reduce the duration of cold symptoms. They also have antiviral properties that may help prevent illness in the first place.
- Raw honey contains natural enzymes, antioxidants, and antibacterial compounds. Local honey may also help with seasonal allergies by exposing you to small amounts of local pollen.
- Cinnamon and cloves have antimicrobial and anti-inflammatory properties. They also help regulate blood sugar, which is helpful when you’re consuming honey.
- Ginger is well-known for its anti-inflammatory and digestive benefits. It can help soothe a sore throat and settle an upset stomach.
Dietary Considerations: This recipe is naturally gluten-free, dairy-free, and soy-free. It’s suitable for paleo and Whole30 diets (if you use compliant honey). For a vegan version, substitute maple syrup. For a low-sugar version, reduce honey or use monk fruit sweetener. Always check with your healthcare provider before starting any new supplement, especially if you’re pregnant, nursing, or on medication.
Conclusion
This homemade immune-boosting elderberry syrup has become a staple in my kitchen, and I honestly can’t imagine cold season without it anymore. It’s one of those rare recipes that’s both practical and comforting—something you make because it works, but also because it makes you feel good. The process is simple enough for a busy weeknight, the ingredients are easy to find, and the result is something you’ll actually look forward to taking. I mean, how many health remedies can you say that about?
I hope you give this recipe a try and make it your own. Maybe you’ll add extra ginger, or skip the cloves, or use orange zest instead of lemon. That’s the beauty of it—it’s forgiving and flexible, just like real cooking should be. Don’t be afraid to experiment. And if your first batch doesn’t turn out perfect? That’s okay. Mine didn’t either. The important thing is that you’re taking care of yourself and the people you love, one spoonful at a time.
I’d love to hear how yours turns out. Drop a comment below and let me know what variations you tried, or tag me in your photos on social media. Your feedback helps me create better recipes, and honestly, it just makes my day to see elderberry syrup being made in kitchens everywhere. Here’s to staying healthy, one delicious spoonful at a time!
Frequently Asked Questions
Can I use fresh elderberries instead of dried?
You can, but fresh elderberries must be cooked before eating—they contain compounds that can cause stomach upset when raw. If using fresh, use 2 cups of fresh berries in place of 1 cup dried, and simmer for an additional 10 minutes. Make sure they’re fully cooked before straining.
How long does homemade elderberry syrup last?
Stored in a sealed glass jar in the refrigerator, this syrup will keep for 2-3 months. The honey acts as a natural preservative. If you notice any mold, off smells, or carbonation (fizzing), discard the batch immediately and make fresh.
Can I give elderberry syrup to my toddler?
Yes, but with caution. Children ages 1-6 can take 1 teaspoon daily. Never give honey to children under 1 year old due to the risk of botulism. Always check with your pediatrician before introducing any herbal remedy to young children.
Do I have to use raw honey?
Raw honey is recommended because it retains natural enzymes and antibacterial properties that support immune health. However, if you can’t find raw honey, regular honey will still work—you’ll just lose some of the additional immune benefits. The syrup will still taste great.
Can I make this syrup without cooking?
There are “raw” methods that involve steeping elderberries in cold water for 24-48 hours, but I don’t recommend them. Cooking helps extract the beneficial compounds from the berries and ensures any potential contaminants are eliminated. The 25-minute simmer is worth it for both safety and effectiveness.
Pin This Recipe!
Homemade Immune-Boosting Elderberry Syrup: Easy 5-Minute Recipe
This homemade immune-boosting elderberry syrup takes just five minutes of active prep and uses simple ingredients like dried elderberries, honey, and spices. It’s a delicious, kid-approved way to support your immune system during cold season.
- Prep Time: 5 minutes
- Cook Time: 30 minutes
- Total Time: 35 minutes
- Yield: 16 servings 1x
- Category: Condiment
- Cuisine: American
Ingredients
- 1 cup dried elderberries
- 4 cups water
- 1 cinnamon stick (3-inch)
- 1 teaspoon whole cloves
- 1-inch piece fresh ginger, sliced (optional)
- 1 cup raw honey
Instructions
- Combine berries, water, and spices: In a medium saucepan, add the dried elderberries, water, cinnamon stick, cloves, and ginger slices if using. Give everything a quick stir.
- Bring to a boil, then simmer: Turn the heat to high and bring the mixture to a boil. Watch it carefully—it can foam up. Once boiling, reduce heat to low and let it simmer gently for 25-30 minutes. The liquid will reduce by about half.
- Mash the berries (optional but helpful): After about 20 minutes, use the back of a wooden spoon to gently mash the berries against the side of the pot to release more flavor.
- Strain the mixture: Place a fine-mesh strainer over a large bowl or measuring cup. Carefully pour the hot liquid through the strainer. Let it drain naturally, then gently press on the berries with the back of a spoon to extract every last drop.
- Cool slightly, then add honey: Let the strained liquid cool for about 10-15 minutes until warm (not hot). Pour in the honey and stir until completely dissolved.
- Bottle and refrigerate: Pour the syrup into a clean mason jar or glass bottle. Let it cool completely at room temperature before putting the lid on and moving it to the fridge. It will keep for 2-3 months refrigerated.
Notes
Don’t skip the cooling step before adding honey—adding honey to boiling liquid destroys beneficial enzymes. The syrup will look thin at first but thickens as it chills. For a thicker syrup, simmer a little longer in step 2. Strain while hot for easier handling. Label your jar with the date to avoid confusion.
Nutrition
- Serving Size: 1 tablespoon (15 ml)
- Calories: 40
- Sugar: 10
- Sodium: 2
- Carbohydrates: 11
Keywords: elderberry syrup, immune-boosting, homemade, natural remedy, cold season, elderberry recipe, honey syrup


